CT23BM23
Double DIN Fitting Kit
for BMW Vehicles
APPLICATION
FEATURES
• Allows for the installation of a double DIN aftermarket stereo
• Allows the retention of the original climate controls
• Includes mounting brackets and accessories
• Finished in black to match vehicle dashboard
The information provided in this document is subject to change without notice due to manufacturer changes and/or improvements to the product/s. This
instruction manual is based on documented data and research. The manufacturer of this product cannot be held responsible for any changes made to the
vehicle by the manufacturer or damages that may occur through the installation of this product in accordance with the steps outlined herein.
DISCLAIMER
CT23BM23_IG_v1
BMW X5 (F15/F85) 2013 - UP
Note: Application data is subject to change at any time
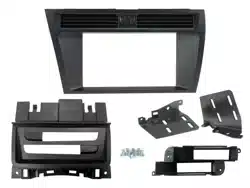
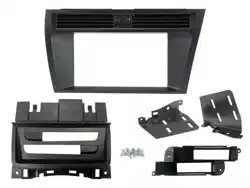
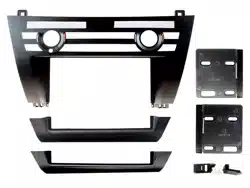
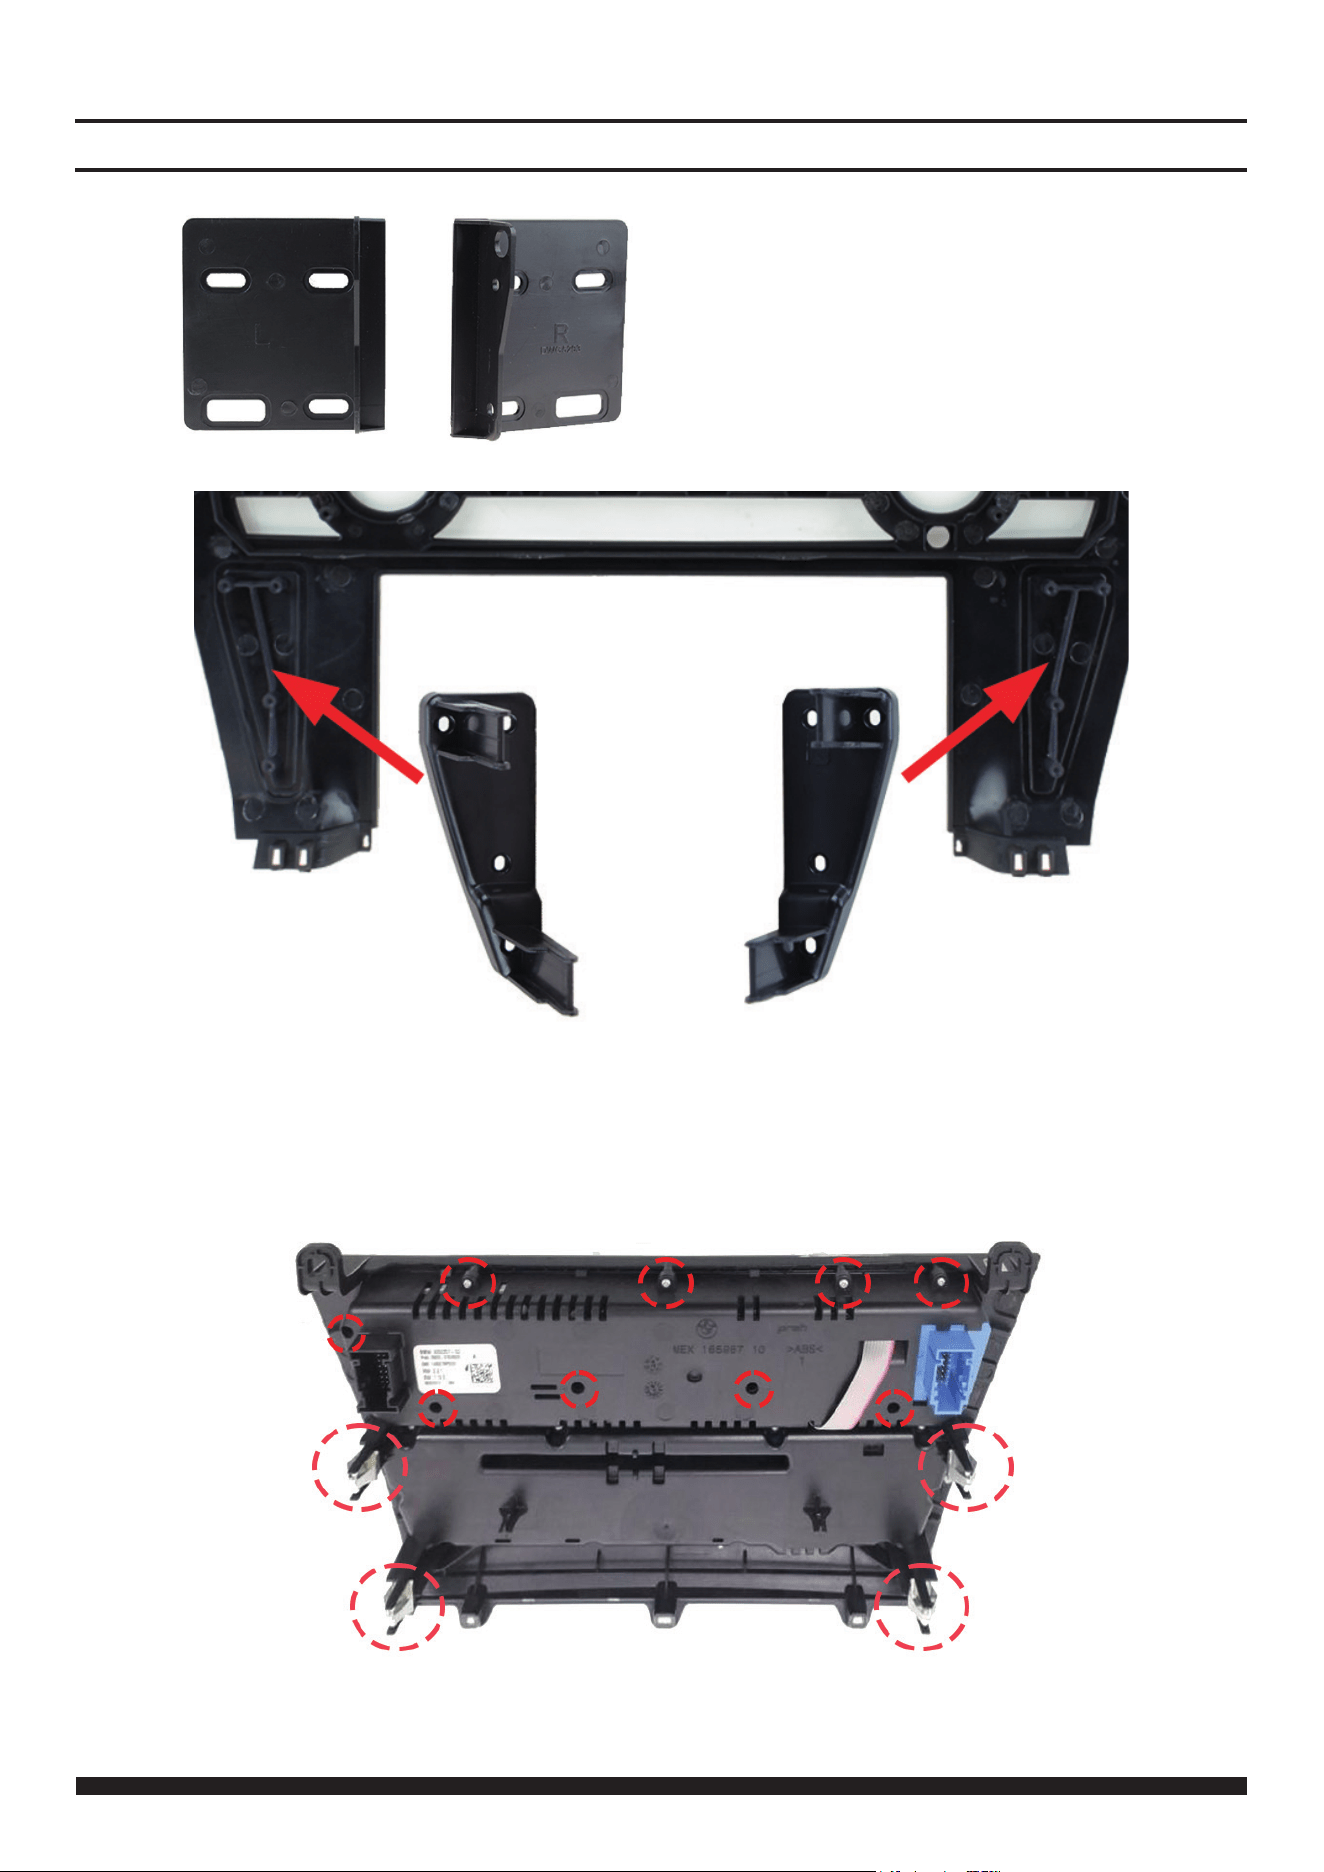
IN THE KIT
• Double DIN Fascia Panel • 2x Radio Brackets
• 2x Bottom Trim Panels • 2x Fascia Locater Brackets (not shown in image)
• 2x Locater Clips with Screws • 8x Self Tapping Screws (not shown in image)
• 8x Radio Screws (not shown in image)
Note: this fascia is suitable for both right and left hand drive vehicles. For the purpose of this manual, the installation was performed
within a RHD vehicle.
2
CT23BM23_IG_v1
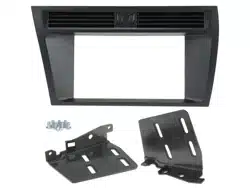
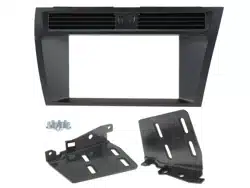
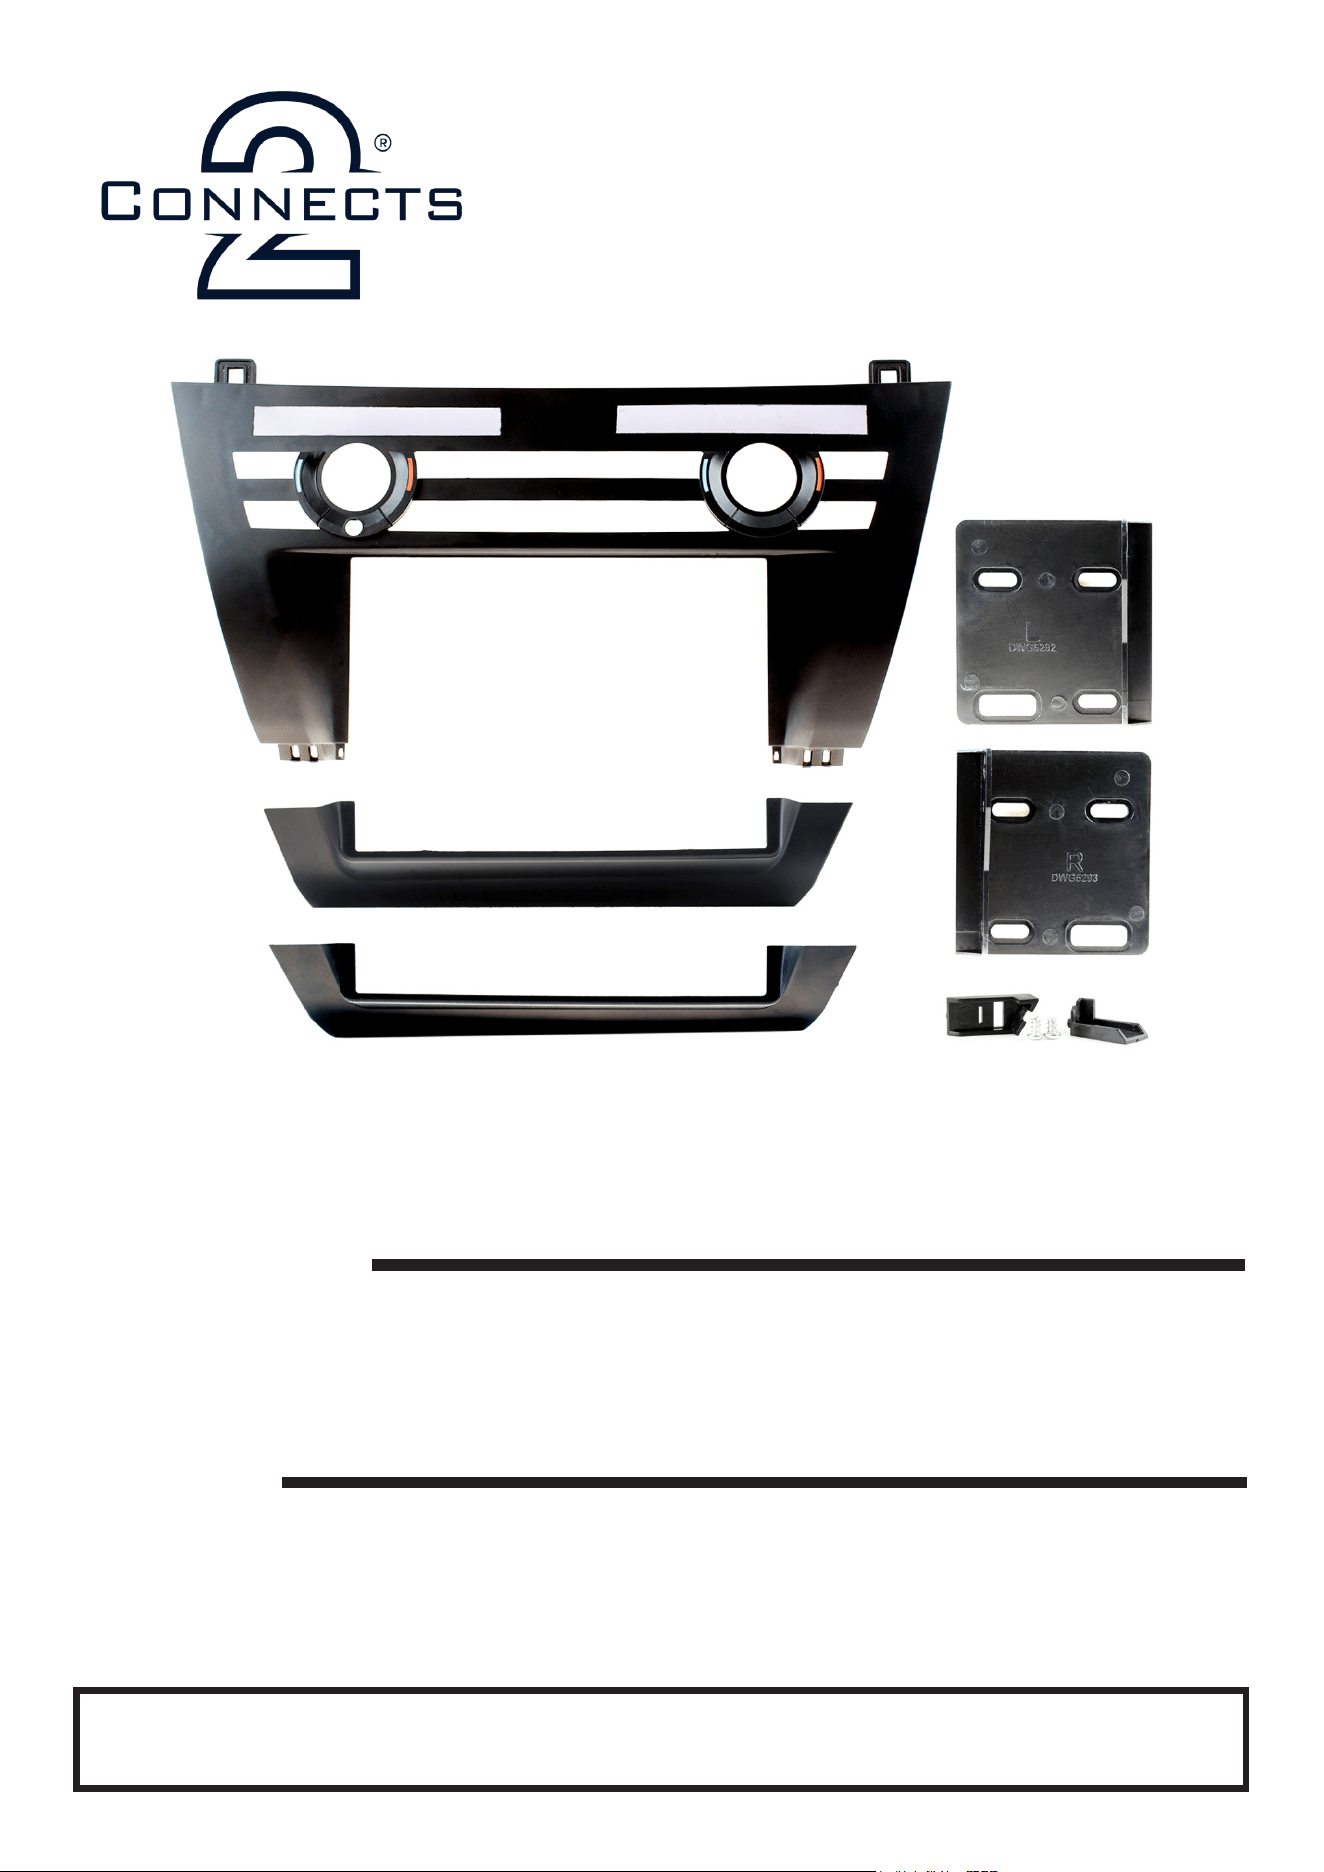
ASSEMBLY OF COMPONENTS
Important Notices:
• Fascia locater clips seen within diagram may come preassembled. If not preassembled, please see step 6 of installation
process for more information.
• Bottom trim panel seen in this diagram is for left hand drive vehicles, for right hand drive vehicles simply swap out panel
seen here. See step 9 of installation process for further information.
• Throughout installation of the new fascia, be sure to relocate any clips from the old fascia where possible.
3
CT23BM23_IG_v1
PRIOR TO INSTALLATION
Read the manual prior to installation. Technical knowledge is necessary for installation. The place of installation must be
free of moisture and away from heat sources. Please ensure that the correct tools are used during the installation to avoid
damage to the vehicle or product. Connects2 can not be held responsible for the installation of this product.
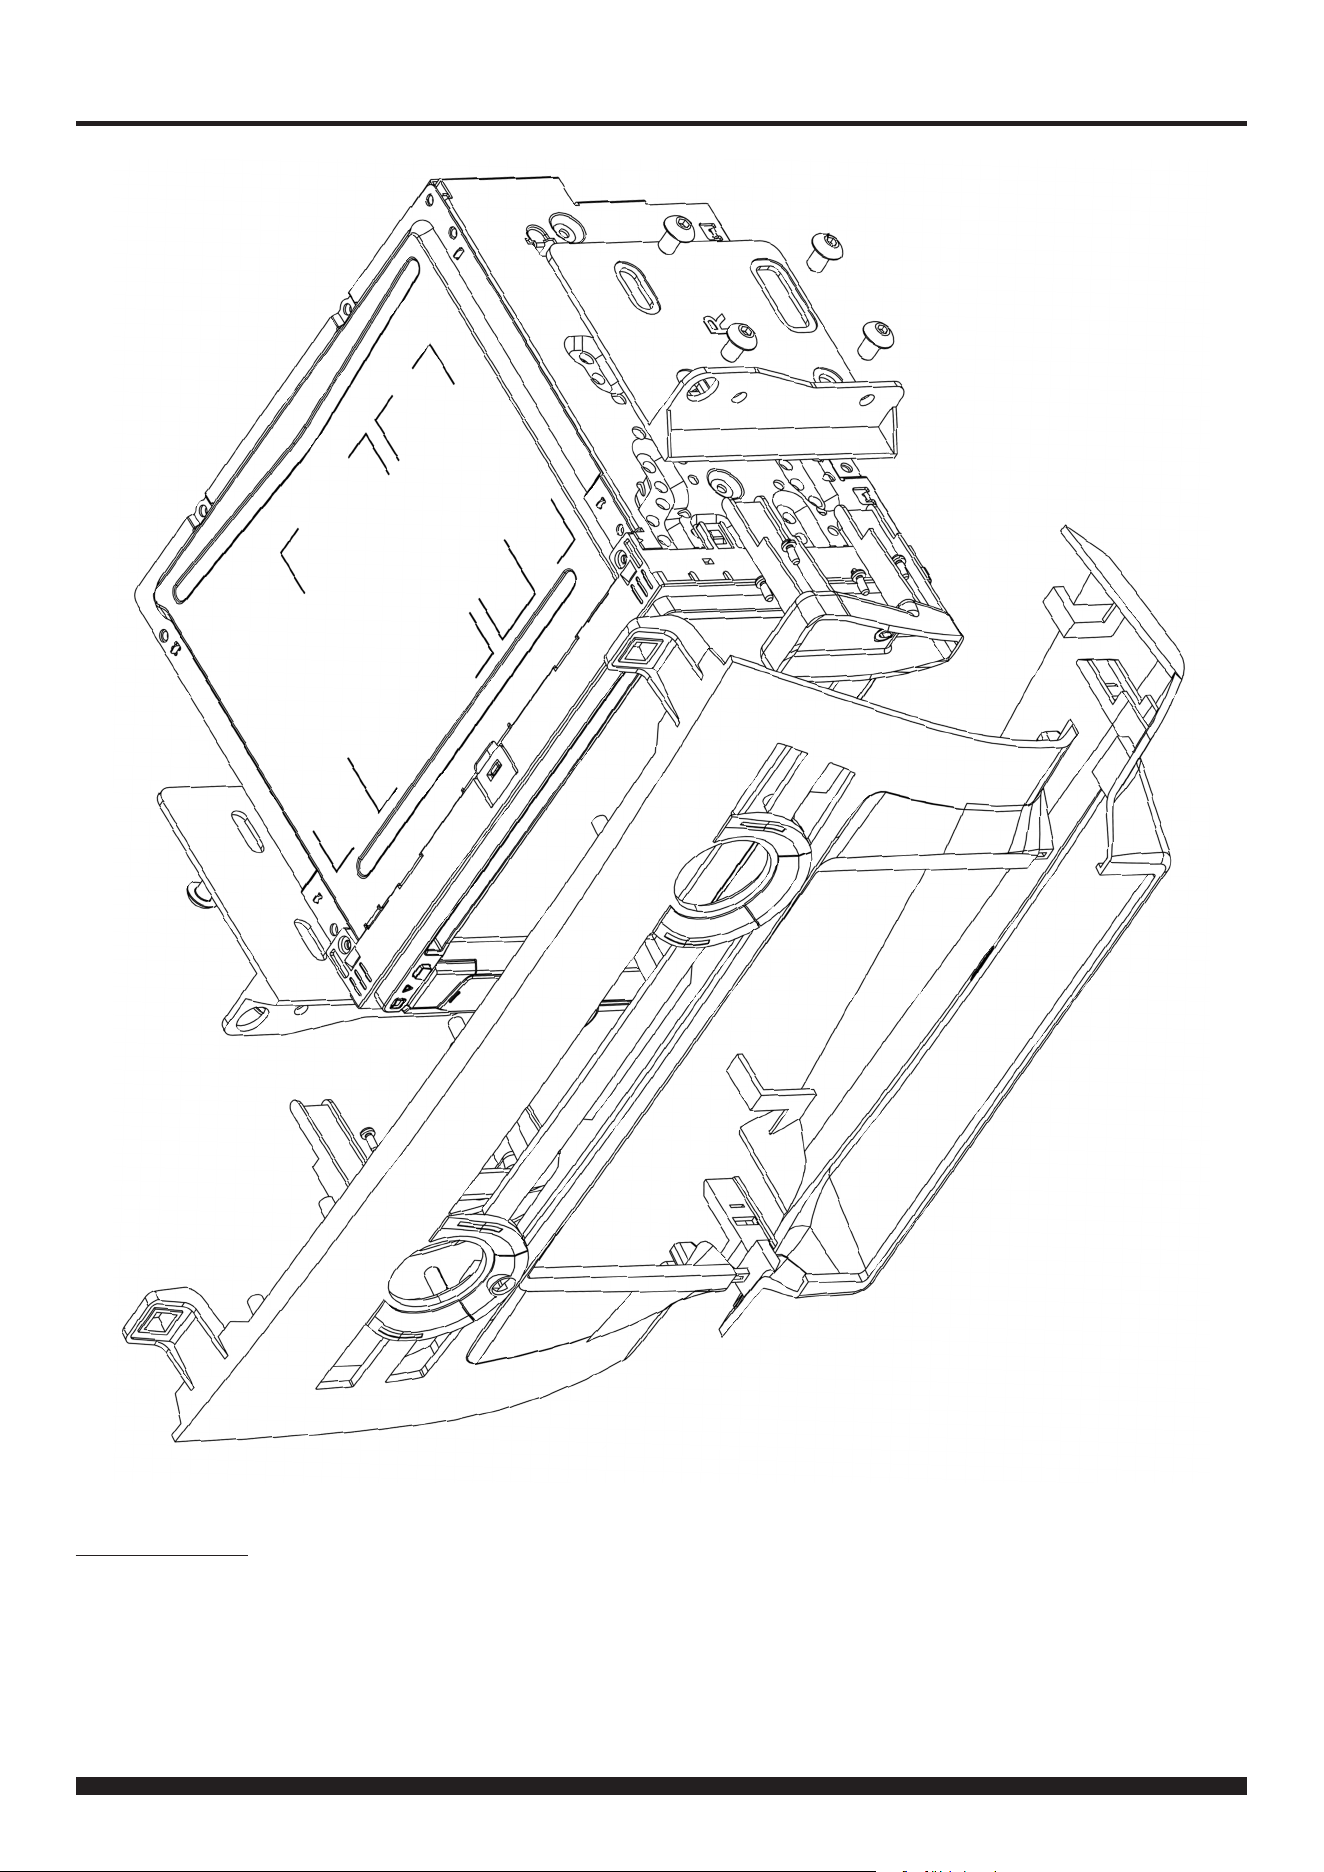
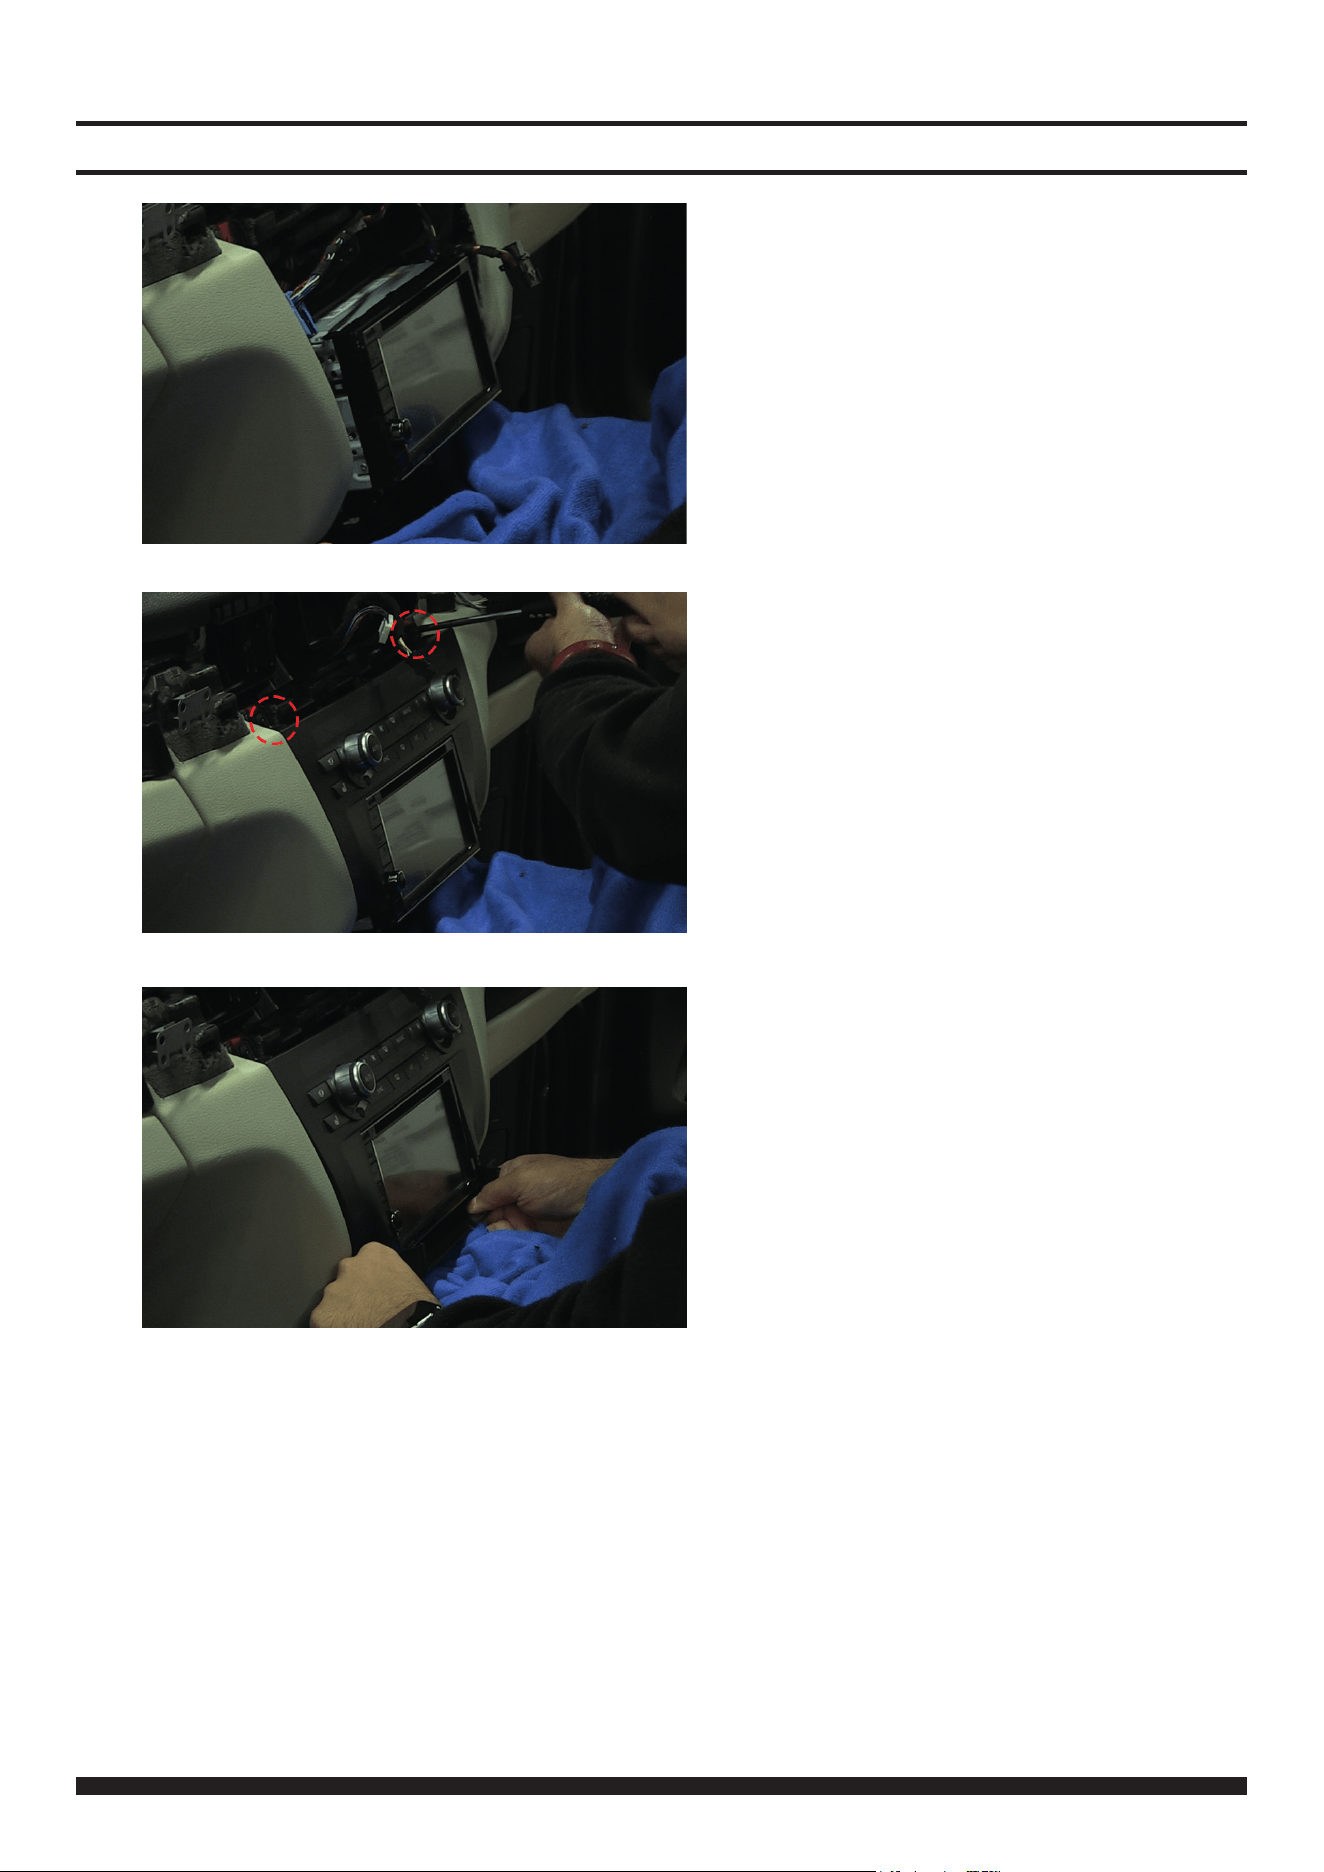
Begin by using a panel removal tool to remove the
bottom trim panel.
1.
INSTALLATION GUIDE
DASH DISASSEMBLY
2.
Still using the panel removal tool, begin to lever off
the air vent panelling. Ensure to do this carefully so
not to break any clips or damage the surface. Once
free, remove whilst disconnecting the hazard switch
and stop/start connectors.
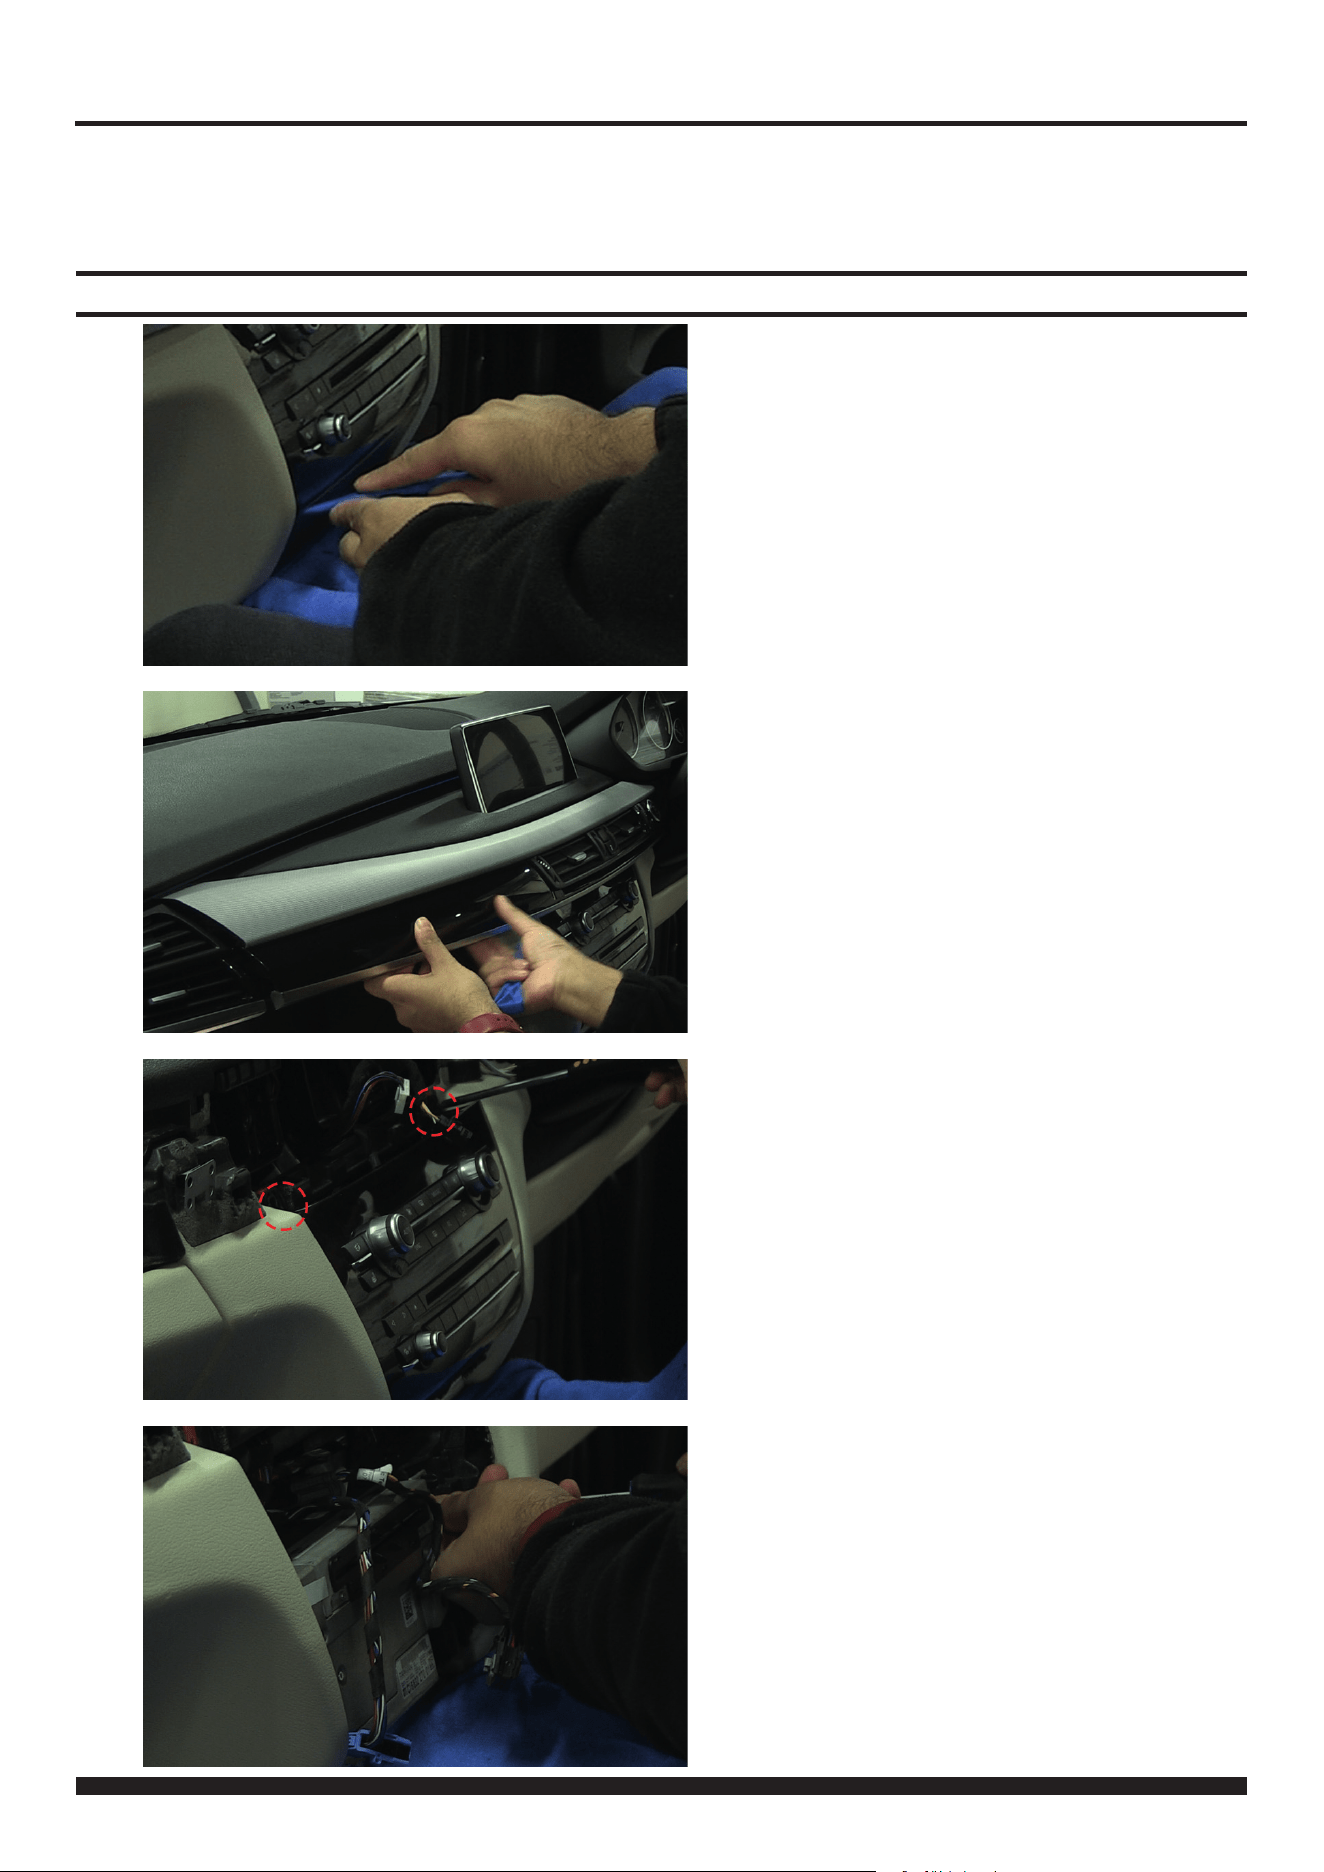
3.
4.
Once the air vent panel has been removed, it will
reveal 2x screws that hold the main fascia panel in
place. Remove both of these and disconnect all of the
wiring.
With the main fascia panel out of the way, proceed
to undo the 4x screws that hold the main head unit
in place. Once free, pull out and disconnect all of the
wiring.
4
CT23BM23_IG_v1
INSTALLATION GUIDE
6.
KIT ASSEMBLY
5.
Use the brackets that come with the kit and ax them
to the relevant side of the new stereo with the 8x
screws that come within the kit. When attached, test
t within the dashboard to gauge the depth and alter
accordingly.
Take the 2x fascia locater brackets within the kit and line them up to the appropriate side of the fascia as indicated by
the plastic grooves. Once lined up correctly, use the 8x self taping screws to attach them to the back of the fascia.
Please note: this step is only needed if the fascia is not pre-assembled.
Take the original fascia and remove the 4x screws along the top, as well as the 5x recessed screws (shown in image)
holding the top climate control button panel in place. You will also need to remove the 4x metal clips highlighted.
7.
5
CT23BM23_IG_v1
INSTALLATION GUIDE
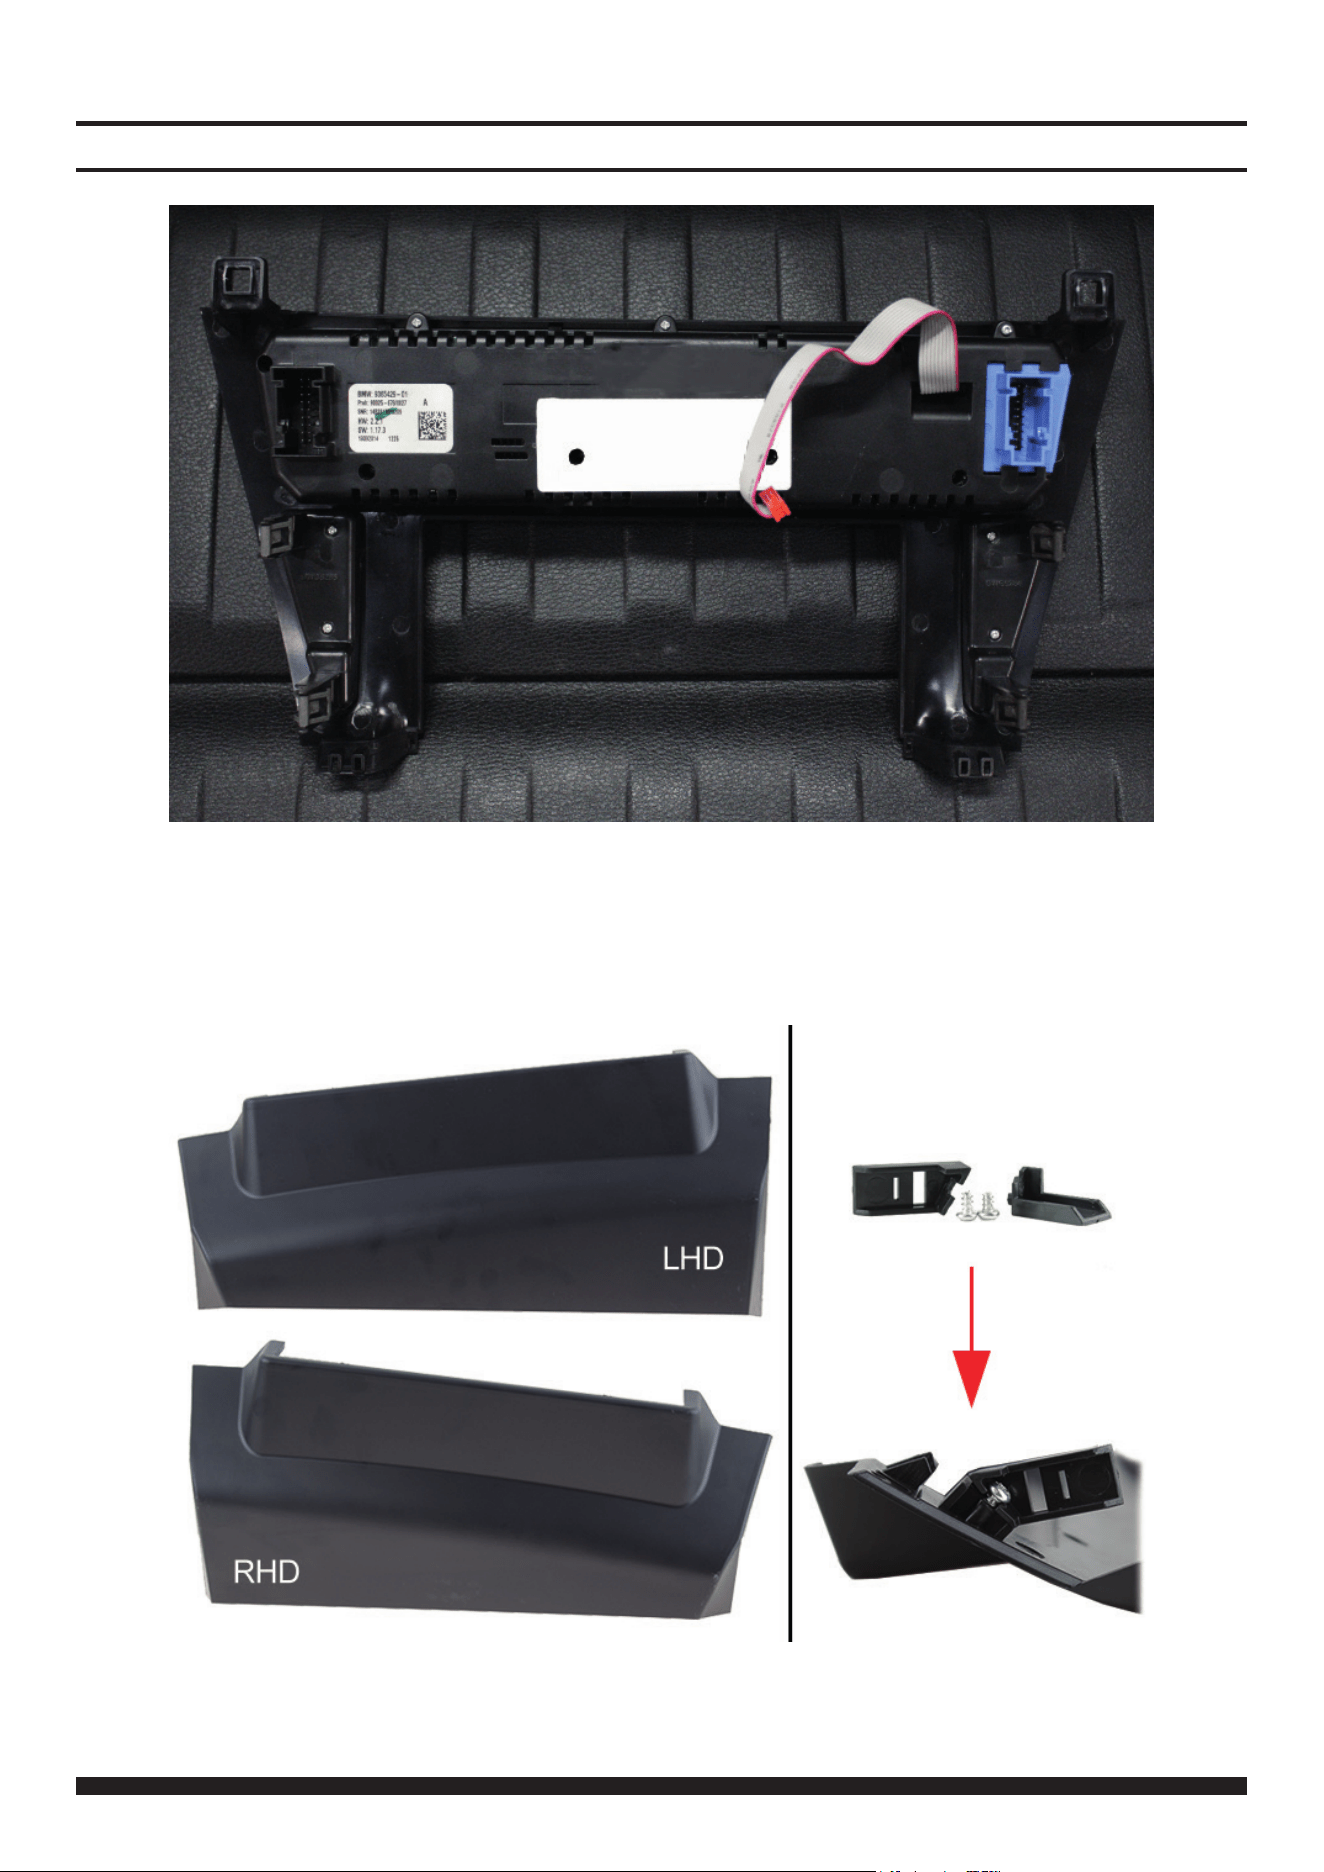
Take the new fascia and transplant the top climate control button panel into the opening, securing it in place using
the 9x pre-existing screws removed in step 7. In addition, x the 4x metal clips onto the new locator posts again
removed in step 7.
Please note: the ribbon wire can either be removed, or left loose as it is not needed anymore.
9.
8.
Select one of the bottom trim panels dependent on the orientation of the vehicle. Once selected, take the 2x locater
clips found within the kit and attach them in the location seen here with the 2x screws provided. When fully attached,
transplant the 2x OEM metal clips from the original bottom panel onto these locater clips.
KIT ASSEMBLY
6
CT23BM23_IG_v1
12.
Take the bottom trim panel and slide it underneath
the new stereo using the clip locaters as guides to
rmly clip it into place.
11.
With the head unit xed into position, place the new
fascia over top, re-establishing the climate control
connections. Once connected, use the 2x pre-existing
screws to x into place.
DASH ASSEMBLY
10.
With the brackets axed to the correct sides of the
stereo, connect up the stereo and slot into place,
screwing into place using the 4x pre-existing screws.
INSTALLATION GUIDE

7
CT23BM23_IG_v1
13.
Reassemble the rest of the dashboard to complete the installation. When installed the vehicles original LED display
will now be viewable alongside your new installed stereo.
INSTALLATION GUIDE
DASH ASSEMBLY

8
CT23BM23_IG_v1
NOTES