
2 | AI Box User Manual
Table of Contents
Revision History ����������������������������������������������������������������������������������������������������������������������������������������������������������������������������������� 4
Read Before Use ���������������������������������������������������������������������������������������������������������������������������������������������������������������������������������� 4
Symbols and Statements in this Document �������������������������������������������������������������������������������������������������������������������������������4
Package Contents �������������������������������������������������������������������������������������������������������������������������������������������������������������������������������5
Physical Description ��������������������������������������������������������������������������������������������������������������������������������������������������������������������������6
Hardware Installation ����������������������������������������������������������������������������������������������������������������������������������������������������������������������� 9
Purchase apps from the Azena Application Store �������������������������������������������������������������������������������������������������������������� 10
Conguration ������������������������������������������������������������������������������������������������������������������������������������������������������������������������������������ 12
Remote Management ��������������������������������������������������������������������������������������������������������������������������������������������������������������������� 17
Device Info ������������������������������������������������������������������������������������������������������������������������������������������������������������������������������������������ 18
Privacy Mask �������������������������������������������������������������������������������������������������������������������������������������������������������������������������������������� 18
Virtual Camera ���������������������������������������������������������������������������������������������������������������������������������������������������������������������������������� 19
Fisheye dewarping ��������������������������������������������������������������������������������������������������������������������������������������������������������������������������� 19
Stream Conguration ���������������������������������������������������������������������������������������������������������������������������������������������������������������������� 20
Device Health ������������������������������������������������������������������������������������������������������������������������������������������������������������������������������������� 21
User Management ��������������������������������������������������������������������������������������������������������������������������������������������������������������������������� 21
Network ����������������������������������������������������������������������������������������������������������������������������������������������������������������������������������������������� 22
Date & Time ���������������������������������������������������������������������������������������������������������������������������������������������������������������������������������������� 22
Firmware ��������������������������������������������������������������������������������������������������������������������������������������������������������������������������������������������� 23
Certicate management ���������������������������������������������������������������������������������������������������������������������������������������������������������������� 23
Applications - Overview ���������������������������������������������������������������������������������������������������������������������������������������������������������������� 24
Data Magnet and VAST2 �������������������������������������������������������������������������������������������������������������������������������������������������������������� 24
I/O Switchboard �������������������������������������������������������������������������������������������������������������������������������������������������������������������������������� 29
IoT gateway ��������������������������������������������������������������������������������������������������������������������������������������������������������������������������������������� 30
This page is used for connecting to a specic MQTT broker through a TCP connection. �������������������������������������� 30
Messaging access control ������������������������������������������������������������������������������������������������������������������������������������������������������������� 31
Applications - Cloud Connection ������������������������������������������������������������������������������������������������������������������������������������������������ 32
Applications - Legal ������������������������������������������������������������������������������������������������������������������������������������������������������������������������ 37
Technology License Notice ������������������������������������������������������������������������������������������������������������������������������������������������������������ 38

AI Box User Manual | 3
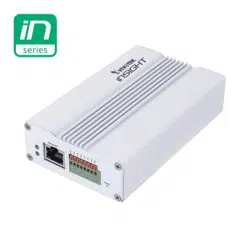
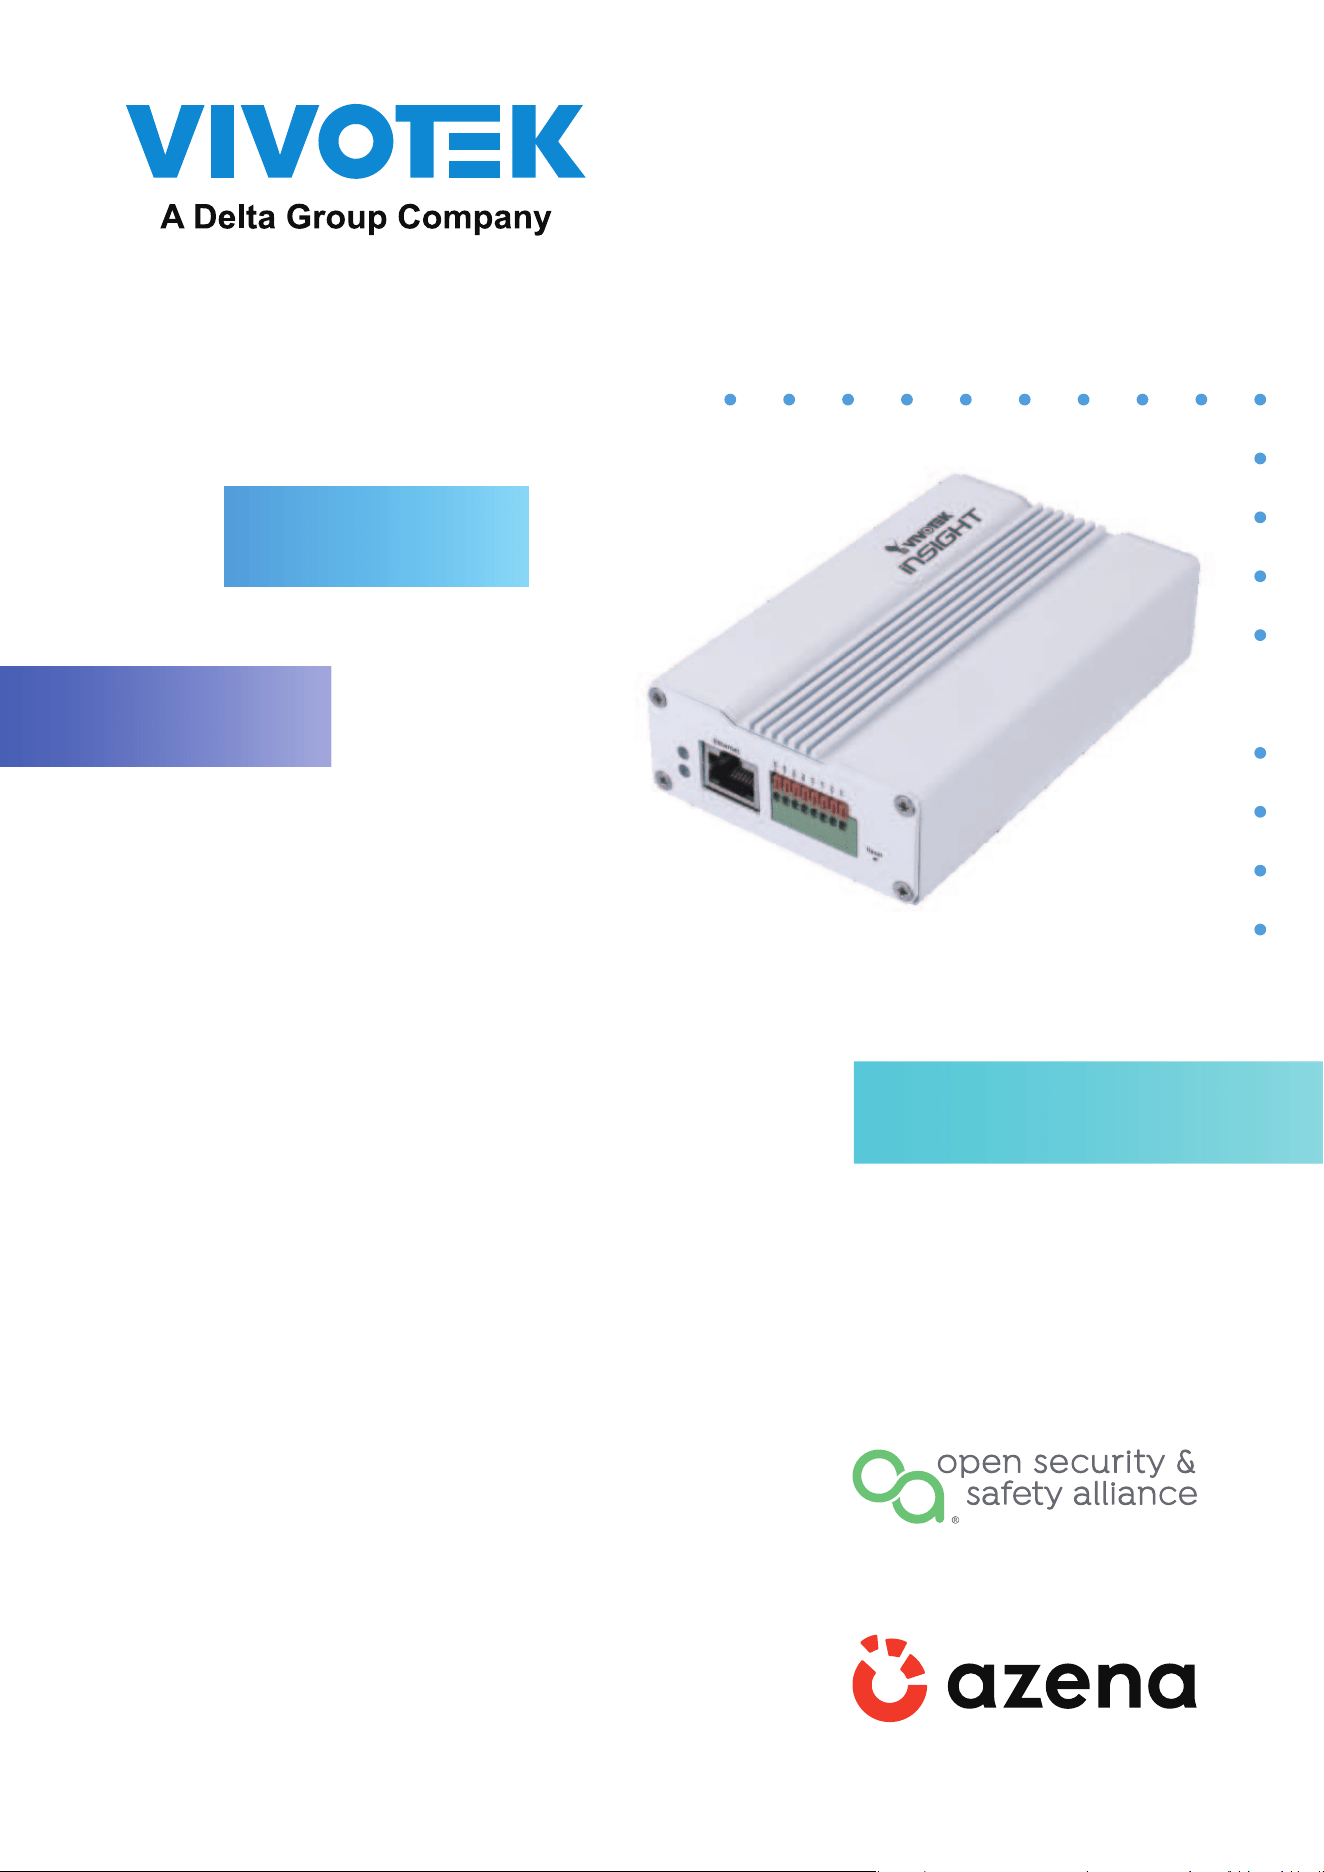
Overview
• Powered by Qualcomm QCS605 SoC with a built-in AI Engine
• Powerful Computing for Video Processing and Machine Learning
• Designed with OSSA Technology Stack, running on Azena Android OS
• Supports a variety of VCA solutions through Azena APPs
• Enables Any Type of Network Camera to act as AIoT Device
• RJ-45 or M12 Connectors for PoE Connection
• Digital input*2, Digital Output *2
• EN50155 Compliance for Professional Mobile Surveillance

4 | AI Box User Manual
Read Before Use
The use of surveillance devices may be prohibited by law in your country� The Network
Camera is not only a high-performance web-ready camera but can also be part of a exible
surveillance system� It is the user’s responsibility to ensure that the operation of such devices is
legal before installing this unit for its intended use�
It is important to rst verify that all contents received are complete according to the Package
Contents listed below� Take note of the warnings in the Quick Installation Guide before the
Network Camera is installed; then carefully read and follow the instructions in the Installation
chapter to avoid damage due to faulty assembly and installation� This also ensures the product
is used properly as intended�
The Network Camera is a network device and its use should be straightforward for those
who have basic networking knowledge� It is designed for various applications including video
sharing, general security/surveillance, etc. The Conguration chapter suggests ways to best
utilize the Network Camera and ensure proper operations� For creative and professional
developers, the URL Commands of the Network Camera section serves as a helpful reference
to customizing existing homepages or integrating with the current web server�
Symbols and Statements in this Document
i
INFORMATION: provides important messages or advices that might help prevent
inconvenient or problem situations�
NOTE: Notices provide guidance or advices that are related to the functional integrity
of the machine�
Tips: Tips are useful information that helps enhance or facilitae an installation,
function, or process�
WARNING: or IMPORTANT:: These statements indicate situations that can be
dangerous or hazardous to the machine or you�
Electrical Hazard: This statement appears when high voltage electrical hazards
might occur to an operator�
Revision History
■
Rev� 1�0: Initial release�
■
Rev. 1.1: Updated the initial portal login and other rmware features.
NOTE:
1� The camera is only to be connected to PoE networks without routing to outside plants�
2� For PoE connection, use only UL listed I�T�E� with PoE output�

AI Box User Manual | 5
Package Contents
■
IE9111-O
■
Screw pack�
■
Wall- / Panel-mount bracket�
■
Quick Installation Guide�
Any Type of Camera
Add New Features to
Existing Installation
Azena Apps
Events & Metadata
Video Streaming for Recording
VAST2 (VMS)
Application

6 | AI Box User Manual
Outer View
Physical Description
GbE LAN
DI/DO
terminal
Reset
PWR/Status
LEDs
Bracket Dimensions

AI Box User Manual | 7
DI/DO Terminal Block Pinouts
DO1+
DO1-
DO2+
DO2-
DI1+
DI1-
DI2+
DI2-
PWR
Status
LED Behavior
PWR Red ON Power is on
PWR Red ON + Status Green blinking System ready
PWR Red + Status Green blinking Reset taking place / restoring default
Consumption & Power Input
PoE: 802.3af class3
RX+
RX- TX+
TX-
M12 D-CODE 4 pin F
Below is the pinouts for the model that comes with a M12 connector:

8 | AI Box User Manual
Hardware Reset
The reset button is used to reset the system or restore the factory default settings�
Sometimes resetting the system can return the camera to normal operation� If the
system problems remain after reset, restore the factory settings and install again�
Use a atten paper clip to press the button.
Reset: Press the recessed reset button� Wait for the Network Camera to reboot�
Restore: Press and hold the reset button until the status LED rapidly blinks� Note that all
settings will be restored to factory default� Upon successful restore, the status LED will
blink green and red during normal operation�
Prerequisites
Hardware:
• Azena Enabled camera�
• A host computer (Windows/Linux/Mac/Ubuntu) with Google Chrome browser�
• Local network (e�g� router and cables) to connect the camera and the host computer�
• POE – Power Over Ethernet (via router, hub or PoE adapter) to power the camera�
Network:
• Network with connectivity to internet (ofine camera supported: not described in this
document)�
• DHCP Network (Using DHCP the camera automatically receives the IP address once
connected to a network)�
Software:
• Ecosystem credentials used across application store and Device Management
Portal� Additionally you can also invite your colleagues to the account via the User
Management�
• Download Azena Device Management tool from the resources section and install
on the host computer� The tool can be used for device discovery and installing
applications on cameras in ofine network.
• Our devices communicate to the external URLs which needs to be allowed in the
network rewall – details can be found in the resources section to the left.

AI Box User Manual | 9
Hardware Installation
1�The optional bracket allows you to install the AI box to a wall or panel� Secure the
bracket to the box using the included sunk head screws�
2�Secure the assembly to wall/panel using the included tapping screws and anchors�
10 | AI Box User Manual
Purchase apps from the Azena Application Store
Sign up/log in to the Azena platform
• Visit the Application Store and click “register”�
• Choose in which role you want to use the Application Store, system integrator,
application developer or both� Depending on which role you choose, the store will be
set up for you�
First you’ll be asked for information about you and your company as well as contact
details� The email you give will be your login name� When everything is completed,
we’ll send you an email to conrm your identity.
Finally, we check your registration and provide you with your personal link to the shop
by e-mail for you to start creating your user prole. In the “Team” section of your
prole, you can also invite other users from your team and manage their user rights
and permissions�
Browse the Application Store and nd apps
To access the Azena Application Store, click on “Application Store” in the navigation
bar at the top of the Azena website or visit store�azena�com/shop� There you will get an
overview of the available apps, search function and detailed information�
• Search for apps by name, developer and use cases
• Get an idea of each app’s functionality, use cases and developer details
• See how other users rate the apps and browse their comments

AI Box User Manual | 11
Purchase the desired apps
Buying apps for your AI Box is as easy as searching and clicking� The Azena
Application Store works in the same familiar way as other online shops�
Add an app to the shopping cart with just one click
• Simply select the number of licences you need for your cameras in the app page’s
“Pricing” section and click “Add to card”�
• If a trial version is available, you can install the app for free and test it for 30 days�
Each trial licence expires automatically after this period�
Place orders and checkout securely
• After adding an app to your shopping cart, you’re taken directly to the order
summary� You also get there by clicking the shopping cart symbol at the top of the
page�
• When you’re ready to buy, just click “Place order”� The new app is immediately
added to your apps� You get there by clicking “Applications” in the navigation at the
top of the page. With every purchase you’ll receive a conrmation email.
Note: You’ll nd an overview of all your orders in the “Order history” section, in the
prole menu in the upper right corner of the Application Store.
Scan here for the full
Azena Application Store guide:

12 | AI Box User Manual
Conguration
1� Download the Device Management Tool� The tool can be requested here:
https://devices�azena�com/tooldownload
Make sure DHCP service is available in your local network�
Resources:
1 User Management Guide: https://hubs�ly/H0xV2j40
2 Download Azena Device Management Tool: https://hubs�li/H0xYjtL0
3 Network Firewall Details: https://hubs�li/H0xYhkr0
2� Use the Device Management Tool to locate your device�
AI Box User Manual | 13
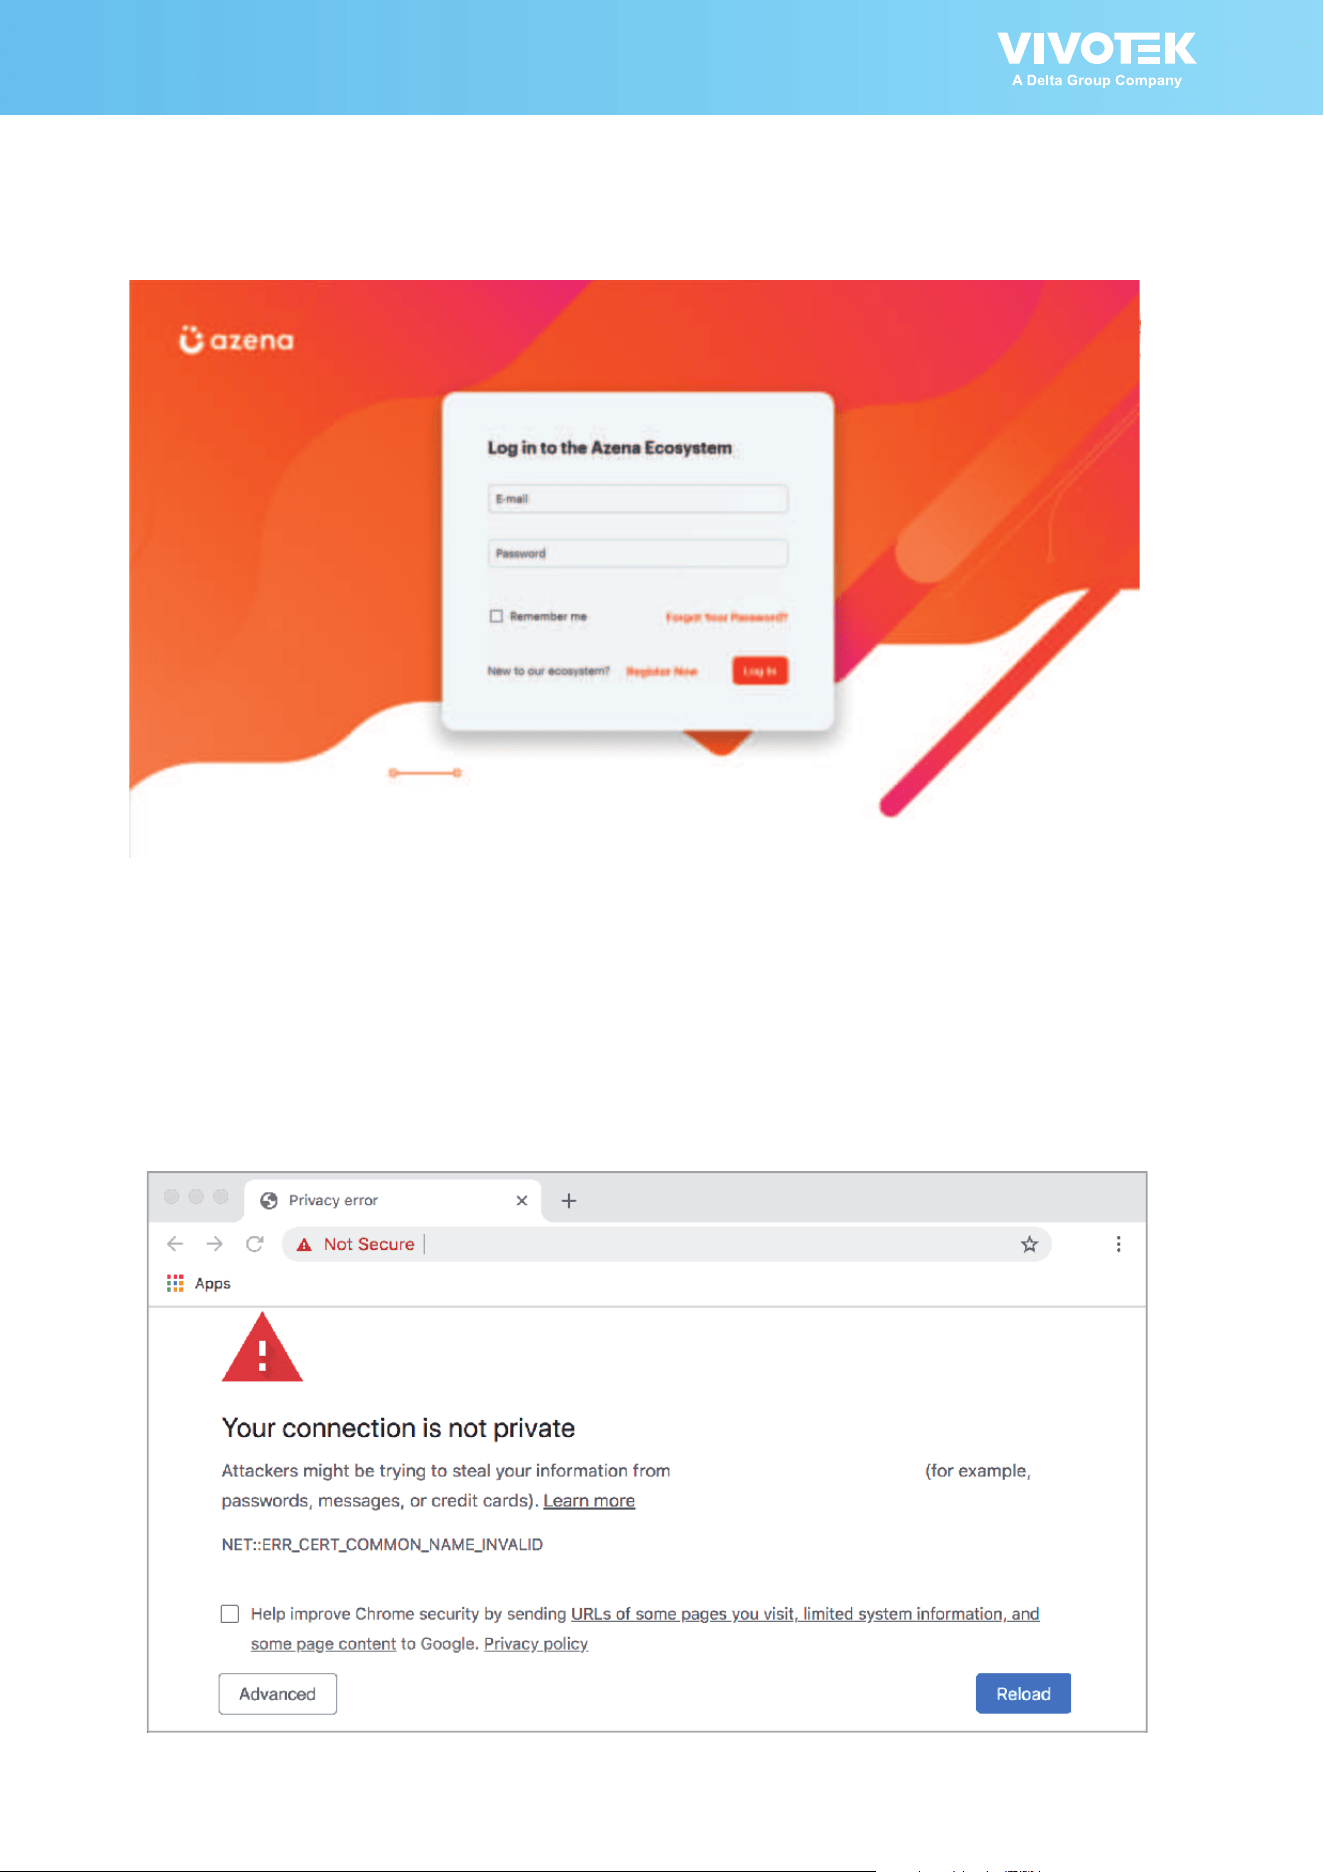
3� You can click Cloud Login to download Azena apps or visit:
https://store�azena�com/shop/
4� Enter URL: https://<ip_address>:8443/
Enter admin/admin as the default credential�
Since the connection is using a self-signed certicate, your connection will not be
considered as a secure connection� Click Advanced to proceed�
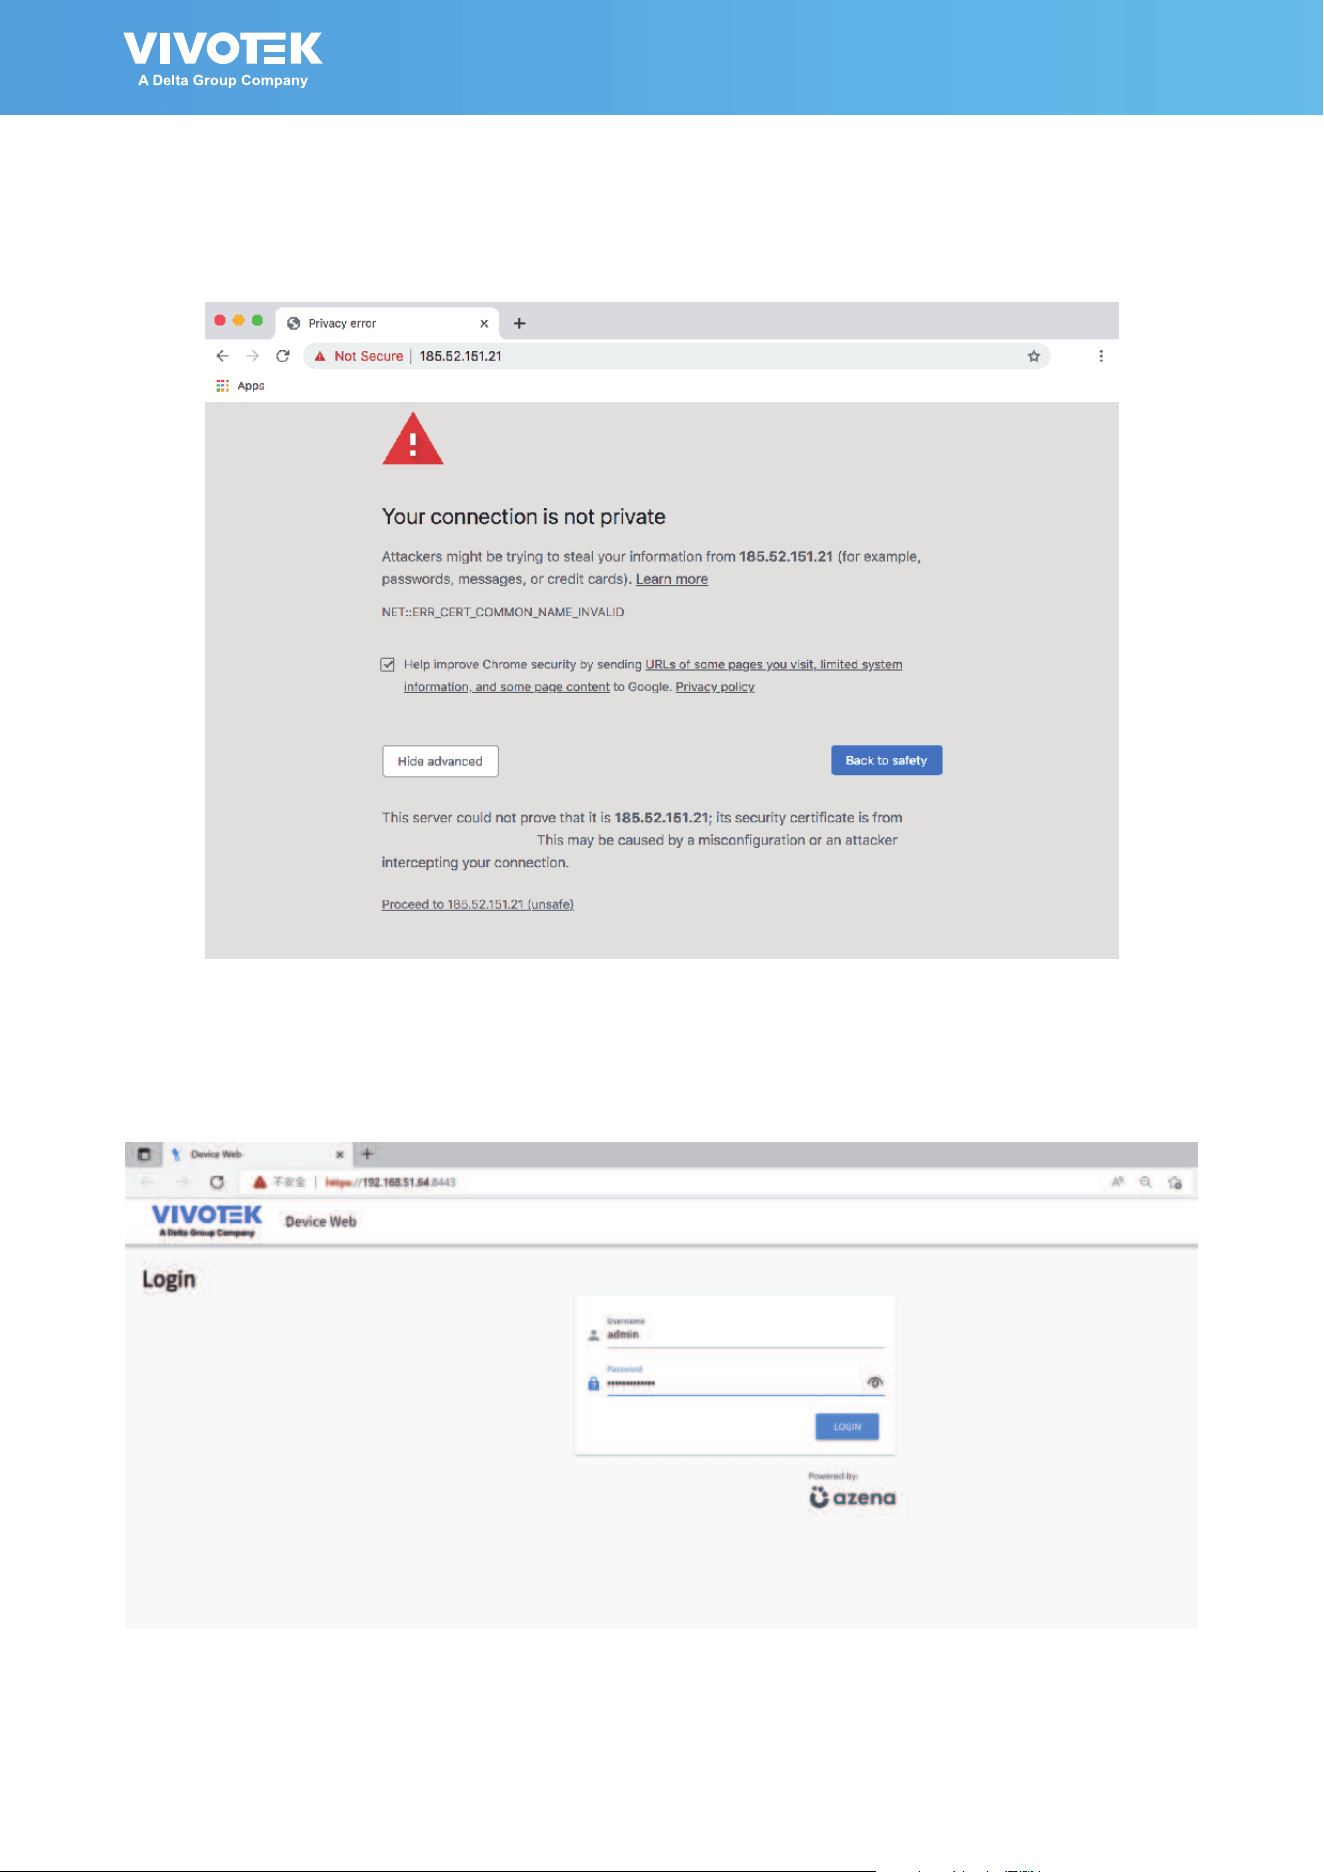
14 | AI Box User Manual
Click Proceed to xxx�xxx�xxx�xxx (Unsafe) to open the web console�
Note the IP addresses below are for reference only�
Enter admin/admin as the default credential�

AI Box User Manual | 15
You will be requested to create a new password for security concern� Enter a
combination of alphabetic, numeric, and special characters that is strong enough for
protection�
The new password must comprise of at least 10 characters, containing uppercase,
lowercase, digits or special characters�
You can also use 3rd party tools like Onvif Device Manager to discover the Azena
enabled cameras�
NOTE:
If installing or testing Insight devices on a network with different VMS, there will
be a chance that a software like Nx Witness will scan and try to add the devices
automatically� If this happens, the user will be timed out from our devices due to login
failures� It is highly recommended that users change their login name from "admin" to
something else, or add a second login account�

16 | AI Box User Manual
IE9111-O
LAN
3rd-party camera
5� From the Remote device management page, you can enter the address, and
credentials for connecting to the 3rd-party IP camera�
Enter 8554 as the RTSP port�
Enter /live�sdp as the stream name� /live1s1�sdp can also be used�
For some older models, the RTSP port can be 554�

AI Box User Manual | 17
Remote Management
This page is used mainly to connect a 3rd-party network camera�
These settings are dependent on camera make and model.

18 | AI Box User Manual
Device Info
Important information about this device is displayed on this page: including Device ID,
OS version, AOSP API, SDK addon, rmware version, etc.
The Device ID is a unique ID for each camera and will be displayed in the Device
Management Portal�
Here, you can also reboot the device or perform a Factory reset�
Privacy Mask
Click and drag on the screen to block out sensitive areas in your eld of view. The size
the orientation will display on screen� Use the Intensity slide bar to determine how
much image within the privacy mask is blurred� Currently 1 privacy mask is supported�
AI Box User Manual | 19
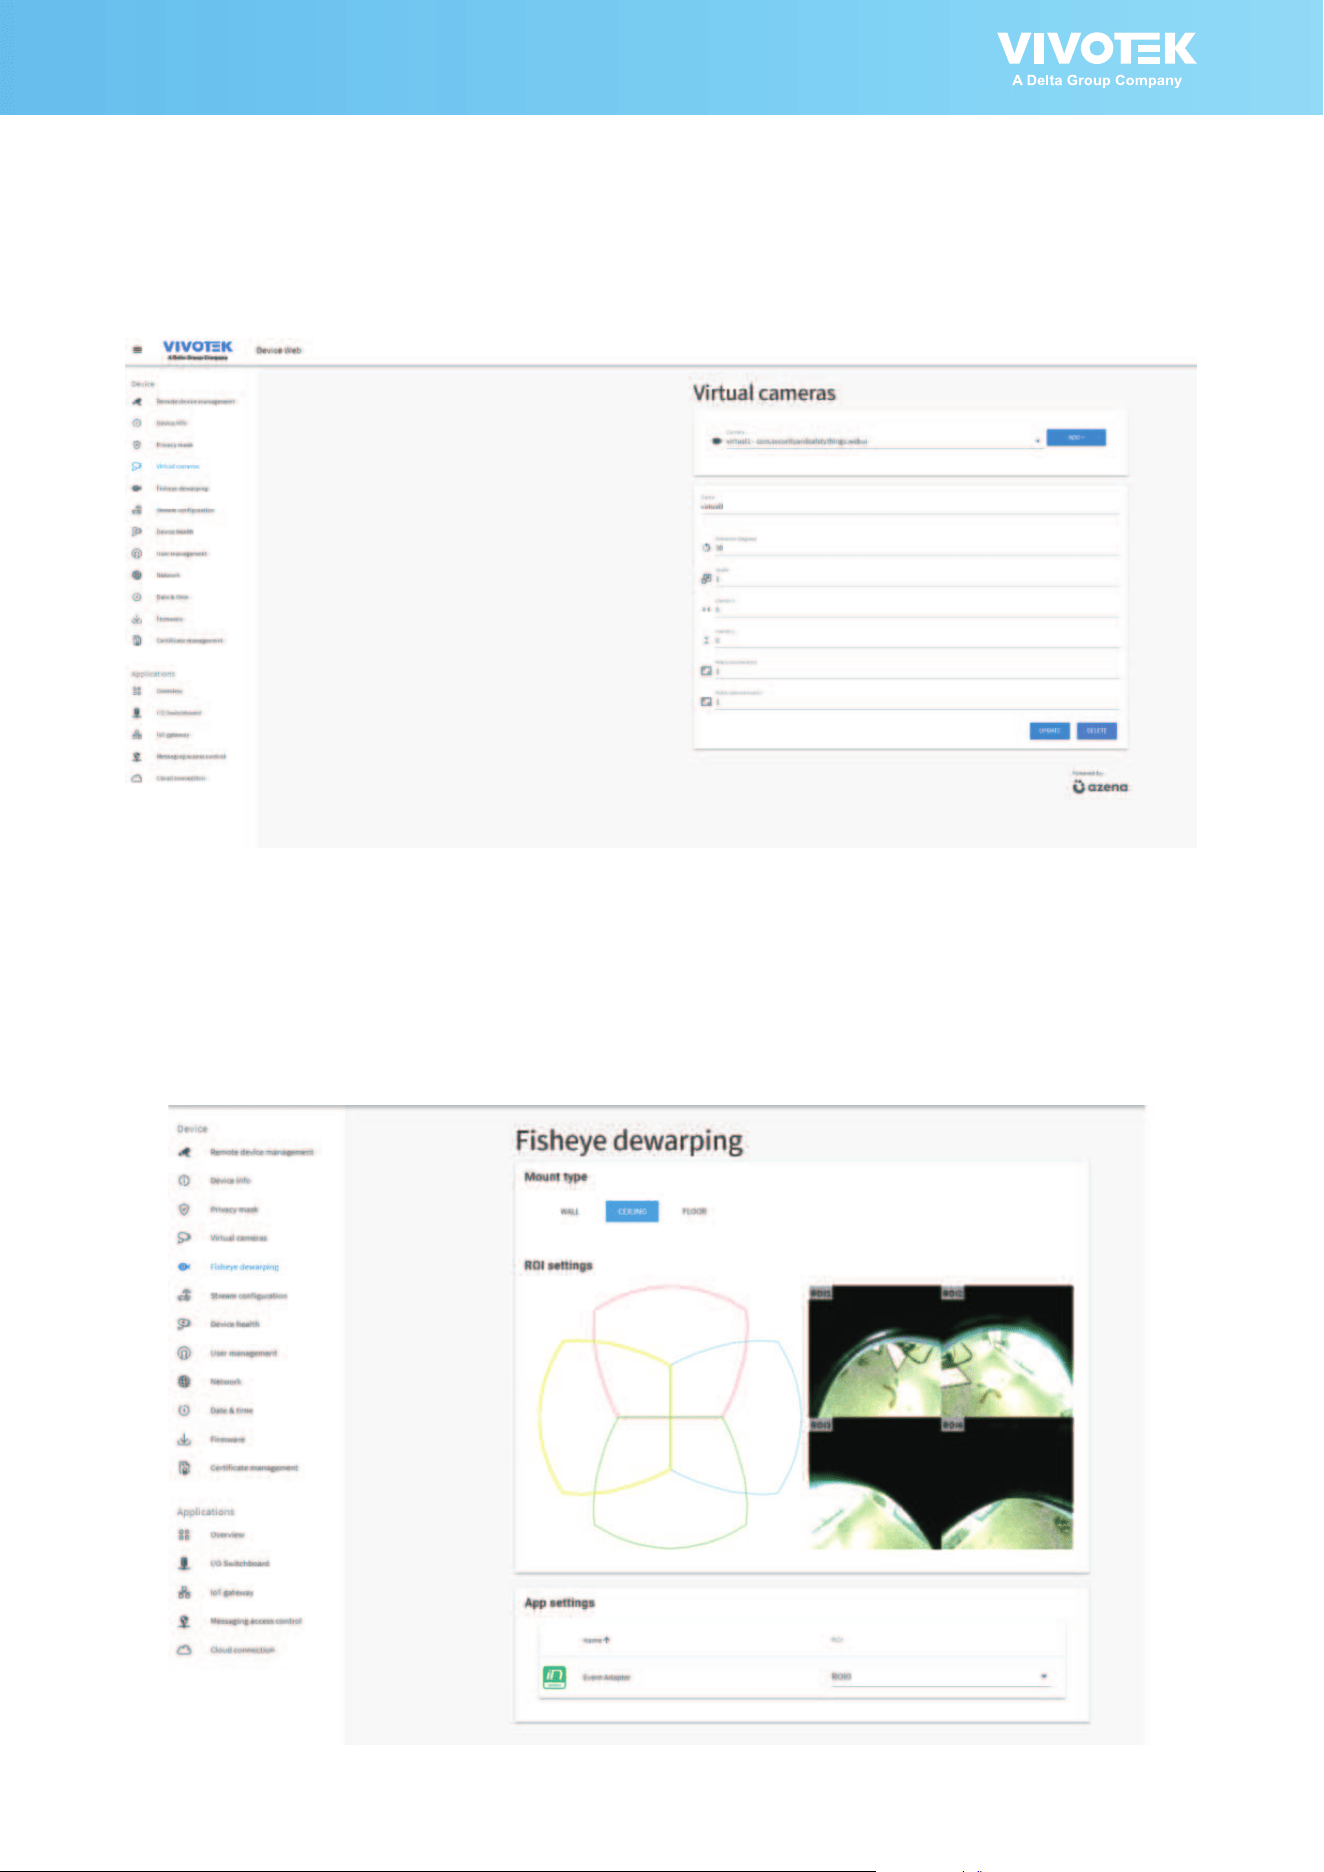
Fisheye dewarping
On this page, there are four pre-congured Region of Interest for the dewarped views
for a sheye camera.
Streams are dened as Full High Denition and Ultra High Denition streams.
Virtual Camera
Allows the creation of additional sub-stream(s) which can cover a certain zone of
interest in the camera's eld of view. The sub-streams are used for video analytics on
apps�
20 | AI Box User Manual
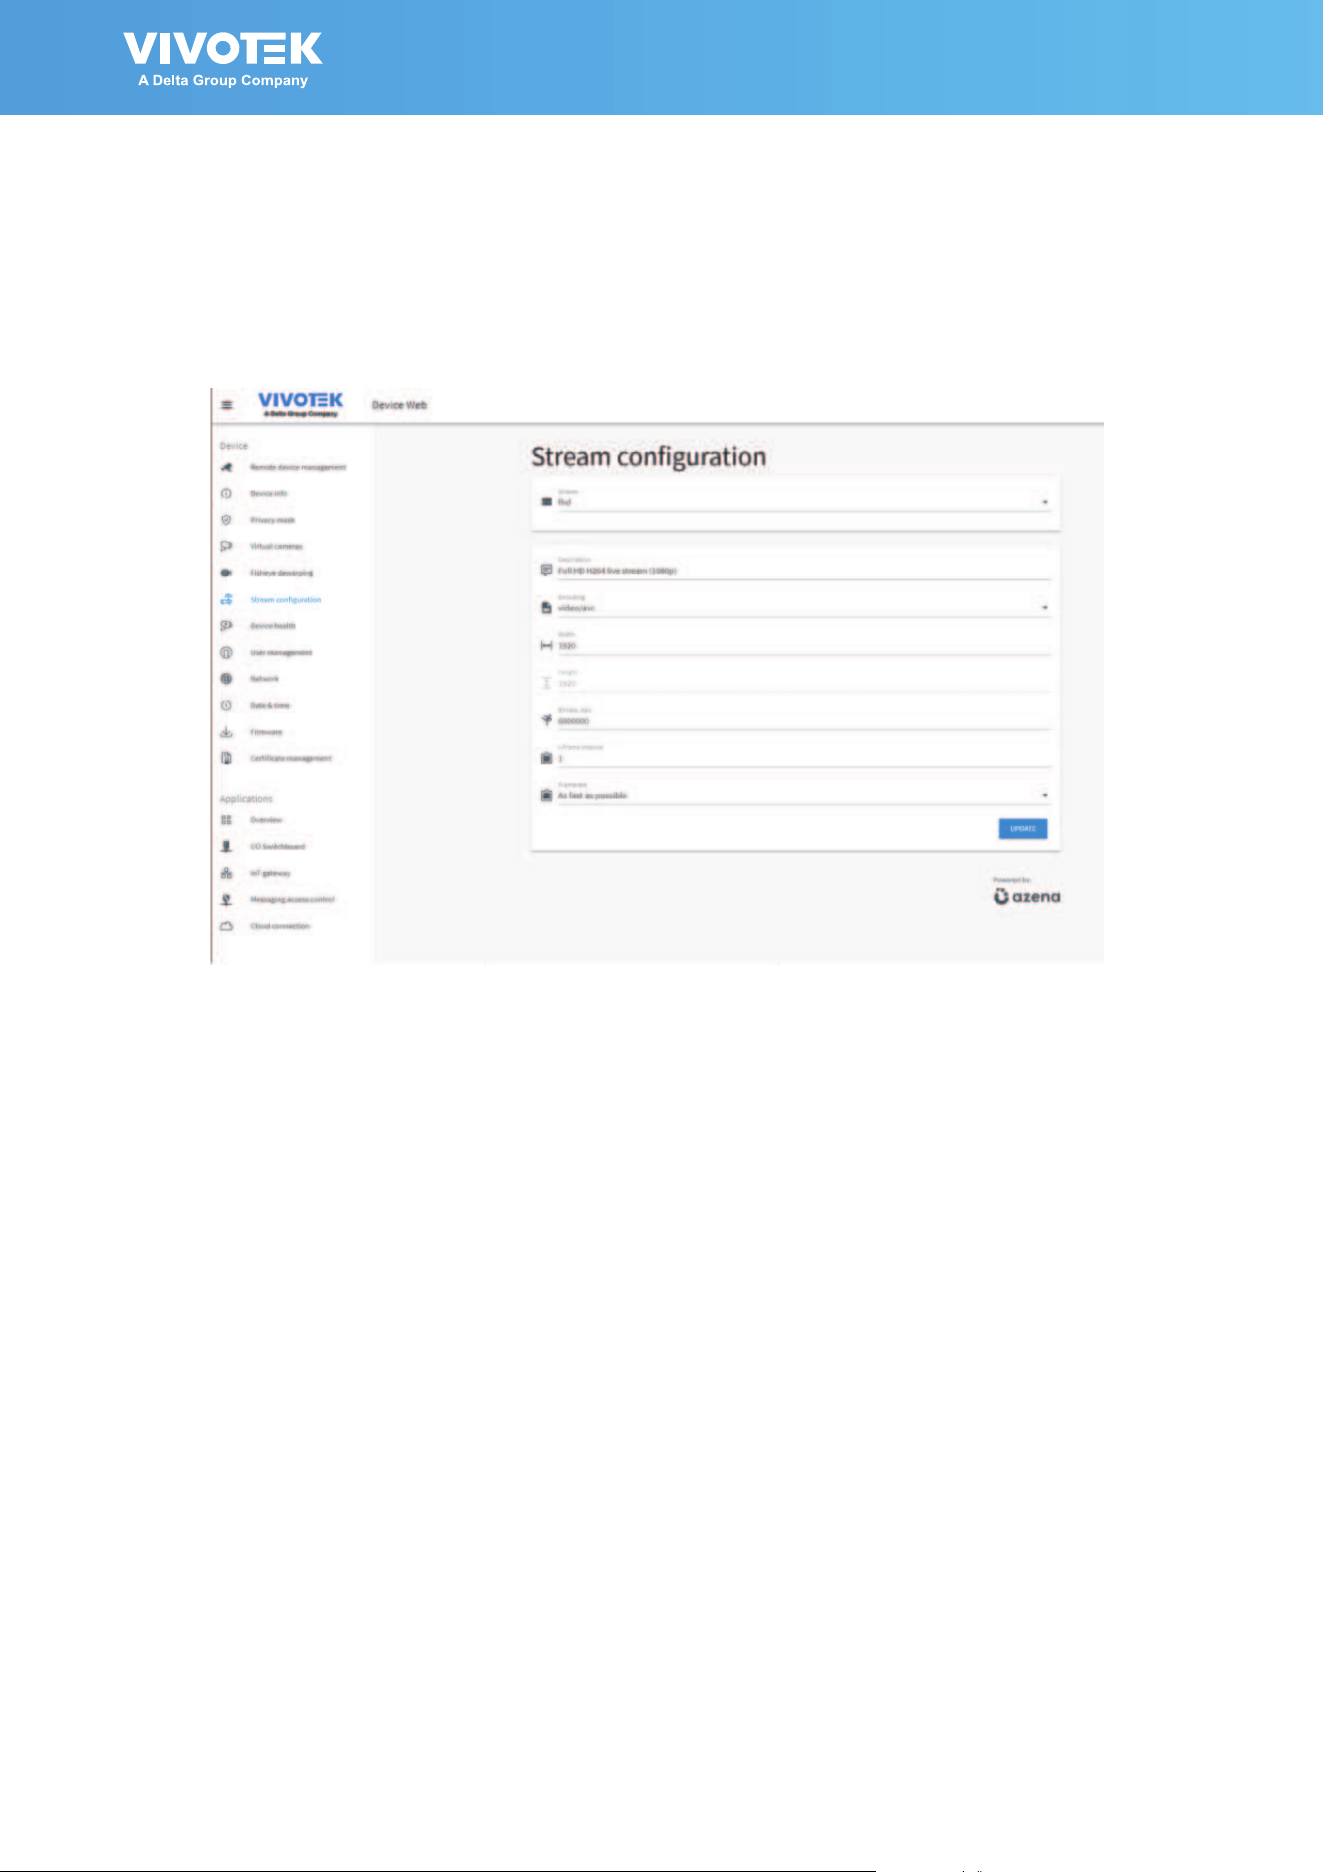
Stream Conguration
On this page, there are four pre-congured video streams which can be additionally
modied with regards to encoding, size, bitrate and I-frame interval.
Streams are dened as Full High Denition and Ultra High Denition streams.

AI Box User Manual | 21
Device Health
This page displays various device health information: CPU/Memory/Storage usage,
Connectivity, Temperature and App status� You can also export a system log for
troubleshooting�
User Management
On this page, you can add/remove users and set user's rights and permissions� Select
the management rights from the checkboxes�

22 | AI Box User Manual
Network
By default, the AI box has the network setup to receive the IP address via DHCP� On
this page you can change different network parameters, disable the DHCP and set a
specic IP.
Date & Time
This page allows the user to congure the current date/time on the device, synchronize
with computer time and also to enable network time synchronization via an NTP server�
The network time setting is necessary when you "claim" the camera for downloading
apps�
AI Box User Manual | 23
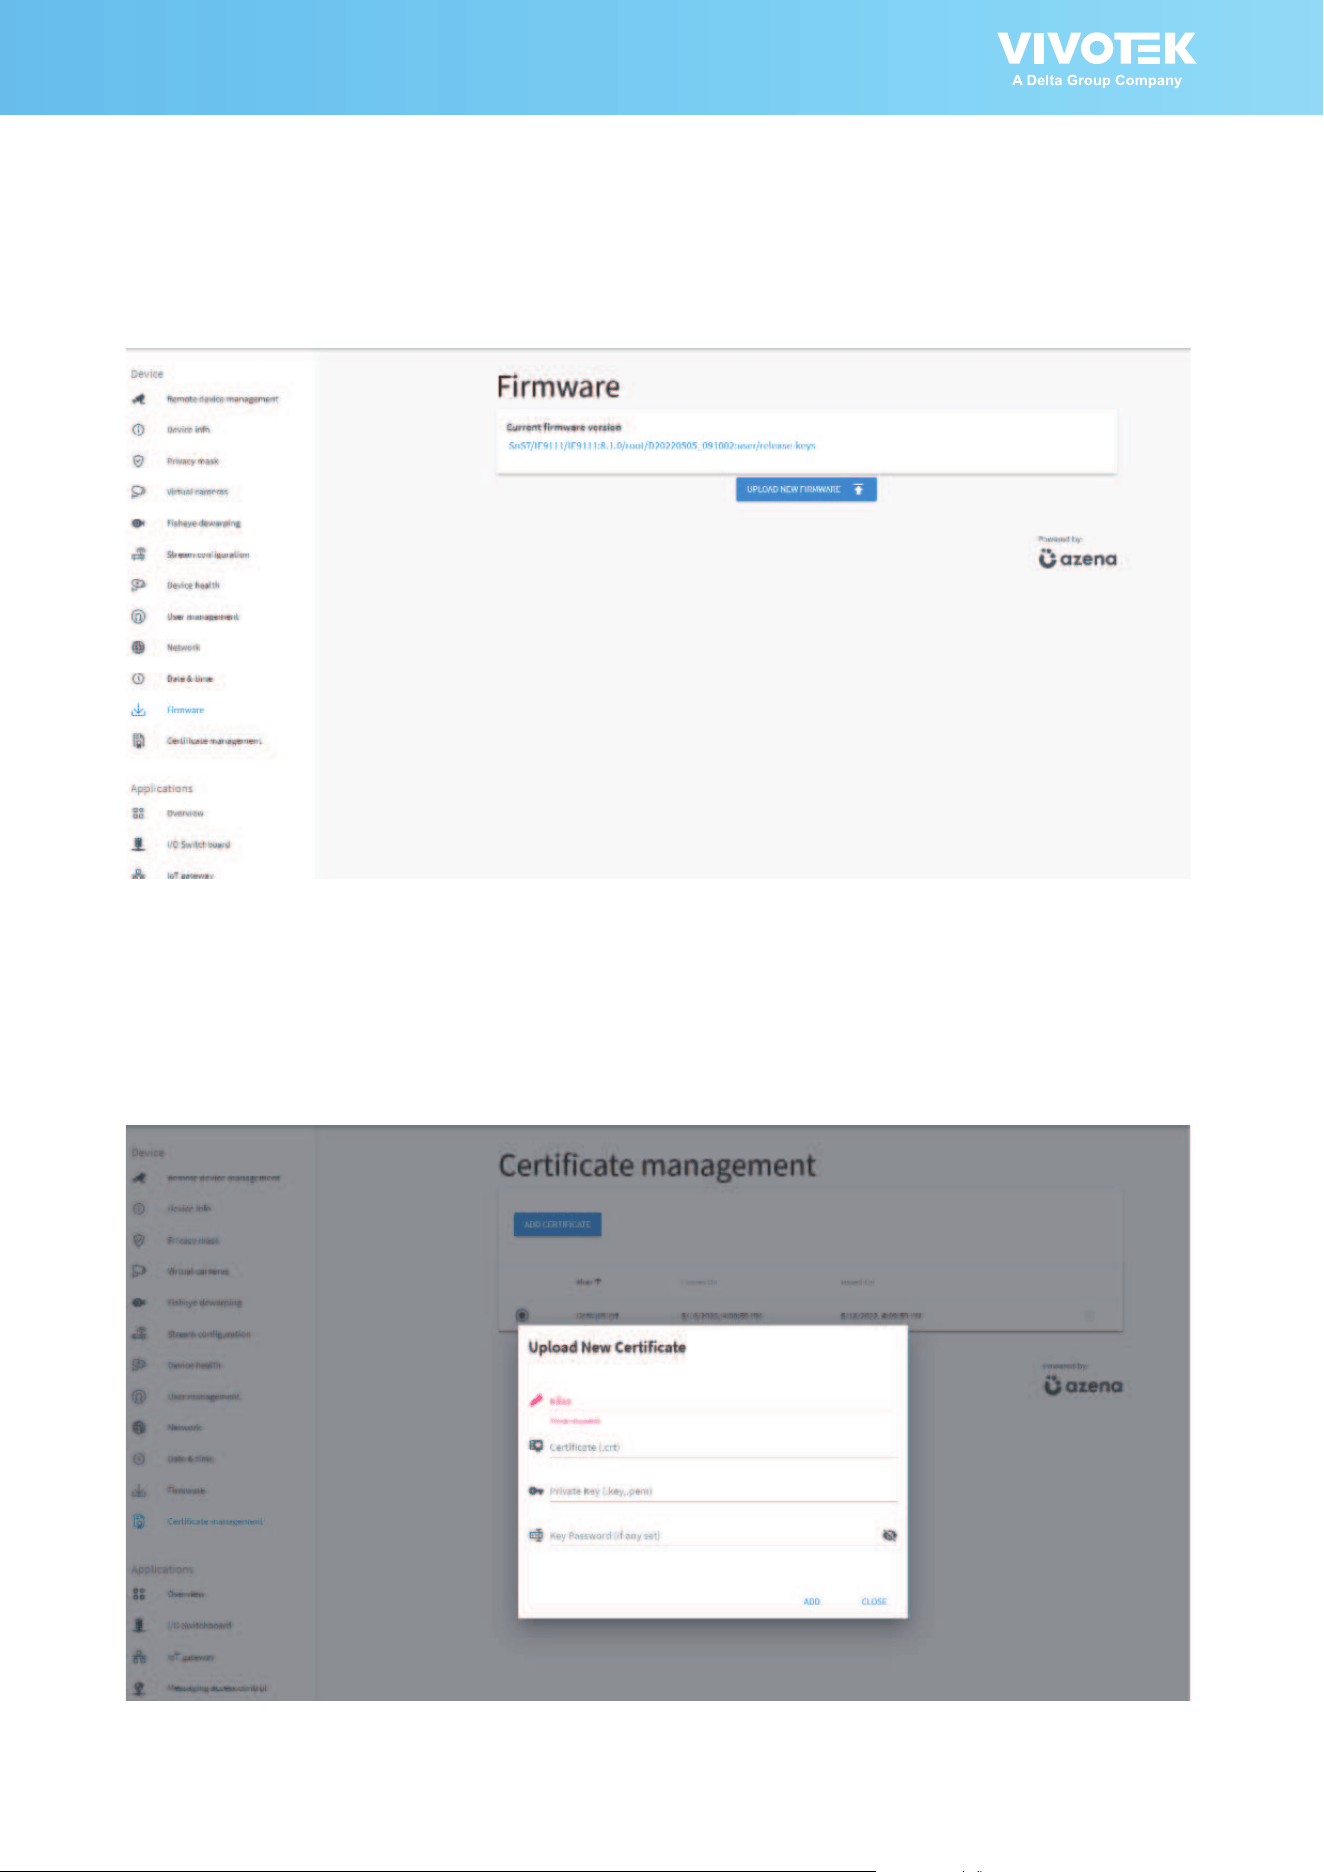
Firmware
On this page you can perform a Firmware (OS version) OTA upgrade�
Certicate management
Use this page to upload a certicate for secure connection.

24 | AI Box User Manual
Applications - Overview
On this page, users can see all the installed applications, their status, version and they
can also start/stop or uninstall an application using the vertical 3-dot menu:
Data Magnet and VAST2
To enable the display of video analytics from apps on the VAST2, click on the App
interface and congurations� Please note that NOT ALL Azena apps can be integrated
through the Data Magnet interface�

AI Box User Manual | 25
Enter the following to enable the connection through Data Magnet:
1
� Your VAST2 server IP�
2
� Data Magnet port: usually 3443�
3� Data Source Name: Note that this name must be identical to that on the VAST2
Data Magnet setting page
�
4
� VAST2 user name and password�
5
� Select the app installed on your device� Click the Update button�
a.
26 | AI Box User Manual
6� On VAST2 > Settings > Device > Data Magnet, click Add data source�

AI Box User Manual | 27
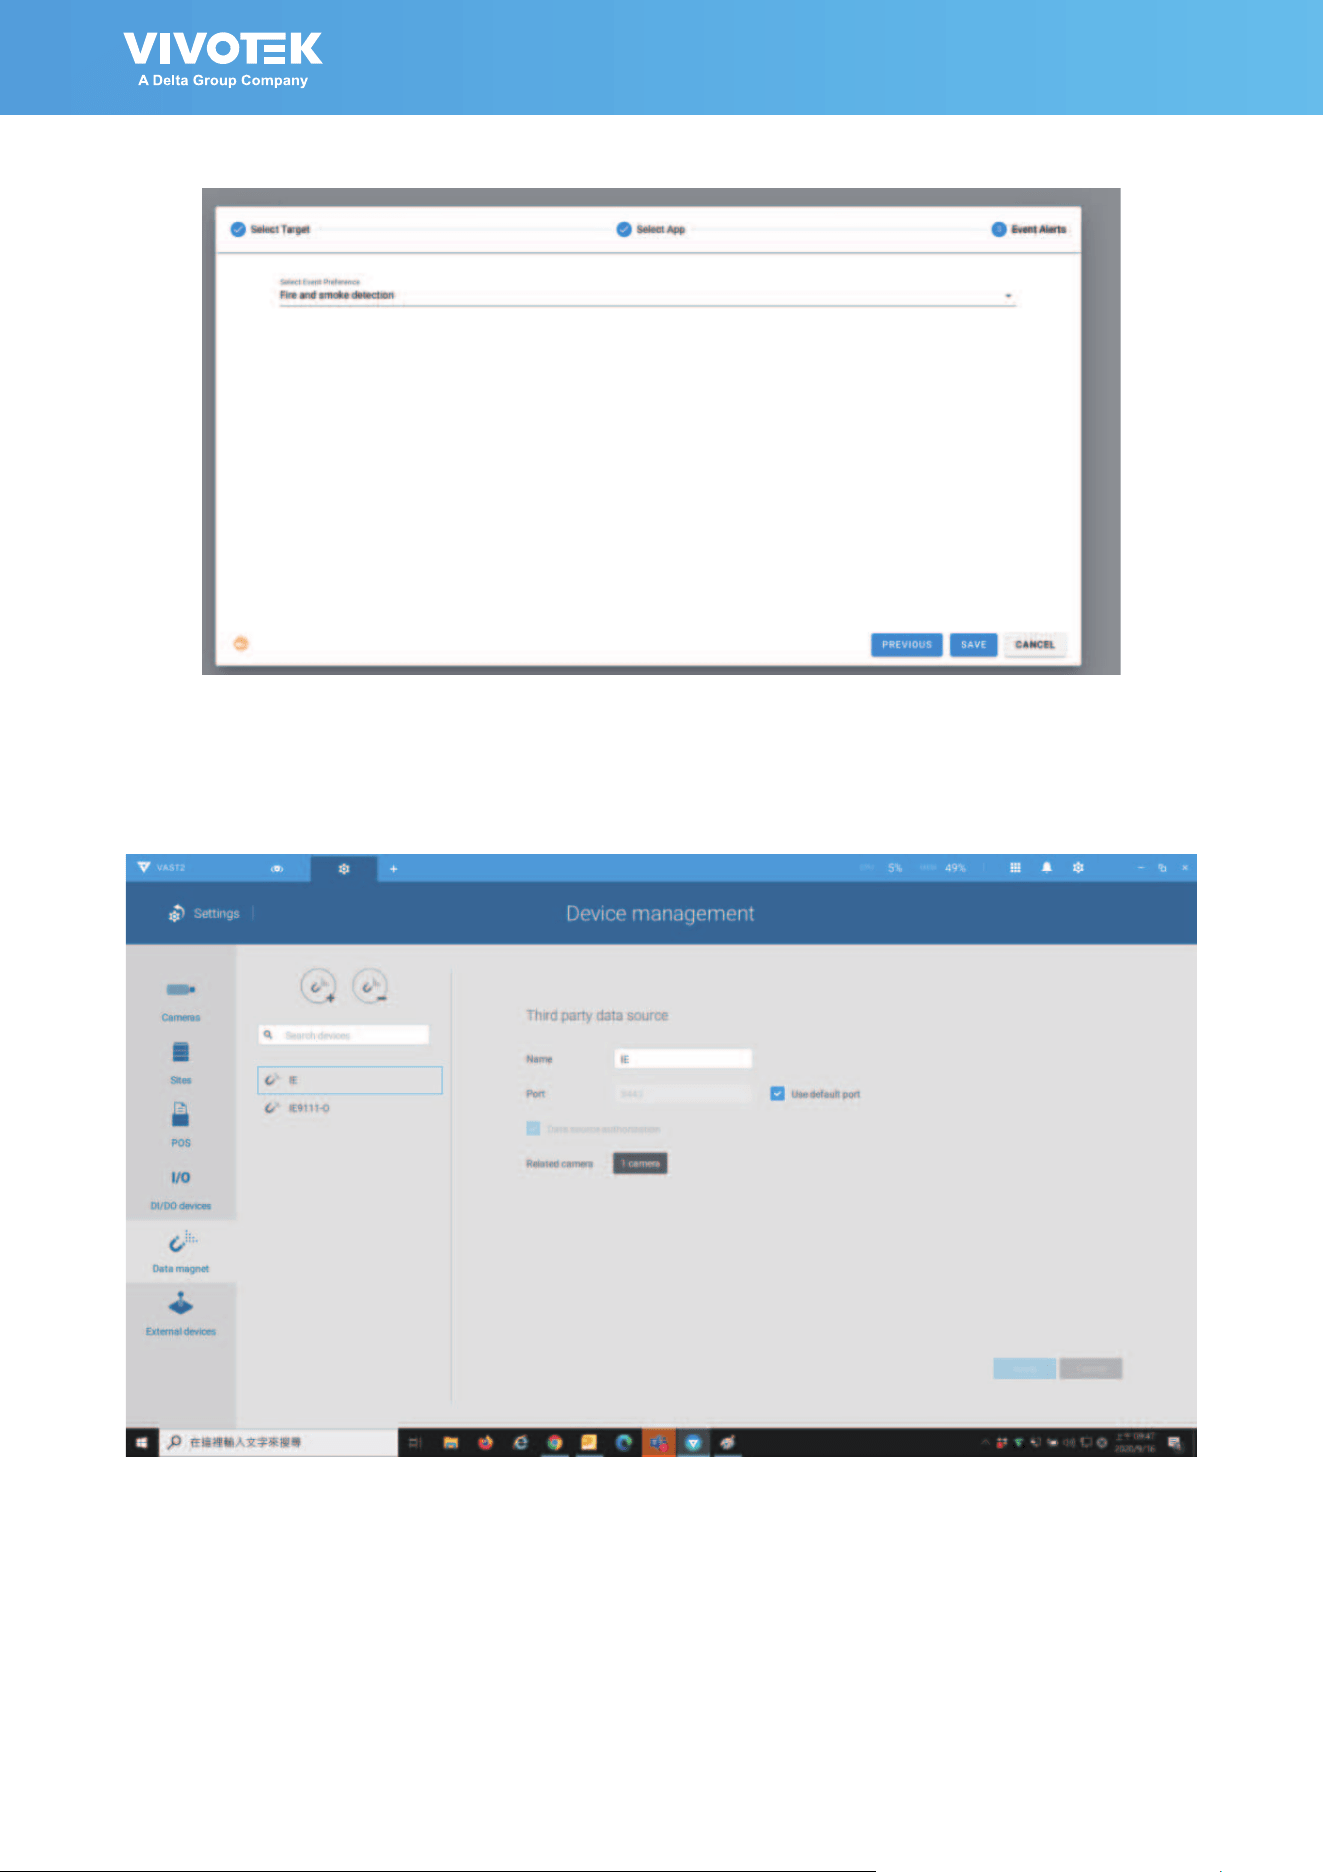
7� Select Third party data source�
8� Enter the Data Source Name, port (usually 3443), select the associated camera, and
click Add�
Note that the camera should be the one that the IE9111-O is connected to� The
camera should be manually added to VAST2�

28 | AI Box User Manual
9. You can then right-click on a VAST2 view cell to display the Data magnet data. The
analytics detection results can display along with the live video.

AI Box User Manual | 29
I/O Switchboard
From this page, you can detect the connected statuses of external relay devices. where it
can be easily retrieved. Check the statuses and see if the connected devices are working
properly.
You can then congure the action to activate those devices.

30 | AI Box User Manual
IoT gateway
This page is used for connecting to a specic MQTT broker through a TCP connection.
MQTT allows for messaging between a deevvice to cloud and cloud to device� The
connection can also be with an external MQTT client�
Type a Connection Name, choose MQTT as the gateway protocol, choose a schema (TCP
or SSL), input the server URL and a port number�
If you set the schema to SSL, then you must upload the CA certi cate of the MQTT
broker to the camera Ashttps://docs�azena�com/developer/core_topics/os_components/
iot_gateway/mqttsoon as you select ‘ssl’ an extra option will appear in the window
with which the camera� As soon as you select ‘ssl’, an extra option will appear in the
window with which you can do this�
Next, set a user name and password if your MQTT broker requires one, otherwise leave
it blank�

AI Box User Manual | 31
Messaging access control
From this page, you can create messaging rules for applications that do not have
applicable rules�

32 | AI Box User Manual
Applications - Cloud Connection
You can connect your device to the Azena cloud where you can install and manage the
applications, buy additional licenses and monitor your camera's health� Also, if crash
reporting is enabled, all the information about application crashes is sent to the cloud
where it can be easily retrieved�

AI Box User Manual | 33
In order to be able to install applications through the Device Management Portal, the
camera has to be connected to the Azena cloud� That process is called claiming�
The prerequisites for connecting the camera to the cloud are:
• You have an account on the Azena Device Management Portal�
• Cameras have a non-restricted access to the Internet�
• Your camera has a valid certicate. Please verify this by accessing the camera using
a web browser and go to the Device info page� Then check if a Device ID is present:
• Your device has a proper date/time set. This can be veried and set on the Date &
time page on the camera’s front end�
Proceed with the following for connecting the camera to the Device Management Portal:
1� Go to the Date & time option on camera’s web console and enable “Use network-provided
time”. If necessary, please congure your own NTP server
2� Go to Cloud connection option and enable “cloud based device management”� A pop-up will
appear with a message� Click Continue�
3� Click on “CLAIM DEVICE�”
Clicking the CLAIM button will redirect you to the Device Management Portal page where you
can enter some additional information regarding this camera:

34 | AI Box User Manual
Click Continue�
On the Device Management Portal page, you can enter some additional information
regarding the device:
• Camera name
• Client
• Location name
• Street address (optional)
Click the SAVE button in order to save the changes
and your camera will appear in the list of cameras
on the Device Management Portal�

AI Box User Manual | 35
On the Device Management Portal page, you can see all connected devices/cameras�
Click to select your device� On the right pane, click INSTALL APP�

36 | AI Box User Manual
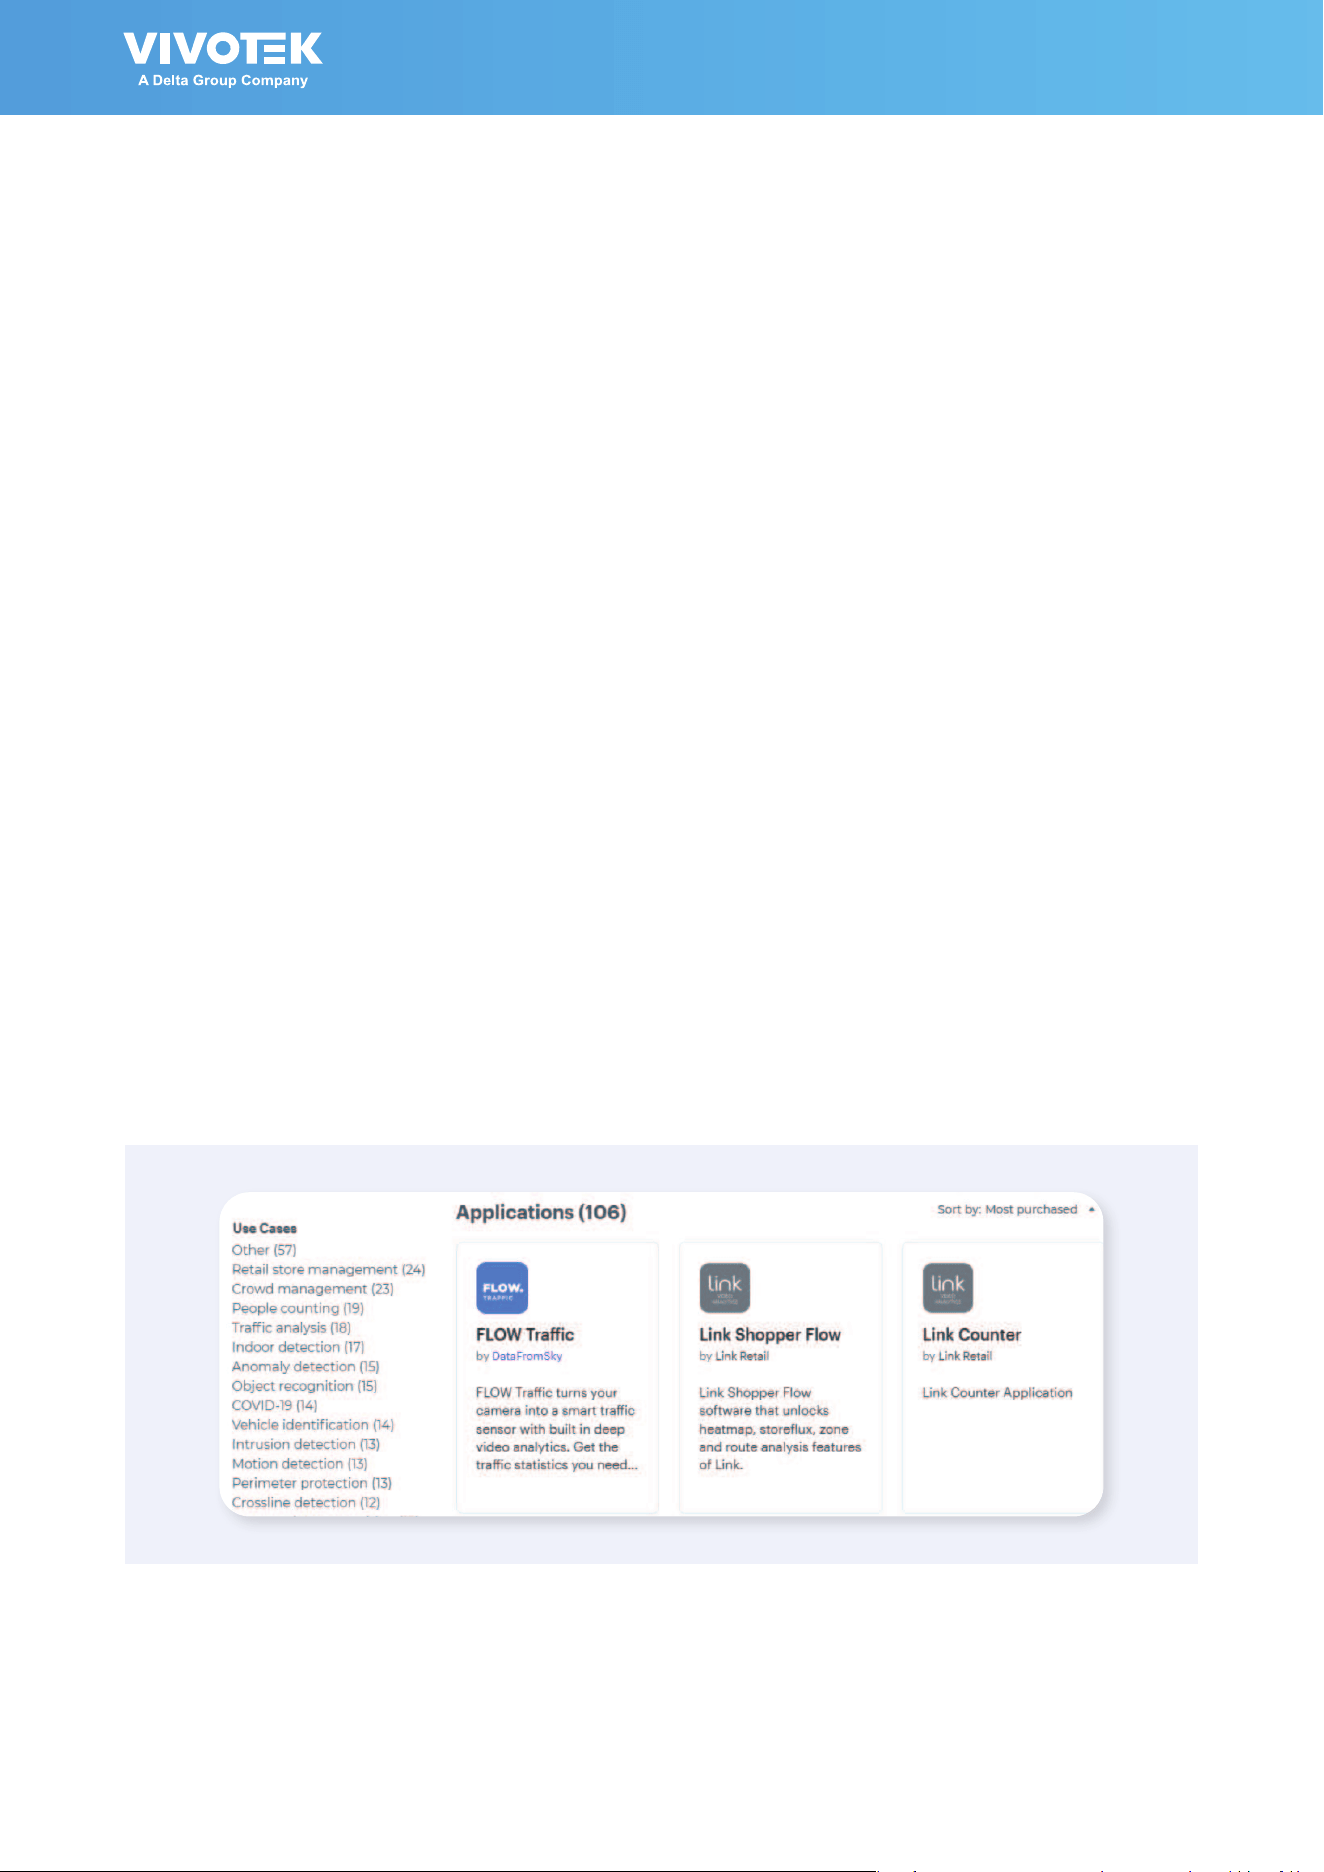
Scroll to select an app� Select and click INSTALL�
You can nd apps by either typing into the search bar or navigating on the left side
panel. There you will nd tailored solutions divided by use cases, such as retail store
management, crowd management and COVID-19�

AI Box User Manual | 37
This page provides legal information for the OS�
Applications - Legal

38 | AI Box User Manual
Technology License Notice
AMR-NB Standard
THIS PRODUCT IS LICENSED UNDER THE AMR-NB STANDARD PATENT LICENSE AGREEMENT� WITH
RESPECT TO THE USE OF THIS PRODUCT, THE FOLLOWING LICENSORS’ PATENTS MAY APPLY:
TELEFONAKIEBOLAGET ERICSSON AB: US PAT� 6192335; 6275798; 6029125; 6424938; 6058359� NOKIA
CORPORATION: US PAT� 5946651; 6199035� VOICEAGE CORPORATION: AT PAT� 0516621; BE PAT� 0516621;
CA PAT� 2010830; CH PAT� 0516621; DE PAT� 0516621; DK PAT� 0516621; ES PAT� 0516621; FR PAT� 0516621;
GB PAT� 0516621; GR PAT� 0516621; IT PAT� 0516621; LI PAT� 0516621; LU PAT� 0516621; NL PAT� 0516621;
SE PAT 0516621; US PAT 5444816; AT PAT� 819303/AT E 198805T1; AU PAT� 697256; BE PAT� 819303; BR
PAT� 9604838-7; CA PAT� 2216315; CH PAT� 819303; CN PAT� ZL96193827�7; DE PAT� 819303/DE69611607T2;
DK PAT� 819303; ES PAT� 819303; EP PAT� 819303; FR PAT� 819303; GB PAT� 819303; IT PAT� 819303; JP PAT�
APP� 8-529817; NL PAT� 819303; SE PAT� 819303; US PAT� 5664053� THE LIST MAY BE UPDATED FROM TIME
TO TIME BY LICENSORS AND A CURRENT VERSION OF WHICH IS AVAILABLE ON LICENSOR’S WEBSITE AT
HTTP://WWW�VOICEAGE�COM�
Notices from HEVC Advance:
THIS PRODUCT IS SOLD WITH A LIMITED LICENSE AND IS AUTHORIZED TO BE USED ONLY
IN CONNECTION WITH HEVC CONTENT THAT MEETS EACH OF THE THREE FOLLOWING
QUALIFICATIONS: (1) HEVC CONTENT ONLY FOR PERSONAL USE; (2) HEVC CONTENT THAT
IS NOT OFFERED FOR SALE; AND (3) HEVC CONTENT THAT IS CREATED BY THE OWNER OF
THE PRODUCT. THIS PRODUCT MAY NOT BE USED IN CONNECTION WITH HEVC ENCODED
CONTENT CREATED BY A THIRD PARTY, WHICH THE USER HAS ORDERED OR PURCHASED
FROM A THIRD PARTY, UNLESS THE USER IS SEPARATELY GRANTED RIGHTS TO USE THE
PRODUCT WITH SUCH CONTENT BY A LICENSED SELLER OF THE CONTENT. YOUR USE OF
THIS PRODUCT IN CONNECTION WITH HEVC ENCODED CONTENT IS DEEMED ACCEPTANCE OF
THE LIMITED AUTHORITY TO USE AS NOTED ABOVE.
H.264
THIS PRODUCT IS LICENSED UNDER THE AVC PATENT PORTFOLIO LICENSE FOR THE
PERSONAL AND NON-COMMERCIAL USE OF A CONSUMER TO (i) ENCODE VIDEO IN
COMPLIANCE WITH THE AVC STANDARD ("AVC VIDEO") AND/OR (ii) DECODE AVC VIDEO
THAT WAS ENCODED BY A CONSUMER ENGAGED IN A PERSONAL AND NON-COMMERCIAL
ACTIVITY AND/OR WAS OBTAINED FROM A VIDEO PROVIDER LICENSED TO PROVIDE AVC
VIDEO� NO LICENSE IS GRANTED OR SHALL BE IMPLIED FOR ANY OTHER USE� ADDITIONAL
INFORMATION MAY BE OBTAINED FROM MPEG LA, L�L�C� SEE HTTP://WWW�MPEGLA�COM

AI Box User Manual | 39
Electromagnetic Compatibility (EMC)
FCC Statement
This device compiles with FCC Rules Part 15� Operation is subject to the following two conditions�
■
This device may not cause harmful interference, and
■
This device must accept any interference received, including interference that may cause
undesired operation�
This equipment has been tested and found to comply with the limits for a Class B digital device,
pursuant to Part 15 of the FCC Rules� These limits are designed to provide reasonable protection
against harmful interference in a residential installation� This equipment generates, uses and can
radiate radio frequency energy and, if not installed and used in accordance with the instructions,
may cause harmful interference to radio communications� However, there is no guarantee that
interference will not occur in a partial installation� If this equipment does cause harmful interference
to radio or television reception, which can be determined by turning the equipment off and on, the
user is encouraged to try to correct the interference by one or more of the following measures:
■
Reorient or relocate the receiving antenna�
■
Increase the separation between the equipment and receiver�
■
Connect the equipment into an outlet on a circuit different from that to which the receiver is
connected�
■
Consult the dealer or an experienced radio/TV technician for help�
Shielded interface cables must be used in order to comply with emission limits�
CE Mark Warning
This is a Class B product� In a domestic environment, this product may cause radio interference, in
which case the user may be required to take adequate measures�
VCCI Warning
この装置は、情報処理装置等電波障害自主規制協議会(VCCI)の基準にづくクラスB情報技術装置です。こ
の装置は、家庭環境で使用することを目的としていますが、この装置がラジオやテレビジョン受信機に近接して使用される
と、受信障害を引き起こすことがあります。
取扱説明書に従って正しい取り扱いをして下さい
Liability
VIVOTEK Inc� cannot be held responsible for any technical or typographical errors and reserves the
right to make changes to the product and manuals without prior notice� VIVOTEK Inc� makes no
warranty of any kind with regard to the material contained within this document, including, but not
limited to, the implied warranties of merchantability and fitness for any particular purpose�