Loading ...
Loading ...
Loading ...
ENGLISH
7
2A 2B
ASSEMBLY PREPARATION
Parts are located throughout the shipping carton, including underneath the grill. Inspect the grill, parts, and hardware blister
pack after removing from the protective shipping carton. Review and inspect all parts by referencing the parts list. If any part
is missing or damaged, do not attempt to assemble. Shipping damage is not covered under warranty. Contact your dealer or Pit
Boss® Grills Customer Care for parts.
service@pitboss-grills.com | USA: (480) 923-9630 | Canada (Toll Free): 1-877-942-2246
IMPORTANT: To ease installation, using two people is helpful (but not necessary) when assembling this unit.
Tools required for assembly: Phillips-head screwdriver.
Tools not included.
ASSEMBLY INSTRUCTIONS
IMPORTANT: It is advised to read each step entirely before starting assembly on instructions. Do not tighten screws
completely until all screws for that step have been installed. Hardware combination involving a locking washer and
washer should be installed with the locking washer closest to the head of the screw.
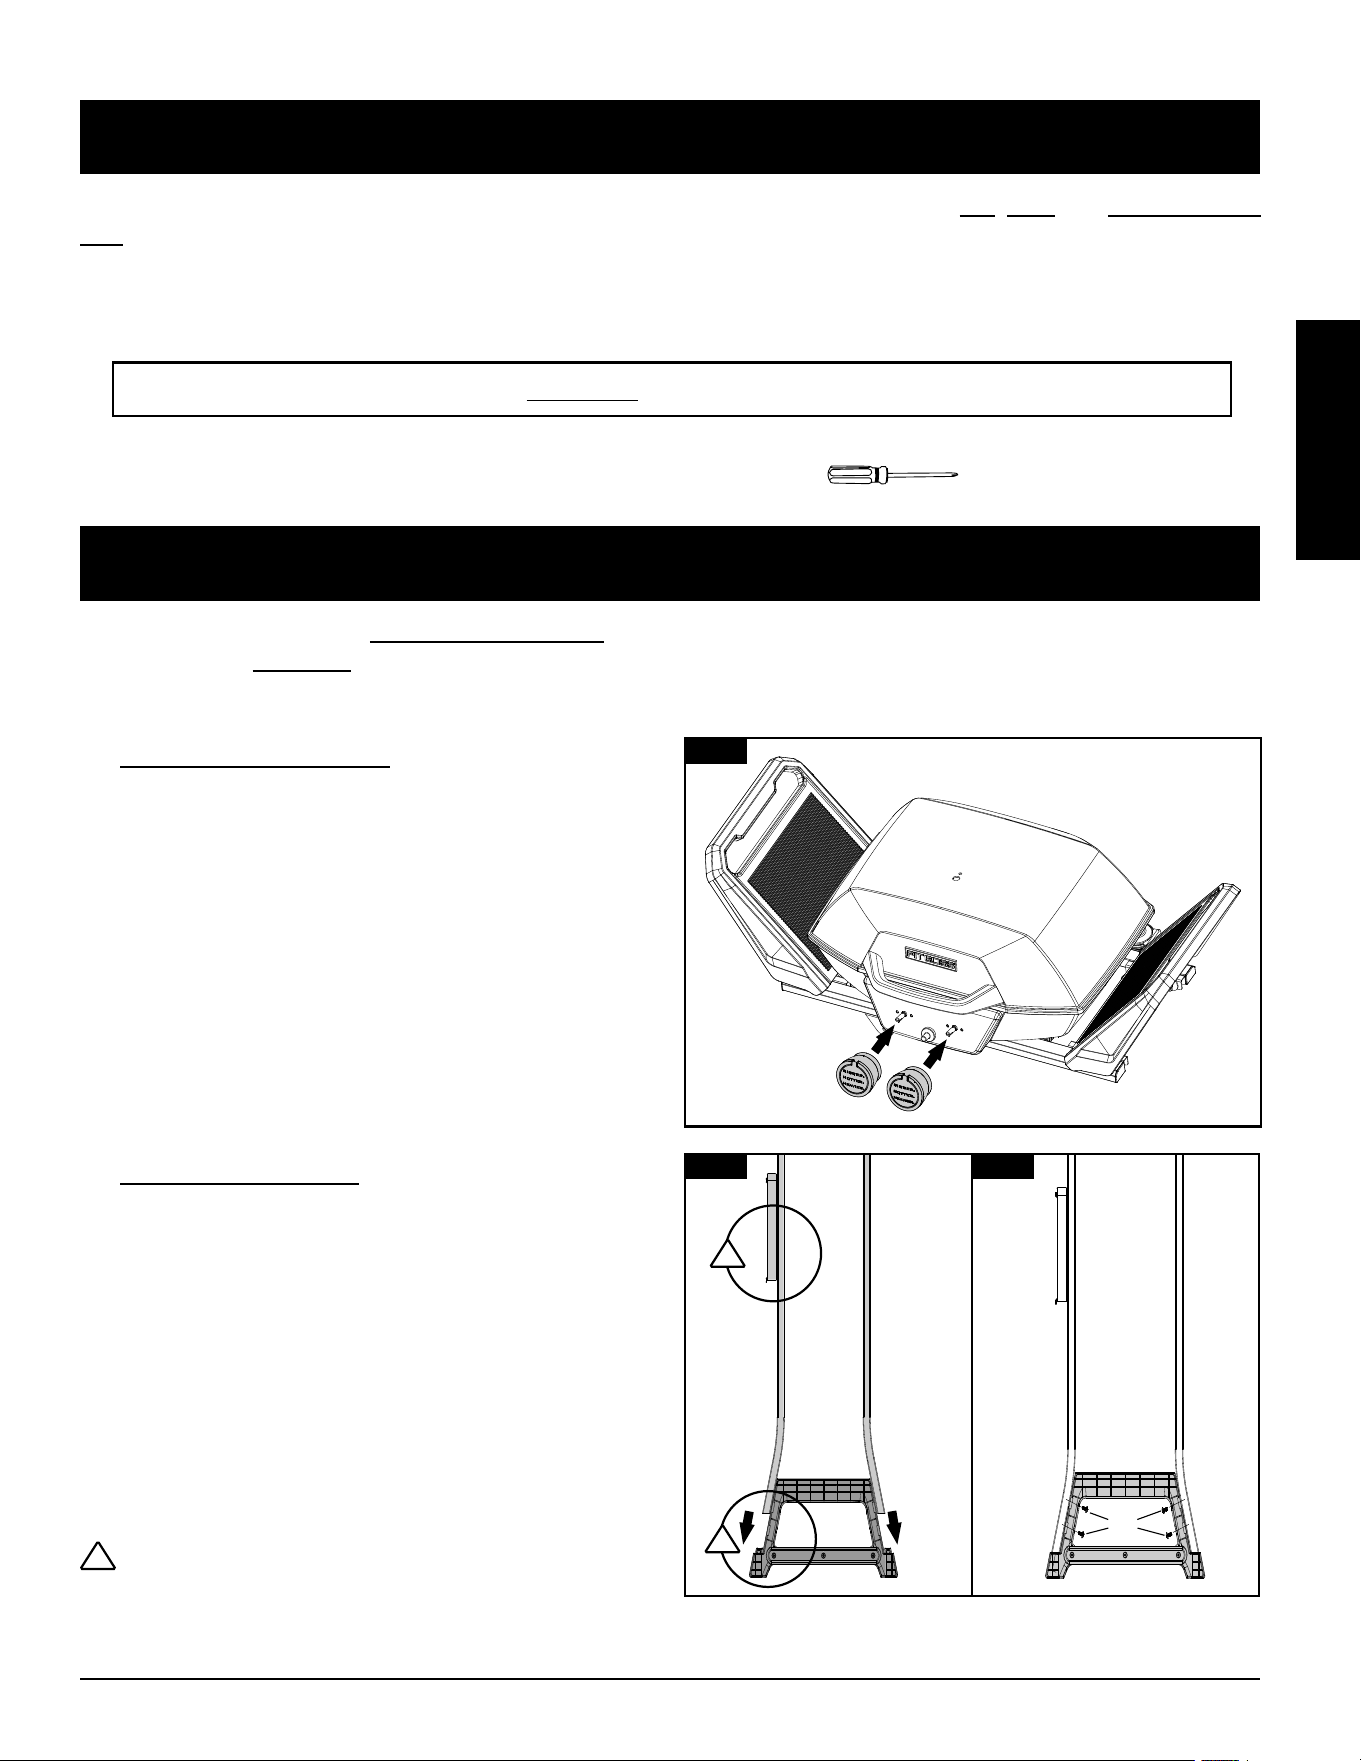
1. INSTALL CONTROL KNOBS
Parts Required:
1 x Cooking Box Assembly (#2)
2 x Knobs (#3)
Installation:
• Place a piece of cardboard on the floor to prevent
scratching the unit and parts during assembly.
• Push the knobs onto the pins of the control panel.
2. ASSEMBLE CART LEGS
Parts Required:
1 x Right Cart Foot Tube - Back (#4)
1 x Right Cart Foot Tube - Front (#5)
1 x Cart Handle (#6)
4 x Screws (#A)
Installation:
• Push the front and back Right Cart Foot Tube onto the
pegs on the outside edge of the Cart Handle. Note 2A.
• Fasten four screws on the inside edge of the Cart
Handle to the Right Cart Foot Tube. Note 2B.
WARNING: The Cart Foot Tube with strap should be
on the left. Place the Cart Handle in the direction shown
in the figure. If it is placed incorrectly, the installation will
fail.
1
2
3
4 5
6
A
!
!
!
Loading ...
Loading ...
Loading ...