Elite Outdoor
Bark Control
operating guide
Please read this entire guide before beginning
Model number
PbC00-12788
2 Customer Care Center 1-800-732-2677
Important Safety Information
Explanation of Attention Words and Symbols used in this guide
This is the safety alert symbol. It is used to alert you to potential personal injury
hazards. Obey all safety messages that follow this symbol to avoid possible injury
or death.
WARNING indicates a hazardous situation which, if not avoided,
could result in death or serious injury.
CAUTION, used with the safety alert symbol, indicates a hazardous
situation which, if not avoided, could result in minor or moderate injury.
CAUTION, used without the safety alert symbol, indicates a hazardous
situation which, if not avoided, could result in harm to your pet.
Risk of explosion. Do not short circuit, mix old and new batteries, dispose
of in fire, or expose to water. When batteries are stored or disposed, they
must be protected from shorting. Dispose of used batteries properly.
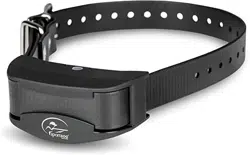
Not for use with aggressive dogs. Do not use this Product if your dog is
aggressive, or if your dog is prone to aggressive behavior. Aggressive dogs
can cause severe injury and even death to their owner and others. If you are unsure whether
this product is appropriate for your dog, please consult your veterinarian or certified trainer.
Humans cannot hear the ultrasonic sound, however precautions should be
taken when preparing the Elite Outdoor Bark Control for use.
:
Keep at arms length away from the human ear to avoid hearing damage if a dog begins
barking while you are setting up, mounting or hanging the Outdoor Bark Control.
:
Humans should also avoid standing very close to the Elite Outdoor Bark Control when it is on.
:
This device is intended for use only with dogs. Never attempt to use it for any purpose not
described in this manual.
:
For outdoor use only. Please visit our website or contact the Customer Care Center for
information on PetSafe
®
Bark Control products.
:
The Elite Outdoor Bark Control is not a toy. Keep it out of the reach of children. Use it only for
its bark control purpose.

www.petsafe.net 3
Thank you for choosing the PetSafe
®
brand. You and your pet deserve a
companionship that includes memorable moments and a shared understanding
together. Our products and training tools promote a lifestyle of protection, teaching,
and love—essentials that influence memories for a lifetime. If you have any questions
about our products or training your pet, please visit our website at www.petsafe.net or
contact our Customer Care Center at 1-800-732-2677.
To get the most protection out of your warranty, please register your product within
30 days at www.petsafe.net. By registering and keeping your receipt, you will enjoy
the product’s full warranty and should you ever need to call the Customer Care
Center, we will be able to help you faster. Most importantly, PetSafe
®
will never
give or sell your valuable information to anyone. Complete warranty information is
available online at www.petsafe.net.
Table of Contents
Components ................................................................................................................. 4
Features ........................................................................................................................ 4
Possible Uses for the Elite Outdoor Bark Control ........................................................ 4
How the Elite Outdoor Bark Control Works .................................................................. 4
Key Definitions ............................................................................................................. 5
Installation and Setup ................................................................................................... 5
To Insert and Remove the Battery ................................................................................ 6
Three Color LED ........................................................................................................... 6
Operating the Clock/Timers ......................................................................................... 6
Setting the Clock .......................................................................................................... 7
Set Timer 1 Off/On ....................................................................................................... 7
Set Timer 2 Off/On ....................................................................................................... 8
To Reset the Clock and Timers .................................................................................... 8
To Test the Elite Outdoor Bark Control ......................................................................... 8
What to Expect During Use of the Elite Outdoor Bark Control .................................... 9
Regular Maintenance ................................................................................................... 9
Frequently Asked Questions ..................................................................................... 9
Troubleshooting .......................................................................................................... 9
Customer Care International ...................................................................................... 10
Terms of Use and Limitation of Liability ..................................................................... 10
Battery Disposal ......................................................................................................... 10
FCC ............................................................................................................................ 11
4 Customer Care Center 1-800-732-2677
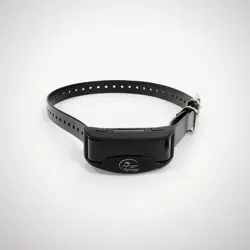
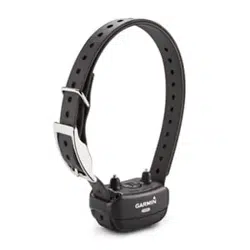
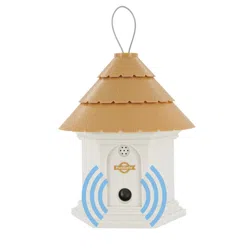
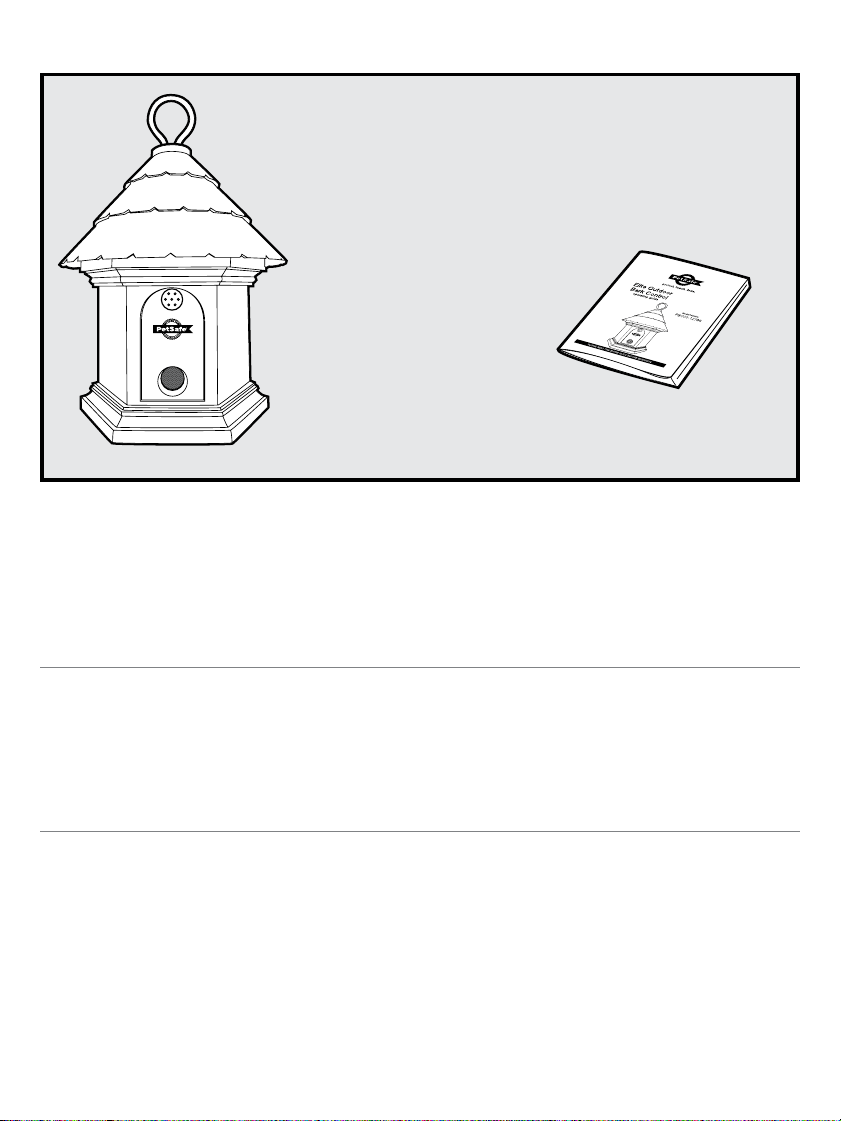
Components
Operating Guide
PetSafe
®
Elite Outdoor
Bark Control
Features
:
Built in timer for two off/on presets
:
Uses Ultrasonic sound to disrupt nuisance barking
:
Detects bark up to 50 feet away
:
Durable and weatherproof
:
Three color LED shows good or low battery, is an indicator for the Timer 1 and Timer 2 OFF, and
indicates ultrasonic corrections
Possible Uses for the Elite Outdoor Bark Control
:
Stop your barking dog
:
Stop your neighbors’ barking dog
:
Stop barking at specific times of day
:
Train puppies not to bark
:
Deter barking dogs on camping trips
How the Elite Outdoor Bark Control Works
When the PetSafe
®
Elite Outdoor Bark Control is within range of a barking dog, an internal
microphone picks up the sound and the unit is automatically activated. The Elite Outdoor Bark
Control emits an ultrasonic sound. The ultrasonic sound can be heard by dogs but is silent to
most humans. Startled by the high-pitched sound that is safe and effective, the dog should stop
barking, as it will associate its bark with this unpleasant noise. When the dog stops barking the
ultrasonic sound also stops. Programmable timers let you curb barking at certain times of day,
i.e. after school as children pass by. Setting the timer(s) also helps conserve battery life. The Elite
Outdoor Bark Control includes a timer for two off/on presets. It is effective up to 50 feet. Note: If
the dog is deaf or hearing impaired, he may not react to the Elite Outdoor Bark Control.
www.petsafe.net 5
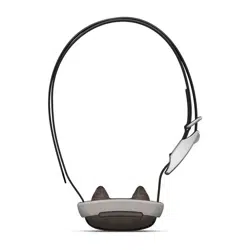
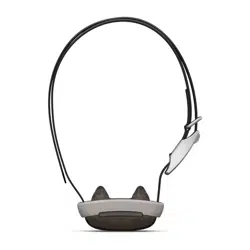
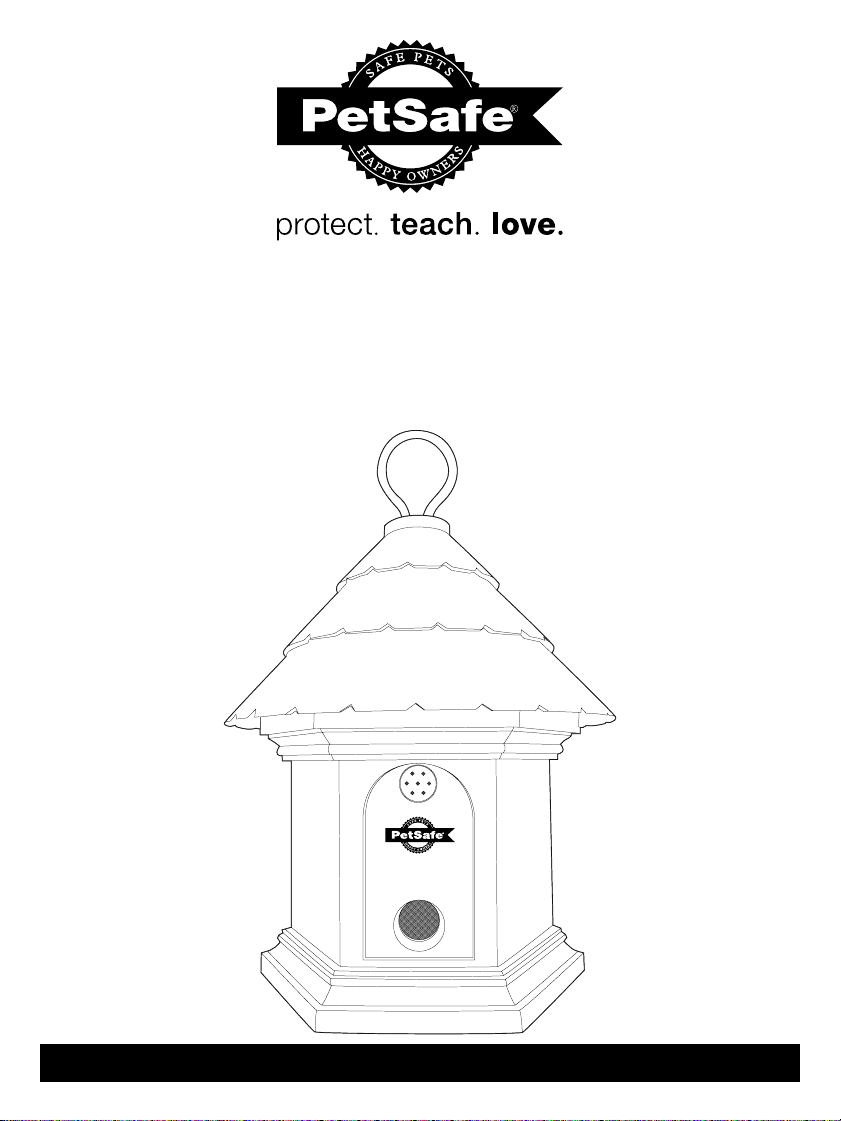
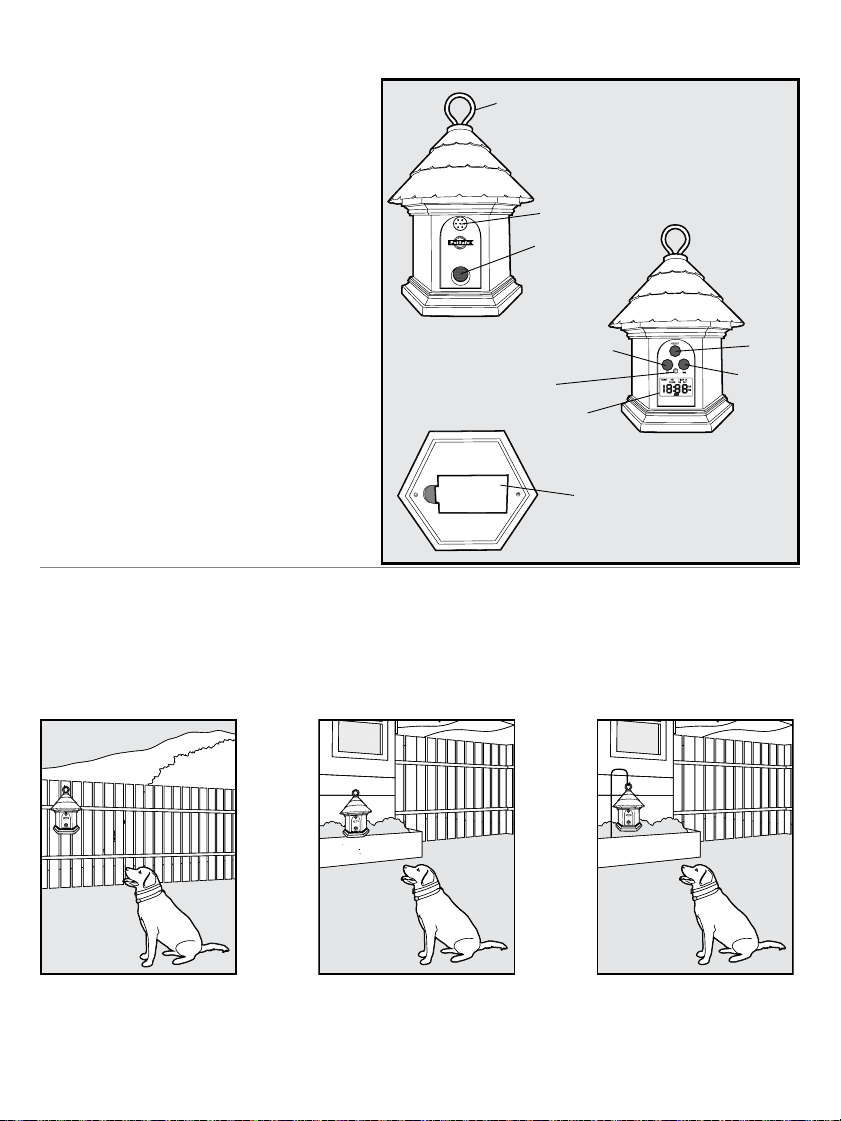
Key Definitions
Front
Metal Hanger: For hanging the Elite Outdoor
Bark Control.
Microphone: Used to detect barking.
Sound Activated Speaker: Produces the
ultrasonic sound.
Back
Select Button: Used to rotate through
and select a menu item.
Hour Button: Used to set the clock, Timer
1 and Timer 2 hour(s).
Minute Button: Used to set the clock,
Timer 1 and Timer 2 minute(s).
Three Color LED: Shows good or low
battery, is an indicator for the Timer 1
and Timer 2 OFF, and indicates ultrasonic
corrections.
LCD Display: Used to show the clock,
timers, test and reset functions.
Bottom
Battery Door: Used to enclose the Battery.
Installation and Setup
The Elite Outdoor Bark Control should be placed facing the dog and within range of the dog.
The unit is designed with provisions for hanging or it can also stand alone and should be
positioned at a height of no more than 5 feet. It can be placed in a tree, hanging from a pole, on
a fence post, etc. For best results, the area between the Elite Outdoor Bark Control and the dog
should be free of any large obstacles.
Three Color
LED
Microphone
Minute
Back
View
Front
View
Bottom
View
Sound Activated
Speaker
Metal Hanger
Select
Battery Door
Hour
LCD
Display

6 Customer Care Center 1-800-732-2677
To Insert and Remove the Battery
Important: When inserting or removing battery, setting the clock or programming the
timer(s), no dog(s) should be within range of the unit to ensure they don’t receive a
correction during set-up.
1. The Elite Outdoor Bark Control utilizes a replaceable 9-volt battery (not included). The battery
door is located on the bottom of the unit. Pull the battery door open.
2. Insert the 9-volt battery with the positive side oriented as shown.
3. Replace the battery door by positioning the top edge, and snap the bottom of battery door
into place.
4. After adding the battery, the Elite Outdoor Bark Control will be on and begin to detect and correct
barking. The LCD display will be blank with the exception of the battery indicator until the clock/
timers are set.
Note: Ensure a working 9-volt battery is installed in the battery compartment.
Battery Life
We recommend using the built in timers to conserve battery life. Depending on how often the
dog barks and whether the timers are used, average battery life can be up to 2 months.
Do not attempt to cut into or pry open the battery. Be sure to discard the used
battery properly.
Three Color LED
The three color LED indicator shows good or low battery and indicates when the Timer is in use
but off. Good battery equals 1 flash every 5 seconds with the green LED. Low battery equals 3
flashes every 5 seconds with the red LED. The orange LED indicates Timer 1 and/or Timer 2 is
set and the unit off. When in test mode, the red LED will also flash.
Operating the Clock/Timers
The Elite Outdoor Bark Control includes a timer with two off/on settings per 24 hour period.
Using the timer extends battery life and also helps prevent dogs from become sensitized to
the ultrasonic sound.
Note: Before using the automatic timer(s) the clock must be set. Once the battery is installed, the
Elite Outdoor Bark Control is always on unless the timer(s) are set or the battery is removed.
www.petsafe.net 7
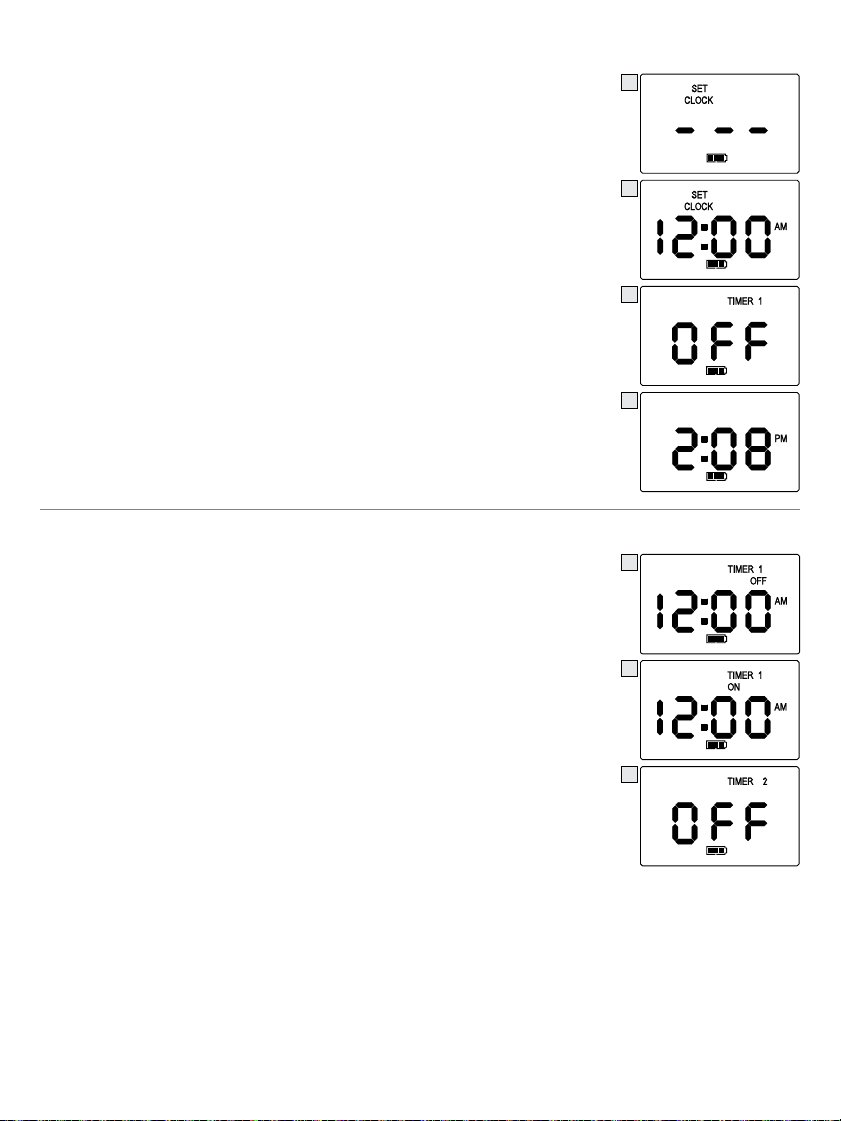
Setting the Clock
1. To begin Set Clock mode (1a), press and release the “SELECT” button
once. Once you have pressed either the “HR” or “MIN” button, the
display will change (1b) and you can begin to adjust the time.
2. Press and release the “HR” button to the correct hour; be sure to
note the correct AM/PM setting.
3. Press and release the “MIN” button to the correct minutes.
–
Pressing and holding the “HR” or “MIN” button will advance the digits faster.
–
The hour setting is a 12 hour format (US version).
–
After 1 minute of no push-button activity, the LCD will appear blank. Press
any button for the clock to display or to review menu options.
4. Press and release the “SELECT” button to confirm the time.
5. After confirming the time, the Elite Outdoor Bark Control will
automatically switch to Timer 1 OFF in the display menu (2).
6. If you choose not to use Timer 1 or Timer 2 after setting the clock,
press and release the button until the menu returns to the current
time (3).
7. If you choose to use the Timer 1 and/or Timer 2 see instructions
on page 7. When using Timer 1 and/or Timer 2 OFF/ON settings
they will repeat daily. Note: The clock and timers will need to be
reprogrammed when replacing the battery.
Set Timer 1 Off/On
After you have set the clock you are ready to program timed events.
1. Press the “SELECT” button until Timer 1 OFF (4) appears in the LCD.
Note: After setting the Clock the menu will default to Timer 1 OFF.
2. Press and release the “HR” button once and “12:00AM” will flash (5).
3. Press and release the “HR” button to the correct hour; be sure to
note the correct AM/PM setting.
4. Press and release the “MIN” button to the correct minutes.
5. Press and release the “SELECT” button to confirm the Timer 1
OFF time.
6. After setting the Timer 1 OFF time, the display will automatically
default to the Timer 1 ON setting mode (5). This step must be
completed for the Timer 1 sequence to be completed.
7. Press and release the “HR” button once and “12:00AM” will flash.
8. Press and release the “HR” button to the correct hour; be sure to
note the correct AM/PM setting.
9. Press and release the “MIN” button to the correct minutes.
10. Press and release the “SELECT” button to confirm the Timer 1 ON time.
11. After confirming the time, the Elite Outdoor Bark Control will automatically switch to Timer
2 OFF in the menu (6). If you choose not to set Timer 2 after setting Timer 1, press and
release the “SELECT” button until the menu returns to the current time (3).
12. If you choose to use Timer 2 see instructions on page 8.
Note: If you have scheduled the Timer 1, the Elite Outdoor Bark Control will continue to turn
off/on daily until the time is reset or the battery needs replacing.
1a
1b
2
3
4
5
6
8 Customer Care Center 1-800-732-2677
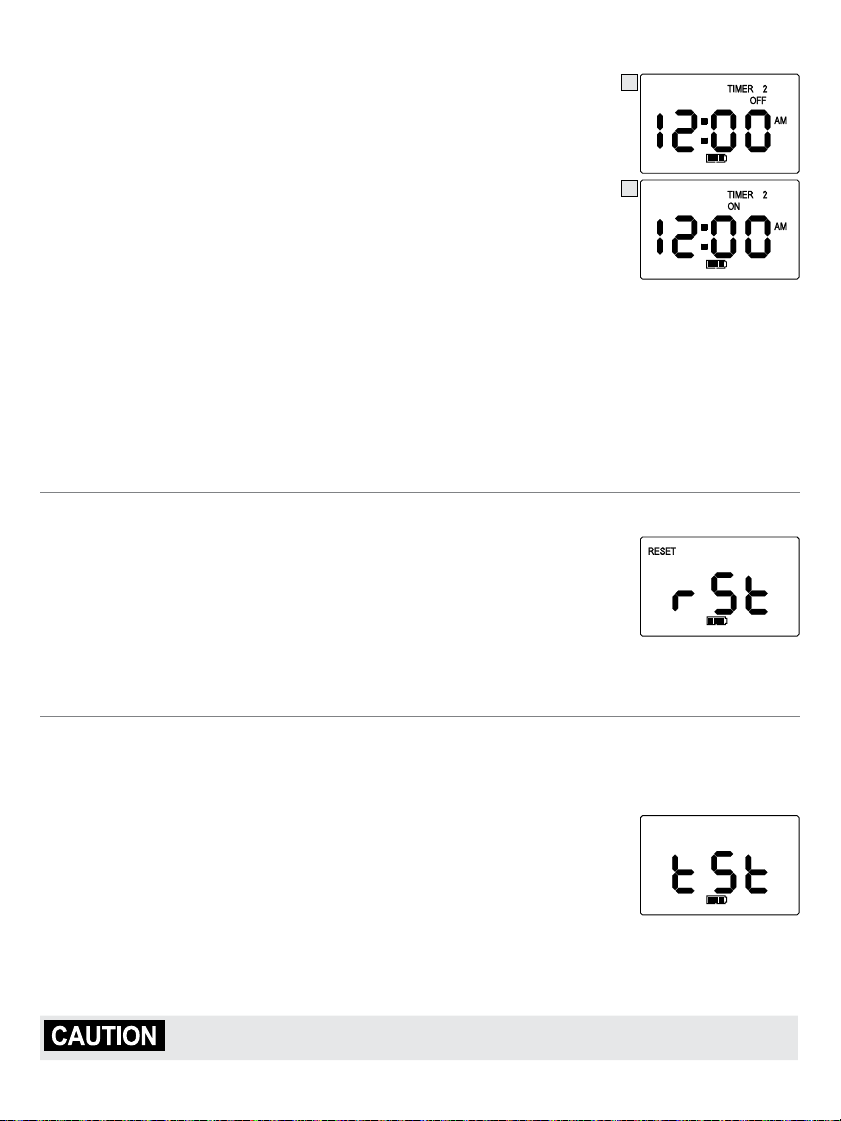
Set Timer 2 Off/On
1. Press the “SELECT” button until Timer 2 OFF (6) appears in the LCD.
Note: After setting the Timer 1 the menu will default to Timer 2 OFF.
2. Press and release the “HR” button once and “12:00AM” (7) will flash.
3. Press and release the “HR” button to the correct hour; be sure to
note the correct AM/PM setting.
4. Press and release the “MIN” button to the correct minutes.
5. Press and release the “SELECT” button to confirm the Timer 2 OFF time.
6. The Elite Outdoor Bark Control will automatically default to Timer 2
ON (8) in the display. This step must be completed for the Timer 2
sequence to be completed.
7. Press and release the “HR” button once and “12:00AM” will flash.
8. Press and release the “HR” button to the correct hour; be sure to note the correct AM/PM setting.
9. Press and release the “MIN” button to the correct minutes.
10. Press and release the “SELECT” button to confirm the Timer 2 ON time.
11. After confirming the time, the Elite Outdoor Bark Control will automatically switch to Reset in
the menu. Continue to press and release the “SELECT” button until the menu returns to the
current time (3).
–
If you have scheduled Timer 2 it will continue to turn off/on daily until the time is reset or the
battery needs replacing.
To Reset the Clock and Timers
1. Press and release the “SELECT” button until “rSt” flashes in the LCD.
2. Press and hold the “HR” and “MIN” buttons simultaneously.
3. All times are now reset.
Note: To keep the current time and reset Timer 1 and/or Timer 2 times,
you do not have to reset all times. Press and release the “SELECT” button
to scroll through the menu options until you arrive at the Timer 1 / Timer 2 time that needs
updating. Press the “HR” or “MIN” that needs updating. Press “SELECT” again to confirm the
updated time. Press and release the “SELECT” button until you return to the current time.
To Test the Elite Outdoor Bark Control
Important: When testing the Elite Outdoor Bark Control no dog(s) should be within range
of the unit to ensure they don’t receive a correction while testing.
1. Press and hold the “HR” and “MIN” buttons simultaneously for 3 seconds.
2. The Elite Outdoor Bark Control will display “tSt” to indicate it is in Test Mode.
3. Say the word “Bark” loudly or blow into the microphone located on the
top front of the unit.
4. The Elite Outdoor Bark Control will detect this sound and emit 3 short
beeps and flash the red LED to show it is working.
5. You may repeat steps 3—4 if necessary to ensure the unit is working.
6. After 30 seconds the Test Mode will automatically time-out and the unit will return to normal
operation. You may also press and release the “SELECT” button to end the Test Mode.
Precautions should be taken when testing the Elite Outdoor Bark. Avoid
repeating the Test Mode for long periods of time. See page 2 for more details.
7
8

www.petsafe.net 9
What to Expect During Use of the Elite Outdoor
Bark Control
Place the Elite Outdoor Bark Control within range of the dog with the unit on. Most dogs will
understand very quickly that the Elite Outdoor Bark Control is disrupting their urge to bark and
will relax and stop barking.
You should notice a reduction in the dog’s barking within the first two weeks that the Elite
Outdoor Bark Control is in use. Please note this product may not work on deaf or hearing
impaired dogs.
Excessive barking can cause a real strain on your relationship with your pet, as well as cause
disruptions in your neighborhood. Please visit our website to view other customized solutions
to the problem of too much barking.
Regular Maintenance
:
Remove the battery before cleaning.
:
Clean the Elite Outdoor Bark Control with a damp cloth.
:
Do no use any kind of spray chemicals or solvent to clean.
:
Do not immerse in water or any other liquid.
Note: The Elite Outdoor Bark Control is weatherproof. However, if water enters into the
microphone it may disrupt the unit’s operation. After the microphone is dry it will resume
working properly.
Frequently Asked Questions
What is the range for
the Elite Outdoor Bark
Control?
:
The Elite Outdoor Bark Control detects barking and sends
the ultrasonic sound up to 50 feet.
Can I use the Elite Outdoor
Bark Control indoors?
:
No, we do not recommend using the product indoors. For
Indoor Bark Control product information, please visit our
website at www.petsafe.net or call our Customer Care Center.
Can a dog become
desensitized to the
ultrasonic sound?
:
There are some situations where dogs become desensitized.
To avoid this, use the timers to turn the Elite Outdoor Bark
Control on during periods of unwanted barking (i.e. leave it
off when you are away).
Troubleshooting
The green LED light
stopped flashing and there
is no red light.
:
Ensure that the battery is properly installed.
:
Replace the battery.
:
If the green LED light is still not flashing, contact the
Customer Care Center.

10 Customer Care Center 1-800-732-2677
Customer Care International
USA & Canada - Tel: 800-732-2677
Monday - Friday 8 AM - 8 PM / Saturday 9 AM – 5 PM
Australia - Tel: 1800 786 608
Monday - Friday 8:30 AM - 5 PM
New Zealand - Tel: 0800 543 054
Monday - Friday 10:30 AM - 7 PM
This product has the benefit of a limited manufacturer’s warranty. Details of the warranty applicable
to this product and its terms can be found at www.petsafe.net and/or are available by sending a
stamped addressed envelope to PetSafe
®
Ltd. Redthorn House, Unit 9, Chorley West Business
Park, Ackhurst Road, Chorley, Lancashire PR7 1NL, United Kingdom.
Terms of Use and Limitation of Liability
1. Terms of Use
This Product is offered to you conditioned upon your acceptance without modification of the terms,
conditions and notices contained herein. Usage of this product implies acceptance of all such
terms, conditions, and notices.
2. Proper Use
This Product is designed for use with pets where training is desired. The specific temperament
of your pet may not work with this product. We recommend that you not use this product if
your pet is aggressive. If you are unsure whether this is appropriate for your pet, please consult
your veterinarian, certified trainer or contact our Customer Care Center or visit our website at
www.petsafe.net.
Proper use includes reviewing the entire Operating and Training Guide provided with your
product and any specific Caution statements.
3. No Unlawful or Prohibited Use
This Product is designed for use with pets only. This pet training device is not intended to harm,
injure, or provoke. Using this product in a way that is not intended could result in violation of
Federal, State or local laws.
4. Limitation of Liability
In no event shall Radio Systems
®
Corporation be liable for any direct, indirect, punitive, incidental,
special or consequential damages, or any damages whatsoever arising out of or connected with the
use or misuse of this Product. Buyer assumes all risks and liability from the use of this Product.
5. Modification of Terms and Conditions
Radio Systems
®
Corporation reserves the right to change the terms, conditions and notices under
which this Product is offered.
Battery Disposal
Separate collection of spent batteries is required in many regions; check the regulations in
your area before discarding spent batteries. At the end of the product life, please contact our
Customer Care Center to receive instructions on proper disposal of the unit. Please do not
dispose of the unit in household or municipal waste. For a listing of Customer Care Center
telephone numbers in your area, visit our website at www.petsafe.net.

www.petsafe.net 11
FCC
This device complies with IC ES-003; this device complies with Part 15 of the FCC Rules.
Operation is subject to the following two conditions:
1. This device may not cause harmful interference.
2. This device must accept any interference received including interference that may cause
undesirable operation.

Radio Systems
®
Corporation
10427 PetSafe Way
Knoxville, TN 37932
1-800-732-2677
www.petsafe.net
400-1557
©2010 Radio Systems Corporation