
Loading ...
Loading ...
Loading ...
4
Installing the Wall Mount Brackets
Drill the holes
1
Install the brackets
with the screws
2
NOTE: Make sure you have your paper template, pencil, tape and screwdriver.
1.
Starting from the top of your TV stand, add 1.501m above it to get the height of the top of the paper template.
Mark the height onto the wall. H and L1 may change according to the adjustment of Laser TV, the length and
height is only for reference.
2.
Put the paper template on the center of the wall.
NOTE: The paper template should match the mark you made on the wall.
3.
Make sure the paper template is level.
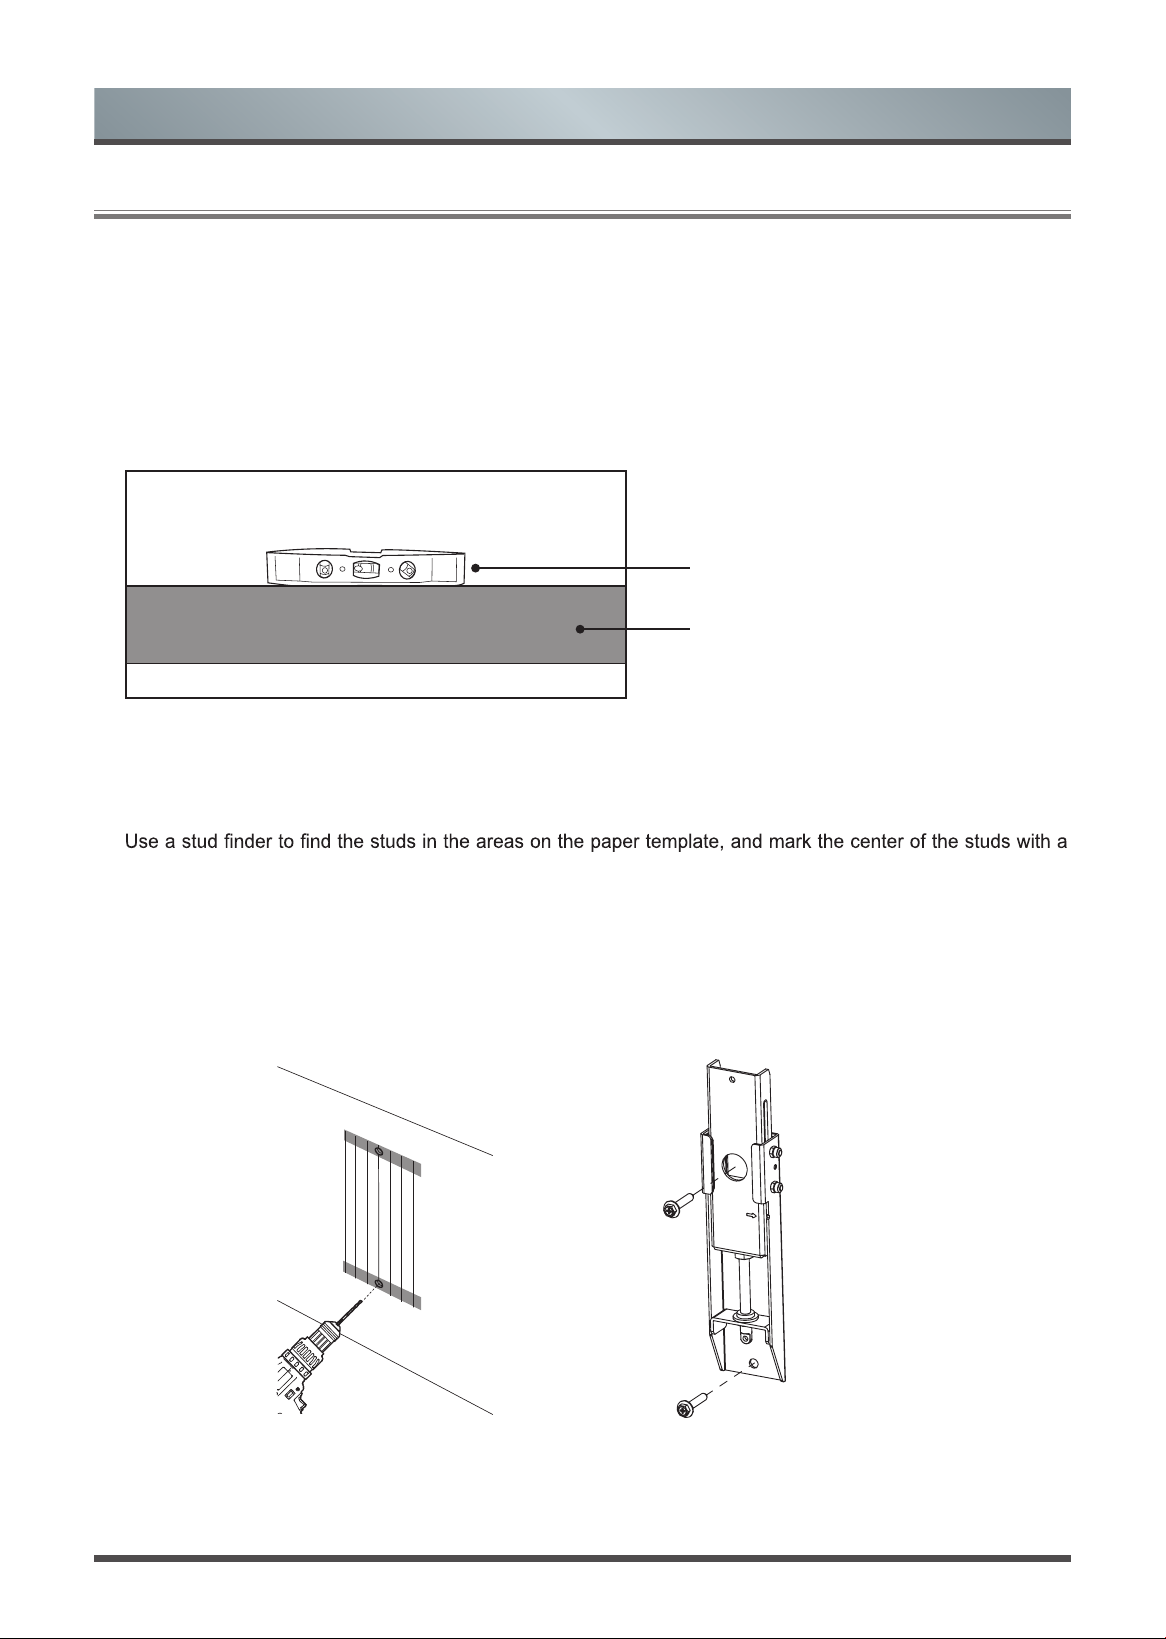
Level
Paper template
IF YOU HAVE A DRYWALL WITH WOOD STUDS / METAL STUDS
NOTE: Make sure you have your stud finder.
4.
pencil. Following the vertical line on the paper template, mark where the bottom screws should be within the
proposed area.
5.
On the marks, drill the holes for the four screws.
6.
Remove the paper template and install the brackets with the screws. Firmly tighten the screws.
NOTE: Hold the bracket in place when tightening the screw to keep the bracket from shifting.
2.1
Install the Wall Mount Brackets
Loading ...
Loading ...
Loading ...