
English
INSTALLATION GUIDE
Before you install this product, read this guide completely and
make sure you understand all of the content.
Hisense Laser TV Display Screen
ES-G1802A4-1
1
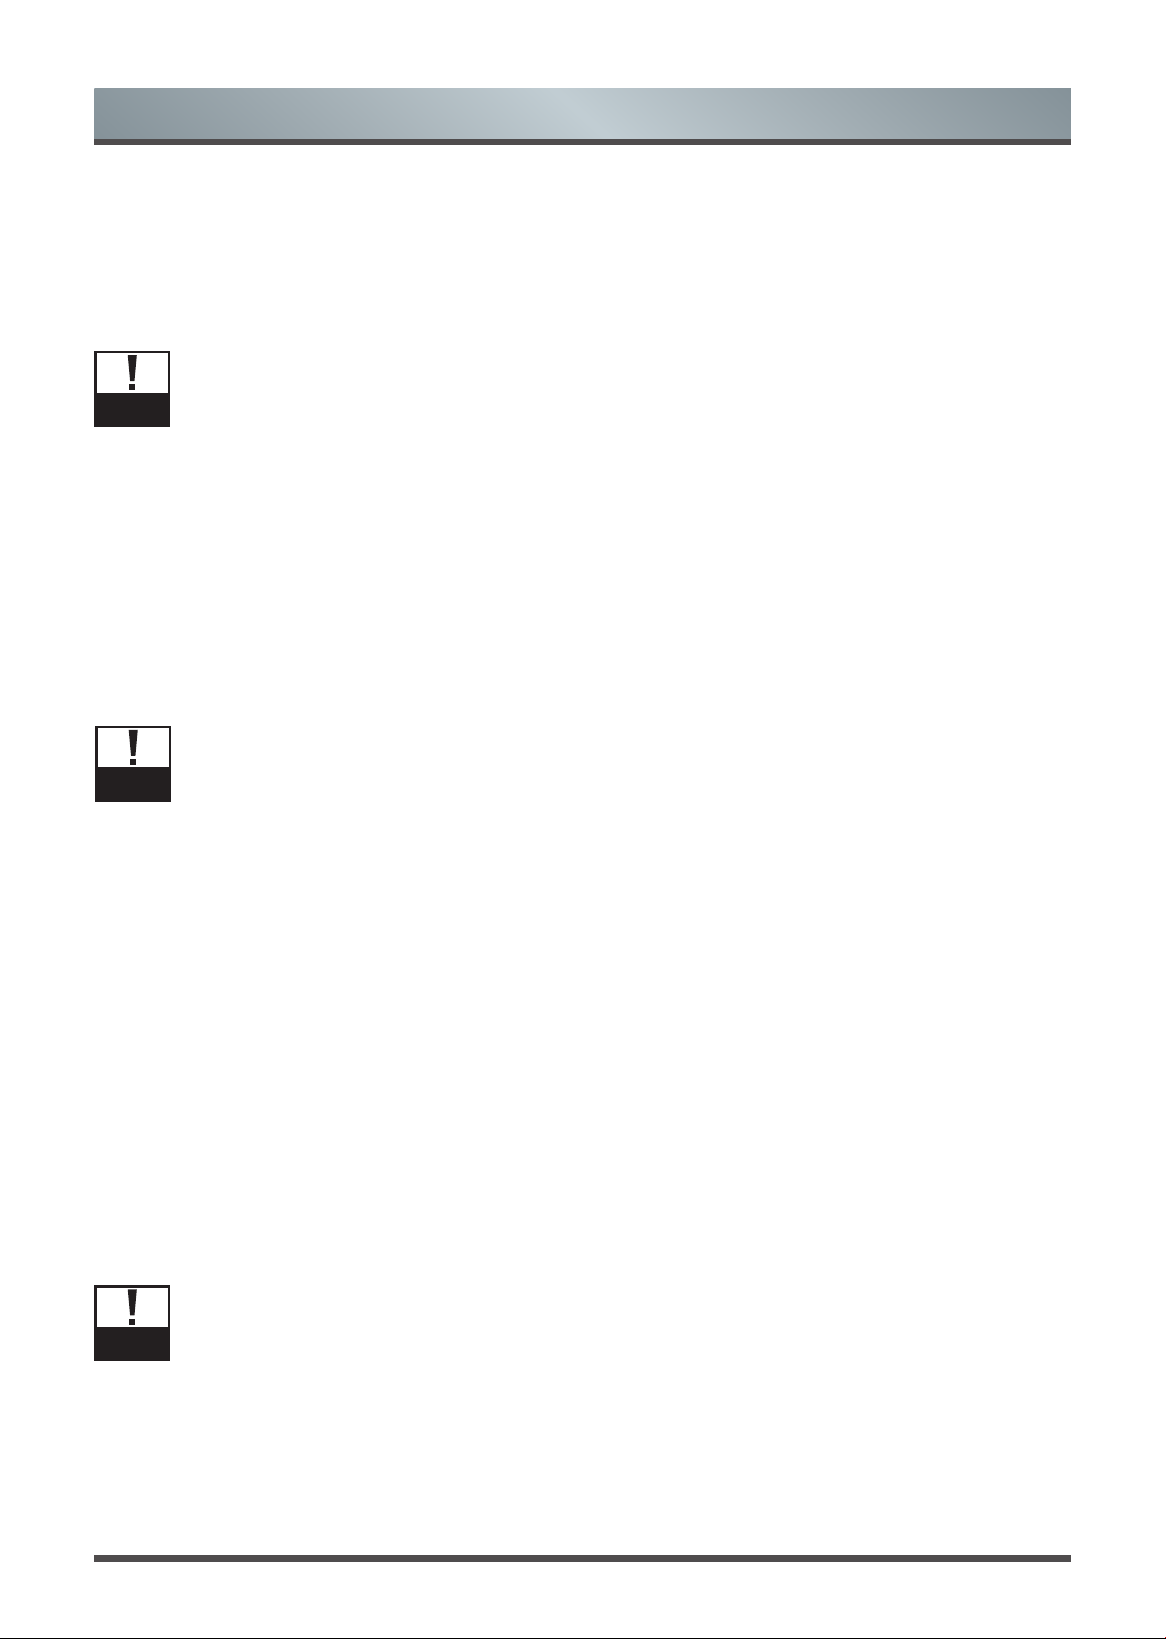
Safety Preventions and Precautions
Disclaimer:
Pictures and instructions are only for reference, and may be different from the actual product.
WARNING
NOTE
•
We recommend that two people load, unload and transfer this screen.
•
The product should be installed by professional and technical personnel
,
and by following
the installation guide. Installing the product by unqualified personnel is dangerous and may
cause personal injury.
•
The product should be installed at the place that can support its weight. Otherwise, the
product may fall and cause personal injury.
•
After installation, if you want to move or replace the product, please contact manufacturer’s
professional and technical personnel. Unqualified personnel may cause safety problems.
•
Do not hit the product, or it may fall and cause injuries.
•
Keep little children away from the screen.
•
Please strictly follow the installation guide when installing the product. Otherwise, it may
cause serious injuries or damage the product.
•
Two or more people are needed when installing the product and adjust the height of the
product. If you install it by yourself, the product may fall, cause personal injury, or damage
the product.
•
Before installation, make sure to check if the wall is strong enough to support the product.
And remember to use accessories and screws provided with the product. Otherwise, safety
problems may happen.
•
When drilling holes on the wall, make sure to use drilling machine and drill bit of designated
size. Follow the instructions on drilling depth. Otherwise, safety problems may happen.
•
Please clean and maintain the screen with soft cloth carefully. If there is no dry cloth, cloth
dipped in a little water can be used, but the water temperature should be lower than 40
℃
.
Do not use alcohol or organic solvents, and do not use acid or alkali solvents.
•
DO NOT scratch the screen with hard or sharp objects.
•
Keep the screen away from direct sunlight.
•
Control the heat and humidity of the room.
WARNING:
Please follow the instructions strictly, or it may cause serious injury or even death.
NOTE:
Please follow the instructions strictly, or it may cause injury and product damage.
TIPS
•
Do not install lighting tube within 3m of the screen.
•
The illumination angle of the light should not be perpendicular to the screen.
2
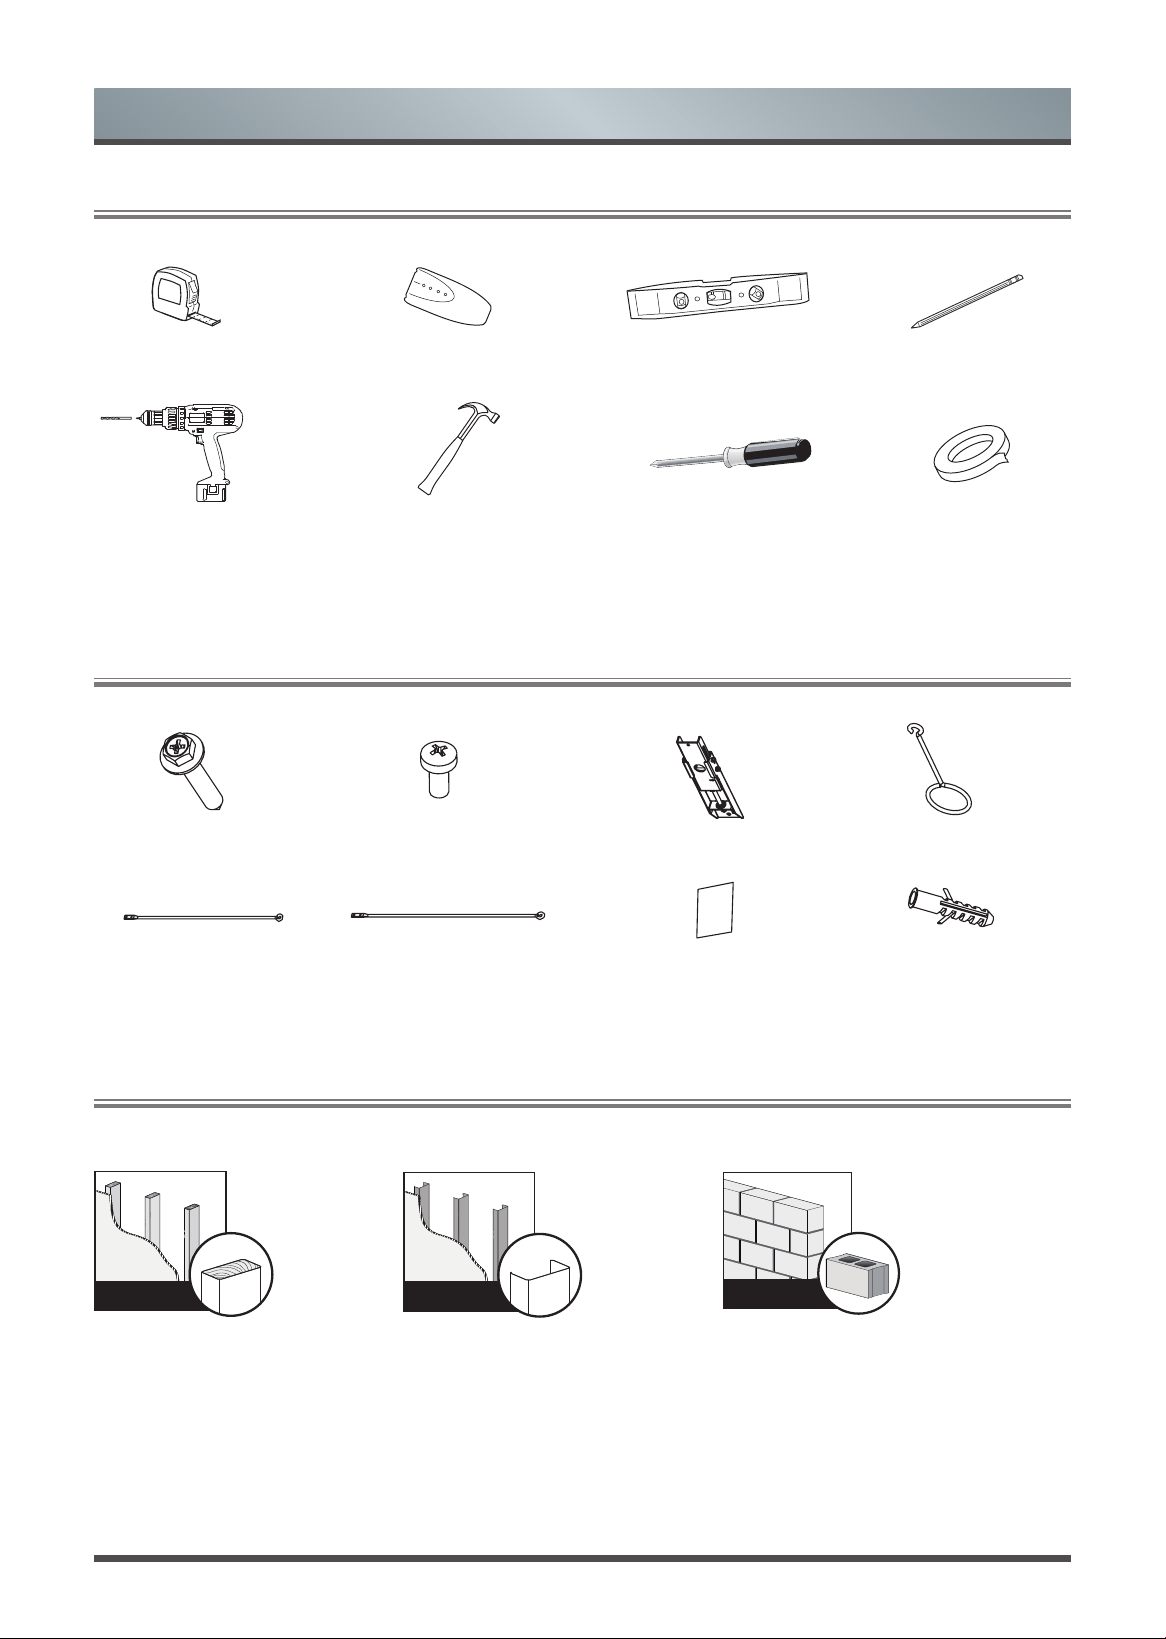
Preparation
1.1
Required Tools to Install the Screen
1.2
Hardware and Parts List for Screen Mounts
Tape measure Stud nder Level Pencil
Screwdriver with 8mm
drill bit for stud
Hammer for concrete Phillips screwdriver Tape
anchors
ST5.5x70 Screws (x4)
M3x6 Screws (x6)
Drill bolt 8 x 60,
Polyamide 6 (PA6)
(x4)
Bracket wands (x2)
460mm
Bracket wands (x2)
500mm
Handle (x2)
Hanging component (x2)
Velcro strips (x2)
Solid concrete or
concrete block wall
1.3
Check the Type of Wall You Have
Wall with
wood stud
s
Wall with
metal studs
Minimum wood stud size:
common 51 x 102 mm
nominal 38 x 89 mm
Minimum metal stud size:
common 51 x 102 mm
nominal 38 x 89 mm
Minimum solid concrete thickness:
203 mm
Minimum concrete block size:
203 x 203 x 406 mm
3
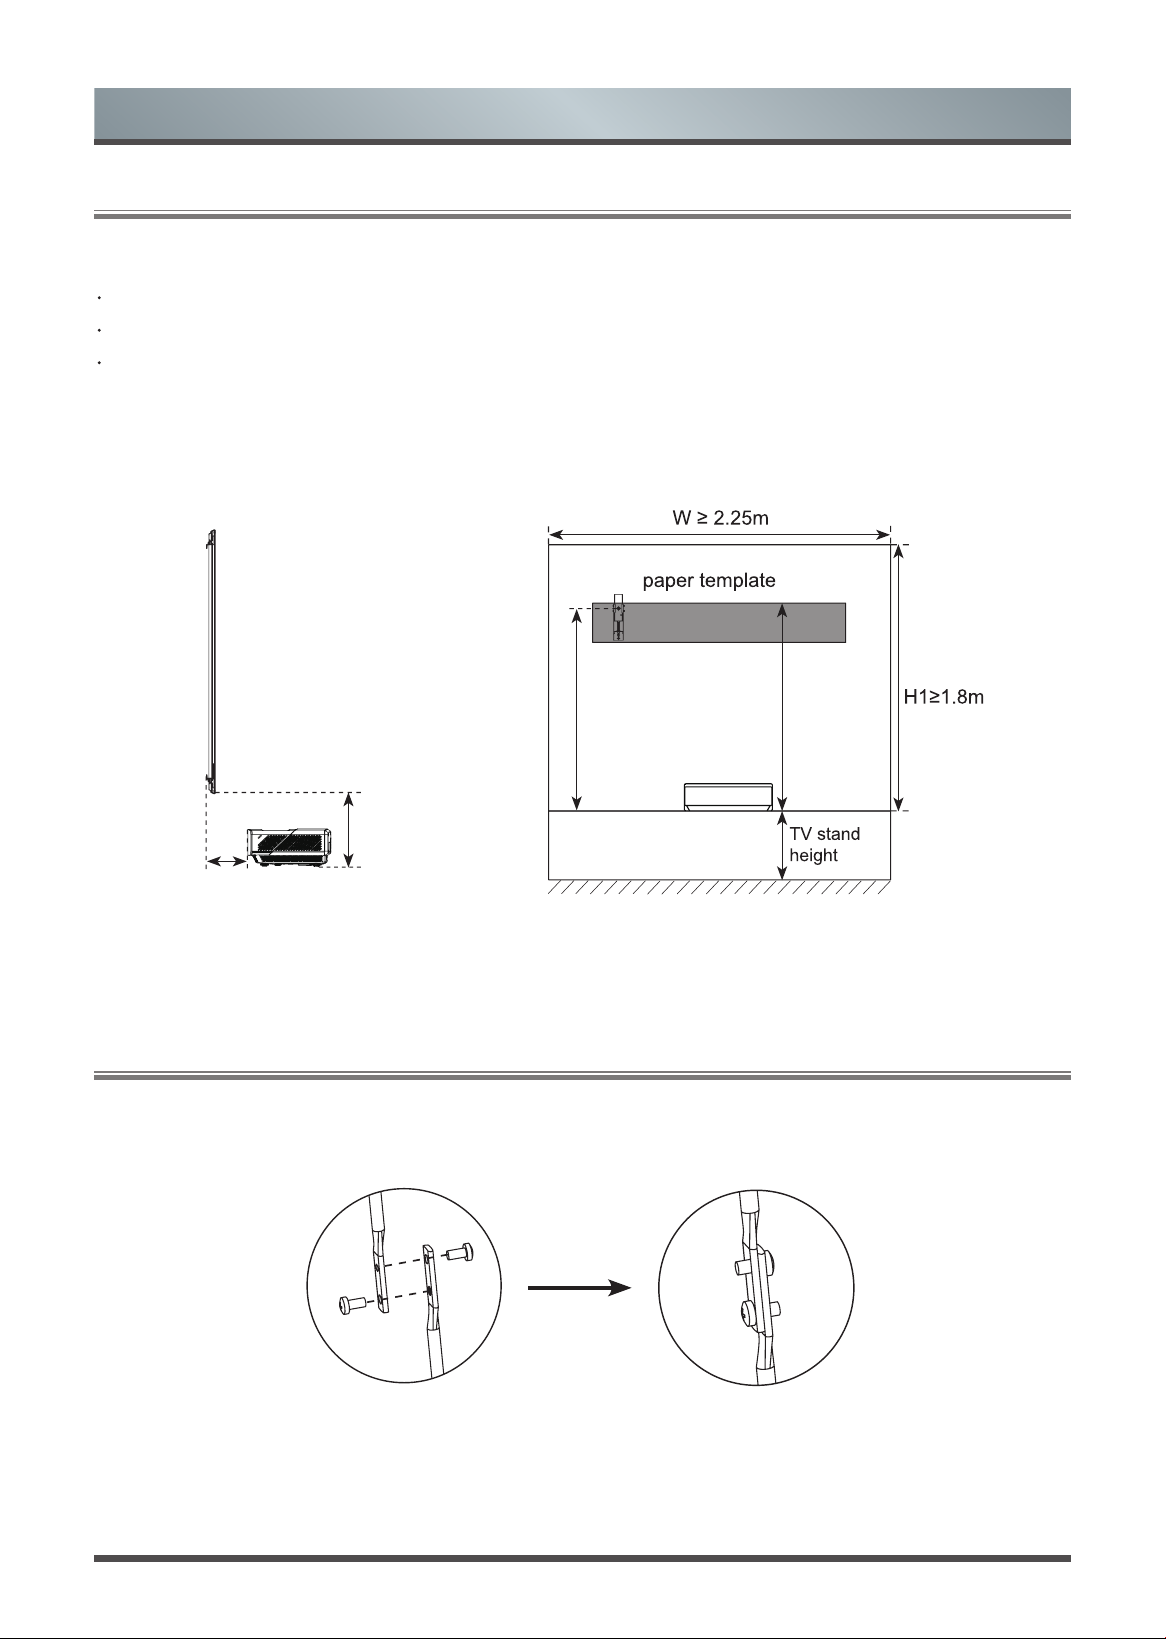
Check the size of your space
Width ≥ 2.25m
Height ≥ 1.8m from the installation surface to the ceiling.
For the optimal viewing experience, we recommend a minimum viewing distance of 3m from the screen.
1.4
Prepare Your Space
Recommended size for your TV stand
We recommend that you place your Laser TV on a TV stand that is at about 50cm tall and wide enough to
hold the TV.
Connect the wands as shown in the illustration below.
1.5
Connecting the Wands
Preparation
L1=0.287m
H=0.373m
H3=1.431m H2=1.501m
4
Installing the Wall Mount Brackets
Drill the holes
1
Install the brackets
with the screws
2
NOTE: Make sure you have your paper template, pencil, tape and screwdriver.
1.
Starting from the top of your TV stand, add 1.501m above it to get the height of the top of the paper template.
Mark the height onto the wall. H and L1 may change according to the adjustment of Laser TV, the length and
height is only for reference.
2.
Put the paper template on the center of the wall.
NOTE: The paper template should match the mark you made on the wall.
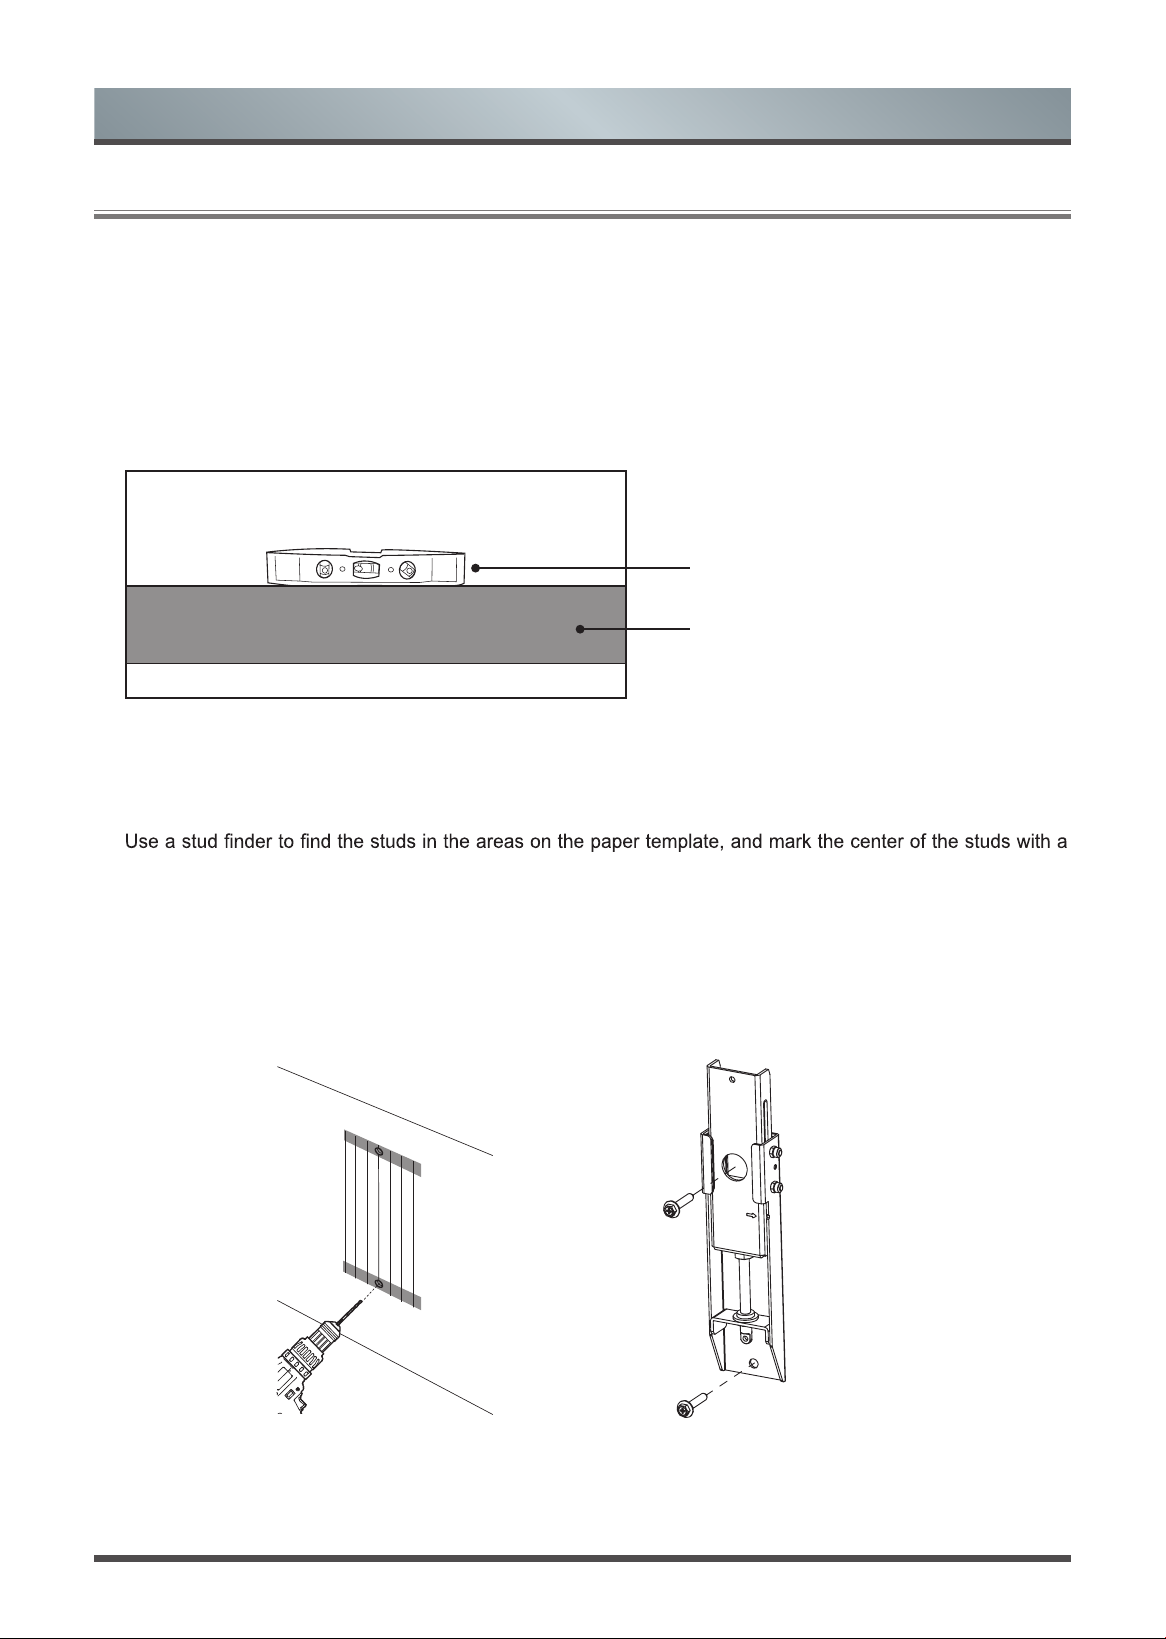
3.
Make sure the paper template is level.
Level
Paper template
IF YOU HAVE A DRYWALL WITH WOOD STUDS / METAL STUDS
NOTE: Make sure you have your stud finder.
4.
pencil. Following the vertical line on the paper template, mark where the bottom screws should be within the
proposed area.
5.
On the marks, drill the holes for the four screws.
6.
Remove the paper template and install the brackets with the screws. Firmly tighten the screws.
NOTE: Hold the bracket in place when tightening the screw to keep the bracket from shifting.
2.1
Install the Wall Mount Brackets
5
Installing the Wall Mount Brackets
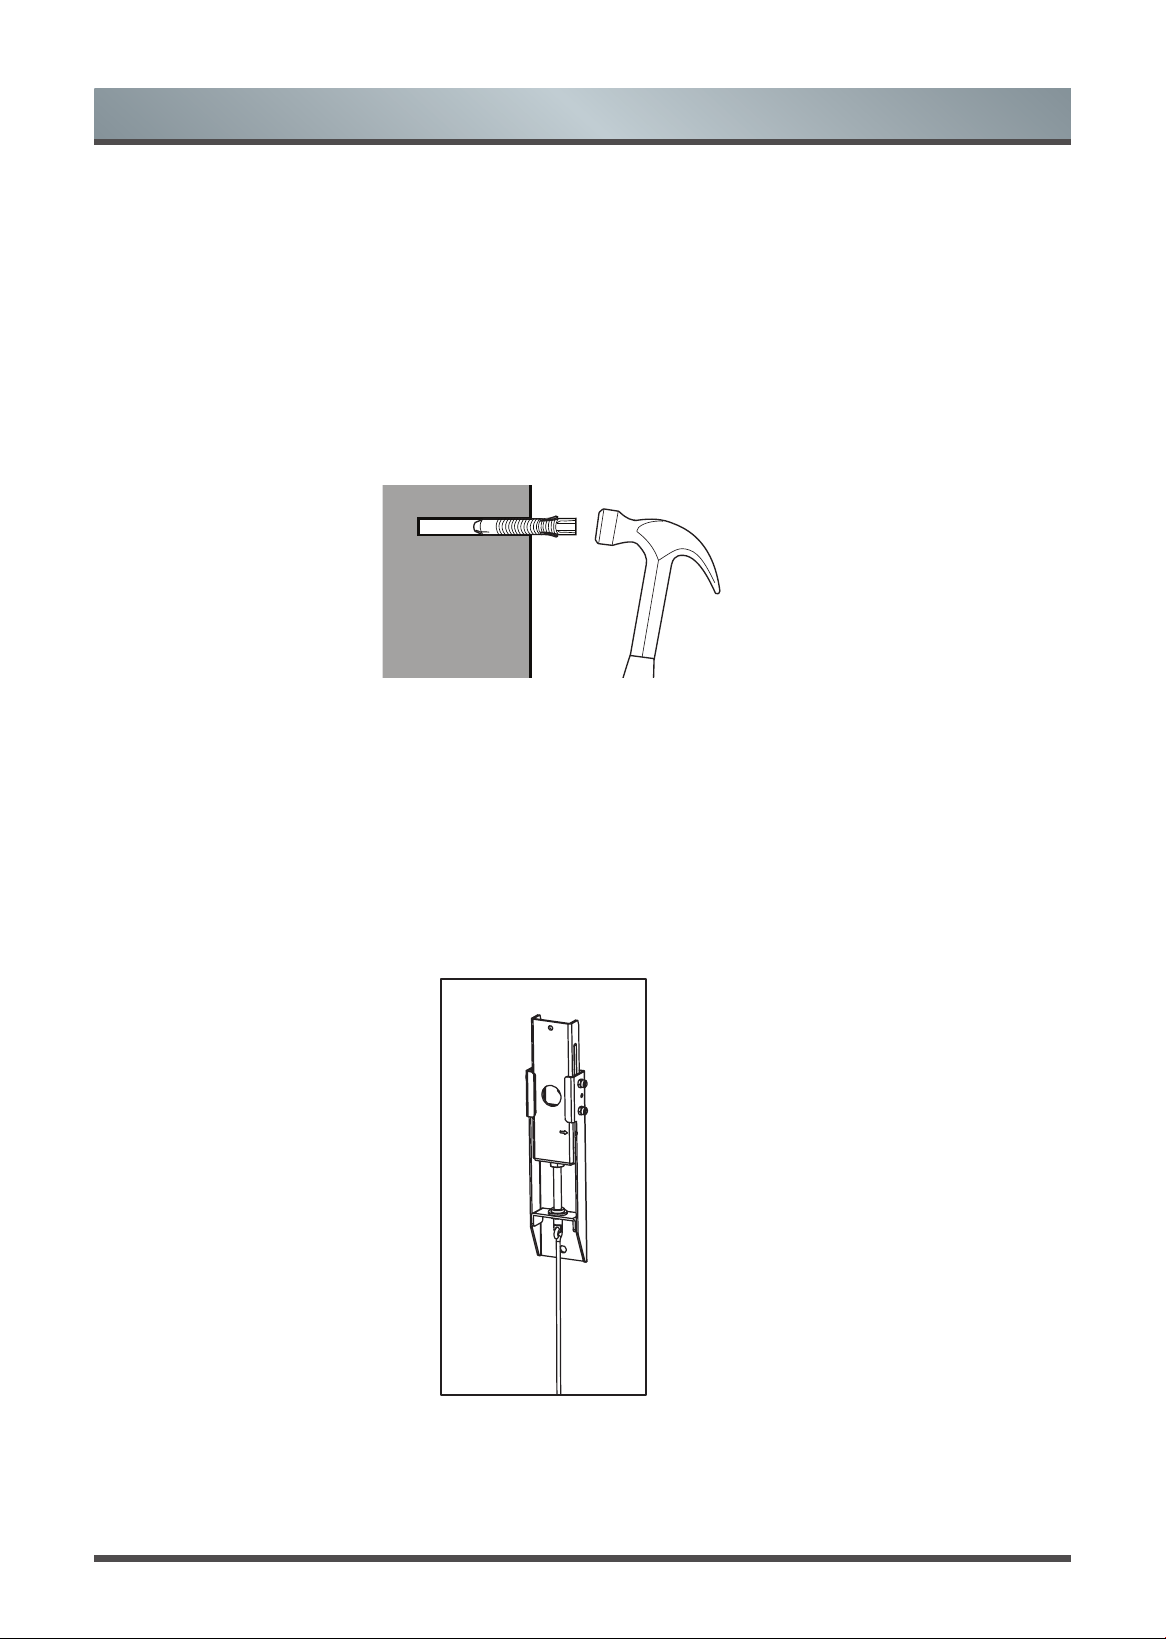
IF YOU HAVE A SOLID CONCRETE OR CONCRETE BLOCK WALL
NOTE: Make sure you have your concrete anchors and hammer.
4.
Drill holes for the top screws. Following the vertical line on the paper template, drill holes for the bottom screws
within the proposed area.
5.
Remove the paper template and insert four anchors into the holes.
Be sure the anchors are flush with the concrete surface.
6.
Install the brackets with the screws and rmly tighten them.
NOTE: Hold bracket in place when tightening the screw to keep the bracket from shifting.
Insert anchors
CAUTION: All screws MUST BE rmly tightened to prevent unwanted movement of the brackets. Make
sure the brackets are securely fastened to the wall before continuing on to the next step.
7.
Attach the upper and lower parts of the wall bracket wands with the screws and bolts. Make sure the two parts
are aligned and rmly tighten the screws.
8.
Hang the wands on to the wall-mount brackets.
6
Hang the Screen
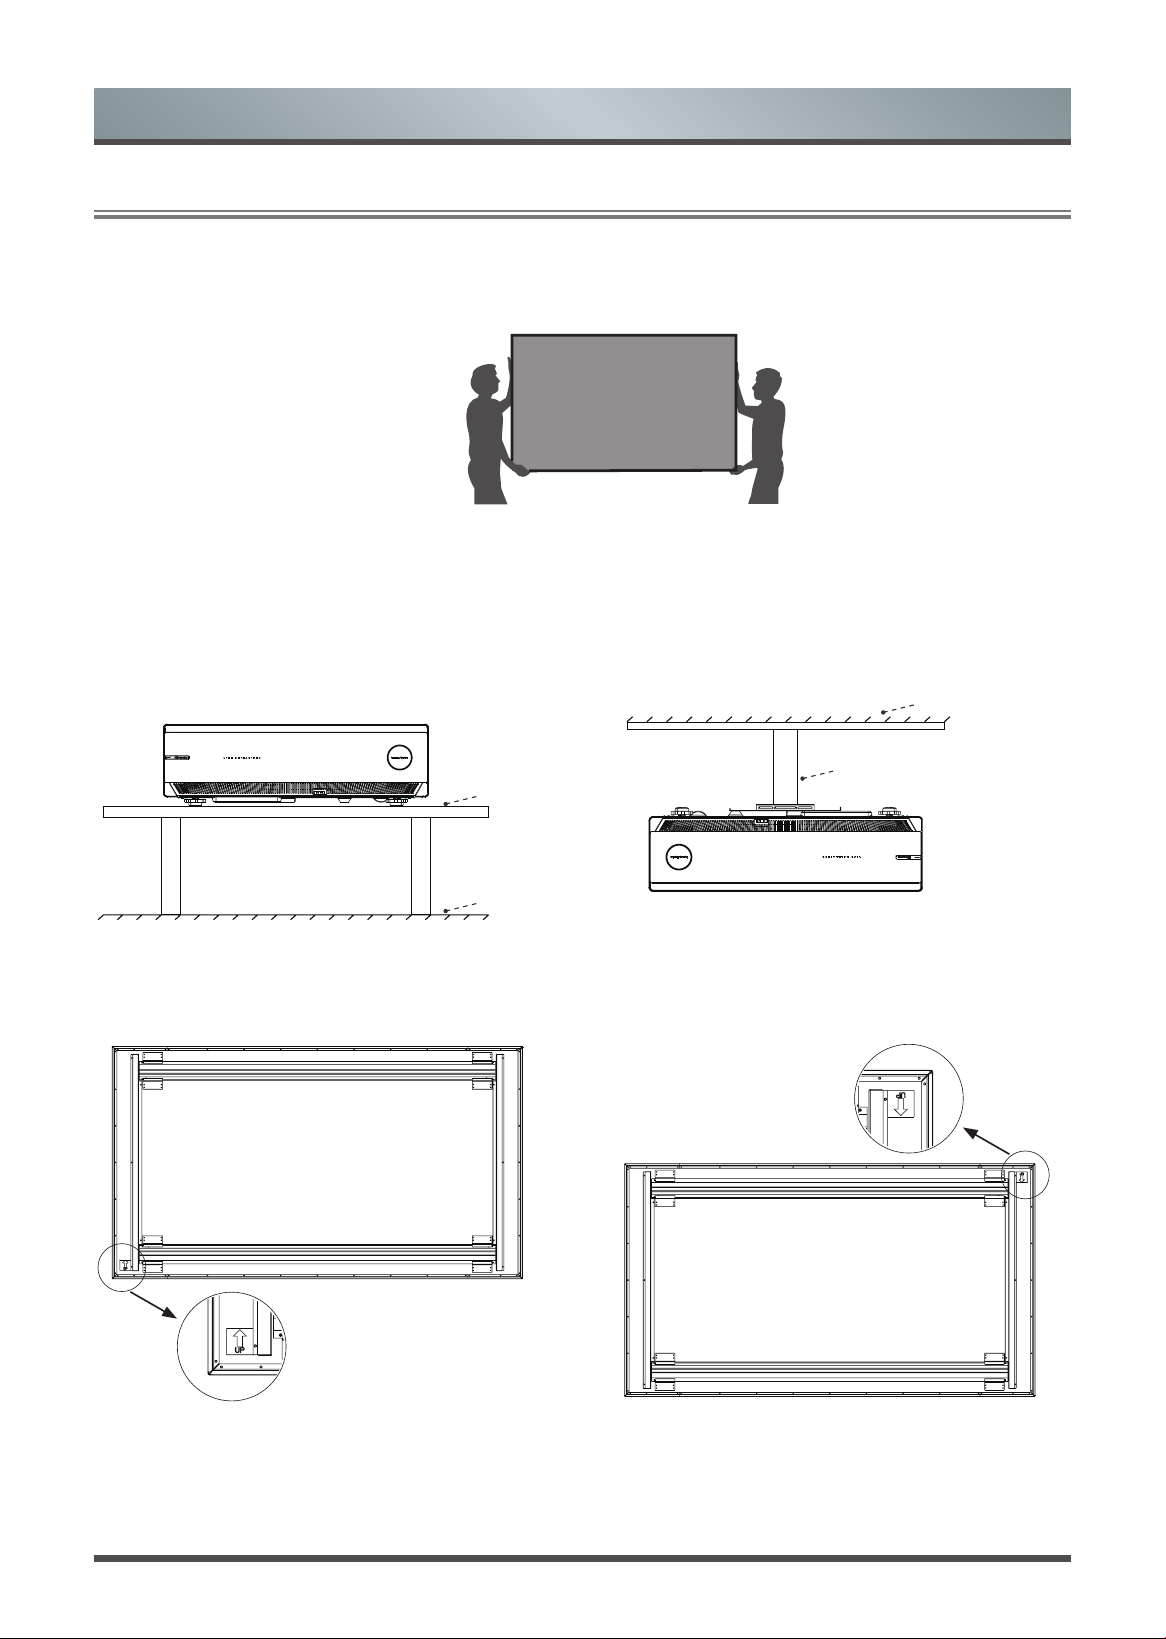
1.
We strongly recommend that two people handle this screen when moving it. Be sure to use gloves(included) to
protect the screen from grease, sweat and dirt.
2.
Check the up and down direction of the screen. To make sure the orientation of the screen is correct, check the
'UP' label on the back cover of the screen. When your Laser TV is placed on a at surface(gure a), the screen
should be installed in its normal direction and the arrow of 'UP' label points up(figure b). When your Laser
TV is mounted upside down(gure c), the screen should be installed inverted, the arrow of 'UP' label points
down(gure d). Please see the illustrations below.
Laser TV
Stand
Floor
Figure a
Laser TV
Ceiling
Bracket
Figure c
UP label
Figure b
UP label
Figure d
3.1
Hang the Screen
7
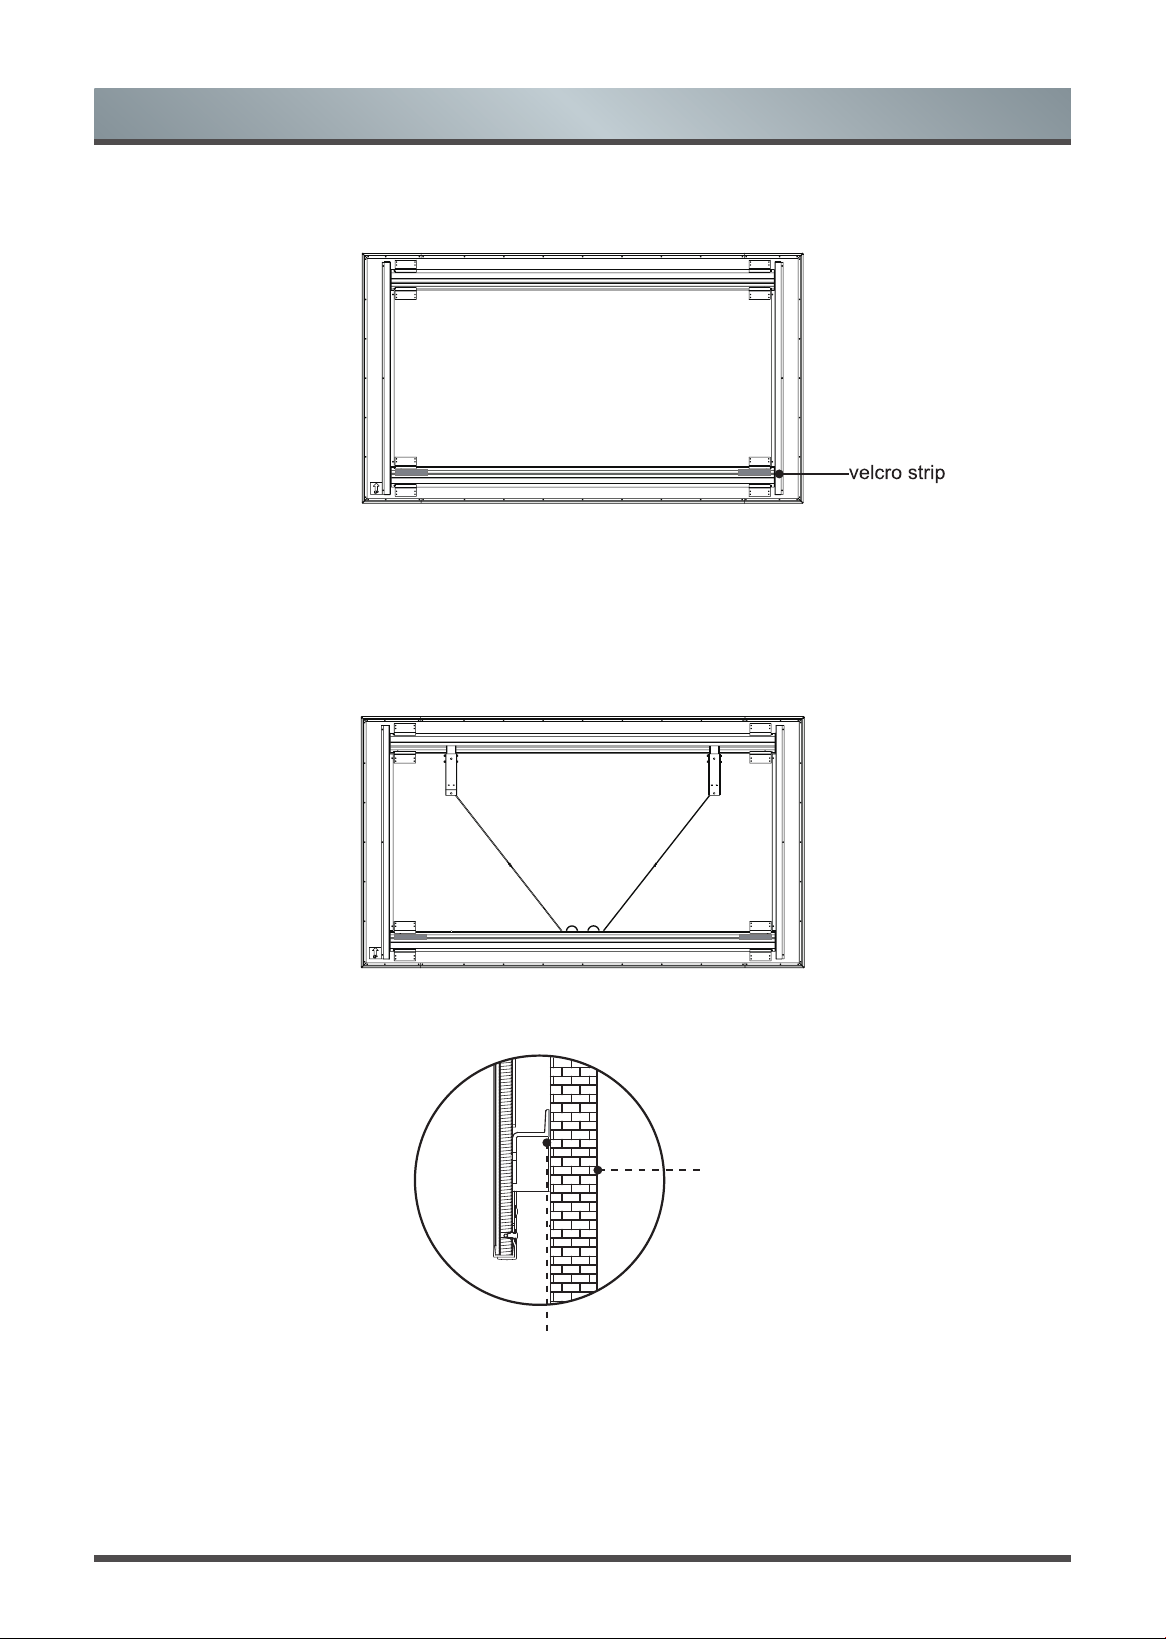
3. Split the release paper on one side of the velcro strips. Paste the velcro strips on the left and right side of
the bottom of the screen(on the back side of the screen).
4.
Place the screen onto the brackets.
NOTE: We do not recommend mounting the TV to the ceiling. However if you choose to, then the orientation of
the screen will need to be reversed.
5.
Make sure the screen is horizontally and vertically level. To prevent the bracket wands from keeping the screen
from being vertically level, fold and rest them on the screen bracket on the bottom of the screen (see the
diagram).
6. When nishing adjusting the positon of screen, split the release paper on the other side of the two velcro
strips. Remove the foam support and push the screen to the wall.
Wall
Velcro Strips
Hang the Screen
8
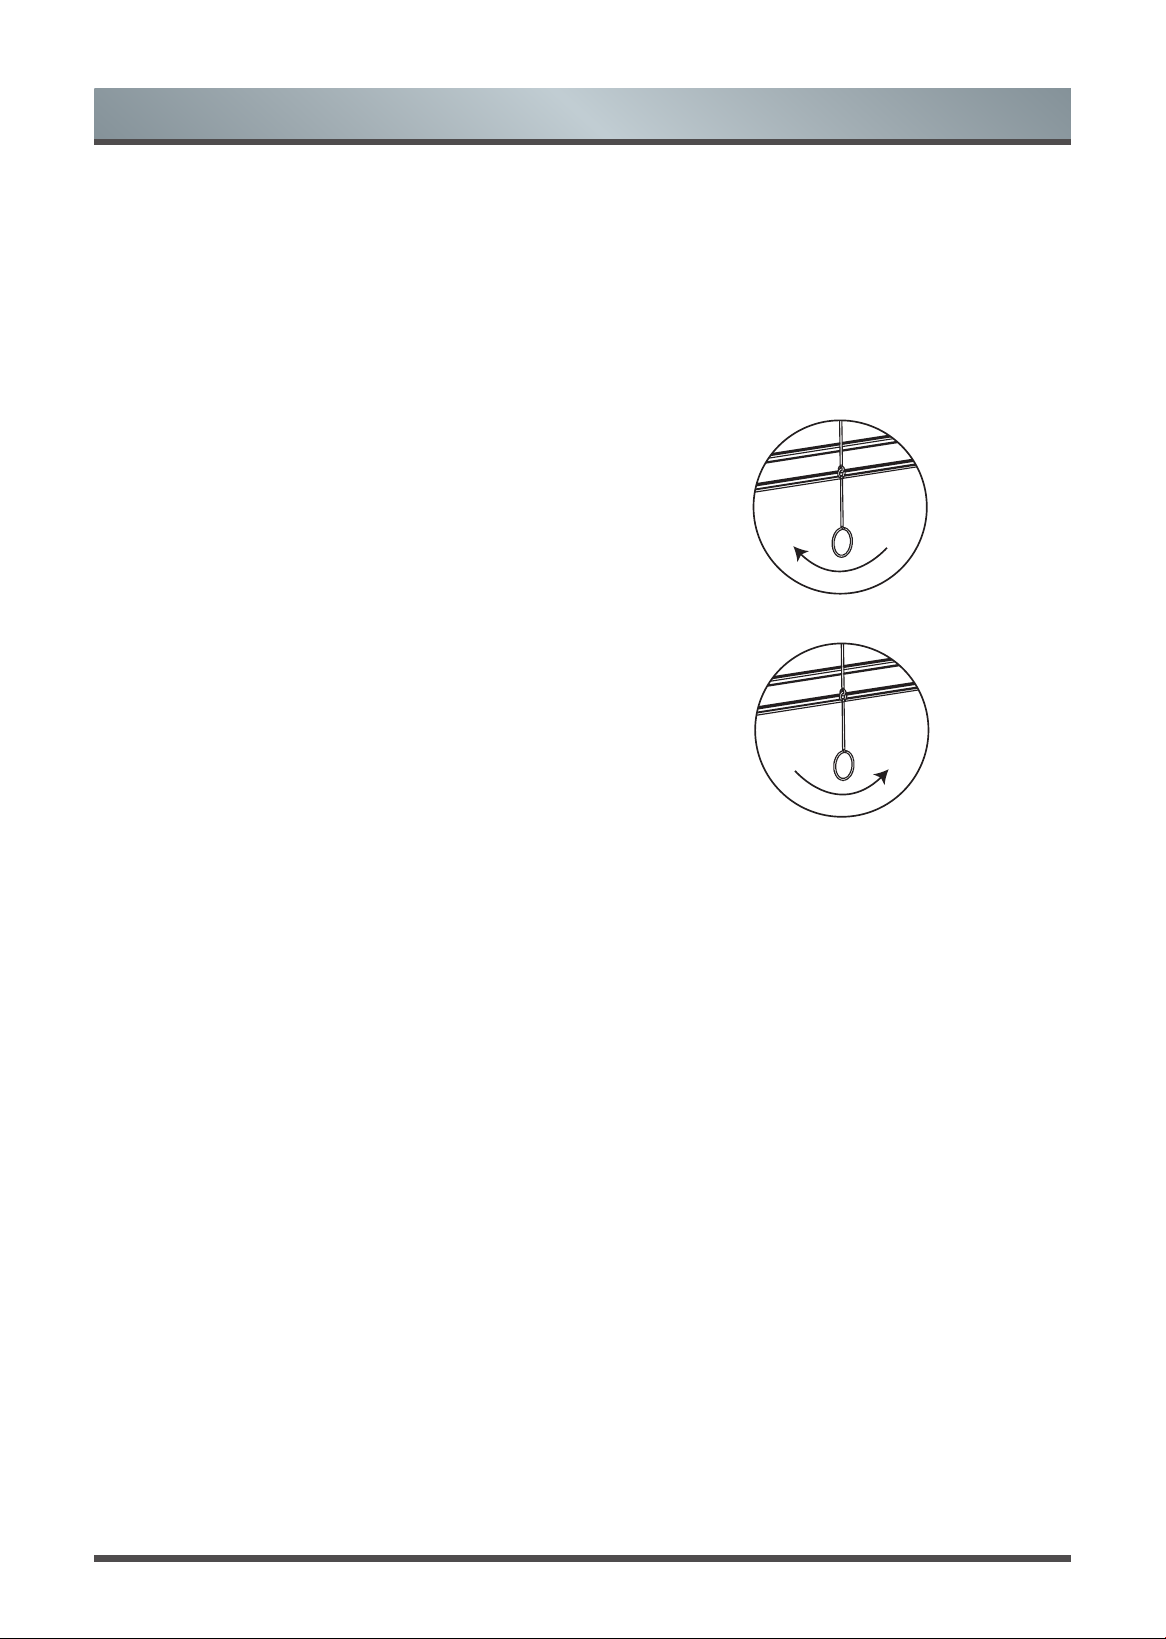
Adjust the Height of the Screen
Attach the handles of the wands on the wall-mount brackets and adjust the height of the screen. Refer to the
top border to match the screen to the display image.
WARNING:
Do not look directly at the lens when this device is on because the laser light may damage your
eyes!
If the screen is higher than the image, then rotate the
wands clockwise and move the screen down.
If the screen is lower than the image, then rotate the
wands counterclockwise and move the screen up.
After you've completed adjusting the screen height, remove the handles. Fold and rest the wands on the
screen bracket on the bottom of the screen.
Hang the Screen