Loading ...
Loading ...
Loading ...
Drying en
33
a Once the rinse cycle has run through to the end, an
audible signal sounds.
21.4 Running the second rinse cycle
1.
Open the control panel and remove the water tank.
2.
Thoroughly rinse the water tank and fill it with fresh
water.
3.
Slide in the water tank and close the control panel.
a The rinse cycle starts. The duration counts down on
the display.
a Once the rinse cycle has run through to the end, an
audible signal sounds.
4.
Empty and dry the water tank.
→"Emptying the water tank", Page18
Drying
22 Drying
To prevent residual moisture , dry the cooking compart-
ment following operation with steam.
22.1 Drying the cooking compartment
WARNING‒Risk of burns!
The appliance becomes hot during operation.
▶ Allow the appliance to cool down before cleaning.
ATTENTION!
If there is water on the cooking compartment floor
when operating the appliance at temperatures above
120°C, this will damage the enamel.
▶ Do not use the appliance if there is water on the
cooking compartment floor.
▶ Wipe away any water on the cooking compartment
floor before operation.
Requirement:The cooking compartment has cooled
down.
1.
Remove any food remnants from the cooking com-
partment.
2.
Dry the cooking compartment with a sponge.
3.
Remove limescale marks with a cloth soaked in vin-
egar, then wipe with clean water and dry with a soft
cloth.
4.
Leave the cooking compartment to dry with the ap-
pliance door open for 1hour or use "Drying func-
tion".
→"Setting 'Drying function'", Page33
22.2 Setting "Drying function"
Requirement:→"Drying the cooking compartment",
Page33
1.
Press "Cleaning".
2.
Press "Drying function".
a The duration appears on the display. You cannot
change the duration of the drying function.
3.
Start the drying function using
.
a A notification stating that you should carry out the
necessary preparatory work for the drying function
appears on the display.
4.
Press "OK" to confirm the notification.
a The drying function starts. The duration counts down
on the display.
a Once the drying function has run through to the
end, an audible signal sounds.
5.
Leave the appliance door open for 1-2minutes so
that the cooking compartment dries completely.
Rails
23 Rails
To thoroughly clean the rails and the cooking compart-
ment, or to replace the rails, you can remove the rails.
23.1 Detaching the rails
WARNING‒Risk of burns!
The shelf supports get very hot
▶ Never touch the shelf supports when hot.
▶ Always allow the appliance to cool down.
▶ Keep children at a safe distance.
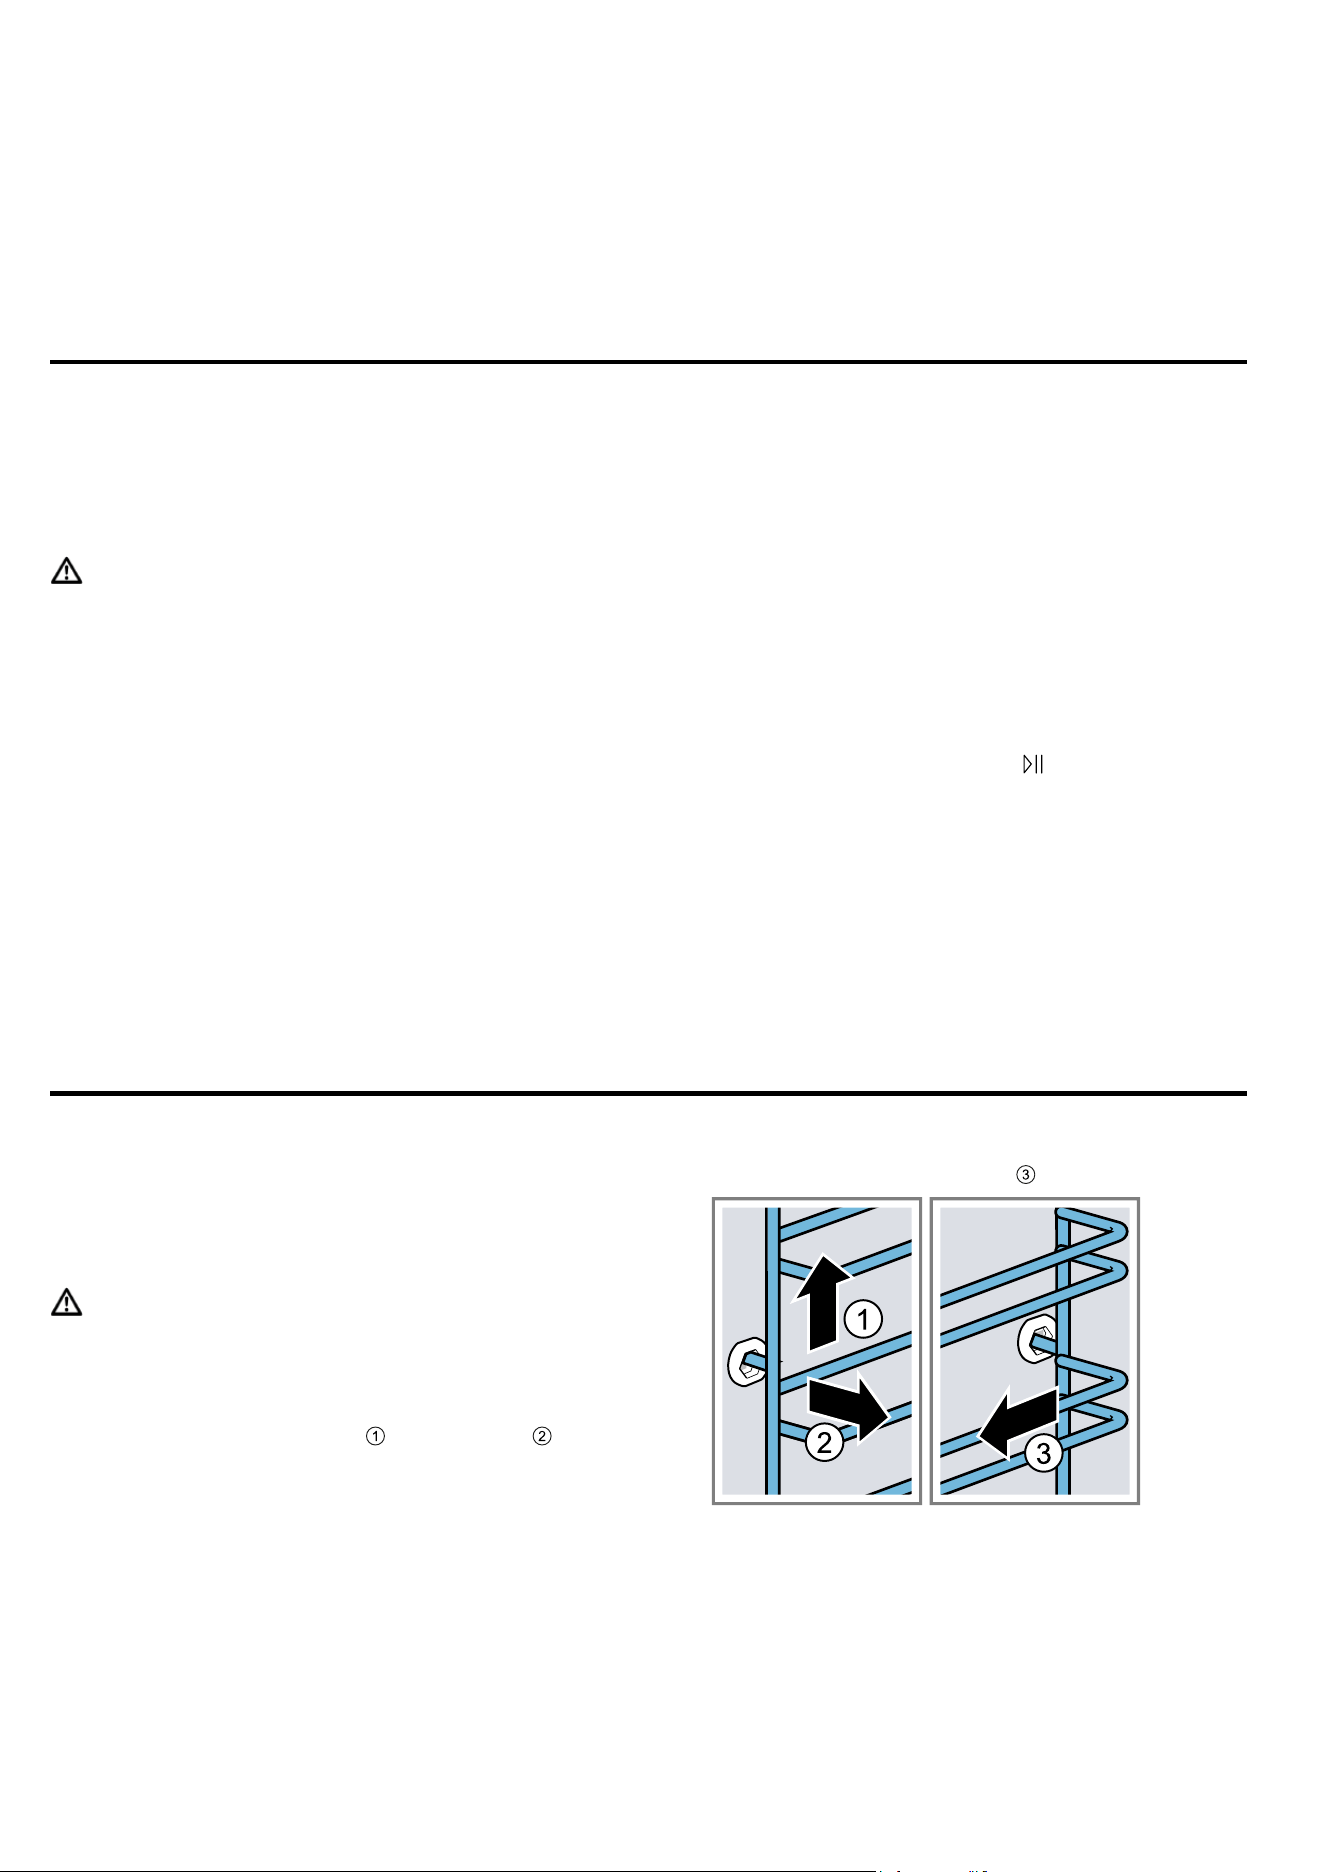
1.
Lift the rail forwards slightly and detach it .
2.
Pull the whole rail to the front and remove it.
3.
Clean the rail.
→"Cleaning products", Page28
23.2 Attaching the rails
Notes
¡ The rails only fit on the right or left.
¡ For both rails, ensure that the curved rods are at the
front.
Loading ...
Loading ...
Loading ...