1
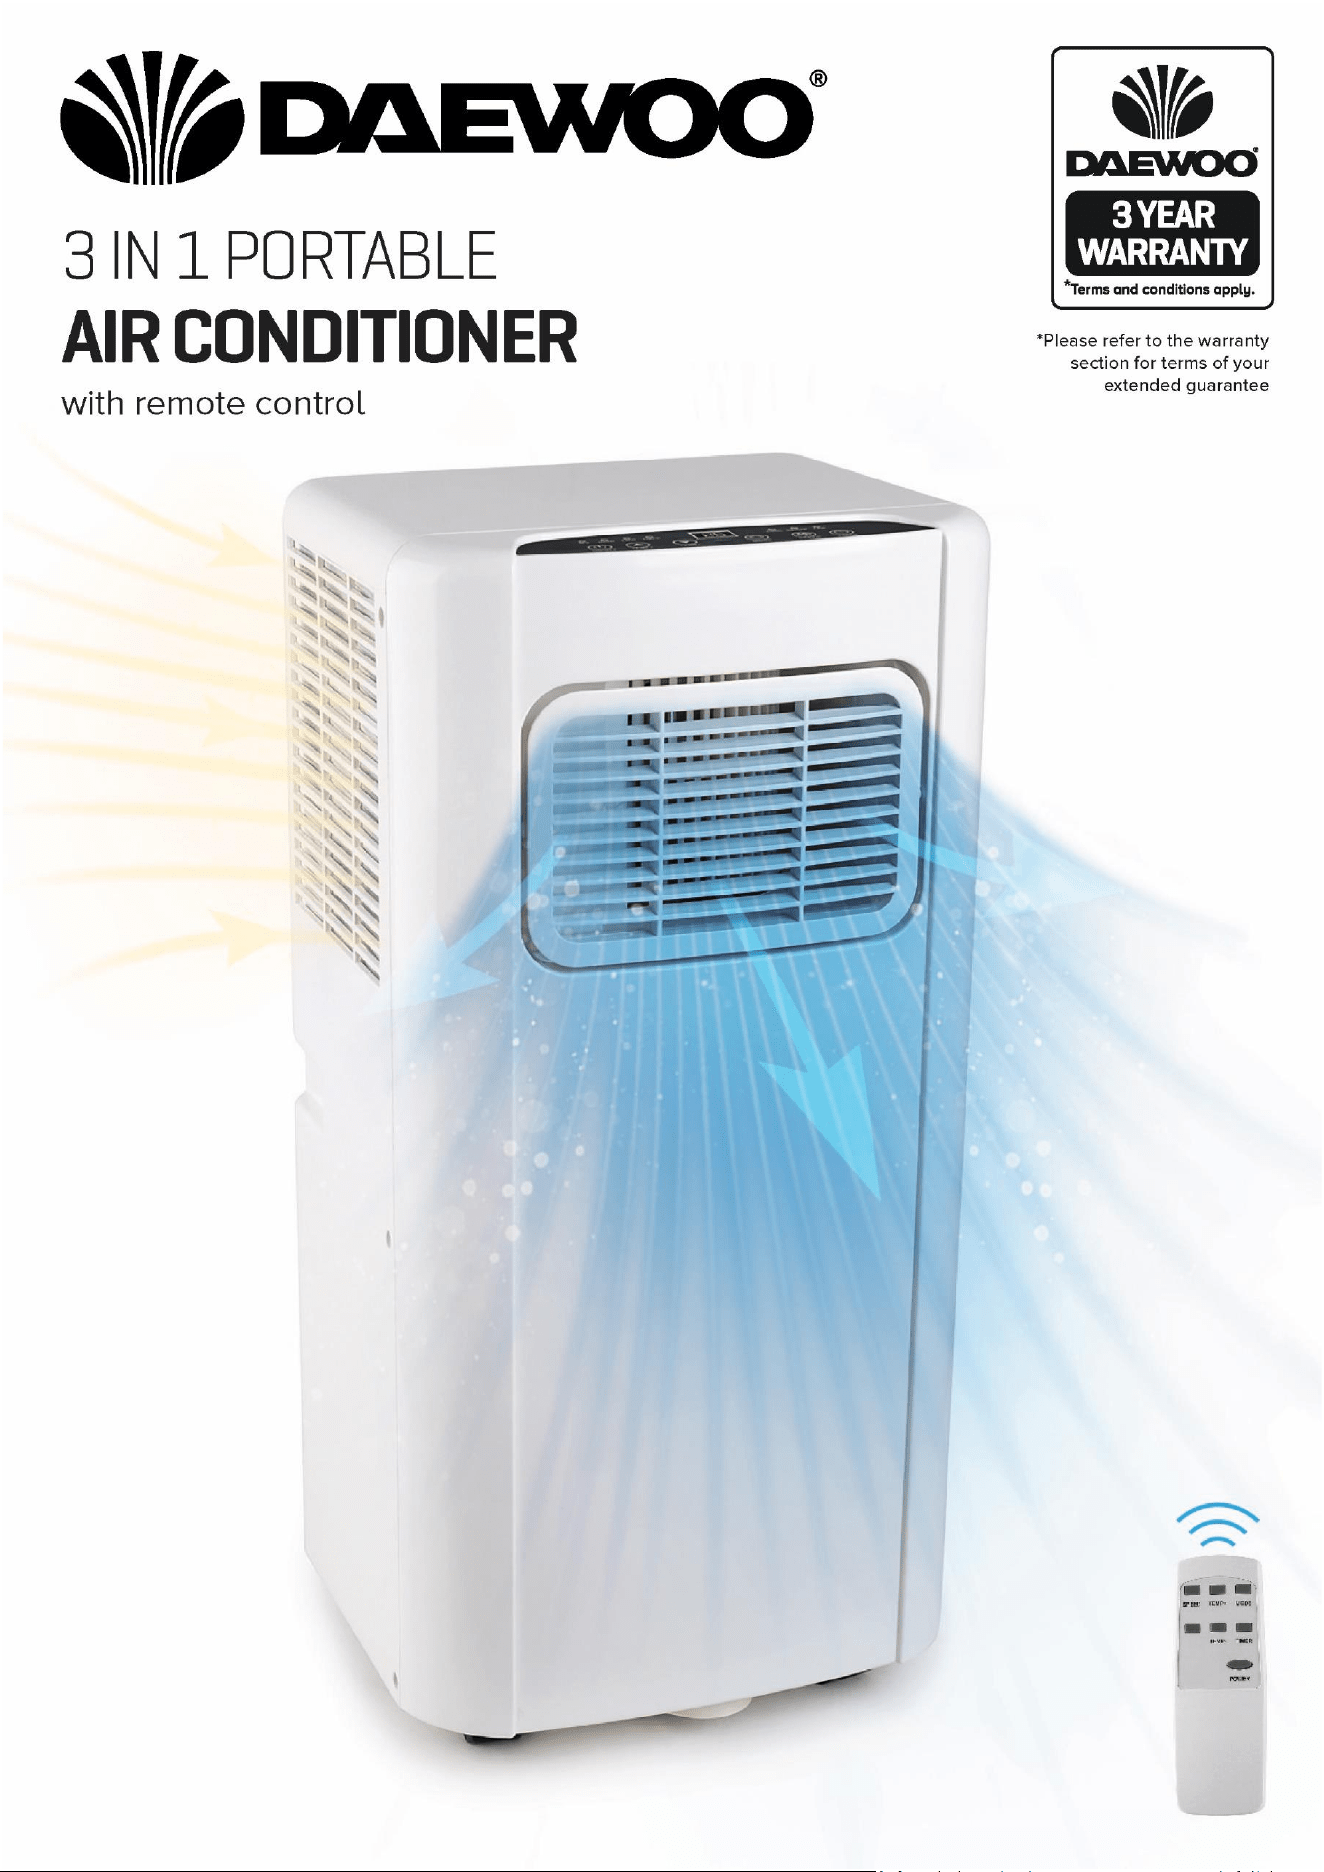
3 in 1 Portable Air Conditioner
Model No. COL1316
User Manual
IMPORTANT – RETAIN THESE INSTRUCTIONS FOR FUTURE REFERENCE

2
3 in 1 Portable Air Conditioner
Model No. COL1316
User Manual
IMPORTANT – RETAIN THESE INSTRUCTIONS FOR FUTURE REFERENCE
Contents
Page No.
2 Contents
3 Reading and Storing the User Manual
3 Important Safety Instructions for Proper Use
6 Explanation of Symbols
7 Description of Parts – Main Unit
7 Description of Parts – Control Panel
8 Description of Parts – The Vent Kit
8 Fitting the Flexible Exhaust Hose
9 Using Your Air Conditioner
Cooling Mode
10 Dehumidifying Mode
Fan Only Mode
10 Using the Timer
Time ON Setting
Time OFF Setting
11 Using the Remote Control
Inserting the Batteries
Battery Safety
12 The Internal Water Tank and Draining
12 Cleaning the Air Filter
13 Safety Shut Off
13 Cleaning and Maintenance
13 Troubleshooting Guide
13 Technical Specification
14 Plug Wiring Information
14 Recycling Information
15 Customer Support
Back Page Warranty Information
3
3 in 1 Portable Air Conditioner
Model No. COL1316
User Manual
IMPORTANT – RETAIN THESE INSTRUCTIONS FOR FUTURE REFERENCE
READING AND STORING THE USER MANUAL
Before using this product, please read through this
manual carefully paying particular attention to the safety
instructions. Failure to do so may result in personal injury
or damage to the product.
Carefully save this instruction manual for future reference.
Ensure the user manual is included when passing the product on
to any third parties.
IMPORTANT SAFETY INSTRUCTIONS FOR PROPER USE
When using electrical appliances, basic safety precautions
should always be followed.
Only use the product as described in this user manual. Any other
use is considered improper and may result in damage to property
or persons.
The manufacturer or vendor cannot be held liable for damages or
injury incurred through improper or incorrect use.
• Read and familiarise yourself with all operating
instructions before using this Air Conditioner.
• Before plugging your unit into the mains, visually check
that the unit is intact and has not suffered any transit
damage.
• Check that the voltage indicated on the data plate
corresponds with that of the local network before
connecting the appliance to the mains power supply.
• Disconnect the power plug from the socket before
dismantling, assembling or cleaning.
• Avoid touching any moving parts within the appliance.
• DO NOT insert fingers, pencils or any other objects
through the guard.
• This appliance can be used by children from 8 years and
above and persons with reduced physical, sensory or
mental capabilities or lack of experience or knowledge if
they have been given supervision or instruction
concerning use of the appliance in a safe way and
understands the hazards involved. Children shall not play
with the appliance. Cleaning and user maintenance shall

4
3 in 1 Portable Air Conditioner
Model No. COL1316
User Manual
IMPORTANT – RETAIN THESE INSTRUCTIONS FOR FUTURE REFERENCE
not be made by children without supervision.
• DO NOT leave children unsupervised with this appliance.
• DO NOT clean the unit by spraying it or immersing it in
water.
• DO NOT connect the appliance to an electrical outlet
using an extension lead. If an outlet is not available, one
should be installed by a qualified electrician.
• DO NOT operate this appliance if the cord or plug are
damaged. Ensure the power cord is not stretched or
exposed to sharp objects or edges.
• A damaged supply cord should be replaced by qualified
personnel in order to avoid a hazard.
• Any service other than regular cleaning or filter
replacement should be performed by an authorised
service representative.
• DO NOT use this appliance for any other purpose than it’s
intended use.
• The air conditioner must always be stored and
transported upright, otherwise irreparable damage may
be caused to the compressor; if in doubt, wait at least
24 hours before restarting the unit.
• Avoid restarting the air conditioner unless 3 minutes have
passed since being turned off. This prevents damage to
the compressor.
• DO NOT use the mains plug or external timer as a means
of switching the air conditioner on or off. Use the
ON/OFF button located on the control panel.
• Always place the unit on a dry and stable surface.
• The appliance should not be placed in a laundry or wet
room.
• The appliance must be placed in a room without sources
of ignition (for example: open flames, an operating gas
appliance or an operating electric heater)
• The appliance must be installed and used in a room with
a floor area larger than 4m
2
5
3 in 1 Portable Air Conditioner
Model No. COL1316
User Manual
IMPORTANT – RETAIN THESE INSTRUCTIONS FOR FUTURE REFERENCE
• This appliance contains R290 refrigerant gas. For quantity
see the rating label on the rear of the unit.
• R290 refrigerant gas complies with EU environmental
directives.
• Refrigerant gas may be odourless, if the appliance is used
or stored in an unventilated room, the room must be
such as to prevent stagnation of possible leaks of
refrigerant gas as there could be a danger of fire or
explosion hazard should the refrigerant come into
contact with electric heaters, stoves or other sources of
ignition.
• The refrigerant system should not be perforated.
• The appliance must be stored in such a way as to prevent
mechanical failure.
• Individuals who operate or work on the refrigerant circuit
must have the appropriate certification issued by an
accredited organisation that ensures competence in
handling refrigerants according to a specific evaluation
recognized by associations in the industry.
• Repairs must be performed based on the
recommendation from the manufacturing company.
Maintenance and repairs that require the assistance of
other qualified persons must be performed under the
supervision of an individual specified in the use of
flammable refrigerants.
• The air conditioner will defrost on occasions, do not use
any tools or heaters to speed up this process as this may
cause damage to the appliance.
6
3 in 1 Portable Air Conditioner
Model No. COL1316
User Manual
IMPORTANT – RETAIN THESE INSTRUCTIONS FOR FUTURE REFERENCE
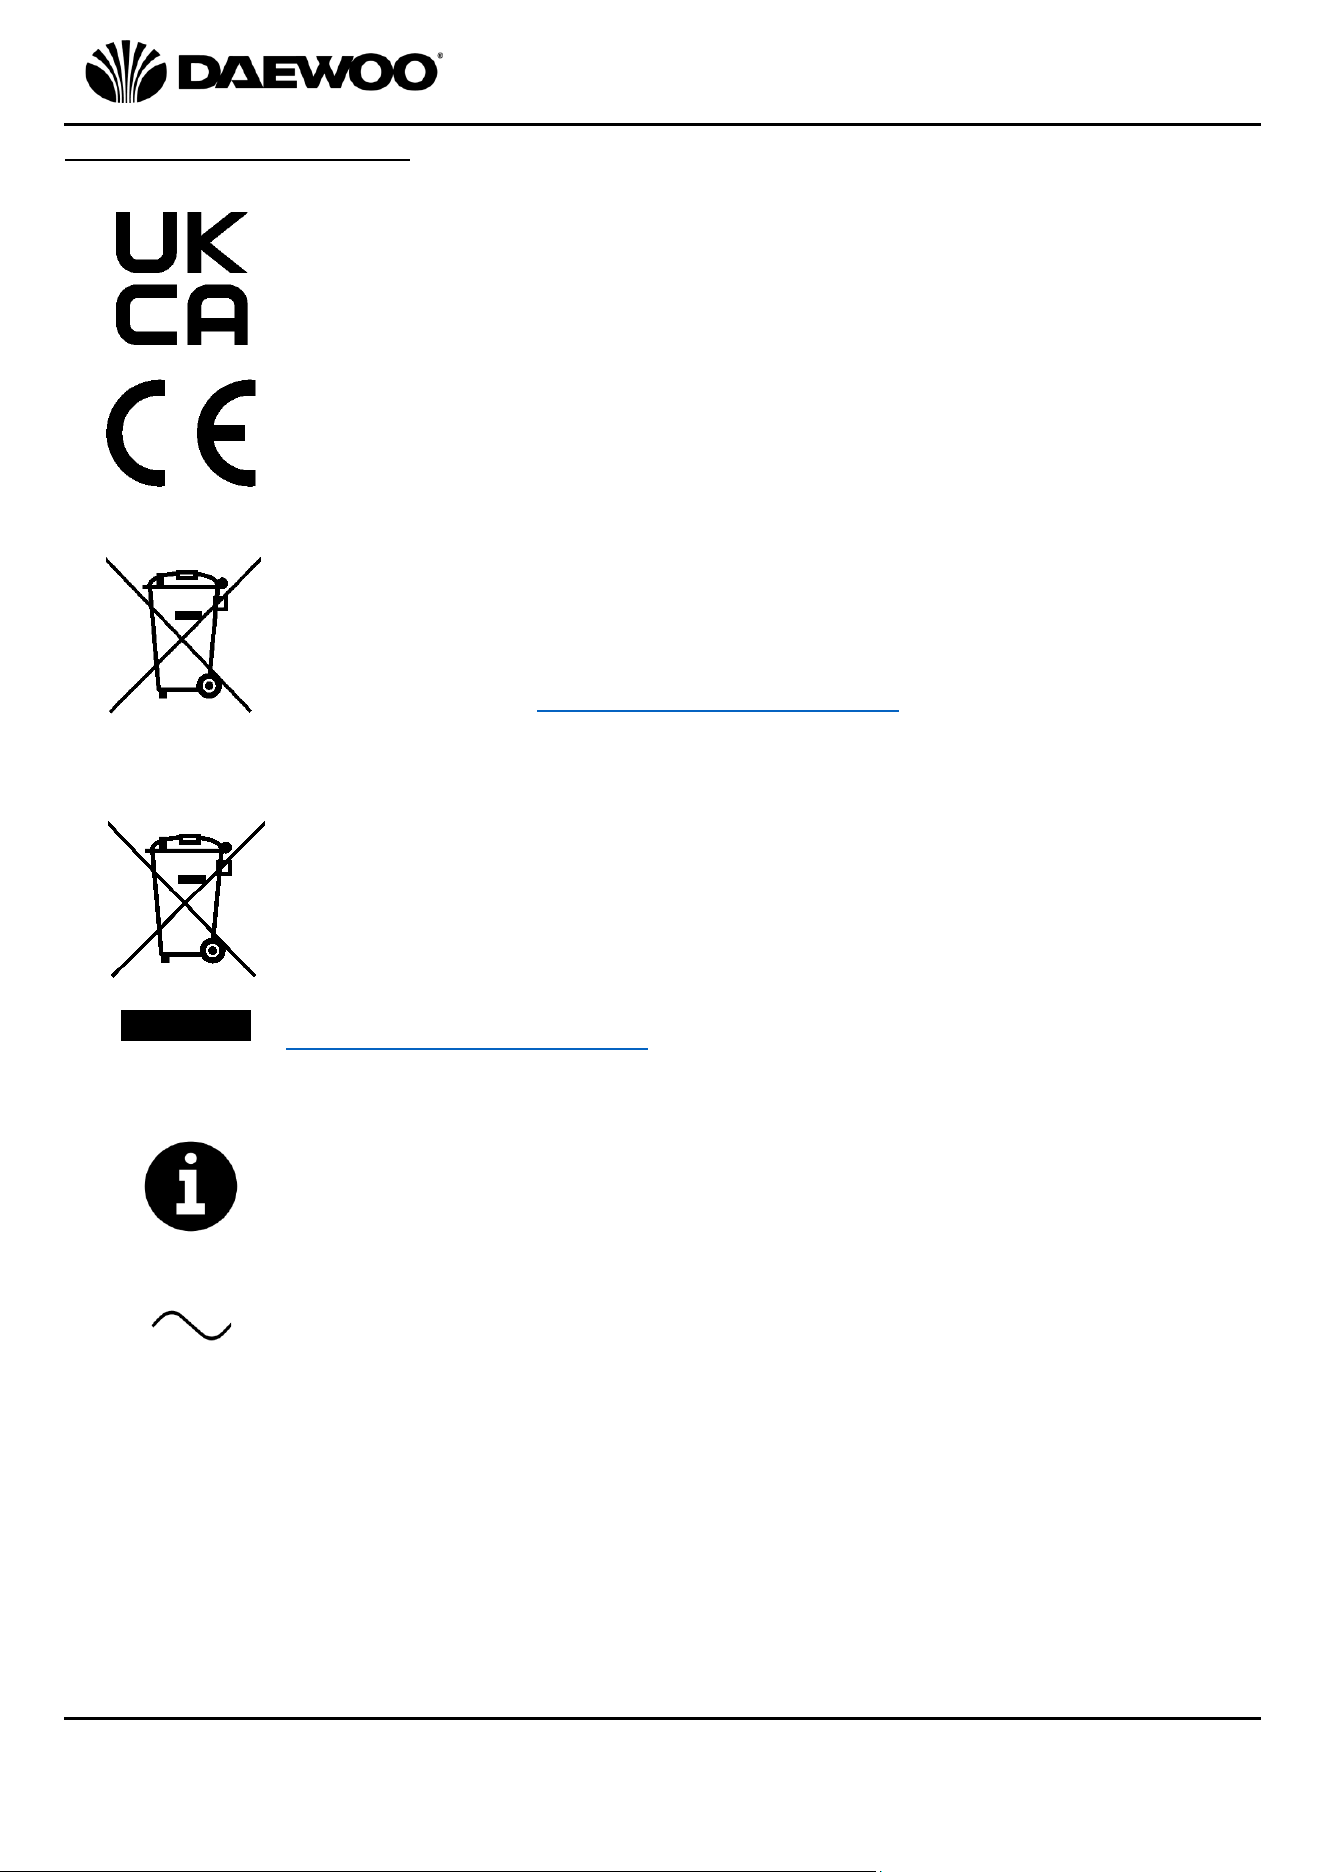
Explanation of Symbols
The following warning symbols or words are used in this instruction manual:
Products labelled with UK Conformity Assessment identifies
products conforming to UK statutory requirements.
Products labelled with this symbol conform to applicable
provisions of the European Economic Area.
This symbol means batteries and rechargeable batteries may not
be disposed of with household waste!
As the end user you are required by law to bring all batteries and
rechargeable batteries to a collection point run by the Local
Authority or visit www.recycle-more.co.uk, so that they can be
disposed of in an environmentally friendly manner.
You should now recycle your waste electrical goods and in doing
so help the environment. This symbol means waste electrical
products at the end of their useful life should not be disposed of
with normal household waste and not sent to landfill. Please
ensure it is taken to a suitable facility for disposal. Check with
your Local Authority or retailer for recycling advice or visit
www.recycle-more.co.uk enter your postcode to find out your
nearest recycling site.
This symbol provides useful additional information on the
use of this product.
This symbol indicates that the supply uses an alternating current
mains supply.
7
3 in 1 Portable Air Conditioner
Model No. COL1316
User Manual
IMPORTANT – RETAIN THESE INSTRUCTIONS FOR FUTURE REFERENCE
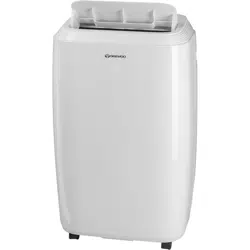
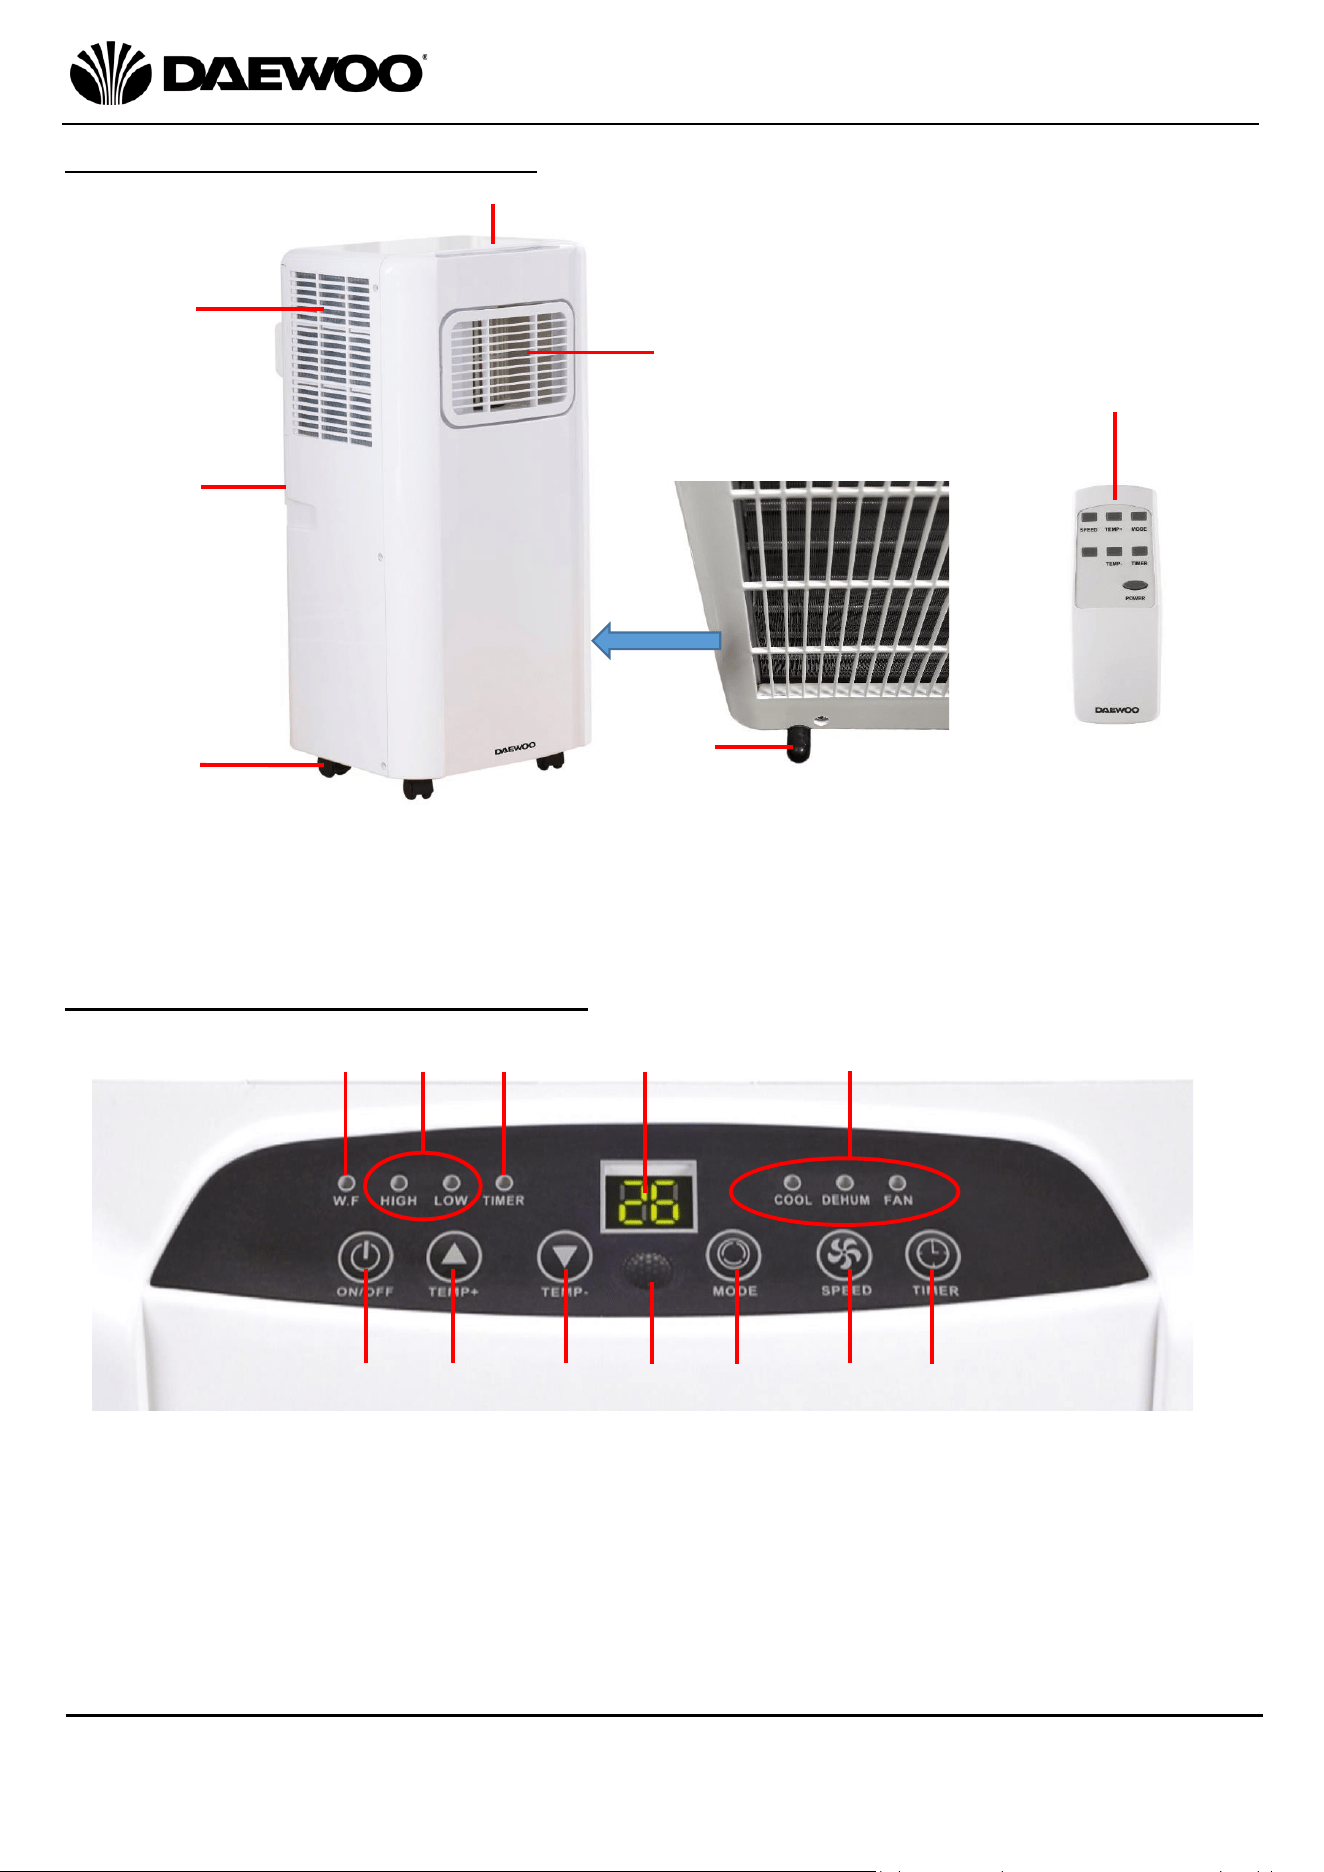
Description of Parts – Main Unit
Description of Parts – Control Panel
1
2
3
4
5
1. Air Inlet
2. Exhaust (rear)
3. Castors
4. Control Panel 7. Remote Control
5. Air Outlet
6. Tank Drain Cover (bottom rear)
9
11
12
15.Temperature/Time - Button
16.Remote Signal Receiver
17.Mode Button
18.Fan Speed Button
19.Timer Button
6
8. Water Full Indicator
9. Fan Speed Indicators
10. Timer Indicator
11. LED Display
12. Mode Indicators
13. Power ON/OFF Button
14. Temperature/Time + Button
7
13
14
15
16
17
18
19
8
10
8
3 in 1 Portable Air Conditioner
Model No. COL1316
User Manual
IMPORTANT – RETAIN THESE INSTRUCTIONS FOR FUTURE REFERENCE
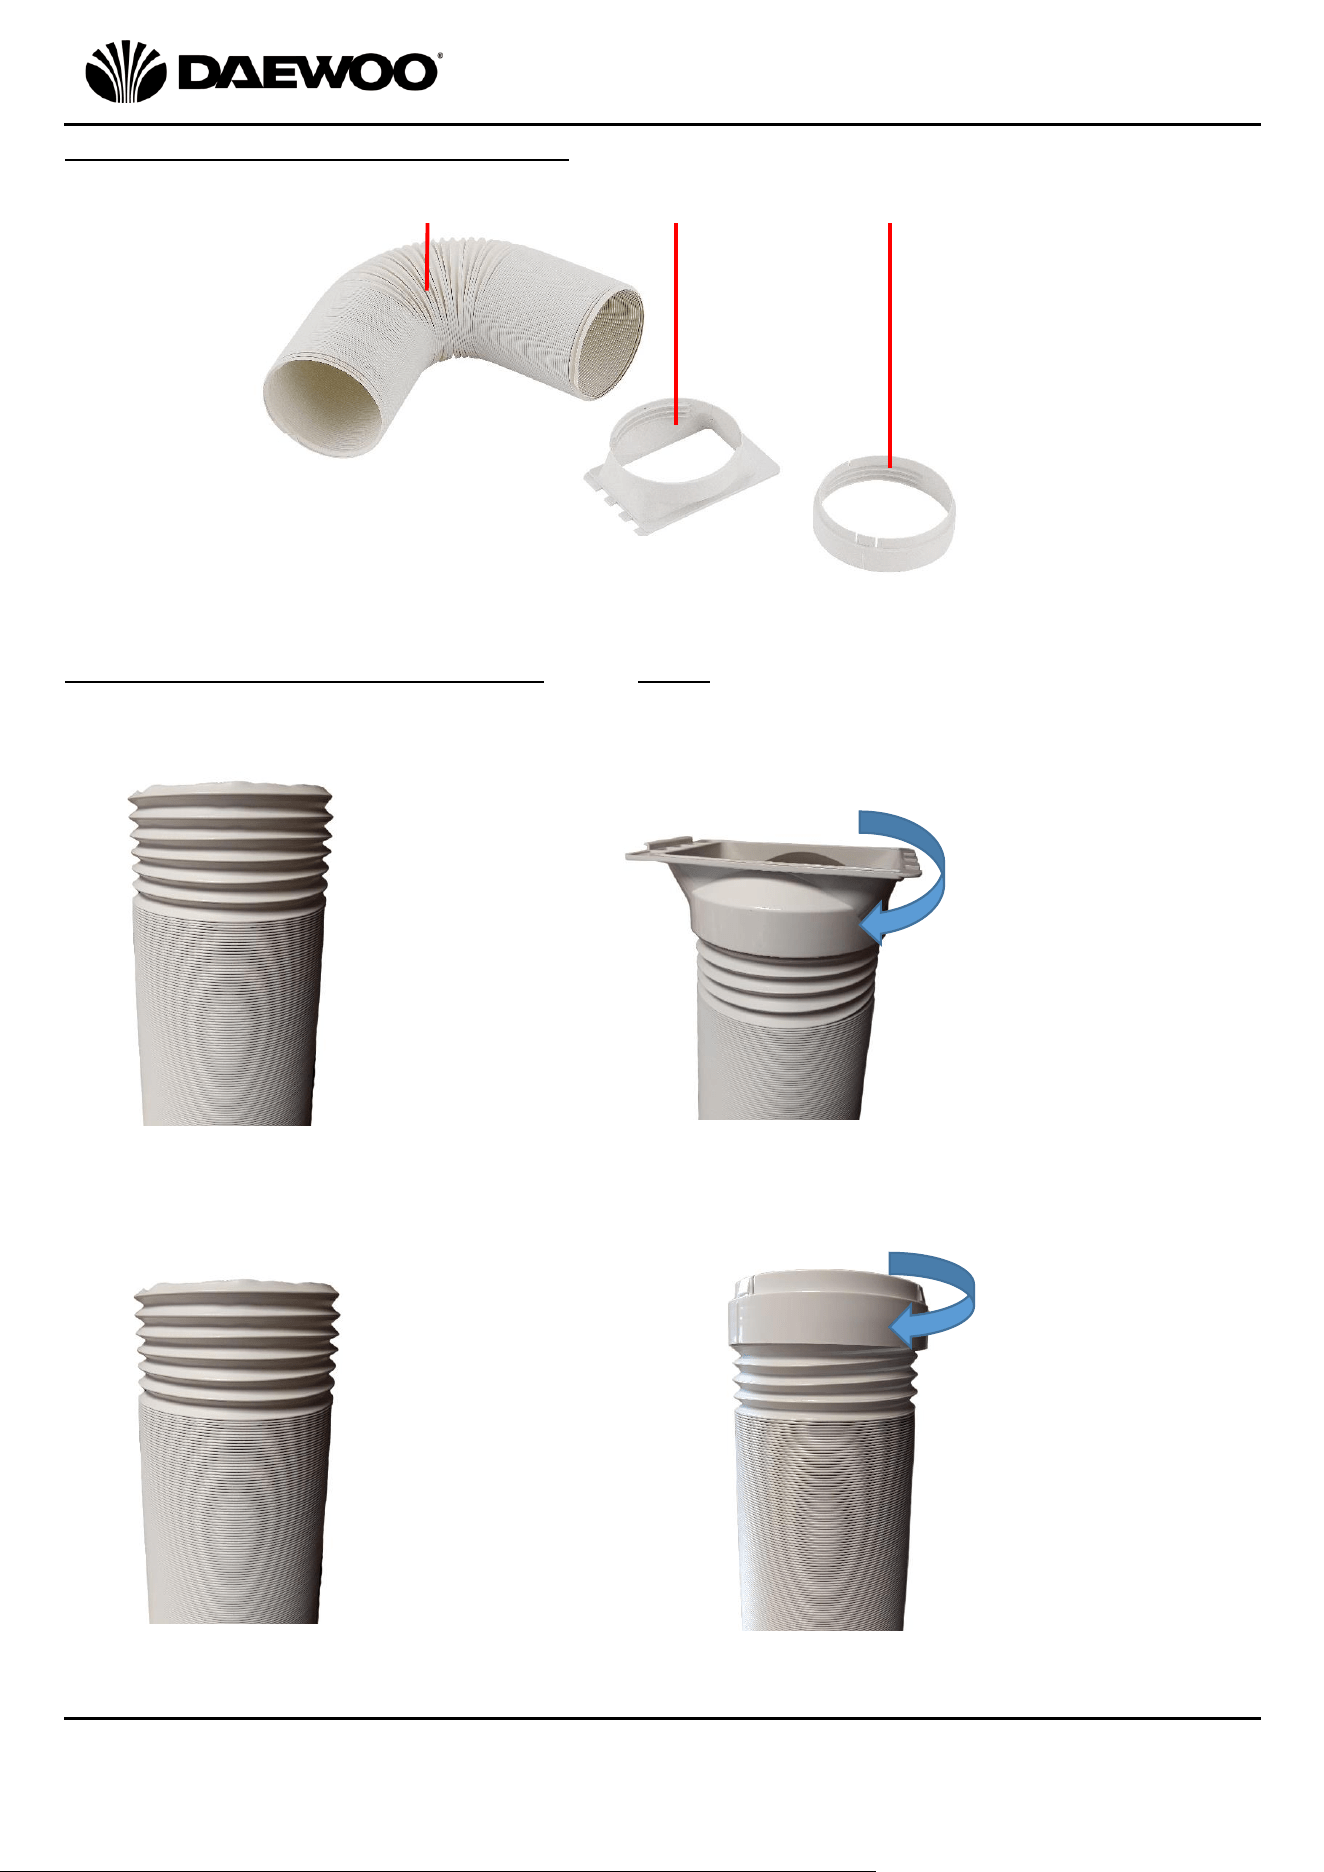
Description of Parts – The Vent Kit
Fitting the Flexible Exhaust Hose – this must be fitted before use:
1. First fit the Hose Connector (21) to one end of the Flexible Hose (20) as follows:
2. Next attached the Hose Exit Ring (22) to the other end of the hose as follows:
20
21
20. Flexible Exhaust Hose
21. Hose Connector
22. Hose Exit Ring
a. Extend one
end of the
Flexible hose
(20) by about
10cm
b. Screw the
Hose
Connector (21)
onto the end
of the hose in
a clockwise
direction.
22
c. Extend the
other end of
the Flexible
Hose (20) by
about 10cm
d. Screw the
Hose Exit Ring
(22) onto the
other end of
the hose in a
clockwise
direction.
a.
b
.
c.
d.
9
3 in 1 Portable Air Conditioner
Model No. COL1316
User Manual
IMPORTANT – RETAIN THESE INSTRUCTIONS FOR FUTURE REFERENCE
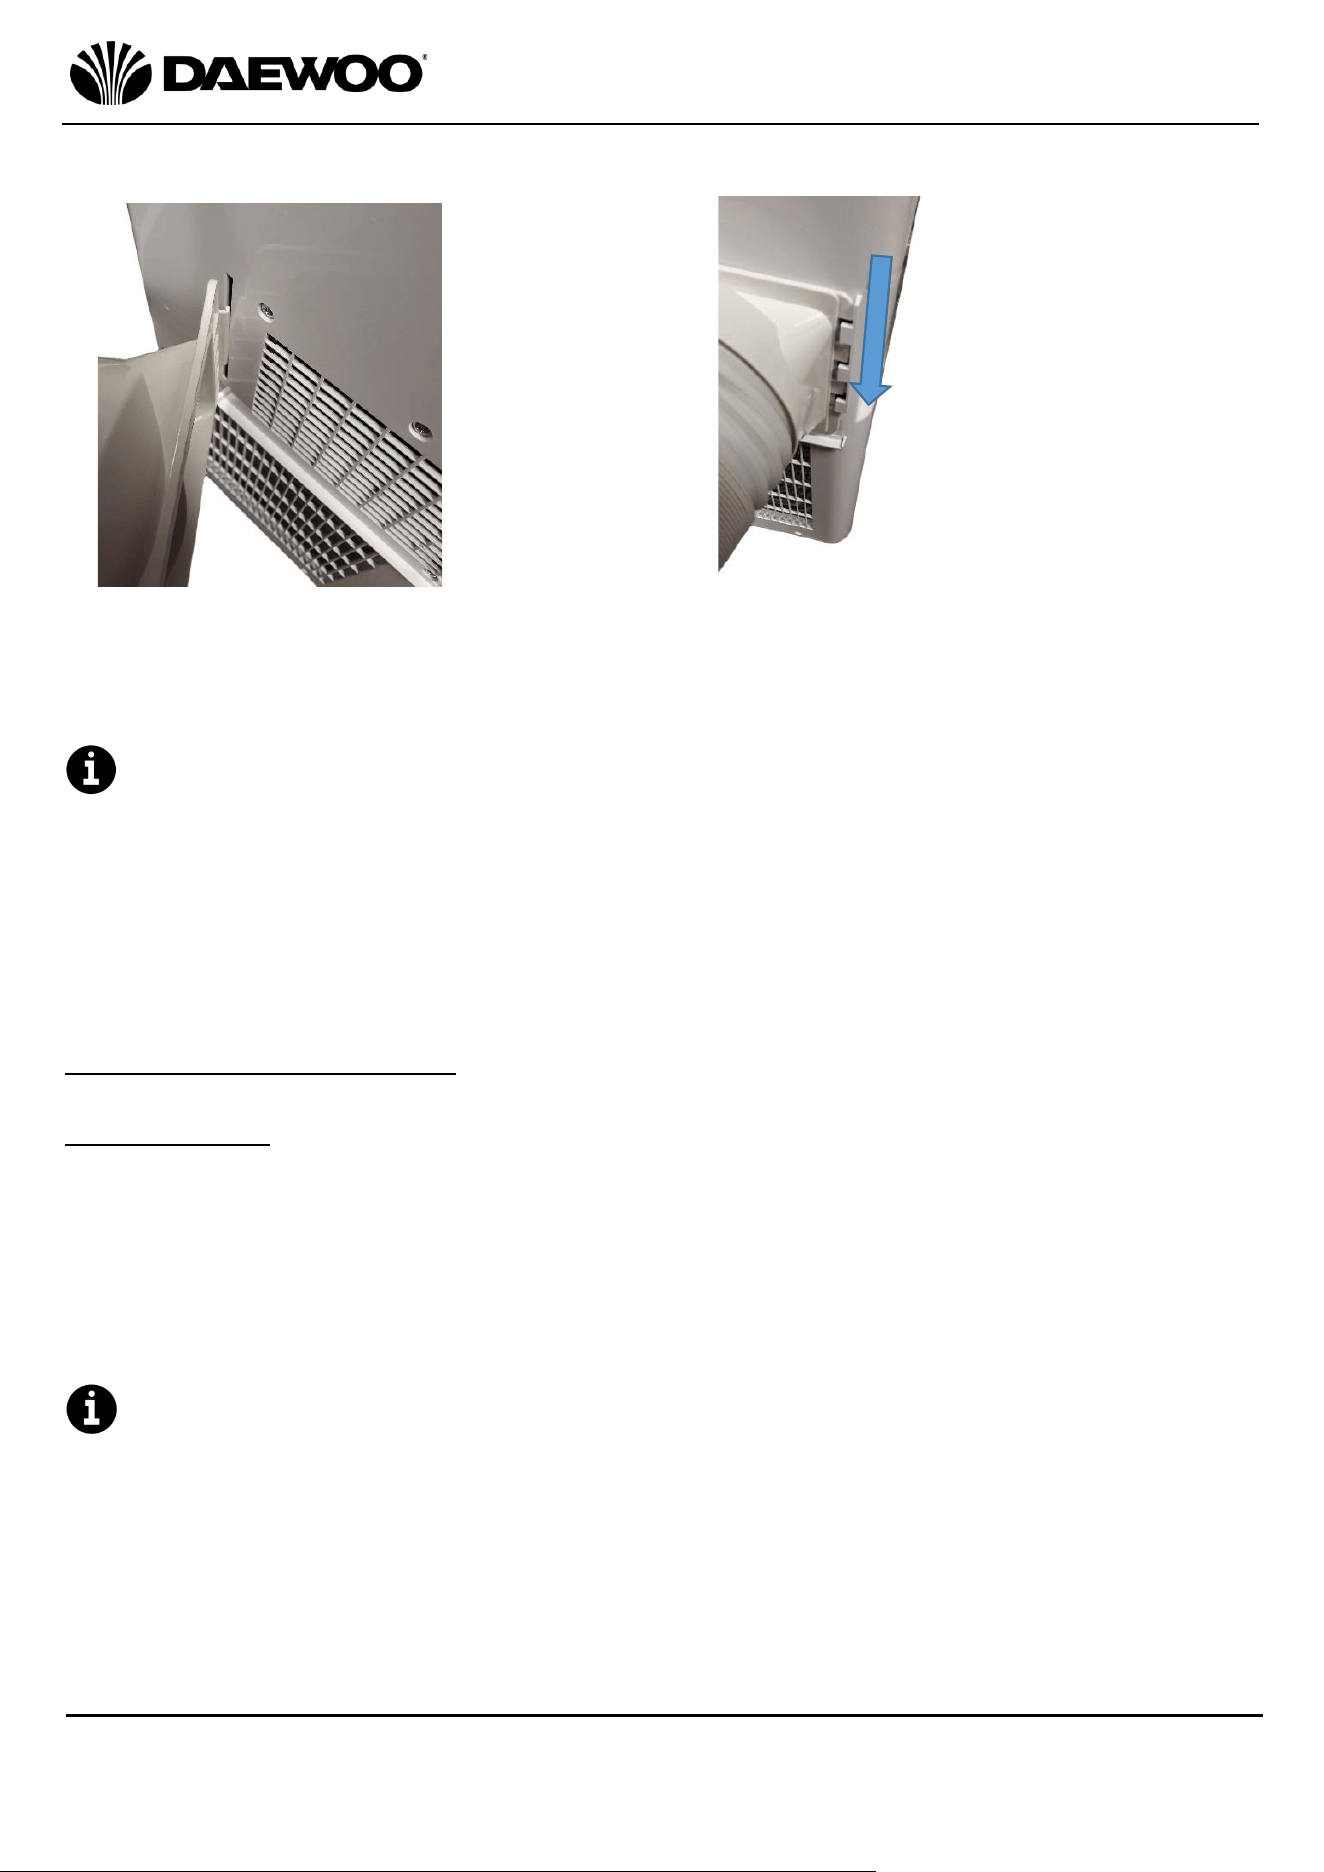
3. Finally, attach the Hose Connector (21) to the rear outlet of the unit as follows:
4. Place the exit end of the Flexible Hose (20) through a suitable outlet such as an
open window, door, etc.
The unit must be positioned a minimum of 1 Metre away from any wall or
obstruction on all sides.
• Before use, check the Flexible Hose (20) is properly fitted.
• Ensure the unit is on a solid, level, dry surface.
• Ensure the unit is plugged directly into the mains socket and does not share
sockets with other appliances via a mains adaptor or an extension lead, etc.
Using Your Air Conditioner
Cooling Mode
1. Power the unit up by pressing the POWER ON/OFF Button (13).
2. Press the Mode Button (17) until the ‘COOL’ Indicator (12) illuminates.
3. Press the Temperature/Time + (14) and Temperature/Time – (15) Buttons to
select the desired room temperature (16˚C - 31˚C) on the LED Display (11).
4. Press the Fan Speed Button (18) to choose either low or high fan speeds, the
selected speed will be shown by the Fan Speed Indicators (9).
To create a circulatory effect, the cooled air exits the unit at an angle and
slightly to one side. This is to make space cooling more efficient and is quite
normal.
e. Hook the flat
part of the
Hose
Connector
(21) into the
slot on the
rear of the
unit as
shown left.
f. Bring the Hose
Connector (21)
towards the back of
the unit until the
notches in the
connector line up
with the tongues on
the rear of the unit.
Finally, slide the
connector down in
the direction of the
arrow shown left.
e.
f.

10
3 in 1 Portable Air Conditioner
Model No. COL1316
User Manual
IMPORTANT – RETAIN THESE INSTRUCTIONS FOR FUTURE REFERENCE
Dehumidifying Mode
1. Power the unit up by pressing the POWER ON/OFF Button (13).
2. Press the Mode Button (17) until the ‘DEHUM’ Indicator (12) illuminates.
The unit will automatically set the temperature to 2˚C below the room
temperature and the fan speed to low and begin dehumidifying.
Fan Only Mode
1. Power the unit up by pressing the POWER ON/OFF Button (13).
2. Press the Mode Button (17) until the ‘FAN’ Indicator (12) illuminates.
3. Press the Fan Speed Button (18) to choose either low or high fan speeds, the
selected speed will be shown by the Fan Speed Indicators (9).
Timer Mode – Time ON Setting
1. With the unit OFF i.e., not powered up but plugged into the mains, press the
Timer Button (19), the ‘TIMER’ Indicator (10) will illuminate to show the unit is
in TIMER mode.
2. Next select how many hours you need until the unit switches ON using the
Temperature/Time + (14) and Temperature/Time – (15) Buttons.
3. The ON time is displayed on the LED Display (11) as a number of hours until the
unit switches on up to a maximum of 24Hrs.
4. The LED Display (11) will flash whilst the time is being set. Once set, leave the
unit alone until the LED Display (11) stops flashing and goes dim.
5. The timer will count down until the unit switches on.
Timer Mode – Time OFF Setting
1. Power the unit up by pressing the POWER ON/OFF Button (13).
2. Press the Timer Button (19), the ‘TIMER’ Indicator (10) will illuminate to show
the unit is in TIMER mode.
3. Next select how many hours you need until the unit switches OFF using the
Temperature/Time + (14) and Temperature/Time – (15) Buttons.
4. The OFF time is displayed on the LED Display (11) as a number of hours until the
unit switches off up to a maximum of 24Hrs.
5. The LED Display (11) will flash whilst the time is being set. Once set, leave the
unit alone until the LED Display (11) stops flashing and goes dim.
6. The timer will count down until the unit switches off.
11
3 in 1 Portable Air Conditioner
Model No. COL1316
User Manual
IMPORTANT – RETAIN THESE INSTRUCTIONS FOR FUTURE REFERENCE
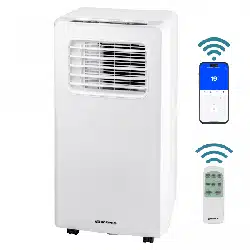
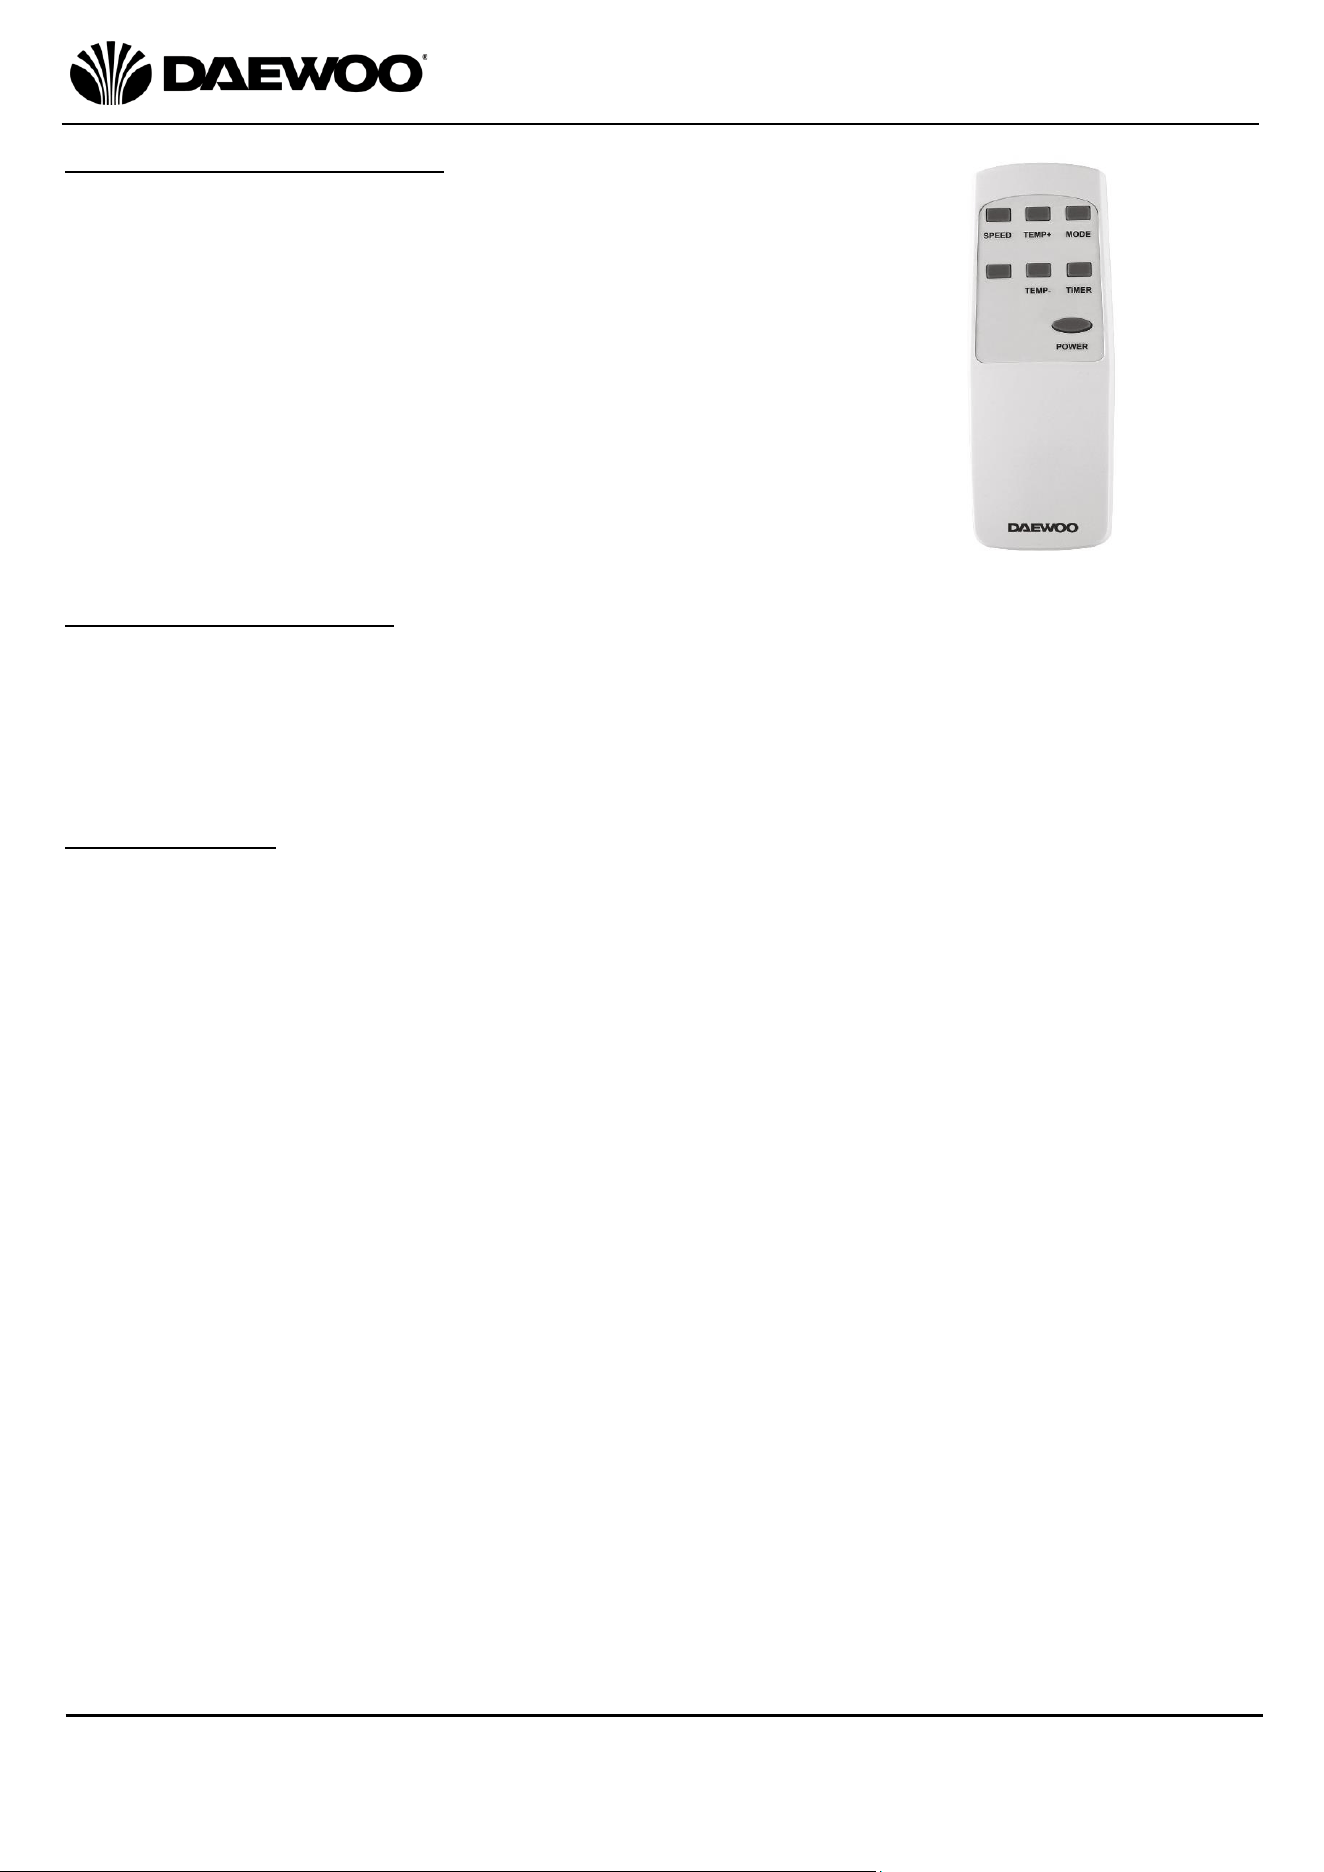
Using the Remote Control
The controls on the control panel are duplicated on
the remote control to allow full functional use of the
Air Conditioner.
Inserting the Batteries
• Slide the battery compartment cover on the rear of the remote back in the
direction of the arrow and remove.
• Insert 2 x 1.5V AAA batteries (not supplied) into the battery compartment
observing the polarity markings on the inside.
• Slide the battery cover back on until it clicks back in place.
Battery Safety
• CAUTION: There is a danger of explosion if the batteries are incorrectly fitted.
• Ensure that the batteries are installed with the correct polarity.
• It is recommended that batteries are removed if the remote if it is not to be used
for a long period of time or if the remote is to be disposed of.
• Replace only with the same or equivalent battery type.
• Store batteries in a cool dry place.
• Do not expose the battery to sunshine, fire, heat or similar, never dispose of
batteries in a fire.
• Do not charge non-rechargeable batteries.
• Do not short-circuit batteries.
• Exhausted batteries are to be removed from the product and safely disposed of.
WARNING!
• DO NOT ingest the battery, Chemical Burn Hazard.
• Keep new and used batteries away from children.
• If the battery compartment does not close securely, stop using the product and
keep away from children.
• If you think batteries may have been swallowed or placed inside any part of the
body, seek immediate medical attention.
12
3 in 1 Portable Air Conditioner
Model No. COL1316
User Manual
IMPORTANT – RETAIN THESE INSTRUCTIONS FOR FUTURE REFERENCE
The Internal Water Tank and Draining
During normal use, most of the moisture collected will be
evaporated internally by the unit and expelled through the
Exhaust (2).
However, the internal water tank will eventually fill to its
maximum capacity and the Water Full (WF) Indicator (8)
will illuminate on the Control Panel (4) to show the tank is
full.
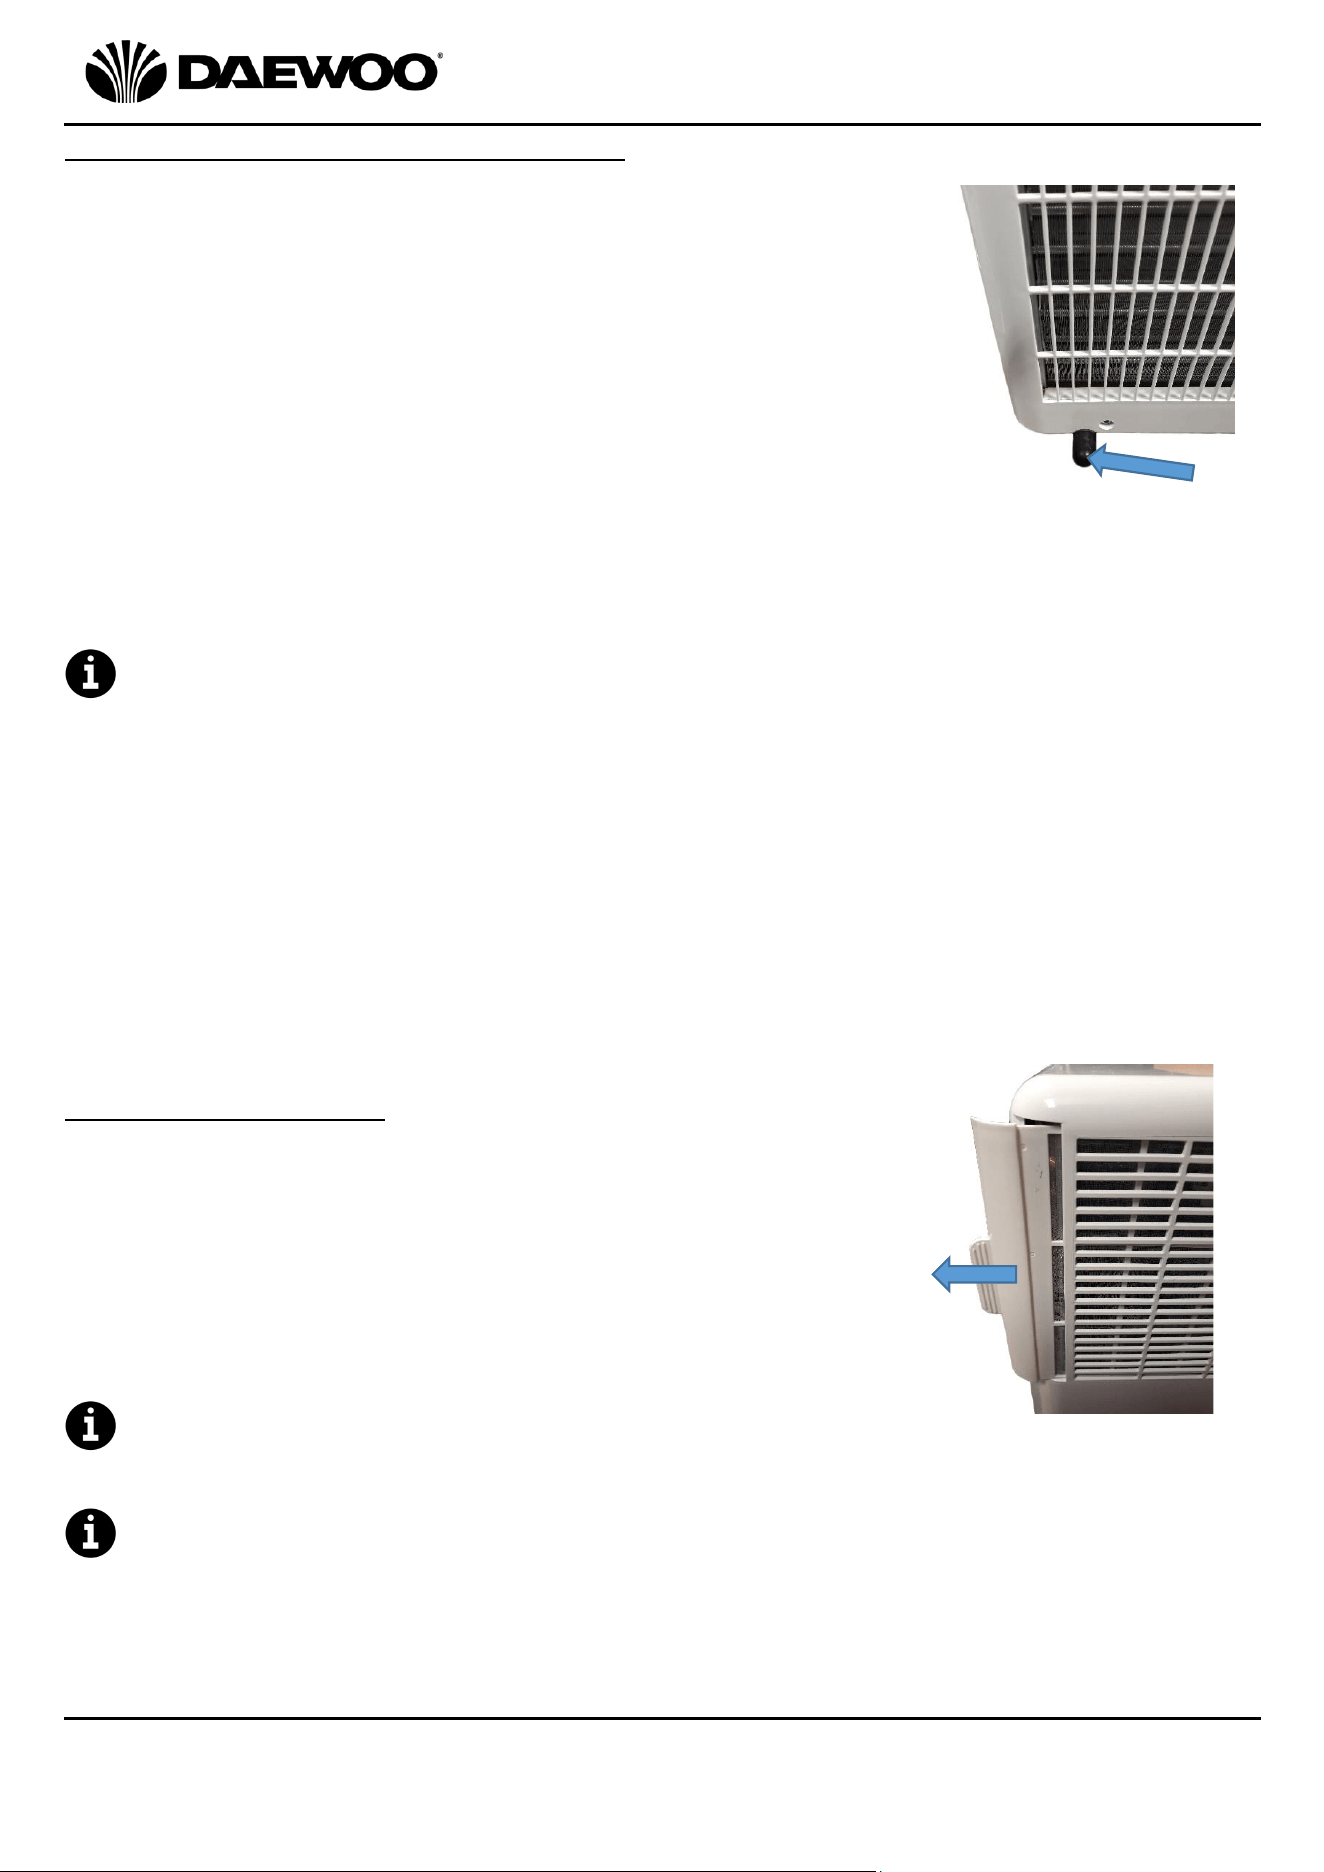
To empty the water tank, take the unit outside, remove
Tank Drain Cover (6) at the bottom rear left of the unit and
allow the tank to empty.
Alternatively connect a hose to the drain and lead it outside
to the drain the tank continuously.
Ensure the Tank Drain Cover (6) is replaced before
using the unit again.
The amount of water collected by the tank and the frequency of draining is
caused by the relative humidity levels which will vary and will depend on several
factors:
1. Avoid placing the Air Conditioner near kitchens or bathrooms (though not in the
bathroom!).
2. Avoid drying washing in the same room as the Air Conditioner.
3. Damp weather outside will affect the amount of water collected especially
when it is raining.
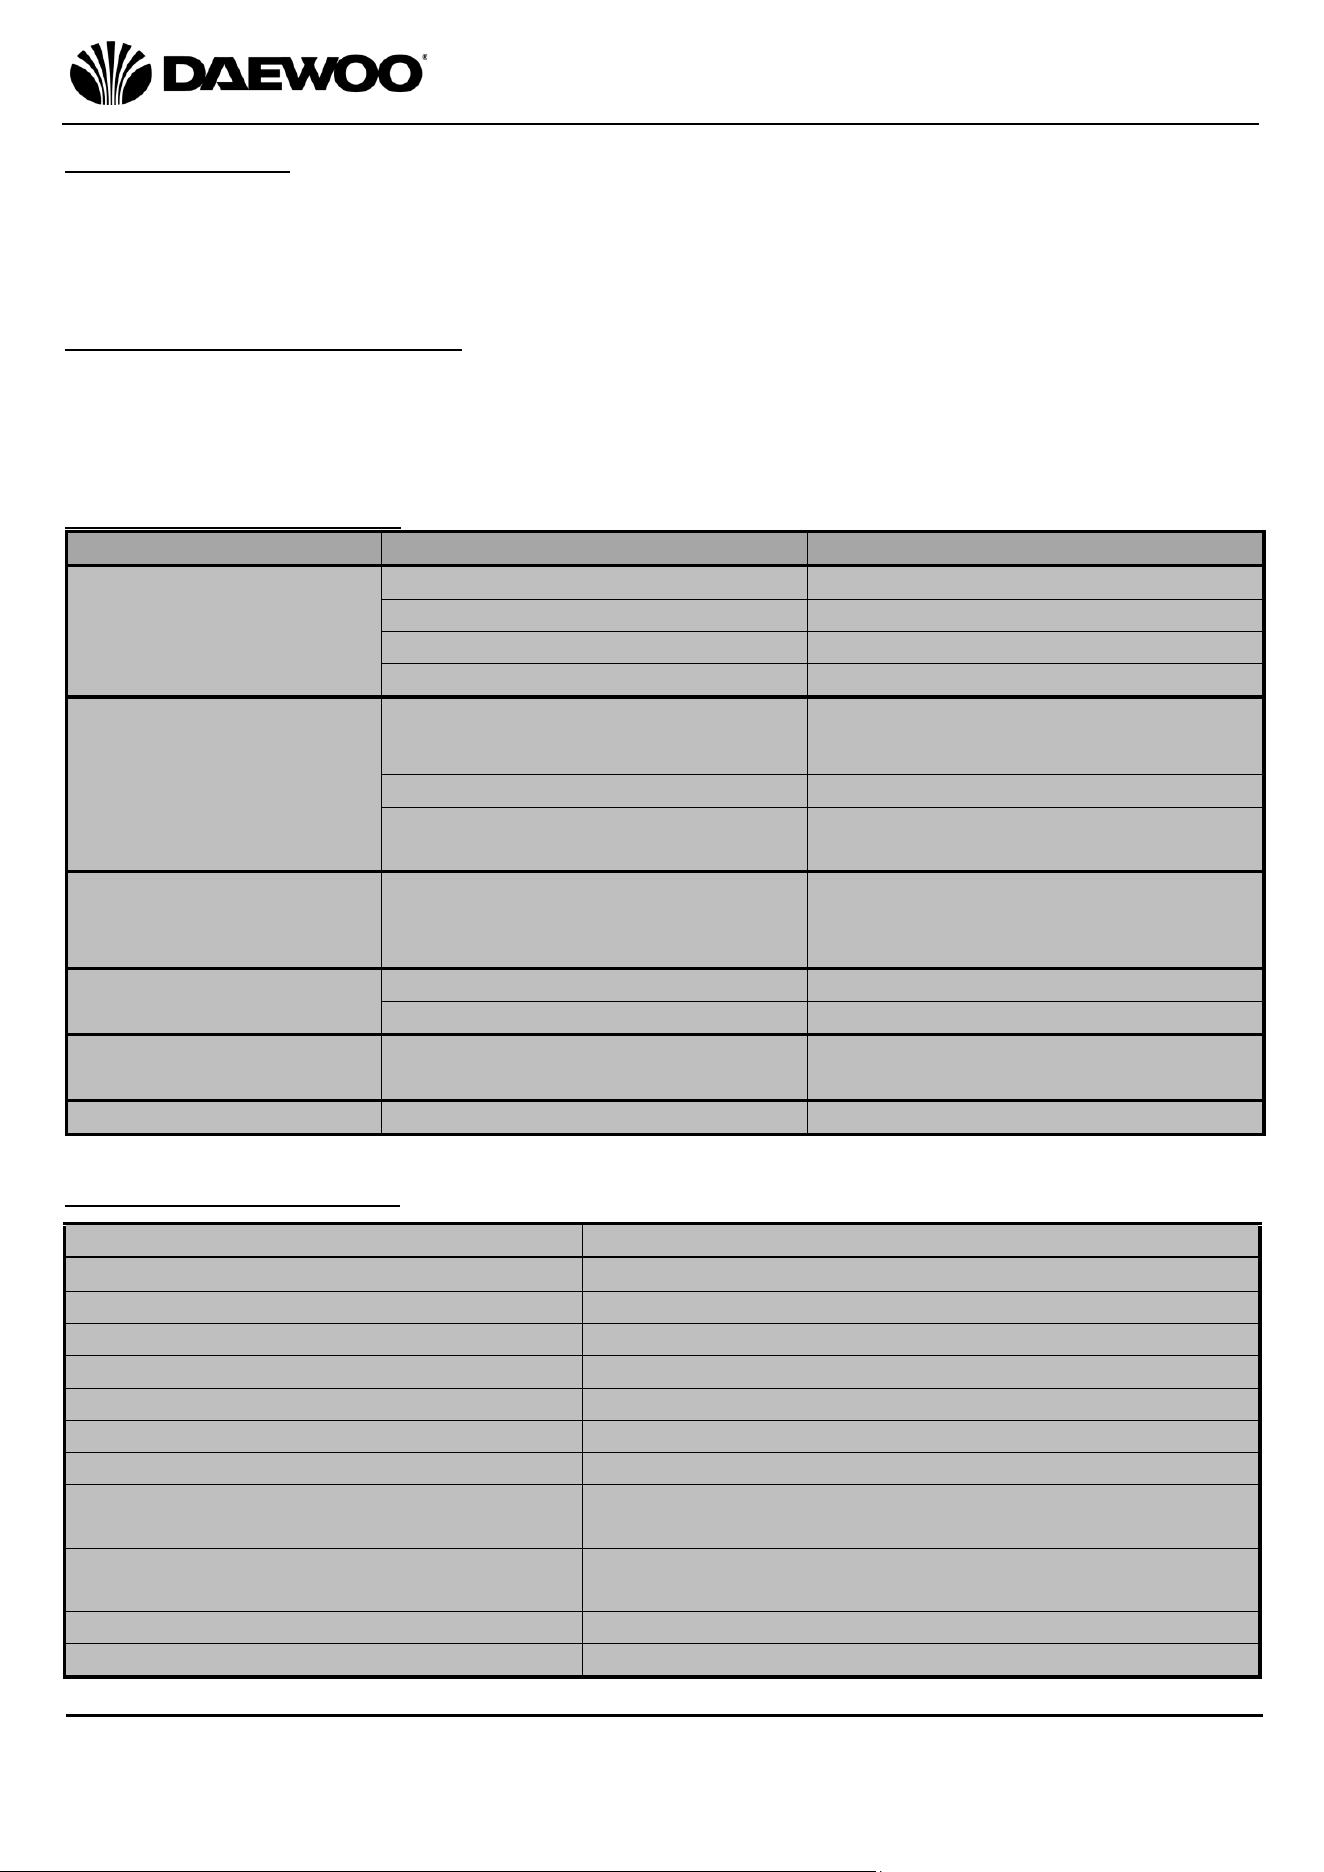
Cleaning the Air Filter
The air filter is located behind the side Air Inlet (1) grille
and will need occasional cleaning. To clean the filter,
remove the filter by pulling the tab, the filter can be
cleaned in lukewarm (40˚C) water with mild detergent. See
image left.
After washing allow the filter to dry naturally, laid flat to
avoid stretching.
Ensure that the filter has thoroughly dried before
refitting it to the unit.
DO NOT use the unit without the filter fitted.
Above: The Water
Tank Drain cover on
the bottom left of the
rear panel (arrowed).
Above: The Air Filter located
on the top left hand side of
the unit (shown partially
removed). To remove, slide
the filter out in the direction
of the arrow.
13
3 in 1 Portable Air Conditioner
Model No. COL1316
User Manual
IMPORTANT – RETAIN THESE INSTRUCTIONS FOR FUTURE REFERENCE
Safety Shut-Off
The unit is fitted with an automatic high temperature shut off device, if the air
inlet or exhaust are blocked the unit will shut down safely.
After clearing the blockage, allow 5 minutes before restarting the unit.
Cleaning and Maintenance
Clean the surface of the unit with a damp cloth and mild detergent.
Excess dust etc. can be removed from grilles and exhaust using the nozzle
attachment of a vacuum cleaner.
Troubleshooting Guide
Problem
Possible Cause
Possible Solution
The unit does not
power up
No power supply
Power on and turn on the unit
Water tank is full
Drain the water tank
Timer function is active
Cancel timer function
Room temperature is too low
Reset temperature on unit
Unit not performing
well
Unit is in direct sunlight
Shade the unit with
curtains/blinds
Filter is dirty
Remove and clean the filter
Air inlet or outlet is blocked
Remove any blockage or debris
from the inlet/outlet
Compressor not
working
Overheat protection device has
operated
Check venting then allow the unit
to cool for 5 minutes before
restarting
Remote control not
working
Operating distance is too far
Move closer to the unit
Batteries are flat
Replace batteries
Unit is noisy
The unit is located on an
uneven surface
Position the unit on a flat level
surface
E2 Code displayed
Water tank full
Drain the water tank
Technical Specification
Model Number
COL1316
Supply Voltage
220-240V~ 50Hz
Rated Power
561W
Rated Current
2.6A
Protection Class
I (This Appliance Must Be Earthed)
Unpacked Weight
15 Kgs (approx.)
Cooling Capacity
5000BTU/h (1420W)
Refrigerant
R290 (100g)
Operating Pressure
Discharge 2.6MPa
Suction 1.0MPa
Maximum Pressure
Discharge 3.2MPa
Suction 1.2MPa
IP Rating
IP20
Sound Power Level
65dB (A)
14
3 in 1 Portable Air Conditioner
Model No. COL1316
User Manual
IMPORTANT – RETAIN THESE INSTRUCTIONS FOR FUTURE REFERENCE
Non-Rewireable Mains Plug
If your appliance is supplied with a non-rewireable plug fitted to the mains lead
and should the fuse needed replacing, you must use an ASTA approved one
(conforming to BS 1362 of the same rating). Never use a plug with the fuse cover
missing. If in doubt, consult a qualified electrician.
If you need to remove the plug -DISCONNECT FROM THE MAINS- and then cut it
off the mains lead and immediately dispose of it safely. Never attempt to reuse
the plug or insert it into a socket outlet as there is a danger of electric shock.
Recycling Information
Disposal of the Packaging
Dispose of paper and cardboard in appropriate paper re-cycling facilities.
Dispose of recyclable plastics in appropriate plastic re-cycling facilities.
Dispose of non-recyclable plastics in the appropriate plastics collection service.
Disposal of the Product
You should now recycle your waste electrical goods and in doing so
help the environment. This symbol means waste electrical products
at the end of their useful life should not be disposed of with normal
household waste and not sent to landfill. Please ensure it is taken to
a suitable facility for disposal. Check with your Local Authority or
retailer for recycling advice or visit www.recycle-more.co.uk enter
your postcode to find out your nearest recycling site.
This symbol means batteries and rechargeable batteries may not
be disposed of with household waste!
As the end user you are required by law to bring all batteries and
rechargeable batteries to a collection point run by the Local
Authority or visit www.recycle-more.co.uk, so that they can be
disposed of in an environmentally friendly manner.
15
3 in 1 Portable Air Conditioner
Model No. COL1316
User Manual
IMPORTANT – RETAIN THESE INSTRUCTIONS FOR FUTURE REFERENCE

16
3 in 1 Portable Air Conditioner
Model No. COL1316
User Manual
IMPORTANT – RETAIN THESE INSTRUCTIONS FOR FUTURE REFERENCE
WARRANTY
Thank you for purchasing your Daewoo product.
As part of our commitment to quality, we are offering you an extra 2 years warranty in
addition to your 1 year guarantee
Your Daewoo product is guaranteed for 1 year from the date of original purchase, with proof
of purchase or receipt. If any defect should occur due to faulty workmanship or material, your
faulty product should be returned to the place of purchase, replacement or refund is at the
discretion of the retailer.
The guarantee is subject to the following provisions:
•
The product must be correctly installed and operated in accordance with the
requirements contained in the instruction manual.
•
The product must be used solely for domestic purposes.
•
It does not cover general wear and tear, damage, misuse or any consumable parts.
•
The guarantee will be rendered invalid if the product is re-sold or has been damaged through
inexpert repair.
•
The guarantee is only valid within the UK and Eire.
Your standard 1 year guarantee will only be extended to the maximum available for your
individual product upon registration. (Note: products must be registered individually and
covers the main body and housing). If you do not register your product within 28 days of the
original purchase date, your product will only be guaranteed for 1 year.
To validate your extended 2 year warranty*please register your purchase online within 28
days of the original purchase date by registering at:
https://help.daewooelectricals.com
or
Contact Us (daewooelectricals.com)
*Your extended warranty is only valid with proof of purchase receipt and subject to the
conditions outlined above.
Daewoo® is a registered trademark.
Produced and imported under license by
Eurosonic Group Limited
Brightgate House
1 Brightgate Way
Manchester M32 0TB UK
EU Rep: EuroSonic Magppie (ESM) Ltd. Ireland D05 X006
www.esgltd.com