SIZE:95mm X 125mm
材质: 封面铜版纸 内页: 书纸
注意:不要随便删减空白页(特别是封面内页不能出现印刷内容)
此页不印刷(本文件共52页)
工艺: 封面过亚膜
PANTONE Black C

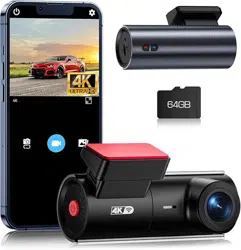
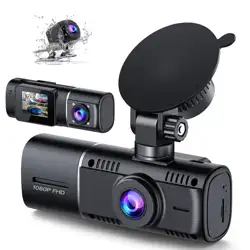
4K+1080P
Dash Camera


Not having a positive experience?
Please contact us by
DC@yooomail.com
We will offer prompt and authoritative reply within 24 hours and
try our best to resolve your problem ASAP.
V20230310

E
Important Notice:
Before using this device, please insert the memory card first,
and need to format micro SD card to FAT32 format on PC firstly,
then format the memory card in camera menu.
●
This product is intended for using in motor vehicles only. Do NOT
install the camera where it might block the driver’s view of road
(including the mirrors) or the deployment of the airbag.
●
For safety reasons, this camera has a small built-in battery,
which is used to save the video file after external power supply
cuts off (car turns off).
●
This camera records video at high resolution. Be sure to use
high speed Micro SD card. Class 10 or above 16 GB or 128 GB
Micro SD card is recommended.
●
Be sure the camera lens is clean and there is nothing blocking
the lens.
●
DO NOT leave the camera in direct sunlight for a long period of
time or where the temperature could go above 170°F(75°C).
●
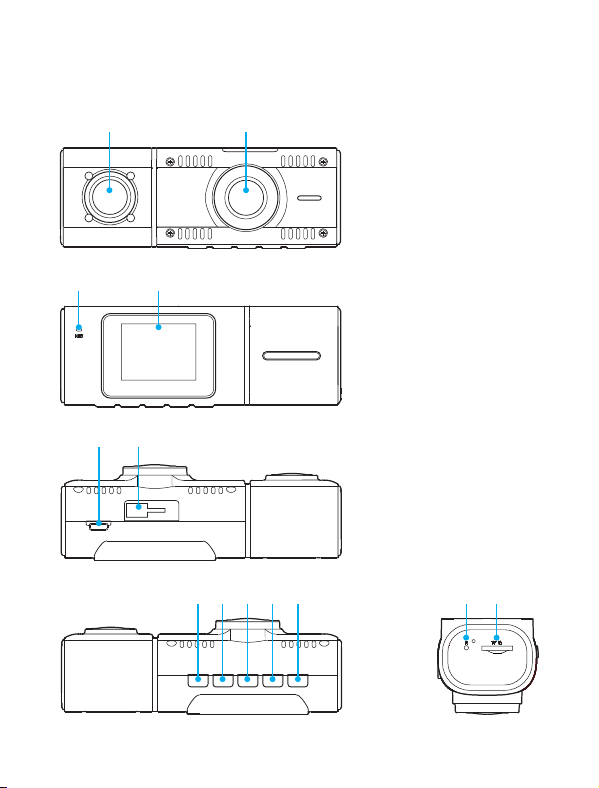
Interface and Button Function
1 2
3 4
5
6
7 8 9 10 11 12
13
1. Inside lens
2. Front Lens
3. MIC
4. Screen
5. Power input
6. Mount Socket
7. Down
8. Menu
9. UP
10. OK
11. Power
12. Reset
13. Memory
Card Slot
·1·

In Standby / Video. Short press to start / stop video recording.
In Setting Menu, short press to confirm selection and
adjustment.
In Playback, short press to select and play recorded files.
Long press the OK button to switch the inside image mirror/
original
In Setting Menu. Short press to select option and adjust values.
In Playback, short press to select media files.
Long press to switch front and inside media files
During video recording, short press to switch front and
inside camera display.
Long press to turn on/off cabin camera IR night vision.
Please press OK button to pause recording firstly,short press to
access the menu settings ,and press twice to access System
Setting Menu.
In standby, Long press to switch mode between Video /
Playback.
In the recording state, short press to lock the video file
In Setting Menu. Short press to select option and adjust
values.
In Playback, short press to select media files.
During video recording, short press to turn ON/OFF
audio recording.
When power off, Press & Hold to turn on the camera.
In any status, Press & Hold to turn off the camera,
Short press to turn on/off screen.
OK
UP
Menu/
Mode
Down
POWER
Button Function:
·2·

2.Use the suction cup mount to install the dash cam on
the windshield. The recommended location is near the rearview
mirror facing front, adjust the lens angle for best coverage.
1. Before installation, please check the camera's normal function,
and make sure you are using a high speed U3 Micro SD card ,
and format the card in the camera menu before recording.
3. Adjust the lens angle of the camera, make sure you get the
best coverage over the hood and the road ahead, so you can
record what happens.
4. Connect the power to the camera and the cigarette lighter,
hide the rest of the cable in the gap of the interior trim board.
Set up and Installation:
·3·

The camera operates in 2 modes: Video Recording Mode, and
Playback Mode. These modes also have menu to help you
configure recording. Long press menu button to switch between
different modes and access to the mode you want. Watch the
icon on top left corner of the screen for each mode.
The camera will automatically enter Video Recording Mode and
start recording when connected to a car charger and power on.
A Red dot flashing on the top left corner indicates recording is in
progress. Press the OK to stop recording, or start recording again.
1
1.Video Mode Icon
2.Recording status icon
3.WDR
4.Recording Time
5.Resolution
6.Infrared night vision Icon
7.Memory Card Status
8.Power Status
9.Time
10.Date
11.Audio Status
12.G-Sensor
13.Parking Monitor
14.Loop Recording
Operating Mode:
Video Recording Mode:
2
4
5
6
7
8
91011
12
13
14
3
·4·
In all 2 operating mode, you can press the Menu button once to
access the menu settings for that particular mode, and press
twice to display System Setting Menu.
The System Setting Menu is common to all modes, See page
10 to page 11.
.
Press UP and DOWN to scroll through the various setting
options and press OK to select and confirm selection, Press
MENU again to exit the setting menu.
Exposure
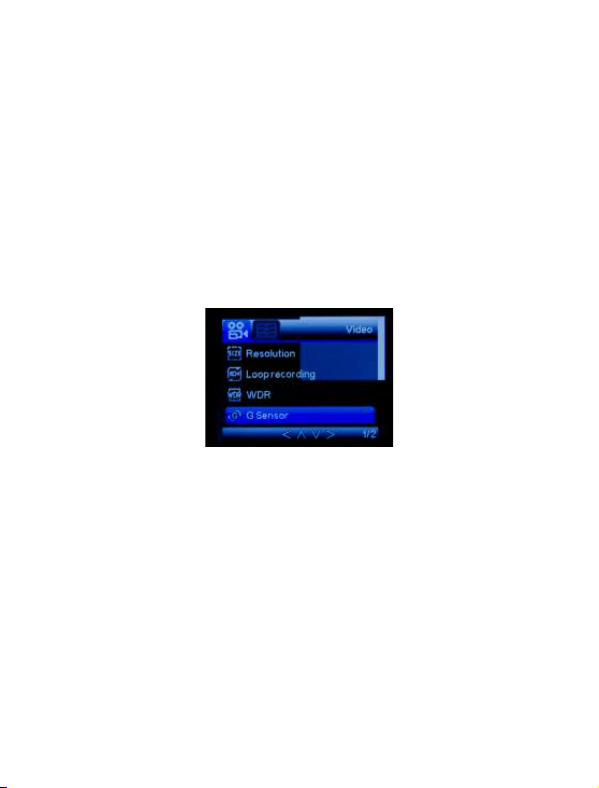
Resolution: Adjust front lens recording video resolution
4K/2K/1080P.
Loop Recording: This function allows you to set video length
to 1/3 minutes, Select a value to activate loop recording, so
when storage is full, it will automatically loop back to the earliest
file and record over it.
WDR: Turn on to optimize video quality with
wider light range and image details.
Video Recording Menu:
·5·

G-Sensor: G-sensor will detect significant or sudden shock
and movement, then automatically locks current file from loop
recording. Low/medium/High sensitivity are available.
Parking Monitor: It’s used to protect your car after parking.
With this function on, after you stop the car and the camera
turns off, it stays standby. When camera detects shock and
collision, it will automatically turn on and take a short video, then
shut down automatically.
Record Audio: Turn ON/OFF audio recording in video.
Date Stamp: Enable/Disable the date and time marks in
video files.
·6·

This mode allows you to play back recorded video or view photos.
1. Stop video recording, long press MENU button to enter
playback mode.
2. Use UP and DOWN button to scroll through the recorded files/
photos, and press OK to view recorded video.
After choosing a recorded video or photo, press the Menu button
once to access the setting menu for Playback Mode.
Delete: Delete the current file displayed or delete all files.
Protection: Lock/Unlock the current file displayed or Lock/
Unlock all files.
Slideshow: Select a time gap to activate this function, and all
recorded file will be displayed in slide show.
Playback Mode:
Playback Menu:
De lete
Pr otec tio n
Sl ides how
·7·
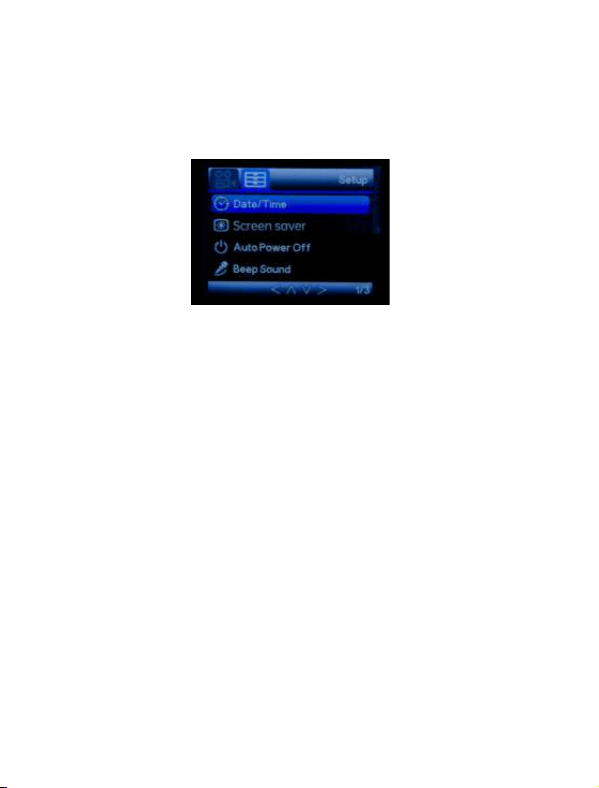
Press MENU button twice to access System Setting Menu in
any mode. The TOOL icon is highlighted in the upper left corner.
Date/Time:Change the time and date by using the UP and
DOWN button, then press OK to confirm changes, press MENU
button again to exit time setup.
Screen saver:Set the time to automatically turn off the LCD display
after no operation.
Auto Power Off:Set the time for the camera to automatically
power off to save power. The camera will automatically power
off when it is standby under the setting time.
Beep Sound:Turn on/off sound when you press any button.
Language:English/German/French/Spanish/Chinese/Japanese
System Setting Menu:
·8·
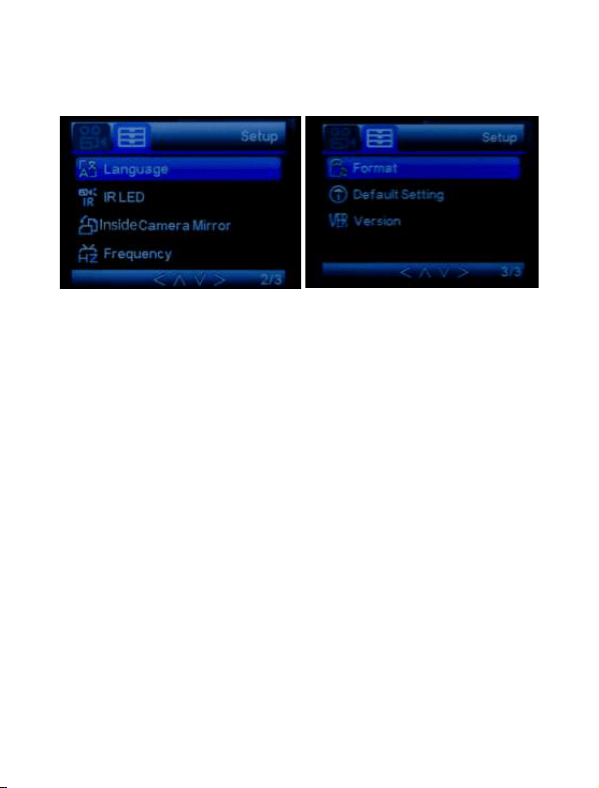
IR LED:Setup the IR LED lamp working mode, Always ON/off or
Auto,in Auto mode, the IR LEDs will light when the ambient light is
too dark.
Inside Camer Mirror:Switch the image of the inside camera
to: mirror/original
Frequency:Set frequency to 50Hz or 60Hz according to local
regulation.
Format:Format the Micro SD card.
Default setting:Reset all settings back to factory default.
Version:Check firmware version.
·9·

Image Sensor
Screen
Lens
Video Resolution
Video Format
Video Coding
Video Mode
Loop Recording
Power on recording
WDR
G-Sensor Lock
Language
Audio Recording
Storage
Operating System
Internal Power
External power
supply
High Resolution CMOS Sensor
1.5 inch LCD Display
170° High-Resolution Wide Angle Lens
Front: 3840x2160P Inside: 1920*1080P
Mp4
H.264
Normal / Loop Record
Supported
Supported
Supported
Supported
English/German/French/Spanish/Chinese/
Japanese
Built-in microphone, On / Off optional
Micro SD Card (up to 128GB)
Windows 7/10 or MAC
Built-in Li-ion Battery
DC 5V / 2A
Specification :
·10·

Storage temperature
Operating
temperature
-20°C~60°C
-10°C~50°C
Common Problems and Solutions:
When press the menu button, why it's not display the menu
of the system?
Please press OK button to pause recording firstly.
Q:
A:
The SD card gets full and it doesn’t overwrite?
Please check whether all video files are locked and cannot
be overwritten, please format micro SD card and adjust
sensitivity of G-sensor.
Q:
A:
Even though set the screen saver, but the screen will randomly
The power supply might not be stable, please change another
car charger to try.
Q:
A:
Suction mount cannot attach on windshield well?
1. Please clean the windscreen where attaching with a glass
cleaning wipe. Removed the protective film, If it does not
work, warming your windscreen then try it again.
2. Please soak suction mount to warm water for a moment.
If it is still not working, we are glad to send a new suction 3.
mount to you, please contact us to get a replacement.
Q:
A:
·11·

The dash cam will stop automatically while recording.
1. Check whether the memory is full.
2. Check whether the loop recording function is turned ON.
3. Check whether the Micro SD card is high-speed above C10
4. Check the memory card, there might be too many locked video
that the loop recording won’t work right.
5. Check the car charger connection status, if the connection is
loose, the power supply is not stable, the camera will
automatically turn off.
Q:
A:
T he camera keeps starting and off
That could be the parking monitor function being triggered,
check the setup menu.
Q:
A:
Why dash cam drain car battery?
Please check whether the cigarette lighter still be on after you
turn off car engine.
Q:
A:
There are stripes interference in the image.
That should be wrong light frequency. According to the local
regulation, choose the appropriate frequency settings
50HZ or 6 0HZ.
Q:
A:
If the video played on the computer is somehow not fluent or
jammed.
1. Try to play the video with different video players, like : Potplayer
or VLCplayer.
2. Format your Micro SD card in the camera.
3. Run speed test on the memory card to make sure the memory
card fits the requirement: Write Speed is over 10MB/S.
Q:
A:
·12·

Without external power supply, the camera only lasts very short
time,or it just can’t turn on.
The built-in battery is low capacity for safety reasons, and the
battery is used to save the video and parking monitor only. It is
not designed to work without external power supply.
A:
·13·