
Loading ...
Loading ...
Loading ...
14
REPLACING THE TRIMMING LINE
Only use the trimming line described in the Specifications section.
Other types of trimming line may cause the unit to overheat or fail.
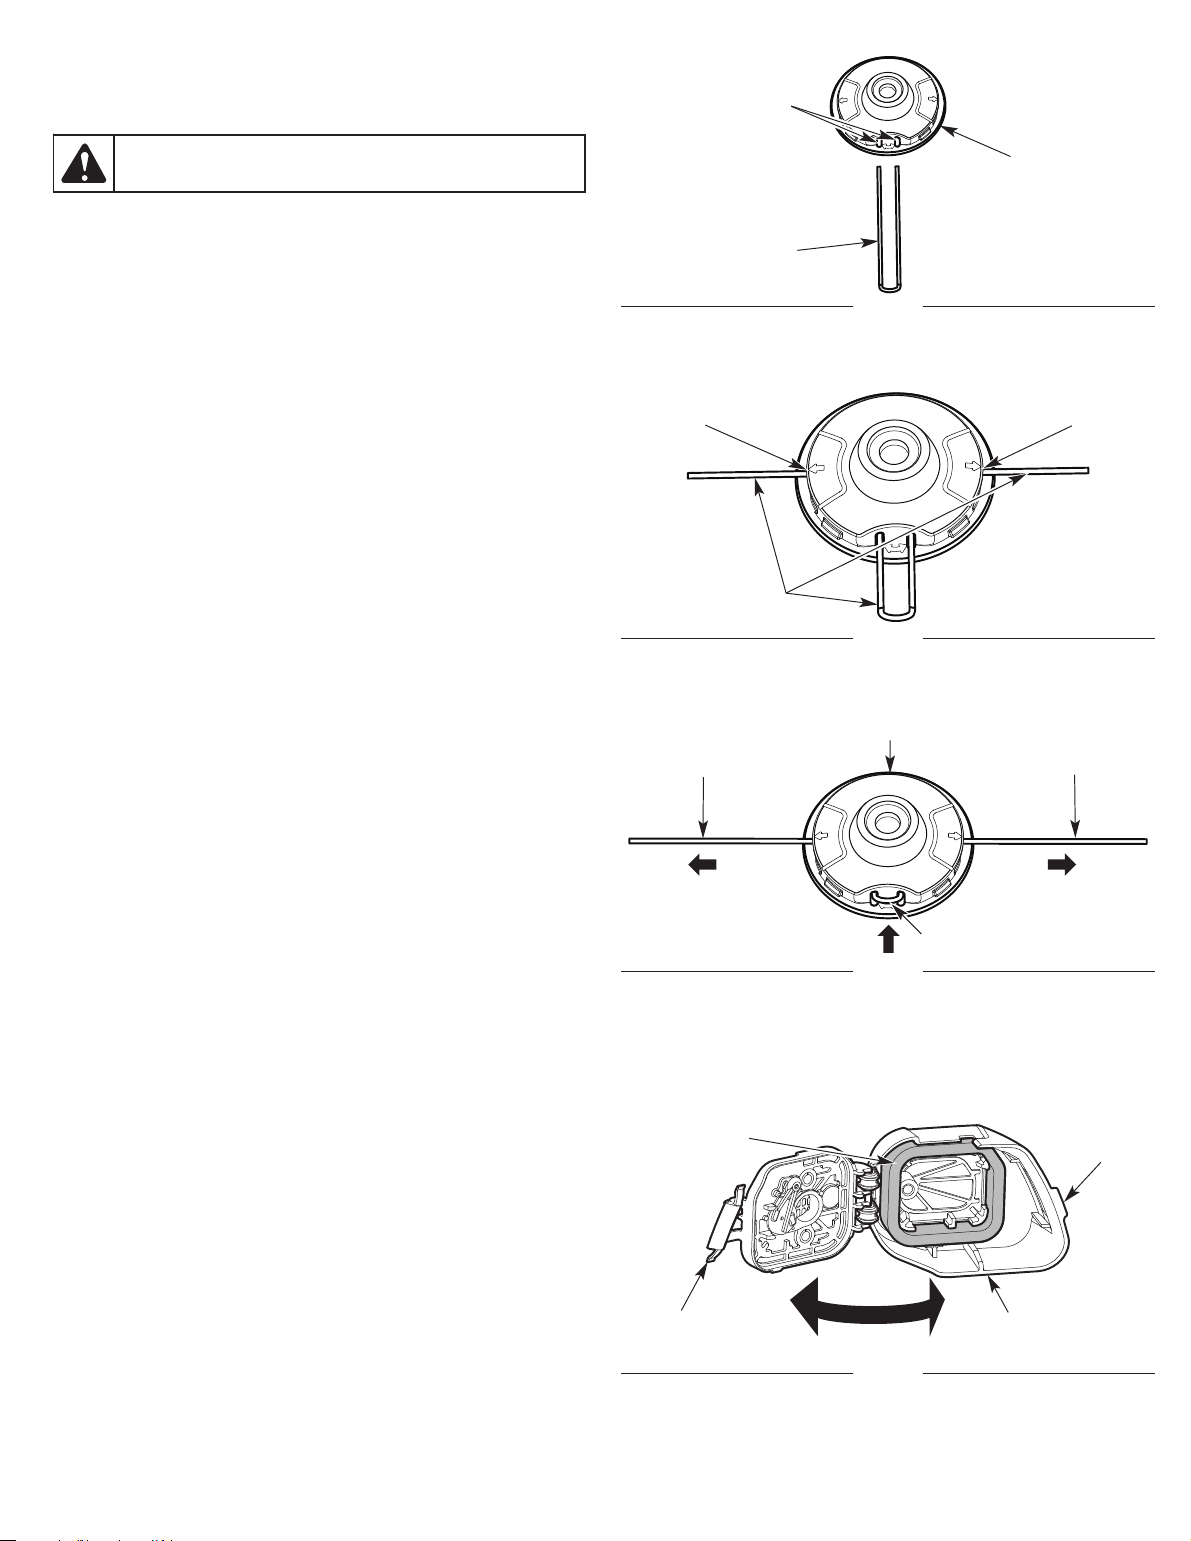
1. Remove the old line from the cutting head. Push one end of the
trimming line into the cutting head until a loop of line protrudes
from the head. Pull the loop to remove the line.
2. Use a clean cloth to clean the surface of the cutting head.
3. Insert the ends of the new trimming line into the holes in the
cutting head (Fig. 16). Push the line through the holes until both
ends protrude from the positioning tunnels (Fig. 17).
4. Pull the ends of the line until the line is tight against the cutting
head. Make sure the ends of the line are of equal length (Fig. 18).
If one end is longer than the other, push the longer end back
through the cutting head partway and pull the shorter end out. If
necessary, repeat this process until both ends are of equal length.
5. Press the exposed loop of trimming line until it is tight against
the cutting head (Fig. 18).
WARNING:
Never use metal-reinforced line, wire, chain or
rope. These can break off and become dangerous projectiles.
Fig. 16
Fig. 17
Line
Holes
Cutting Head
Positioning
Tunnel
Positioning
Tunnel
Line
Fig. 18
Line
Line
Cutting Head
Loop
MAINTAINING THE AIR FILTER
Failure to maintain the air filter can result in poor performance or
can cause permanent damage to the engine. Engine failure due to
improper air filter maintenance is not covered by the product warranty.
Cleaning the Air Filter
1. Open the air filter cover: Hook your fingers behind the cover tab.
To unlock the air filter cover, pull it to the left and away from the
engine. This may require a firm pull. Swing the air filter cover to
the right (Fig. 19).
2. Remove the air filter from inside the air filter cover (Fig. 19).
3. Wash the air filter in detergent and water. Rinse the air filter
thoroughly and allow it to dry.
4. Lightly coat the air filter with clean SAE 30 oil.
5. Squeeze the air filter to spread and remove excess oil.
6. Reinstall the air filter inside the air filter cover (Fig. 19).
NOTE: Operating the unit without the air filter and air filter cover will
VOID the warranty.
7. Close the air filter cover: swing the air filter cover to the left and
press it closed until the lock tab snaps into place (Fig. 19).
Fig. 19
Air Filter
Air Filter Cover
Lock Tab
Cover Tab
Loading ...
Loading ...
Loading ...