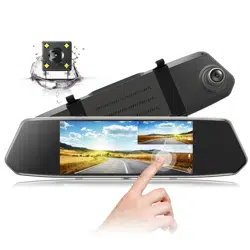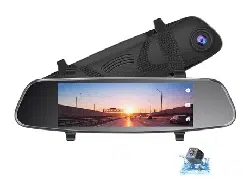
TOUCH SCREEN STREAMING
VIDEO REAR VIEW MIRROR
RM03


20220118
If you have any other questions or problems,Please feel free to
contact us at
We have professional team at your service, and your satisfaction is
guaranteed.
DC@yooomail.com


1
This product is intended for use in motor vehicle only.Do NOT
install the device where it might block the driver’s view of road
(including the mirrors) or the deployment of the airbag.
Before using this device, please insert the memory card first, and
need to format micro SD card to FAT32 format on PC firstly, then
format the memory card in camera menu.
This device records video at high resolution, Be sure to use high
speed memory card, Class 10 or above is recommended, 16GB or
128GB cards are recommended.
We do recommend doing a benchmark test and make sure the
unit is working perfectly before installing the unit on your vehicle.
Be sure the lens is clean and there is nothing blocking the lens.
Make sure you are using the original included power adapter to
power the unit.
DO NOT leave the device in direct sunlight for a long period of time
or where the temperature could go above 170°F(75°C).
The GPS function has to workwith the customized GPSmodule,
please download "GXplayer". (Please contact the seller for details.)
NOTICE : Due to the high power consumption of this
unit, it should always be connected to an external
power supply. This unit will not power on without
external power supply.
Important Notice:
2
Installation Guide
1. Before installation, please insert a high speed memory card in the
unit and format the memory card in the unit setting, also do a
simple test to make sure the unit is working perfectly.
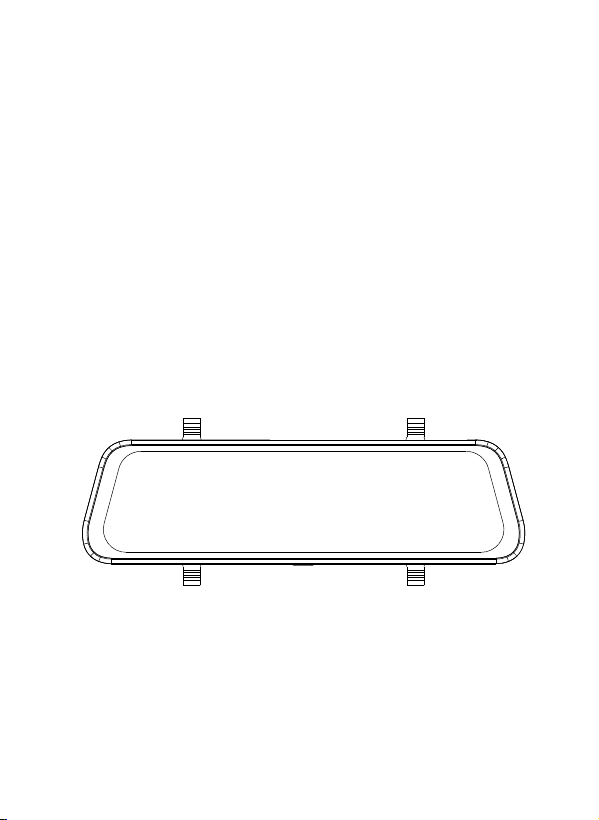
2. Mount the mirror over the original rearview mirror and use the
included rubber ring to fix it. Make sure the mirror is in the right
place and secured.
3. Adjust the mirror angle according to your driving position, make
sure the mirror is right in place and the view is clear.
4. Adjust the angle of the lens.Make sure you get best coverage
over the hood and the road ahead, so you can record what
happens.
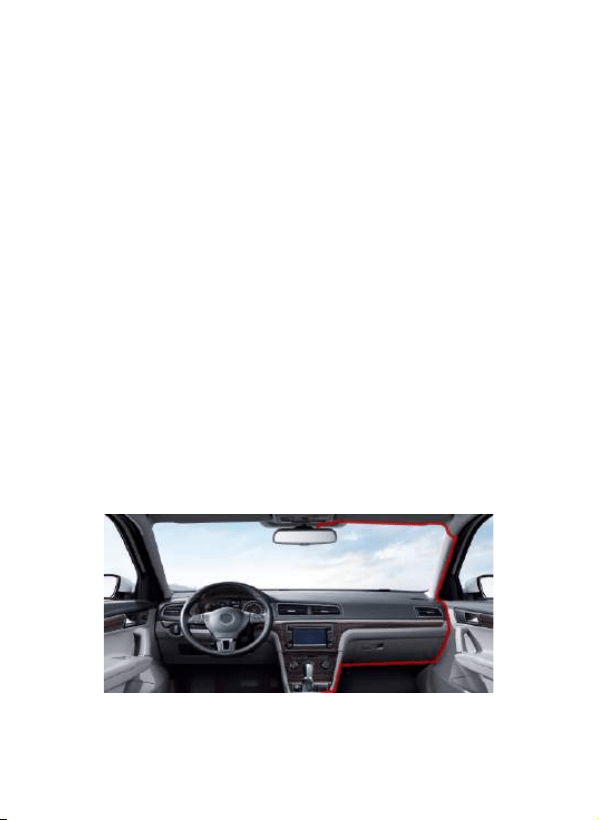
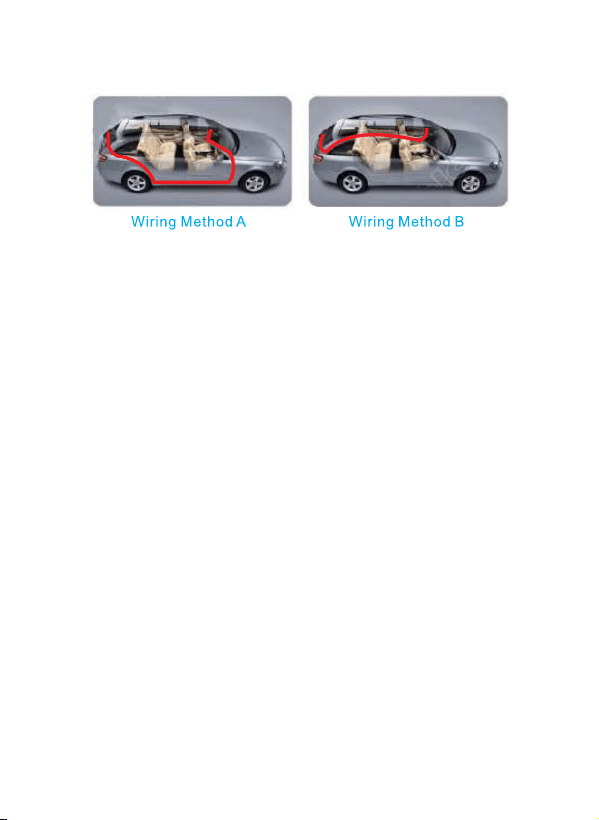
5. Connect the power adapter to the mirror and the cigarette
lighter, then route the power cable along the interior trim board,
you can route it as indicated below, and hide the excess cable in
the gaps for good looking.
3
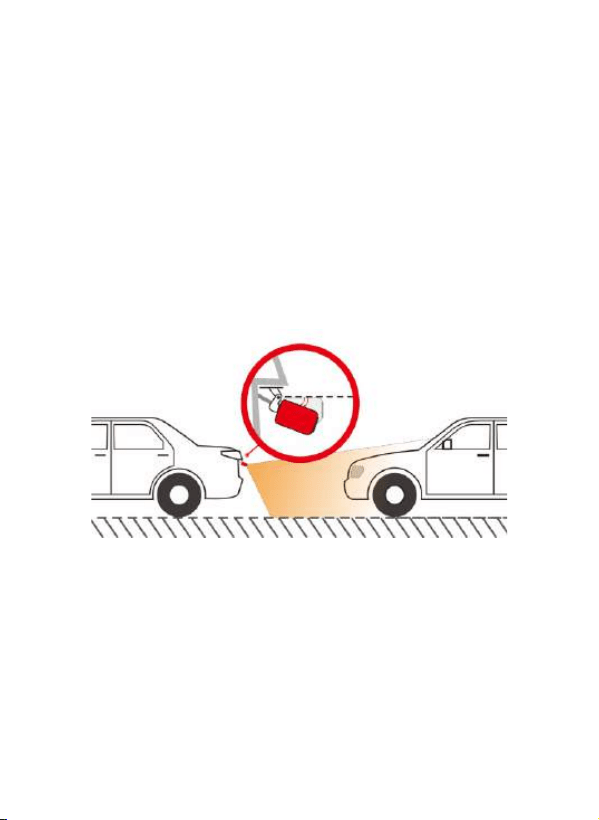
6. The rearview camera should be installed at the rear end of the
car, normally the best place is above the number plate. The
camera can be fixed with the sticker or the screw. You can see
the diagram for reference.
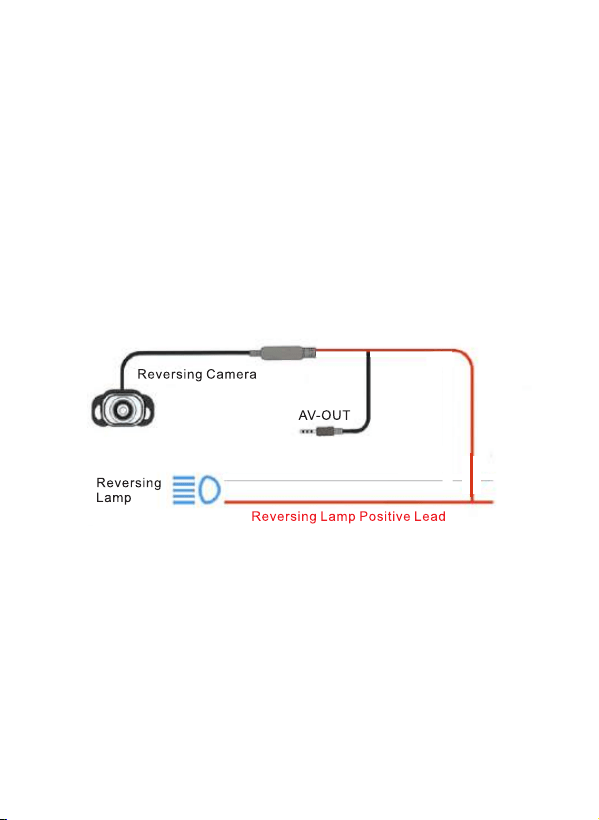
7.T he excess RED lead near the rear view camera is used for
reverse status sensing. Connect the RED cable to the positive
lead of the reverse lamp power.
( Please check whether the backup camera is installed Note:
upside down before you install screws.)
8. Route the backup camera cable to the front of the car and
connect it to the main unit. There are 2 pictures for reference.
( Holes might need to be drilled to pass the cable NOTICE:
and please check whether the cable for backup camera is
long for your car before you install it.)
4
9. After the installation is completed, please start the engine and
have a test run, make sure all functions are working.
NOTICE: The wiring and the installation requires certain
hand work and some professional electrician skills, if you
are not sure about it, please get some professional help.
5
Adjust the reversing camera angle, the best angle is the the
camera can cover the rear of the car and the ground surface
under the rear end.
Notice:
When the car is in reverse, the rear camera will
automatically display in full screen, and turn to the lowest
angle, so you can see the ground surface under the rear
end while reversing.
Adjust the Reversing Camera
6
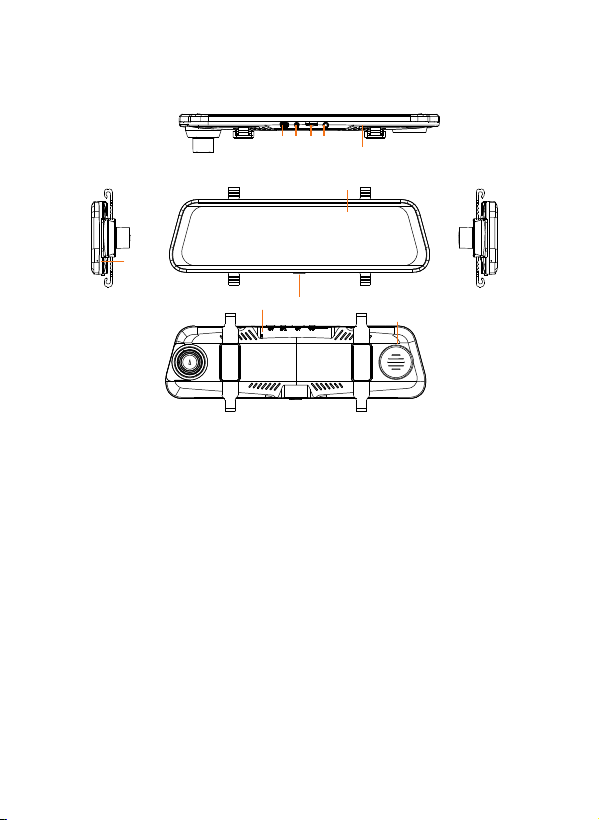
Interface and Button Functions
1 2 34
5
6
7
8
109
1. Power interface(mini USB)
2. Av-in rear camera interface、
3. Micro SD card slot
4.3 .5mm middle camera interface
5.F ixing strap hook
6. IPS HD display
7.M ic recording hole
8.P ower key (long press for 5seconds to restart)
9.E ngineering upgrade hole
10.H orn
1. It will automatically stop recording and save the recorded video file.
2. 2.5mm AV-in rear camera interface: connect the standard
2.5mm4 section headphone base rear camera extension cable.

7
3. Micro SD card slot: insert the micro SD card and the video files
will be stored on the micro SD card. Use of memory card: please
determine the insertion direction of micro SD card. If the insertion
direction is incorrect, the machine and the micro SD card may be
damaged: please use a high micro SD card conforming to
SDHC specification. For this product, please use an authentic
micro SD card marked above class10. Support 8 ~ 128G.
4. Middle 3.5mm camera interface: connected to middle camera.
5. Fixing strap hook: it is used to fix the rear view mirror to the
original rear view mirror and cooperate with the strap.
6. IPS HD display screen: display the camera preview image.
Note that the protective film is pasted at the factory.
Please remove it when using.
7. Recording hole: there is a recording microphone in this hole,
which is used for recording during video recording
8. Power key (long press for 10 seconds to restart)
A. On/ off function In the shutdown state, press and hold the
power key for 3 seconds to turn on the power of the machine.
In the power on state, press and hold the power key for 3
seconds, and the machine will automatically save video files and
shut down;
B. Turn off the display backlight In any state, short press the power
key to sleep, turn off the backlight, and short press the power
key again to light up.
9. Engineering upgrade hole: used to upgrade the system.
10. Loudspeaker: the key tone of operating the machine and the
sound of playing back the video file of the recorder.
8
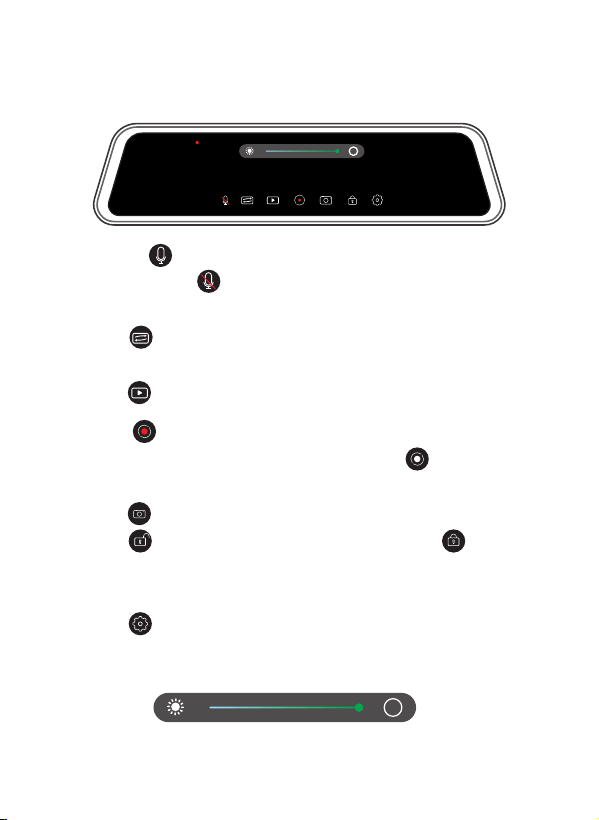
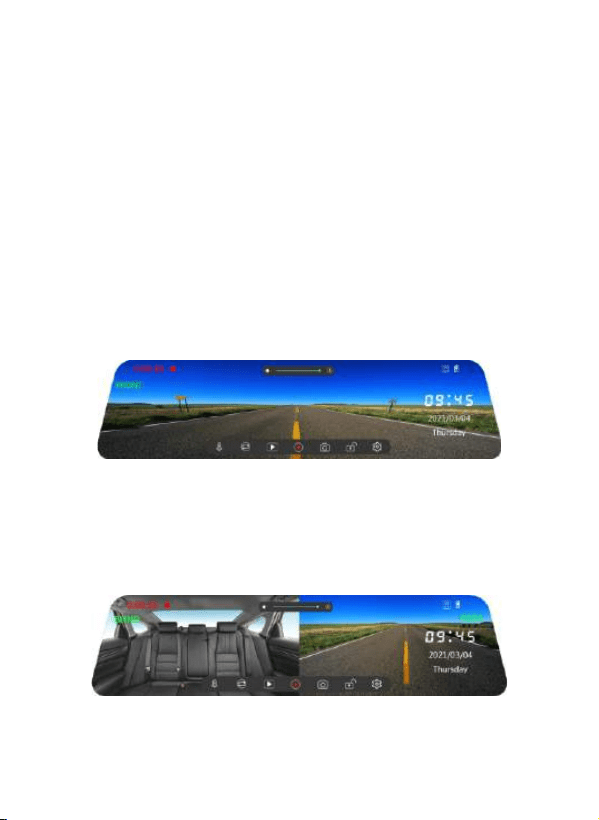
Main interface
A.Clicking indicates that there is sound in the video recording,
and the red slash in the recording icon indicates that the video
recording is silent.
B.Click to switch the preview imaqes of front, rear and middle
cameras, or slide the screen left and right to switch.
C.Click on the video playback.
D.Click a small red dot to indicate that the video has been
recorded, and no small red dot turns into a white dot to stop
the video.
E.Click the photo icon capture the photo.
F.Click the icon indicating that the video is unlocked
indicating that the video has been locked, and the recording time
will change from red to yellow.
G.Click to enter the setting-related functions.
H.Slide the brightness bar to adjust the brightness of the screen
backlight.
A
00:01:05
00:45
2021/03/04
Thursday
A
9
Main interface
Slide the screen left and right or click the switch button to switch
the front camera preview picture, the middle + rear camera
preview picture displayed on the same screen, the rear camera
preview picture, the middle + rear + front camera preview picture
displayed on the same screen, and the four preview pictures can
be switched in a cycle.
1.Front camera preview screen. Dragging the screen up and down
under the front camer preview screen can adjust the display range
of the camera screen on the screen, and the adjustment screen
will not affect the actual picture range of video recording.
2. The middle road + rear camera preview screen is displayed on
the same screen.

10
3.The rear camera preview screen. Dragging the screen up and
down under the rear camera preview screen can adjust the
display range of the camera screen on the screen. The
adjustment.screen does not affect the actual picture range of
video recording.
4.The middle road + rear camera + front camera preview screen
is displayed on the same screen.
Video playback
You can view video sand pictures recorded before and after.Click
the preview interface to lock,play,delete and other related
functions.
11
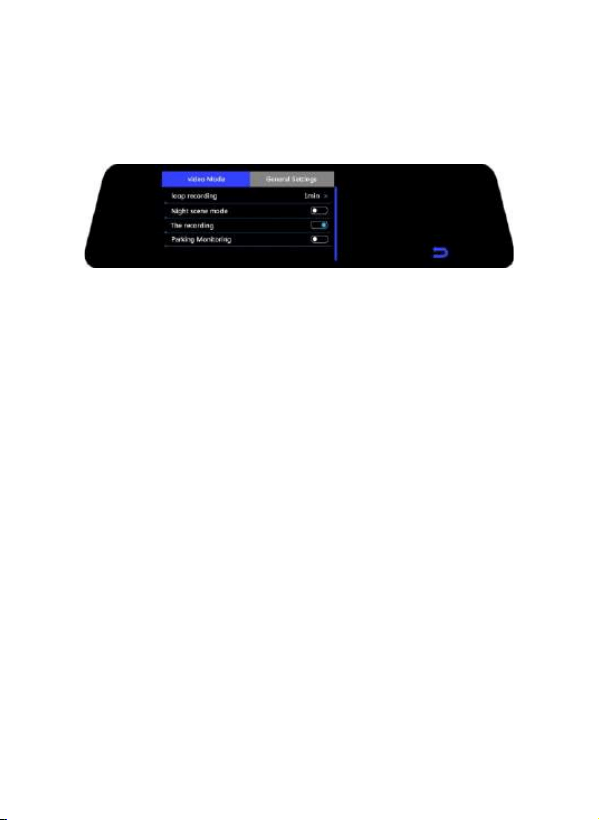
Setup
You cannot enter the setting when recording. You can only enter
when recording is stopped do.
Video mode:
Loop recording:
set the duration of video segmentation: 1 minute, 3 minutes and
5 minutes. It is 1 minute by default
Night scene mode:
the user can turn on or off to change the number of frames of the
video according to the incoming brightness at night, so as to make
the brightness of the video and screen display reach the effect of
starlight level. It is turned off by default.
The recording:
video recording switch, which can turn on and off the video
recording function.It is turned off by default.
Parking monitoring:
turn on the parking mode in the menu. When the recorder is
turned off, it is vibrated. The recorder can sense it according to
G-sensor, automatically start the machine and record for 30
seconds, and then turn it off. When the parking mode is not
turned on, the recorder will not start when it is vibrated (This file
will be locked. and the locked image will be saved as a special file,
which will not be overwritten.) Off by default.

12
General settings:
Clicking sound:
the user can run on or off the key feedback tone, which is turned
on by default.
Volume:
you can set the driving record on-off sound and key tone of
operation, and select relevant, high, medium and low, which is
medium by default.
Language:
the user can select the language as required. The machine
supports simplified Chinese, English, traditional Chinese, Japanese, etc.
Flicker:
set the corresponding flicker frequency according to different light
source frequencies, including 50 Hz and 60 Hz. The default is 60 Hz.
LCD Auto shuts down:
1 minute. 1 minute. 3 minutes and 5 minutes can be set. It is closed
by default.
Gravity induction:
the machine has a built-in collision sensor (G-sensor). In case of
serious vehicle collision. the recorder will lock the current image
data at the time of the accident, and the unlock icon at the bottom
of the display screen will automatically change to lock; The
locked image will be saved as a special file, which will not be
overwritten circularly.
Rear mirror:
off by default. If on is selected, the rear preview is the original
image. Note: it should be a mirror image when reversing.

13
Middle mirror:
turns on or off the middle route preview image. It is off by default..
Clock settings:
the user can click Reset to set it. [note] in order to effectively
record the date and time of obtaining evidence of driving safety
accidents, please set the correct time immediately before using
the machine.
Date format:
date display formats include mm/ DD /yyyy, mm/ DD /yyyy and mm /
DD/yyyy.The default format is mm/DD/yyyy.
Time format:
you can select the time system of 12 hours and 24 hours. The
default is 24hours.
Reset default setting:
clicking restore factory settings will prompt whether to restore
factory settings, confirm and cancel.
Format TF - Card:
with this option, you can format the micro SD card and back up
important data regularly. Formatting the micro SD card will
delete all files in the micro SD card and cannot be recovered.
Please operate carefully and make a backup. Please format the
micro SD card regularly. If it is used for a long time, the recorder
will stop recording because the locked file will not record circularly,
resulting in an insufficient capacity of the recorder. It is recommended
to format once every 1-2 weeks
FW version:
you can view the information related to the system version number.

14
Specification:
Screen Display
Screen Resolution
Lens
Video Resolution
Video Format
Video Encode
Image Format
Loop Recording
Parking Monitor
G-Sensor Lock
Microphone
Speaker
Storage
Operating Temperature
Storage Temperature
Operation Humidity
Power Supply
Modell Rm03
10 inch (9.66 inch)
1280 * 320
Front and Rear Wide Angle Lens
Front: 1920*1080P Rear: 1280 * 720P
Middle :1280 * 720P
TS
H.264
JPG
Built-in
Built-in
Built-in
Built-in
Built-in
Micro SD Card Up to 128GB (NOT included )
-20~60℃
-30~70℃
15~85%RH
DC 5V / 2.5A

15
Common Problem and Solution
Recorder shows memory full, unable to loop video, etc.
The device will automatically turn on or turn off.
1. First, when a new memory card is used for the first time on the
machine. Please format the memory card to FAT32 format on PC
then format it in the camera.Or the memory card is previously
used on another type of device,it needs to be formatted when
used on this camera.Or change another new SANDISK 32G
Micro SD CARD.
2. Check the sensitivity of G-sensor, If the sensitivity is too high,the
bumping and shaking of the camera will trigger the G-sensor,and
the file will be locked. Locked files cannot be overwritten.If the
lock file is accumulated, there will be no memory card to loop
record. When parking monitoring is turned on, shaking will also
cause too many stray files, which will also affect the reading and
writing of cards.)
1.Please format the memory card to FAT32 format on PC then
format it in the camera.
2. Please check whether the parking monitoring function is on.With
parking monitor on, the device will automatically turn on and
record when it detects a collision or shaking.
3. Check the car charger connection status, if the connection is
loose, the power supply is not stable, the camera will automatically
turn on and off.

16
Screen operation or button reaction is slow during
recording
1. Please check whether the memory card used is a high-speed
card(Class10), If you use a non-high-speed card, problems such
as missed seconds, video playback jams, screen display Colorful
stripes, and crashes may occur.
2. Reset the camera if necessary.
Change in the setting menus won’t save.
1. After change settings, please manually press the Power button
to shut down, and the device settings will be saved.
2. When the device is abnormally powered off, the unit might not
save the settings.
3. When the battery is too low, the customized settings might be
lost.
The rear camera does not display image
1. Please switch the camera display mode to double check the rear
camera status.
2. Please check if the AV plug is properly connected and the cable
is plugged in correctly.
3. Try to disconnect the camera and clean the connector with some
Medical alcohol connect it again.
Even though set the screen saver, but the screen will
randomly come back on.
The power supply might not be stable, please change another car
charger to try.

17

18

19