
IMPORTANT SAFEGUARDS
When using electrical appliances, basic safety precautions should
always be followed. These instructions should be saved for future
reference:
Keep the appliance at least 100cm (1.0m) from walls and any other
combustible materials including clothing, curtains, furniture, etc.
Read and familiarise yourself with all operating instructions before
using this Halogen Heater.
Before plugging your unit into the mains, visually check that the unit is
intact and has not suffered any transit damage.
WARNING: In order to avoid overheating, do not cover the
heater.
Do not install the appliance directly below an electrical socket.
Do not use this heater with a programmer, timer, separate remote-
control system or any other device that switches the heater on
automatically, since a fire risk exists if the heater is covered or
positioned incorrectly.
Do not use this heater with an extension cable.
Check that the voltage indicated on the data plate corresponds with
that of the local network before connecting the appliance to the mains
power supply.
Close supervision is required when using this appliance near children.
Never leave this appliance within reach of children.
This appliance can be used by children aged from 8 years and above
and persons with reduced physical, sensory or mental capabilities or
lack of experience and knowledge if they have been given supervision
or instruction concerning use of the appliance in a safe way and
understand the hazards involved. Children shall not play with the
appliance. Cleaning and user maintenance shall not be made by
children without supervision.
Children of less than 3 years should be kept away unless
continuously supervised.
Children aged from 3 years and less than 8 years shall only switch
on/off the appliance provided that it has been placed or installed in its
intended normal operating position and they have been given
supervision or instruction concerning use of the appliance in a safe
way and understand the hazards involved. Children aged from 3
years and less than 8 years shall not plug in, regulate and clean the
appliance or perform user maintenance.
WARNING: This heater is not equipped with a device to
control the room temperature. Do not use this heater in small rooms
when they are occupied by persons not capable of leaving the room
on their own, unless constant supervision is provided.
CAUTION — some parts of this product can become very
hot and cause burns. Particular attention has to be given where
children and vulnerable people are present.
Do not use this heater in the immediate surroundings of a bath, a
shower or a swimming pool.
Do not immerse the appliance or its cord in water or any other liquids.
Do not leave the appliance unattended during use.
Do not leave the appliance unattended whilst connected to the mains
supply.
Always use this appliance on a solid, level, non-flammable surface.
Do not use this appliance outdoors.
It is imperative to unplug the power cord after the appliance has been
used, before it is cleaned and whilst being repaired.
Repairs to electrical appliances should only be performed by a
qualified electrician. Improper repairs may place user at serious risk.
Do not operate this appliance with a damaged plug or cord, after a
malfunction or after being dropped or damaged in any way.
Regular, periodic checks should be carried out on the mains cable to
ensure no damage is evident. Should there be any signs of damage
the appliance should not be used.
If the power cable is damaged, it should only be replaced by the
manufacturer or a suitable qualified after-sales-service in order to
avoid a hazard
Do not allow the mains cable to hang over sharp edges or come in
contact with hot surfaces.
Do not run the mains cable under carpets, rugs, etc.
Allow the unit to cool before storage.
Before cleaning, disconnect the appliance from the mains supply and
allow to cool.
Never place the appliance near to flammable material or high
pressure containers. (e.g., Paper, wood, petrol, solvents, spray
canisters etc.)
This appliance is intended for household use only and should not be
used for industrial purposes.
Do not use any accessories or attachments with this appliance other
than those supplied or recommended by supplier.
Do not use this appliance for anything other than its intended use.
Do not push objects into any openings as damage to the appliance
and/or electric shock may occur.
Ensure appliance is situated in an open area, do not allow it to come
in contact with Cupboards, Curtains, wall coverings, clothing or other
flammable materials.
The appliance should not be installed in areas which have a fire-risk,
such as garages, stables or wooden sheds; this is applicable also for
rooms in which highly inflammable gasses or dust can develop.
Danger of fire!!
Unplug after each use. Grasp the plug, not the cord.
THIS APPLIANCE MUST BE EARTHED
NB During the first few minutes of initial use, you may notice a
slight odour and a little smoke. This is normal and will quickly
disappear, It is the coating applied to the heating elements to
prevent any corrosion during transit.
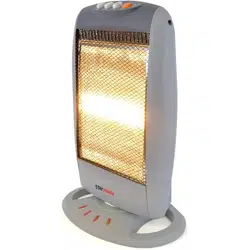
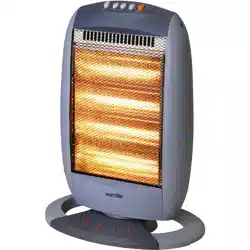
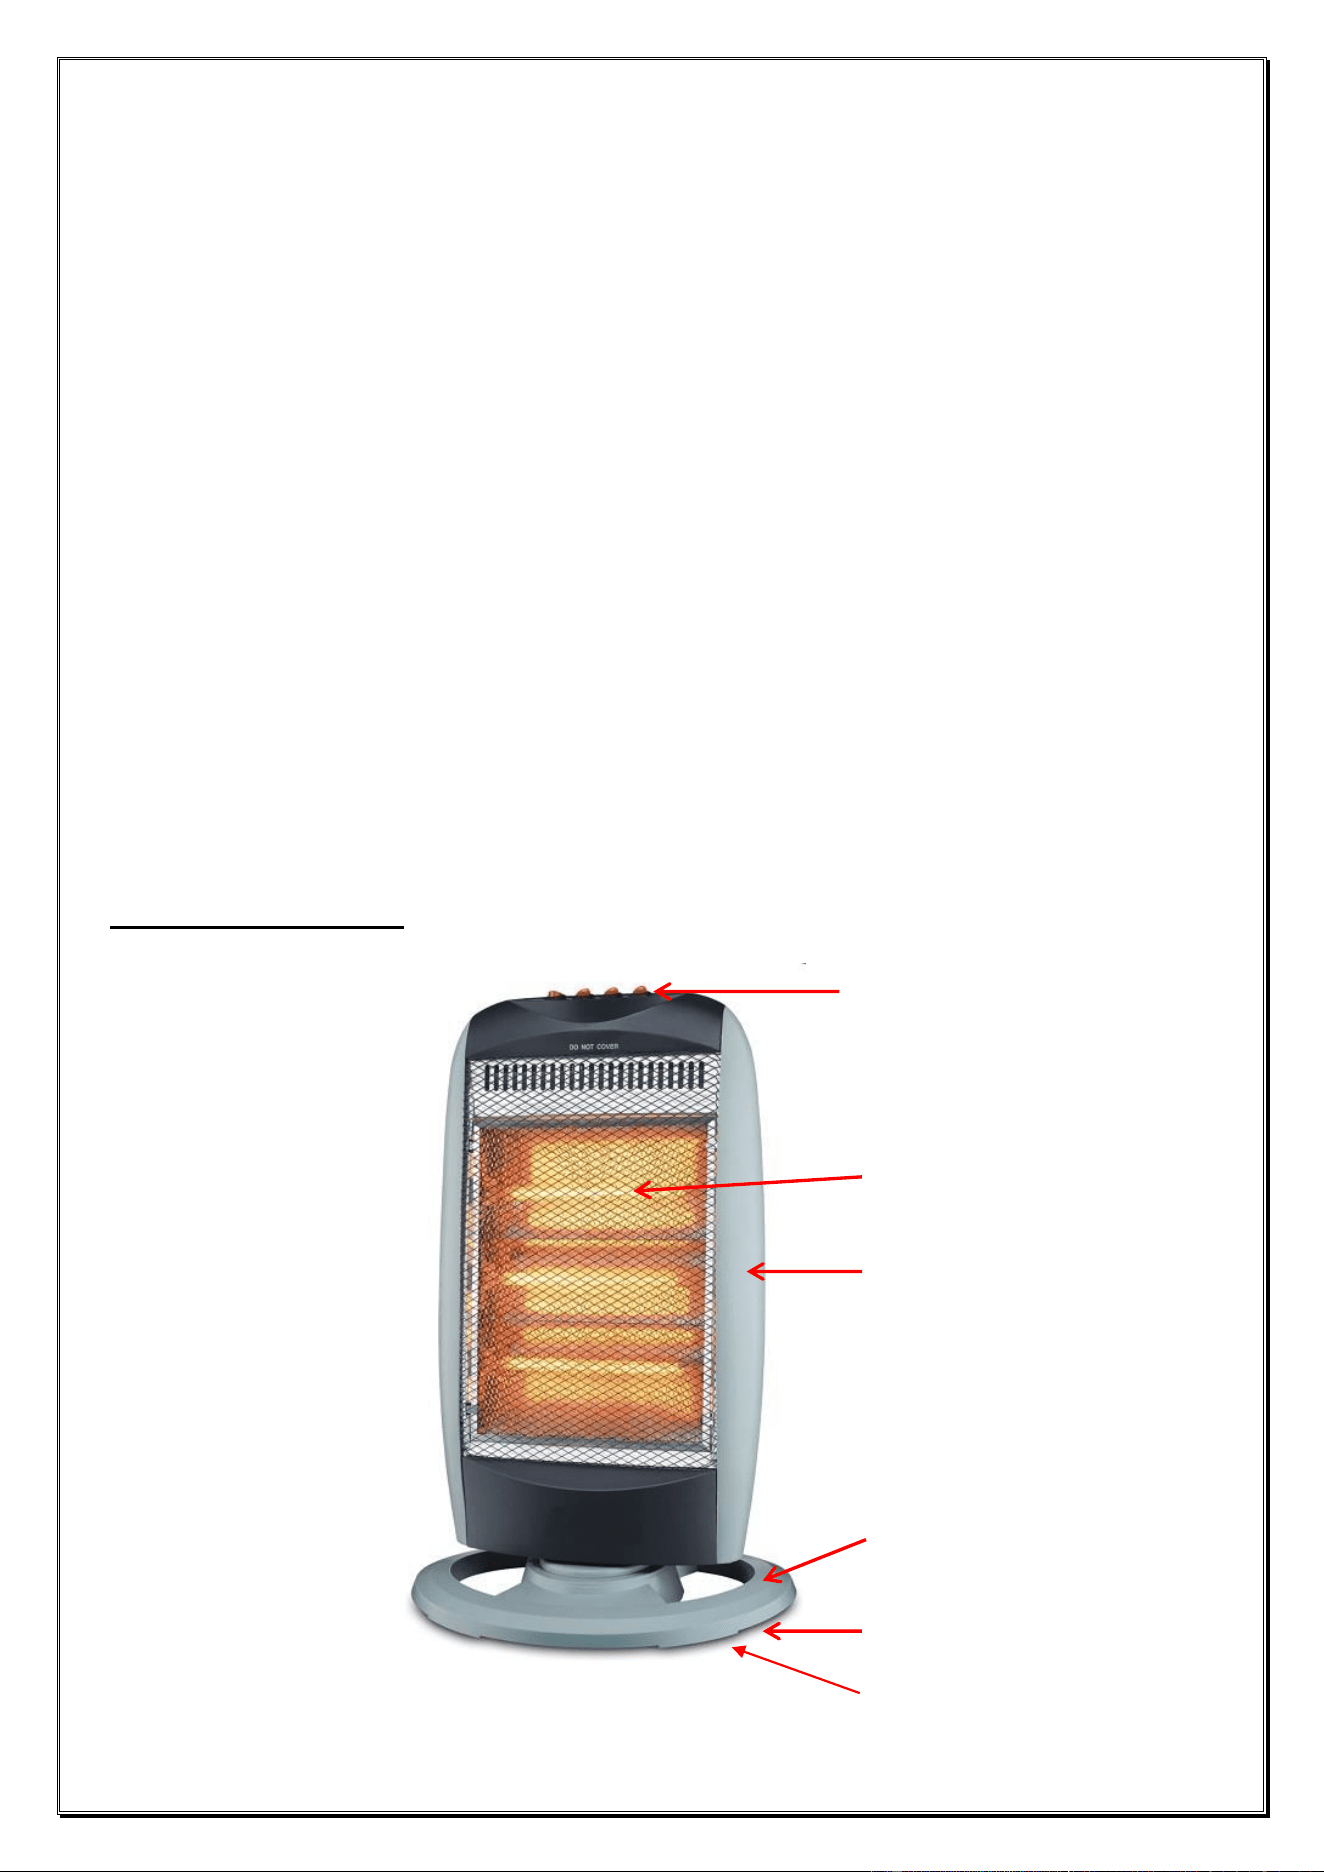
Description of parts
Control Switches
Halogen Tube
Heater Body
Base
Plastic Headed Fixing
Screws (underside)
Anti-Tilt Switch (underside)
Before the first time you use your Halogen Heater
Please read these operating instructions thoroughly and keep them in
a safe place for future reference.
Remove all packing materials and discard responsibly.
Ensure that the two plastic headed fixing screws are present.
Assembling your Halogen Heater
Attach the base of the heater to the main body as follows:
Remove the two plastic headed fixing screws from the baseplate of
the heater.
Thread the power cord through the hole in the middle of the base and
then attach the base to the baseplate using the two plastic headed
fixing screws.
Clip the mains cable into the cord grip on the underside of the base
and feed it through the slot in the rear edge.
Operating Instructions
NB This heater is fitted with a safety tilt switch. The heater will not
operate if placed on an uneven surface or a soft/fluffy carpet.
Place the heater on a solid, level non-flammable surface.
Ensure that all the control switches are in the off (O) position.
Insert the mains plug into the mains socket.
Press the power switch (I) to power up the heater and select the low
heat setting (400w - one tube).
For the medium heat setting (800w – two tubes) press second switch
(I) in from the right (leaving the power switch pressed).
For the full high heat setting (1200w – three tubes) press the third
switch (I) in from the right (leaving the first two pressed).
Press the power switch (O) to switch off the heater.
Oscillation Mode
Press the left hand switch (I) to enable the heater to oscillate from left
to right to disperse heat over a larger area.
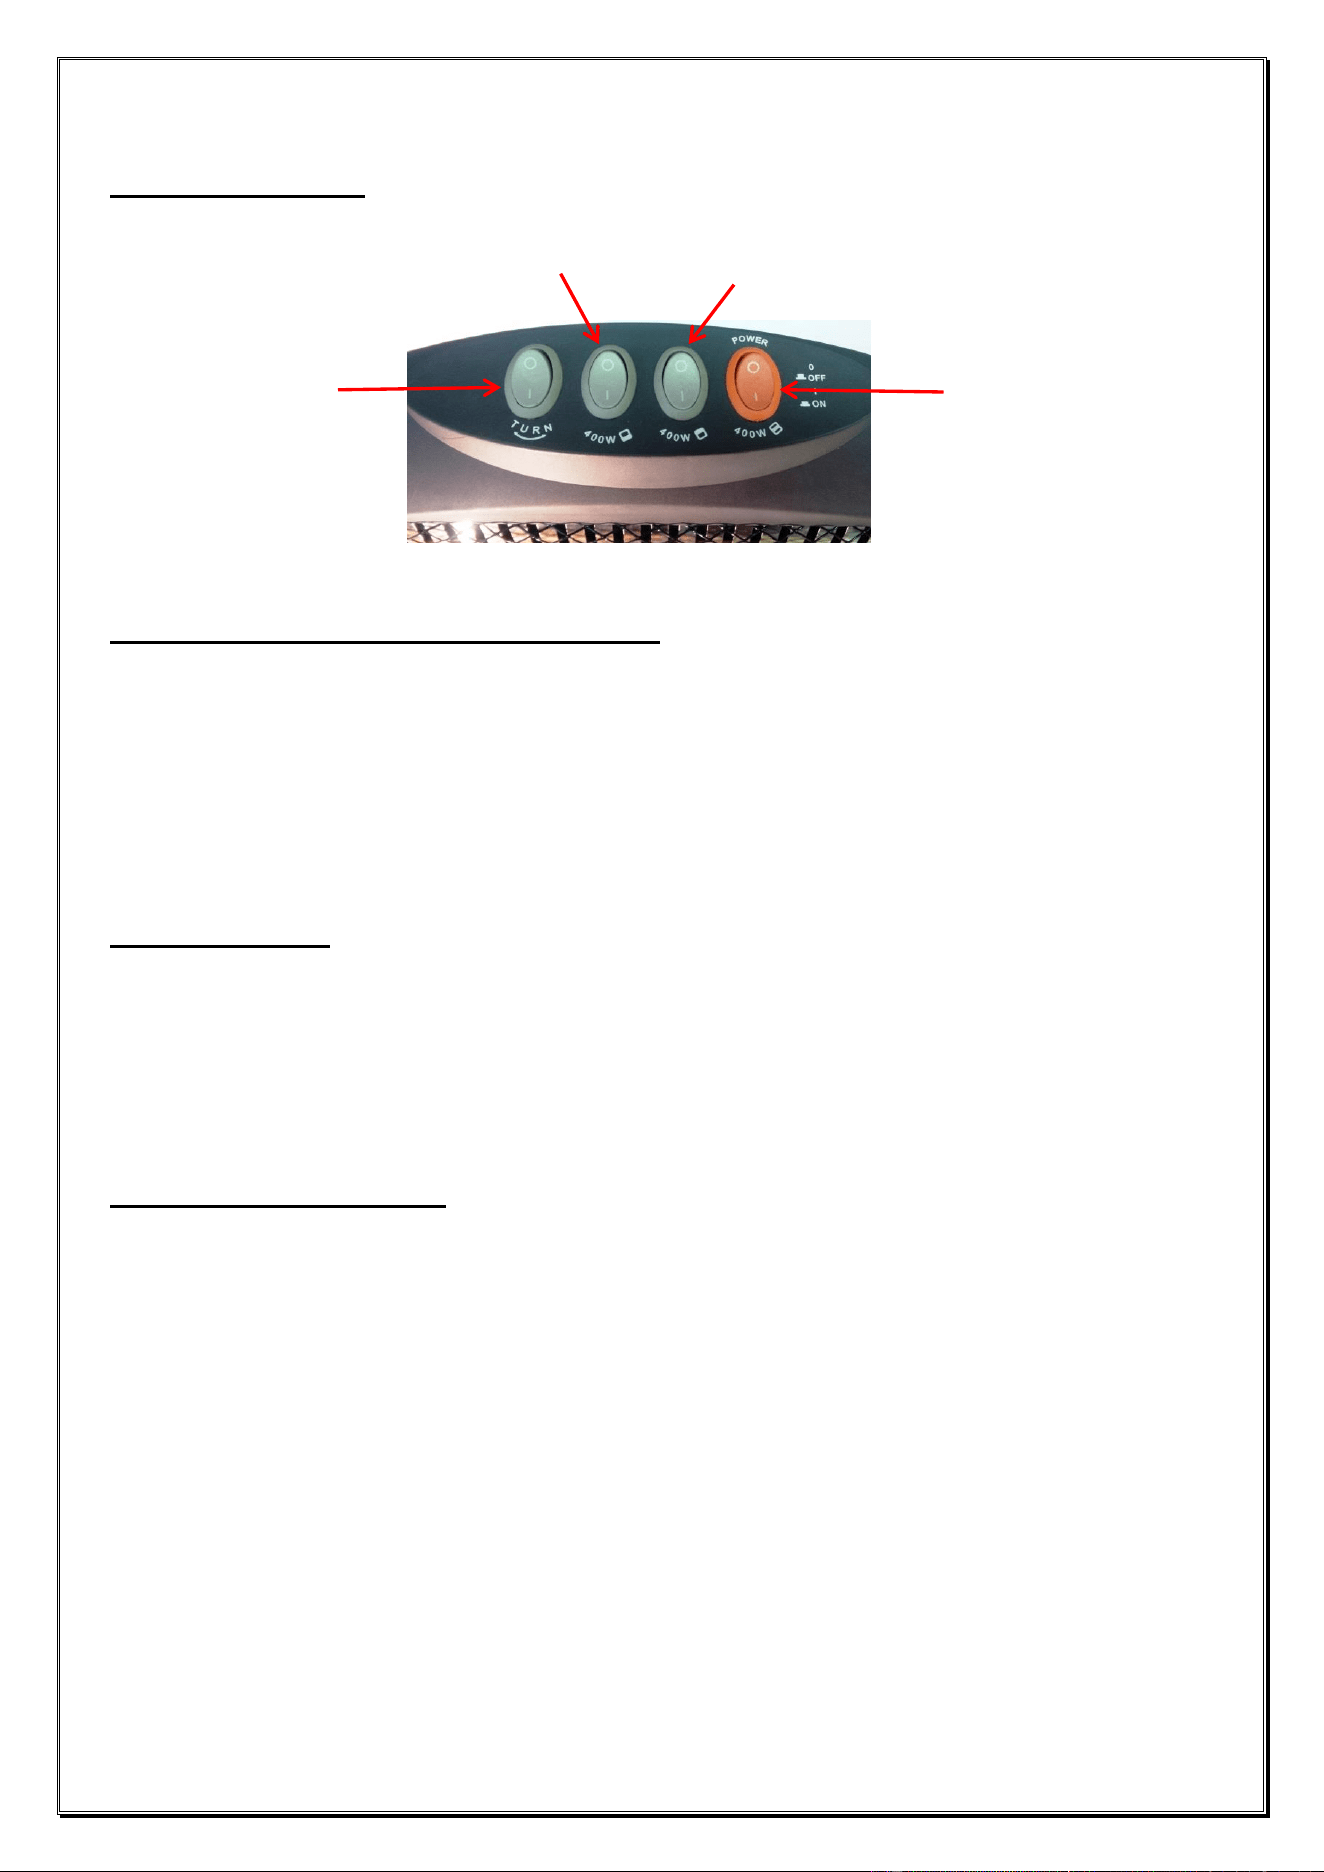
Control Switches
Care and Use of your Halogen Heater
Always disconnect the halogen heater from the mains power supply
and allow to cool before cleaning.
Clean outside of the halogen heater with a clean damp cloth. Never
clean with harsh or abrasive cleaners.
Do not submerge any part of halogen heater in water or any other
liquids.
Technical Data
Voltage : 220-240V ~ 50Hz
Rated power : 1200 W (400+400+400W)
Model Number : HEA1131
Electrical Connections
This appliance is fitted with a fused three-pin plug to BS 1363. If the
plug has to be removed, it should be cut off and carefully disposed of
immediately. To avoid a possible shock hazard, do not insert the
discarded plug into a mains socket.
Press this switch to
power up the heater
and select the low
heat setting
Press this switch to
enable oscillation mode
Press this switch for
the medium heat
setting
Press this switch for
the high heat setting
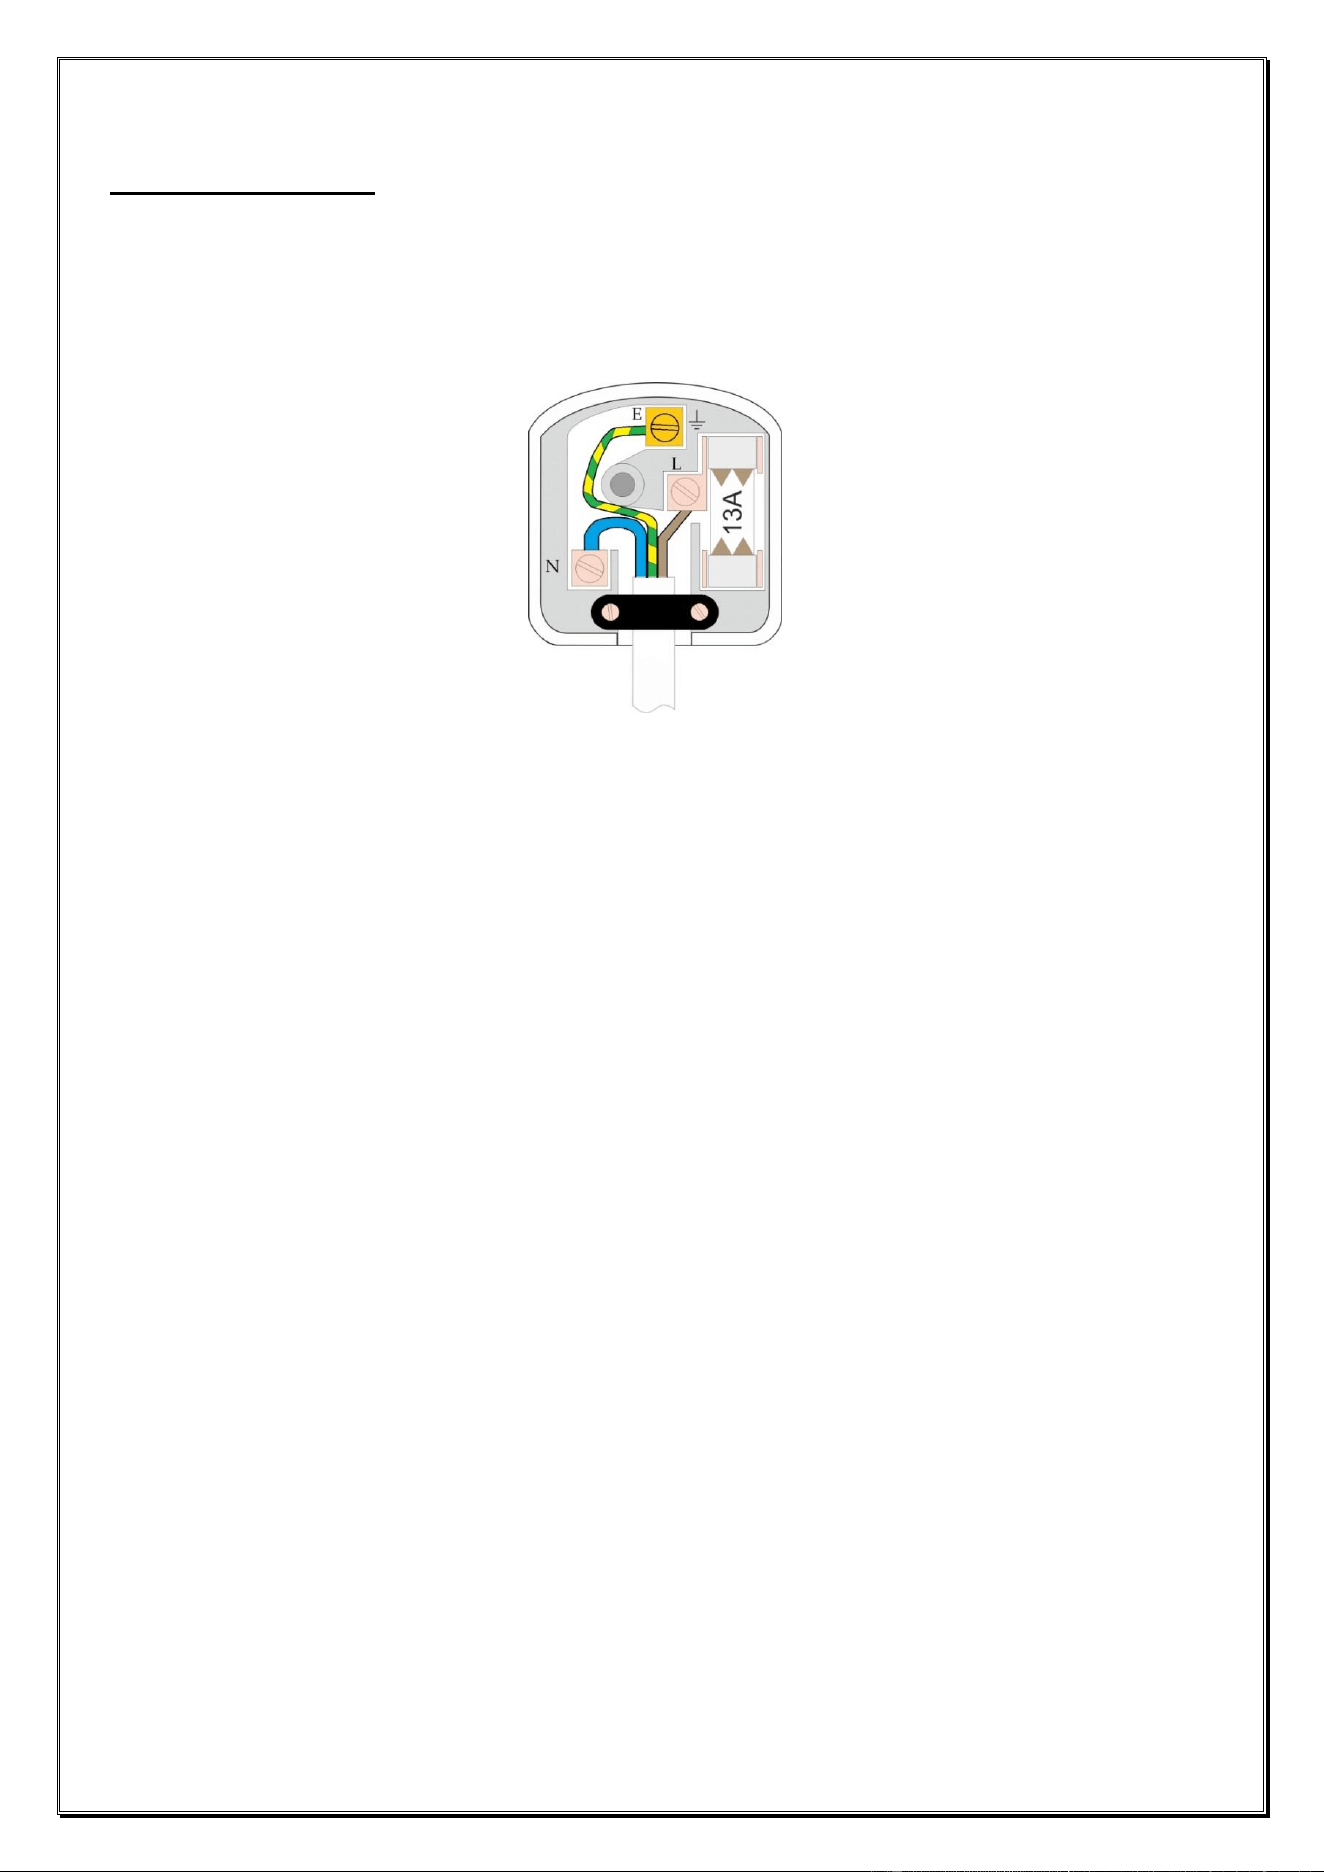
Fitting a new plug
The mains lead must be connected as shown below. The wires are coloured
with the following code - Brown wire = Live (L), Blue wire = Neutral (N), Green
& Yellow = Earth (E).
The Blue wire must be connected to the terminal marked N or coloured Black.
The Brown wire must be connected to the terminal marked L or coloured Red.
The Green and Yellow wire must be connected to the terminal marked E or
coloured Green.
Check that there are no cut or stray strands of wire inside the plug.
Use a 13 Amp BS 1362 fuse, only use BSI or ASTA approved fuses.
If you are in any way unsure which plug or fuse to use, always refer to a
qualified electrician.
After replacing or changing a fuse on a moulded plug, the cover must be
refitted to the plug; the appliance must not be used without a fuse cover.
WARNING: Do not wrap the cord around the heater for storage
Connect
Blue to
Neutral
(N)
Ensure the outer sheath of the mains
lead is securely held by the cable clamp
Connect
Brown to
Live (L)
Connect
Green &
Yellow to
Earth (E)
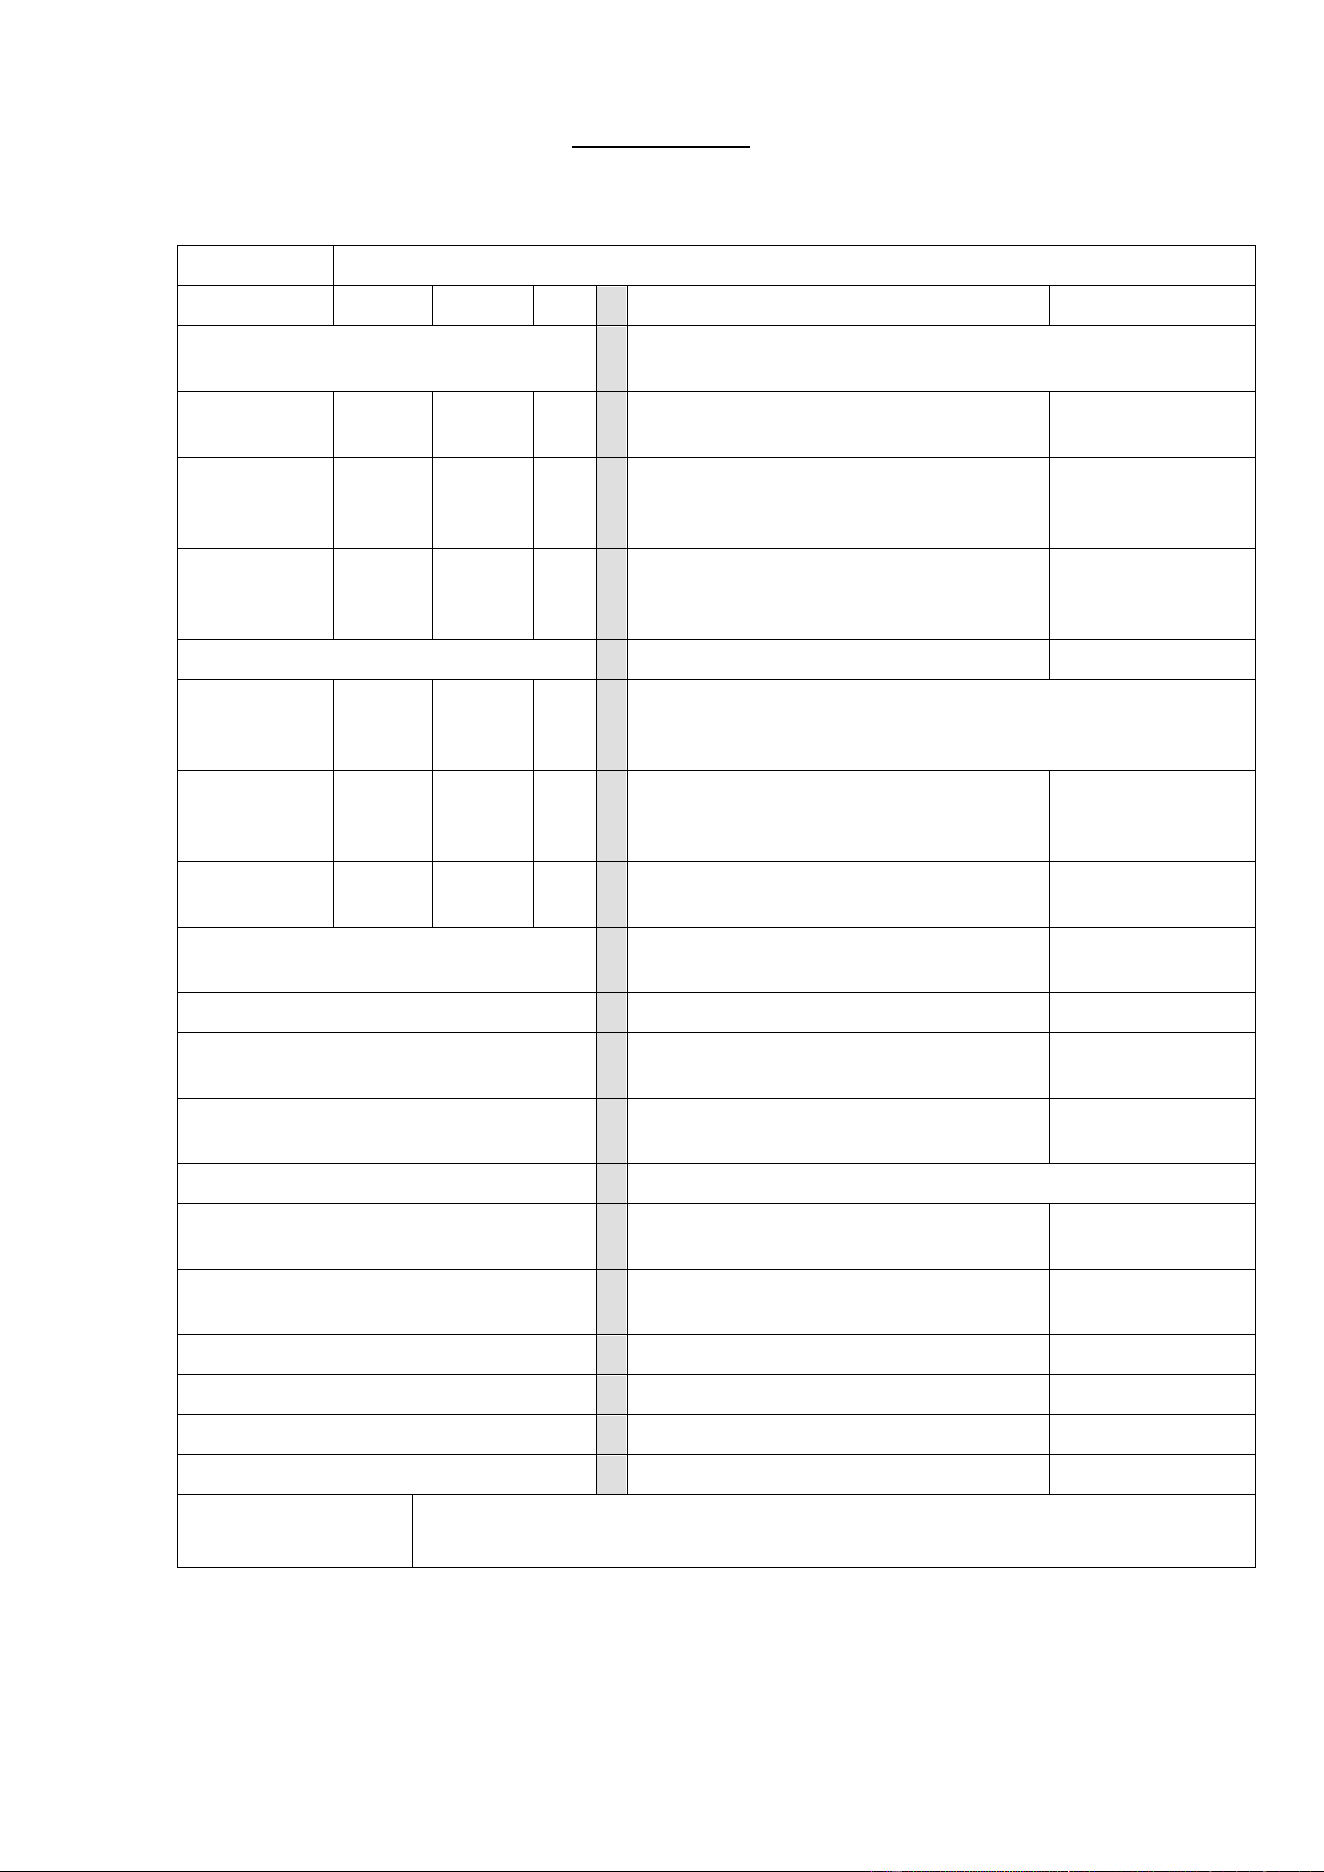
Model
HEA1131
Item
Symbol
Value
Unit
Item
Unit
Heat output
Type of heat input, for electric storage local space
heaters only (select one)
Nominal heat
output
P
nom
1.2
KW
manual heat charge control, with
integrated thermostat
Not applicable
Minimum
heat output
(indicative)
P
min
0.4
KW
manual heat charge control with room
and/or outdoor temperature feedback
Not applicable
Maximum
continuous
heat output
P
max,c
1.2
KW
electronic heat charge control with room
and/or outdoor temperature feedback
Not applicable
Auxiliary electricity consumption
fan assisted heat output
Not applicable
At nominal
heat output
el
max
0
KW
Type of heat output/room temperature control (select
one)
At minimum
heat output
el
min
0
KW
single stage heat output and no room
temperature control
[no]
In standby
mode
el
SB
0
KW
Two or more manual stages, no room
temperature control
[no]
with mechanic thermostat room
temperature control
[no]
with electronic room temperature control
[no]
electronic room temperature control plus
day timer
[no]
electronic room temperature control plus
week timer
[no]
Other control options (multiple selections possible)
room temperature control, with
presence detection
[no]
room temperature control, with open
window detection
[no]
with distance control option
[no]
with adaptive start control
[no]
with working time limitation
[no]
with black bulb sensor
[no]
ERP Data