
Ap ril 2023
QSG1_A _EN
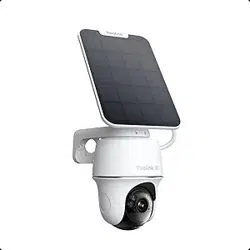
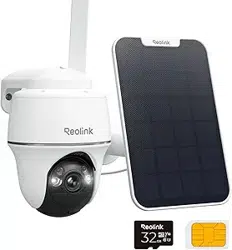
Argus PT Ultra
Quick Start Guide
@R eo li n kTe ch ht tps://re o l i nk .co m
58.03.0 0 1.030 6
English English1 2
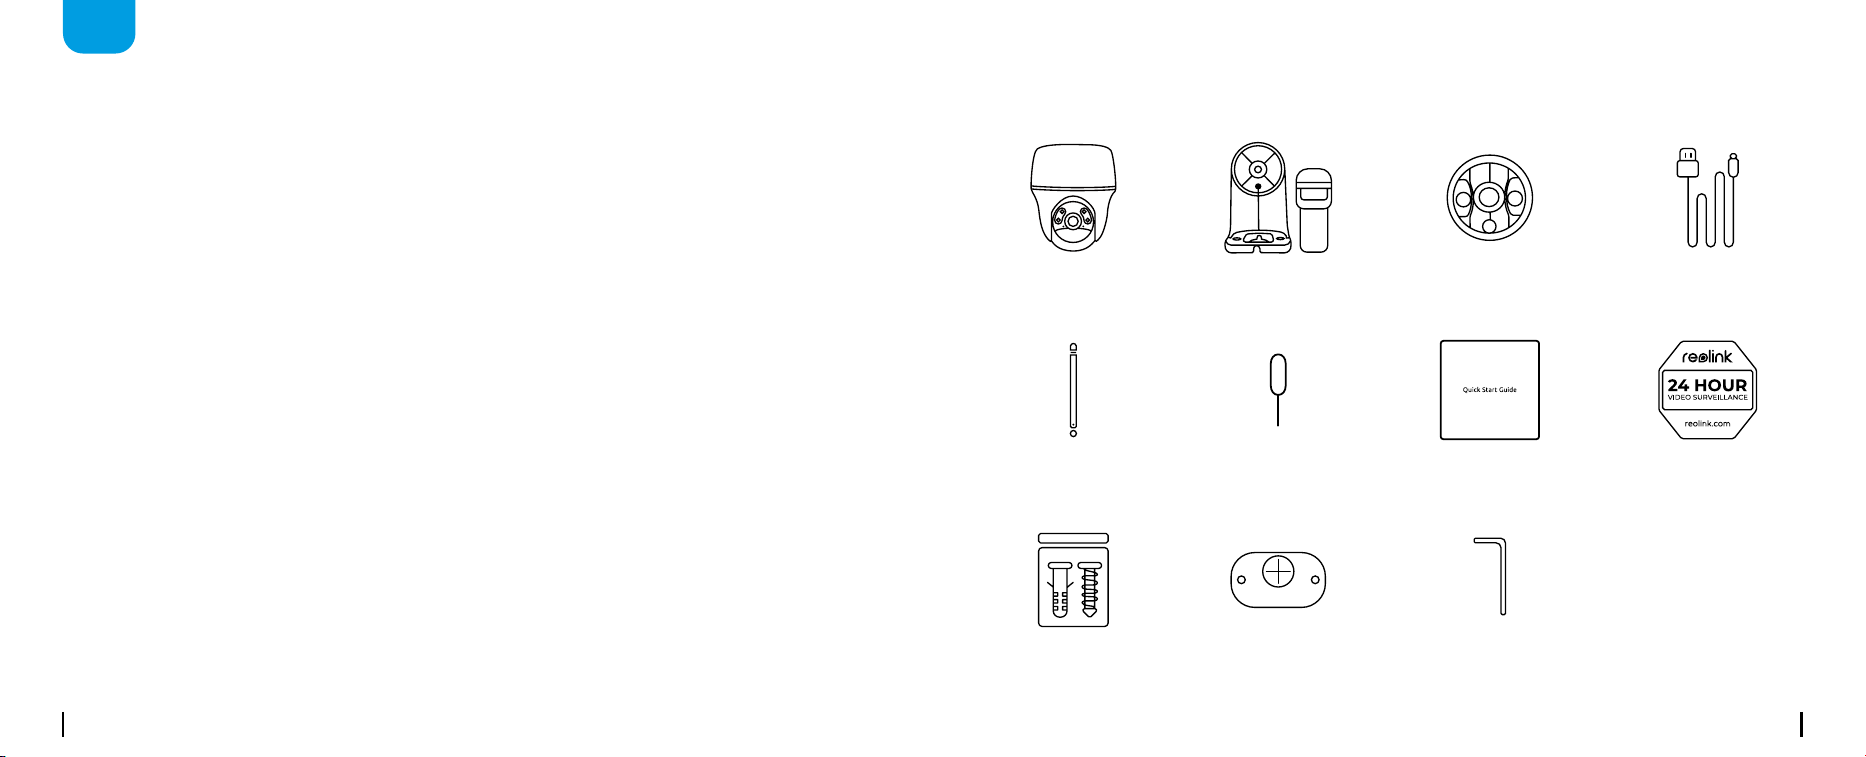
What's in the Box
Camera
Quick Start Guide Surveillance Sign
Pack of Screws Mounting Template
Camera Bracket Type-C CableMount Base
Antenna Reset Needle
EN
Content
What’s in the Box · · · · · · · · · · · · · · · · · · · · · · · · · · · · · · · · · · · · · · · · · · · · · · · · · · · · · · · · · · · · · · · · · · · · · · · · · · · · ·2
Camera Introduction · · · · · · · · · · · · · · · · · · · · · · · · · · · · · · · · · · · · · · · · · · · · · · · · · · · · · · · · · · · · · · · · · · · · · · · · ·3
Set up the Camera · · · · · · · · · · · · · · · · · · · · · · · · · · · · · · · · · · · · · · · · · · · · · · · · · · · · · · · · · · · · · · · · · · · · · · · · · · ·4
Charge the Camera · · · · · · · · · · · · · · · · · · · · · · · · · · · · · · · · · · · · · · · · · · · · · · · · · · · · · · · · · · · · · · · · · · · · · · · · · ·6
Install the Camera · · · · · · · · · · · · · · · · · · · · · · · · · · · · · · · · · · · · · · · · · · · · · · · · · · · · · · · · · · · · · · · · · · · · · · · · · · · ·7
Safety Instructions of Battery Usage · · · · · · · · · · · · · · · · · · · · · · · · · · · · · · · · · · · · · · · · · · · · · · · · · · · · · · · · · 12
Troubleshooting · · · · · · · · · · · · · · · · · · · · · · · · · · · · · · · · · · · · · · · · · · · · · · · · · · · · · · · · · · · · · · · · · · · · · · · · · · · · · 13
Specication · · · · · · · · · · · · · · · · · · · · · · · · · · · · · · · · · · · · · · · · · · · · · · · · · · · · · · · · · · · · · · · · · · · · · · · · · · · · · · · · 14
NoticationofCompliance · · · · · · · · · · · · · · · · · · · · · · · · · · · · · · · · · · · · · · · · · · · · · · · · · · · · · · · · · · · · · · · · · · 14
Hex Key

English English1 2
What's in the Box
Camera
Quick Start Guide Surveillance Sign
Pack of Screws Mounting Template
Camera Bracket Type-C CableMount Base
Antenna Reset Needle
EN
Content
What’s in the Box · · · · · · · · · · · · · · · · · · · · · · · · · · · · · · · · · · · · · · · · · · · · · · · · · · · · · · · · · · · · · · · · · · · · · · · · · · · · ·2
Camera Introduction · · · · · · · · · · · · · · · · · · · · · · · · · · · · · · · · · · · · · · · · · · · · · · · · · · · · · · · · · · · · · · · · · · · · · · · · ·3
Set up the Camera · · · · · · · · · · · · · · · · · · · · · · · · · · · · · · · · · · · · · · · · · · · · · · · · · · · · · · · · · · · · · · · · · · · · · · · · · · ·4
Charge the Camera · · · · · · · · · · · · · · · · · · · · · · · · · · · · · · · · · · · · · · · · · · · · · · · · · · · · · · · · · · · · · · · · · · · · · · · · · ·6
Install the Camera · · · · · · · · · · · · · · · · · · · · · · · · · · · · · · · · · · · · · · · · · · · · · · · · · · · · · · · · · · · · · · · · · · · · · · · · · · · ·7
Safety Instructions of Battery Usage · · · · · · · · · · · · · · · · · · · · · · · · · · · · · · · · · · · · · · · · · · · · · · · · · · · · · · · · · 12
Troubleshooting · · · · · · · · · · · · · · · · · · · · · · · · · · · · · · · · · · · · · · · · · · · · · · · · · · · · · · · · · · · · · · · · · · · · · · · · · · · · · 13
Specication · · · · · · · · · · · · · · · · · · · · · · · · · · · · · · · · · · · · · · · · · · · · · · · · · · · · · · · · · · · · · · · · · · · · · · · · · · · · · · · · 14
NoticationofCompliance · · · · · · · · · · · · · · · · · · · · · · · · · · · · · · · · · · · · · · · · · · · · · · · · · · · · · · · · · · · · · · · · · · 14
Hex Key
English English3 4
OFFON
P
O
W
ER
RST
M
ic
r
o
S
D
Set up the CameraCamera Introduction
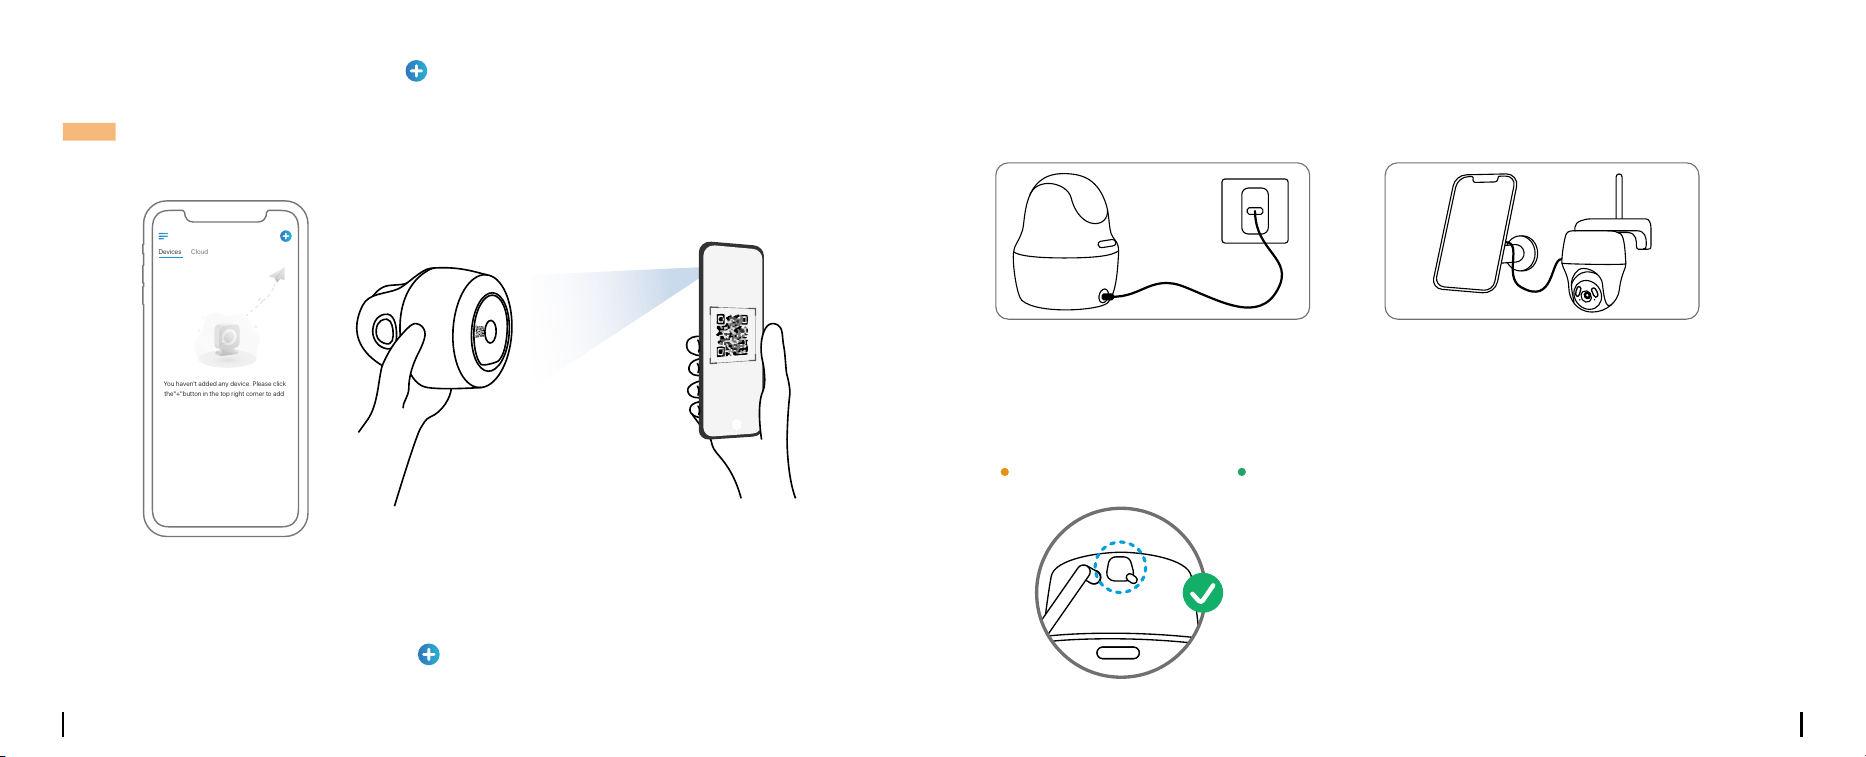
Set up the Camera Using a Smartphone
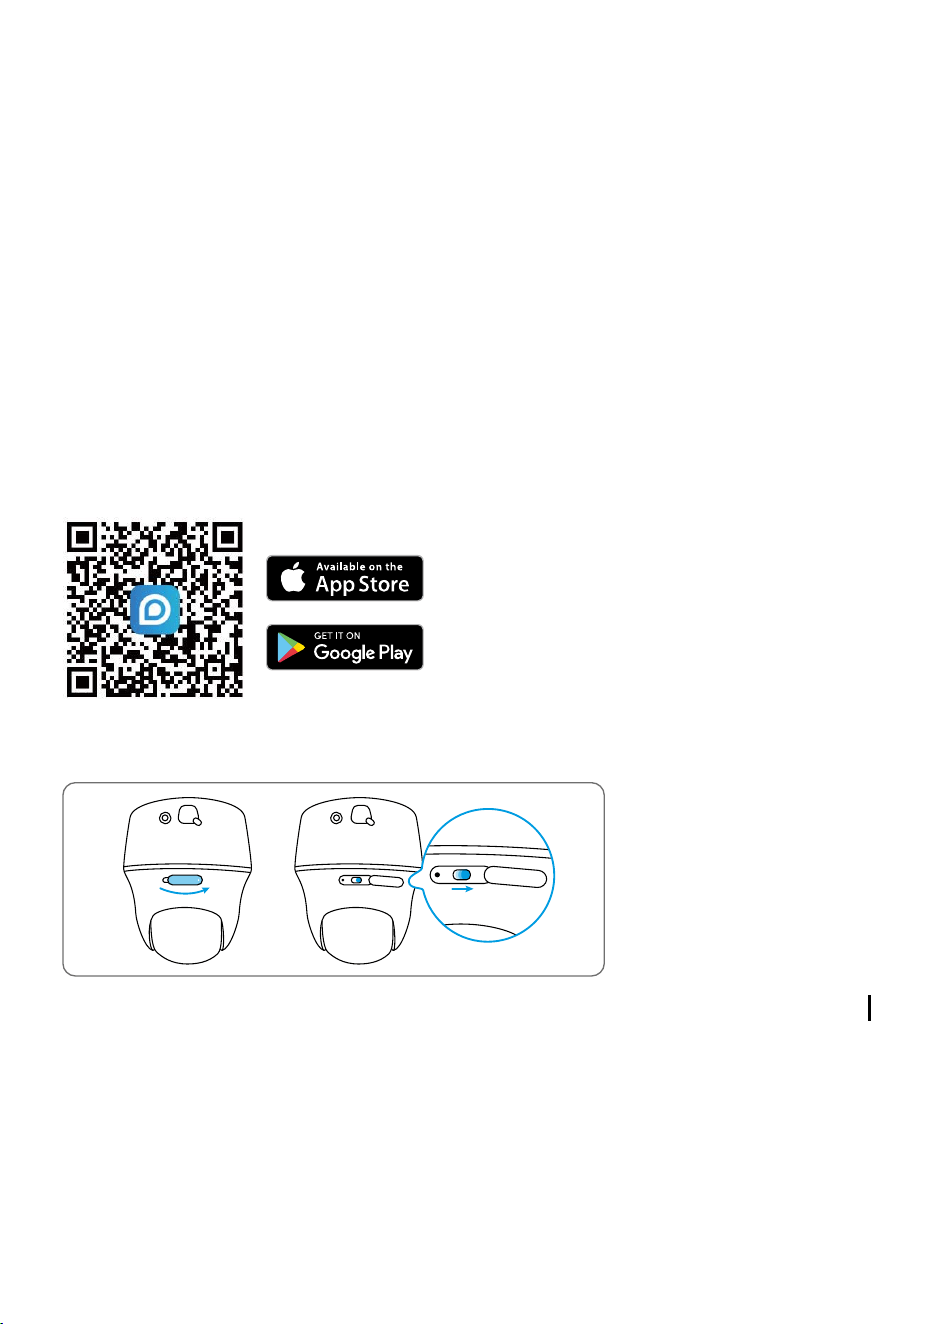
Step 1 Scan to download the Reolink App from the App Store or Google Play store.
Step 2 Turn on the power switch to power on the camera.
Di�erentstatesofthestatusLED:
Red Light: WiFi connection failed Blinking: Standby status
Blue Light: WiFi connection succeeded On: Working status
OFFON
P
O
W
E
R
POWER
OFFON
P
O
W
E
R
Lens
Power Switch
IRLEDs
Antenna
Spotlight
Charging Port
Daylight Sensor
BatteryStatusLED
Built-in PIR Sensor
Built-in Mic
StatusLED
Speaker
Reset Hole
Micro SD Card Slot
*Pressformorethanvesecondsto
restorethedevicetodefaultsettings.
*Rotatethecamera’slenstondthe
reset hole and the SD card slot.
1
11
2
12
3
13
4
14
5
6
7
8
9
10
4
8
10
9
3
2
1
12
11
5 7
13
14
6
English English3 4
OFFON
P
O
W
ER
RST
M
ic
r
o
S
D
Set up the CameraCamera Introduction
Set up the Camera Using a Smartphone
Step 1 Scan to download the Reolink App from the App Store or Google Play store.
Step 2 Turn on the power switch to power on the camera.
Di�erentstatesofthestatusLED:
Red Light: WiFi connection failed Blinking: Standby status
Blue Light: WiFi connection succeeded On: Working status
OFFON
P
O
W
E
R
POWER
OFFON
P
O
W
E
R
Lens
Power Switch
IRLEDs
Antenna
Spotlight
Charging Port
Daylight Sensor
BatteryStatusLED
Built-in PIR Sensor
Built-in Mic
StatusLED
Speaker
Reset Hole
Micro SD Card Slot
*Pressformorethanvesecondsto
restorethedevicetodefaultsettings.
*Rotatethecamera’slenstondthe
reset hole and the SD card slot.
1
11
2
12
3
13
4
14
5
6
7
8
9
10
4
8
10
9
3
2
1
12
11
5 7
13
14
6
English English5 6
Charge the Camera
Step 3 Launch the Reolink App, click the “ ” button in the top right corner to add the camera.
ScantheQRcodeonthedeviceandfollowtheonscreeninstructionstonishinitialsetup.
Charge the battery with a power adapter.
(not included)
Charge the battery with the Reolink Solar Panel
(Not included if you only purchase the camera).
For better weatherproof performance, please
alwayscoverthechargingportwiththerubber
plug after charging the battery.
Step 2 Launch the Reolink Client, click the “ ” button, input the UID code of the camera to add it
andfollowtheonscreeninstructionstonishinitialsetup.
Step 1 Download and install the Reolink Client: Go to https://reolink.com > Support > App&Client.
Set up the Camera on PC (Optional)
Orange LED: Charing Green LED: Fully charged
Charging Indicator:
It’s recommend to fully charge the battery before mounting the camera.
OFFON
POWER
NOTE:Thisdevicesupports2.4GHzand5GHzWi-Finetworks.Itisrecommendedtoconnectthe
deviceto5GHzWi-Fiforabetternetworkexperience.

English English7 8
Install the Camera
• For outdoor use, the camera
MUST be installed upside
down for better waterproof
performance and better PIR
motionsensor’seciency.
•Installthecamera2-3meters
(7-10ft)abovetheground.This
heightmaximizesthedetection
range of the PIR motion sensor.
• For better motion detection
performance, please install the
camera angularly.
Mount the Camera
Mounting Height:
2-3 Meters
PIR Detection Distance:
2-10 Meters
Drill holes in accordance with the
mounting hole template and screw the
camera bracket to the wall.
NOTE: Use the drywall anchors included in the package if needed.
Install the antenna to the camera.
1
2
NOTE:Ifamovingobjectapproachesthe
PIRsensorvertically,thecameramayfail
to detect motion.
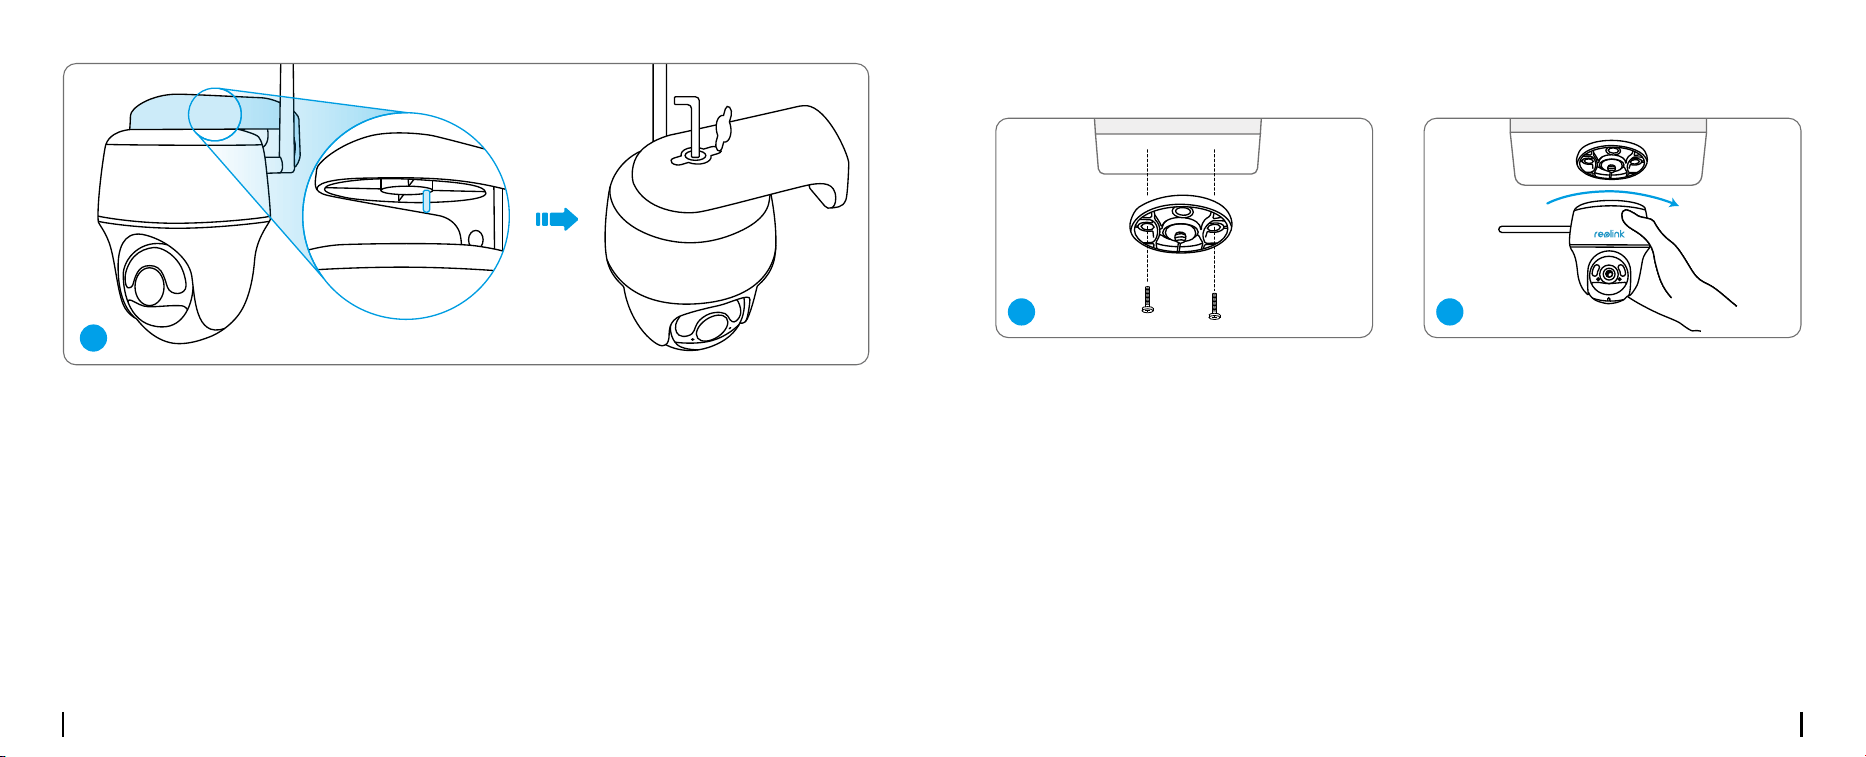
English English9 10
Mount the Camera to Ceiling
Install the mount base to the ceiling. Align the camera with the bracket and turn the camera unit
clockwise to lock it in position.
1 2
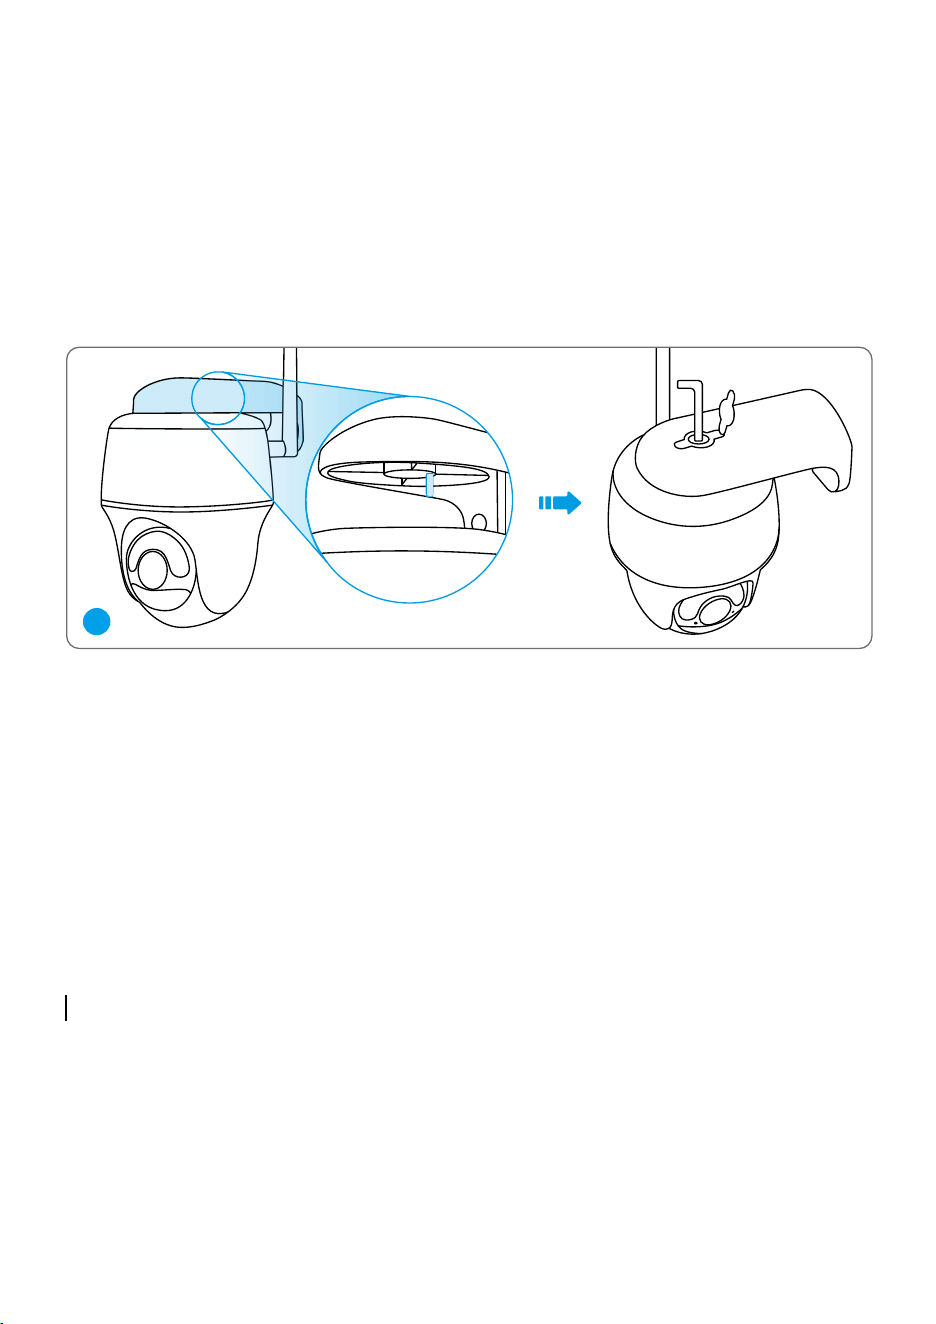
Align the white hole on the camera top with the white hollow screw on the bracket. Use a wrench
andahexheadscrewprovidedtosecurethecameraintoplace.Thencovertherubberplug.
3

English English9 10
Mount the Camera to Ceiling
Install the mount base to the ceiling. Align the camera with the bracket and turn the camera unit
clockwise to lock it in position.
1 2
Align the white hole on the camera top with the white hollow screw on the bracket. Use a wrench
andahexheadscrewprovidedtosecurethecameraintoplace.Thencovertherubberplug.
3
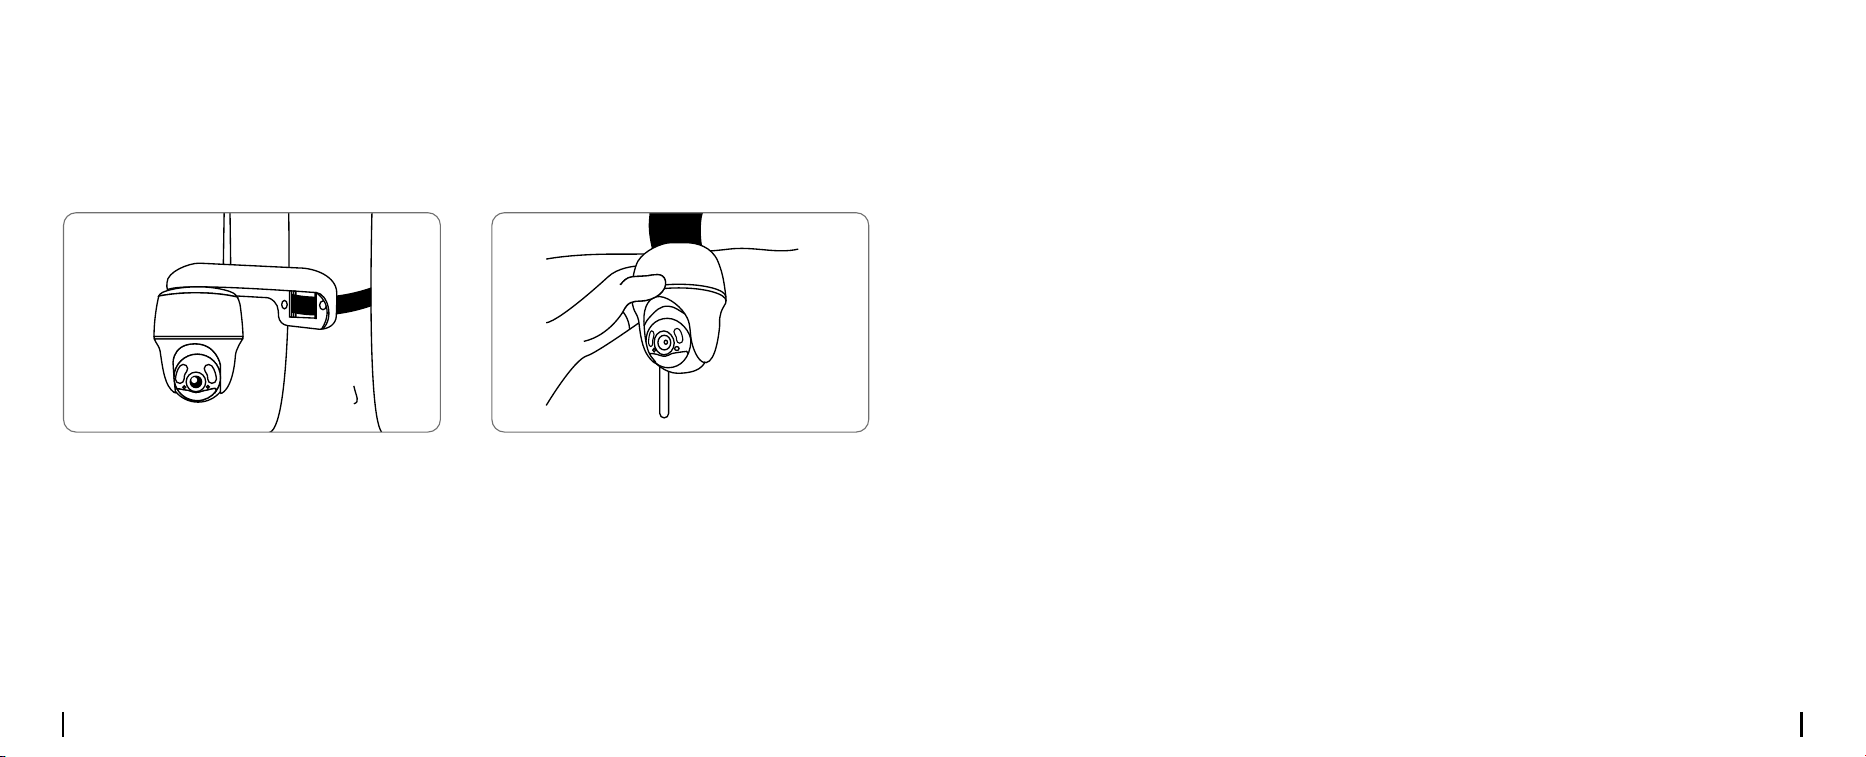
English English11 12
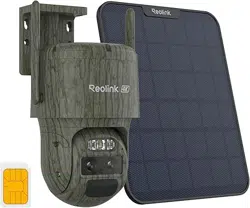
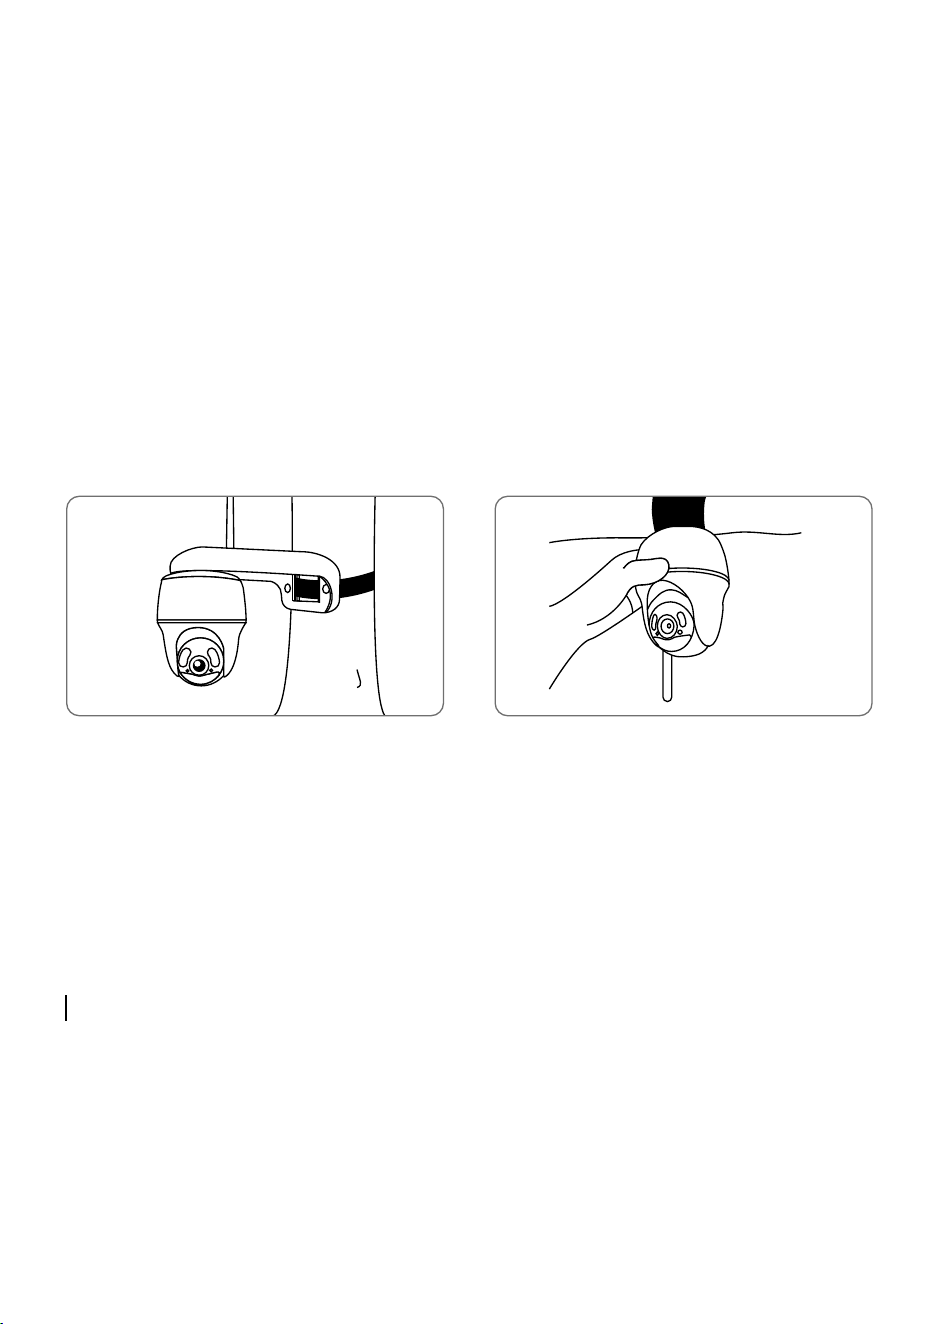
You are allowed to strap the camera to a tree with both the security mount and ceiling bracket.
Threadtheprovidedstraptotheplateandfastenittoatree.Next,attachthecameratothe
plate and you are good to go.
Install the Camera with Loop Strap
Safety Instructions of Battery Usage
Thecameraisnotdesignedforrunning24/7atfullcapacityoraround-the-clocklivestreaming.
It’sdesignedtorecordmotioneventsandtoliveviewremotelyonlywhenyouneedit.Learnuseful
tips on how to extend the battery life in this post:
https://support.reolink.com/hc/en-us/articles/360006991893
1.Thebatteryisbuilt-in,sodonotremoveitfromthecamera.
2.Chargetherechargeablebatterywithastandardandhigh-qualityDC5V/9Vbatterychargeror
Reolink solar panel. Do not charge the battery with solar panels from any other brands.
3.Chargethebatterywhentemperaturesarebetween0°Cand45°Candalwaysusethebattery
whentemperaturesarebetween-20°Cand60°C.
5.Donotcharge,useorstorethebatterynearanyignitionsources,suchasreorheaters.
6.Donotusethebatteryifitgiveso�anodor,generatesheat,becomesdiscoloredordeformed,
orappearsabnormalinanyways.Ifthebatteryisbeingusedorcharged,removethebattery
fromthedeviceorthechargerimmediately,andstopusingit.
7. Always follow the local waste and recycle laws when you get rid of the used battery.

English English11 12
You are allowed to strap the camera to a tree with both the security mount and ceiling bracket.
Threadtheprovidedstraptotheplateandfastenittoatree.Next,attachthecameratothe
plate and you are good to go.
Install the Camera with Loop Strap
Safety Instructions of Battery Usage
Thecameraisnotdesignedforrunning24/7atfullcapacityoraround-the-clocklivestreaming.
It’sdesignedtorecordmotioneventsandtoliveviewremotelyonlywhenyouneedit.Learnuseful
tips on how to extend the battery life in this post:
https://support.reolink.com/hc/en-us/articles/360006991893
1.Thebatteryisbuilt-in,sodonotremoveitfromthecamera.
2.Chargetherechargeablebatterywithastandardandhigh-qualityDC5V/9Vbatterychargeror
Reolink solar panel. Do not charge the battery with solar panels from any other brands.
3.Chargethebatterywhentemperaturesarebetween0°Cand45°Candalwaysusethebattery
whentemperaturesarebetween-20°Cand60°C.
5.Donotcharge,useorstorethebatterynearanyignitionsources,suchasreorheaters.
6.Donotusethebatteryifitgiveso�anodor,generatesheat,becomesdiscoloredordeformed,
orappearsabnormalinanyways.Ifthebatteryisbeingusedorcharged,removethebattery
fromthedeviceorthechargerimmediately,andstopusingit.
7. Always follow the local waste and recycle laws when you get rid of the used battery.

English English13 14
Troubleshooting
If your camera is not powering on, please try
the following solutions:
• Make sure the power switch is turned on.
•ChargethebatterywithaDC5V/2Apower
adapter. When the green light is on,
the battery is fully charged
If these won’t work, contact Reolink Support.
If the camera fails to connect to WiFi, please
try the following solutions:
•Ensurethatyouhaveenteredthecorrect
WiFi password.
• Put the camera closer to your router to
ensure a strong WiFi signal.
• Change the encryption method of the WiFi
networktoWPA2-PSK/WPA-PSK
(safer encryption) on your router interface.
• Change your WiFi SSID or password and
make sure that SSID is within 31 characters
and password is within 64 characters.
If these won’t work, contact Reolink Support.
If you cannot scan the QR code on your
phone, please try the following solutions:
•Removetheprotectivelmfromthecamera
lens.
• Wipe the camera lens with a dry paper/
towel/tissue.
•Varythedistancebetweenyourcamera
and the mobile phone so that the camera can
focus better.
•TrytoscantheQRcodeundersucient
lighting.
If these won’t work, contact Reolink Support.
Camera is Not Powering On
Failed to Connect to WiFi During
Initial Setup Process
Failed to Scan QR Code
on the Phone
Reolinkdeclaresthatthisdeviceisin
compliancewiththeessentialrequirements
andotherrelevantprovisionsofDirective
2014/53/EUandDirective2014/30/EU.
Operating Temperature:
-10°Cto55°C(14°Fto131°F)
Size:98x112mm
Weight(Batteryincluded):481g
Formorespecications,visitthe
Reolinkocialwebsite.
CE Declaration of Conformity
Speci�cation
Noti�cationof
Compliance
Reolink declares that this product is in
compliancewithRadioEquipment
Regulations2017andElectromagnetic
CompatibilityRegulations2016.
ThisdevicecomplieswithPart15oftheFCC
Rules.Operationissubjecttothefollowing
twoconditions:(1)thisdevicemaynotcause
harmfulinterference,and(2)thisdevicemust
acceptanyinterferencereceived,including
interference that may cause undesired
operation.
Note:Thisequipmenthasbeentestedand
found to comply with the limits for a Class B
digitaldevice,pursuanttoPart15oftheFCC
Rules.Theselimitsaredesignedtoprovide
reasonable protection against harmful in-
terference in a residential installation. This
equipmentgenerates,usesandcanradiate
radiofrequencyenergyand,ifnotinstalled
and used in accordance with the instructions,
may cause harmful interference to radio
communications.However,thereisnoguar-
antee that interference will not occur in a
particularinstallation.Ifthisequipmentdoes
causeharmfulinterferencetoradioortelevi-
sion reception, which can be determined by
turningtheequipmento�andon,theuseris
encouraged to try to correct the interference
by one or more of the following measures:
•Reorientorrelocatethereceivingantenna.
UKCA Declaration of Conformity
FCC Compliance Statements
English English15 16
•Increasetheseparationbetweentheequip-
mentandreceiver.
•Connecttheequipmentintoanoutletona
circuitdi�erentfromthattowhichthereceiver
is connected.
• Consult the dealer or an experienced radio/
TVtechnicianforhelp.
Caution:Changesormodicationsnotex-
presslyapprovedbythepartyresponsiblefor
compliancecouldvoidtheuser’sauthorityto
operatetheequipment.
ThisequipmentcomplieswithFCCradiation
exposure limits set forth for an uncontrolled
environment.Thisequipmentshouldbein-
stalled and operated with minimum distance
20cmbetweentheradiatorandyourbody.
Thisdevicecontainslicence-exempttransmit-
ter(s)/receiver(s)thatcomplywithInnovation,
ScienceandEconomicDevelopmentCanada’s
licence-exemptRSS(s).Operationissubjectto
the following two conditions:
(1)Thisdevicemaynotcauseinterference.
FCC Radiation Exposure statement
ISED Compliance Statements
(2)Thisdevicemustacceptanyinterference,
including interference that may cause unde-
siredoperationofthedevice.
ThisequipmentcomplieswithICRSS-102ra-
diation exposure limits set forth for an uncon-
trolledenvironment.Thisequipmentshouldbe
installed and operated with minimum distance
20cmbetweentheradiatorandyourbody.
NOTE:Operationof5150-5250MHzis
restricted to indoor use only in Canada.
Lefonctionnementde5150-5250MHzest
limitéàuneutilisationenintérieuruniquement.
This marking indicates that this product
should not be disposed with other household
wastes.throughouttheEU.Topreventpossible
harmtotheenvironmentorhumanhealth
from uncontrolled waste disposal, recycle it
responsibly to promote the sustainable reuse
of material resources. To return your used
device,pleaseusethereturnandcollection
systems or contact the retailer where the
ISED Radiation Exposure statement
Correct Disposal of This Product
Useoftheproductissubjecttoyour
agreementtotheTermsofServiceand
PrivacyPolicyatreolink.com.Keepoutof
reach of children.
Terms and Privacy
OPERATING FREQUENCY :
(the maximum transmitted power)
2.4GHz:(For2.4GHzcameraonly):
2412MHz---2472MHz(EIRP<20dBm)
5GHz:
5150MHz---5250MHz(EIRP<23dBm)
5745MHz---5825MHz(EIRP<14dBm)
Ifyouneedanytechnicalhelp,pleasevisitour
ocialsupportsiteandcontactoursupport
team before returning the products,
https://support.reolink.com.
WiFi Operating Frequency
Technical Support
Thisproductcomeswitha2-yearlimited
warrantythatisvalidonlyifpurchasedfrom
ReolinkOcialStoreoraReolinkauthorized
reseller. Learn more:
https://reolink.com/warranty-and-return/.
LimitedWarranty
The functions of Wireless Access
Systems including Radio Local
Area Networks(WAS/RLANs) within
theband5150-5350MHzforthisdevice
are restricted to indoor use only within all
EuropeanUnioncountries(BE/BG/CZ/DK/
DE/EE/IE/EL/ES/FR/HR/IT/CY/LV/LT/
LU/HU/MT/NL/AT/PL/PT/RO/SI/SK/FI/
SE/TR/NO/CH/IS/LI/UK(NI)
product was purchased. They can take this
productforenvironmentallysaferecycling.

Ap ril 20 2 3
QS G1 _ A _ EN
Argus PT Ultra
Quick Start Guide
@R eo li n kTe ch ht tps://re o l i nk .co m
58.03.0 0 1.030 6