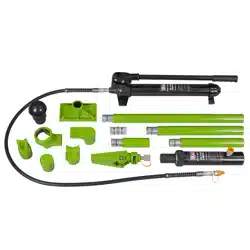
10 TONNE SNAP HYDRAULIC BODY REPAIR KIT
MODEL NO: RE9810
Thank you for purchasing a Sealey product. Manufactured to a high standard, this product will, if used according to these instructions,
and properly maintained, give you years of trouble free performance.
IMPORTANT: PLEASE READ THESE INSTRUCTIONS CAREFULLY. NOTE THE SAFE OPERATIONAL REQUIREMENTS, WARNINGS &
CAUTIONS. USE THE PRODUCT CORRECTLY AND WITH CARE FOR THE PURPOSE FOR WHICH IT IS INTENDED. FAILURE TO DO
SO MAY CAUSE DAMAGE AND/OR PERSONAL INJURY AND WILL INVALIDATE THE WARRANTY. KEEP THESE INSTRUCTIONS SAFE
FOR FUTURE USE.
1. SAFETY
1.1. GENERAL SAFETY
WARNING! Ensure Health & Safety, local authority and general workshop practice regulations are adhered to when using this equipment.
9 Only fully trained and qualied persons should use this equipment. Familiarise yourself with the application and limitations, as well as
the specic potential hazards, of the repair kit.
WARNING! No part of this unit or any accessory relating to the repair kit is designed for lifting loads. It is intended only as a pushing
device and must be used as such, with care.
WARNING! Disconnect the repair kit from the hydraulic pump before servicing or performing any maintenance on the unit.
9 Maintain repair kit in good order. Replace/repair with genuine parts only. Unauthorised parts may be dangerous and will invalidate the
warranty.
9 Use qualied person to lubricate and maintain the hydraulic pump. DO NOT use brake uid to top up hydraulic unit. Use Sealey
hydraulic oil only.
9 Keep the repair kit clean for best and safest performance.
WARNING! Ensure you know how much load you are pushing. Never exceed the maximum pushing capacity.
9 Use only with the supplied Sealey hydraulic pump and accessories. Other equipment may damage unit and will invalidate your warranty.
9 The kit accessories may be used with other popular makes of kit.
9 Ensure there is positive engagement of repair kit accessories with the vehicle body before pushing.
9 Maintain correct balance and footing. Ensure the oor is not slippery and wear non-slip shoes.
9 If working on an o centre load, pump with care. If you feel undue resistance, stop and re-adjust the set-up.
WARNING! Keep your hands, body and clothing away from the repair kit and accessories when in use. Take any necessary
precautions to protect your personal safety and that of others whilst using the repair kit.
9 Ensure the hydraulic hose is not bent or kinked.
9 Keep non-essential persons away from the operating area. Be aware of the locations of other persons assisting you.
9 When releasing tension from the load be sure to undo the hydraulic valve VERY slowly.
8 DO NOT operate the repair kit if any parts are damaged or missing as this may cause failure and/or personal injury.
WARNING! DO NOT use repair kit as a lifting device of any type. DO NOT use for any purpose other than for which it is designed.
8 DO NOT over extend the ram as the plunger may be forced out of the cylinder.
8 DO NOT heat accessories as this may weaken them.
8 DO NOT modify accessories for use with this kit.
9 When not in use, place dust cap on end of hydraulic hose and store the kit, in the case, in a safe, dry, childproof location.
2. INTRODUCTION
Heavy gauge snap-together pipework and cast snap-together attachments compatible with most leading makes of snap-together
equipment. Components are manufactured from high-quality steel. All attachments interchange with other popular makes so you can use
your existing equipment with the snap-together equipment.
Supplied in composite storage case.
RE9810 Issue 1 04/04/24
Original Language Version
© Jack Sealey Limited
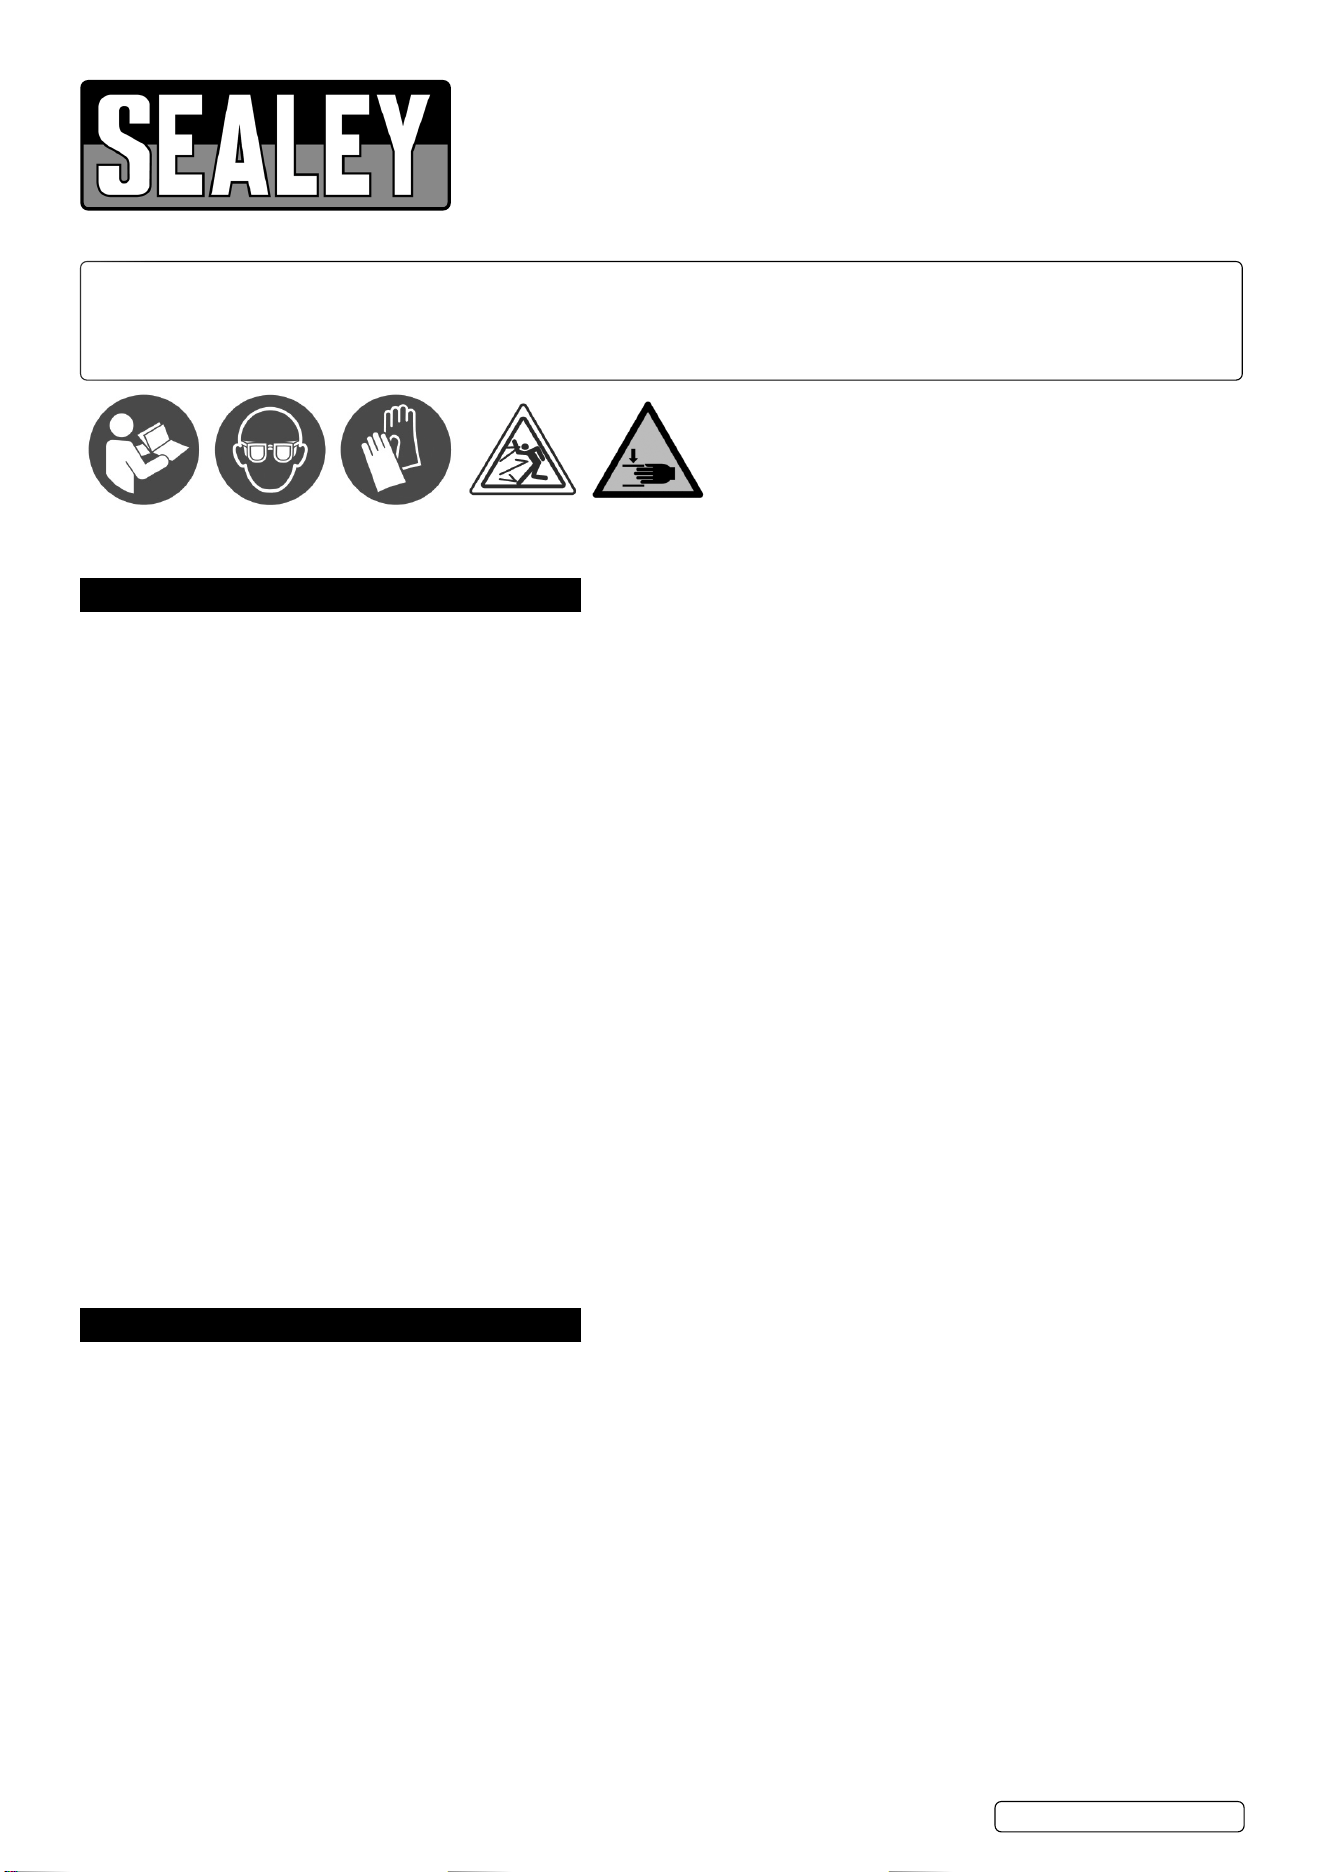
Refer to
instructions
Wear eye
protection
Wear protective
gloves
Keep people
away
WARNING!
Crushing
of Hands
RE9810 Issue 1 04/04/24
Original Language Version
© Jack Sealey Limited
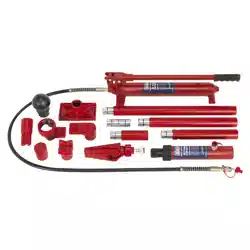
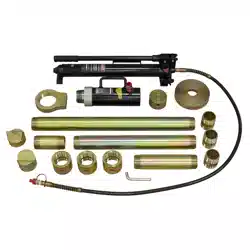
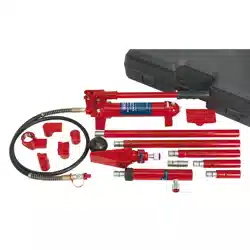
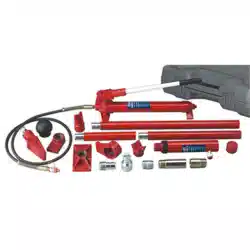
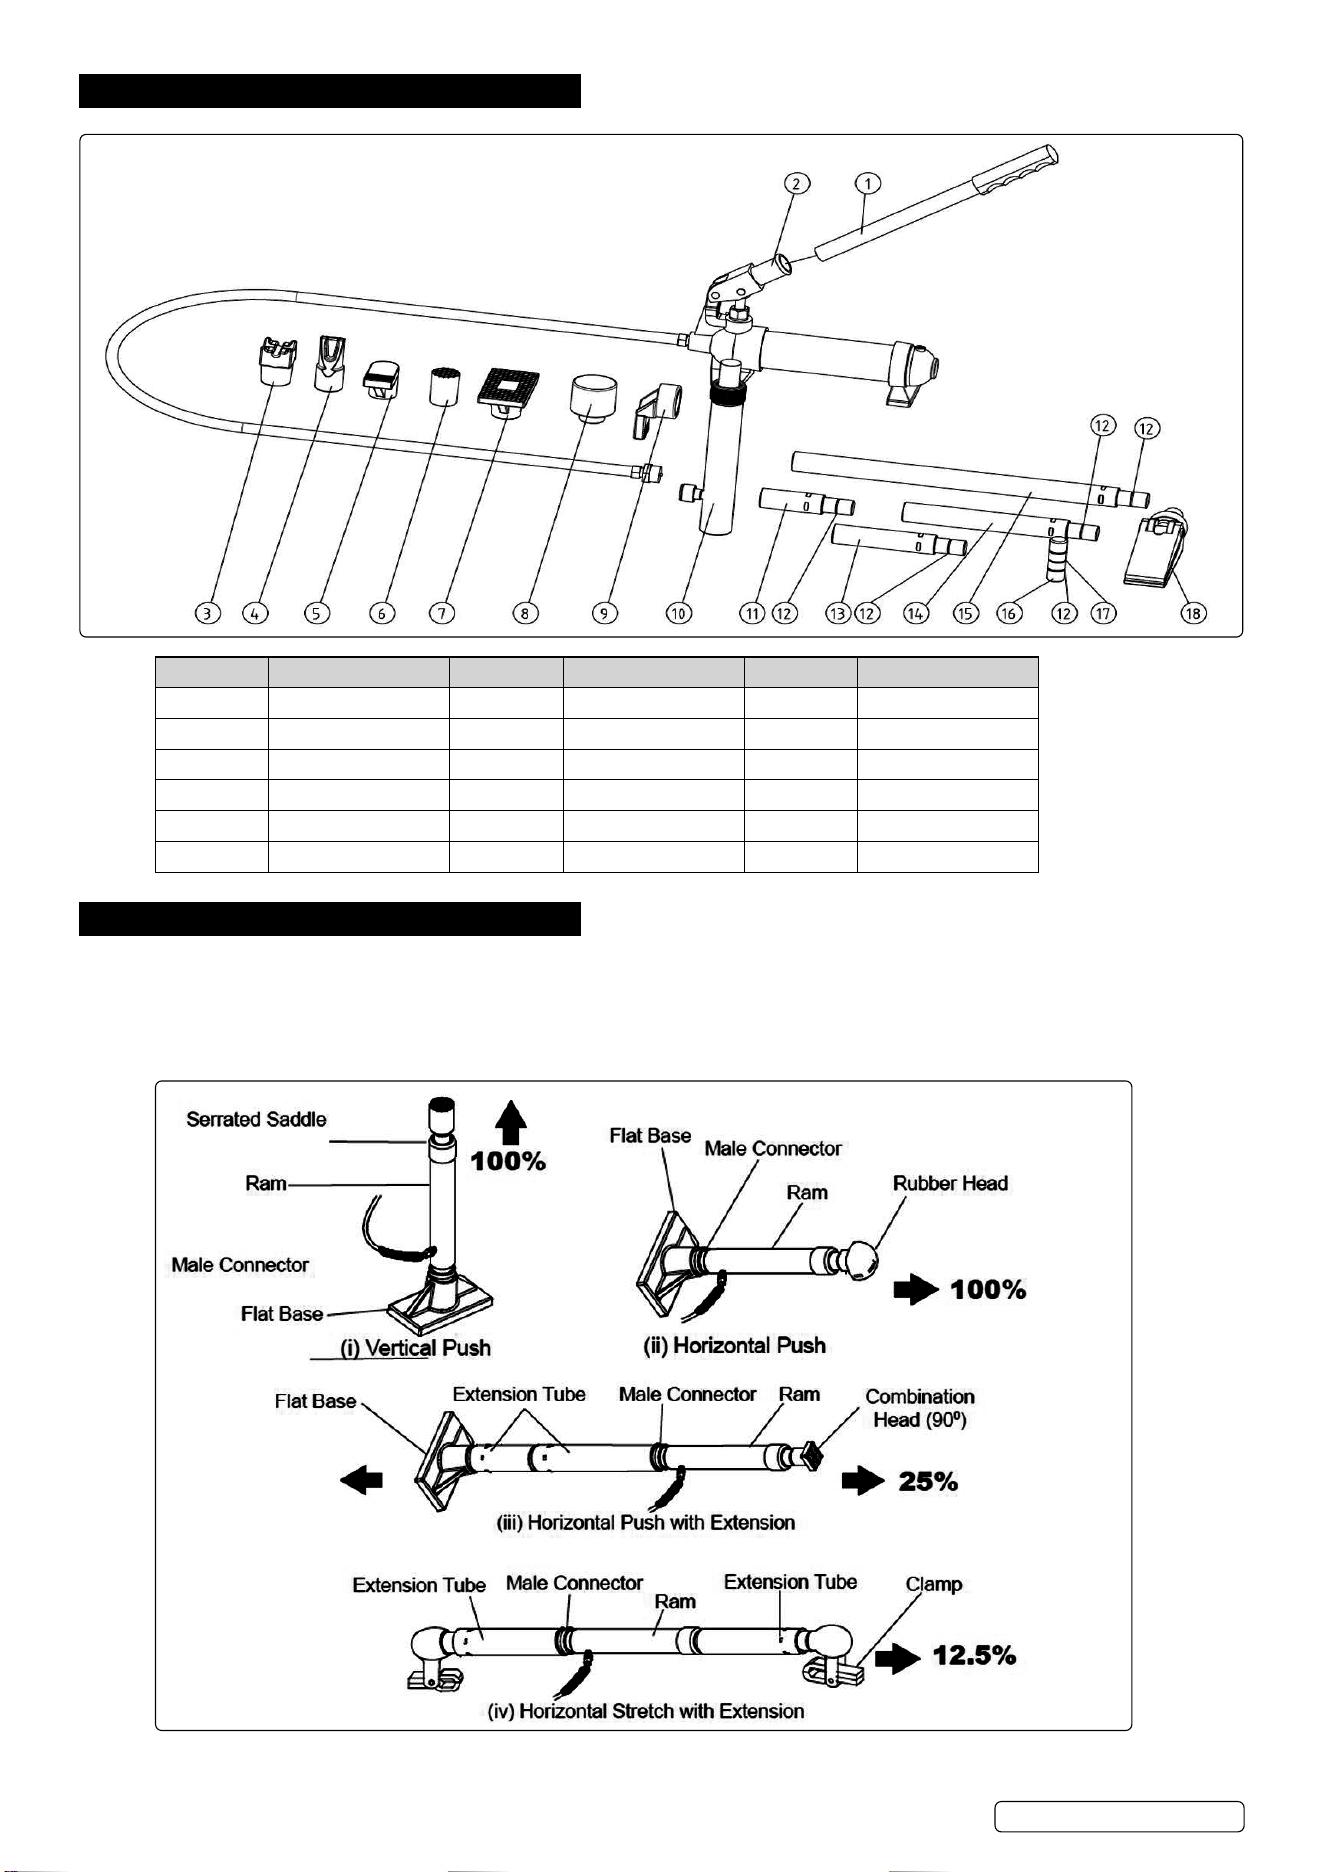
3. CONTENTS
PART NO. DESCRIPTION PART NO. DESCRIPTION PART NO. DESCRIPTION
1 Handle 7 Flat Base 13 Extension Tube
2 Handle Seat 8 Rubber Head 14 Extension Tube
3 Combination Head 9 Ram Toe 15 Extension Tube
4 Wedge Head 10 Cylinder 16 Male Connector
5 Plunger Toe 11 Extension Tube 17 Jump Ring
6 Serrated Saddle 12 Steel Traveller (x6) 18 Hydraulic Spreader
4. OPERATION
NOTE: The capacity of the body repair kit can be signicantly aected by the number of attachments used and the type of load applied.
The approximate load capacity of each function setup is illustrated below. When two or more extension tubes are used together, be
sure to position the shortest tube further away from the ram.
4.1. PUSH & STRETCH
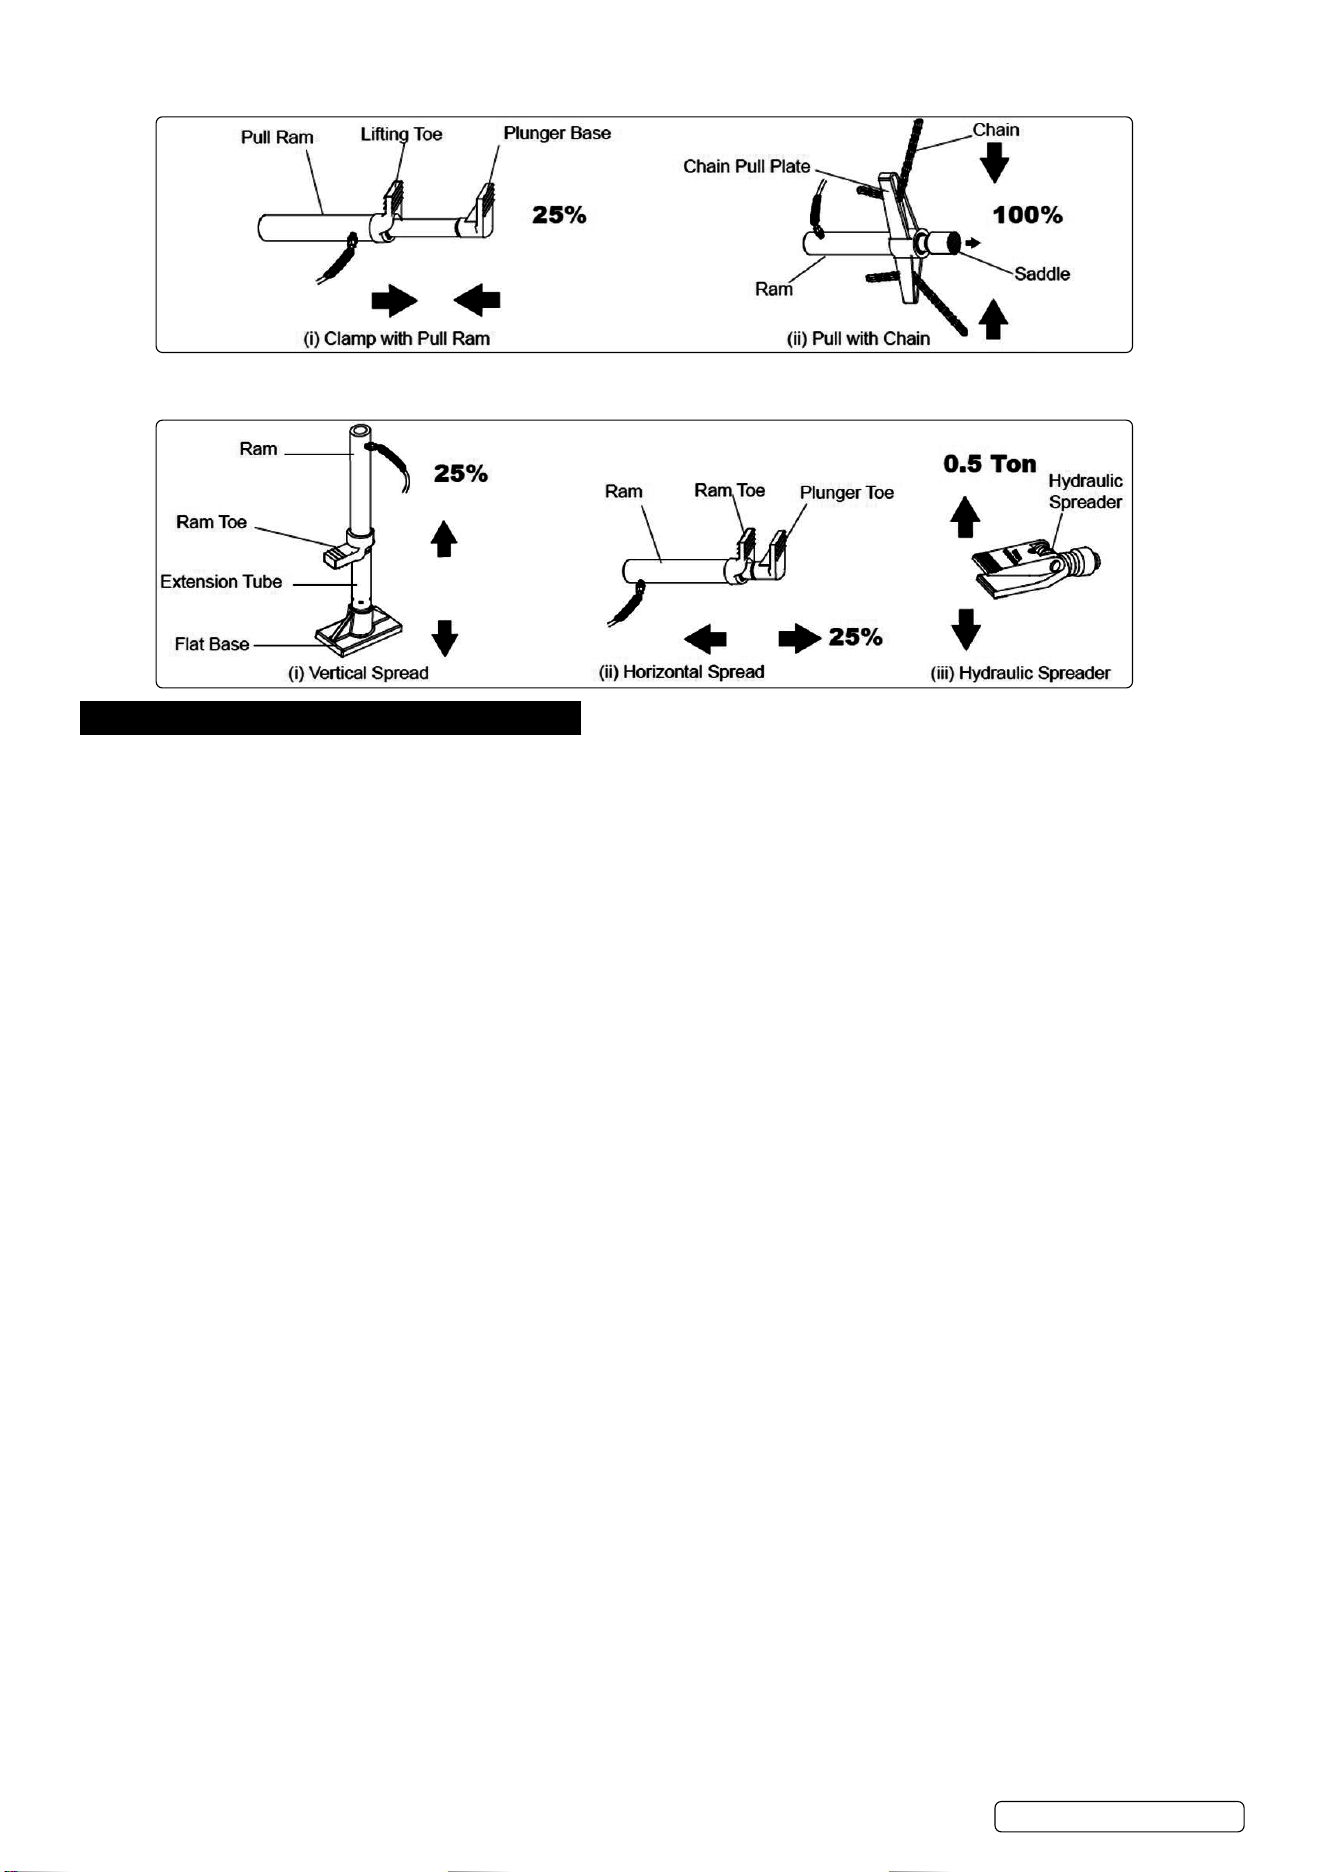
4.2. CLAMP & PULL
4.3. SPREAD
5. MAINTENANCE
IMPORTANT: Only fully qualied personnel should attempt maintenance or repair of the hydraulic system.
5.1. PUMP OIL LEVEL
Release pressure and disconnect the ram from the pump.
Hold pump in an upright position.
Ensure the hydraulic ram is fully retracted. Remove the oil reservoir plug (opposite valve) and top up using Sealey hydraulic jack oil
(Sealey Part Nos HJO500MLS/HJO5LS). DO NOT use brake uid. After lling, purge the system in order to eliminate any air. Open
the release valve (Fig.1.) and pump the handle several times (suggested 20 times). Close the valve and replace the oil reservoir plug.
Should the system fail at any time, repeating this process may resolve the problem.
5.2. GENERAL MAINTENANCE
5.2.1. Keep the surface of this tool and its accessories free of hydraulic uid and grease.
5.2.2. Use only a mild detergent and damp cloth when cleaning.
5.2.3. DO NOT use a ammable or combustible solvent to clean this tool or its accessories.
5.2.4. Before each use, examine the general condition of the tool and its accessories. Check for loose components, misalignment, binding of
moving parts, broken parts and any other condition that may aect its safe operation.
5.2.5. DO NOT use a damaged tool or its damaged accessories.
5.3. Keep hydraulic connections clean. Clean all hydraulic ports and replace end plugs immediately after use.
5.4. Store the Pump with the Release Valve open.
5.5. HYDRAULIC FLUID FILL AND BLEEDING
If the Pump operation feels spongy, or the Ram lowers while the Release Valve is closed, there may be air in the Pump. Bleed the
Pump as follows:
5.5.1. Set Pump at on a level surface.
5.5.2. Remove the Fill Screw. The O-ring should come o with it.
5.5.3. The uid level should be near the bottom of the opening. If required, add high grade hydraulic uid.
5.5.4. Make sure the O-ring is still in place around the Fill Screw and thread the Fill Screw into the Pump securely. DO NOT use thread seal tape.
5.5.5. Firmly close the Release Valve by turning it clockwise.
5.5.6. Press the tip of the Coupling against a hard surface and pump the pump handle.
5.5.7. Continue pumping, until the hydraulic uid coming out the end of the coupler tip is free of air bubbles.
5.5.8. Recheck the uid level and add uid if necessary.
5.5.9. Turn the Release Valve counter-clockwise to release the pressure in the pump and hose.
5.6. Change the hydraulic uid yearly. Remove the Fill Screw and tilt the Pump to drain out the old uid. Rell the hydraulic uid and bleed
the system several times to ensure all air is out of the system.
5.7. DE-COMMISSIONING HYDRAULIC PUMP/RAM
Should the pump or ram become unserviceable, draw o the oil into an approved container and dispose of the product and the oil
in accordance with local authority regulations. Owing to their size and weight, hydraulic products should ideally be repaired by local
service agents. We have service / repair agents in most parts of the UK. Before returning your product please call our technical helpline
on 01284 757505 for advice and trouble shooting guidance. If the jack is under guarantee please contact your stockist..
RE9810 Issue 1 04/04/24
Original Language Version
© Jack Sealey Limited

Sealey Group, Kempson Way, Suffolk Business Park, Bury St Edmunds, Suffolk. IP32 7AR
01284 757500 sales@sealey.co.uk www.sealey.co.uk
Note: It is our policy to continually improve products and as such we reserve the right to alter data, specications and component parts without prior notice.
Important: No Liability is accepted for incorrect use of this product.
Warranty: Guarantee is 12 months from purchase date, proof of which is required for any claim.
ENVIRONMENT PROTECTION
Recycle unwanted materials instead of disposing of them as waste. All tools, accessories and packaging should be
sorted, taken to a recycling centre and disposed of in a manner which is compatible with the environment. When
the product becomes completely unserviceable and requires disposal, drain any uids (if applicable) into approved
containers and dispose of the product and uids according to local regulations.
REGISTER YOUR
PURCHASE HERE
RE9810 Issue 1 04/04/24
Original Language Version
© Jack Sealey Limited