
0
Outdoor Guidance LED Screen
Quick Start Guide

Outdoor Guidance LED Screens • Quick Start Guide
i
Table of Contents
Chapter 1 Product Introduction....................................................................................................... 1
Brief Introduction to Product Functions .............................................................................. 1
Chapter 2 Wiring and Installation .................................................................................................... 2
Wiring Instructions.............................................................................................................. 2
Installation Instructions ...................................................................................................... 3
Device Installation .............................................................................................................. 3
Positions of Mounting Holes............................................................................................... 4
Chapter 3 Quick Operation .............................................................................................................. 4
Connecting to the Internet .................................................................................................. 4
Outdoor Guidance LED Screens • Quick Start Guide
1
Chapter 1 Product Introduction
Brief Introduction to Product Functions
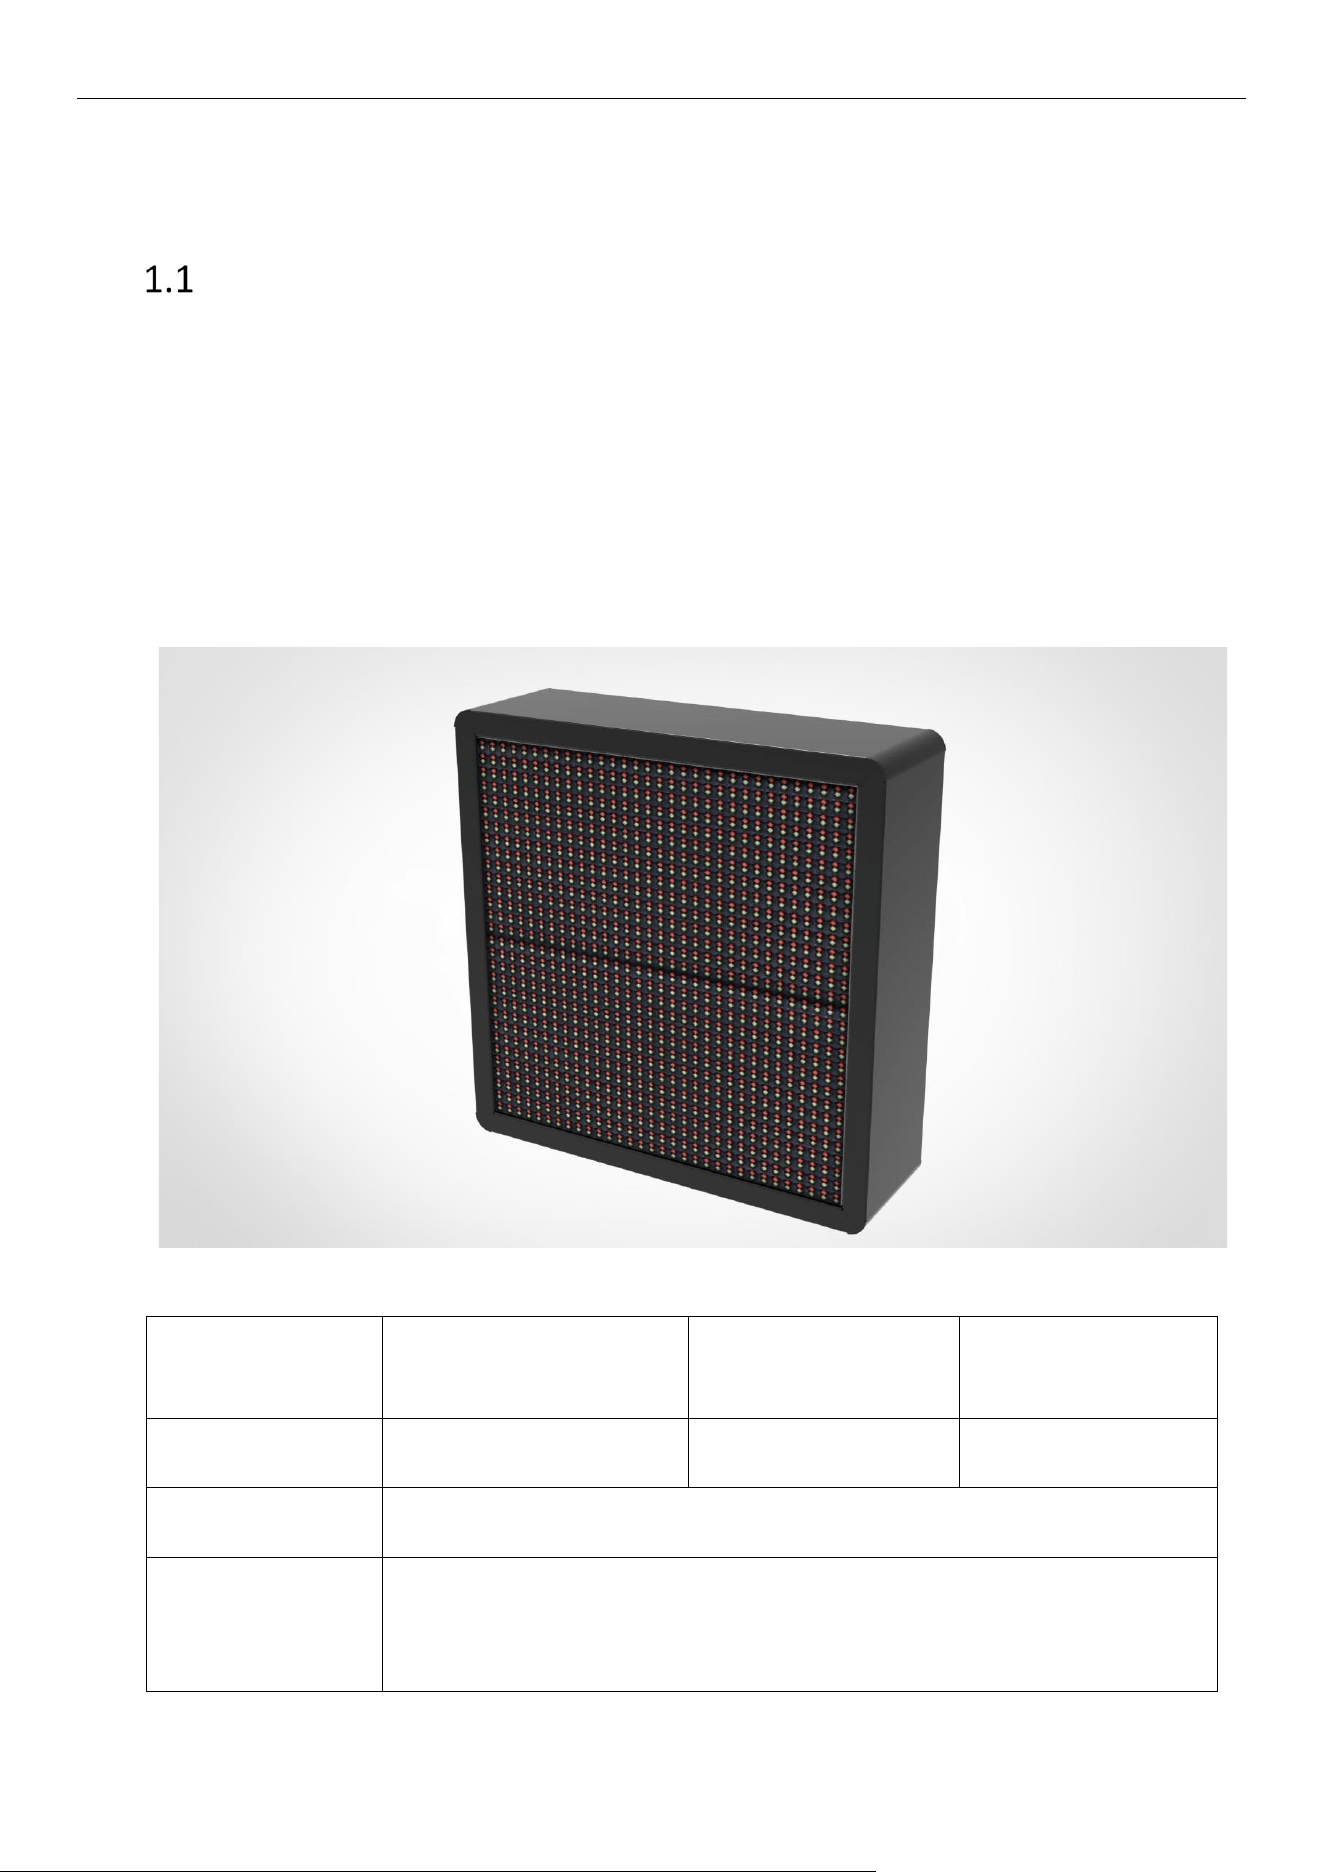
The product is an outdoor guidance LED screen installed at an intersection in a parking lot, displaying
the unoccupied parking spaces in the entire parking lot and their orientations. It can display standard
text and digits, and the standard communication mode is RJ45. It can be used independently or in a
local area network (LAN). The displayed content can be the number of unoccupied parking spaces in
the entire parking lot or the number of unoccupied parking spaces in each zone. A management
system is employed to learn how many parking spaces are available and display them on the outdoor
guidance LED screen. Drivers can refer to the guidance LED screen to see the number of unoccupied
parking spaces and the direction to the parking zones with vacant spaces.
Product Image:
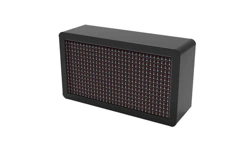
One-way Guidance LED
Screen
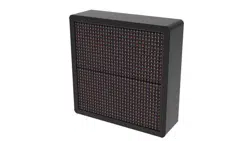
Two-way Guidance
LED Screen
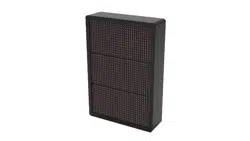
Three-way Guidance
LED Screen
Product Model
DS-TVL221-2-10P
DS-TVL222-2-10P
DS-TVL223-2-10P
Power Supply
100–240 V~, 50/60 Hz, MAX 0.5 A
Downlink
Communication
Mode
RJ45
Outdoor Guidance LED Screens • Quick Start Guide
2
Maximum
Communication
Distance
100 M (if a more extended communication distance is required, an
auxiliary device should be used)
Overall Dimensions
362 × 202 × 110 mm
362 × 362 × 110 mm
362 × 522 × 110 mm
Display Size
320 × 160 mm
320 × 320 mm
320 × 480 mm
Resolution
32 × 16
32 × 32
32 × 48
Displayed Colors
Red, green, yellow
Red, green, yellow
Red, green, yellow
Chapter 2 Wiring and Installation
Wiring Instructions
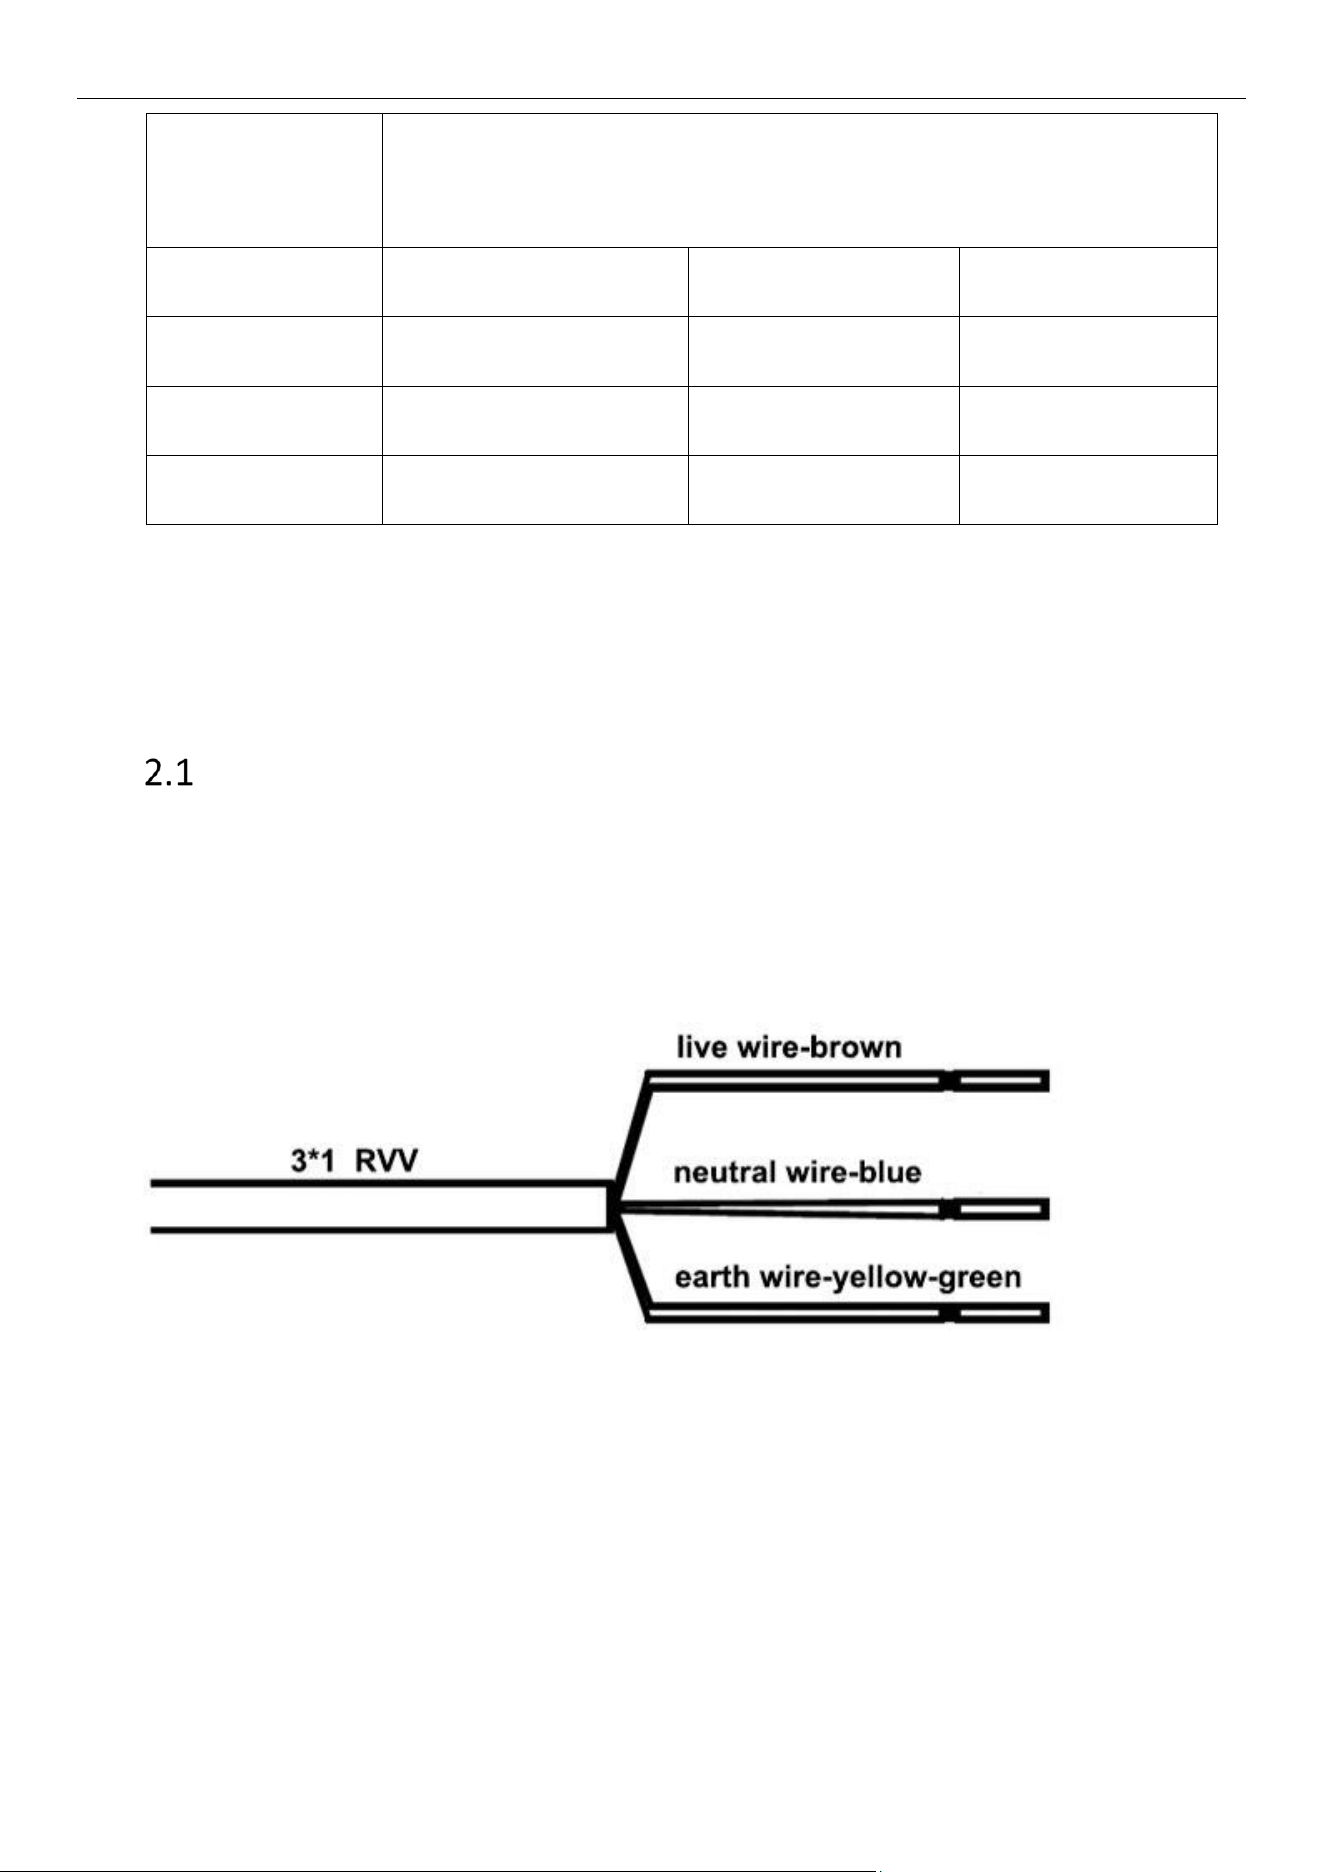
The reserved cable is a 3-core 1.0 mm² RVV cable. The power cord is reserved inside the enclosure.
Cable interfaces: live wire — brown; neutral wire — blue; earth wire — yellow-green (as shown
below).
Power supply: 100–240 V~, 50/60 Hz, MAX 0.5 A
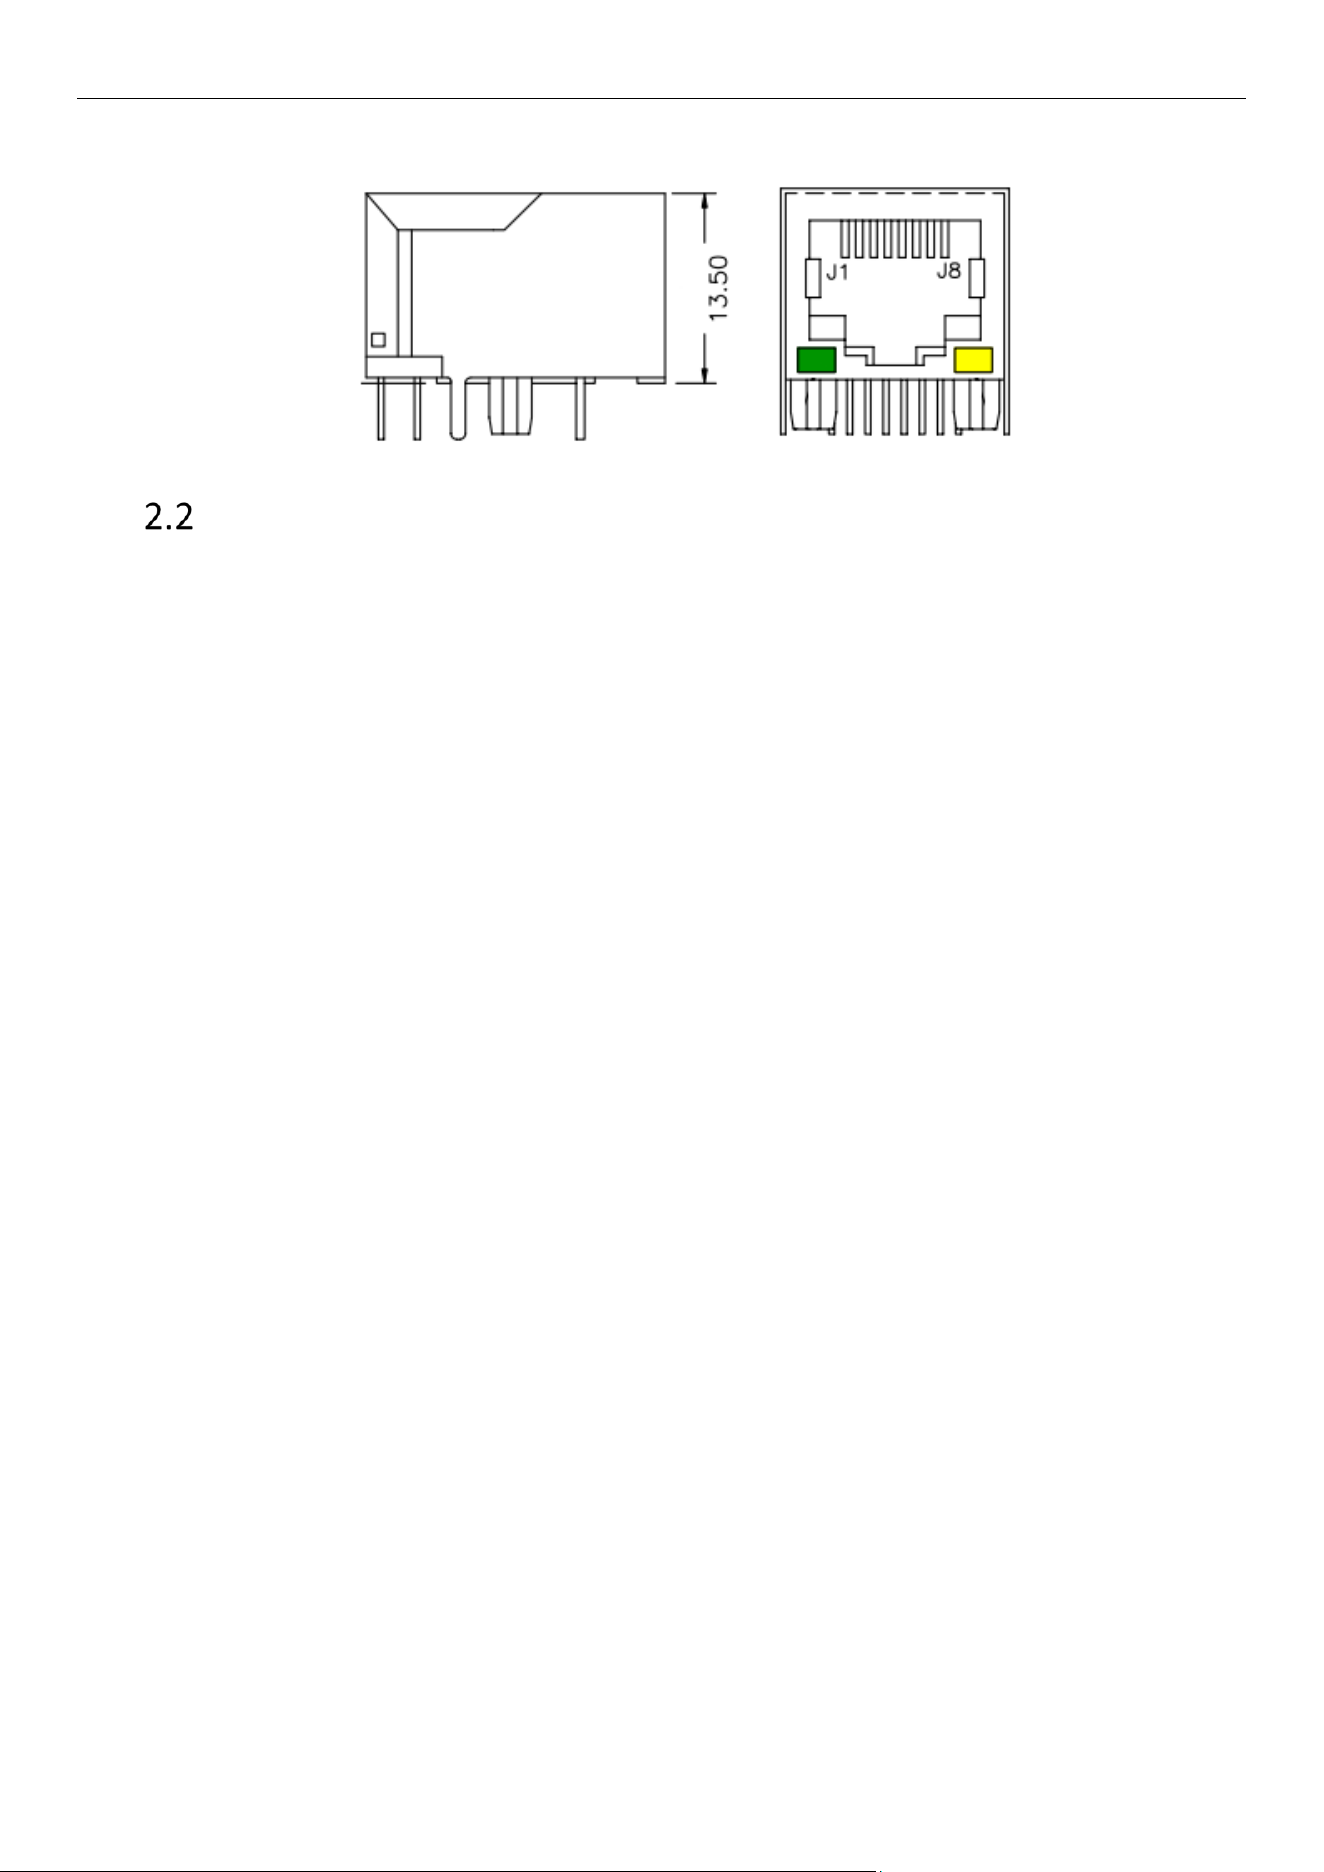
Signal interface (as shown below)
RJ45 interface: directly connect to the control card.
Outdoor Guidance LED Screens • Quick Start Guide
3
RJ45
Installation Instructions
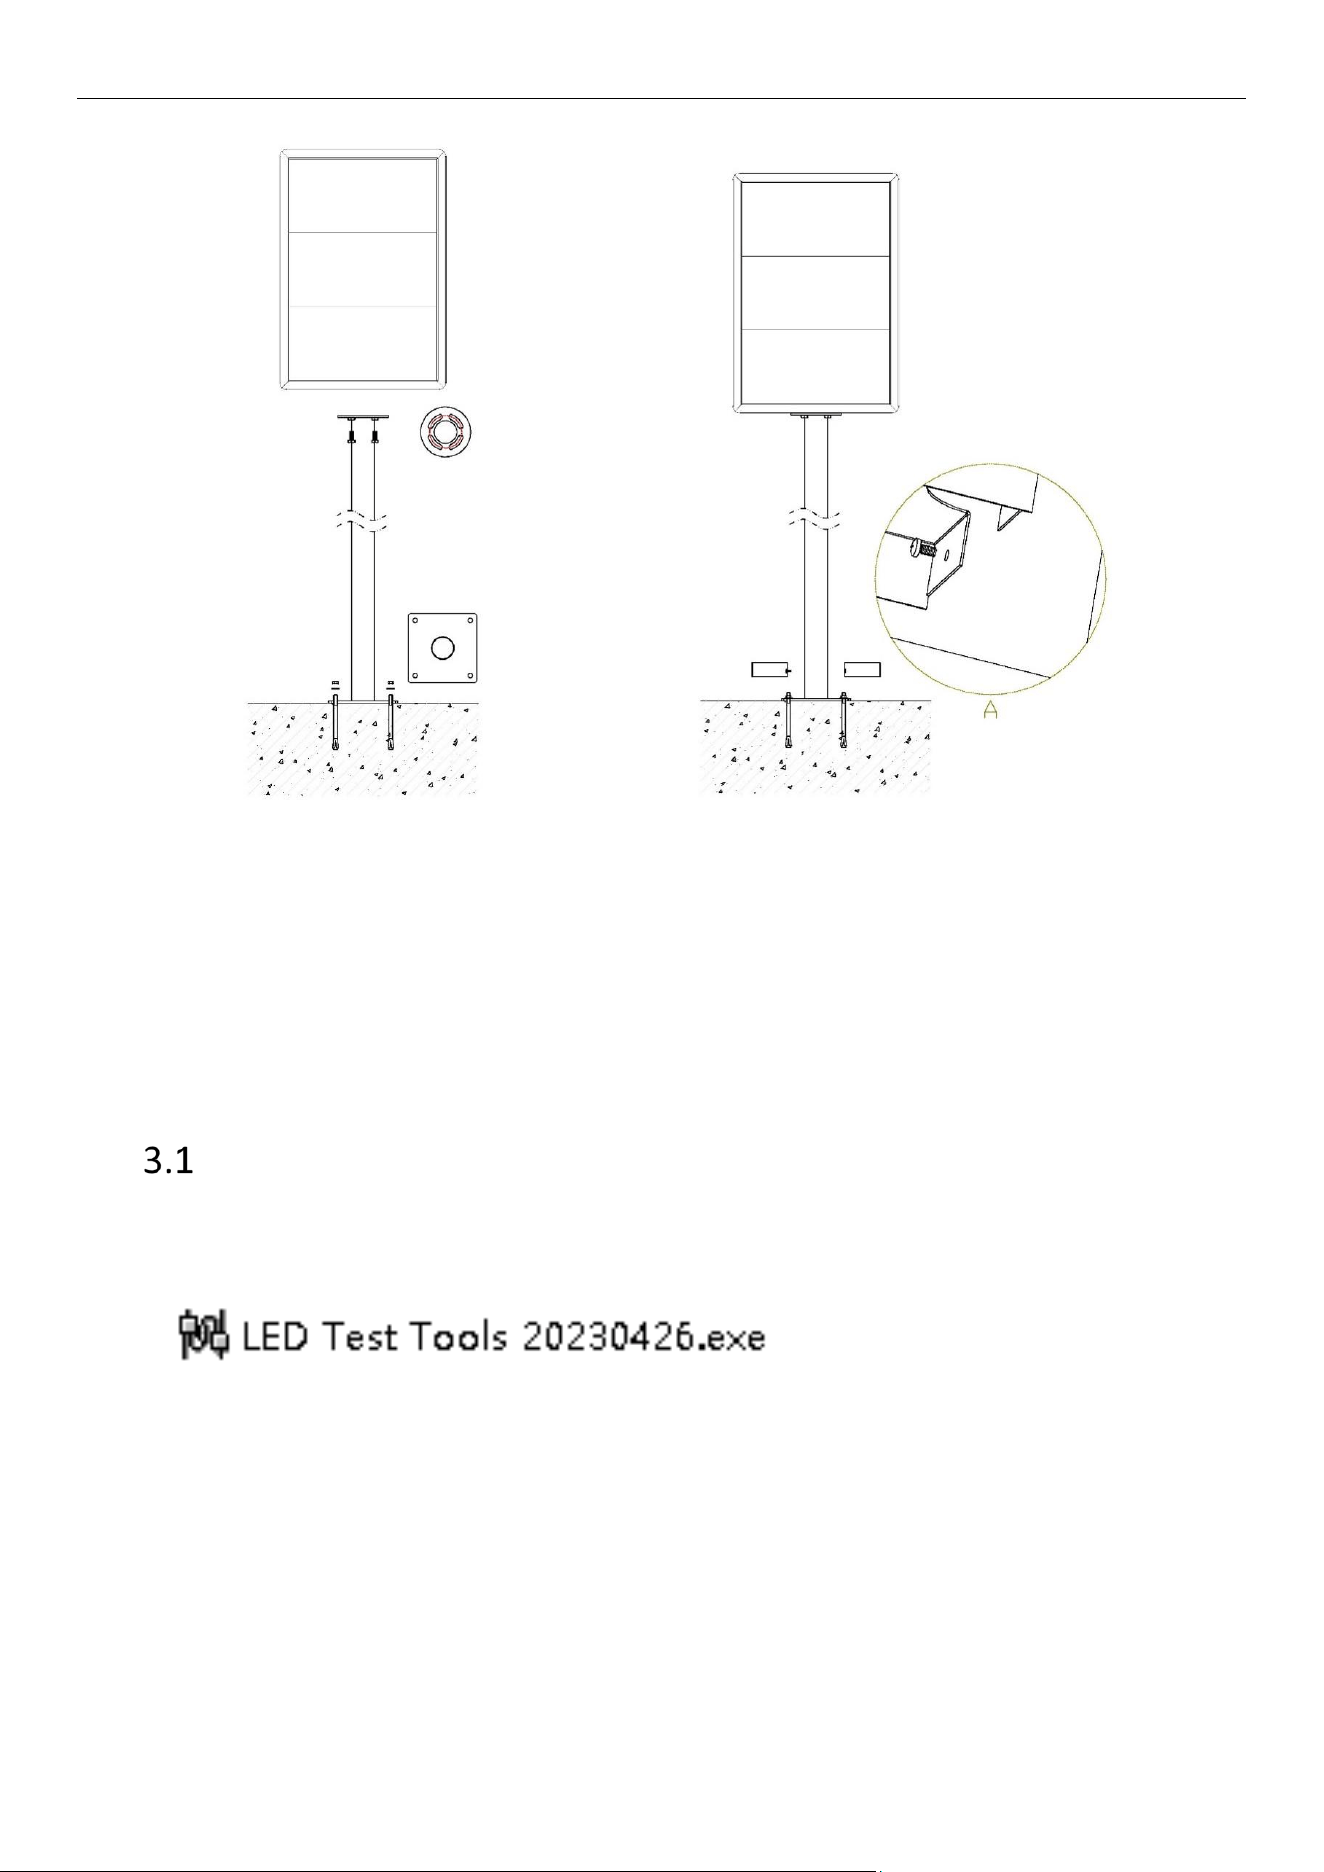
Device Installation
Required Tools:
Anti-static wristband or gloves
Hammer drill (drilling diameter: 10 mm; drilling depth: 800 mm)
Open-end wrench
Device Installation:
Several individuals are required to work together to install this device. The installation process is as
follows:
1. Connect the screen to the pole using four M8*25 bolts.
2. Drill four expansion bolt holes at the designated location (following the fixed hole position at the
bottom of the pole) and hammer four expansion bolts into these holes (expansion bolt: M8*70
×4).
3. Insert four expansion bolts into the holes at the bottom of the pole and tighten them using nuts.
4. Position the left and right decorative plates on both sides of the bottom of the pole, and secure
them inside the decorative plates using screws.
5. Connect the power cord and the signal cable.
Outdoor Guidance LED Screens • Quick Start Guide
4
Positions of Mounting Holes
Chapter 3 Quick Operation
Connecting to the Internet
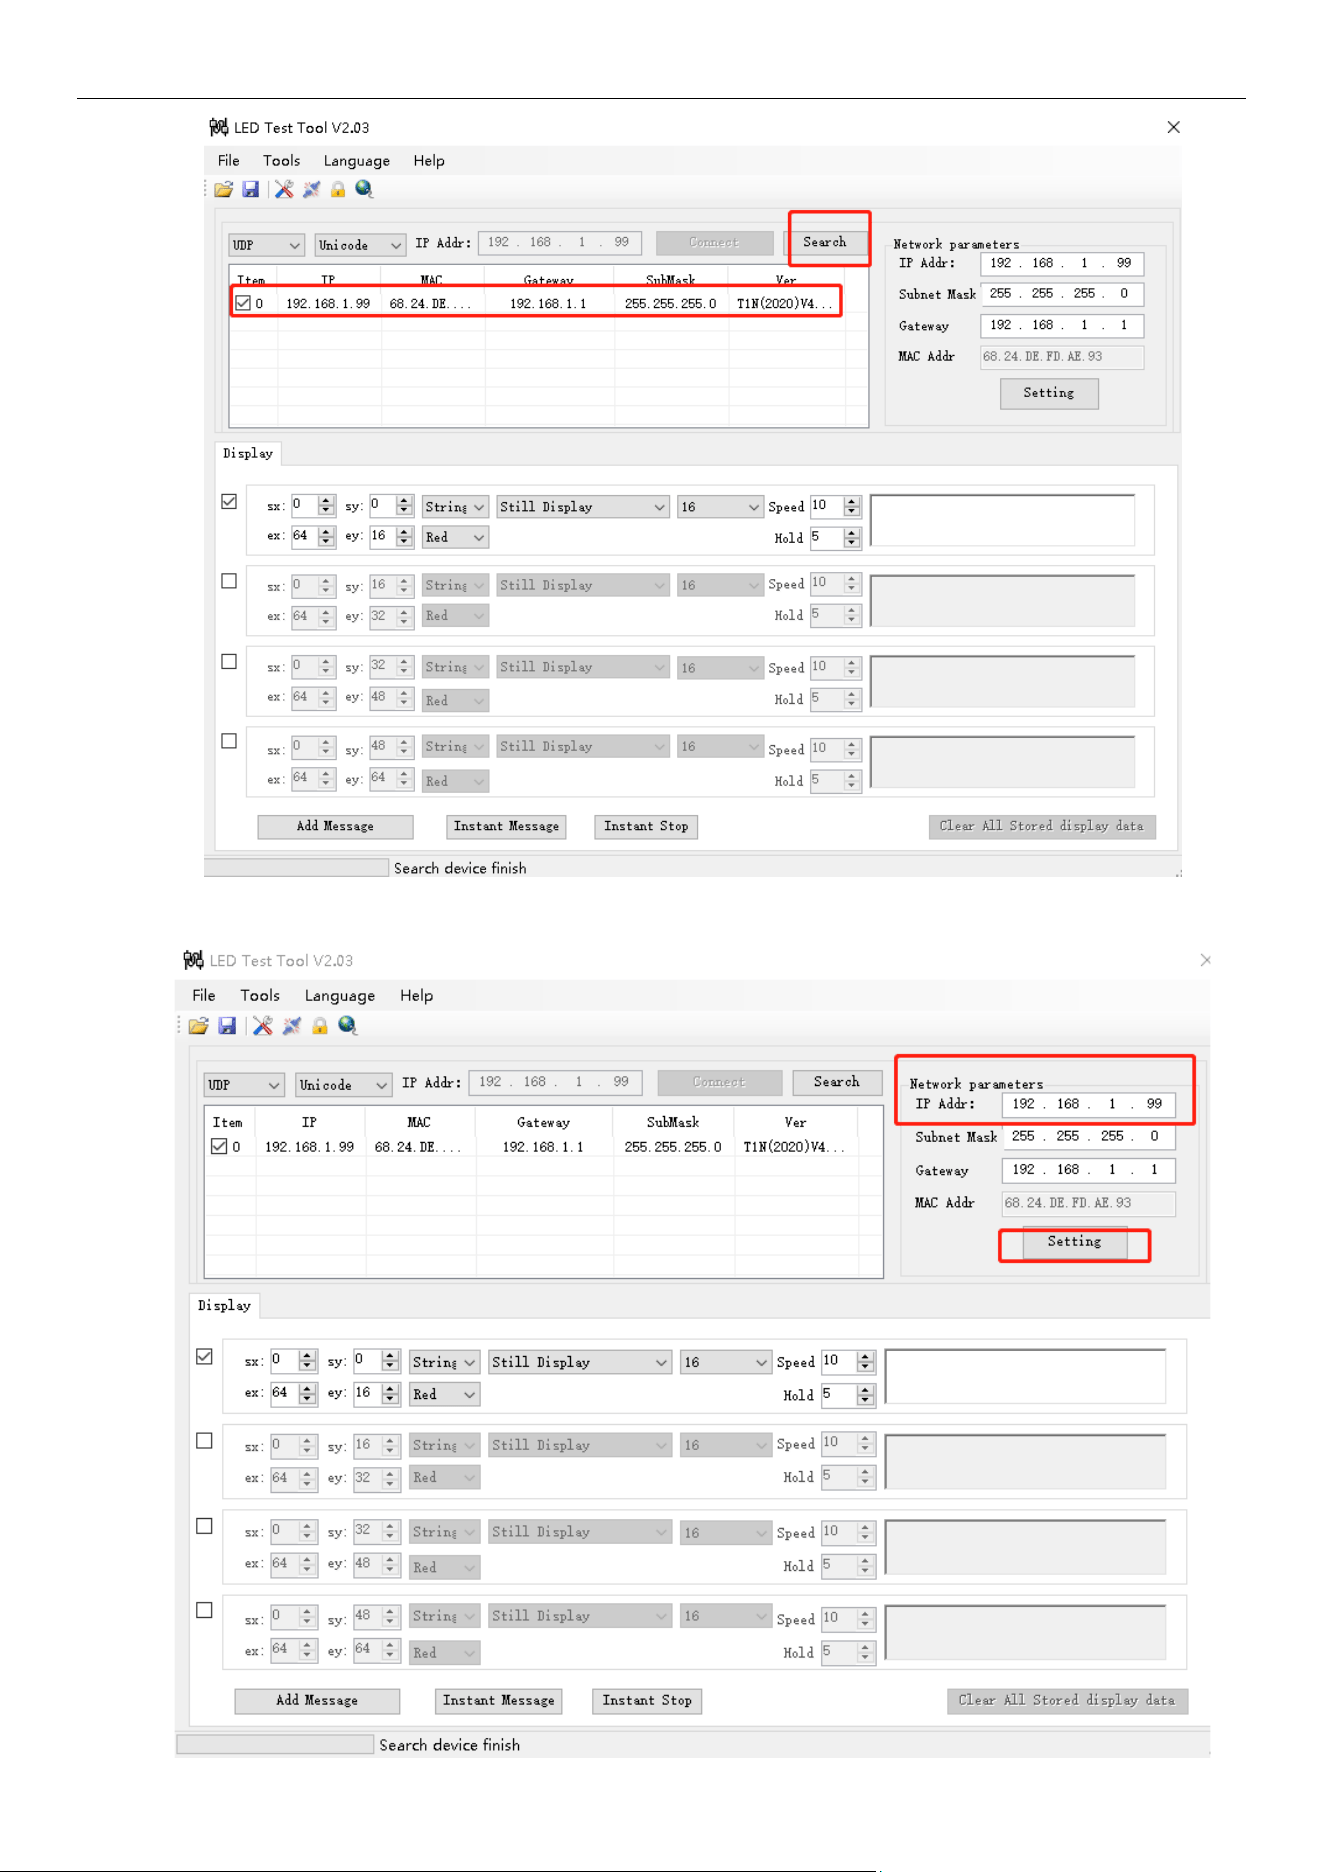
After powering on, change the IP address of the product first.
Default IP: 192.168.1.99
Search for the device.
Outdoor Guidance LED Screens • Quick Start Guide
5
Change the IP address: Enter the IP address to be changed, and click Setting to apply the changes.

Outdoor Guidance LED Screens • Quick Start Guide
6
The device is directly connected to the platform after the IP address is changed.
Package Contents
No.
Name
Specifications
Quantity
Remarks
1
Screen
LED screen
1
2
Bolt
M8*25, stainless steel
4
3
Key
Universal triangle key
1
4
Quick Start Guide
1

0