COMPATIBLE HARD WIRED POWER SUPPLIES* /
BLOCS D’ALIMENTATION COMPATIBLES À BRANCHEMENT DIRECT*
BT06DIMLED-IC (6W), BT12DIMLED-IC (12W), BT24DIMLED-IC (24W),
BT36DIMLED (36W), BT48DIMLED (48W)
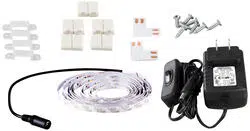
ITEMS INCLUDED IN THE BOX / ARTICLES INCLUS DANS LA BOÎTE
LIGHT OUTPUT / SORTIE D’ÉCLAIRAGE POLARITY / POLARITÉ
Installation guide for
Guide d'installation pour
Approved for installation inside, under or over cabinets,
with light shining in any directions.
Approuvé pour installation à l’intérieur, sous ou sur une
armoire, éclairage dans n’importe quelle direction.
1x plug-in LED driver
1x transformateur DEL enchable
1x WIFI controler with infrared receiver
1x contrôleur WIFI avec récepteur infrarouge
Clips
Attaches
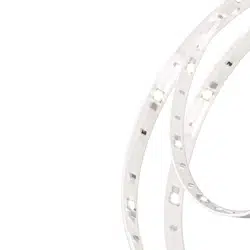
RGB LED + Cool White & Warm White tape light
Ruban DEL RGB + blanc froid et blanc chaud
1
5
2
6
1x wireless remote control
1x manette de contrôle sans-ls
3 4
0.125”
(0.3 cm)
0.5"
(1.2 cm)
110°
SM-TAP 1M
SM-TAP3M
SM-TAP5M
(5.5W)
(14W)
(17W)
WARRANTY / GARANTIE
Dals oers a warranty of 3 years for the LED exible tape light and driver from the date of purchase which covers repair or replacement
of defective parts of the housing, optics, and electronics. To contact Dals customer service call to 1 877 430 1818.
Dals ore une garantie de 3 ans pour le ruban exible à DEL et pour le transformateur à partir de la date de l’achat qui couvre la réparation ou le remplacement
des pièces du boîtier, des pièces optiques et électroniques défectueuses. Pour contacter le service à la clientèle de Dals, appelez au 1 877 430 1818.
* Sold seperately
Vendu séparément
For use without dimmer only
Pour utilisation sans gradateur seulement
1 877 430 1818 www.dals.com
Download the free Dals app
Téléchargez l’appli gratuite Dals
Router
Routeur
max. 10m (33')
+12V
W
CW
R
G
B
+12V
W
CW
R
G
B
+12V
W
CW
R
G
B
+=black/noir, B = blue/bleu,
R=red/rouge, G=green/vert,
WW=warm white/blanc chaud
CW=cool white/ blanc froid
Align «V+» with «+12V» / Aligner «V+» avec «+12V»
v+
v+
Cutting line /
Ligne de coupe
Align «V+» with «+12V» /
Aligner «V+» avec «+12V»
Cutting section: / Section de coupe:
6" (15.25 cm)
Align «V+» with «+12V» / Aligner «V+» avec «+12V»
v+
v+
6" Reconnect adapter
Adaptateur de reconnexion 6"
( 1x SM-TAP1M, 3x SM-TAP3M, 5x SM-TAP5M )
max. 5m
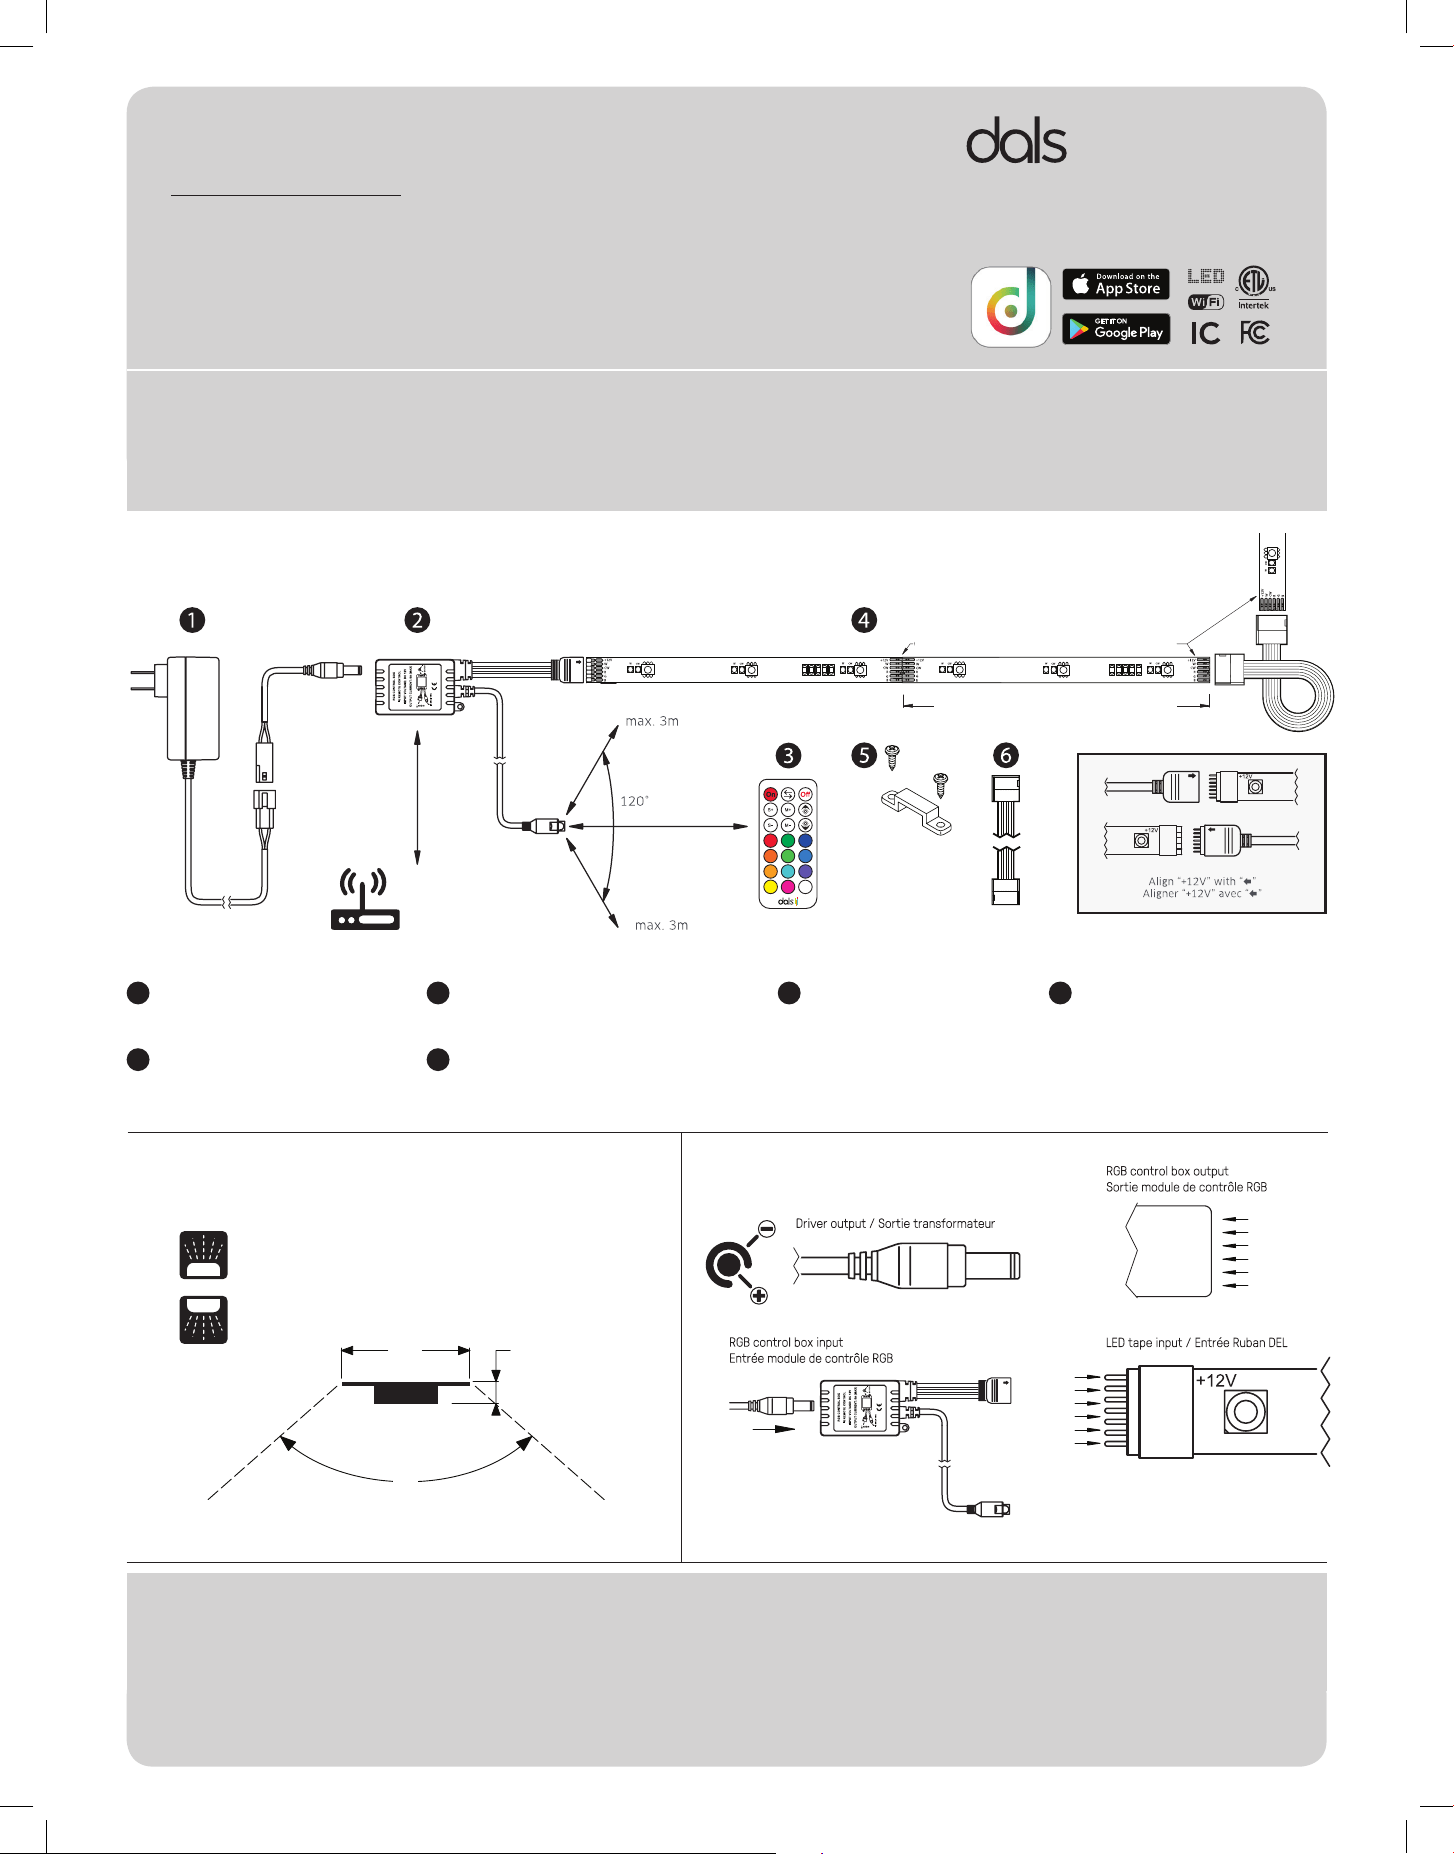
INSTALLATION INSTRUCTIONS / INSTRUCTIONS D’INSTALLATION
DALS REMOTE CONTROL / TÉLÉCOMMANDE DALS
1
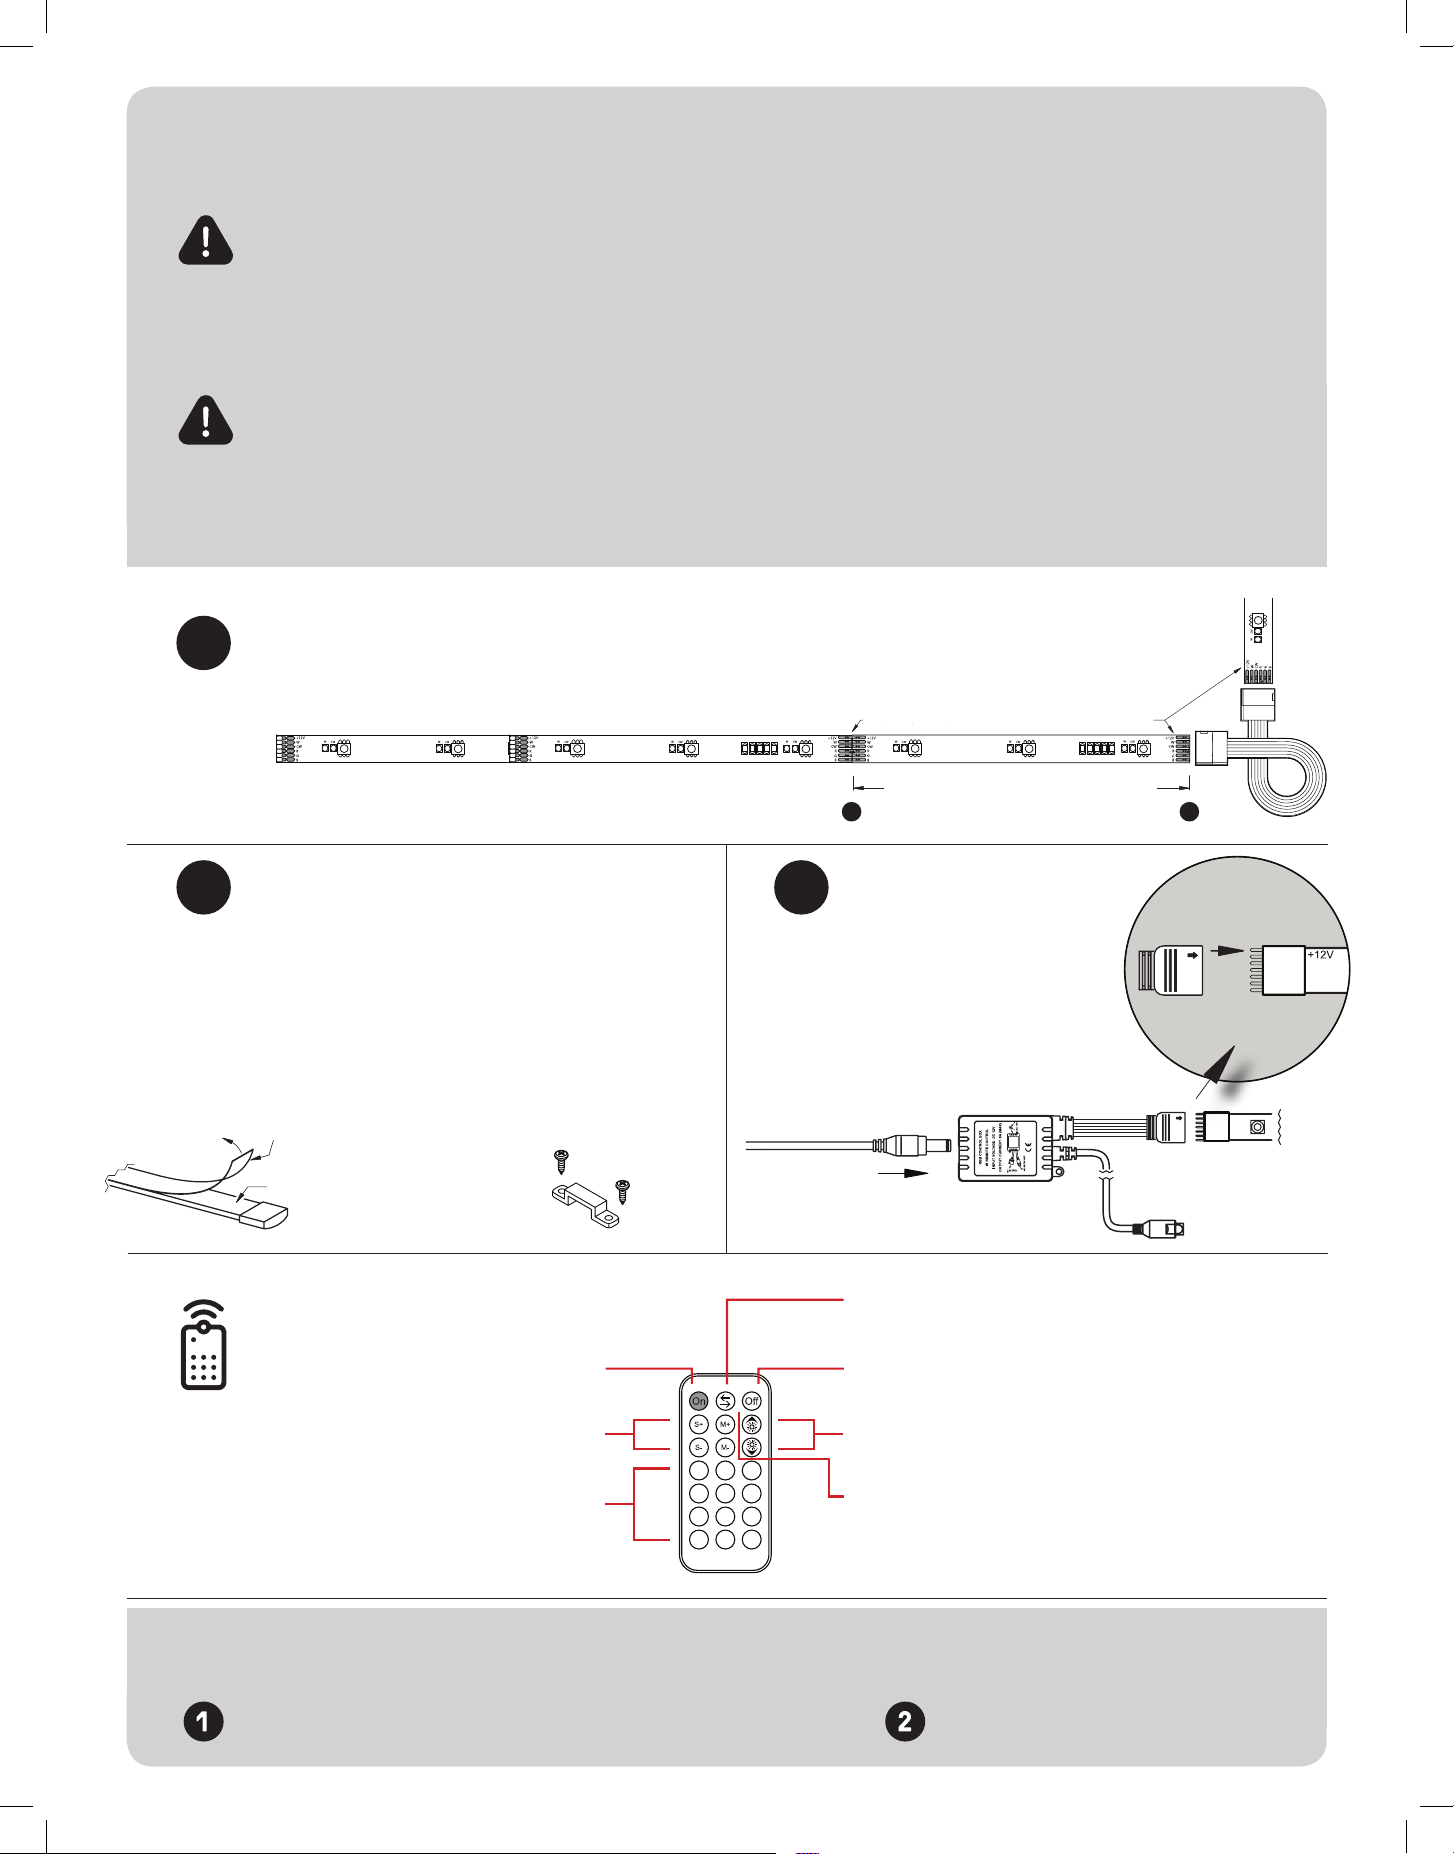
If needed, cut the LED tape on a cutting line at the desired length (A) . To create angled congurations with multiple LED tape strips (B),
please use the Reconnect Adapters. ( 1x SM-TAP1M, 3x SM-TAP3M, 5x SM-TAP5M )
Au besoin, coupez le ruban DEL sur une ligne de coupe à la longueur désirée (A). Pour créer des congurations en angle avec
plusieurs bandes de ruban à DEL (B), veuillez utiliser les Adaptateur de Reconnexion fournis. ( 1x SM-TAP1M, 3x SM-TAP3M, 5x SM-TAP5M )
Ces instructions se rapportent à un risque d’incendie, de chocs électriques ou de blessures corporelles. Pour réduire le risque de feu, chocs ou blessures; utiliser des agraphes
isolées ou attaches en plastique pour xer les cordons, aussi les sécuriser pour prévenir les dommages quand un meuble est poussé au mur, positionner l’appareil pour que les mar-
quages de lampes soient visibles lors du remplacement. Non prévus pour une installation encastrée ni pour être installé dans des plafonds, corniches extérieures ou “constructions
structurales” tels que meubles-cuisine, vaisseliers ou armoires à trophées intégrés. L’appareil bas voltage peut être installé dans ou sous une armoire ou autres meubles encastrés
quand le transformateur Classe 2 bas voltage est placé à l’extérieur de l’armoire et n’est pas caché et quand le cordon d’alimentation de tension de secteur n’est pas caché ou passé
dans des ouvertures dans l’armoire, des murs, des plafonds ou des planchers. Cette condition ne s’applique pas au lage entre l’appareil et le transformateur. Le Code National de
L’Électricité (CNE) ne permet pas que les cordons soient cachés où un dommage à l’isolation devient indétectable. Pour prévenir le risque de feu, ne pas passer les cordons derrière
les murs, plafonds, corniches et meubles où l’examen est impossible, les cordons doivent être inspectés périodiquement et remplacés dès qu’un dommage est détecté.
AVANT DE COMMENCER
Instructions pertaining to a risk of re, electric shock or injury to persons. To reduce the risk of re, electric shock or injury to persons; use only insulated staples or plastic ties
to secure cords, route and secure cords so that they will not be pinched or damaged when the cabinet is pushed to the wall, position the portable cabinet light with respect to
the cabinet so the lamp replacement markings are able to read during relamping. Not intended for recessed installation or for installation in ceilings, sots, “built-in furnishings”
such as a kitchen, china cabinet or trophy case. The low voltage portable cabinet light may be installed inside or under a kitchen cabinet or other built-in furniture when the low
voltage Class 2 power supply is located outide the cabinet and is not concealed and when the line voltage power supply cord is not concealed or run through openings in the cabi-
net, walls, ceilings or oors. This requirement does not apply to the wiring between the cabinet light and the power unit. The National Electrical Code (NEC) does not permit cords
to be concealed where damage to insulation may go unnoticed. To prevent re danger, do not run cord behind walls, ceilings, sots or cabinets where it may be inaccessable for
examination, cords should be examined periodically and immediatly replaced when any damage is noted.
BEFORE YOU START
SM-TAP 1M
SM-TAP3M
SM-TAP5M
Installation guide
Guide d'installation
2 3
Remove the protection tape and stick the LED tape to the mounting
surface or use the supplied mounting clips & screws to fasten the
tape to the desired surface. Fix the wireless controller by using the
2 xation holes and wire clips; make sure that there are no obstacles
between the wireless controller and the wireless remote control.
Retirer le ruban de protection et coller le ruban à DEL sur la surface de
montage ou utiliser les clips et vis de montage fournis pour xer le ruban
à la surface souhaitée. Fixer le module de contrôle sans l en utilisant
les deux trous de xation et les attaches de l; assurez-vous qu’il n’y ait
aucun obstacle entre le récepteur et la télécommande sans ls.
Connect the LED tape with the RGBW
control box by aligning the connector
arrow with the «+12V» then, connect the
RGBW control box with the LED driver,
plug in the wall outlet.
Connecter le ruban DEL avec le module
de contrôle RGBW en alignant la èche
du connecteur avec le «+12V» puis,
connecter le module de contrôle RGBW
avec le transformateur DEL, brancher
dans une prise murale.
LED driver
Transformateur DEL
LED tape
Ruban DEL
RGBCCT control box
Module de
contrôle RGBCCT
HARD RESET / RÉINITIALISATION AUX PARAMÈTRES D’USINE
If the controller cannot be seen by your phone and has not created its own wi access point, you may need to reset it.
Si le contrôleur ne peut être reconnu par votre appareil mobile et n’a pas créé son propre réseau Wi-Fi, vous pourriez avoir besoin de le réinitialiser aux paramètres d’usine.
Once light is on for 10+ seconds, unplug and plug in the controller 3 times quickly.
Une fois que l'appareil est allumé pendant plus de 10 secondes, débranchez et branchez
le contrôleur 3 fois rapidement.
Go through the setup procedure again.
Refaire la procédure de connexion au réseau sans-l.
On and o keys /
Boutons «
on
» et «
off
»
Toggle /
Basculer
On and o keys /
Boutons «
on
» et «
off
»
Preset colors /
Couleurs prédénies
Increase / decrease brightness /
Augmenter / diminuer la luminosité
Previous / next mode /
Mode précédent / suivant
Increase / decrease speed /
Augmenter / diminuer la vitesse
Protection tape /
Protection du ruban adhésif
Adhesive tape / Ruban adhésif
Mounting clips & screws /
Clips de xation et vis
A B
+12V
Align «V+» with «+12V» / Aligner «V+» avec «+12V»
v+
v+
Align «V+» with «+12V» / Aligner «V+» avec «+12V»
v+
v+
Cutting line /
Ligne de coupe
Align «V+» with «+12V» /
Aligner «V+» avec «+12V»
Cutting section: / Section de coupe:
6" (15.25 cm)