Loading ...
Loading ...
Loading ...

10
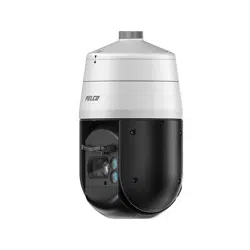
1. Pendant Cap: Open the pendant cap by loosening the T-20 torx star screws and then connect required items (digital I/O
connectors, power terminal, and RJ-45 network port) if necessary. In addition, both the reset and default buttons are
embedded here for utilization when needed.
2. SFP Port: The port is used to connect to a variety of fiber and Ethernet cables.
3. Activity Behaviors:
Booting: With a fast flashing green, the LED indicates the camera is currently booting.
Software updating: With alternate fast/slow flashing green, the LED indicates the camera is updating software.
Booting failure: With a slower flashing green, the LED indicates the camera failed to boot.
Booting completion: With the green light off, the LED indicates the camera has completed booting.
4. Reset/Default Button: Press the button for approximately 1 second to reboot the camera. Press the button for 5 seconds
to restore the camera’s settings back to the factory default. There are two Reset/Default buttons: one located under the
top cover and the second button is located under the SD card cover.
5. Digital I/O Connectors:
Alarm In: Via “GND” and “AI” ports, connect to external device that can trigger alarm input signals.
Alarm Out: Via “COM” and “AO” ports, connect to external device to be triggered through alarm output signals.
Audio In: Via “Au/I” and “GND” ports, connect to external device such as microphone that receives sound for camera.
Audio Out: Via “Au/O” and “GND” ports, connect to device such as speaker to be triggered through alarm output signals.
6. Power Terminal: The port is to connect with either external DC 48V or AC 24V power supply. NOTE: There is no
polarity for the power connection.
7. RJ-45 Network Port: Connect the RJ-45 connector to this port for network connection and also allow a PoE BT (Class 8)
power sourcing equipment (PSE) to supply power through Ethernet cable.
8. SD Card Cover: Open the SD card cover by loosening the T-6 torx star screws and then insert micro SD card, if necessary.
9. Micro SD Card Slot: The slot is for inserting optional micro SD card (not supplied) for local file storage.
10. IR Board: The IR LED embedded board for illumination under low-light environment. (The IR board is hidden under the
front window assembly)
Loading ...
Loading ...
Loading ...