KDK911424M
KDE911424M
KDE911424B
KDK912924M
KDE912924M
KDK911424T
EN
User manual
Warming drawer
02
FR
Manuel d’utilisation
Tiroir chauffant
14
ZH
用户手册
加热抽屉
26
AR
مدختسملا ليلد
جرد رارتحا
36
USER
MANUAL
2 www.aeg.com
CONTENTS
1. SAFETY INFORMATION ............................................................................ 3
2. APPLIANCE DESCRIPTION ...................................................................... 8
3. USE ............................................................................................................. 9
4. CLEANING AND MAINTENANCE ............................................................ 11
5. WHAT SHOULD I DO IF THE WARMING DRAWER DOESN’T WORK?12
6. INSTALLATION INSTRUCTIONS ............................................................ 12
7. ENVIRONMENTAL PROTECTION .......................................................... 13
DESIGNED FOR YOU
Thank you for purchasing an Aeg appliance. You have chosen a product that brings with it
decades of professional experience and innovation. Ingenious and stylish, it has been
designed with you mind. So whenever you use it, you can be safe in the knowledge that
you’ll get great results every time. Welcome to Aeg.
Visit our website to:
Get usage advice, brochures, troubleshooting and service information:
www.aeg.com
Register you product for better service:
www.aeg.com/productregistration
Buy accessories, consumables and original spare parts for your appliance:
www.aeg.com/shop
CUSTOMER CARE AND SERVICE
We recommend the use of original spare parts.
When contacting Service, ensure that you have the following data available.
The information can be found on the appliance dataplate. Model, PCN, Serial Number.
Warning / Caution - Safety information
General information and tips
Environmental information.
Subject to change without notice.
ENGLISH 3
1. SAFETY INFORMATION
Carefully read the instructions before installing and using
the equipment. The manufacturer is not liable for
property damage or personal injury resulting from
improper installation and use of the equipment. Always
keep the instructions at hand, so they can be easily
referred to during use. This appliance complies with
applicable safety standards. Improper use of the
appliance may put users, bystanders and property at
risk.
1.1 Safety of children and vulnerable adults
WARNING!
Risk of suffocation, injury or permanent disability.
• This appliance may be used by children aged 8 years
and over and persons with reduced physical, sensory
or mental capabilities or lack of experience and
knowledge as long as they are given supervision or
instructions concerning how to use the appliance in a
safe way and understand the hazards involved.
• Children should not play with the appliance. Keep
children under the age of three away from the
appliance.
• Keep packaging materials out of reach of children.
• Keep children and pets away from the appliance
during operation or cooling. The accessible parts are
red hot.
• Cleaning and maintenance should not be performed
by unsupervised children.
• Keep the appliance and its cable out of reach of
children under the age of eight.

4 www.aeg.com
1.2 General safety warnings
During use, the appliance becomes hot. Care should be
taken to avoid touching heating elements inside the
device. Always use oven gloves to insert or remove
accessories or oven-proof cookware.
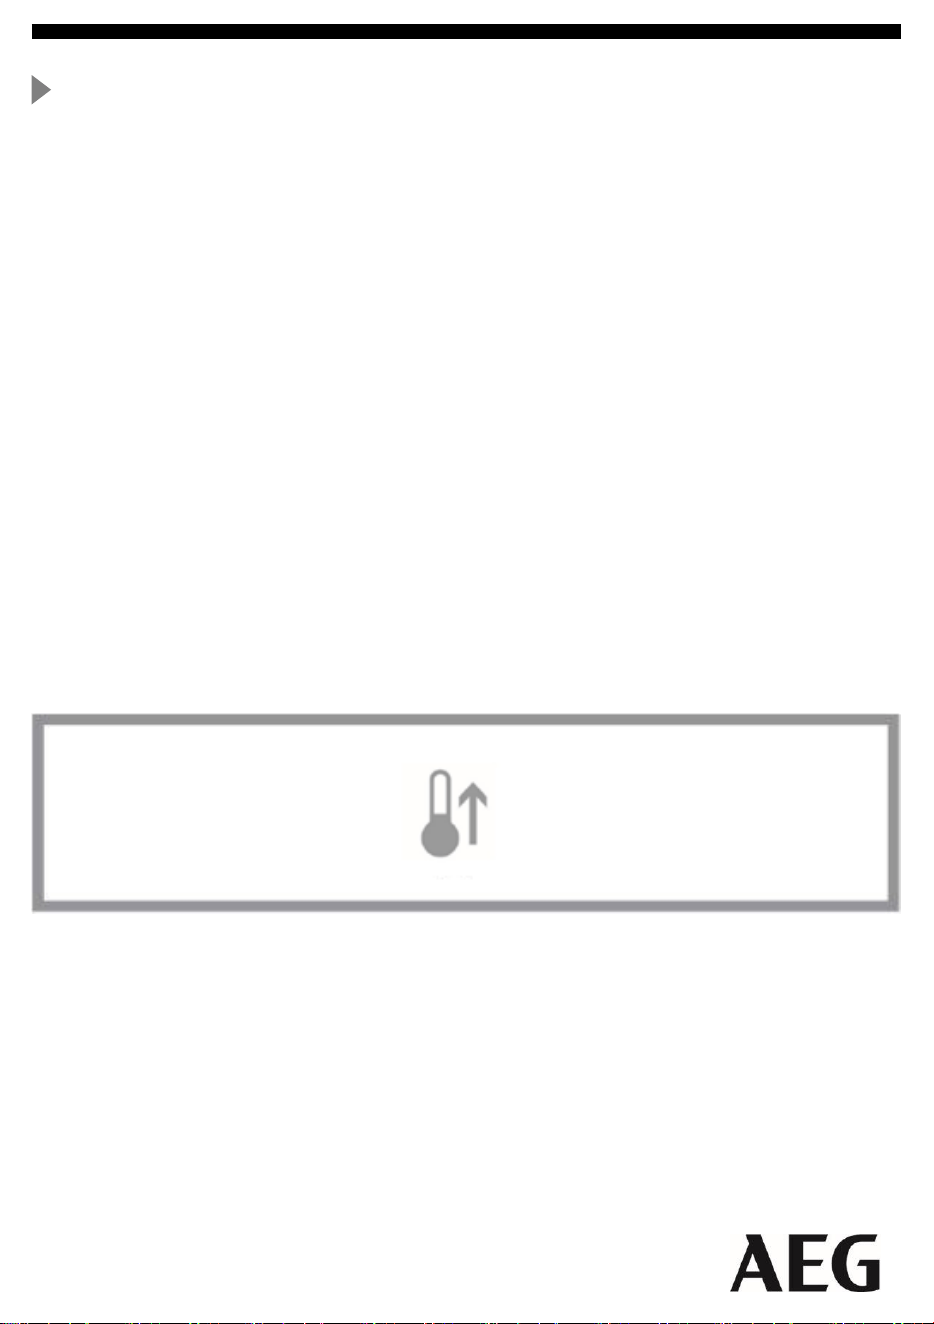
• Depending on temperature selected and the operating
time, the temperature inside the appliance may reach
80°C. When taking crockery out of the crockery
warmer, protect your hands using oven gloves or a tea
towel.
• Do not sit or hang on the drawer – the telescopic
runners would be damaged. The maximum load
capacity of the drawer is 15 kg.
• Do not store synthetic containers or flammable objects
inside the crockery warmer. When you switch on the
appliance such containers and objects may melt or
catch fire. Fire hazard!
• Do not use the appliance as a space heater. The high
temperatures reached could cause flammable objects
close to the appliance to catch fire.
• When you stop using the appliance at the end of its
working life, disconnect it from the power supply and
render the electrical cable unusable so that it is not a
hazard to children, for example.
1.3 Installation
• Refer to the installation instructions supplied
separately.
• The installation must ensure protection against direct
contact with live parts.
ENGLISH 5
• The electric system must be equipped with an isolation
switch providing all-pole contact separation which
provides for full disconnection under overvoltage
category III.
• A plug must be used for the electrical connection; this
must remain accessible after installation.
• Warning! Before connecting the appliance, compare
the power supply data (voltage and frequency)
indicated on the data plate with those of the mains
supply. If these data do not match there may be
problems. In case of doubt, contact an electrician.
• Warning! If the appliance is to be connected without
using a plug (hard-wired), the appliance must be
installed and connected by a technician. Contact a
qualified electrician who will perform the work in
accordance with electrical code and comply with all
provisions of this manual. The manufacturer cannot be
held responsible for damage resulting from installation
or connection errors.
• Warning! The electrical safety of the appliance can
only be guaranteed if it is properly earthed. The
manufacturer cannot be held responsible for damage
resulting from the absence of or defects in the
installation’s protective earthing system (e.g. electrical
shock).
• Warning! Only use the appliance once it has been
fully installed. Only full and final installation within the
kitchen unit carcase can ensure that there is no risk of
contact with live parts.
6 www.aeg.com
• WARNING! Never open the appliance’s structure.
Potential contact with live parts or any modifications to
the electrical and mechanical structure can lead to
hazardous situations for users and compromise
correct operation of the appliance.
1.4 Cleaning
• Do not use harsh abrasive cleaners or metal
scrapers/scourers to clean the device since they can
scratch the surface.
• Do not use steam cleaners to clean the appliance.
• Do not use high pressure or steam jet cleaning
devices. The steam may affect electrical components
and cause a short circuit. The steam pressure may
also cause damage to the appliance’s surface and
components in the long time.
1.5 Repairs
• If the appliance’s power supply cable is damaged, it
must be replaced by the manufacturer, by an
authorised technician or by a qualified electrician in
order to negate any potential hazards.
• Warning! The appliance must be isolated from the
electricity supply when installation and repair work is
being performed. To disconnect the appliance from the
current, one of the following conditions must be met:
- The relevant fuses / circuit breakers at the
switchboard must be disconnected.
- The plug should be removed from the socket. To
remove the plug from the socket do not pull on the
electric cable but rather pull out the plug itself
directly.

ENGLISH 7
• Warning! Repairs and maintenance, especially of
live components, must only be performed by
technicians authorised by the manufacturer. The
manufacturer and retailer do not accept responsibility
for any injury to people or animals or damage to
personal property as a result of repairs and
maintenance carried out by non-authorised personnel.
• Warning! Repairs undertaken during the warranty
period must only be performed by technicians
authorised by the manufacturer. If this is not the case
then any damage resulting from the repair in question
shall be excluded from the guarantee.
8 www.aeg.com
2
3
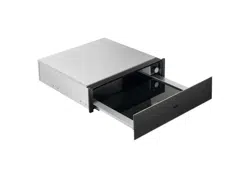
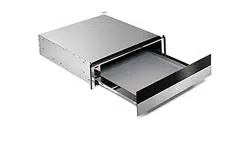
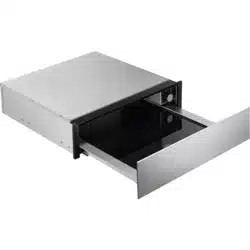
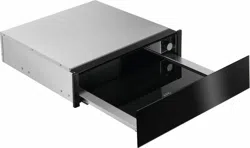
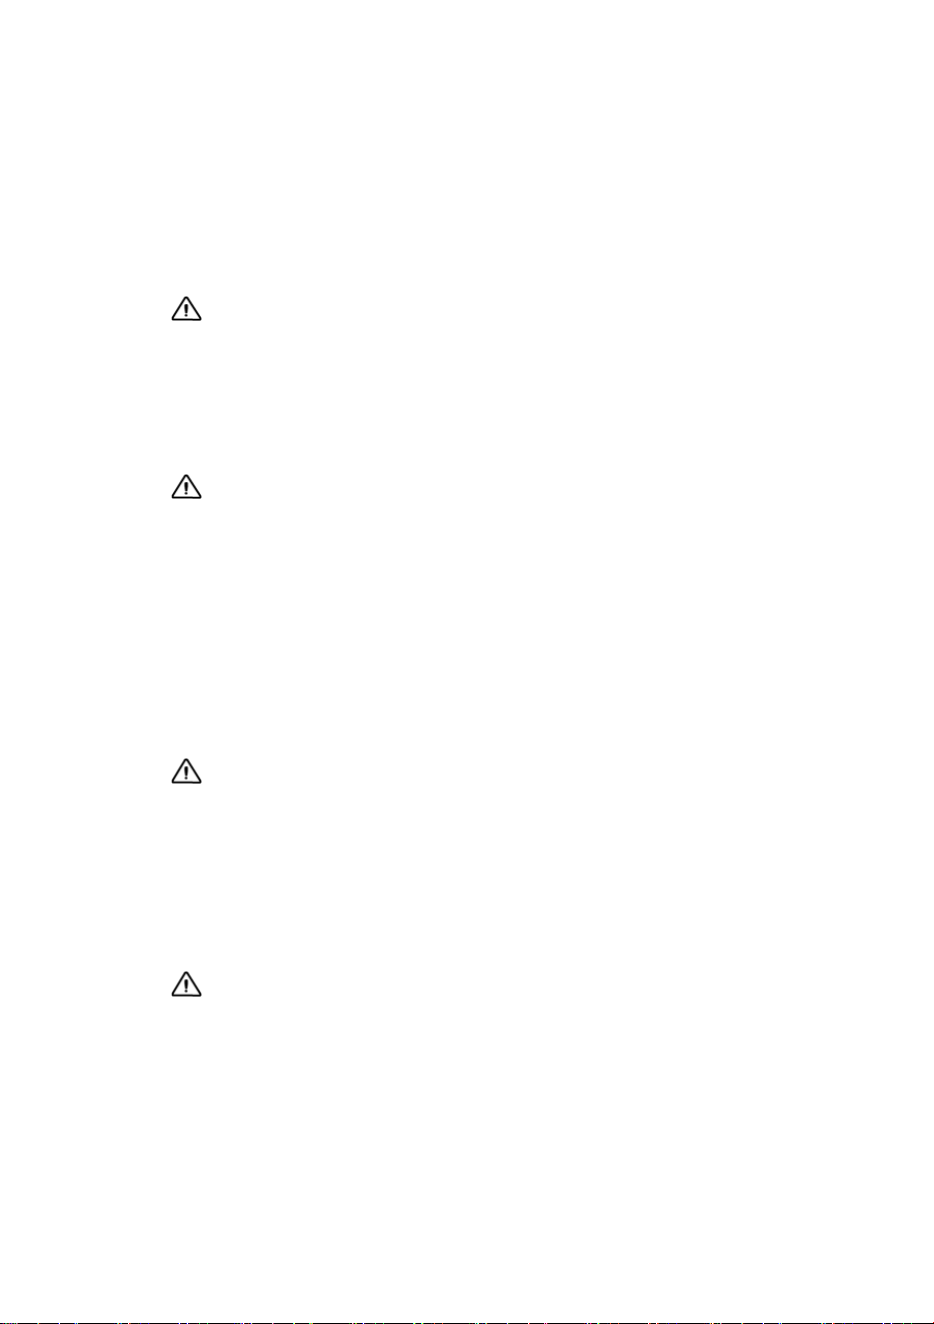
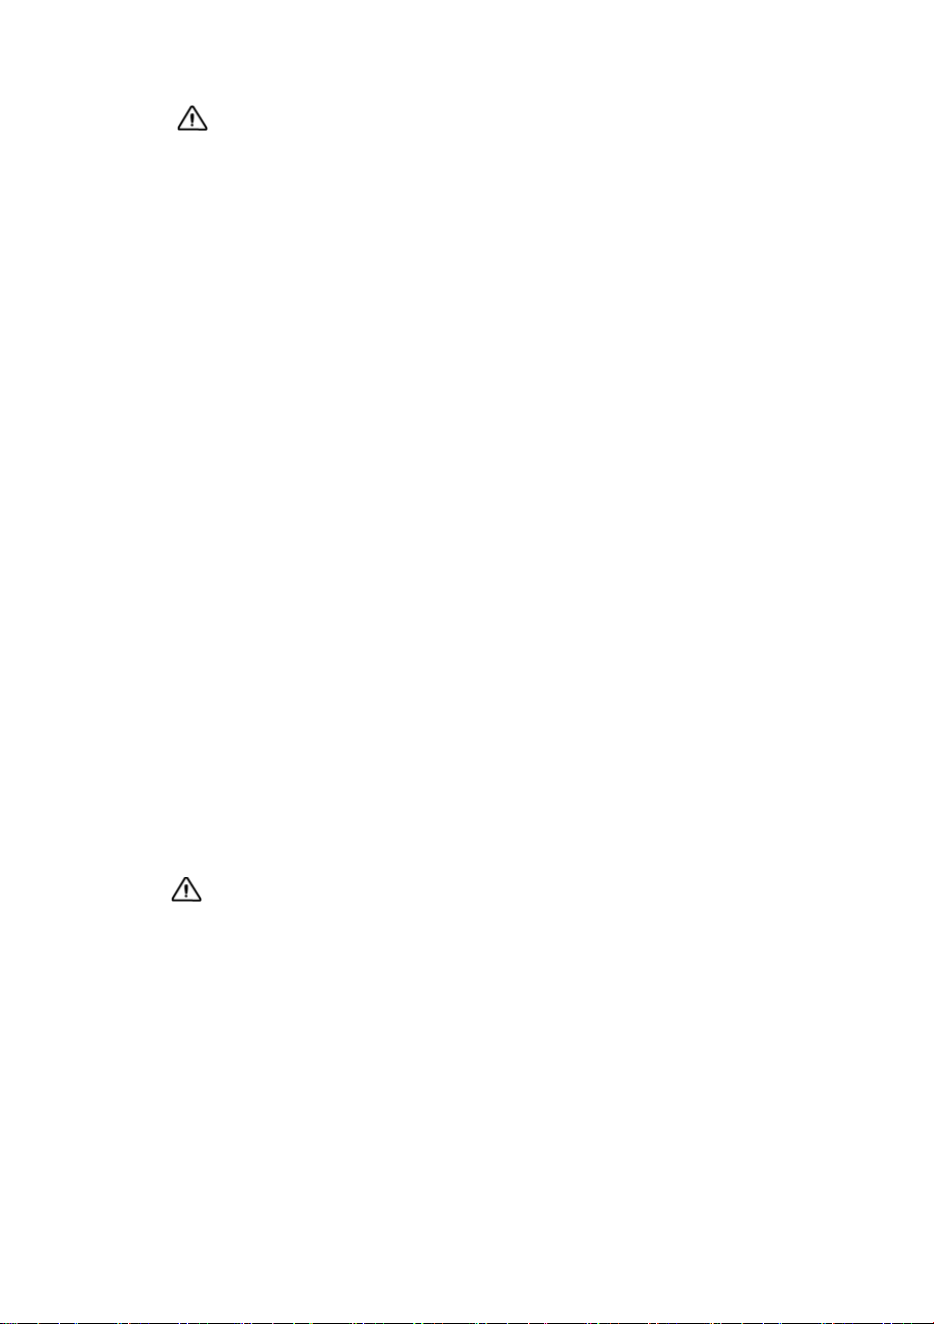
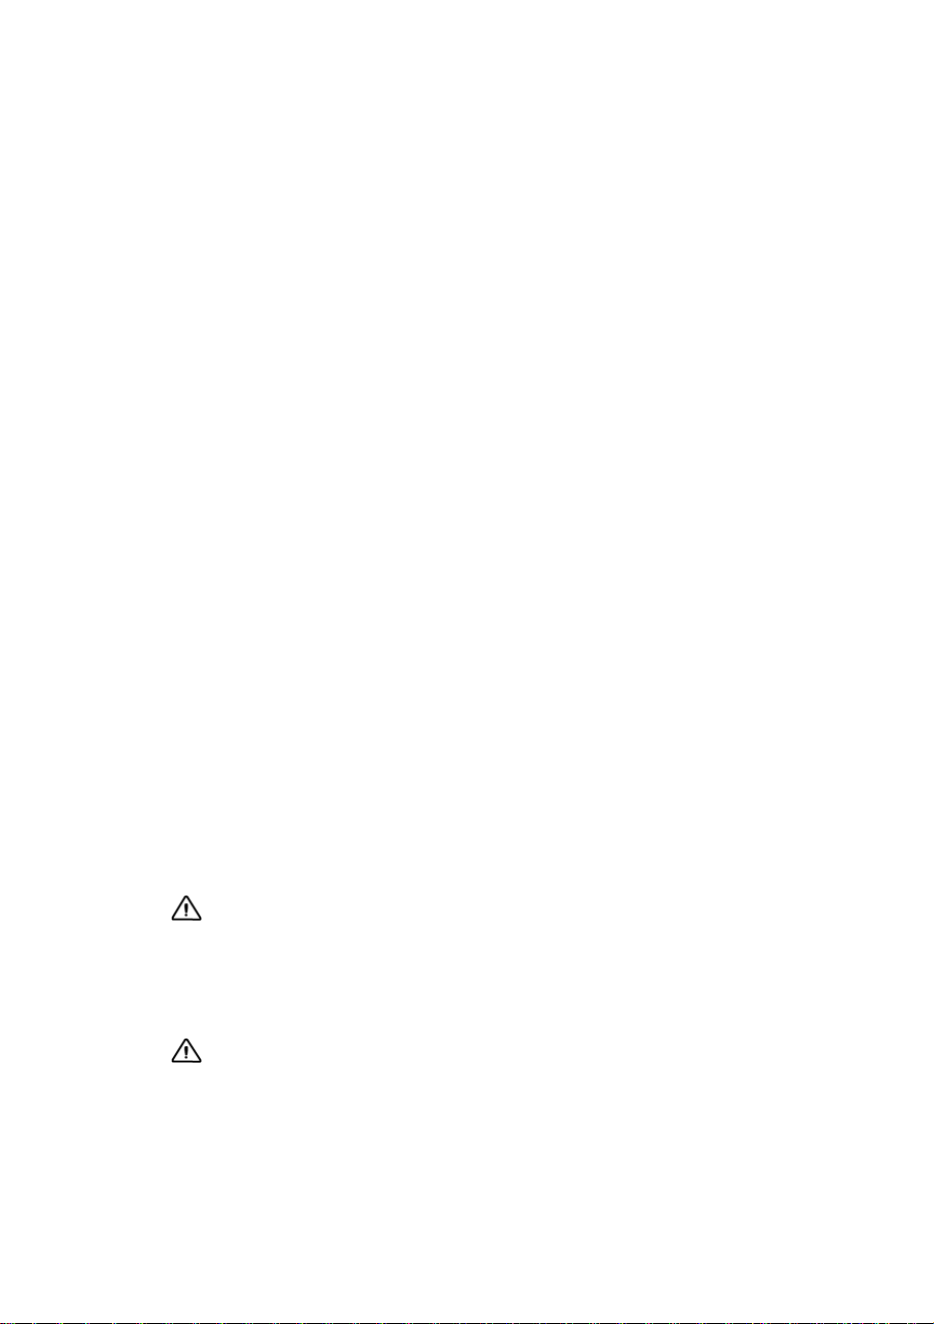
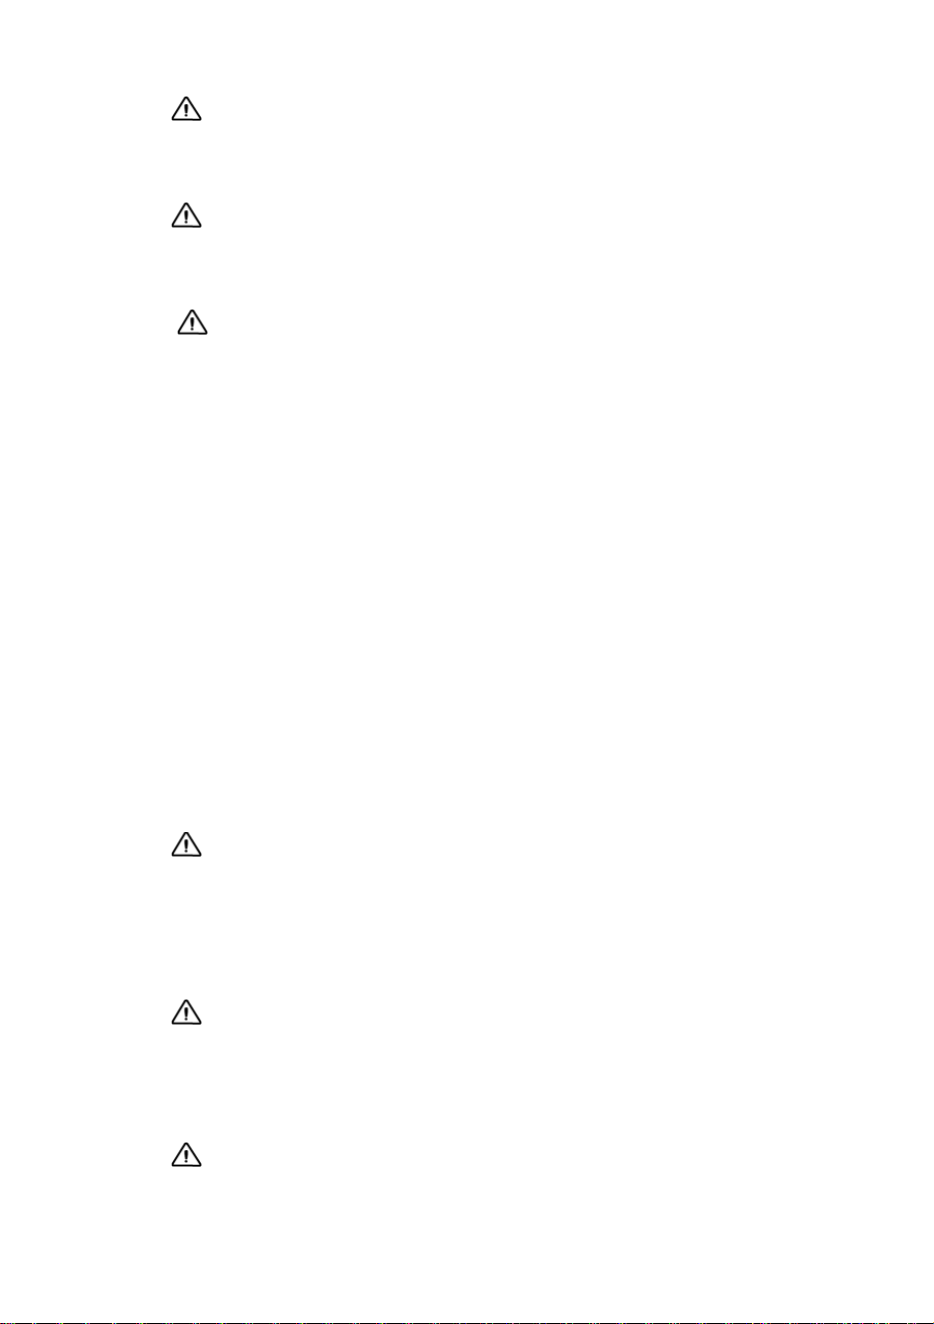
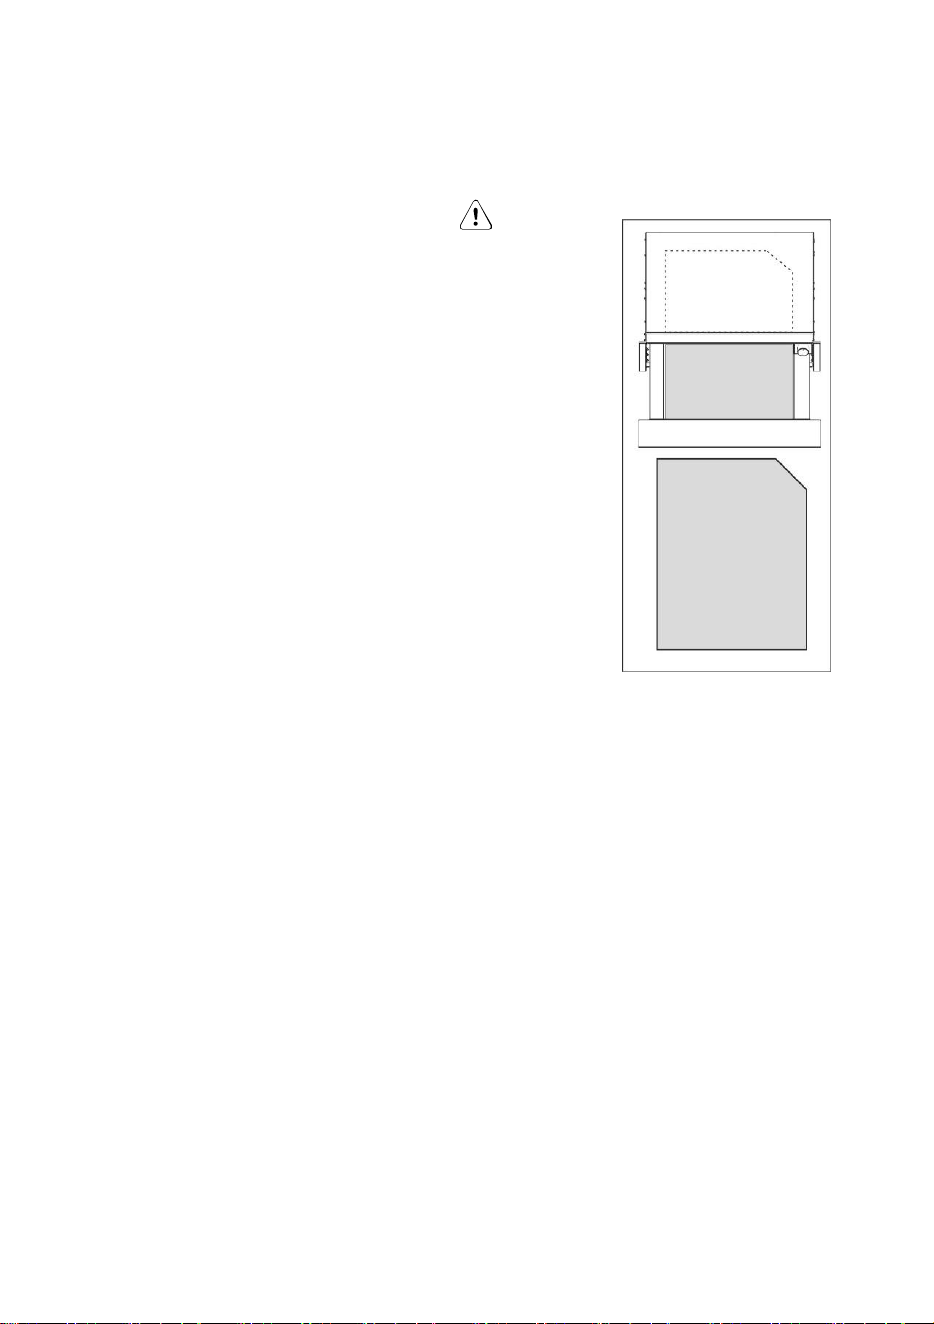
2. APPLIANCE DESCRIPTION
2.1 Main components
On/Off switch and light
Front panel with push-push
mechanism or handle
Thermostat
Support rack (depending on the
model)
Non-slip base
2.2 How the warming drawer works
This appliance is equipped with a warm
air circulation system. A fan distributes
the heat generated by an electrical
heating element throughout the interior of
the appliance.
The thermostat allows the user to set and
control the temperature for the crockery.
The circulating hot air that is generated
heats up the crockery quickly and evenly.
A protective grille prevents accidental
contact with the heating element and fan.
The base of the drawer is covered with
non-slip material to stop dishes from
moving when the drawer is opened or
closed.
1
4
5
ENGLISH 9
3. USE
3.1 Before First Use
Before using the appliance for the first
time you should clean the interior
and the exterior, following the cleaning
instructions given in the section “Cleaning
and maintenance”.
Remove the non-slip base.
Then heat the warming drawer for at least
2 hours. To do this, turn the temperature
control to the maximum position (see
section “Selecting temperature”).
Make sure the kitchen is well-ventilated
when you are doing this.
The appliance’s parts are treated with a
special product. This may cause an
unpleasant odour to be released during
this initial heating. Both the odour and
any fumes that may form will disappear
after a short time and neither signifies
that there is anything wrong with the
connection or the appliance.
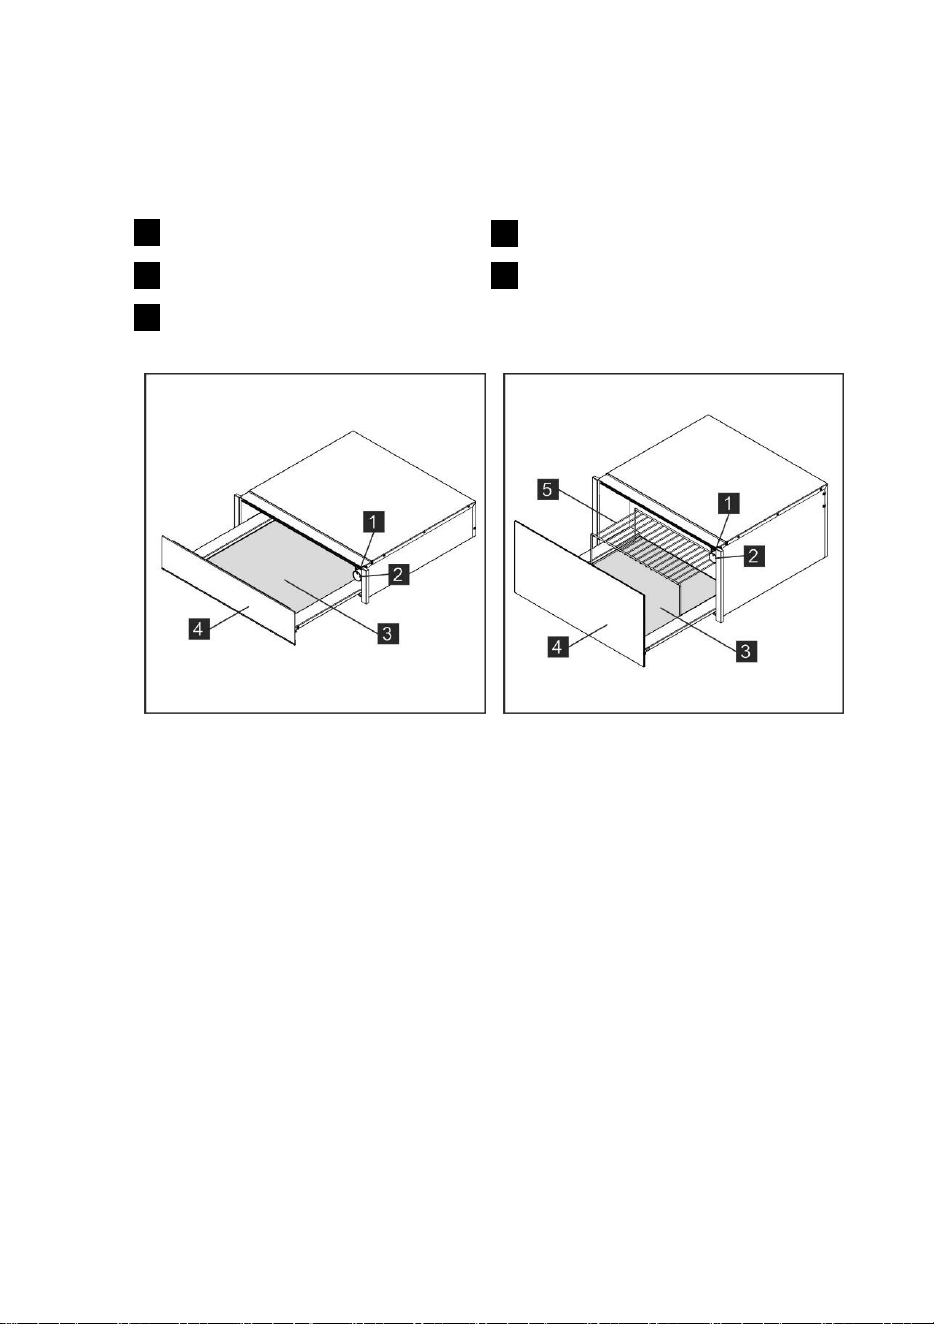
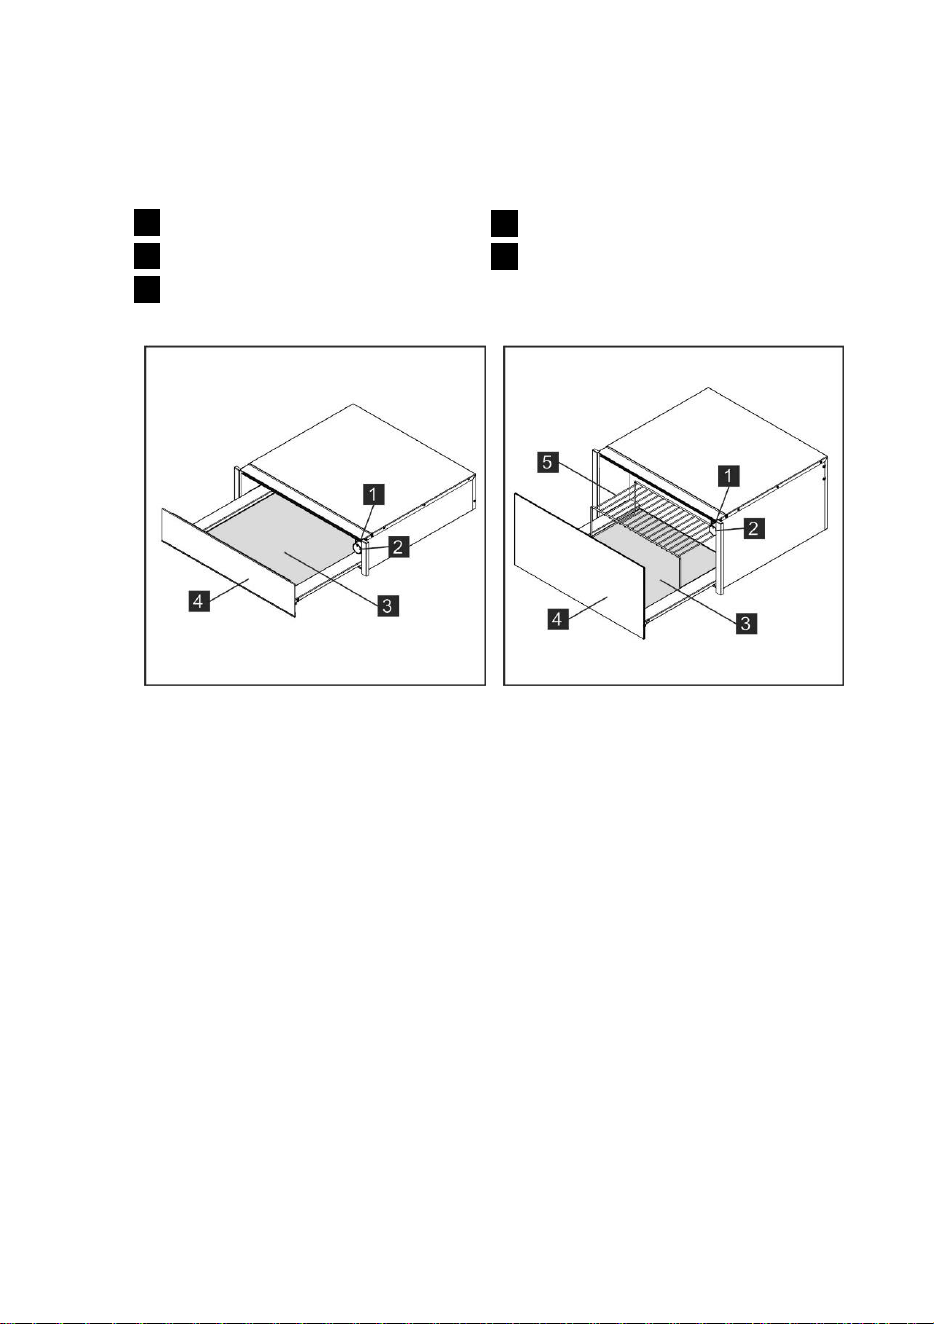
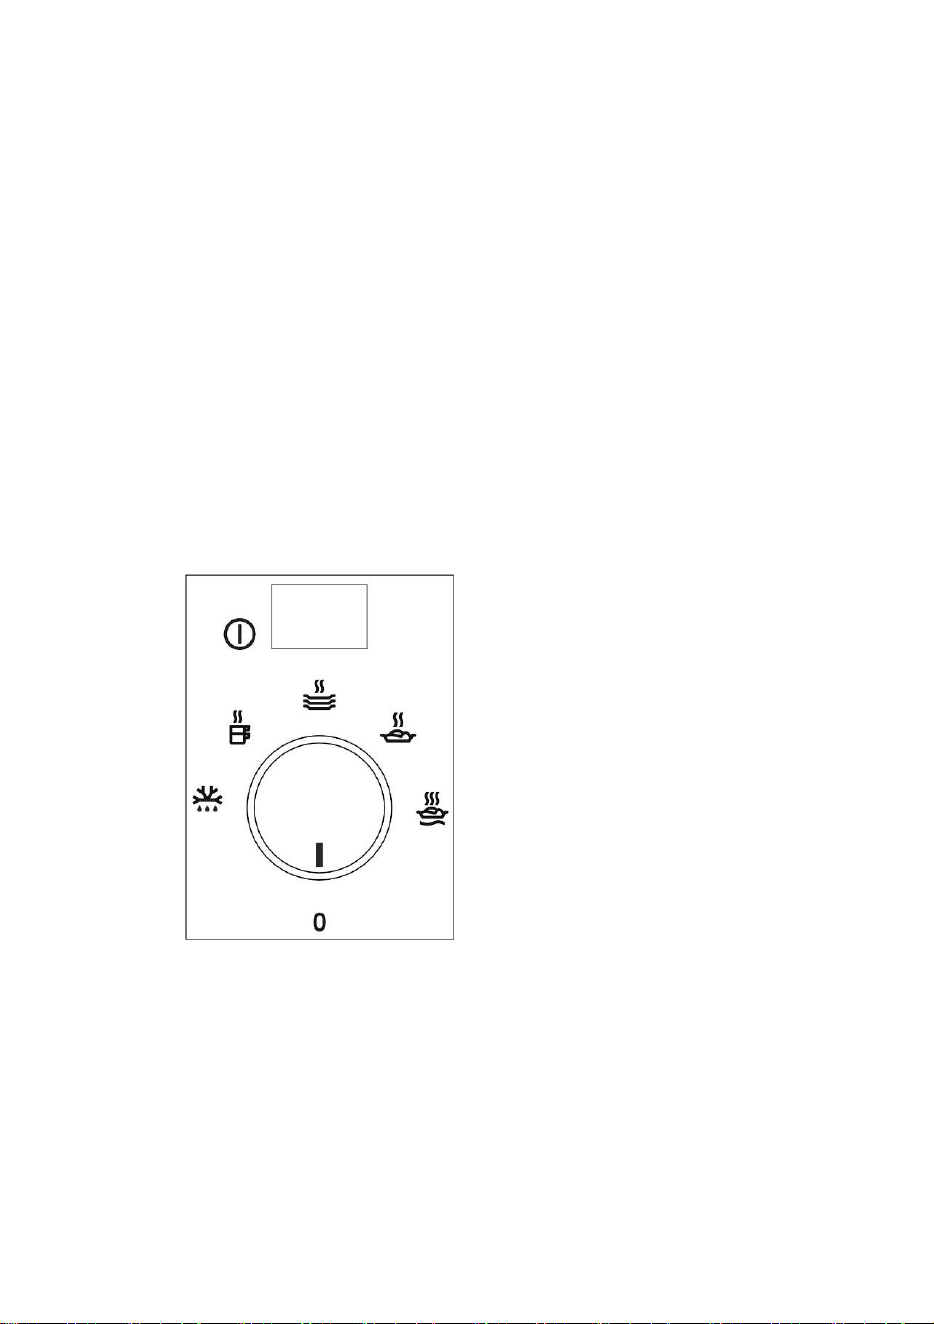
3.2 Control panel
The control panel has a selector and an
on/off switch. The control panel is only
visible when the drawer is open.
3.3 Using the warming drawer
To use the warming drawer, proceed as
follows:
• Place the crockery in the drawer.
• Do not arrange plates vertically in front
of the ventilation slots.
The warm air would not be able to fully
escape from the slots. This would lead
to uneven heating of crockery.
• Select the desired function by turning
the thermostat knob to the
corresponding position.
• Switch on the appliance by pressing the
switch; the corresponding light will
come on.
• Close the drawer.
Be careful not to use too much force
when closing the drawer since it may
open up again. Before taking out the
warm crockery you must switch off the
warming drawer by pressing the switch
again.
3.4 Function Selection
The thermostat knob allows you to select
temperatures between 30 and 80°C.
Do not force the thermostat knob to the
left beyond the "0" position, or to the right
beyond the maximum temperature, as
this could damage it.
As soon as the selected temperature is
reached, the heating element will turn off.
When the temperature drops back below
the selected value, the heating element
will turn on again.
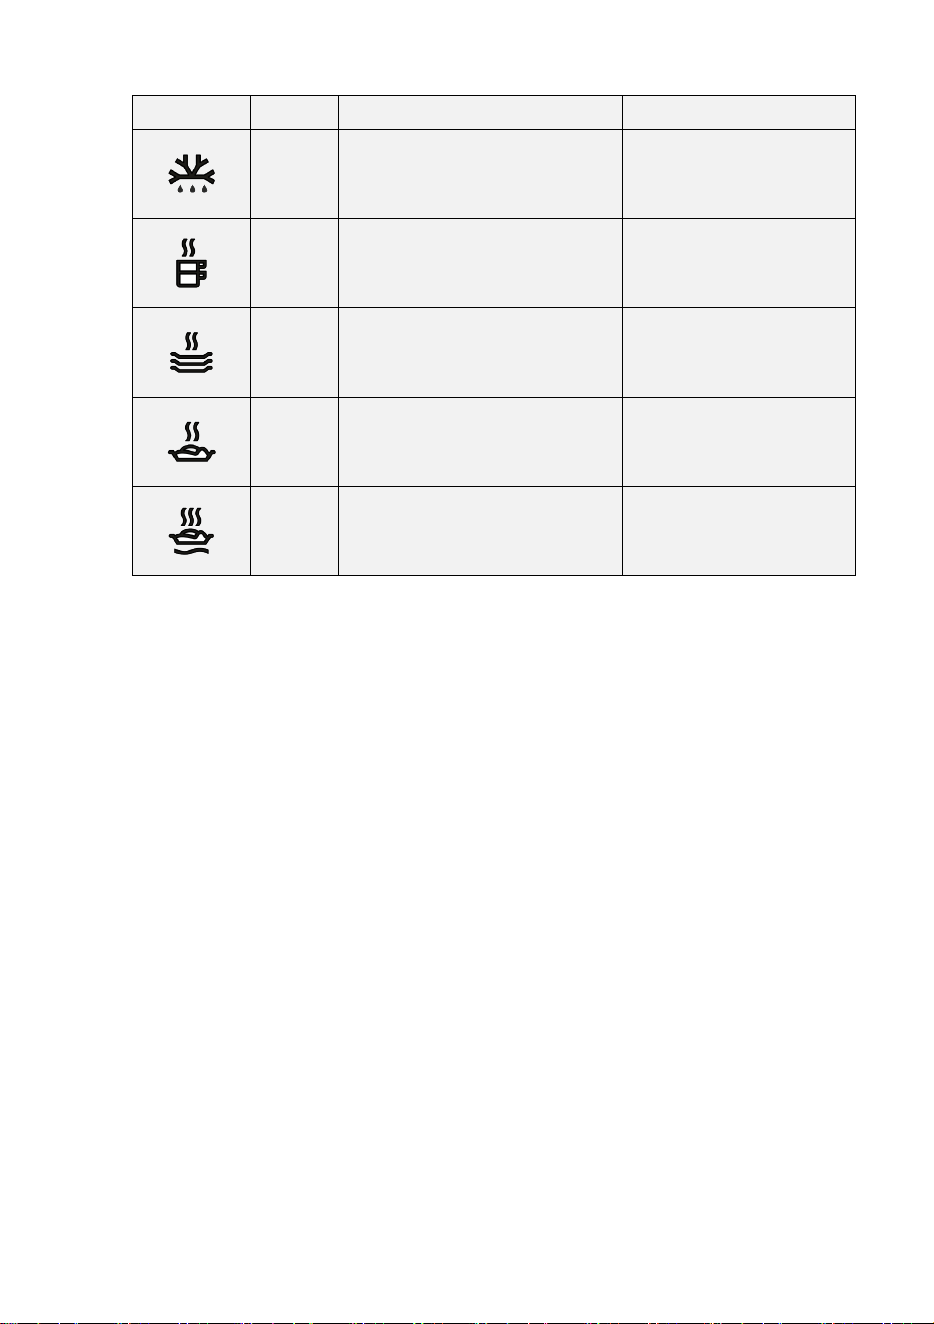
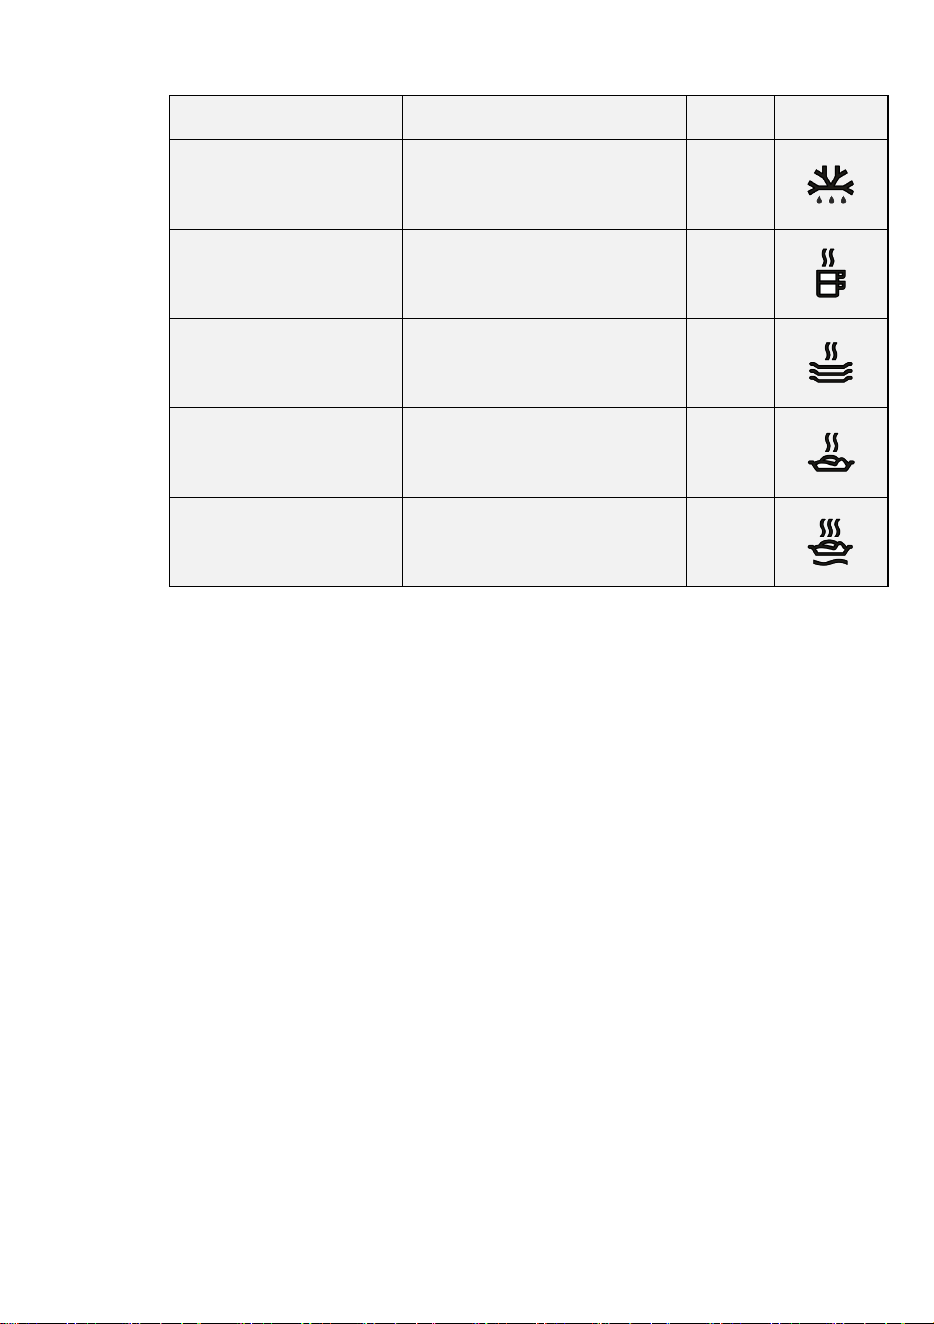
The temperature scale is marked with
absolute temperatures in °C and also has
symbols which correspond to the
optimum temperatures for groups of
crockery:

10 www.aeg.com
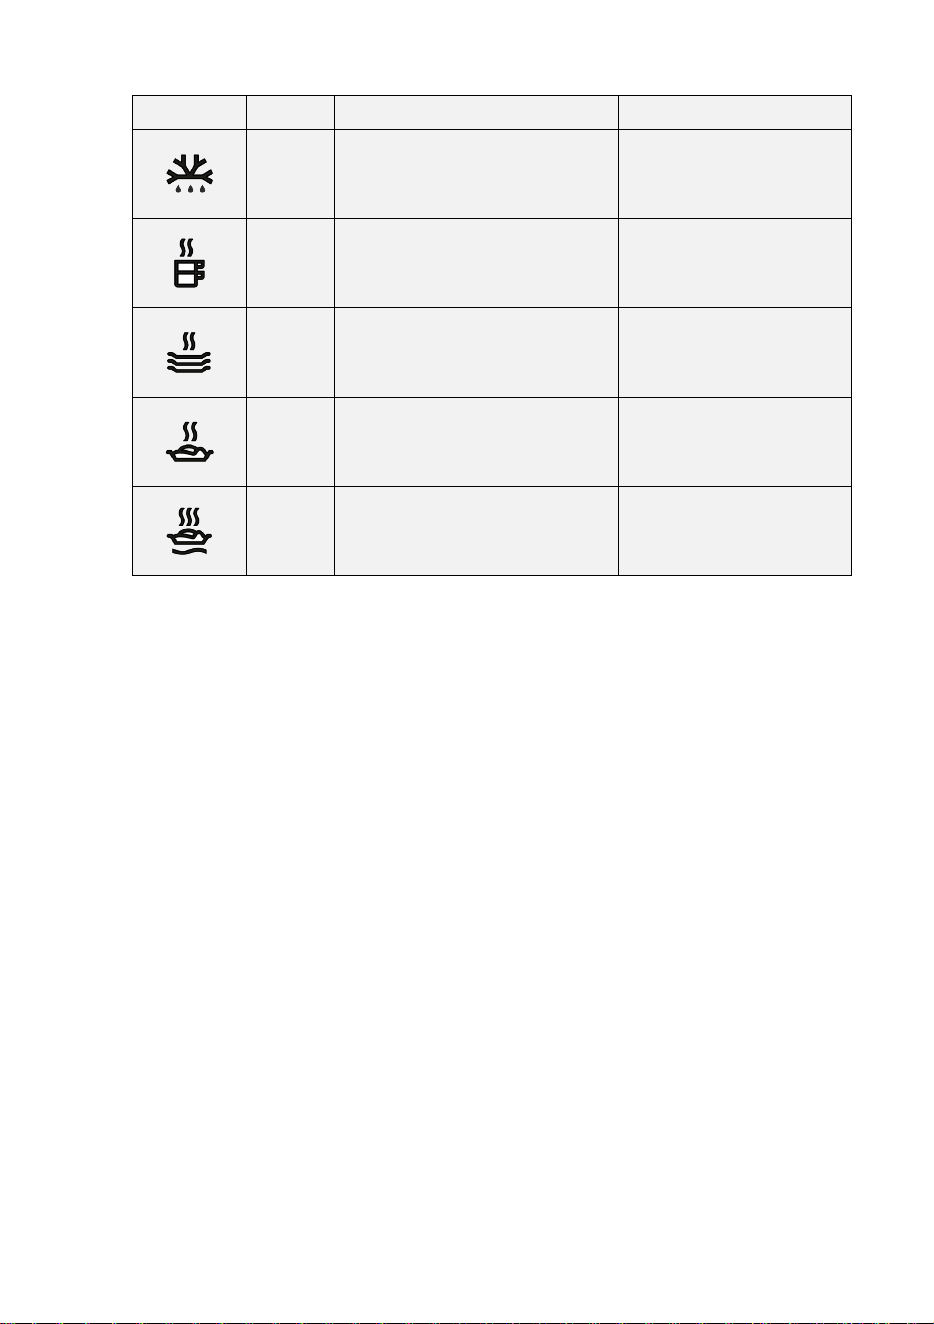
Symbol
°C (*)
Function
Warning
30°C
Defrosting.
Dough proving.
Yoghurt fermentation.
-
Cover the dough.
Cover the tub.
45°C
Warming cups and glasses.
-
60°C
Warming dinner plates.
Reheating delicate foodstuffs.
-
Preheat the dish.
70°C
Keeping foodstuffs warm.
Preheat the dish and
cover the food.
80°C
Reheating foodstuffs.
Preheat the dish.
* The temperatures refer to the drawer when empty and closed.
3.5 Heating times
Various factors affect heating times:
• The material and thickness of the
crockery
• Load size
• How the crockery is arranged
• Temperature setting
• Repeated opening and closing of the
drawer
It is therefore not possible to give precise
heating times.
As you use the warming drawer regularly,
you will learn the best settings for your
crockery.
Suggestions for the “keep warm” and
“reheat” function:
Preheat the warming drawer for 15
minutes to ensure it is at the required
internal temperature.
ENGLISH 11
4. CLEANING AND MAINTENANCE
Cleaning is the only maintenance activity
that is generally required.
WARNING!
The warming drawer must be
disconnected from the power supply
before cleaning. Unplug the device from
the socket or isolate its power supply
circuit.
Do not use harsh or abrasive cleaning
products, scouring pads/sponges or
sharp objects, since this could cause
stains or scratches.
Never use high pressure or steam jet
cleaning appliances.
4.1 Appliance front and
control panel
The warming drawer can be cleaned
using just a damp cloth. If it is very dirty,
add few drops of washing-up liquid to the
water.
Wipe the surfaces dry using a dry cloth.
For stainless-steel fronted warming
drawers, special products for stainless-
steel surfaces can be used.
These products prevent the build-up of
dirt on such surfaces. Apply a thin layer
of this product on the surface using a soft
cloth.
On aluminium fronted warming drawers,
use a delicate glass cleaning product and
a soft, lint-free cloth. Wipe horizontally
without applying.
4.2 Interior of the warming
drawer
Clean the interior of the warming drawer
regularly using a damp cloth. If it is very
dirty, add few drops of washing-up liquid
to the water.
Wipe the surfaces dry using a dry cloth.
Avoid water entering the air circulation
opening.
Only use the warming drawer again when
it is completely dry.
Non-slip base
The non-slip surface mat can be removed
to facilitate cleaning of the drawer.
The mat can be cleaned by hand using
hot water with a few drops of washing-up
liquid. Dry thoroughly.
The non-slip mat should only be replaced
when it is completely dry.
12 www.aeg.com
5. WHAT SHOULD I DO IF THE WARMING DRAWER
DOESN’T WORK?
WARNING!
Any repairs must only be performed by a
specialised technician. Any repair
performed by a person not authorised by
the manufacturer is potentially
dangerous.
However, the following faults can be
resolved by the user without calling
Technical Assistance.
Before contacting Technical Assistance,
check on the following:
• The crockery does not warm up
sufficiently. Check whether:
− The appliance is on
− The appropriate temperature has
been selected
− The air circulation orifices are blocked
by the crockery
− The crockery was left to warm up for
sufficient time
• Heating time depends on several
factors, such as, for example:
− The material and thickness of the
crockery
− Load size
− How the crockery is arranged
• The crockery does not heat up at all.
Check whether:
− You can hear the noise of the fan If
the fan is running, this means that the
heating element is defective. If the
fan is not running, this means that it is
faulty
− The fuse has blown or the circuit
breaker has tripped
• The crockery is too hot:
− The temperature selector is not
working
• The on/off switch does not light up:
− The switch indicator light has blown
6. INSTALLATION INSTRUCTIONS
6.1 Before installation
Check that the supply voltage indicated
on the data plate is the same as that
provided by the power socket you plan to
use.
Open the drawer, take out all the
accessories and remove the packaging
material
WARNING!
The front surface of the warming drawer
may be covered in a protective film.
Carefully remove this film before using
the warming drawer for the first time.
Ensure that the warming drawer is not
damaged in any way. Check that the
drawer opens and closes correctly. If
damage is encountered, inform
Technical Assistance.
WARNING:
The power socket should be easily
accessible after the warming drawer has
been installed.
The warming drawer should only be
installed in combination with the
appliances specified by the
manufacturer. If it is fitted in combination
with other appliances, the guarantee will
be void since it is impossible to
guarantee that the warming drawer will
work correctly.

ENGLISH 13
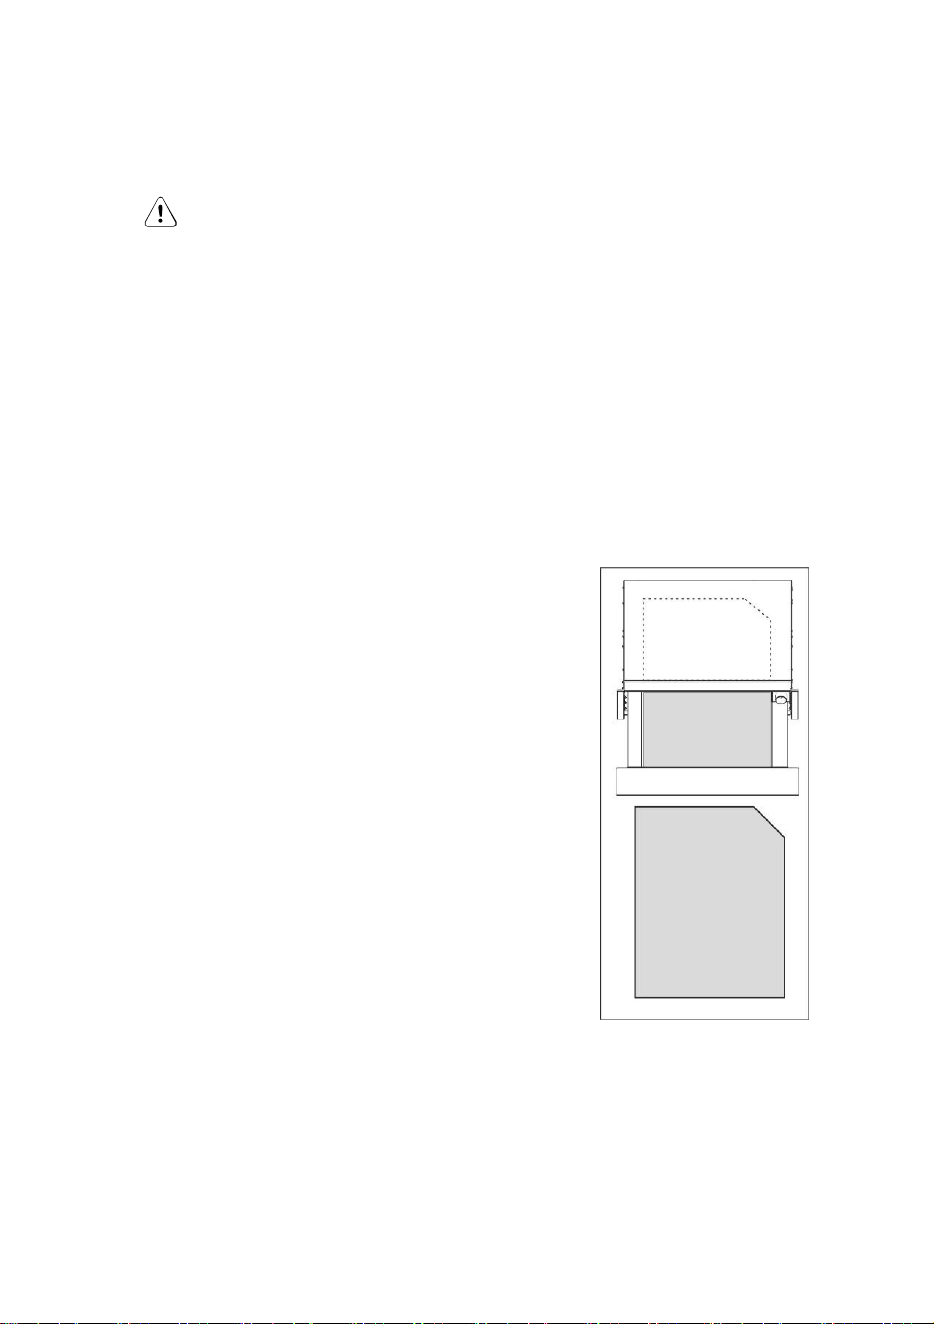
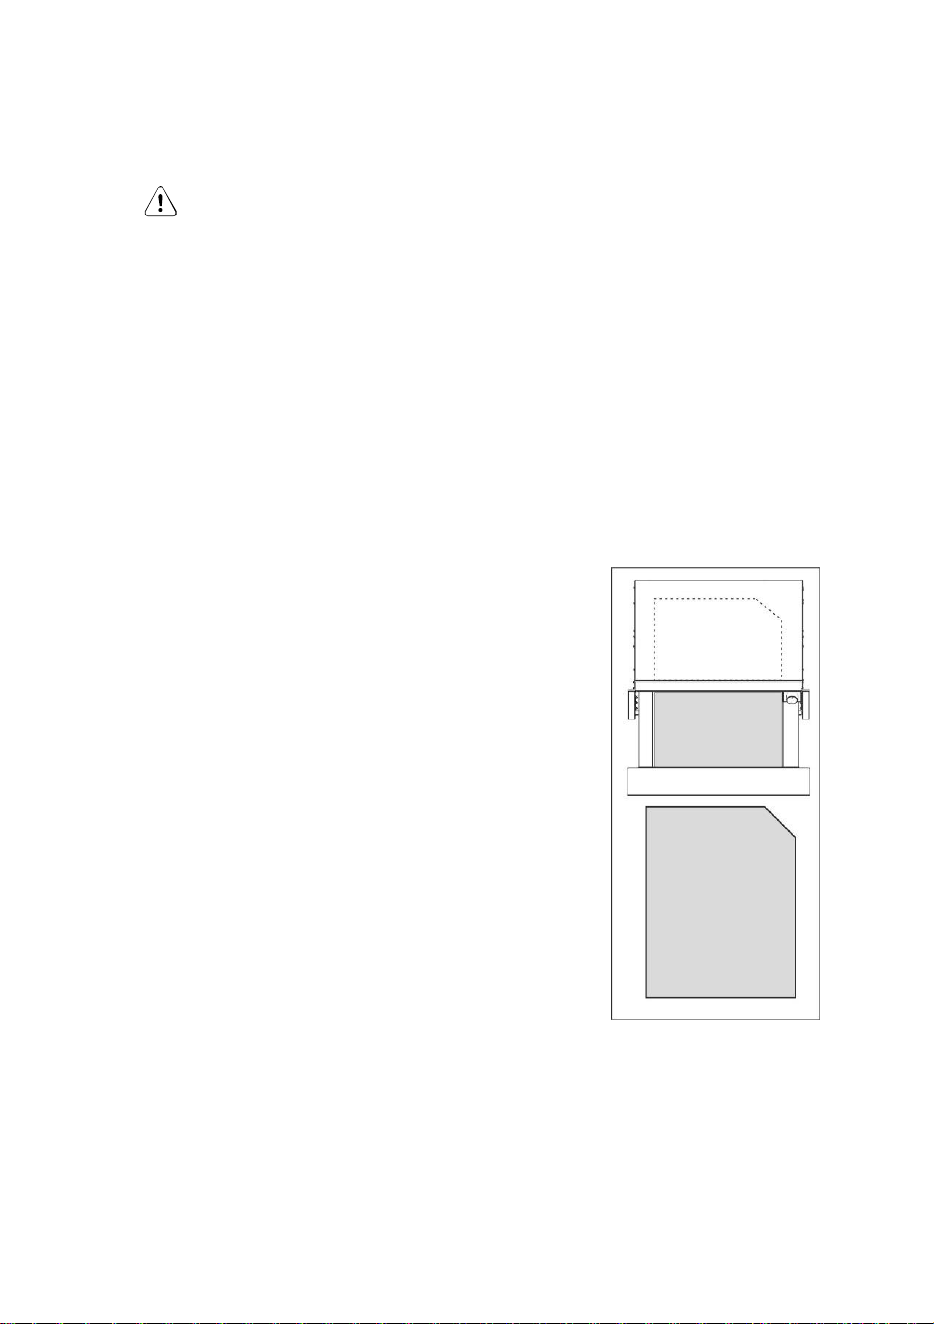
6.2 Installation
Refer to the installation instructions
supplied separately.
Installing the warming drawer in
combination with another appliance
requires be a fixed intermediate shelf in
the carcase to support the weight of both
appliances.
The appliance to be installed in
combination with the warming drawer will
be installed directly on top of it.
Follow the instructions given in the
corresponding instruction and installation
booklet for installation of the combined
appliance.
6.3 Electrical connection
Electrical installation must be performed
by a qualified electrician.
Before connecting the warming drawer to
the mains electricity supply, check that
the voltage and frequency of the mains
supply matches that shown on the data
plate inside the appliance.
The electrical connection should be
made via an omnipolar switch rated for
the current capacity with minimum 3 mm
contact separation, in order to provide
isolation in emergencies or when
cleaning the warming drawer.
The connection must be suitably earthed.
WARNING:
The warming drawer must be earthed.
If the appliance flex requires
replacement, contact Technical
Assistance or an authorised service
centre, as specialised tools are required.
The manufacturer and retailer do not
accept responsibility for any injury to
people or animals or damage to personal
property as a result of failure to follow the
supplied installation instructions.
7. ENVIRONMENTAL PROTECTION
Recycle materials with the
following symbol.
Place the packaging in the
corresponding containers for recycling.
Help protect the environment and human
health and to recycle waste from
electrical and electronic appliances.
Do not dispose of appliances
marked with the following symbol
with general household waste. Take the
product to your local recycling facility or
contact your local council.
14 www.aeg.com
SOMMAIRE
1. CONSIGNES DE SÉCURITÉ ................................................................... 15
2. DESCRIPTION DE L’APPAREIL .............................................................. 20
3. UTILISATION ............................................................................................ 21
4. NETTOYAGE ET ENTRETIEN ................................................................. 23
5. QUE FAIRE EN CAS DE MAUVAIS FONCTIONNEMENT ? ................... 24
6. INSTRUCTIONS POUR L'INSTALLATION .............................................. 24
7. PROTECTION DE L'ENVIRONNEMENT ................................................. 25
NOUS PENSONS À VOUS
Merci d'avoir choisi ce produit Aeg. Avec ce produit, vous bénéficiez de dizaines d'années
d'expérience professionnelle et d'innovation. Ingénieux et élégant, il a été conçu sur
mesure pour vous. Grâce à cet appareil, vous savez que chaque utilisation vous
apportera satisfaction. Bienvenue chez Aeg.
Visitez notre site Internet pour :
Obtenir des conseils d'utilisation, des brochures, de l'aide, des informations :
www.aeg.com
Enregistrer votre produit pour obtenir un meilleur service :
www.aeg.com/productregistration
Acheter des accessoires, consommables et pièces de rechange d'origine pour
votre appareil :
www.aeg.com/shop
SERVICE APRÈS-VENTE
N'utilisez que des pièces de rechange d'origine.
Avant de contacter le service, assurez-vous de disposer des informations suivantes.
Vous trouverez ces informations sur la plaque signalétique. Modèle, PNC, numéro de
série.
Avertissement/Attention : consignes de sécurité.
Informations générales et conseils.
Informations en matière de protection de l'environnement.
Sous réserve de modifications.

FRANÇAIS 15
1. CONSIGNES DE SÉCURITÉ
Avant d'installer et d'utiliser cet appareil, lisez
soigneusement les instructions fournies. Le fabricant ne
peut être tenu pour responsable des dommages et
blessures liés à une mauvaise installation ou utilisation.
Conservez toujours cette notice avec votre appareil pour
vous y référer ultérieurement. Votre appareil est aux
normes de sécurité en vigueur. Une utilisation
inadéquate peut constituer un danger pour l'utilisateur.
1.1 Sécurité des enfants et des personnes
vulnérables
Avertissement !
Risque d'asphyxie, de blessure ou d'invalidité
permanente.
• Cet appareil peut être utilisé par des enfants de plus
de 8 ans, ainsi que des personnes dont les capacités
physiques, sensorielles et mentales sont réduites ou
dont les connaissances et l'expérience sont
insuffisantes, à condition d'être surveillés par une
personne responsable de leur sécurité.
• Ne laissez pas les enfants jouer avec l'appareil. Les
enfants de moins de 3 ans ne doivent pas être laissés
sans surveillance à proximité de l'appareil.
• Ne laissez pas les emballages à la portée des enfants.
• Tenez les enfants éloignés de l'appareil lorsqu'il est en
cours de fonctionnement ou lorsqu'il refroidit. Les
parties accessibles sont chaudes.
• Les enfants ne doivent pas nettoyer ni entreprendre
une opération de maintenance sur l'appareil sans
surveillance.
• L'appareil et son cordon d'alimentation doivent être
conservés hors de portée des enfants âgés de moins
de 8 ans.

16 www.aeg.com
1.2 Sécurité générale
L'intérieur de l'appareil devient chaud lorsqu'il est en
fonctionnement. Ne touchez pas les éléments chauffants
se trouvant dans l'appareil. Utilisez toujours des gants de
cuisine pour retirer ou enfourner des accessoires ou des
plats allant au four.
• Selon la température et le temps de fonctionnement
sélectionnés, la température à l'intérieur de l'appareil
peut monter jusqu'à 80 °C. Utilisez des gants de
cuisine pour vous protéger les mains quand vous
retirez la vaisselle de l'intérieur du chauffe-vaisselle.
• Prenez garde de ne pas le surcharger, cela
endommagerait les rails télescopiques. Le tiroir peut
supporter un poids maximum de 15 kg.
• Les récipients et objets synthétiques ou qui prennent
facilement feu ne doivent pas être rangés dans le
chauffe-vaisselle. Si l'appareil est mis en marche, ils
peuvent fondre ou brûler. Danger d'incendie.
• N'utilisez pas votre appareil comme chauffage de
maison. Les hautes températures peuvent mettre le
feu à des objets facilement inflammables situés près
de l'appareil.
• Quand vous cessez définitivement d'utiliser l'appareil,
à la fin de sa vie utile, débranchez-le du réseau et
éliminez le câble électrique pour éviter le danger que
les enfants s'en servent pour s'amuser.
1.3 Installation
• Reportez-vous aux instructions d'installation fournies
séparément.
• La protection contre les contacts directs doit être
assurée par le mode d'intégration
FRANÇAIS 17
• Le système électrique doit être équipé d'un moyen de
déconnexion, avec une séparation de contact sur tous
les pôles assurant une coupure complète de la
catégorie de surtension III.
• Le raccordement électrique doit être effectué au
moyen d'une prise qui doit être accessible après
l'installation.
• Attention ! Avant de brancher l'appareil, comparez-
en les données (tension et fréquence) indiquées sur la
plaque des caractéristiques avec celles de votre
réseau électrique. Elles doivent correspondre, pour
éviter tout problème. En cas de doute, appelez un
électricien.
• Attention ! Dans le cas d'un câble sans prise, elle
doit être installée et raccordée par un électricien
spécialisé. Adressez-vous à un électricien attitré qui
respecte les normes de sécurité et qui effectue les
travaux conformément aux mêmes instructions et à
toutes les instructions contenues dans ce manuel. La
responsabilité du fabricant n'est pas engagée pour des
dommages provenant d'une erreur de montage ou de
branchement.
• Attention ! La sécurité électrique de l'appareil n'est
assurée que s'il est relié à la terre. La responsabilité du
fabricant n'est pas engagée pour des dommages
provenant d'un manque ou d'un défaut du système de
protection de l'installation (choc électrique par
exemple).
• Attention ! Ne mettez l'appareil en marche qu'une
fois celui-ci dûment encastré, car c'est la seule façon
d'interdire l'accès aux composants électriques.

18 www.aeg.com
• ATTENTION ! N'ouvrez jamais la structure de
l'appareil. D'éventuels contacts avec les pièces
conductrices ou modifications des composants
électriques ou mécaniques peuvent constituer un
danger pour la sécurité de l'utilisateur et perturber le
bon fonctionnement de l'appareil.
1.4 Nettoyage
• N'utilisez pas de produits abrasifs ni de racloirs pointus
en métal pour nettoyer la porte en verre car ils peuvent
rayer sa surface, ce qui peut briser le verre.
• N'utilisez pas de nettoyeur vapeur pour nettoyer
l'appareil.
• N'utilisez pas d'appareils de nettoyage à haute
pression ou qui projettent de la vapeur. La vapeur peut
atteindre les composants électriques et provoquer un
court-circuit. La pression de la vapeur peut aussi
endommager durablement la surface de l'appareil et
ses composants.
1.5 Réparation
• Si le câble d'alimentation est endommagé, il ne doit
être remplacé que par un professionnel qualifié afin
d'éviter tout danger.
• Attention ! Avant toute opération de maintenance,
déconnectez l'alimentation électrique. Pour que
l'appareil soit débranché, vous devez constater l'une
des conditions suivantes :
- Les fusibles/disjoncteur du tableau électrique sont
débranchés.
- L'appareil est débranché de la prise murale, ce qui
doit être fait en tirant sur la prise de l'appareil et non
sur le câble électrique.
FRANÇAIS 19
• Attention ! Les réparations et entretiens, tout
particulièrement sur les pièces sous tension, ne
peuvent être effectués que par des techniciens agréés
par le fabricant. Le fabricant et les revendeurs
déclinent toute responsabilité pour d'éventuels
dommages, causés aux personnes, aux animaux ou
aux biens, qui découlent de réparations ou entretiens
effectués par des personnes non autorisées.
• Attention ! Les réparations au cours de la période
de garantie ne doivent être exécutées que par des
techniciens agréés par le fabricant. Dans le cas
contraire, tout dommage provenant de ces réparations
est exclu de la garantie.

20 www.aeg.com
2
3
2. DESCRIPTION DE L’APPAREIL
2.1 Composants principaux
Interrupteur et voyant lumineux
Marche/Arrêt
Panneau frontal avec
mécanisme de poussée ou
poignée
Thermostat
Grille de support (selon le
modèle)
Revêtement antidérapant
2.2 Principe de fonctionnement
Votre appareil est équipé d'un système
de circulation d'air chaud. Un ventilateur
distribue la chaleur, générée par une
résistance électrique, dans tout l'intérieur
de l'appareil.
Le thermostat permet de définir et de
contrôler la température souhaitée pour
la vaisselle.
La circulation de l'air chaud fait que la
vaisselle est chauffée rapidement et
uniformément.
La résistance ainsi que le ventilateur sont
protégés par une grille métallique.
La base du tiroir est équipée d'un
revêtement antidérapant pour empêcher
la vaisselle de glisser quand vous ouvrez
ou fermez le tiroir.
1
4
5

FRANÇAIS 21
3. UTILISATION
3.1
Avant la première utilisation
Avant d'utiliser l'appareil pour la première
fois, vous devez en laver l'intérieur
et l'extérieur en suivant les indications sur
le nettoyage figurant au chapitre
« Nettoyage et entretien ».
Enlevez la base antidérapante.
Ensuite, chauffez le chauffe-vaisselle
pendant au moins 2 heures en tournant
le sélecteur de température sur la
position maximum (consultez le chapitre
« Sélectionner la température »).
Veillez à aérer correctement la cuisine.
Les pièces de l'appareil sont protégées par un
produit spécial qui peut éventuellement lors
de la première mise en marche, dégager une
odeur et un peu de fumée qui disparaissent
très vite. Ni l'une ni l'autre ne constituent une
anomalie de fonctionnement de l'appareil.
3.2 Tableau de commandes
Le tableau de commandes comporte un
thermostat et un bouton marche/arrêt. Le
tableau de commandes n’est visible que
lorsque le tiroir est ouvert.
3.3 Principe d'utilisation
Pour utiliser le chauffe-vaisselle,
procédez de la façon suivante :
• Placez la vaisselle dans le tiroir.
• Évitez de placer les plateaux de
chargement verticalement devant les
fentes d'aération.
L'air chaud ne sortirait pas
complètement des fentes. La vaisselle
ne serait pas chauffée uniformément.
• Sélectionnez la fonction en tournant le
thermostat sur la position désirée.
• Mettez l'appareil en marche en
appuyant sur l'interrupteur dont le
voyant s'allume.
• Fermez le tiroir.
Prenez garde que le tiroir peut se rouvrir
si vous le fermez trop fort. Avant de
retirer la vaisselle chaude, vous devez
éteindre le chauffe-vaisselle en appuyant
de nouveau sur l'interrupteur.
3.4 Sélectionner la fonction
Vous pouvez sélectionner des
températures entre 30 et 80 °C en
tournant le thermostat.
Ne forcez pas le bouton du thermostat, ni
vers la gauche de la position « 0 » ni vers
la droite de la position maximum, car cela
pourrait le détériorer.
Dès que la température sélectionnée est
atteinte, le chauffage s'éteint. Il se
rallume automatiquement si la
température redescend.
Les températures absolues en °C et des
symboles sont indiqués sur le Tableau de
Commandes. Ils correspondent à la
température optimisée pour un groupe de
vaisselle :
22 www.aeg.com
Symbole
°C (*)
Fonction
Avertissement
30°C
Décongélation.
Levage des pâtes.
Fermentation du yaourt.
-
Couvrez la pâte.
Couvrez le pot.
45°C
Chauffage des verres et
tasses.
-
60°C
Chauffage de la vaisselle.
Chauffer les aliments en
douceur.
-
Préchauffez l'assiette.
70°C
Gardez les aliments au chaud.
Préchauffez l’assiette et
couvrir le plat.
80°C
Chauffage des aliments.
Préchauffez l'assiette.
* Les températures se rapportent au tiroir vide et fermé.
3.5 Temps de chauffage
Le temps de chauffage dépend de
plusieurs facteurs :
• Matériel et épaisseur de la vaisselle ;
• Quantité de charge ;
• Disposition de la vaisselle ;
• Température sélectionnée.
• ouverture et fermeture répétées du
tiroir.
Il est dès lors impossible d'indiquer des
temps de chauffage rigoureusement
exacts.
La pratique vous aidera à sélectionner les
temps appropriés à votre vaisselle.
Conseils pour « garder les aliments au
chaud » et « chauffer les aliments » :
Chauffez le tiroir pendant 15 minutes afin
de vous assurer que la température
nécessaire soit atteinte.
FRANÇAIS 23
4. NETTOYAGE ET ENTRETIEN
Le nettoyage est l'unique entretien
normalement nécessaire.
ATTENTION !
Le nettoyage doit être effectué quand le
chauffe-vaisselle est débranché de
l'alimentation électrique. Retirez la prise
du mur ou débranchez le circuit
d'alimentation du chauffe-vaisselle.
N'utilisez pas de produits de nettoyage
agressifs ou abrasifs, ni frottoirs ni objets
pointus qui peuvent provoquer des
rayures.
N'utilisez pas d'appareils de nettoyage à
haute pression ou qui projettent de la
vapeur.
4.1 Partie avant de l'appareil
et tableau de commandes
Il suffit de nettoyer la chauffe-vaisselle
avec un chiffon humide. S'il est très sale,
ajoutez quelques gouttes de produit
vaisselle à l'eau de lavage.
Essuyez ensuite les surfaces avec un
chiffon sec.
Les chauffe-vaisselle dont l'avant est en
acier inoxydable peuvent être nettoyés
avec des produits spéciaux pour ce type
de surface.
Ces produits évitent que les surfaces ne
se resalissent rapidement. Appliquez une
fine couche de produit sur toute la
surface avec un chiffon doux.
Les chauffe-vaisselle dont l'avant est en
aluminium peuvent être nettoyés avec un
produit léger pour les vitres et un chiffon
doux qui ne laisse pas de fibres. Nettoyez
dans le sens horizontal sans appuyer car
l'aluminium est un métal mou qui se raye
ou se coupe facilement.
4.2
Intérieur du chauffe-vaisselle
Nettoyez régulièrement l'intérieur du
chauffe-vaisselle avec un chiffon humide.
S'il est très sale, ajoutez quelques
gouttes de produit vaisselle à l'eau de
lavage.
Nettoyez ensuite les surfaces avec un
chiffon sec.
Évitez de faire entrer de l'eau dans les
orifices par où circule l'air.
Attendez que votre chauffe-vaisselle soit
bien sec avant de le réutiliser.
Revêtement antidérapant
Vous pouvez retirer le revêtement
antidérapant pour nettoyer plus
facilement le tiroir.
Le revêtement peut être lavé à la main
avec de l'eau chaude et quelques gouttes
de produit vaisselle. Séchez-le bien pour
finir.
Vous ne devez remettre en place le
revêtement antidérapant que lorsque le
tiroir est bien sec.
24 www.aeg.com
5. QUE FAIRE EN CAS DE MAUVAIS
FONCTIONNEMENT ?
ATTENTION !
Seuls des techniciens spécialisés sont à
même d'effectuer les réparations, de
quelque type que ce soit. Toute
réparation effectuée par des personnes
non agréées par le fabricant est
dangereuse.
Les dysfonctionnements suivants
peuvent être éliminés par l'utilisateur
sans l’assistance technique.
Avant d'appeler l'assistance technique,
vérifiez les cas suivants :
• La vaisselle ne chauffe pas
suffisamment ? Vérifiez les points
suivants :
− L'appareil est bien branché et en
marche.
− Vous avez sélectionné la température
adéquate.
− Les orifices par où circule l'air sont
obstrués par de la vaisselle.
− La vaisselle a chauffé pendant un
temps suffisant ?
• Le temps de chauffage dépend de
divers facteurs, en particulier :
− Matière et épaisseur de la vaisselle.
− Quantité de vaisselle.
− Rangement et disposition de la
vaisselle.
• La vaisselle ne chauffe pas ? Vérifiez
les points suivants :
− Le ventilateur fonctionne (il fait du
bruit). C'est peut-être alors la
résistance qui est en panne. Si le
ventilateur ne fait pas de bruit, c'est
lui qui doit être en panne.
− Les plombs ont sauté ou le tableau
électrique a disjoncté.
• La vaisselle est trop chaude ?
− Le sélecteur de température ne
marche pas correctement.
• L'interrupteur marche/arrêt ne s'allume
pas ?
− Le pilote de l'interrupteur a fondu.
6. INSTRUCTIONS POUR L'INSTALLATION
6.1 Avant l'installation
Vérifiez que la tension d'alimentation de
l'appareil, indiquée sur la plaque des
caractéristiques, correspond à celle de
votre installation.
Vérifiez que la tension d'alimentation de
l'appareil, indiquée sur la plaque des
caractéristiques, correspond à celle de
votre installation.
ATTENTION !
Le devant du chauffe-vaisselle peut être
enveloppé d'une pellicule de protection.
Retirez soigneusement cette pellicule
avant la première utilisation.
Vérifiez que le chauffe-vaisselle n'est pas
endommagé. Assurez-vous que le tiroir
s'ouvre et se ferme correctement. En cas
de détérioration, appelez le Service
d'assistance technique.
ATTENTION :
La prise de courant doit rester facilement
accessible après l'installation du chauffe-
vaisselle.
Le chauffe-vaisselle ne peut être
encastré et combiné qu'avec les
appareils indiqués par le fabricant. La
garantie n'est pas valable s'il est monté
et combiné avec d'autres appareils, car il
n'est alors pas possible de garantir un
fonctionnement correct.
FRANÇAIS 25
6.2 Installation
Reportez-vous aux instructions
d'installation fournies séparément.
Pour encastrer le chauffe-vaisselle et le
combiner avec un autre appareil, vous
devez utiliser une étagère intermédiaire
fixe, capable de supporter le poids des
deux appareils.
L'appareil combiné avec le chauffe-
vaisselle devra être placé directement
sur le chauffe-vaisselle. Une étagère de
séparation n'est pas nécessaire.
Pour encastrer l'appareil combiné avec le
chauffe-vaisselle, suivez les indications
figurant dans le manuel d'instructions et
de montage de cet appareil.
6.3 Branchement électrique
L’installation électrique doit être réalisée
par un électricien qualifié et respecter la
législation en vigueur.
Avant de brancher le chauffe-vaisselle
sur secteur, assurez-vous que la tension
et la fréquence du secteur correspond à
ceux indiqués sur la plaque signalétique
se trouvant à l'intérieur du bloc chauffant.
Le branchement électrique s’effectue
avec un interrupteur omnipolaire
approprié pour tolérer l’intensité et
présentant un espacement minimum de
3 mm entre ses éléments de contact,
ceci afin d’assurer le découplage en cas
d’urgence ou lors de du nettoyage du
chauffe-vaisselle.
Le branchement doit disposer d’une
prise de terre adéquate et répondant aux
normes actuelles.
ATTENTION :
Le chauffe-vaisselle doit être relié à la
terre.
Si le câble d’alimentation flexible du
chauffe-vaisselle a besoin d’être changé,
l’opération doit être réalisée par un
employé du service après-vente car des
outils particuliers sont nécessaires.
Le fabricant et les revendeurs déclinent
toute responsabilité en cas de
dommages provoqués par des
personnes, des animaux ou des objets
lorsque les instructions d’installation ne
sont pas respectées.
7. PROTECTION DE L'ENVIRONNEMENT
Recyclez les matériaux portant le
symbole.
Déposez les emballages dans les conteneurs
prévus à cet effet.
Contribuez à la protection de l'environnement
et à votre sécurité, recyclez vos produits
électriques et électroniques.
Ne jetez pas les appareils portant
le symbole avec les ordures
ménagères. Emmenez un tel produit
dans votre centre local de recyclage ou
contactez vos services municipaux.
26 www.aeg.com
目录
1. 安全信息 .................................................................................................... 27
2. 电器描述 .................................................................................................... 30
3. 使用 ........................................................................................................... 31
4. 清洁和保养 ................................................................................................ 33
5. 如果加热抽屉出现故障,该怎么办? ........................................................ 34
6. 安装说明 .................................................................................................... 34
7. 环境保护 .................................................................................................... 35
想您所想
感谢您购选 Aeg 电器。您选择的产品蕴含着我们数十年的专业经验和创新。电器拥有精巧
时尚的外观和体贴周到的设计。每次使用时,都可安心畅享其超凡效果。欢迎来到 Aeg 的
世界。
请访问我们的网站以:
获取使用建议、手册、故障排除和维修服务信息:
www.aeg.com
如需获得更好的服务,请注册您的产品:
www.aeg.com/productregistration
要购买适用于您的电器的配件、耗材和原厂备件,请访问:
www.aeg.com/shop
客户关怀与服务
我们建议使用原厂备件。
联系服务人员时,请确保提供下列信息。
您可在铭牌上找到这些信息。型号、PNC 和序列号。
警告/安全警示信息。
一般信息和温馨提示。
环保信息。
如有变更,恕不另行通知。
中文 27
1. 安全信息
在安装和使用本设备前,请仔细阅读本说明书。对于因设
备安装有误和使用不当所造成的伤害和损失,制造商不承
担任何责任。请妥善保管本说明书,以便在使用设备过程
中随时参阅。本电器符合现行安全标准。不当使用本电器
可能危及用户安全。
1.1 儿童和弱势成人的安全
警告!
存在令人窒息、受伤及永久残疾的危险。
对于 8 岁及以上的儿童,存在身体缺陷、感官或精神障
碍或缺乏相关经验及知识的人员,仅应在得到安全使用
本电器的指导和监督并了解所涉及危害的情况下进行使
用。
儿童不得玩耍本电器。请确保 3 岁以下儿童远离本电器。
请将包装材料放在远离儿童的地方。
请确保在电器运行或冷却期间儿童和宠物远离本电器。
接触零件高温炙热。
儿童不得在没有监督的情况下清洁和维护本电器。
请确保 8 岁以下儿童远离接触零件和电线。
28 www.aeg.com
1.2 一般安全警告
电器在使用过程中会变热。请小心,避免触碰电器内部加
热元件。放入或取出餐具时始终使用烤箱隔热手套。
电器内的温度可能会达到 80 ºC,具体取决于所选温度
和运行时间。从餐具加热器中取出餐具时,请使用烤箱
隔热手套或烤箱耐热布来保护双手。
请勿坐在或靠在加热抽屉上。这会损坏伸缩滑轨。加热
抽屉的最大承重量为 15 kg。
请勿将合成材料容器或易燃物品装入餐具加热器。开启
本电器后,此类容器或物品可能熔化或起火。火灾危险!
请勿使用本电器升高厨房室温。达到的高温可能引燃本
电器附近的易燃物品。
当本电器达到使用寿命而您已停止使用时,请断开本电
器的电源,然后处理电缆使其无法使用,以免儿童玩耍
等带来危险。
1.3 安装
安装期间,请遵守各部分的说明。
安装时,必须不得直接接触带电部件。
电气系统必须配备断开装置,并提供全极触点间隙,从
而在 III 类过电压下实现完全断开。
必须使用插头进行电气连接;须确保安装后插头可用。
警告!连接本电器前,请比较电器铭牌上标识的电源
数据(电压和频率)和待连接电源的相应数据。如果这
些数据不匹配,则可能出现问题。如有任何疑问,请联
系电气技师。
警告!如果电线插头(硬接线)已卸下,则必须由相
关技师安装和连接本电器。请联系遵守电气规范并遵循
本手册所有规定的合格电气技师。对于因安装或连接有
误而造成的任何损害,制造商不承担任何责任。
中文 29
警告!只有将本电器正确接地,才能保障电气安全。
对于因未安装本电器的接地保护系统或安装有误所引起
的损害(如电击),制造商不承担任何责任。
警告!只有将本电器完全安装才方可进行使用。只有
将本电器最终完全安装于厨具组柜中才可保证无接触带
电部件危险。
警告!请勿拆开本电器的外壳。接触导电部件或变更
电气或机械部件可能危及用户安全并妨碍电器的正常运
行。
1.4 清洁
请勿使用粗糙磨砂型清洁剂或尖锐的金属刮刀/钢丝球来
清洁本电器,因为它们会在电器表面造成划痕。
请勿使用蒸汽清洁器来清洁本电器。
请勿使用高压或蒸汽喷流清洁装置。蒸汽可能影响电气
部件并导致短路。蒸汽长时间聚积所产生的压力也可能
导致电器表面损伤和各部件损坏。
1.5 维修
如电器电源线损坏,则必须由制造商、授权技术人员或
合格电气技师更换,以避免造成任何潜在危险。
警告!安装或维修过程中,必须切断本电器的供电。
为切断本电器的供电,必须满足下列条件之一:
- - 配电盘熔断器/断路器必须断开。
- - 插头必须从插座上拔下。从插座上拔下插头时,请
直接握住插头拔出,切勿拉扯电源线。
警告!维修和维护工作(尤其是涉及带电部件时)必
须由制造商授权的电气技师执行。对于因非授权人员执
行维修和维护工作所引起的任何人员、动物或财产损害,
制造商和零售商不承担任何责任。
警告!保修期内进行的维修工作必须由制造商授权的
技师执行。否则,由相关维修引起的任何损坏均不在保
修范围之列。
30 www.aeg.com
2
3
2. 电器描述
2.1 主要部件
On/Off 开关及控制灯
前面板(配有推挽装置或手柄)
恒温器
烤架(适配型号)
防滑垫
2.2 加热抽屉工作原理
本电器配有热空气循环系统。风扇会将电
热元件产生的热量输送至电器内部各处。
恒温器可用于设定并控制餐具需要达到的
温度。
产生的循环流动热空气可快速均匀地加热
餐具。
金属格栅可保护加热元件及风扇。
加热抽屉底部装有防滑垫,可防止碟盘在
保温抽屉打开和关闭时来回滑动。
1
4
5
中文 31
3. 使用
3.1 首次使用前
首次使用前,应按照
“清洁和维护”一节中给出的说明来清洁
电器内部和外部。
取下防滑底座。
然后将加热抽屉加热至少 2 个小时。为此,
请将温度控制旋钮调至最大位置(请参阅
“选择温度”一节)。
进行此项操作时请确保厨房通风良好。
电器部件采用了专门的产品进行保护。因
此,在首次加热期间将有气味放出。短暂
时间过后,产生的气味和烟雾将消失,上
述现象均不代表存在任何连接错误或电器
故障。
3.2 控制面板
控制面板上有选择钮和 on/off 开关。只能
在打开加热抽屉时看到控制面板。
3.3 使用加热抽屉
要使用加热抽屉,请按照如下步骤进行操
作:
将餐具放入加热抽屉
请勿在散热孔前垂直放置餐盘。
否则热气将无法完全由散热孔散出。这
将导致加热不均。
通过旋转恒温器控制旋钮到合适位置来
选择所需功能。
按下开关来开启本电器,开关随即亮起。
关上抽屉。
请注意,关闭加热抽屉时不要用力过猛,
以免它再次弹开。取出加热好的餐具前,
必须再次按下开关以关闭加热抽屉。
3.4 选择功能
通过旋转恒温器控制旋钮,您可以选择 30
到 80 °C 之间的温度。
请勿强行将恒温器控制旋钮转到“0”位
置以左或最大位置以右,以免损坏本电器。
达到所选温度后,将停止加热。当温度下
降到所选温度以下时,将再次开始加热。
温标刻有绝对温度(单位:°C)以及与
各种餐具的最佳温度对应的符号:
32 www.aeg.com
符号
°C (*)
功能
警告
30°C
解冻
发面
发酵酸奶
-
盖好面团
盖好容器
45°C
茶杯/玻璃杯加热
-
60°C
餐具加热
美食加热
-
餐盘预热
70°C
食物保温
餐盘预热,封盖食物
80°C
食物加热
餐盘预热
*抽屉空置及关闭时的建议温度。
3.5 加热时间
影响加热时间的各种因素:
餐具材质及厚度
装载量
餐具摆放方式
温度设置
重复开关抽屉
因此无法给出确切的加热时间。
随着您使用加热抽屉的次数越来越多,您
将了解到适合您餐具的最佳设置。
食物保温和食物加热功能的建议:
将加热抽屉预热 15 分钟,以确保其内部
达到所需温度。
中文 33
4. 清洁和保养
清洁是日常所需的唯一保养工作。
警告!
清洁前必须断开加热抽屉电源。从电源插
座拔下插头或断开其供电电路。
请勿使用刺激性或磨砂型清洁剂、磨砂型
海绵或尖锐物体进行清洁,以免造成掉色
或产生划痕。
请勿使用高压或蒸汽喷流清洁设备。
4.1 电器前面板和控制面板
仅可使用湿布来清洁加热抽屉。如果设备
较脏,可在清洗用水中加入几滴洗洁精。
之后用干布擦干电器表面。
对于前面板采用不锈钢材质的加热抽屉,
可使用专用于处理不锈钢表面的产品。
此类产品可在一定时间内防止表面再次变
脏。用软布在表面涂上薄薄一层此类产品。
对于前面板采用铝材质的加热抽屉,请使
用温和的玻璃清洁剂和不起毛的软布。请
水平擦拭,切勿按压表面。
4.2 电热保温抽屉内部
请用湿布定期清洁加热抽屉内部。 如果
设备较脏,可在清洗用水中加入几滴洗洁
精。
之后用干布擦干电器表面。
避免水进入空气循环口。
只有当电器完全干燥后才可再次使用。
防滑垫
可撤掉防滑垫以便于清洁加热抽屉。
可在热水中加入几滴洗洁精来手洗防滑垫。
彻底晾干。
仅当防滑垫彻底晾干后才可将其放回本电
器。
34 www.aeg.com
5. 如果加热抽屉出现故障,该怎么办?
警告!
任何类型的维修必须由专业技师进行。由
非制造商授权的人员进行任何维修都会带
来危险。
然而,下述问题可由用户自行解决,而无
需联系技术支持。
联系技术支持前,请检查下列各项:
餐具无法充分加热。检查是否:
已开启本电器
已选择合适的温度
空气循环口被餐具挡住。
有足够的时间对餐具进行加热。
加热时间取决于若干因素,例如:
餐具材质及厚度
装载量
餐具摆放方式
餐具完全无法加热。检查是否:
可以听到风扇的噪声。如果风扇正在
运转,则表明加热元件损坏。 如果风
扇没有运转,则表明风扇损坏。
熔断器/断路器已经熔断/断路。
餐具过度加热:
温度选择旋钮损坏。
On/off 开关未亮起:
开关的指示灯损坏。
6. 安装说明
6.1 安装前
检查输入电压,确保铭牌上标注的输入电
压与即将使用的电源的输出电压相同。
打开加热抽屉,取出所有配件并拆下包装
材料。
警告!
加热抽屉的前面板可能贴有保护膜。首次
使用本加热抽屉之前,请小心揭下该保护
膜。
确保加热抽屉未受任何损坏。请检查加热
抽屉能否正常打开和关闭。如发现有任何
损坏,请联系技术支持服务人员。
警告:
加热抽屉安装完成后,电源插座应便于使
用。
本加热抽屉只能与制造商指定的电器组合
在一起。若将加热抽屉与其他电器组合在
一起,则保修不再有效,因为无法保证加
热抽屉能够正常工作。
中文 35
6.2 安装
请参阅单独提供的安装指南。
要将加热抽屉和其他电器组合在一起,安
置空间内必须有固定的中间托架,以支撑
两个电器的总重量。
要与加热抽屉组合在一起的电器可直接安
放于其上。
如需安置与加热抽屉组合的电器,请遵照
相应说明书和安装手册中的说明。
6.3 电气连接
电气安装工作必须由合格电气技师根据现
行法规执行。
将加热抽屉连接至电源前,请检查电源的
电压和频率是否与加热组件内部铭牌所示
相一致。
电气连接由全极开关控制,此开关能够适
应耐受的工作强度,并且触点间最小间距
为 3mm,这可确保在紧急情况下或清洗
加热抽屉时断开连接。
电气连接正确接地。
警告:
加热抽屉必须接地。
如果连接至电器的柔性电源电缆需要更换,
则应由官方售后服务部门予以更换,因为
操作中需要使用特殊工具。
对于因不遵守安装说明所引起的任何人员、
动物或财产损害,制造商和零售商不承担
任何责任。
7. 环境保护
带有下述标识的为可回收材料。
将包装放入相应容器中以便回收。
回收电气及电器废物,助力保护环境与人
类健康。
请勿将带有以下标识的电器与一般
生活垃圾等
同处理。将产品运至当地废品回收
站或联系当地政府。
36 www.aeg.com
تايوتحملا
1. ةمسلا تامولعم ....................................................................................... 37
2. زاهجلا فصو ........................................................................................... 40
3. مادختسا ................................................................................................ 41
4. ةنايصلاو فيظنتلا ...................................................................................... 43
5. ؟نيخستلا جرد لمعي مل اذإ هلعف يغبني يذلا ام........................................................ 44
6. بيكرتلا تاميلعت ........................................................................................ 44
7. ةئيبلا ةيامح .............................................................................................. 45
كل ا
ً
صيصخ ممصم جتنم
ةزهجأ دحأ ءارش ىلع كركشنAeg راكتباو ةربخلا نم دوقعب زيمتي ا
ً
جتنم ترتخا دقل .
،هل كمادختسا دنع .ةصاخلا كتاجايتحا ةيبلتل ا
ً
صيصخ ممصمو قينأو ركتبم وهف .يفارتحا
عم كب ا
ً
بحرم .ةرم لك يف ةعئار جئاتن ىلع لصحتس كن ناماب رعشتسAeg.
:ةيلاتلا تامدخلاب عتمتلل تنرتنا ربع انعقوم اوروز
:ةمدخلا تامولعمو اهحلصمو ءاطخا فشكتسمو تابيتكلاو مادختسا حئاصن يلع لوصحلا
www.aeg.com
:لضفأ ةمدخ يلع لوصحلل جتنملا ليجست
www.aeg.com/productregistration
:زاهجلاب ةصاخلا ةيلصا رايغلا عطقو ةيكهتسا داوملاو تاقحلملا ءارش
www.aeg.com/shop
ءمعلا ةمدخو ةيانعلا
.ةيلصا رايغلا عطق مادختساب كيصون
.ةيلاتلا تانايبلا رفاوت نم دكأت ،ةمدخلا زكرمب لاصتا دنعو
تانايب ةحول يلع تامولعملا هذه يلع روثعلا نكمي و جتنملا مقرو زارطلا .زاهجلا
.لسلسملا مقرلا
هيبنت/ريذحت- ةمسلا تامولعم
ةماع حئاصنو تامولعم
.ةيئيب تامولعم
راطخإ نود رييغتلل عضخت.

ةيبرعلا37
1. ةمسلا تامولعم
ةكرشلا نأ امك .همادختساو زاهجلا بيكرت لبق ةيانعب تاميلعتلا ةءارق ىجري
ببستي دق يذلا زاهجلا مادختساو ميلسلا ريغ بيكرتلا نع ةلوئسم ريغ ةعنصملا
،كدي لوانتم يف ةدوجوملا تاداشراب ا
ً
مئاد ظفتحا .رارضأو تاباصإ عوقو يف
ا ءانثأ ةلوهسب اهيلا عوجرلا كنكمي ثيح ريياعم عم زاهجلا اذه قفاوتي .مادختس
ضيرعت ىلإ زاهجلل ميلسلا ريغ مادختسا يدؤي دق .اهب لومعملا ةمسلا
.رطخلل تاكلتمملاو ةراملاو نيمدختسملا
1.1 ةمسلافطا نسلا رابكو
!ريذحت
.مئادلا زجعلا وأ ةباصا وأ قانتخا رطخ
• مهرامعأ غلبت نيذلا لافطل نكمي8 ةردقلا يوذ صاخشاو رثكأو تاونس
ةفرعم وأ ةربخ مهيدل سيل نمم وأ ةدودحملا ةيسحلا وأ ةيلقعلا وأ ةيدسجلا
تاميلعت مهيقلت دعب وأ نيغلابلا فارشإ تحت كلذ ناك اذإ ةزهجا مادختسا
.همادختساب ةطبترملا رطاخملل مهمهفتو زاهجلل نما مادختسا
• اب لافطا ثبعي نأ يغبني اًديعب فيلغتلاو ةئبعتلا داوم ىلع ظفاح .زاهجل
.تاونس ثث نع مهرامعأ لقت نيذلا لافطا لوانتم نع
• .لافطا لوانتم نع اًديعب فيلغتلاو ةئبعتلا داوم ىلع ظفاح
• دنع وأ ليغشتلا ءانثأ زاهجلا نع اًديعب ةفيلا تاناويحلاو لافطا ىلع ظفاح
ةرارح ةجرد عفترت ثيح .ديربتلا .ةدشب اهيلإ لوصولا نكمي يتلا هؤازجأ
• .فارشإ نودب لافطا لب
ِ
ق نم هتنايصو زاهجلا فيظنت يغبني
• ينامث نع مهرامعأ لقت نيذلا لافطا لوانتم نع اًديعب هلبكو زاهجلا
ِ
قبأ
.تاونس

38 www.aeg.com
1.2 ةماعلا ةمسلا تاريذحت
بنجتل رذحلا
خوتف .مادختسا ءانثأ ا
ً
نخاس زاهجلا حبصي نيخستلا رصانع ةسمم
يهطلا يناوأ وأ تاقحلملا لاخد نرفلا تازافق ا
ً
مئاد مدختسا .زاهجلا لخاد
.اهجارخإ وأ نرفلل ةمواقملا
• لخاد ةرارحلا ةجرد لصت دق ،ليغشتلا دنع ةرارحلا ةجرد ىلع اًدامتعا
ىلإ زاهجلا80 ىمحا يناوا ةئفدت ةرجح نم يناوا جارخو .ةيوئم ةجرد
كيدي .نوحصلا ةفشنم وأ نرفلا تازافق مادختساب
• جردلا ىلع ءاكتا وأ سولجلا بنجت- .نرفلا يراجم ررضتت نأ نكميف
جردلل ىوصقلا ةلومحلا غلبتو15 .مجك
• ةرجح لخاد ةعرسب لاعتشل ةلباقلا وأ ةيعانطصا تايواحلا نيزخت بنجت
هذه بوذت دق زاهجلا ليغشت دنعف .يناوا ةئفدت لعتشت وأ ماسجاو تايواحلا
!قيرحلا رطخب رذنتو .نارينلا اهيف
• ةعفترملا ةرارحلا تاجرد ببست دقف .ةئفدت زاهجك زاهجلا مادختسا بنجت
.زاهجلا نم برقلاب ةدوجوملا لاعتشل ةلباقلا داوملا لاعتشا
•
ردصم نم هلصفا ،يضارتفا هرمع ةياهن يف زاهجلا مادختسا نع فقوتلا دنع
لباق ريغ زاهجلا ريصي ىتح ةيئابرهكلا تبكلا نم صلختو ةقاطلاب دادما
.هب بعلل لافطا مادختسا ،لاثملا ليبس ىلع ا
ً
رطخ نوكي و مادختسل
1.3 بيكرتلا
• .لصفنم لكشب ةقفرملا تاميلعتلا عبتا
• ةلصتملا ءازجاب رشابملا لاصتا نم ةيامحلا بيكرتلا نمضي نأ بجي
رهكلا رايتلاب.يئاب
•
عيمج دنع عطاوق لخ نم ،رايتلا لصفل ةليسوب يئابرهكلا ماظنلا د
وزي نأ يغبني
.ةثلاثلا ةئفلا ىلإ يئابرهكلا دهجلا عافترا دنع رايتلل ا
ً
مات ا
ً
عطق رفوت باطقا
• دعب هيلإ لوصولا ل
ُ
هسي نأ بجيو ،يئابرهكلا ليصوتلل سباق مدختسا بجي
.بيكرتلا
• ليصوت لبق !ريذحت )ددرتلاو يبرهكلا دهجلا( تانايبلا ةنراقم بجي ،زاهجلا
تكشم ثدحت دقف .ةقاطلاب دادما ردصمب ةصاخلا كلت عم تانايبلا ةحول يف
.يئابرهكلاب لاصتاب كيلع كش دوجو ةلاح يفو .تانايبلا قباطت مدع ةلاح يف
• يكرت بجي ،)يكلس( سباق مادختسا نودب زاهجلا ليصوت ةلاح يف !ريذحت ب
زمرلل ا
ً
قفو لمعلا ذيفنتل لهؤم يئابرهكب لصتا .ينف لب
ِ
ق نم هليصوتو زاهجلا
ريغ ةعنصملا ةكرشلا نأ امك .ليلدلا اذه ماكحأ عيمج عم فقتي امبو يئابرهكلا
.ليصوتلا وأ بيكرتلا ءاطخأ نع ةجتانلا رارضا نع ةلوؤسم
•
ةلاح يف طقف زاهجلل ةيئابرهكلا ةمسلا نامض نكمي !ريذحت
ٍ
لكشب ضيرأتلا
مدع نع ةمجانلا رارضا نع ةلوؤسم ريغ ةعنصملا ةكرشلا نأ امك .حيحص
.)ةيئابرهكلا ةمدصلا لثم( هب للخ دوجو وأ بيكرتلل يئاقولا ضيرأتلا ماظن دوجو
ةيبرعلا39
• نأ نكمي ثيح .هعقوم يف هبيكرت دنع طقف زاهجلا اذه مدختسا !ريذحت
و لخاد طقف يئاهنلاو لماكلا بيكرتلا نمضي نم رطخ دوجو مدع خبطملا ةدح
.يئابرهكلا رايتلاب ةلصتملا ءازجا ةسمم
•
ةلصتملا ءازجا نيب لاصتا ثودح نكمي ثيح .زاهجلا ندب حتف رظح
ُ
ي !ريذحت
ةيكيناكيملاو ةيئابرهكلا ءازجا ىلع تارييغت يأ لثمت نأ نكمي وأ يئابرهكلا رايتلاب
لختو نيمدختسملا ةمس ىلع ا
ً
رطخ.ميلسلا زاهجلا لمعب
1.4 فيظنتلا
• زاهجلا فيظنتل نيكاكس/ةيندعم تاطشاك وأ ةيساق وأ ةداح تافظنم مدختست
.حطسلا شدخت نأ نكمي اهن
• .زاهجلا فيظنتل راخبلا تافظنم مدختست
• رثؤي دق دقف .راخبلاب فيظنتلا وأ يلاعلا طغضلاب فيظنتلا ةزهجأ مدختست
ىلع راخبلا .ةريصق ةيئابرهك ةرئاد ثودح يف ببستيو ةيئابرهكلا تانوكملا
ىلع تانوكملاو زاهجلا حطسل ا
ً
ررض راخبلا طغض ببسي نأ اضيأ نكميو
.ليوطلا ىدملا
1.5 تاحصا
• لبق نم هلادبتسا بجي ،زاهجلاب صاخلا ةقاطلاب دادما لبك فلت ةلاح يف
يئابرهك وأ دمتعم ينف وأ ةعنصملا ةكرشلا.ةلمتحم رطاخم يأ يدافتل لهؤم
• بيكرتلا لامعأ ذيفنت دنع ءابرهكلا ردصم نع زاهجلا لزع بجي !ريذحت
:ةيلاتلا طورشلا دحأ ءافيتسا بجي ،رايتلا نع زاهجلا لصفلو .حصاو
- .حيتافملا ةحول يف ةلصلا تاذ ةرئادلا عطاوق/رهاصملا لصف بجي
- سباقلا عزنل .سبقملا نم سباقلا عزن يغبني كلسلا بحس بنجت ،سبقملا نم
.
ً
ةرشابم سباقلا بحسا لب يئابرهكلا
• ةلصتملا تانوكملل
ً
ةصاخ ،ةنايصلاو تاحصا ءارجإ بجي !ريذحت
.ةعنصملا ةكرشلا لبق نم مهل حرصملا نيينفلا لبق نم طقف ،يئابرهكلا رايتلاب
تاباصإ يأ ثودح ةيلوؤسم ةئزجتلا رجاتو ةعنصملا ةكرشلا لمحتت
ل حصا تايلمعل ةجيتن ةيصخشلا تاكلتمملا فلت وأ تاناويحلا وأ صاخش
.كلذب مهل حرصم ريغ دارفأ اهب موقي يتلا ةنايصلاو
• نم طقف نامضلا ةرتف لخ ىرج
ُ
ت يتلا تاحصا ءارجإ بجي !ريذحت
،كلذك رما نكي مل اذإف .ةعنصملا ةكرشلا لبق نم مهل حرصملا نيينفلا لب
ِ
ق
.نامضلا نم ينعملا حصا نع جتان ررض يأ داعبتسا متيس

40 www.aeg.com
2
3
2. زاهجلا فصو
2.1 ةيسيئرلا تانوكملا
ةءاضاو ليغشتلا فاقيإ/ليغشتلا حاتفم
ضبقم وأ ةيلا عم ةيماما ةحوللا
يطاغضنا
ةرارحلا ةجرد يف مكحتلا زاهج
بسح( معاد فر)زارطلا
قزنل ةمواقم ةدعاق
2.2 نيخستلا جرد لمعي فيك
ثيح .ئفادلا ءاوهلا ريودت ماظنب زاهجلا اذه زيهجت مت
نيخستلا رصنع نع ةجتانلا ةرارحلا ةحورملا ع
ِ
زو
ُ
ت
ءاحنأ عيمج يف يئابرهكلا.لخادلا نم زاهجلا
ةجرد طبض مدختسملل ةرارحلا ةجرد يف مكحتلا زاهج حيتي
.يناوا ةيعون بسح اهب مكحتلاو ةرارحلا
نيخست ىلع نرفلا لخاد رودي يذلا نخاسلا ءاوهلا لمعيو
.
ٍ
واستم
ٍ
لكشبو ةعرسب يناوا
ةحورملاو نيخستلا رصنع ةسمم نم ةيقاولا ةكبشلا يقت
.يضرع لكشب
ةيامحل قزنل ةلباق ريغ ةدامب جردلا ةدعاق ىطغ
ُ
ت
.هقلغ وأ جردلا حتف دنع كرحتلا نم قابطا
1
4
5
ةيبرعلا41
3. مادختسا
3.1 ىلوا ةرملل مادختسا لبق
فيظنت كل يغبني ىلوا ةرملل زاهجلا مادختسا لبق زاهجلا
لخادلا نم
يف ةحضوملا فيظنتلا تاميلعت عابتاب جراخلاو
."ةنايصلاو فيظنتلا" مسق
قزنل ةلباقلا ريغ ةدعاقلا لزأ
.لقا ىلع نيتعاس ةدمل يناوا نخس مث
ةجرد يف مكحتلا حاتفم ردأ ،كلذب مايقللو ةرارحلا
ةجرد ديدحت" مسق عجار( عضو ىصقأ ىلإ
.)"ةرارحلا
دنع خبطملا يف ةديجلا ةيوهتلا رفاوت نم دكأتو
.كلذب مايقلا
ببستي دقو .صاخ جتنمب ةجَلاعم زاهجلا ءازجأ
.يلوا نيخستلا ءانثأ ةهيرك ةحئار ثاعبنا يف كلذ
ٍتقو دعب ةجتان ةرخبأ يأو ةحئارلا يفتختسو
يشت و ريصق وأ ليصوتلا يف أطخ يأ دوجو ىلإ ر
.زاهجلا
3.2 مكحتلا ةحول
حاتفمو فئاظولا ددحم حاتفم يلع مكحتلا ةحول يوتحت
حتف ءانثا طقف مكحتلا ةحول رهظتو .ليغشتلا فاقيا/ليغشتلا
.جردلا
3.3 نيخستلا جرد مادختسا
:ةيلاتلا تاوطخلا عبتا ،نيخستلا جرد مادختس
• .جردلا يف يناوا عض
• تاحتف مامأ يسأر عضو يف يناوا عضو بنجت
.ةيوهتلا
نم اذهو .تاحتفلا نم لماكلاب ئفادلا ءاوهلا جرخي نلف
.يناول
ٍ
واستم ريغ نيخست ىلإ يدؤي نأ هنأش
• مكحتلا ضبقم ريودت قيرط نع ةبوغرملا ةفيظولا ددح
.رظانملا عضوملا ىلإ ةرارحلا ةجرد يف
• حاتفملا ىلع طغضلاب زاهجلا ل
ّ
غش ءوضلا ئيضيس ؛
.لباقملا
• .جردلا قلغأ
ةرم حتفي دق هن ا
ً
رظن ةوقب جردلا قلغت و رذحلا خوت
جرد ليغشت فاقيإ بجي ،ةئفادلا يناوا جارخإ لبق .ىرخأ
.ىرخأ ةرم حاتفملا ىلع طغضلا قيرط نع نيخستلا
3.4 ةفيظولا ديدحت
تاجرد ديدحت ةرارحلا ةجرد يف مكحتلا ضبقم كل حيتي
رتت ةرارح نيب حوا30 و80 .ةيوئم ةجرد
ىلإ راسيلا ىلإ ةرارحلا ةجرد يف مكحتلا ضبقم كرحت
" عضولا دعب ام0 ةجرد دعب ام ىلإ نيميلا ىلإ وأ ،ةوقلاب "
.هفتإ ىلإ كلذ يدؤي دقف ،ةوقلاب ىوصقلا ةرارحلا
فاقيإ متيس ،ةددحملا ةرارحلا ةجرد ىلإ لوصولا درجمب
رصنع ليغشت ىلإ ةرارحلا ةجرد ضفخنت امدنعو .نيخستلا
ةرم نيخستلا رصنع ليغشت متيس ،ةددحملا ةميقلا نود ام
.ىرخأ
،ةددحملا ةميقلا نود ام ىلإ ةرارحلا ةجرد ضفخنت امدنع
:ىرخأ ةرم نيخستلا رصنع ليغشت متيس
42 www.aeg.com
زمرلا
ةجرد
)*( ةيوئم
ةفيظولا
ريذحتلا
30 ةجرد
ةيوئم
.جلثلا ةباذإ
.نيجعلا رمخت
.يدابزلا رمخت
-
.نيجعلا ةيطغتب مق
.ضوحلا ةيطغتب مق
45 ةجرد
ةيوئم
.نيجانفلاو باوكا ةئفدت
-
60 ةجرد
ةيوئم
.ءاشعلا قابطأ ةئفدت
.ةساسحلا ةمعطا نيخست ةداعإ
-
.ا
ً
قبسم قبطلا ن
ّ
خس
70 ةجرد
ةيوئم
.ةمعطا ءفد ىلع ةظفاحملا
ةيطغتب مقو ا
ً
قبسم قبطلا ن
ّ
خس
.ماعطلا
80 ةجرد
ةيوئم
.ةمعطا نيخست ةداعإ
.ا
ً
قبسم قبطلا ن
ّ
خس
ا
ً
غراف نوكي امدنع جردلا ىلإ ةرارحلا تاجرد ريشت *.ا
ً
قلغمو
3.5 نيخستلا تاقوأ
:نيخستلا تاقوأ ىلع رثؤت يتلا ةفلتخملا لماوعلا
• يناوا كمسو داوملا
• ماعطلا رادقم
• يناوا يف ماعطلا عضو ةيفيك
• ةرارحلا ةجرد طبض
• رركتم لكشب هقغإو جردلا حتف
.ةقيقد نيخست تاقوأ ديدحت نكمي اذل
لضفأ ملعتتس ،ماظتناب نيخستلا جرد كمادختسا دنع
.كب ةصاخلا يناول تادادعا
ةداعإ"و "ماعطلا ءفد ىلع ظافحلا" ةفيظول تاحارتقا
:"نيخستلا
ةدمل ا
ً
قبسم نيخستلا جرد ن
ّ
خس15 هلوصو نم دكأتلل ةقيقد
.ةبولطملا ةيلخادلا ةرارحلا ةجرد ىلإ
ةيبرعلا43
4. ةنايصلاو فيظنتلا
هؤارجإ بولطملا ديحولا ةنايصلا ءارجا وه فيظنتلا
.ا
ً
مومع
!ريذحت
لبق ةقاطلاب دادما ردصم نم نيخستلا جرد لصف بجي
دادما ةرئاد لزعا وأ سبقملا نم زاهجلا لصفا .فيظنتلا
.هب ةصاخلا ةقاطلاب
فيظنتلا داوم مادختسا بنجت وأ ةطشاكلا وأ ةيساقلا
ببسي دقف ،ةداحلا ءايشا وأ ةطشاكلا تاجنفسا/تاداسولا
.شودخ وأ عقب ثودح كلذ
فيظنتلا وأ يلاعلا طغضلاب فيظنتلا ةزهجأ مادختسا رظح
ُ
ي
.راخبلاب
4.1 مكحتلا ةحولو زاهجلا ةهجاو
ةللبم شامق ةعطق مادختساب نيخستلا جرد فيظنت نكمي
ناك اذإو .طقف لئاس نم تارطق عضب فضأ ،ةياغلل ا
ً
خستم
.ءاملا ىلإ يناوا لسغ
.ةفاج شامق ةعطق مادختساب حطسا ففج
نم ةعونصملا حطسل ةصصخم تاجتنم مادختسا نكمي
نيخستلا جاردأ نم يماما ءزجلا عم أدصلل مواقملا ذوفلا
.أدصلل مواقملا ذوفلا نم عونصملا
.حطسا هذه ىلع خاسوا مكارت تاجتنملا هذه عنمت ثيح
ةعطق مادختساب حطسلا ىلع جتنملا اذه نم ةقيقر ةقبط عض
.ةمعان شامق
نم عونصملا نيخستلا جاردأ نم يماما ءزجلا ىلع
ةعطقو فيفخ يجاجز فيظنت جتنم مدختسا ،موينوملا
ض نودب ا
ً
يقفأ حسماو .ربولا نم ةيلاخ ةمعان شامق.طغ
4.2 نيخستلا جردل يلخادلا ءزجلا
ةعطق مادختساب ماظتناب نيخستلا جردل يلخادلا ءزجلا ف
ِ
ّ
ظن
تارطق عضب فضأ ،ةياغلل ا
ً
خستم ناك اذإو .ةللبم شامق
.ءاملا ىلإ يناوا لسغ لئاس نم
.ةفاج شامق ةعطق مادختساب حطسا ففج
.ءاوهلا ريودت ةحتف يف ءاملا لوخد بنجتو
.ا
ً
مامت فجي امدنع طقف ىرخأ ةرم نيخستلا جرد مدختسا
قزنل ةمواقم ةدعاق
فيظنت ليهستل قزنل مواقملا حطسلا ءاطغ ةلازإ نكمي
.جردلا
عضب عم نخاسلا ءاملا مادختساب ديلاب ءاطغلا فيظنت نكميو
.اًديج هففجو .يناوا لسغ لئاس نم تارطق
نوكي امدنع إ قزنل مواقملا ءاطغلا لادبتسا يغبني
.ا
ً
مامت ا
ً
فاج
44 www.aeg.com
5. ؟نيخستلا جرد لمعي مل اذإ هلعف يغبني يذلا ام
!ريذحت
دقف .صصختم ينف لبق نم طقف تاحصإ يأ ءارجإ بجي
نم هل حرصم ريغ صخش هيرجي حصإ يأ يوطني لب
ِ
ق
.ةروطخ ىلع ةكرشلا
بلط نود ةيلاتلا ءاطخا ةجلاعم مدختسملل نكمي ،كلذ عم
."ةينفلا ةدعاسملا"
:يلي امم ققحت ،ةينفلا ةدعاسملاب لاصتا لبق
• :ناك اذإ امم ققحت .فاك
ٍ
لكشب يناوا نيخست متي
− ليغشتلا ديق زاهجلا
− ةبسانملا ةرارحلا ةجرد ديدحت مت
− تاحتفيناواب ةدودسم ءاوهلا ريودت
−
ٍ
فاك
ٍ
تقول ةئفدتلل يناوا تك
ِ
ر
ُ
ت
• ليبس ىلع ،اهنم لماوع ةدع ىلع نيخستلا تقو دمتعي
:لاثملا
− يناوا كمسو داوملا
− ماعطلا رادقم
− يناوا يف ماعطلا عضو ةيفيك
• :ناك اذإ امم ققحت .قطا ىلع يناوا نيخست متي
− جيجض عامس كنكمي ديق ةحورملا تناك اذإ ةحورملا
مل اذإف .بيعم نيخستلا رصنع نأ ينعي اذهف ،ليغشتلا
.ةلطعتم اهنأ ينعي اذهف ،ليغشتلا ديق ةحورملا نكت
− ةرئادلا عطاق لطعت وأ رهصملا فلت
• :ةياغلل ةنخاس يناوا
− لمعي ةرارحلا ةجرد ددحم
• :ءيضي ليغشتلا فاقيإ/ليغشتلا حاتفم
− شؤم حابصمفلات حاتفملا ر
6. بيكرتلا تاميلعت
6.1 بيكرتلا لبق
ةحول يف ددحملا رايتلا دهج نأ نم دكأت هسفن وه تانايبلا
.همادختسا يونت يذلا ةقاطلا سبقم هرفوي يذلا
.فيلغتلا داوم لزأو تاقحلملا عيمج جرخأو جردلا حتفا
!ريذحت
.ةيقاو ةقبطب نيخستلا جردل يماما حطسلا ةيطغت متي دق
جرد مادختسا لبق رذحب ةقبطلا هذه لزأ ةرملل نيخستلا
.ىلوا
.لاكشا نم
ٍ
لكش يأب نيخستلا جرد فلت مدع نم دكأتو
ةلاح يفو .حيحص
ٍ
لكشب قلغيو حتفي جردلا نأ نم دكأتو
.ةينفلا ةدعاسملا غلبأ ،فلت دودجو
:ريذحت
بيكرت دعب ةقاطلا سبقم ىلإ لوصولا لهسي نأ يغبني
.نيخستلا جرد
نم ةددحملا ةزهجا يف طقف نيخستلا جرد بيكرت يغبني
،ىرخأ ةزهجأ يف هبيكرت مت اذإو .ةعنصملا ةكرشلا لبق
جرد لمع نامض ليحتسي هن ا
ً
يغ نامضلا نوكيسف
.حيحص
ٍ
لكشب نيخستلا
ةيبرعلا45
6.2 بيكرتلا
.لصفنم لكشب ةقفرملا تاميلعتلا عبتا
فر رفاوت رخآ زاهج يف نيخستلا جرد بيكرت بلطتي
.نيزاهجلا نزو معدل لكيهلا يف تباث طيسو
هقوف نيخستلا جرد عم هبيكرت دارملا زاهجلا بيكرت متيس
.
ً
ةرشابم
بيكرتلاو تاميلعتلا بيتك يف ةدراولا تاميلعتلا عبتا
لباقملا.جمدملا زاهجلا بيكرتل
6.3 يئابرهكلا ليصوتلا
.لهؤم يئابرهك لب
ِ
ق نم يئابرهكلا بيكرتلا ءارجإ بجي
دكأت ،يئابرهكلا رايتلا ردصمب نيخستلا جرد ليصوت لبق
حضوملا يئابرهكلا رايتلا ردصم ددرتو دهجلا قباطت نم
.زاهجلا لخاد تانايبلا ةحول ىلع
ربع يئابرهكلا ليصوتلا ءارجإ يغبني ددعتم حاتفم
لصاف دوجو عم رايتلا ةردق بسح ف
ّ
نصم باطقا3 مم
وأ ئراوطلا تاح يف لزعلا ريفوت لجأ نم ،لقا ىلع
.نيخستلا جرد فيظنت دنع
.بسانم
ٍ
لكشب ا
ً
ضرؤم ليصوتلا نوكي نأ بجي
:ريذحت
.نيخستلا جرد ضيرأت بجي
ىلإ ةجاحب زاهجلاب صاخلا نرملا لبكلا ناك اذإ ،لادبتسا
مزلي ثيح ،دمتعم ةمدخ زكرم وأ ينفلا معدلاب لصتاف
.ةصصختم تاودأ مادختسا
يأ ةيلوؤسم ةئزجتلا رجاتو ةعنصملا ةكرشلا لمحتت
تاكلتمملا فلت وأ تاناويحلا وأ صاخشل ةباصإ
.ةمدقملا بيكرتلا تاميلعت عابتا مدع ةجيتن ةيصخشلا
7. ةئيبلا ةيامح
.يلاتلا زمرلا لمحت يتلا داوملا ريودت دعأ
.اهريودت ةداع ةلباقملا تايواحلا يف ةوبعلا عض
تايافنلا ريودت دعأو ناسنا ةحصو ةئيبلا ةيامح يف دعاس
.ةينورتكلاو ةيئابرهكلا ةزهجا نم ةجتانلا
زمرلا لمحت يتلا ةزهجا نم صلختلا بنجت
تايافنلا عم يلاتلا
ريودتلا ةداعإ قفرم ىلإ جتنملا ذخ .ةيلزنملا
.كيدل ةيلحملا ةطلسلاب لصتا وأ يلحملا
www.aeg.com/shop