
Loading ...
Loading ...
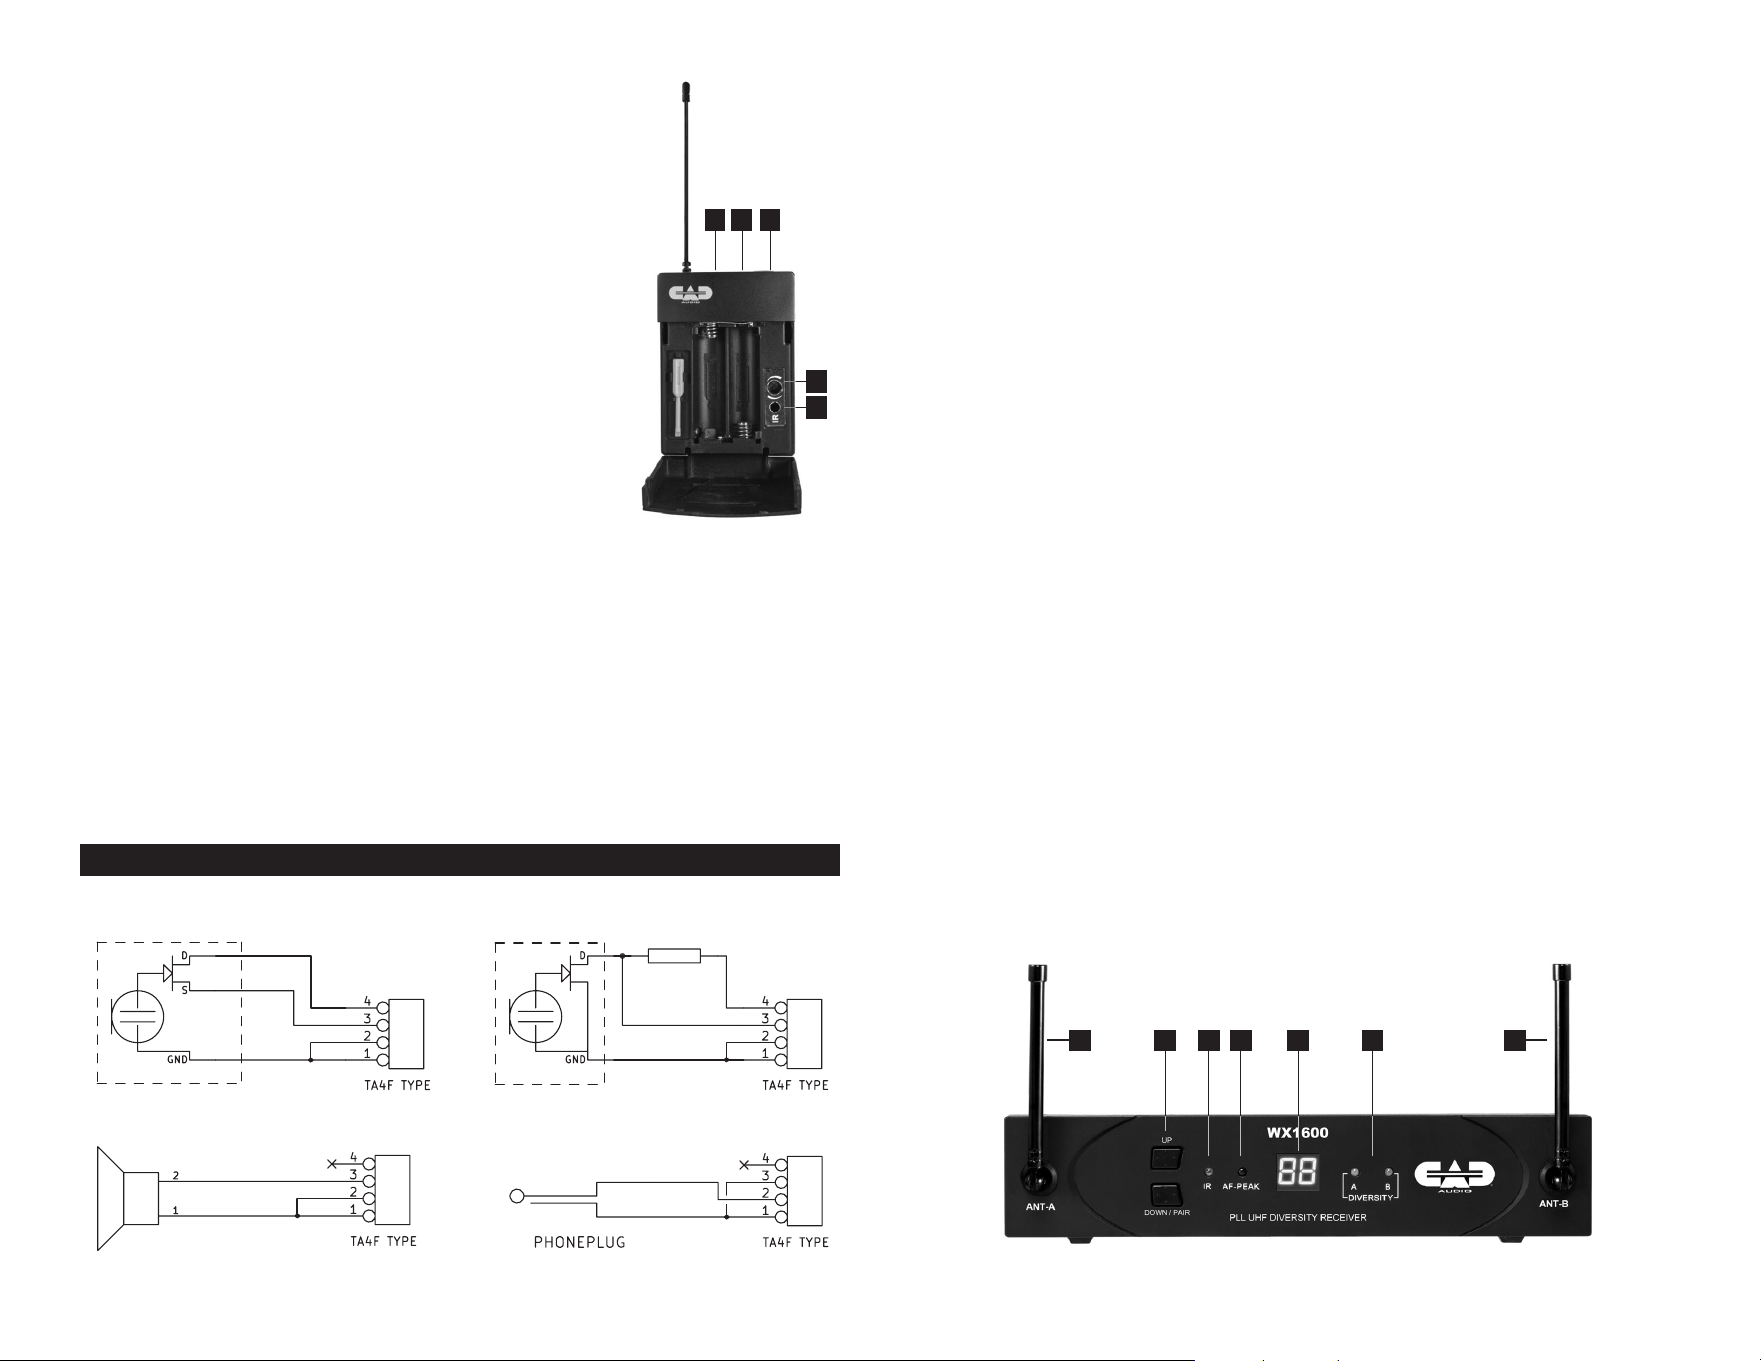
Bodypack TX1610 Transmitter
1. IR Node for Scan-Link
TM
operation
2. 4 pin connector (TB4M-type)
3. 3 Color LED indicator
- Green = Transmitter is powered up
and audio is live
- Orange = Transmitter is powered up
and audio is muted
- Flashing Red = Low battery status
(change battery ASAP)
4. Power Switch – Soft touch switch
- Holding the switch for 2 seconds turns
the transmitter on/off
- Quick momentary press of the switch
mutes or unmutes the audio
5. Volume control
Specications TX1610
Frequency Response ................................................................40Hz – 15KHz
Maximum Input Level
Microphone Input: ................................................................. -10dBV
Instrument Input: ..................................................................+15dBV
RF Output ............................................................................................. 10mW
Dimensions .............................................. 2-9/16" [6.5cm] x 4 -1/4" [10.8cm]
x 15/16" [2.3cm]
Net Weight .................................................................................... 2.8oz [82g]
Power Requirements ............................................................ 2x AA batteries
Battery Life ...................................... >15hrs, high- quality alkaline batteries
3
6
Operating Instructions
• Insert new high-quality alkaline AA batteries into your transmitter,
observing proper direction.
• Power up the receiver and transmitter.
• Scan-Link
TM
your system by pressing the Down/Pair button for
approximately 1 second on the receiver to automatically activate
the Scan-Link
TM
function. A clean channel will be selected and the
display will ash.
• While the receiver display is ashing hold the transmitter
IR node in alignment with the receiver IR node within a distance
of approximately 12". The receiver will automatically set the
transmitter channel. When the display stops ashing the system
is “Scan-Link’d.” (The IR node on the handheld transmitter is on
the bottom near the on/off switch. The IR node on the bodypack is
inside the battery compartment.)
• To set up additional units continue the sequence while keeping
previously linked transmitters away from the receiver (and out of
the way of the IR Beam, about 2-3 feet away) that is attempting to
Scan-Link
TM
.
Receiver RX1600 (Front)
1. Antenna A
2. Channel up/Channel down/pair
3. IR node
4. AF peak indicator
5. Channel display
6. Diversity active
7. Antenna B
Interfacing to TX1610 input connector
3k3
3k3
3k3
3k3
3-wire type electret mic
Dynamic mic
2-wire type electret mic
Instrument
1 72 3 4 5 6
1
5
43
2
Loading ...