10533
Ages 6 and up
Requires 2-357 (LR44)
button cell batteries,
included
night ops
glasses
See in the dark and send
signals with LED light!
These are common Light signals to use for
communicating with your fellow agents.
a. Solid Red = Stop
b. Flashing Red = Take cover quickly!
c. Solid Yellow = Enemy in sight…be
careful
d. Solid Green = GO!
e. Flashing Green = Mission success!
…Or make up your own light codes for
super secret communication!
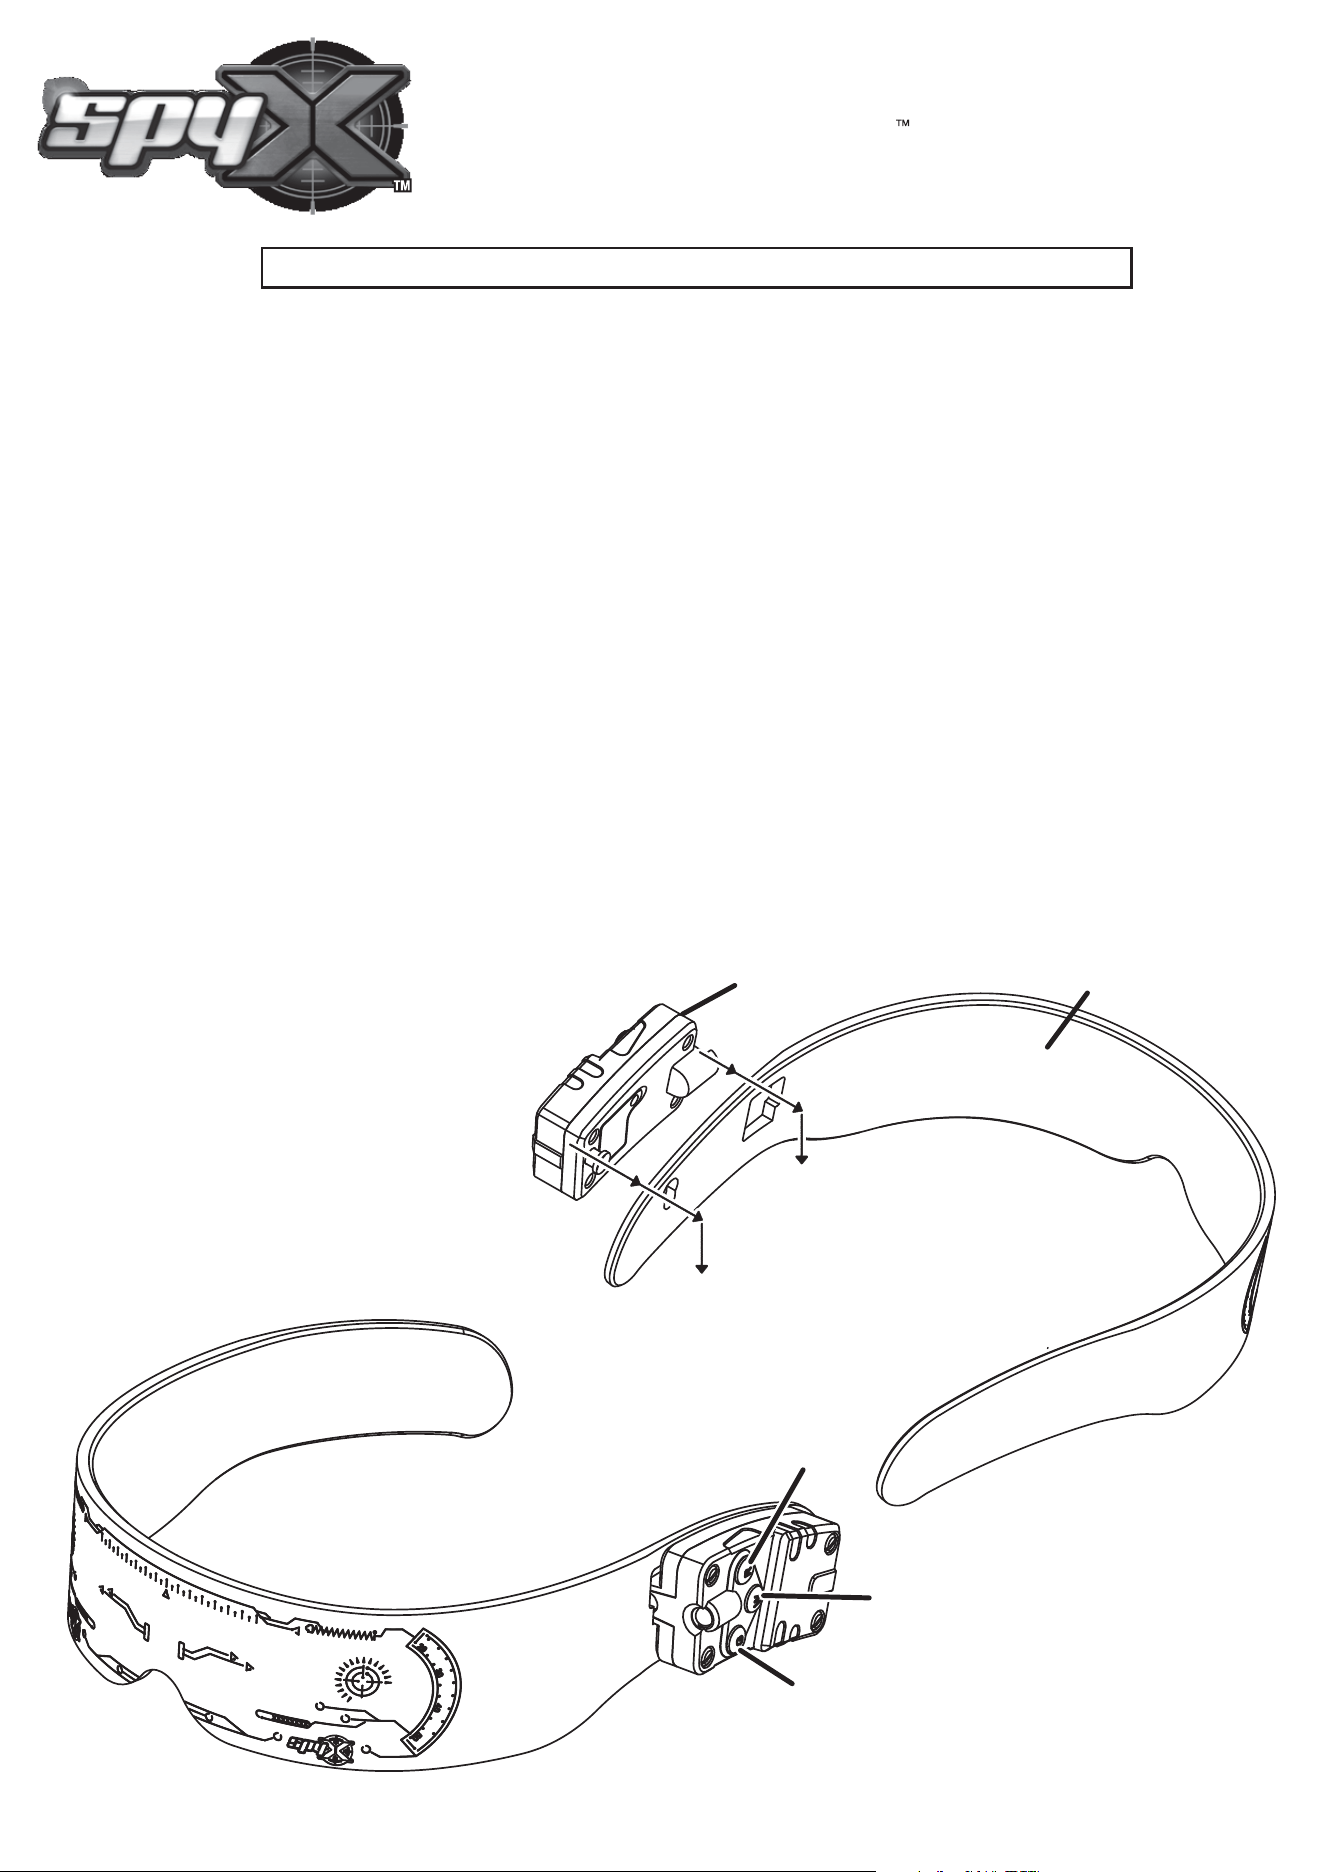
ASSEMBLY
HOW TO OPERATE THE NIGHT OPS GLASSES
The Night Ops Glasses comes in two parts. Attach the Light Module onto the Glasses
by placing the front and the rear of the Light Module into the Square and Round
opening on the glasses. Then slide the light module down so that it locks into place on
the glasses (See Fig 1).
The Colored LED Light shines through the edge of the glasses and diffuses the light across
the entire surface. The White LED Light does not shine through the edge so it can light up the
area in front of you.
The LED Light Module has 3 Buttons. (see Fig 2)
a. The top button (R) is the Red Color LED light, The bottom button (G) is the Green Color LED
light. The middle button (W) is the White LED Light - for seeing straight ahead in the dark!
b. To send Colored-light signals to your friends and other agents in the dark, press once to
turn on either the top button or the bottom button. Press the button again to turn off (or you
can press and release the button several times to send a flashing signal).
Hint: When you press both the Red light and the Green light it creates a Yellow Color LED signal.
Tip for parents: if not used for 10 minutes the Light Module will turn off to help the save battery life.
IMPORTANT: Please read this instruction sheet carefully and keep it for future reference.
Fig 1
(Red + Green together
makes Yellow!)
Fig 2
Red
White
Green
Light Module
Glasses
NIGHT OPS GLASSES 10533IS-US
© 2023 Atomic Monkey Products, Ltd. Hong Kong, China.
All rights reserved. PRINTED IN CHINA
BATTERY SAFETY INFORMATION:
• Only adults should install and replace batteries. Do not recharge non-rechargeable batteries.
• Remove dead or exhausted batteries.
• Insert batteries correctly. Match positive and negative signs.
• The supply terminals are not to be short circuited.
• Do not use rechargeable batteries.
• Do not mix alkaline, standard (carbon-zinc), or rechargeable (nickel-cadmium) batteries.
• Do not mix old and new batteries.
• Only the batteries of the same or equivalent type recommended to be used.
• Do not dispose of batteries in a fire; they may explode. Dispose of batteries safely.
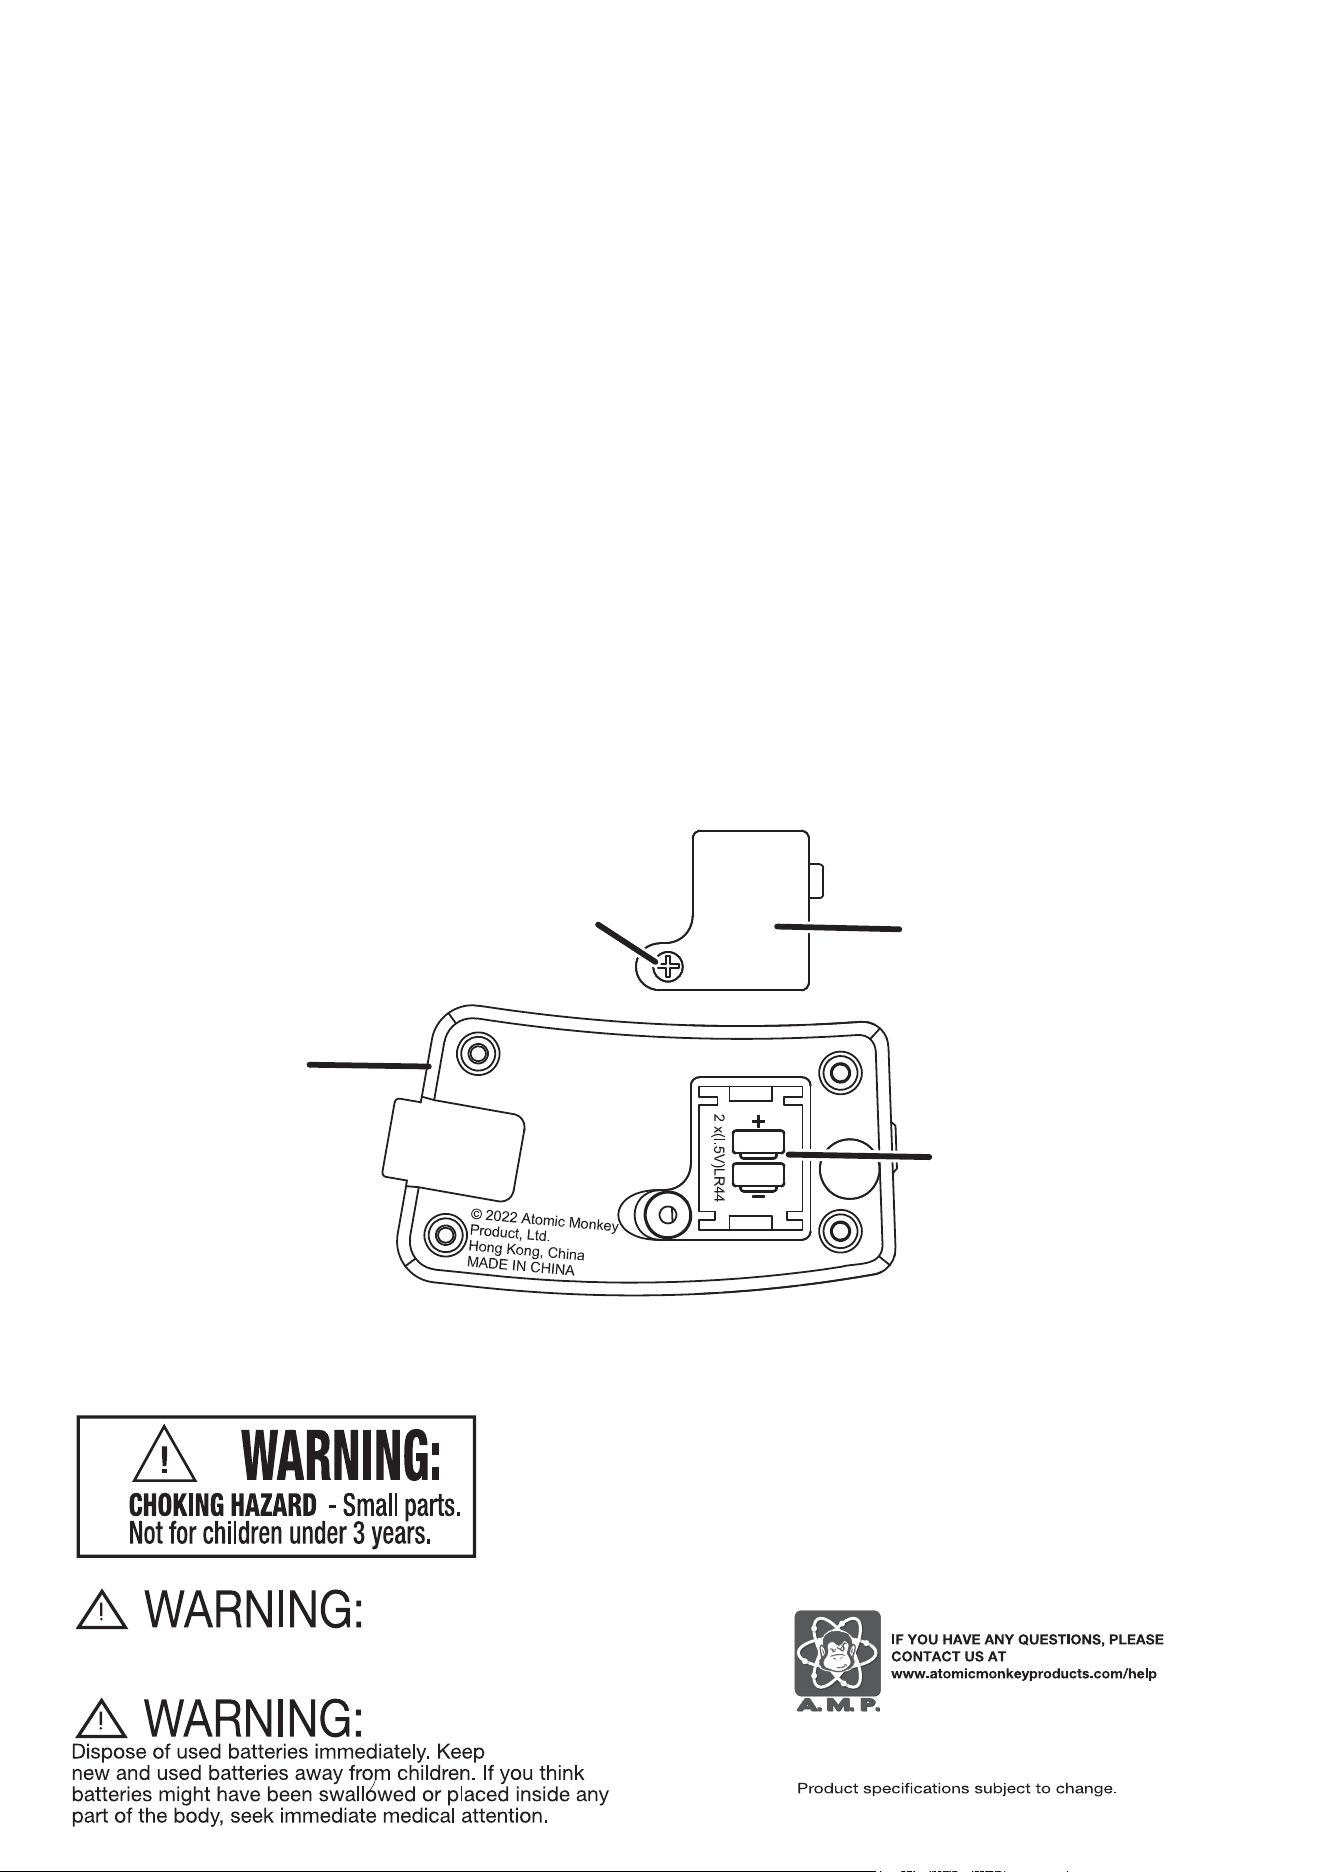
ATTENTION ADULTS - TO REPLACE BATTERIES (Fig 3)
SpyX Night Ops Glasses requires two 357 (LR44) button cell batteries, included.
• Slide the Light Module up until it is free from its locked position and pull away from the glasses.
Locate the Battery Door on the back of the Light Module.
• Use a small Phillips head screwdriver to loosen the screw and remove the BATTERY DOOR (Fig.3).
• Remove all old batteries.
• Place new batteries in compartments as shown.
• Replace the battery cover and tighten screw.
• Reattach the Light Module to the Glasses.
(see ASSEMBLY section on opposite side of this sheet)
This is a toy. Does not provide eye protection.
Battery Door
Light Module
Screw
2x 357 (LR44) button
cell batteries
Fig 3