
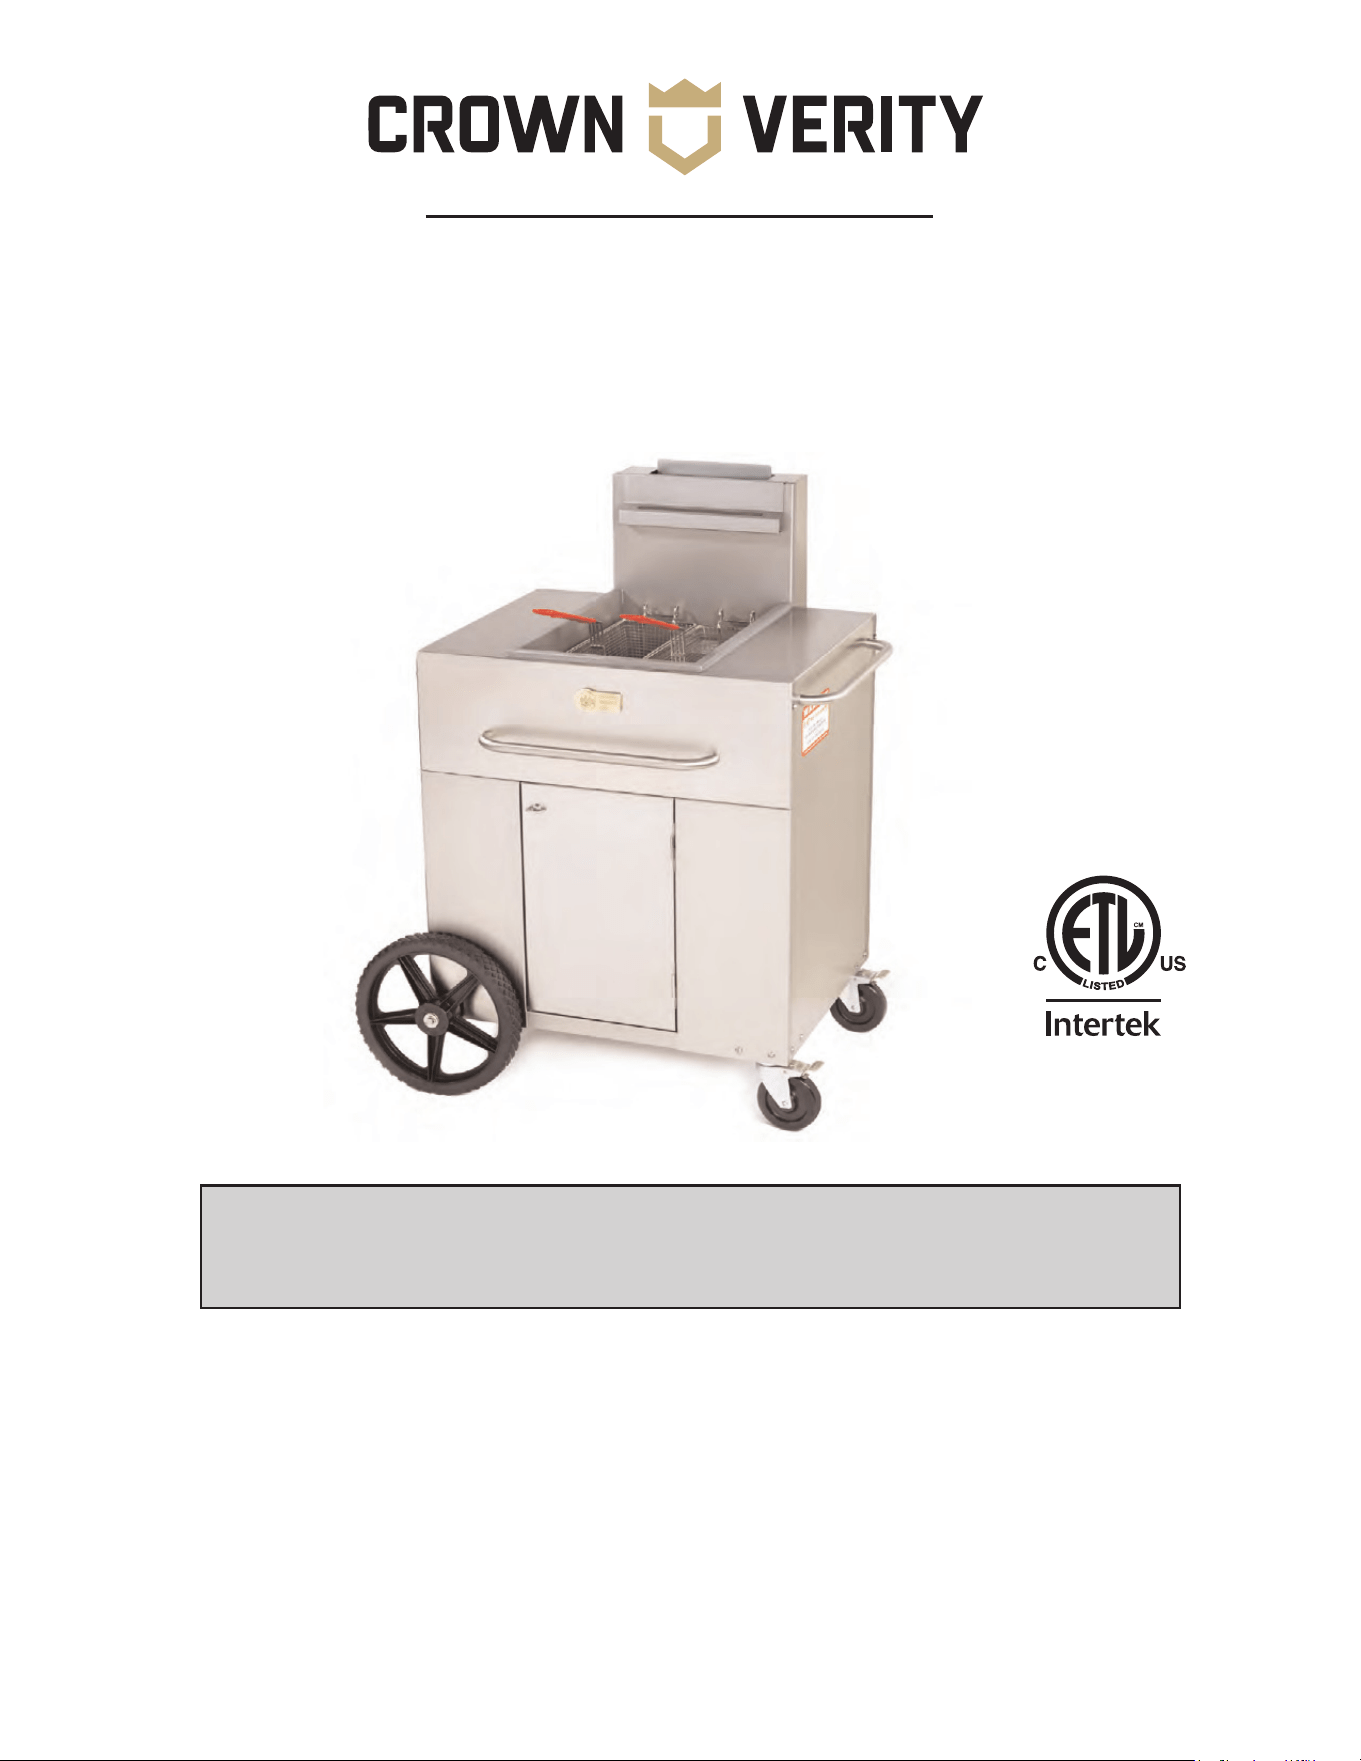
PRO SERIES GAS FRYERS
OWNER’S MANUAL
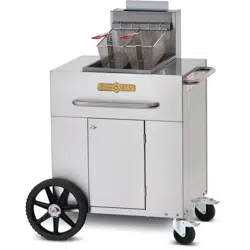
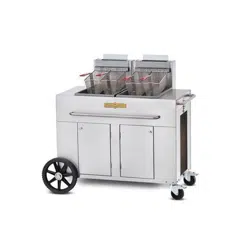
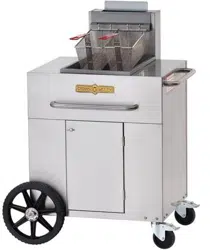
MODELS: PF-1 PRO-FRYER, PF2 DUAL PRO-FRYER
REVISED DECEMBER, 2014
*PLEASE RETAIN FOR FUTURE REFERENCE
This appliance has been tested according to ANSI Z83.11/CSA1.8 - 2009.
This outdoor cooking gas appliance is not intended to be installed in or on
recreational vehicles and/or boats.
Read the installation, operating and maintenance instructions thoroughly
before installing or servicing this equipment.
CROWN VERITY INC., 37 ADAMS BLVD., BRANTFORD, ON. CAN. N3S 7V8
TEL: (519) 751-1800 FAX: (519) 751-1802
www.crownverity.com
Email: info@crownverity.com
ANSI Z83.11/CSA1.8 - 2009
Printed January 2015

2
TABLE OF CONTENTS
IMPORTANT FOR YOUR SAFETY . . . . . . . . . . . . . . . . . . . . . . . . . . . . . . . . . . . . . . . . . . . . . . . . 3
INTRODUCTION . . . . . . . . . . . . . . . . . . . . . . . . . . . . . . . . . . . . . . . . . . . . . . . . . . . . . . . . . . . 4
GENERAL . . . . . . . . . . . . . . . . . . . . . . . . . . . . . . . . . . . . . . . . . . . . . . . . . . . . . . . . . 4
ORDERING PARTS . . . . . . . . . . . . . . . . . . . . . . . . . . . . . . . . . . . . . . . . . . . . . . . . . . . 4
UNPACKING . . . . . . . . . . . . . . . . . . . . . . . . . . . . . . . . . . . . . . . . . . . . . . . . . . . . . . . 4
INSTALLATION . . . . . . . . . . . . . . . . . . . . . . . . . . . . . . . . . . . . . . . . . . . . . . . . . . . . . . . . . . . . 5
Clearances . . . . . . . . . . . . . . . . . . . . . . . . . . . . . . . . . . . . . . . . . . . . . . . . . . . . 5
Location . . . . . . . . . . . . . . . . . . . . . . . . . . . . . . . . . . . . . . . . . . . . . . . . . . . . . . 5
CODES AND STANDARDS. . . . . . . . . . . . . . . . . . . . . . . . . . . . . . . . . . . . . . . . . . . . . . 6
GAS CONNECTION . . . . . . . . . . . . . . . . . . . . . . . . . . . . . . . . . . . . . . . . . . . . . . . . . . . 6
GAS PRESSURE.....................................................7
TEST GAS SUPPLY . . . . . . . . . . . . . . . . . . . . . . . . . . . . . . . . . . . . . . . . . . . . . . . . . . . 7
PROPANE CYLINDERS AND REGULATORS . . . . . . . . . . . . . . . . . . . . . . . . . . . . . . . . . . . 7
TRANSPORTATION AND STORAGE OF LP CYLINDERS . . . . . . . . . . . . . . . . . . . . . . . . . . . 8
OPERATION . . . . . . . . . . . . . . . . . . . . . . . . . . . . . . . . . . . . . . . . . . . . . . . . . . . . . . . . . . . . . . 8
LEVELING THE FRYER . . . . . . . . . . . . . . . . . . . . . . . . . . . . . . . . . . . . . . . . . . . . . . . . 9
OVER-TEMPERATURE SHUTDOWN........................................ 9
BEFORE FIRST USE .................................................. 9
FILLING TANK WITH SHORTENING . . . . . . . . . . . . . . . . . . . . . . . . . . . . . . . . . . . . . . . 10
LIGHTING THE PILOT . . . . . . . . . . . . . . . . . . . . . . . . . . . . . . . . . . . . . . . . . . . . . . . . . 10
TURNING ON THE FRYER . . . . . . . . . . . . . . . . . . . . . . . . . . . . . . . . . . . . . . . . . . . . . 12
TURNING OFF THE FRYER.............................................12
EXTENDED SHUTDOWN . . . . . . . . . . . . . . . . . . . . . . . . . . . . . . . . . . . . . . . . . . . . . . 12
BASIC FRYING INSTRUCTIONS . . . . . . . . . . . . . . . . . . . . . . . . . . . . . . . . . . . . . . . . . . 12
Fry Basket Guidelines.............................................12
EXTENDED SHORTENING LIFE ..........................................12
DRAINING THE TANK . . . . . . . . . . . . . . . . . . . . . . . . . . . . . . . . . . . . . . . . . . . . . . . . 12
FILTERING-ALL MODELS. . . . . . . . . . . . . . . . . . . . . . . . . . . . . . . . . . . . . . . . . . . . . . . 13
CLEANING . . . . . . . . . . . . . . . . . . . . . . . . . . . . . . . . . . . . . . . . . . . . . . . . . . . . . . . . 13
BOIL OUT PROCEDURE . . . . . . . . . . . . . . . . . . . . . . . . . . . . . . . . . . . . . . . . . . . . . . . . . . . . . 14
TROUBLESHOOTING . . . . . . . . . . . . . . . . . . . . . . . . . . . . . . . . . . . . . . . . . . . . . . . . . . . . . . . 15
Troubleshooting Chart . . . . . . . . . . . . . . . . . . . . . . . . . . . . . . . . . . . . . . . . . . . . . . . . 15
3
IMPORTANT FOR YOUR SAFETY
WARNING Hot oil and parts can cause burns. Use care when operating, cleaning and servicing
the fryer.
WARNING Spilling hot frying compound can cause severe burns. Do not move the fryer without
draining all frying compound from the tank.
INSPECT HOSES BEFORE EACH USE.
IN THE EVENT A GAS ODOR IS DETECTED, SHUT DOWN UNITS AT THE MAIN SHUTOFF VALVE AND
CONTACT THE LOCAL GAS COMPANY OR GAS SUPPLIER FOR SERVICE.
DO NOT STORE OR USE GASOLINE OR OTHER FLAMMABLE VAPORS OR LIQUIDS IN THE VICINITY OF
THIS OR ANY OTHER APPLIANCE.
NEVER CHECK FOR LEAKS WITH A MATCH OR OPEN FLAME.
AN LP CYLINDER NOT CONNECTED FOR USE SHALL NOT BE STORED IN THE VICINITY OF THIS OR ANY
OTHER APPLIANCE.
THIS APPLIANCE SHALL ONLY BE USED IN A WELL VENTILATED SPACE AND SHALL NOT BE USED IN
A BUILDING, GARAGE, OR ANY OTHER ENCLOSED AREA.
DO NOT OBSTRUCT THE FLOW OF COMBUSTION AND VENTILATION AIR TO THE FRYER.
DO NOT LEAVE YOUR FRYER UNATTENDED WHILE IN OPERATION.
DO NOT ALLOW CHILDREN TO PLAY ON OR NEAR YOUR FRYER.
DO NOT USE THIS FRYER UNTIL YOU HAVE READ AND UNDERSTOOD ALL OF THE INFORMATION IN
THIS MANUAL.
PROPER BURNER POSITIONING IS CRITICAL TO SAFE OPERATION. DO NOT ATTEMPT BURNER
ADJUSTMENT OR REPLACEMENT. CONTACT QUALIFIED PERSONNEL.
WARNING
Improper installation, adjustment, alteration, service or maintenance can cause
property damage, injury or death.
FOR YOUR SAFETY
IF YOU SMELL GAS:
1) Shut off gas supply to appliance.
2) Extinguish any open flame.
3) If odor continues, immediately call your gas supplier.
CROWN VERITY INC., 37 ADAMS BLVD., BRANTFORD, ON. CAN. N3S 7V8
TEL: (519) 751-1800 FAX: (519) 751-1802
www.crownverity.com
Email: info@crownverity.com

4
INTRODUCTION
GENERAL
Crown Verity Inc. Fryers are produced with quality workmanship and material. Proper installation, usage
and maintenance will result in years of satisfactory performance.
Before using the fryer, thoroughly read this manual and carefully follow all instructions.
This manual is applicable to models listed on the cover page. Procedures in this manual will apply to all
models unless otherwise specified.
WARNING Hot oil and parts can cause burns. Use care when operating, cleaning and servicing
the fryer.
WARNING Spilling hot frying compound can cause severe burns. Do not move the fryer without
draining all frying compound from the tank.
ORDERING PARTS
Customers may order parts directly from Customer Service at 888-505-7240.
To speed up your order, provide the model number, serial number, gas type, part needed, item part
number (if known) and quantity needed.
NOTE: Hoses must be rated min. 140° F. Do not replace hoses, regulators, valves or burners with
other than original equipment. Do not attempt to replace or adjust burners. Contact qualified personnel.
UNPACKING
This fryer was carefully inspected and tested before leaving the factory. Upon acceptance of the
shipment, the transportation company assumes full responsibility for safe delivery.
Immediately after unpacking the fryer, check for possible shipping damage. If the fryer is damaged, save
the packaging material and contact the carrier immediately.
Check that the following have been included:
• Crumb Rack
• Basket Hanger
• Drain Pipe Extension
• Twin Fry Baskets (2)
• Manual and Warranty
Do not use the fr
yer’s door or its handles to lift the fryer at any time.

5
INSTALLATION
WARNING!
DO NOT OPERATE THIS OUTDOOR APPLIANCE UNDER OVERHEAD,
UNPROTECTED CONSTRUCTION.
THIS APPLIANCE SHALL BE USED ONLY IN A WELL VENTILATED SPACE AND SHALL
NOT BE USED IN A BUILDING, GARAGE, OR ANY OTHER ENCLOSED AREA.
Before installing the fryer, verify that the type of gas (natural or propane) agrees with the specifications
on the fryer data plate, which is located on the inside of the door panel.
Record your fryer model, device, and serial numbers for future reference in the space provided below.
This information can be found on the fryer data plate.
Fryer Model No: _____________________________
Fuel Type:____________________________________
Serial #(s): __________________________________
Clearances
• Minimum clearance from combustible construction:
6” (15 cm) from the sides of the fryer
6” (15 cm) from the back of the fryer
The fryer may be installed on combustible floors free of debris.
• Minimum clearance from non-combustible construction:
0” from the sides of the fryer
0” from the back of the fryer
• Between the fryer and any open-top flame units:
16” (41 cm)
Location
• Minimum ambient temperature for safe use is -25°C
• Install fryer outdoors only, on level ground, free of debris
• Do not obstruct the flow of combustion and ventilation air.
• Provide adequate clearance for air openings into the combustion chamber.
• Do not install near open windows and doors.
• CASTERS MUST BE LOCKED AT ALL TIMES DURING OPERATION.

6
CODES AND STANDARDS
The fryer must be installed in accordance with:
In the United States:
• State and local codes, or in the absence of local codes, with:
National Fuel Gas Code, ANSI-Z223.1/NFPA #54 (latest edition).
In Canada:
• Local codes
• CAN/CSA-B149.1 Natural Gas and Propane Code (latest edition).
NATURAL GAS CONNECTIONS
NOTICE All gas supply connections and any pipe joint compound must be resistant to the action of
propane gases.
Codes require that a gas shutoff valve be installed in the gas line ahead of the fryer.
The NATURAL GAS supply line must be at least the equivalent of 1/2” (12.7 mm) iron pipe for single
units and 1-1/4” (31.75 mm) dual units. If using the optional quick-disconnect flex hose, 3/4” (19
mm) iron pipe for single units and 1-1/4” (31.75 cm) iron pipe for dual units.
Make sure the pipes are clean and free of obstructions, dirt, and piping compound. A dual unit requires
one or two connections of appropriate size for the gas requirement.
WARNING Prior to lighting, check all joints in the gas supply line for leaks.
Use soap and water solution. Do not use an open flame.
After piping has been checked for leaks, fully purge gas pipes to remove air.
NOTICE Inspect hose(s) frequently. Replace with original manufacturer’s parts only.
CROWN VERITY INC., 37 ADAMS BLVD., BRANTFORD, ON. CAN. N3S 7V8
TEL: (519) 751-1800 FAX: (519) 751-1802
www.crownverity.com
Email: info@crownverity.com

7
GAS PRESSURES (ALL MODELS):
The gas pressure should be set at 4” W.C. (Water Column) (0.8 kPa) for natural gas and 11” W.C.
(2.75 kPa) for propane gas. If incoming pressure exceeds 1/2 PSI (3.45 kPa), an additional pressure
regulator may be required.
TESTING THE GAS SUPPLY PIPING SYSTEM:
When test pressures exceed 1/2 PSI (3.45 kPa), the fryer and its individual shutoff valve must be
disconnected from the gas supply piping system.
When test pressures are 1/2 PSI (3.45 kPa) or less, the fryer must be isolated from the gas supply
piping system by closing its individual shutoff valve.
PROPANE CYLINDERS AND REGULATORS
v Pressure regulators and hose assemblies supplied with this appliance must be used. Replacement
pressureregulators and/or hose assemblies must be original manufacturers parts.
The standard, self-contained propane system fryer is designed for use with 13.6 kg. (30 lb.) propane
cylinders, equipped with a Type I cylinder valve.
v Do not store propane cylinders in or on the appliance, explosion, fire or injury may result.
The Type I (Q.C.C.1) cylinder valve is recognizable by the large external thread on the outlet part of the
valve. Standard valves do not have these exterior threads. Any attempt to fit the regulator(s) with
anything other than the mating Type I (Q.C.C.1) connector, (recognized by the large plastic coupling nut)
will negate the important safety features designed into the Type I (Q.C.C.1) system. Fitting a standard
#510 P.O.L connector, will not provide the flow control or temperature shut-off safety features built into
the complete Type I (Q.C.C.1) system.
When purchasing a cylinder for your PRO-FRYER, it must be constructed and marked in accordance
with the specifications of:
The U.S. Department of Transportation (DOT), or CAN/CSA B339.
The cylinder must also be equipped with:
a) A shut-off valve terminating in a proper cylinder valve outlet specified in current standards.
b) A safety relief valve having direct communication with the vapor space of the cylinder.
c) A collar to protect the cylinder shut-off valve.
d) An arrangement for vapor withdrawal only.
e) A bottom ring for securing to the cylinder support assembly.
v Protect regulator vent openings from the elements. Do not expose regulators to rain, snow or ice.
Store regulators in cabinet when not in use.
v Only install and operate cylinders in the retaining brackets on the appliance. Cylinders must be
secured against tip-over and from heat sources at all times.

8
FIRE EXTINGUISHERS
At least one UL/ULC approved, portable, dry chemical fire extinguisher must be
available to the operator(s) at all times while the fryer is in operation.
TRANSPORTATION AND STORAGE OF LP CYLINDERS
Handling, storage and transportation of propane cylinders must be in accordance with Storage and
Handling of Liquid Petroleum Gases, ANSI/NFPA 58 or Natural Gas and Propane Installation Code, CSA
B149.1.
THEREFORE:
Always use the protective cap provided with your cylinder whenever it is not connected to your fryer.
• Do not store in a building, garage or any other enclosed area. Store only in a well ventilated area.
• Do not store in the vicinity of any gas burning apparatus or in any high heat area such as a closed
car or trunk.
• Do not smoke while transporting a cylinder in your vehicle.
• Transport and store cylinder(s) in an upright position only.
• Store out of reach of children.
• Allow only qualified LP gas dealer to fill or repair cylinder(s).
• Do not allow the cylinder to be over filled.
• Make sure the LP gas dealer checks the cylinder for leaks after filling.
OPERATION
WARNING Hot oil and parts can cause burns. Use care when operating, cleaning and servicing
the fryer.
WARNING Spilling hot frying compound can cause severe burns. Do not move the fryer without
draining all frying compound from the tank.
CROWN VERITY INC., 37 ADAMS BLVD., BRANTFORD, ON. CAN. N3S 7V8
TEL: (519) 751-1800 FAX: (519) 751-1802
www.crownverity.com
Email: info@crownverity.com

9
LEVELING THE FRYER
Check the level of the fryer by placing a level on top of the fryer
Ensure that the fryer is level front-to-back and side-to-side in the installed position.
Lock the wheels after unit is level.
OVER-TEMPERATURE SHUTDOWN
If the shortening becomes overheated, a high-temperature shutoff device will turn the gas valve off and
extinguish the pilot.
If the fryer shuts down due to overheating, DO NOT re-light the pilot until the shortening temperature is
below 300° F (149° C).
If an overheating situation persists, contact Crown Verity Inc. service office at 1-888 505 7240.
BEFORE FIRST USE
Cleaning
New units are wiped down at the factory to remove any visible signs of dirt, oil, grease, etc. remaining
from the manufacturing process.
Before any food preparation, thoroughly wash the protective oil from all surface parts and the tank
interior with hot soapy water to remove any film residue and dust or debris.
NOTICE Do not use chlorine or sulfate/sulfide cleaners.
• Wash any accessories shipped with unit.
• Rinse fryer and accessories thoroughly and drain the fryer.
• Wipe tank completely dry with a soft, clean cloth.
WARNING Hot oil and parts can cause burns. Use care when operating, cleaning and servicing
the fryer.
WARNING Spilling hot frying compound can cause severe burns. Do not move the fryer without
draining all frying compound from the tank.
FIRE EXTINGUISHERS
At least one UL/ULC approved, portable, dry chemical fire extinguisher must be
available to the operator(s) at all times while the fryer is in operation.
10
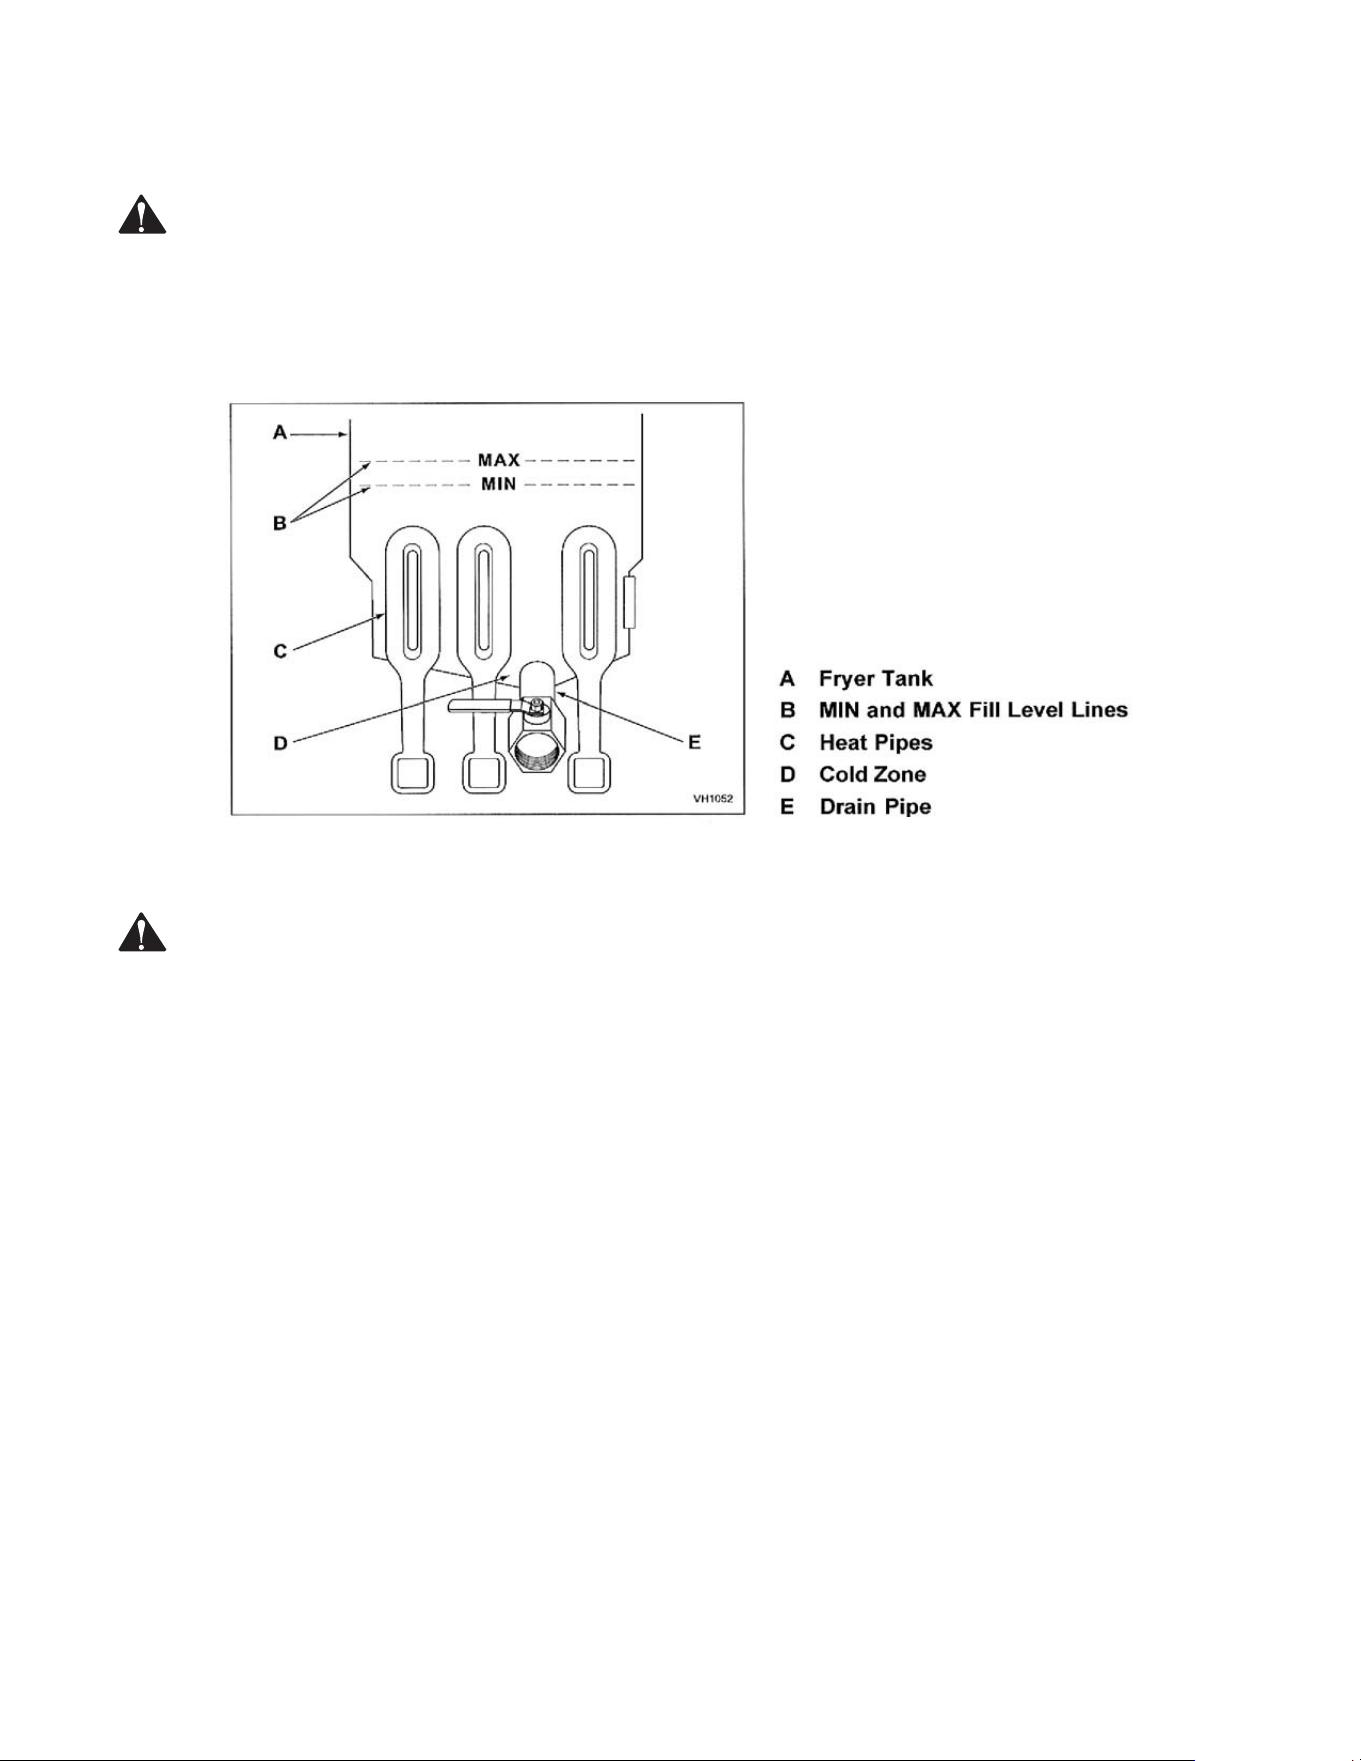
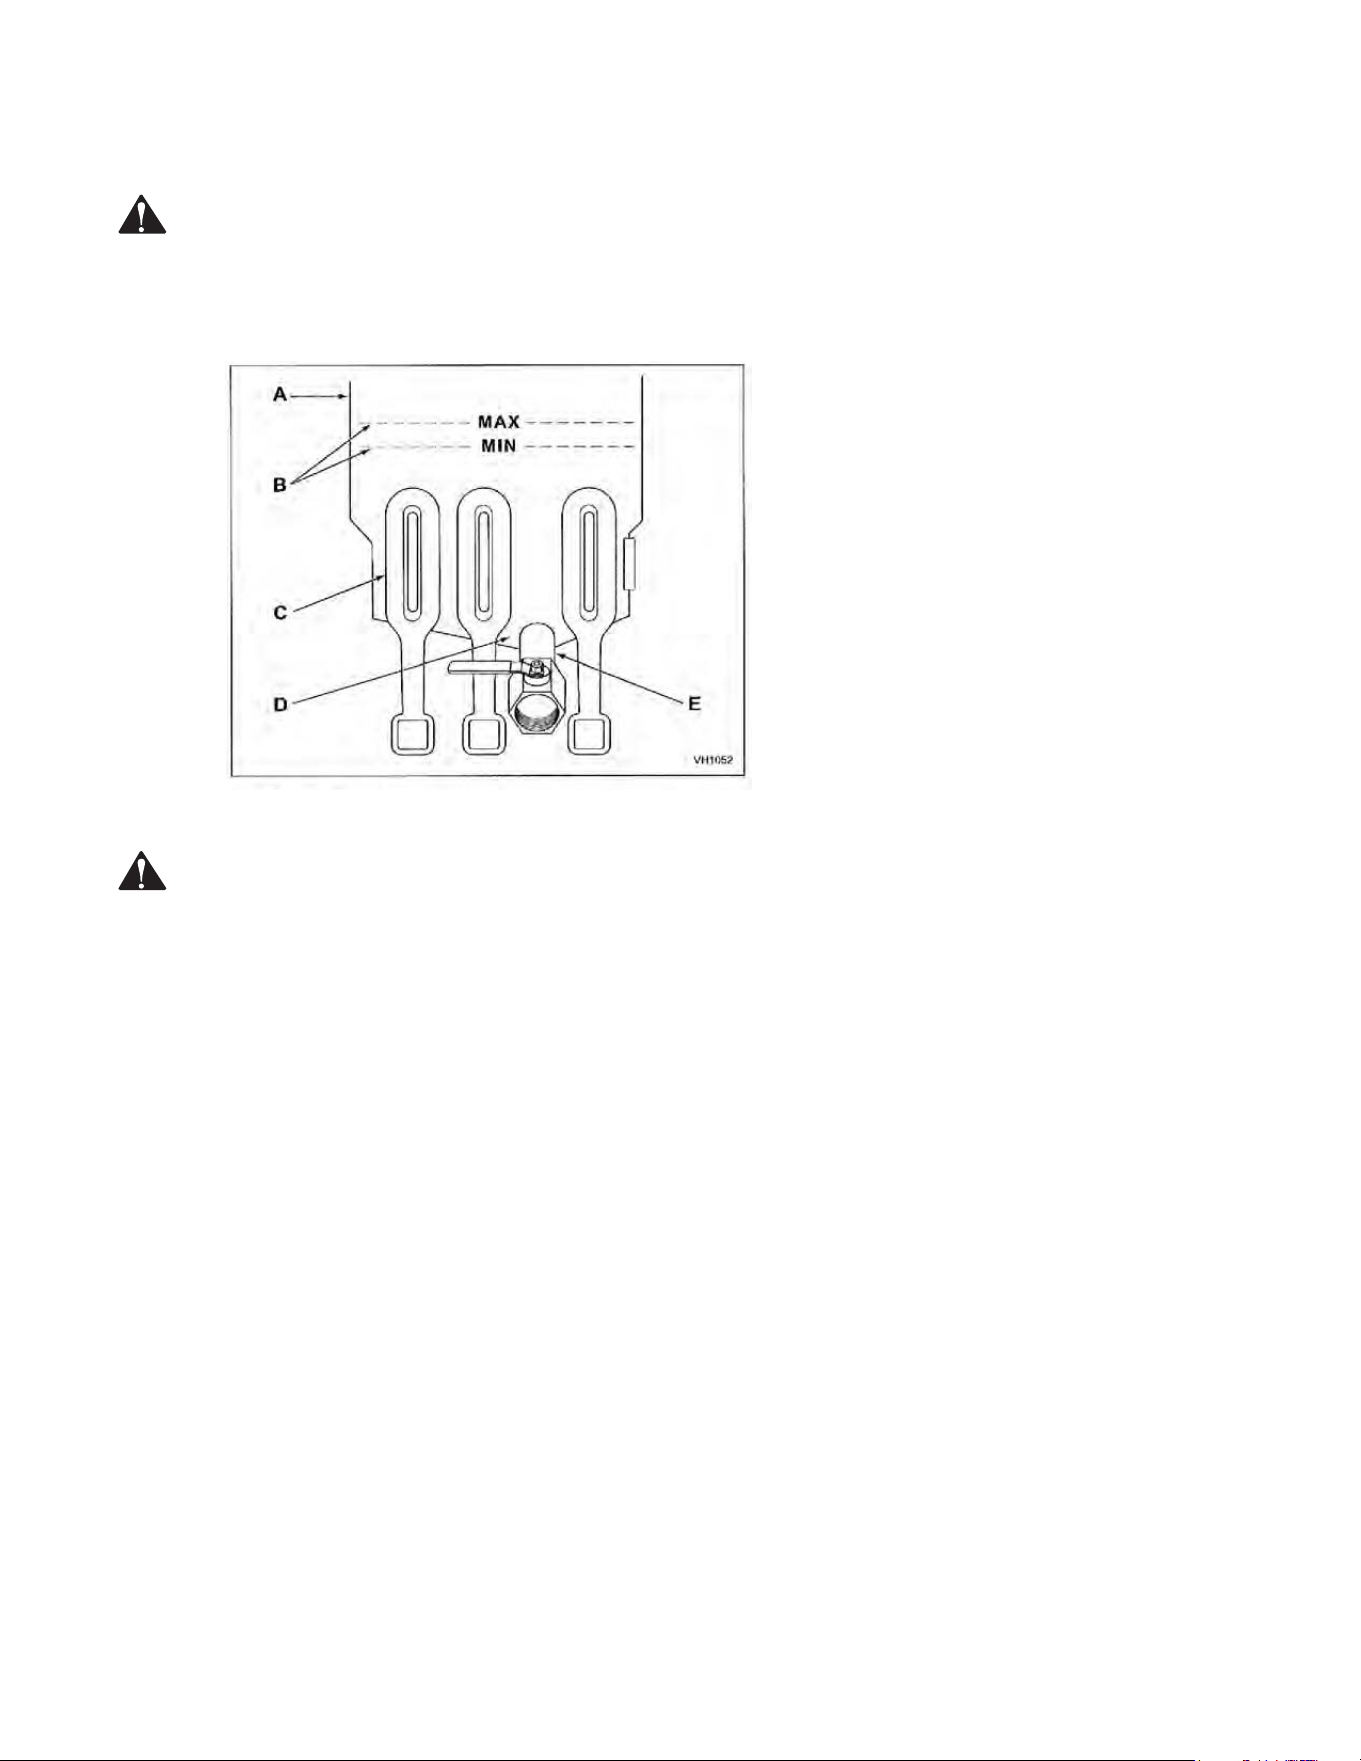
FILLING TANK WITH SHORTENING
NOTICE Solid shortening should NOT be used with PRO-FRYERS. Melting solid shortening will damage
the tank and void your warranty.
• Close the drain valve.
• Check the level of the fryer
• Fill the fryer tank with liquid shortening.
• Shortening level should be between the min and max
lines in the fryer tank.
• Shortening will expand when heated. Do not fill the
fryer tank past the MAX line.
• Add fresh shortening as needed to maintain oil level.
Before Start-Up • Inspect hose(s) for evidence of excessive wear, cuts or cracks. If evident, replace
only with manufacturer’s original parts before operation.
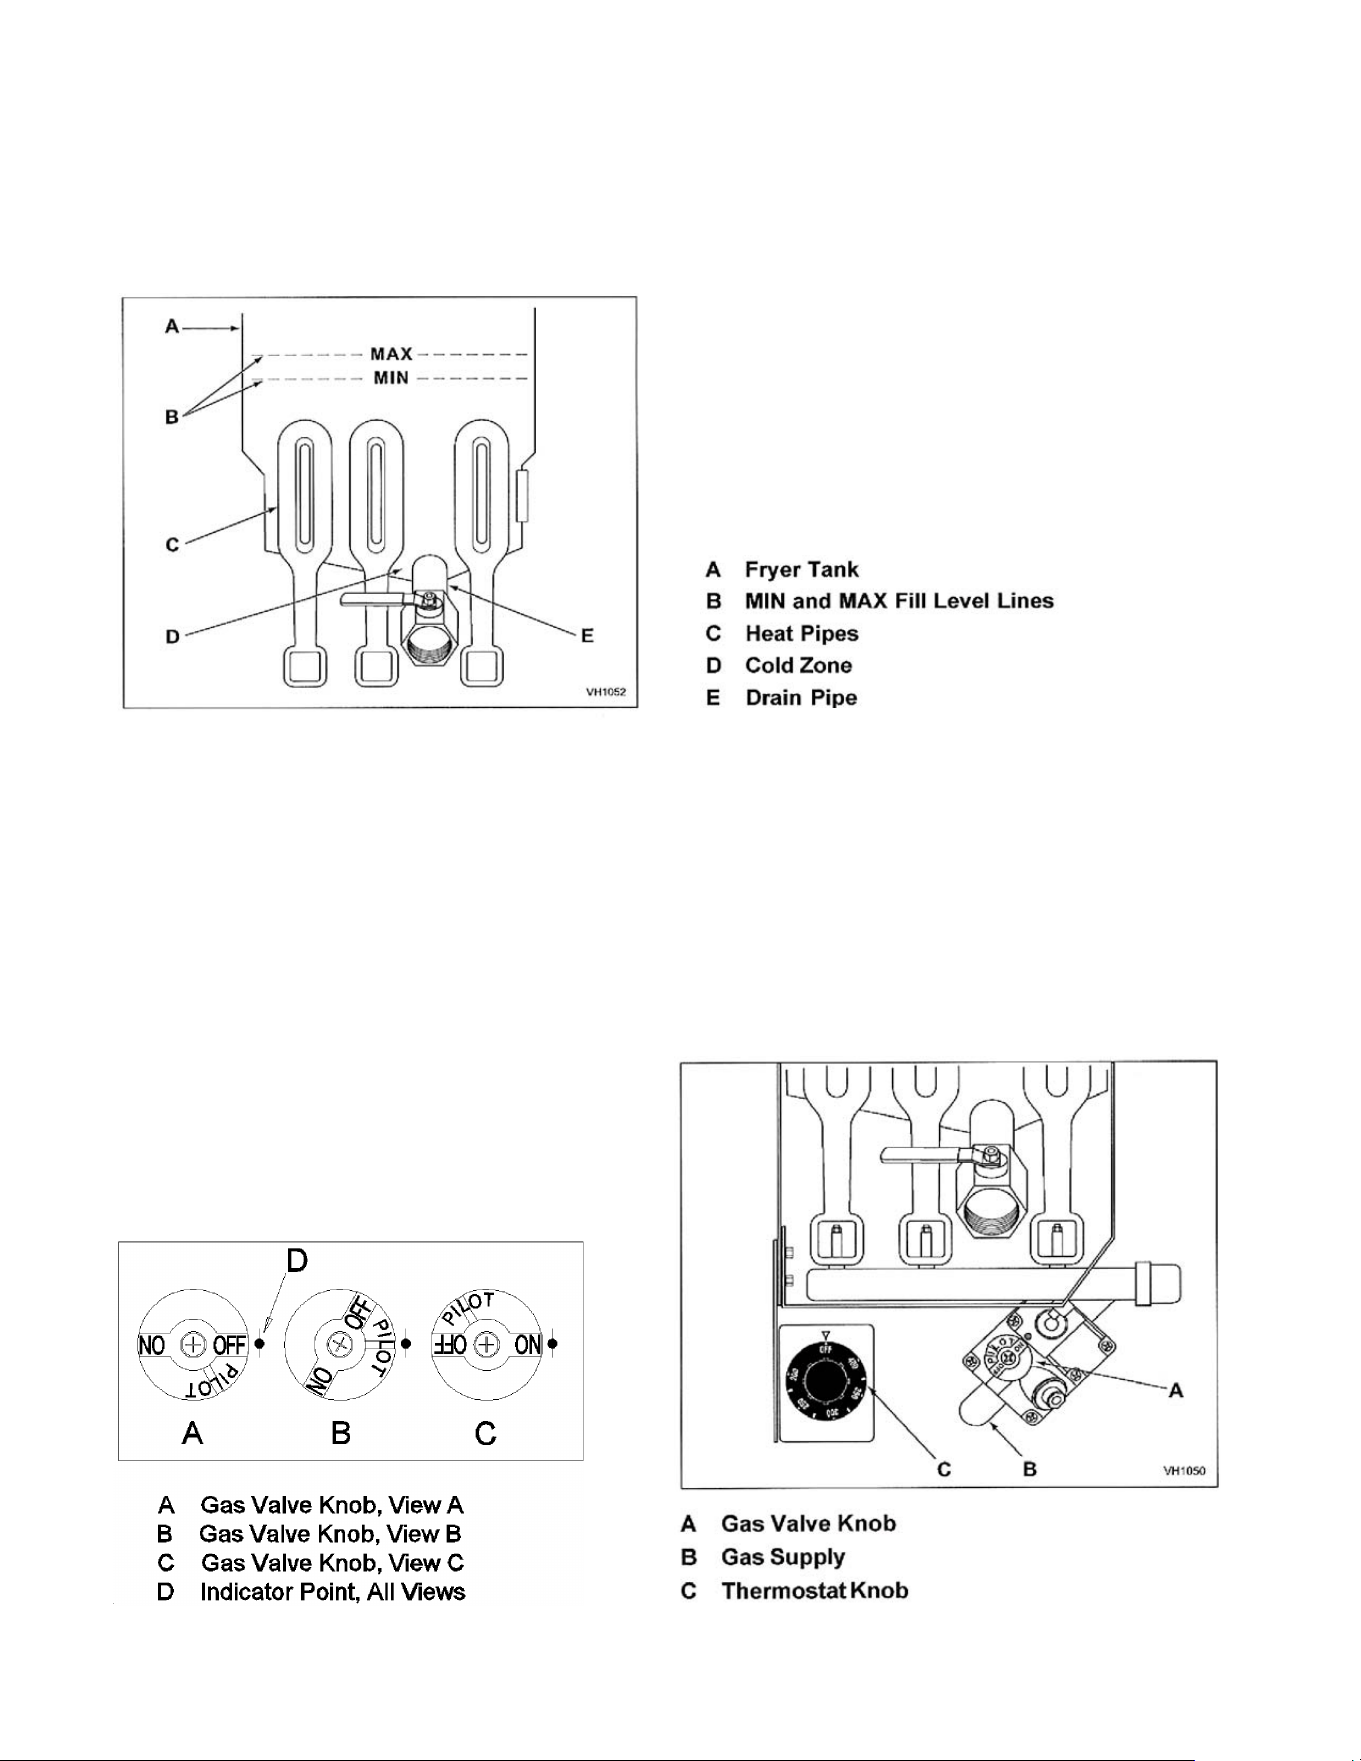
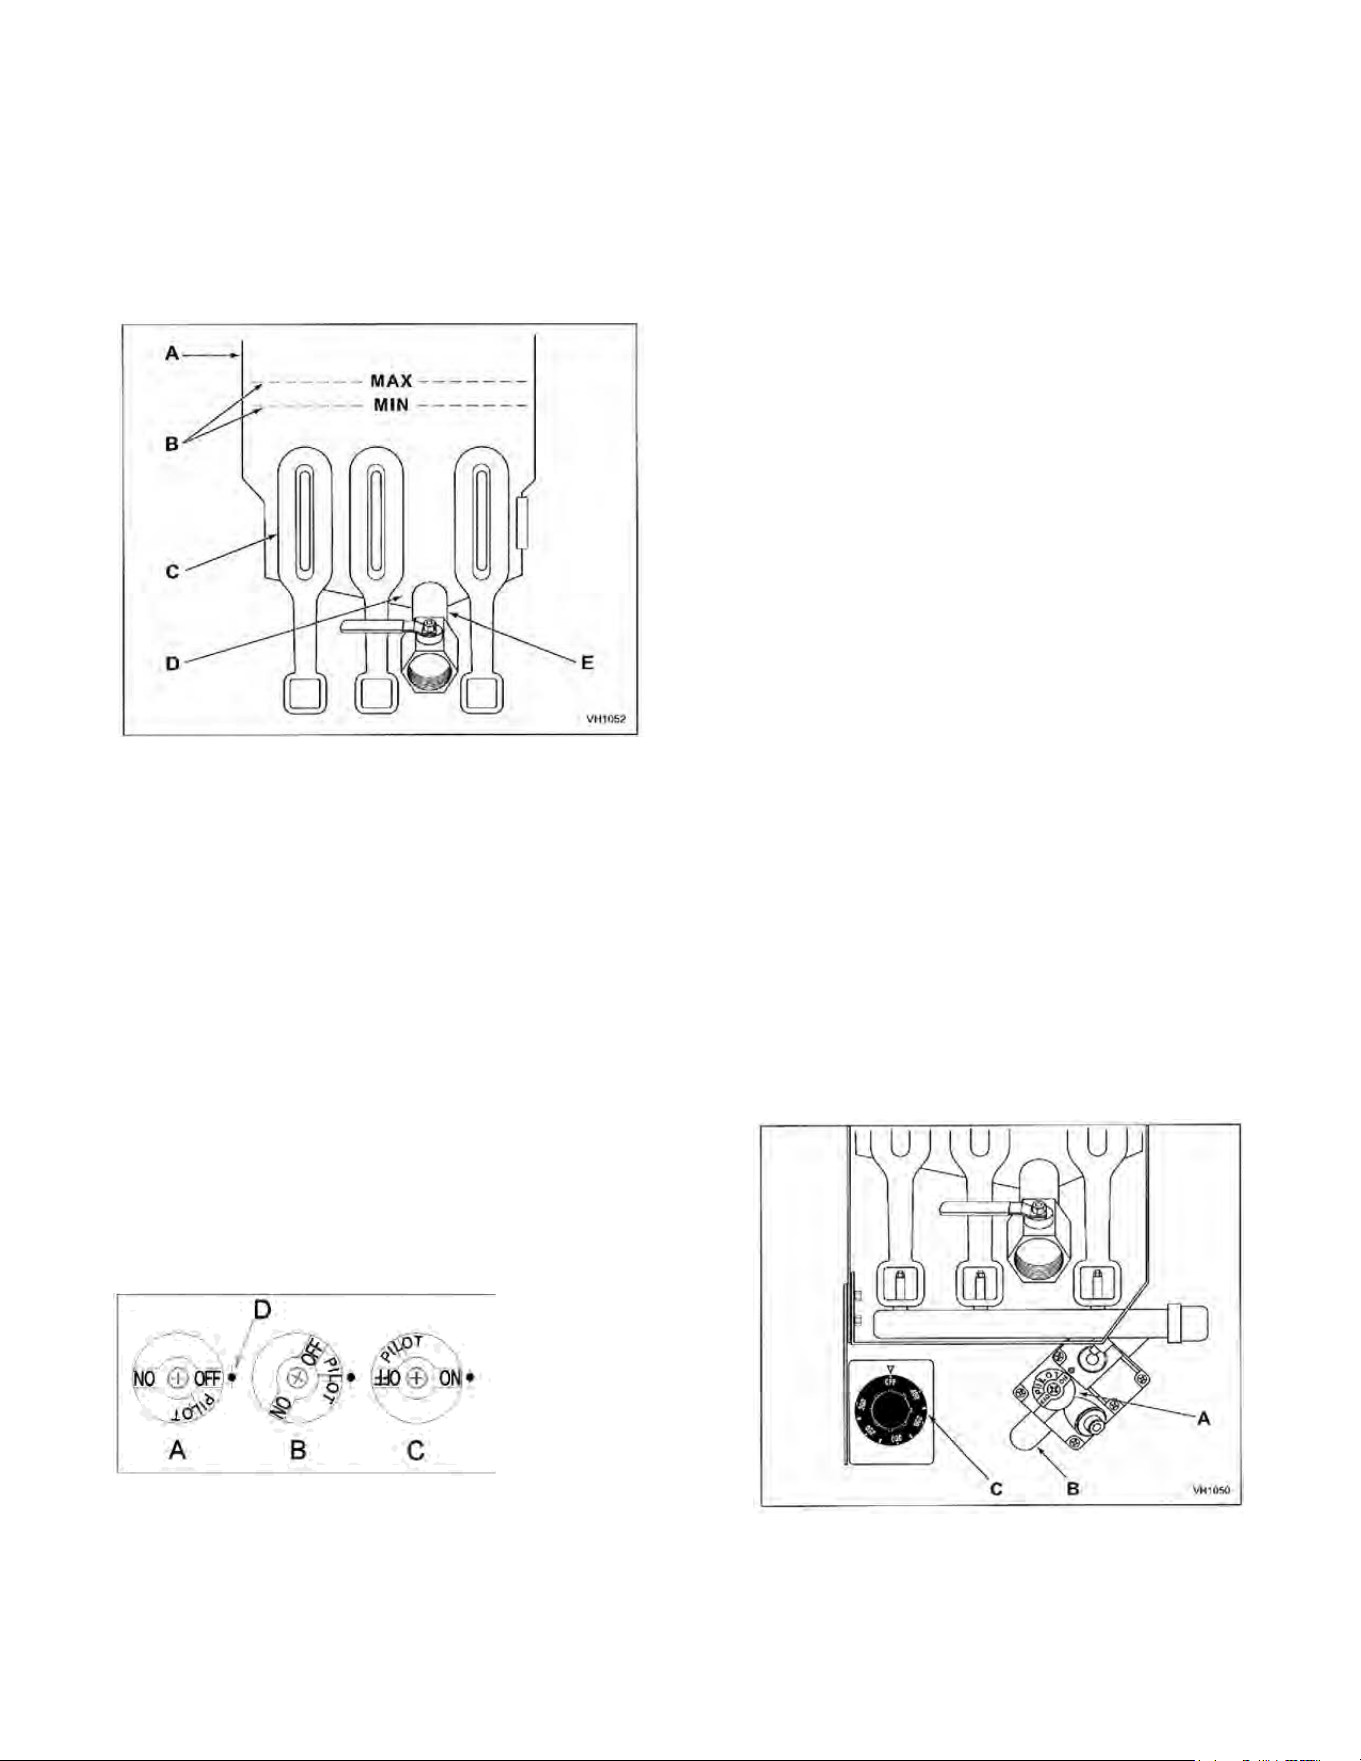
LIGHTING THE PILOT
1. Open the door
2 Turn the thermostat OFF (see figure below, view A). The thermostat is located behind the door.
3. Push the gas control valve knob and turn to OFF.Wait 5 minutes for unburned gas to vent.
4. Push and turn gas control valve knob to the “L” in PILOT (see figure below, view B).
5. While still holding the knob in, light the pilot with a lit flame. Continue to depress the knob until pilot
remains lit when knob is released. If the pilot
does not remain lit, repeat step 3 through 5.
6. Depress and turn gas control knob to ON (See
figure below, view C).
7. If gas supply is interrupted, repeat steps 2
through 6.

11
TURNING ON THE FRYER
• Set the temperature knob to desired temperature.
• After the set temperature has been reached, the thermostat shuts off the gas flow to burners.
• The pilot remains lit. The burners will cycle on and off, maintaining the set temperature.
TURNING OFF THE FRYER
1. Turn the thermostat OFF.
2. To keep the pilot lit, turn the gas valve to “L” in Pilot.
3. To shut off all gas to the system, including the pilot, turn the gas valve knob to OFF.
4. Turn off gas supply at cylinder valve or supply pipe.
EXTENDED SHUTDOWN
1. Turn the thermostat knob to OFF.
2. Push in the pilot knob and turn to OFF.
3. Thoroughly drain the fryer. Refer to DRAINING THE FRYER.
4. Clean the fryer according to CLEANING.
5. Turn off the main gas shutoff valve.
BASIC FRYING INSTRUCTION
WARNING Hot oil and parts can cause burns. Use care when operating, cleaning and servicing
the fryer.
WARNING Spilling hot frying compound can cause severe burns. Do not move the fryer without
draining all frying compound from the tank.
• Set the desired temperature and allow shortening to heat up to that temperature.
• Fry items that are the same size to ensure equal doneness.
• Drain or wipe dry raw or wet foods to minimize splatter when lowering into hot shortening.
• Add fresh shortening as needed.
CROWN VERITY INC., 37 ADAMS BLVD., BRANTFORD, ON. CAN. N3S 7V8
TEL: (519) 751-1800 FAX: (519) 751-1802
www.crownverity.com
Email: info@crownverity.com

12
Fry Basket Guidelines
• Do not overfill baskets. (See table for recommended basket capacities below) Carefully lower basket
into oil.
• When frying doughnuts and fritters, turn product only once during frying.
• When cooking French fries or onion rings, shake the basket several times.
• Batter-covered foods should be dropped carefully, one by one, into shortening or basket. If you use
the basket, first dip the basket into the shortening to reduce batter-build up on basket surfaces.
• When frying is completed, remove basket or product. Hang basket on rear hanger.
Fry Basket Capacity:
Recommended pounds per basket are 1.5 lbs. (0.7 kg).
EXTENDING SHORTENING LIFE
Shortening life can be extended by the following guidelines:
• Do not salt foods over the fryer.
• Use good-quality shortening.
• Filter shortening daily (at a minimum).
• Replace shortening if it becomes poorly flavored.
• Keep equipment and surrounding clean.
• Set thermostat correctly.
• Remove excess moisture and particles from food products before placing in fryer.
DRAINING THE TANK
WARNING Hot oil and parts can cause burns. Use care when operating, cleaning and servicing
the fryer.
WARNING Spilling hot frying compound can cause severe burns. Do not move the fryer without
draining all frying compound from the tank.
1. Turn the thermostat to OFF.
2. Turn the gas valve to OFF.
3. Let the shortening cool completely before draining.
4. Direct the drain spout into the container that you want to drain the shortening into.
5. Open the drain valve. The oil will drain into the container. When the container is full or the fryer
tank is empty, close the drain valve. Repeat this step until the fryer is empty.
6. If desired, perform routine clean-out as described under CLEANING.
7. Once tank is completely clean and empty, add new shortening and set thermostat to desired
temperature.
13
FILTERING
WARNING Hot oil and hot parts can cause burns. Use care when operating, cleaning, and
servicing the fryer.
• Filter shortening as required. Refer to the instructions provided with your filtering
equipment.
CLEANING
WARNING Hot oil and hot parts can cause burns. Use care when operating, cleaning, and
servicing the fryer.
Clean your fryer regularly with the tank brush along with a damp cloth, and polish with a soft dry cloth.
If regular cleaning is neglected, grease will be burned on and discolorations may form.
Fingerprints are sometimes a problem on highly polished surfaces of stainless steel. They can be
minimized by applying a cleaner that will leave a thin oily or waxy film.
• Clean all exterior surfaces of your fryer at least once daily.
• Use a damp cloth with warm water and a mild soap or detergent.
NOTICE Do not use chlorine or sulfate/sulfide cleaners.
• Rinse thoroughly, and then polish with a soft dry cloth.
• Keep he fryer exterior clean and free of accumulated grease to prevent stubborn stains from forming.
If regular cleaning is neglected, grease will be burned on and discolorations may form.
• Remove discolorations by washing with any detergent or soap and water.
• Use a self-soaping, non-metallic scouring pad for particularly stubborn discolorations.
• Always rub with the grain of the stainless steel.
• Do not use a metallic scoring pad or harsh cleaners.

14
BOIL OUT PROCEDURE
As required:
1. Drain the tank as described under DRAINING THE TANK.
2. Once the shortening has been drained, flush out scraps and sediment with a small amount of warm
shortening, using tank brush. Allow the tank to drain thoroughly.
3. Close the drain valve and fill tank with water. Use recommended Boil-Out solid degreaser low
foaming cleaner tablets which can be ordered from your local dealer. Follow the instructions on the
package.
NOTICE Do not use chlorine or sulfate/sulfide cleaners.
4. Add commercial boil-out solution. Solution level must be between the MIN and MAX levels on the
fryer tank.
5. Set thermostat to the temperature recommended for the solution being used. Allow solution to
simmer for about 15 to 20 minutes.
6. Drain the cleaning solution from the tank.
7. Close the drain valve and refill the tank with water. Add 1 cup (1/4 L) of vinegar to neutralize
alkaline left by the cleaner. Solution level must be between the MIN and MAX level on the fryer tank.
8. Bring the solution to a simmer only, turn the thermostat off. Allow to stand for a few minutes.
9. Drain the tank according to DRAINING THE TANK. Rinse thoroughly with clear, hot water. All traces
of cleaner must be removed. Dry the tank thoroughly.
10. Close the drain valve and add shortening. Follow the FILLING TANK WITH SHORTENING procedure
in this manual. The fryer is now ready for use.
FIRE EXTINGUISHERS
At least one UL/ULC approved, portable, dry chemical fire extinguisher must be
available to the operator(s) at all times while the fryer is in operation.
CROWN VERITY INC., 37 ADAMS BLVD., BRANTFORD, ON. CAN. N3S 7V8
TEL: (519) 751-1800 FAX: (519) 751-1802
www.crownverity.com
Email: info@crownverity.com

15
TROUBLESHOOTING
For Service and Repairs in the US and Canada
Contact Crown Verity Inc. at 1-888 505 7240
Troubleshooting Chart:
Problem: Probable Cause:
No Heat: Gas valve not set to ON.
Thermostat dial not turned on.
Pilot not lit.
Gas supply not turned on, or connected.
Wire connections loose
Wire connections need cleaning
Thermopile
Insufficient or too much heat: Thermostat dial not set to desired temperature.
High limit tripped (call service)
Temperature probe (call service)
Tank will not drain: Shortening too cold.
Drain pipe clogged with debris.
NOTE: Hoses must be rated min. 140° F. Do not replace hoses, regulators, valves or burners with
other than original equipment. Do not attempt to replace or adjust burners. Contact qualified personnel
CROWN VERITY INC., 37 ADAMS BLVD., BRANTFORD, ON. CAN. N3S 7V8
TEL: (519) 751-1800 FAX: (519) 751-1802
www.crownverity.com
Email: info@crownverity.com

16
NOTES
_____________________________________________________________________________________
_____________________________________________________________________________________
_____________________________________________________________________________________
_____________________________________________________________________________________
_____________________________________________________________________________________
_____________________________________________________________________________________
_____________________________________________________________________________________
_____________________________________________________________________________________
_____________________________________________________________________________________
_____________________________________________________________________________________
_____________________________________________________________________________________
_____________________________________________________________________________________
_____________________________________________________________________________________
_____________________________________________________________________________________
_____________________________________________________________________________________
_____________________________________________________________________________________
_____________________________________________________________________________________
_____________________________________________________________________________________
_____________________________________________________________________________________
_____________________________________________________________________________________
CROWN VERITY INC., 37 ADAMS BLVD., BRANTFORD, ON. CAN. N3S 7V8
TEL: (519) 751-1800 FAX: (519) 751-1802
www.crownverity.com
Email: info@crownverity.com

16
REMARQUES
_____________________________________________________________________________________
_____________________________________________________________________________________
_____________________________________________________________________________________
_____________________________________________________________________________________
_____________________________________________________________________________________
_____________________________________________________________________________________
_____________________________________________________________________________________
_____________________________________________________________________________________
_____________________________________________________________________________________
_____________________________________________________________________________________
_____________________________________________________________________________________
_____________________________________________________________________________________
_____________________________________________________________________________________
_____________________________________________________________________________________
_____________________________________________________________________________________
_____________________________________________________________________________________
_____________________________________________________________________________________
_____________________________________________________________________________________
_____________________________________________________________________________________
_____________________________________________________________________________________
CROWN VERITY INC., 37 ADAMS BLVD., BRANTFORD, ON. CAN. N3S 7V8
TÉL: (519) 751-1800 FAX: (519) 751-1802
www.crownverity.com
Courriel: info@crownverity.com

15
DÉPANNAGE
Service aux États-Unis et au Canada
Communiquez avec le service de Crown Verity Inc. au 1 888 505-7240
Tableau de dépannage
Problème Cause probable
Absence de chaleur Robinet de gaz non réglé à ON (MARCHE).
Thermostat fermé.
Veilleuse éteinte.
Alimentation en gaz fermée ou non raccordée.
Raccords mal serrés.
Raccords nécessitant un nettoyage.
Pile thermoélectrique.
Chaleur insuffisante ou excessive Thermostat non réglé au degré désiré.
service) Limite thermique supérieure déclenchée (appelez le .
Sonde thermique (appelez le service).
Pas de vidange du réservoir Shortening trop froid.
Drain obstrué par des débris.
NOTE : Les tuyaux doivent être évalués le minimum 140°F. Ne pas remplacer des tuyaux, les
régulateurs, les soupapes ou les brûleurs avec autrement que l'équipement original. Ne pas tenter de
remplacer ou ajuster des brûleurs. Le contact a qualifié le personnel.
CROWN VERITY INC., 37 ADAMS BLVD., BRANTFORD, ON. CAN. N3S 7V8
TÉL: (519) 751-1800 FAX: (519) 751-1802
www.crownverity.com
Courriel: info@crownverity.com

14
PROCÉDURE DE DÉBOUILLISSAGE
Au besoin :
1. Vidangez le réservoir conformément à la section VIDANGE DU RÉSERVOIR.
2. Une fois le shortening vidangé, évacuez les restes et dépôts au moyen d’une petite quantité de
shortening chaud et de la brosse à réservoir. Vidangez le réservoir complètement.
3. Fermez le robinet de vidange et remplissez le réservoir d’eau. Utilisez des pastilles nettoyantes de
dégraissage solide peu moussantes recommandées pour le débouillissage qui peuvent être
commandées auprès de votre détaillant local. Suivez les instructions sur l’emballage.
REMARQUE N’utilisez pas de nettoyants à base de chlore ou de sulfate/sulfure.
4. Ajoutez une solution de débouillissage. Remplissez jusqu’entre les marques minimale et maximale à
l’intérieur du réservoir.
5. Réglez le thermostat au degré recommandé pour la solution utilisée. Laissez mijoter de 15 à 20
minutes.
6. Vidangez le réservoir.
7. Fermez le robinet de vidange et remplissez de nouveau le réservoir d’eau. Ajoutez 250 mL (1
tasse) de vinaigre pour neutraliser les traces alcalines laissées par le nettoyant. Remplissez
jusqu’entre les marques minimale et maximale à l’intérieur du réservoir.
8. Portez la solution au point d’ébullition et tournez le thermostat à OFF (ARRÊT). Laissez reposer
pendant quelques minutes.
9. Vidangez le réservoir conformément à la section VIDANGE DU RÉSERVOIR. Rincez abondamment à
l’eau chaude. Éliminez toute trace de nettoyant. Essuyez bien le réservoir.
10. Fermez le robinet de vidange et ajoutez du shortening. Suivez la procédure indiquée à la section
REMPLISSAGE DU RÉSERVOIR AVEC LE SHORTENING de ce manuel. La friteuse est maintenant
prête à fonctionner.
EXTINCTEURS
L’utilisateur de la friteuse doit disposer en permanence d’au moins un extincteur portatif à poudre
chimique homologué UL/ULC.
CROWN VERITY INC., 37 ADAMS BLVD., BRANTFORD, ON. CAN. N3S 7V8
TÉL: (519) 751-1800 FAX: (519) 751-1802
www.crownverity.com
Courriel: info@crownverity.com
13
FILTRAGE
AVERTISSEMENT L’huile et les pièces chaudes peuvent causer des brûlures. Soyez prudent lors de
l’utilisation, du nettoyage et de l’entretien courant de la friteuse.
• Filtrez le shortening au besoin. Reportez-vous aux instructions de votre matériel de filtrage.
NETTOYAGE
AVERTISSEMENT L’huile et les pièces chaudes peuvent causer des brûlures. Soyez prudent lors
de l’utilisation, du nettoyage et de l’entretien courant de la friteuse.
Nettoyez régulièrement votre friteuse avec la brosse à réservoir et un chiffon humide. Polissez avec un
chiffon doux et sec. Faute de quoi, la graisse risque de brûler et de décolorer l’intérieur du réservoir.
Les empreintes de doigts constituent parfois un problème sur les surfaces en acier inoxydable très
polies. Pour en minimiser la formation, appliquez un produit de nettoyage qui laissera un léger film
d’huile ou de cire.
• Nettoyez l’extérieur de votre friteuse au moins une fois par jour.
• Utilisez un chiffon imbibé d’eau tiède et de savon doux ou de nettoyant.
REMARQUE N’utilisez pas de nettoyants à base de chlore ou de sulfate/sulfure.
• Rincez et polissez ensuite soigneusement avec un chiffon doux et sec.
• Gardez l’extérieur de la friteuse propre et exempt d’accumulation de graisse pour éviter la formation
de taches tenaces. Faute de quoi, la graisse risque de brûler et de décolorer l’intérieur du réservoir.
• Pour éliminer les décolorations, lavez avec un nettoyant ou de l’eau savonneuse.
• Utilisez un tampon à récurer savonneux non métallique pour les taches particulièrement tenaces.
• Frottez toujours dans le sens du grain de l’acier inoxydable.
• N’utilisez pas de laine d’acier ou de nettoyant fort.
A Réservoir de la friteuse
B Marques de remplissage minimale et maximale
C Caloducs
D Zone froide
E Drain

12
Directives pour les paniers à friture
• Ne les remplissez pas à l’excès. (Reportez-vous au tableau des capacités recommandées pour les
paniers ci-dessous.) Plongez délicatement le panier dans l’huile.
• Pour la friture de beignes ou de beignets, tournez les morceaux une seule fois pendant la cuisson.
• Pour la cuisson de frites ou de rondelles d’oignon, secouez le panier à plusieurs reprises.
• Plongez délicatement, un à un, les aliments enrobés de pâte à frire dans le shortening ou le panier. Si
vous utilisez le panier, plongez d’abord celui-ci dans le shortening afin d’éviter l’accumulation de pâte à
frire sur ses surfaces.
• Lorsque la friture est terminée, retirez le panier ou les morceaux. Accrochez le panier au support
arrière.
Capacité des paniers à friture :
Le poids recommandé par panier est de 0,7 kg (1,5 lb).
PROLONGATION DE LA VIE DU SHORTENING
Afin de prolonger la vie du shortening, suivez les directives suivantes :
• Ne salez pas les aliments au-dessus de la friteuse.
• Utilisez un shortening de bonne qualité.
• Filtrez le shortening chaque jour (au minimum).
• Remplacez le shortening si les aliments perdent leur saveur.
• Gardez l’appareil et les accessoires propres.
• Réglez le thermostat correctement.
• Enlevez l’excès d’humidité et les particules sur les aliments avant de les déposer dans la friteuse.
VIDANGE DU RÉSERVOIR
AVERTISSEMENT L’huile et les pièces chaudes peuvent causer des brûlures. Soyez prudent lors
de l’utilisation, du nettoyage et de l’entretien courant de la friteuse.
AVERTISSEMENT Le renversement de matière grasse de friture peut causer de graves brûlures.
Ne déplacez pas la friteuse sans vidanger toute la matière grasse de friture
contenue dans le réservoir.
1. Tournez le thermostat à OFF (ARRÊT).
2. Tournez le robinet de gaz à OFF (ARRÊT).
3. Laissez le shortening refroidir complètement avant de le vidanger.
4. Dirigez l’orifice du drain vers le contenant dans lequel vous désirez vidanger le shortening.
5. Ouvrez le robinet de vidange. L’huile s’écoulera dans le contenant. Lorsque le contenant est plein ou
que le réservoir de la friteuse est vide, fermez le robinet de vidange. Répétez l’opération jusqu’à ce
que la friteuse soit vide.
6. Si vous le désirez, effectuez un nettoyage de routine conformément à la section NETTOYAGE.
7. Une fois le réservoir complètement vide et propre, ajoutez du shortening frais et réglez le
thermostat au degré désiré.

11
MISE EN MARCHE DE LA FRITEUSE
• Réglez le bouton de température au degré désiré.
• Une fois le degré de température atteint, le thermostat coupe l’alimentation en gaz vers les brûleurs.
• La veilleuse reste allumée. Les brûleurs s’allument et s’éteignent par intermittence afin de maintenir
la température.
ARRÊT DE LA FRITEUSE
1. Tournez le thermostat à OFF (ARRÊT).
2. Pour garder la veilleuse allumée, tournez le robinet de gaz à « L » sur PILOT (veilleuse).
3. Pour couper toute l’alimentation en gaz du système et éteindre la veilleuse, tournez le bouton du
robinet de gaz à OFF (ARRÊT).
4. Eteindre de la provision de gaz à la soupape de cylindre ou au tuyau de provision.
ARRÊT PROLONGÉ
1. Tournez le bouton du thermostat à OFF (ARRÊT).
2. Enfoncez et tournez le bouton de la veilleuse à OFF (ARRÊT).
3. Vidangez la friteuse complètement. Reportez-vous à la section VIDANGE DU RÉSERVOIR.
4. Nettoyez la friteuse conformément à la section NETTOYAGE.
5. Fermez le robinet d’arrêt principal du gaz.
INSTRUCTIONS DE BASE POUR LA FRITURE
AVERTISSEMENT L’huile et les pièces chaudes peuvent causer des brûlures. Soyez prudent lors
de l’utilisation, du nettoyage et de l’entretien courant de la friteuse.
AVERTISSEMENT Le renversement de matière grasse de friture peut causer de graves brûlures.
Ne déplacez pas la friteuse sans vidanger toute la matière grasse de friture
contenue dans le réservoir.
• Réglez la température au degré désiré et faites chauffer le shortening jusqu’à atteindre le degré de
température.
• Assurez-vous de frire des morceaux de même taille pour assurer une cuisson uniforme.
• Égouttez et essuyez les aliments crus pour réduire les éclaboussures lorsque vous les plongez dans le
shortening chaud.
• Ajoutez du shortening frais au besoin.
CROWN VERITY INC., 37 ADAMS BLVD., BRANTFORD, ON. CAN. N3S 7V8
TÉL: (519) 751-1800 FAX: (519) 751-1802
www.crownverity.com
Courriel: info@crownverity.com
10
REMPLISSAGE DU RÉSERVOIR AVEC LE SHORTENING
REMARQUE
AUCUN shortening solide NE doit être utilisé pour la friteuse PRO. Utiliser du shortening solide
endommagera le réservoir et annulera votre garantie.
• Fermez le robinet de vidange. • Vérifiez le niveau du shortening dans la friteuse.
• Remplissez le réservoir de la friteuse avec le shortening
liquide.
• Remplissez jusqu’entre les marques minimale et
maximale à l’intérieur du réservoir.
• Le shortening prend de l’expansion lorsqu’il est chauffé.
Ne remplissez pas le réservoir au-delà de la marque
maximale.
• Ajoutez du shortening frais au besoin pour maintenir un
niveau suffisan
Avant que •
Inspecte le tuyau (les tuyaux) pour la
preuve d'usure excessive, les coupures ou les fissures. Si évident, remplacer seulement avec
les parties originales du fabricant avant l'opération.
ALLUMAGE DE LA VEILLEUSE
1. Ouvrez la porte.
2 Tournez le thermostat à OFF (ARRÊT) (voir la vue A de la figure ci-dessous). Le thermostat est situé
derrière la porte.
3. Poussez et tournez le bouton du robinet de gaz à OFF (ARRÊT). Attendez 5 minutes pour laisser le
gaz non brûlé s’échapper.
4. Poussez et tournez le bouton du robinet de gaz à la position « L » de PILOT (veilleuse) (voir la vue B
de la figure ci-dessous).
5. Tout en maintenant le bouton enfoncé, allumez la
veilleuse avec une allumette. Tenez le bouton enfoncé
jusqu’à ce que la veilleuse reste allumée lorsque le
bouton est relâché. Si la veilleuse ne reste pas
allumée, répétez les étapes 3 à 5.
6. Poussez et tournez le bouton du robinet de gaz à ON
(MARCHE) (voir la vue C de la figure ci-dessous).
7. Si l’alimentation en
gaz est coupée,
répétez les étapes
2 à 6.
A Réservoir de la friteuse
B Marques de remplissage minimale et maximale
C Caloducs
D Zone froide
E Drain
A Bouton du robinet de gaz, vue A
B Bouton du robinet de gaz, vue B
C Bouton du robinet de gaz, vue C
D Point indicateur, toutes les vues
A Bouton du robinet de gaz
B Alimentation en gaz
C Thermostat
le Démarrage

9
NIVELAGE DE LA FRITEUSE
Ajustez le niveau de la friteuse en plaçant un niveau sur le dessus de la friteuse.
Assurez-vous que la friteuse est de niveau entre sa partie avant et arrière et d’un côté à l’autre dans sa
position d’installation.
Verrouillez les roues une fois l’appareil de niveau.
ARRÊT DE SURCHAUFFE
Si le shortening surchauffe, un dispositif d’arrêt de surchauffe coupera le robinet de gaz et éteindra la
veilleuse.
Si la friteuse s’arrête en raison d’une surchauffe, NE rallumez PAS la veilleuse tant que la température
du shortening n’est pas inférieure à 149 °C (300 °F).
Si la surchauffe persiste, contactez le bureau de service de Crown Verity Inc. au 1 888 505-7240.
AVANT LA PREMIÈRE UTILISATION
Nettoyage
Chaque nouvel appareil est nettoyé à l’usine afin de supprimer toute trace visible de saleté, d’huile, de
graisse ou de tout autre dépôt émanant du processus de fabrication.
Avant toute préparation alimentaire, assurez-vous de bien laver l’huile de protection recouvrant les
surfaces des pièces et l’intérieur du réservoir avec de l’eau chaude savonneuse pour enlever tout résidu
ou pellicule, poussière ou débris.
REMARQUE N’utilisez pas de nettoyants à base de chlore ou de sulfate/sulfure.
• Lavez tous les accessoires livrés avec l’appareil.
• Rincez soigneusement la friteuse et les accessoires et vidangez.
• Essuyez le réservoir à fond avec un chiffon doux et propre.
AVERTISSEMENT L’huile et les pièces chaudes peuvent causer des brûlures. Soyez prudent lors
de l’utilisation, du nettoyage et de l’entretien courant de la friteuse.
AVERTISSEMENT Le renversement de matière grasse de friture peut causer de graves brûlures.
Ne déplacez pas la friteuse sans vidanger toute la matière grasse de friture
contenue dans le réservoir.
EXTINCTEURS
L’utilisateur de la friteuse doit disposer en permanence d’au moins un extincteur portatif à poudre
chimique homologué UL/ULC.

8
EXTINCTEURS
L’utilisateur de la friteuse doit disposer en permanence d’au moins un extincteur portatif à poudre
chimique homologué UL/ULC.
TRANSPORT ET REMISAGE DES BOUTEILLES DE PROPANE
Le maniement, l'emmagasinage et le transport de cylindres de propane doivent être conformément à
Emmagasinage et le Maniement de Gaz de Pétrole Liquide. ANSI/NFPA 58 ou Gaz Naturel et le Code
d'Installation de Propane, CSA B149.1
PAR CONSÉQUENT :
Vous devez toujours utiliser le bouchon protecteur fourni avec la bouteille lorsque celle-ci n’est pas
raccordée à la friteuse.
• Ne remisez pas de bouteilles dans un bâtiment, garage ou tout autre endroit clos. Remisez-les
toujours dans un endroit bien aéré.
• Ne remisez pas de bouteilles à proximité d’un appareil à gaz ou dans un endroit chaud ou fermé
comme une automobile ou le coffre d’une automobile.
• Ne fumez pas dans un véhicule dans lequel se trouve une bouteille.
• Transportez et remisez toujours les bouteilles en position debout.
• Remisez les bouteilles hors de la portée des enfants.
• Faites toujours appel à un vendeur autorisé de propane pour remplir ou réparer les bouteilles.
• Ne remplissez jamais les bouteilles à l’excès.
• Assurez-vous que le vendeur de propane vérifie l’étanchéité de la bouteille après chaque remplissage.
FONCTIONNEMENT
AVERTISSEMENT L’huile et les pièces chaudes peuvent causer des brûlures. Soyez prudent lors
de l’utilisation, du nettoyage et de l’entretien courant de la friteuse.
AVERTISSEMENT Le renversement de matière grasse de friture peut causer de graves brûlures.
Ne déplacez pas la friteuse sans vidanger toute la matière grasse de friture
contenue dans le réservoir.
CROWN VERITY INC., 37 ADAMS BLVD., BRANTFORD, ON. CAN. N3S 7V8
TÉL: (519) 751-1800 FAX: (519) 751-1802
www.crownverity.com
Courriel: info@crownverity.com

7
PRESSION DU GAZ - TOUS LES MODÈLES :
La pression du gaz doit être réglée à 0,8 kPa (4 po) CE pour le gaz naturel et à 2,75 kPa (11 po) CE
pour le gaz propane. Si la pression d’arrivée dépasse 3,45 kPa (1/2 lb/po2), un régulateur de
pression supplémentaire peut être nécessaire.
ESSAIS DE PRESSION DU SYSTÈME D’ALIMENTATION EN GAZ :
Si la pression de la canalisation de gaz est supérieure à 3,45 kPa (1/2 lb/po2) lors d’essais de
pression, débranchez la friteuse et son robinet d’arrêt du système d’alimentation en gaz.
Lorsque la pression d’essai est égale ou inférieure à 3,45 kPa (1/2 lb/po2), isolez l’appareil du
système d’alimentation en gaz en fermant le robinet d’arrêt.
BOUTEILLES ET RÉGULATEURS DE PRESSION DE PROPANE
v Faire pression sur des assemblées de régulateurs et tuyau fournies avec cet appareil doivent être
utilisées. Les assemblées de tuyau de et/ou de régulateurs de pression de remplacement doivent
être les parties de manufaxturers original.
La friteuse équipée d’un système autonome de gaz propane standard est conçue pour une utilisation
avec une bouteille de propane de 13,6 kg (30 lb) munie d’un robinet de bouteille de type I.
v Ne pas emmagasiner des cylindres de propane dans ou sur l'appareil, l'explosion, le feu ou la
blessure peuvent résulter.
Le robinet de bouteille de type I (Q.C.C.1) est facilement reconnaissable à la grosseur des filets de la
partie externe du robinet. Les robinets standard ne sont pas munis de filets externes. Toute tentative de
raccorder le régulateur à tout embout autre que le raccord de type I (Q.C.C.1) approprié
(reconnaissable à son gros écrou-raccord de plastique) neutralisera le dispositif de sécurité important
intégré au système de type I (Q.C.C.1). Le raccord standard no 510 P.O.L. de dispose pas des
caractéristiques de régulation de débit ou d’arrêt de surchauffe qu’offre le dispositif intégré dans le
système de type I (Q.C.C.1).
Lorsque vous faites l’achat d’une bouteille de propane pour votre FRITEUSE PRO, assurez-vous qu’elle est
fabriquée et étiquetée selon les spécifications suivantes :
États-Unis - U.S. Department of Transportation (DOT), ou CAN/CSA B339.
La bouteille doit également être munie des éléments suivants :
a) un robinet d’arrêt se raccordant à un robinet de bouteille conforme aux normes en vigueur;
b) un robinet de sûreté et de décharge qui communique directement avec l’espace pour vapeurs de la
bouteille;
c) un manchon pour protéger le robinet d’arrêt de la bouteille;
d) un dispositif d’évacuation des vapeurs de gaz uniquement;
e) une bague inférieure à fixer au dispositif de soutien de la bouteille.
v Protéger les ouvertures régulatrices de conduit des éléments. Ne pas exposer des régulateurs pour
pleuvoir, neiger ou glacer. Emmagasiner des régulateurs dans le cabinet quand pas dans l'usage.
v Seulement installer et fonctionner des cylindres dans les crochets de soutènement sur l'appareil. Les
cylindres doivent être obtenus contre pointe-sur et des sources de chaleur à tout instant.

6
NORMES ET CODES
L’installation de la friteuse doit respecter les codes suivants :
Aux États-Unis :
• Les codes de l’État et les codes locaux, ou en l’absence de codes locaux :
le National Fuel Gas Code, ANSI-Z223.1 / NFPA 54 (dernière édition).
Au Canada :
• Les codes locaux.
• CAN/CSA-B149.1, Code d’installation du gaz naturel (dernière édition).
RACCORDEMENT DU GAZ NATUREL
REMARQUE Tous les raccords d’alimentation en gaz et produits d’étanchéité doivent être résistants à
l’action du gaz propane.
Conformément aux exigences des codes, un robinet d’arrêt du gaz doit être installé en amont de la
friteuse.
La canalisation de GAZ NATUREL doit se composer d’un tuyau en fer de 12,7 mm (1/2 po) pour les
appareils individuels et de 31,75 mm (1-1/4 po) pour les appareils doubles. Dans le cas d’une
friteuse munie d’un tuyau flexible à démontage rapide en option, utilisez un tuyau en fer de 19 mm
(3/4 po) pour les unités individuelles et de 31,75 mm (1-1/4 po) pour les appareils doubles.
Assurez-vous que les tuyaux sont propres et exempts de tout obstacle, de toute saleté ou de tout
produit d’étanchéité. Conformément aux exigences pour le gaz, l’appareil double doit disposer d’un ou
de deux raccords de taille appropriée.
AVERTISSEMENT Avant de procéder à l’allumage, vérifiez l’étanchéité de tous les joints de la
canalisation de gaz à l’aide d’une eau savonneuse. Ne vous servez pas d’une
flamme nue.
Après avoir vérifié l’étanchéité de la tuyauterie, purgez complètement les tuyaux de gaz pour évacuer
tout l’air qu’ils contiennent.
NOTE : Inspecte le tuyau (les tuyaux) fréquemment. Remplacer avec les parties originales du fabricant
seulement.

INSTALLATION
AVERTISSEMENT!
N’UTILISEZ PAS CET APPAREIL SOUS UNE STRUCTURE SURPLOMBANTE SANS PROTECTION.
CET APPAREIL NE DOIT ÊTRE UTILISÉ QUE DANS UN ESPACE BIEN AÉRÉ ET NON DANS UN
BÂTIMENT, GARAGE OU TOUT AUTRE ESPACE CLOS.
Avant d’installer la friteuse, assurez-vous que le type de gaz (naturel ou propane) correspond aux
spécifications de la plaque signalétique de la friteuse se trouvant sur l’intérieur de la porte.
Consignez le modèle, le type de gaz et le numéro de série de votre friteuse dans l’espace prévu ci-
dessous, à des fins de référence future. Cette information se trouve sur la plaque signalétique de la
friteuse.
No de modèle de la friteuse :: _____________________________
Type de gaz :____________________________________
No de série : __________________________________
Dégagements
• Dégagement minimal des structures combustibles :
15 cm (6 po) pour les côtés de la friteuse;
15 cm (6 po) pour l’arrière de la friteuse.
Celle-ci peut être installée sur un plancher combustible exempt de débris.
• Dégagement minimal des structures non combustibles :
0 cm (0 po) pour les côtés de la friteuse;
0 cm (0 po) pour l’arrière de la friteuse.
• Entre la friteuse et tout appareil à flamme nue :41 cm (16 po).
Emplacement
• La température ambiante minimum pour l'usage sûr est -25° C
• Installez la friteuse à l’extérieur seulement, sur un terrain plat, sans débris.
• N’obstruez pas la circulation de l’air nécessaire à la combustion et à la ventilation.
• Maintenez un dégagement approprié pour les ouvertures d’aération de la chambre de combustion.
• N’installez pas l’appareil à proximité de fenêtres et de portes.
• LES ROULETTES DOIVENT ÊTRE MAINTENUES VERROUILLÉES LORSQUE LA FRITEUSE FONCTIONNE.

4
INTRODUCTION
GÉNÉRALITÉS
Les friteuses Crown Verity sont fabriquées avec soin et à partir de matériaux de qualité. Leurs
installation, utilisation et entretien appropriés permettront d’en obtenir un rendement optimal pendant
de nombreuses années.
Avant d’utiliser la friteuse, lisez ce manuel au complet et suivez attentivement toutes les instructions.
Ce manuel s’applique aux modèles répertoriés sur la page couverture. Les procédures décrites dans le
présent manuel s’appliquent à tous les modèles, sauf indication contraire.
AVERTISSEMENT L’huile et les pièces chaudes peuvent causer des brûlures. Soyez prudent lors
de l’utilisation, du nettoyage et de l’entretien courant de la friteuse.
AVERTISSEMENT Le renversement de matière grasse de friture peut causer de graves brûlures.
Ne déplacez pas la friteuse sans vidanger toute la matière grasse de friture
contenue dans le réservoir.
COMMANDE DE PIÈCES
Les clients peuvent commander des pièces directement auprès du service à la clientèle au
888 505-7240.
Afin d’accélérer la commande, indiquez le numéro de modèle, le numéro de série, le type de gaz, la
pièce désirée, le numéro de la pièce (si connu) et la quantité nécessaire.
NOTE : Les tuyaux doivent être évalués le minimum 140° F. Ne pas remplacer des tuyaux, les
régulateurs, les soupapes ou les brûleurs avec autrement que l'équipement original. Ne pas tenter de
remplacer ou ajuster des brûleurs. Le contact a qualifié le personnel.
DÉBALLAGE
Cette friteuse a été soigneusement inspectée et soumise à des essais avant de quitter l’usine. En
acceptant de livrer cette marchandise, le transporteur en assume l’entièreresponsabilité jusqu’à la
livraison.
Immédiatement après avoir déballé l’appareil, vérifiez s’il n’a pas été endommagé lors du transport. En
cas de dommages, conservez le matériel d’emballage et avisez le transporteur immédiatement.
Assurez-vous que toutes les pièces suivantes sont incluses :
• Planche ramasse-miettes
• Support de panier
• Extension de drain
• Panier à friture (2)
• Manuel et garantie
Ne soulevez jamais la friteuse par la por
te ou la poignée.
3
IMPORTANT POUR VOTRE SÉCURITÉ
AVERTISSEMENT L’huile et les pièces chaudes peuvent causer des brûlures. Soyez prudent lors
de l’utilisation, du nettoyage et de l’entretien courant de la friteuse.
AVERTISSEMENT Le renversement de matière grasse de friture peut causer de graves brûlures.
Ne déplacez pas la friteuse sans vidanger toute la matière grasse de friture
contenue dans le réservoir.
INSPECTER DES TUYAUX AVANT CHAQUE USAGE.
EN CAS D’ODEURS DE GAZ, ÉTEIGNEZ L’APPAREIL PAR LE ROBINET D’ARRÊT PRINCIPAL ET
COMMUNIQUEZ AVEC LA COMPAGNIE DE GAZ LA PLUS PRÈS OU AVEC LE FOURNISSEUR DE GAZ
POUR L’ENTRETIEN.
NE RANGEZ PAS OU N’UTILISEZ PAS DE L’ESSENCE NI TOUT AUTRE LIQUIDE OU VAPEUR
INFLAMMABLE À PROXIMITÉ DE CET APPAREIL OU DE TOUT AUTRE APPAREIL.
NE VÉRIFIEZ JAMAIS L’ÉTANCHÉITÉ DE LA TUYAUTERIE À L’AIDE D’UNE ALLUMETTE OU D’UNE FLAMME
NUE.
NE REMISEZ JAMAIS DE BOUTEILLE DE GAZ NON RACCORDÉE À PROXIMITÉ DE CET APPAREIL OU DE
TOUT AUTRE APPAREIL.
CET APPAREIL NE DOIT ÊTRE UTILISÉ QUE DANS UN ESPACE BIEN AÉRÉ ET NON DANS UN BÂTIMENT,
GARAGE OU TOUT AUTRE ESPACE CLOS.
N’OBSTRUEZ PAS LA CIRCULATION DE L’AIR NÉCESSAIRE À LA COMBUSTION ET À LA VENTILATION.
NE LAISSEZ PAS LA FRITEUSE FONCTIONNER SANS SURVEILLANCE.
NE LAISSEZ PAS D’ENFANTS S’AMUSER AVEC LA FRITEUSE OU S’EN APPROCHER.
N’UTILISEZ PAS CETTE FRITEUSE AVANT D’AVOIR LU ET COMPRIS TOUTES LES INFORMATIONS
CONTENUES DANS CE MANUEL.
LA POSITION CORRECTE DE BRÛLEUR EST CRITIQUE À L'OPÉRATION SÛRE. NE PAS TENTER
L'AJUSTEMENT DE BRÛLEUR OU LE REMPLACEMENT. LE CONTACT A QUALIFIÉ LE PERSONNEL.
AVERTISSEMENT
L’installation, le réglage, la modification et l’entretien incorrects de cet appareil
peuvent causer des dommages matériels, des blessures, voire la mort.
POUR VOTRE SÉCURITÉ
SI VOUS DÉCELEZ UNE ODEUR DE GAZ :
1) Coupez l’alimentation en gaz de l’appareil.
2) Éteignez toute flamme nue.
3) Si l’odeur persiste, appelez sans délai le fournisseur de gaz.

2
TABLE DES MATIÈRES
IMPORTANT POUR VOTRE SÉCURITÉ . . . . . . . . . . . . . . . . . . . . . . . . . . . . . . . . . . . . . . . . . . . . . 3
INTRODUCTION . . . . . . . . . . . . . . . . . . . . . . . . . . . . . . . . . . . . . . . . . . . . . . . . . . . . . . . . . . . 4
GÉNÉRALITÉS. . . . . . . . . . . . . . . . . . . . . . . . . . . . . . . . . . . . . . . . . . . . . . . . . . . . . . . 4
COMMANDE DE PIÈCES . . . . . . . . . . . . . . . . . . . . . . . . . . . . . . . . . . . . . . . . . . . . . . . 4
DÉBALLAGE. . . . . . . . . . . . . . . . . . . . . . . . . . . . . . . . . . . . . . . . . . . . . . . . . . . . . . . . 4
INSTALLATION . . . . . . . . . . . . . . . . . . . . . . . . . . . . . . . . . . . . . . . . . . . . . . . . . . . . . . . . . . . . 5
Dégagements . . . . . . . . . . . . . . . . . . . . . . . . . . . . . . . . . . . . . . . . . . . . . . . . . . 5
Emplacement. . . . . . . . . . . . . . . . . . . . . . . . . . . . . . . . . . . . . . . . . . . . . . . . . . . 5
NORMES ET CODES. . . . . . . . . . . . . . . . . . . . . . . . . . . . . . . . . . . . . . . . . . . . . . . . . . 6
RACCORDEMENT DU GAZ . . . . . . . . . . . . . . . . . . . . . . . . . . . . . . . . . . . . . . . . . . . . . 6
PRESSION DU GAZ...................................................7
ESSAIS DE PRESSION DU SYSTÈME D’ALIMENTATION EN GAZ . . . . . . . . . . . . . . . . . . . . 7
BOUTEILLES ET RÉGULATEURS DE PRESSION DE PROPANE . . . . . . . . . . . . . . . . . . . . . . . 7
TRANSPORT ET REMISAGE DES BOUTEILLES DE PROPANE . . . . . . . . . . . . . . . . . . . . . . . 8
FONCTIONNEMENT ........................................................ 8
NIVELAGE DE LA FRITEUSE............................................. 9
ARRÊT DE SURCHAUFFE . . . . . . . . . . . . . . . . . . . . . . . . . . . . . . . . . . . . . . . . . . . . . . 9
AVANT LA PREMIÈRE UTILISATION. . . . . . . . . . . . . . . . . . . . . . . . . . . . . . . . . . . . . . . . 9
REMPLISSAGE DU RÉSERVOIR AVEC LE SHORTENING..........................10
ALLUMAGE DE LA VEILLEUSE ..........................................10
MISE EN MARCHE DE LA FRITEUSE ......................................12
ARRÊT DE LA FRITEUSE . . . . . . . . . . . . . . . . . . . . . . . . . . . . . . . . . . . . . . . . . . . . . . 12
ARRÊT PROLONGÉ..................................................12
INSTRUCTIONS DE BASE POUR LA FRITURE ................................12
Directives pour les paniers à friture . . . . . . . . . . . . . . . . . . . . . . . . . . . . . . . . . . . 12
PROLONGATION DE LA VIE DU SHORTENING . . . . . . . . . . . . . . . . . . . . . . . . . . . . . . . . 12
VIDANGE DU RÉSERVOIR. . . . . . . . . . . . . . . . . . . . . . . . . . . . . . . . . . . . . . . . . . . . . . 12
FILTRAGE - TOUS LES MODÈLES . . . . . . . . . . . . . . . . . . . . . . . . . . . . . . . . . . . . . . . . . 13
NETTOYAGE . . . . . . . . . . . . . . . . . . . . . . . . . . . . . . . . . . . . . . . . . . . . . . . . . . . . . . . 13
PROCÉDURE DE DÉBOUILLISSAGE . . . . . . . . . . . . . . . . . . . . . . . . . . . . . . . . . . . . . . . . . . . . . . 14
DÉPANNAGE . . . . . . . . . . . . . . . . . . . . . . . . . . . . . . . . . . . . . . . . . . . . . . . . . . . . . . . . . . . . 15
Tableau de dépannage................................................15
MANUEL D’UTILISATION
DES FRITEUSES À GAZ
DE SÉRIE PRO
MODÈLES : FRITEUSE PF-1 PRO, FRITEUSE DOUBLE PF2 PRO
RÉVISÉ EN DECÉMBRE 2014
*RENSEIGNEMENTS À CONSERVER POUR RÉFÉRENCE FUTURE
Cet appareil a fait l’objet d’essais conformes aux normes ANSI Z83.11/CSA1.8-2009.
Cet appareil de cuisson extérieur au gaz n’est pas conçu pour
véhicules de plaisance ou des bateaux.
être utilisé dans des
Lisez attentivement les instructions d’installation, d’utilisation et d’entretien avant
d’installer cet appareil ou d’en faire l’entretien.
CROWN VERITY INC., 37 ADAMS BLVD., BRANTFORD, ON. CAN. N3S 7V8
TÉL: (519) 751-1800 FAX: (519) 751-1802
www.crownverity.com
Courriel: info@crownverity.com
Imprimé janvier 2015
ANSI Z83.11/CSA1.8 - 2009