ROADSTART®, 1200A 12V JUMP STARTER &
TYRE INFLATOR
MODEL NO: RS1200TI
Thank you for purchasing a Sealey product. Manufactured to a high standard, this product will, if used according to these instructions,
and properly maintained, give you years of trouble free performance.
IMPORTANT: PLEASE READ THESE INSTRUCTIONS CAREFULLY. NOTE THE SAFE OPERATIONAL REQUIREMENTS, WARNINGS & CAUTIONS. USE
THE PRODUCT CORRECTLY AND WITH CARE FOR THE PURPOSE FOR WHICH IT IS INTENDED. FAILURE TO DO SO MAY CAUSE DAMAGE AND/OR
PERSONAL INJURY AND WILL INVALIDATE THE WARRANTY. KEEP THESE INSTRUCTIONS SAFE FOR FUTURE USE.
1. SAFETY
IMPORTANT WARRANTY INFORMATION: KEEP YOUR ROADSTART HEALTHY
9 Read and understand the general safety and operating instructions before use. The following information is intended to help you
keep the product in top working order.
NOTE: – The battery in this unit is a consumable item and its ability to accept charge will reduce over time. We will provide warranty
against mechanical and electrical defect for a period of one year - this does not cover fair wear and tear.
If the battery is not charged properly before first use, or regularly conditioned, its capacity will diminish. Under these circumstances we
will not replace the battery even if it is less than one year old.
9 You can help prolong the life of the battery by following a few simple guidelines.
9 Plug in your new Roadstart via the Type - C connection to USB and make an INITIAL charge.
9 Ensure the unit is fully charged before storage.
8 DO NOT leave the Roadstart for longer than 2 months without putting it on charge.
8 DO NOT attempt to start a vehicle when the Roadstart battery level lights show red.
8 DO NOT drop or roughly handle the Roadstart.
IMPORTANT: To reduce the risk of a battery explosion, follow these instructions and those published by the battery manufacturer
and the manufacturer of any equipment you intend to use in the vicinity of the battery. Remember to review warning marks on all
products and on engines. Modern vehicles contain extensive electronic systems. Check with the vehicle manufacturer for
any specic instructions regarding the use of this type of equipment on each vehicle. No liability will be accepted for damage/injury
where this product is not used in accordance with all instructions.
1.1. PERSONAL PRECAUTIONS
9 Ensure there is another person within hearing range, or close enough to come to your aid should a problem arise, when working
near a lead-acid battery.
9 Have fresh water and soap nearby in case battery acid contacts skin, clothing or eyes.
9 Wear safety eye protection and protective clothing. Avoid touching eyes while working with a battery.
9 Wash immediately with soap and water if battery acid contacts skin or clothing. If acid enters eye, ush eye immediately with cool,
clean running water for at least 15 minutes and seek immediate medical attention.
9 Remove personal metallic items such as rings, bracelets, necklaces and watches. A lead-acid battery can produce a short-circuit
current high enough to weld a ring or the like to metal, which may cause severe burns.
1.2. IMPORTANT SAFETY INSTRUCTIONS
9 Familiarise yourself with the applications, limitations and potential hazards of the RoadStart.
9 Keep the unit in good working order and condition. Replace damaged parts immediately.
9 The RoadStart must only be opened and checked by qualied service personnel. DO NOT disassemble the unit for any reason.
9 Keep children and unauthorised persons away from the work area.
9 Keep work area clean and tidy and free from unrelated materials. Ensure that there is adequate lighting.
9 If the RoadStart receives a sharp knock or blow, it must be checked by a qualied service agent before being used.
9 When not in use re-charge every two months.
8 DO NOT smoke or allow a spark or ame in the vicinity of the battery or engine.
8 DO NOT drop any metal item onto the battery as it may spark or short circuit the battery, which could cause an explosion.
8 DO NOT use RoadStart to recharge dry cell batteries that are commonly used with home appliances. These batteries may explode
and cause personal injury and damage to property.
8 DO NOT charge or boost a frozen battery.
8 DO NOT use attachments other than those recommended. To do so may risk damage to the unit and other equipment and possible
personal injury.
8 DO NOT pull or carry the unit by its cables and DO NOT pull the negative and positive clamps from the battery terminals.
8 DO NOT operate in vicinity of ammable liquids or gases.
8 DO NOT recharge the unit with plugs, cables or attachments that are damaged. Replace such items immediately.
8 DO NOT use this product to perform a task for which it is not designed.
8 DO NOT store the unit in damp or wet locations or where the temperature may exceed 50°C.
8 DO NOT submerge the unit in water.
8 DO NOT use whilst under the inuence of drugs, alcohol or intoxicating medication.
8 DO NOT leave the unit in a totally discharged state for an extended period of time as this may result in permanent damage.
Refer to
instruction
manual
Wear eye
protection
Wear
protective
gloves
Keep in dry
area. Protect
from rain
Warning
corrosive
substance
Electrical
shock
hazard
Keep away
from sources
of ignition
Use in well
ventilated
areas
Warning:
Explosive
material
RS1200TI Issue 2 (3,F) 07/11/23
Original Language Version
© Jack Sealey Limited
8 DO NOT cross-connect the power leads from the RoadStart to the battery. Ensure that positive is to positive and negative is to
negative. Observe polarity indicator during connection.
9 Ensure that the unit is fully charged before storage.
2. INTRODUCTION
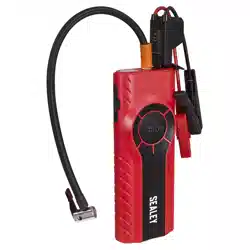
Easily ts in a glove box or backpack and benets from being compact and lightweight. Capable of starting an average 7L petrol or 5L
diesel engine. Powered by lithium-ion technology and fully protected against short circuit, overload and reverse polarity. Fitted with a
12,000mAh lithium-ion battery and two USB Outlets (1x 5V/3A, 9V/2A,12V/1.5A and 1x 5V/2A), Type-C input (5V/2A, 9V/2A), this unit
can also supply several full charges for smartphones and tablets/laptops. Digital tyre inator which reads PSI, KPA and Bar. Maximum
Pressure: 120psi. Suitable for inating vehicle tyres, bike tyres, balloons/inatables and balls. Integral LED ashlight with 3 modes
(Solid Light, Strobe, SOS). Supplied with smart battery clamps, inator hose, Nozzle adaptors and charging cable all stored in a sturdy
hard-shell zip-up case.
3. SPECIFICATION
Model No:........................................................RS1200TI
Auxiliary Output: .......................................USB 1 - 5V/2A
......................................USB 2 - 5V/3A ,9V/2A,12V/1.5A
Cable & Clamp Length: .......................................360mm
Capacity: ............................3.7V 12Ah Lith-ion (44.4Wh)
Maximum Current:...............1200A Peak, 600A Cranking
Maximum Starting Capacity: ............. 7L Petrol/5L Diesel
Size (W x D x H): ...............................257 x 53 x 103mm
Voltage: .....................................................................12V
4. OPERATION
4.1. LED DISPLAY
4.1.1. Press the Power Button to check the storage level of the jump starter detected on the display, it shows the remaining charge in the
battery and activated output ports (USB1/2) by ashing the “OUT” sign on the display panel. The appliance will automatically power
o when there is no load detected, or charging is complete.
4.1.2. The display shows dierent charge levels. The number will reach 100% when the charging is completed.
4.2. JUMP STARTER CHARGING
4.2.1. Plug the Charging Cable to USB input port to commence charging.
Or
4.3. Plug a car adaptor into the socket of an auxiliary port.
4.3.1. Connect 5V/2A input port of jump starter to the other end of car adaptor.
NOTE: DO NOT charge the jump starter unit immediately after starting engines, but wait at least 30 minutes.
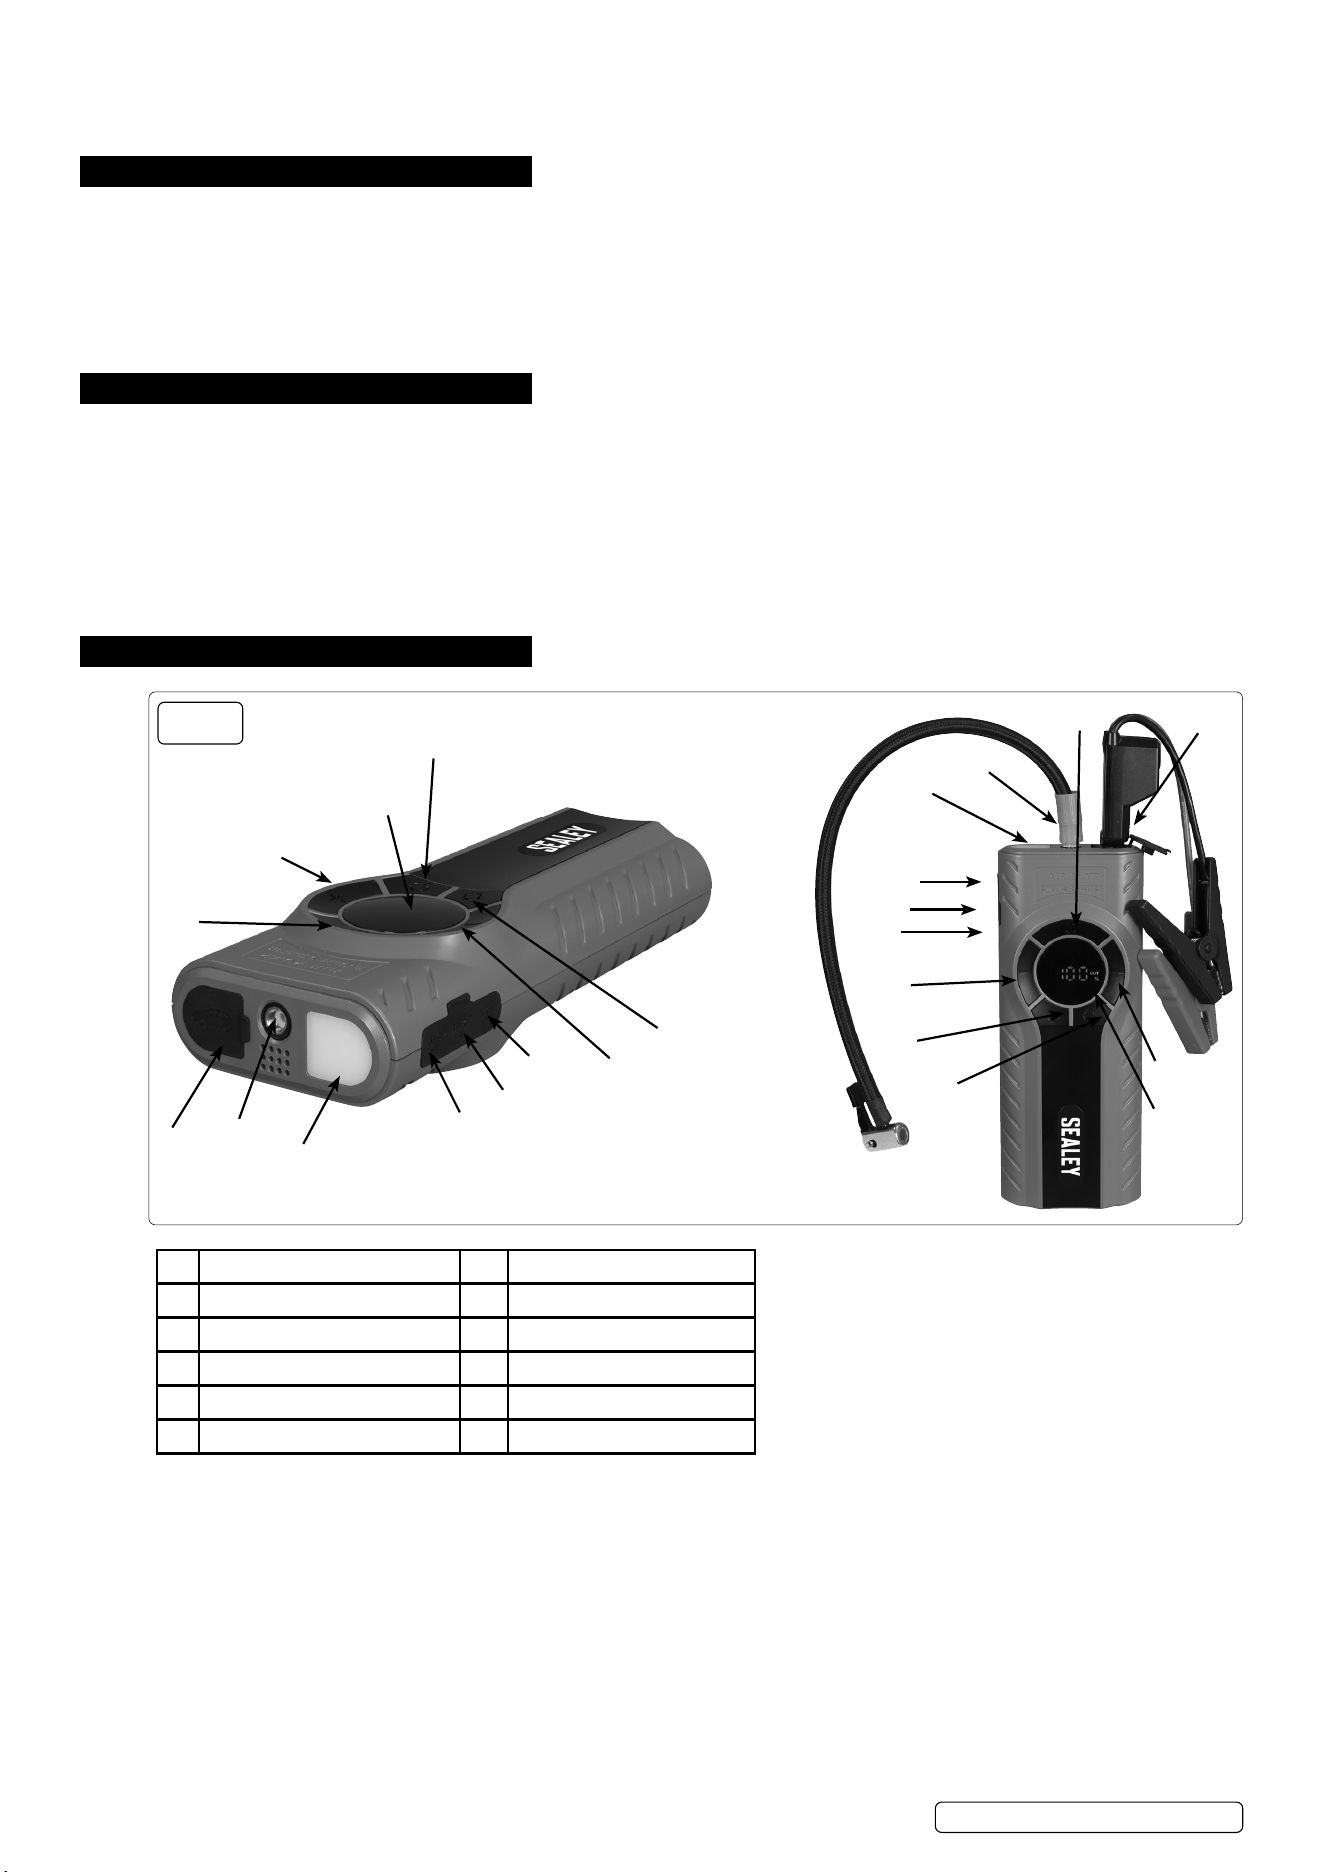
fig.
1
1 Jumpstart port / Smart cable 7 Display
2 Air hose connection 8 Minus Button -
3 LED Light 9 Pump button
4 USB1 Output 10 Power button
5 Type - C Input 11 Plus Button +
6 USB2 Output 12 Unit selection button
1
2
3
4
6
8
9
5
7
10
11
12
1
2
3
4
5
6
7
8
9
10
11
12
RS1200TI Issue 2 (3,F) 07/11/23
Original Language Version
© Jack Sealey Limited

4.4. JUMP START 12V VEHICLE
4.4.1. Make sure that the charge level is not less than 80%, fully charged is recommended.
4.4.2. Plug the lead set into the jump start socket. (g.1.1)
4.4.3. Connect the RED clamp to the vehicle’s battery positive (+) terminal and connect the BLACK clamp to the vehicle’s battery negative (-)
terminal. (g.1.2)
4.4.4. Start the vehicle, and leave a 30 second interval, before trying again. After three attempts please check to see if there are problems
with the vehicle’s engine or the vehicles electrics. Meanwhile, check the jump starter, if there is a problem, please return it to your
Sealey stockist.
4.4.5. When the vehicle is started, remove lead set from jump starter and disconnect red and black clamps to the vehicle battery terminals
within 30 seconds.(g.1.4, g.1.5)
4.4.6. Leave the vehicle’s engine running.
4.5. SMART CABLE
4.5.1. Connect the smart cable to jump starter unit, if the “start” and “error” indicators ash with “green” and “red” lights, it means the circuit is
normal. lf only red light is on, it means the voltage of the jump starter is too low to start.
4.5.2. Correctly connect the smart cables clamps to vehicle’s battery terminals; positive(+) to positive (+), negative (-) to negative (-).
4.5.3. Smart cable will detect the circuit for 3 seconds, if the “start” indicator turns green, and “error” indicator turns o, then can start the
vehicle (the green light will be on for 30 seconds, if no start within 30 seconds, the smart cable will automatically shut down, and the
green and red light will be on at the same time. If you want to start the vehicle again, should pull the smart cable out o the jump
starter, and plug it into jump starter again.
5. TROUBLESHOOTING
Indication on Jump start connector Solutions
Flashing red and green indicator Connect jumper cable
Solid green indication Ready to start
Solid red Indicator 1. Low voltage indication charge the jump start unit.
2. Over-heating indication is on remove clamps to let cool down.
3.Timed out protection. Remove clips within 30 seconds after a successful start.
Solid red with momentry bleeping Reverse polarity warning.
Reverse the clips on battery and ensure the correct connection.
Solid red with continious beeping Short circuit indication.
Do not connect the clips together or across metal which would connect the two
terminals.
5.1. CHARGING MOBILE PHONE OR TABLET
5.1.1. Plug the charging cable to USB1 or USB2 output port (g.1.4 and 1.6).
5.1.2. Select appropriate connector for your mobile phone or tablet.
5.1.3. Press the Power Button to charge. (Charge time aproximatly 1 Hour).
5.2. AIR COMPRESSOR FOR TYRE INFLATION
5.2.1. Connect to the “Hose Valve” of the tyre and the jump starter.
5.2.2. Turn on the Power Button, press the Pump Button to switch to the ination mode, the default value is 2.5 Bar, press the “+” and “-”
keys to set dierent pressure values. Press unit button to change unit.
5.2.3. After the setting is completed, wait for 2 seconds, the air pump will start to inate, and the current air pressure will be displayed.
5.2.4. When the air pressure reaches the set value, the air pump will automatically stop working.
NOTE: If using for long period, it’s recommended to stop every 10 minutes to cool down the unit. Otherwise the protection program will
be started automatically.
5.3. LED LAMP (g.1.3)
5.3.1. Press the Power Button button for 3 seconds to start the LED light. There are 3 modes for the LED light. They appear in order by
pressing once to change mode. (Illumination, strobe and SOS)
5.4. OTHER DISPLAY INDICATORS
5.4.1. H8: The battery temperature has exceeded 60°C, and the product stops working at this time. It can be used normally after the
temperature returns to normal after cooling.
5.4.2. H0: The battery temperature is lower than -20°C, the product stops working. It can be used normally only after the temperature returns
to normal.
5.4.3. HH8: The temperature of the air compressor motor reaches 95°C, at which point the product stops working. The motor can be used
normally after the temperature of the motor returns to below 60°C (about 30 minutes).
5.4.4. H--: The motor has reached the maximum single working time of 15 minutes, and the product stops working at this time. It is
recommended to cool down for at least 30 minutes before using the secondary air pump function.
RS1200TI Issue 2 (3,F) 07/11/23
Original Language Version
© Jack Sealey Limited

WEEE REGULATIONS
Dispose of this product at the end of its working life in compliance with the EU Directive on Waste Electrical and Electronic Equipment
(WEEE). When the product is no longer required, it must be disposed of in an environmentally protective way. Contact your local solid
waste authority for recycling information.
RS1200TI Issue 2 (3,F) 07/11/23
Original Language Version
© Jack Sealey Limited
ENVIRONMENT PROTECTION
Recycle unwanted materials instead of disposing of them as waste. All tools, accessories and packaging should be
sorted, taken to a recycling centre and disposed of in a manner which is compatible with the environment. When
the product becomes completely unserviceable and requires disposal, drain any uids (if applicable) into approved
containers and dispose of the product and uids according to local regulations.
REGISTER YOUR
PURCHASE HERE
Sealey Group, Kempson Way, Suffolk Business Park, Bury St Edmunds, Suffolk. IP32 7AR
01284 757500 sales@sealey.co.uk www.sealey.co.uk
Note: It is our policy to continually improve products and as such we reserve the right to alter data, specications and component parts without prior notice.
Important: No Liability is accepted for incorrect use of this product.
Warranty: Guarantee is 12 months from purchase date, proof of which is required for any claim.