
Installation/USER Guide
PCAM-11FF
Must be used in conjunction with
FCTP-GM1903 or FCTP-GM2003
Front Camera Kit

3
email - gmsupport@echomaster.com (US) - tel - 866-766-2267
2
Installation Guide
email - gmsupport@echomaster.com (US) - tel - 866-766-2267
Illustrations are typical and may not match exact vehicle details
PCAM-11FF
Front Camera Kit
Cover all surfaces with tape or plastic protection film to protect against
scratching and damage. EchoMaster is in no way responsible for any damage
that may incur during installation.
This product has been validated in the vehicles listed on the application guide only.
Care must be taken when installing this accessory to ensure damage does not occur
to the vehicle. The installation of this accessory should follow approved guidelines to
ensure proper installation. Read entire instructions thoroughly before starting.
This document covers such items as:
- Vehicle Protection (use of covers and blankets, cleaning chemicals, etc).
- Vehicle Disassembly / Reassembly (panel removal, part storage, etc).
- Electrical Component Disassembly / Reassembly (battery disconnection,
connector removal, etc).
NOTES:
Removed Parts: Inspect the vehicle and parts for any damage.
Place all removed parts on a protected surface in an area where they will not get
damaged.
Connectors: When disconnecting connectors, do not pull on the wires; pull by
holding the connectors.
Retains factory tailgate camera.
Prior to Installation

Installation Guide
3
email - gmsupport@echomaster.com (US) - tel - 866-766-2267
Illustrations are typical and may not match exact vehicle details
PCAM-11FF
Front Camera Kit
email - gmsupport@echomaster.com (US) - tel - 866-766-2267
CAUTION
Consult your vehicle owner’s manual to disconnect the battery. Do not disconnect
ANY airbag connectors or indicators. Doing so may result in activating a diagnostic
code. These codes will require the dealer to perform the reset procedure which may
incur a reset fee. If you are unsure of any vehicle trim removal process consult the
OEM service manual.
Removing vehicle trim panels in extreme hot and/or cold climate could result in
damage. Use care when removing all vehicle trims.
Using painter’s Blue tape on the vehicle trim panels can help limit any scratches
and/or marring. Use a nylon trim panel removal tool whenever possible.
Vehicle Preparation & Protection
Recommended Tools
5
email - gmsupport@echomaster.com (US) - tel - 866-766-2267
4
Installation Guide
email - gmsupport@echomaster.com (US) - tel - 866-766-2267
Illustrations are typical and may not match exact vehicle details
PCAM-11FF
Front Camera Kit
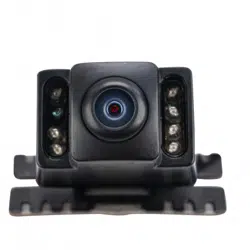
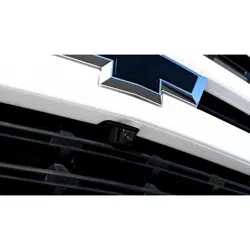
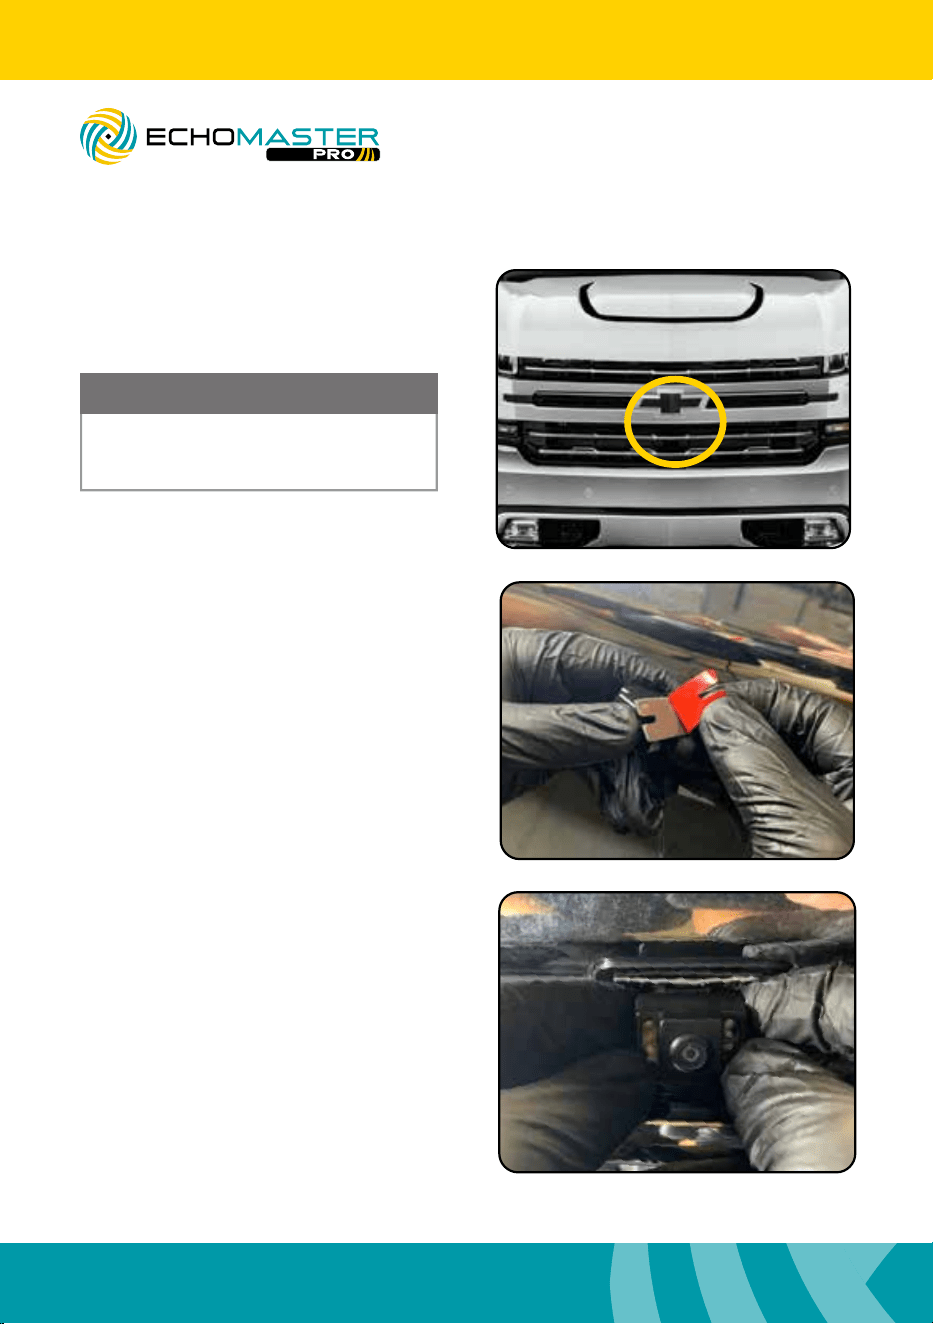
Installing the Camera
Find the desired mounting location.
Remove the adhesive backing from the
mounting base of the camera.
Clean the surface and secure the camera to
the grill in the desired mounting location.
PLEASE NOTE
The recommended mounting location
is centered on the grille and just
below the emblem.
NOTE
Installation Guide
5
email - gmsupport@echomaster.com (US) - tel - 866-766-2267
Illustrations are typical and may not match exact vehicle details
PCAM-11FF
Front Camera Kit
email - gmsupport@echomaster.com (US) - tel - 866-766-2267
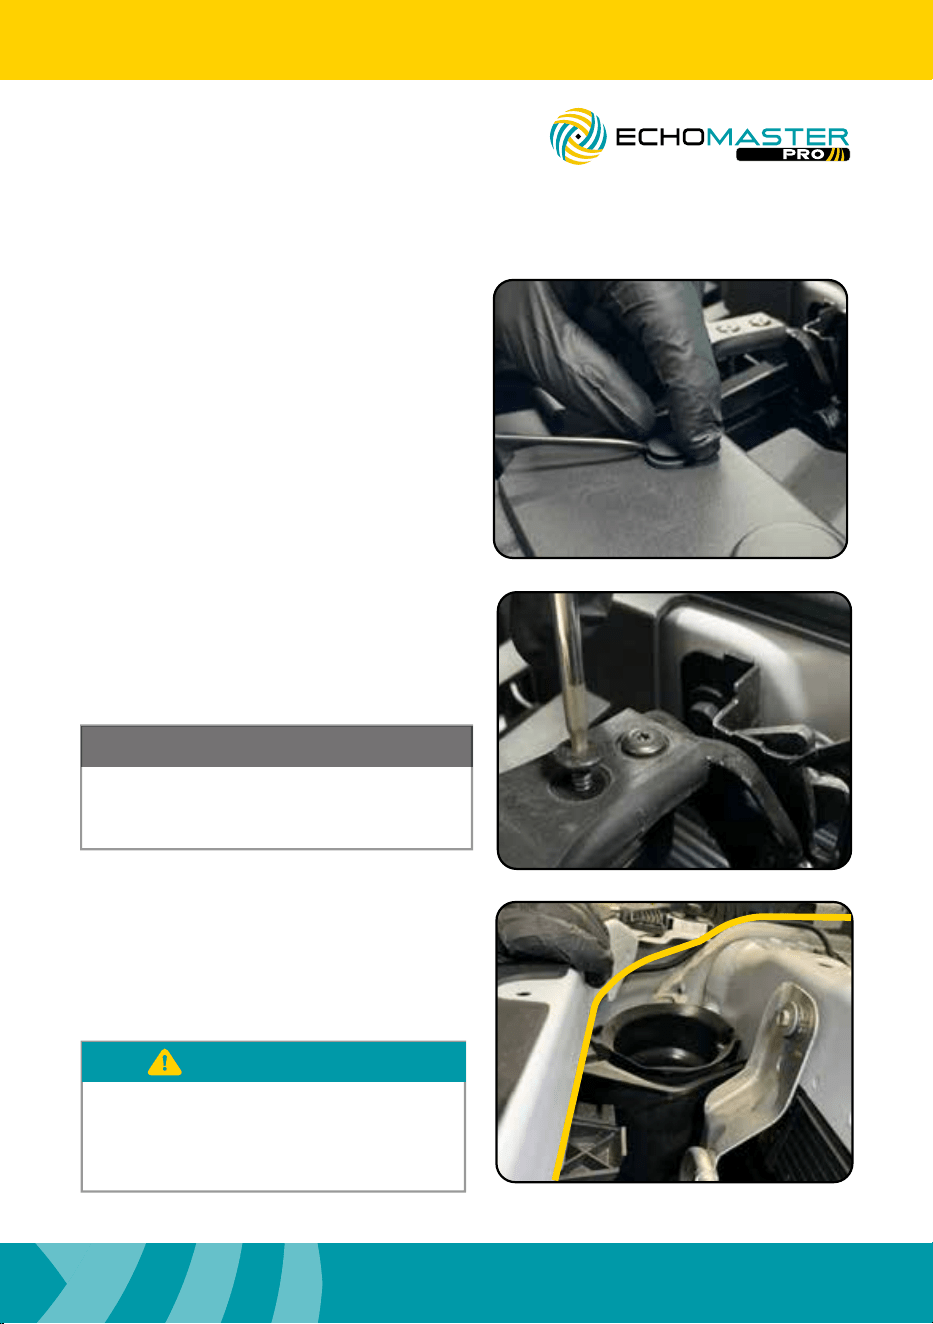
Using a small flat blade tool, remove the
push-in rivets to remove the plastic trim
panel on the top side of the grille.
Remove the (x2) T15 screws attaching the
hood release handle to the hood release.
Remove both the handle and the trim panel
and set aside.
Route the camera cable behind the grille
towards the passenger side of the vehicle
securing it with wire ties along the way.
Once the cable has reached the back side
of the headlight, route the cable towards
the firewall.
Once the handle and trim panel are
removed, place in safe area to avoid
damage.
NOTE
Some vehicles have shutters behind the
grille that open and close. Be sure to
route the camera cable to avoid moving
parts.
WARNING
7
email - gmsupport@echomaster.com (US) - tel - 866-766-2267
6
Installation Guide
email - gmsupport@echomaster.com (US) - tel - 866-766-2267
Illustrations are typical and may not match exact vehicle details
PCAM-11FF
Front Camera Kit
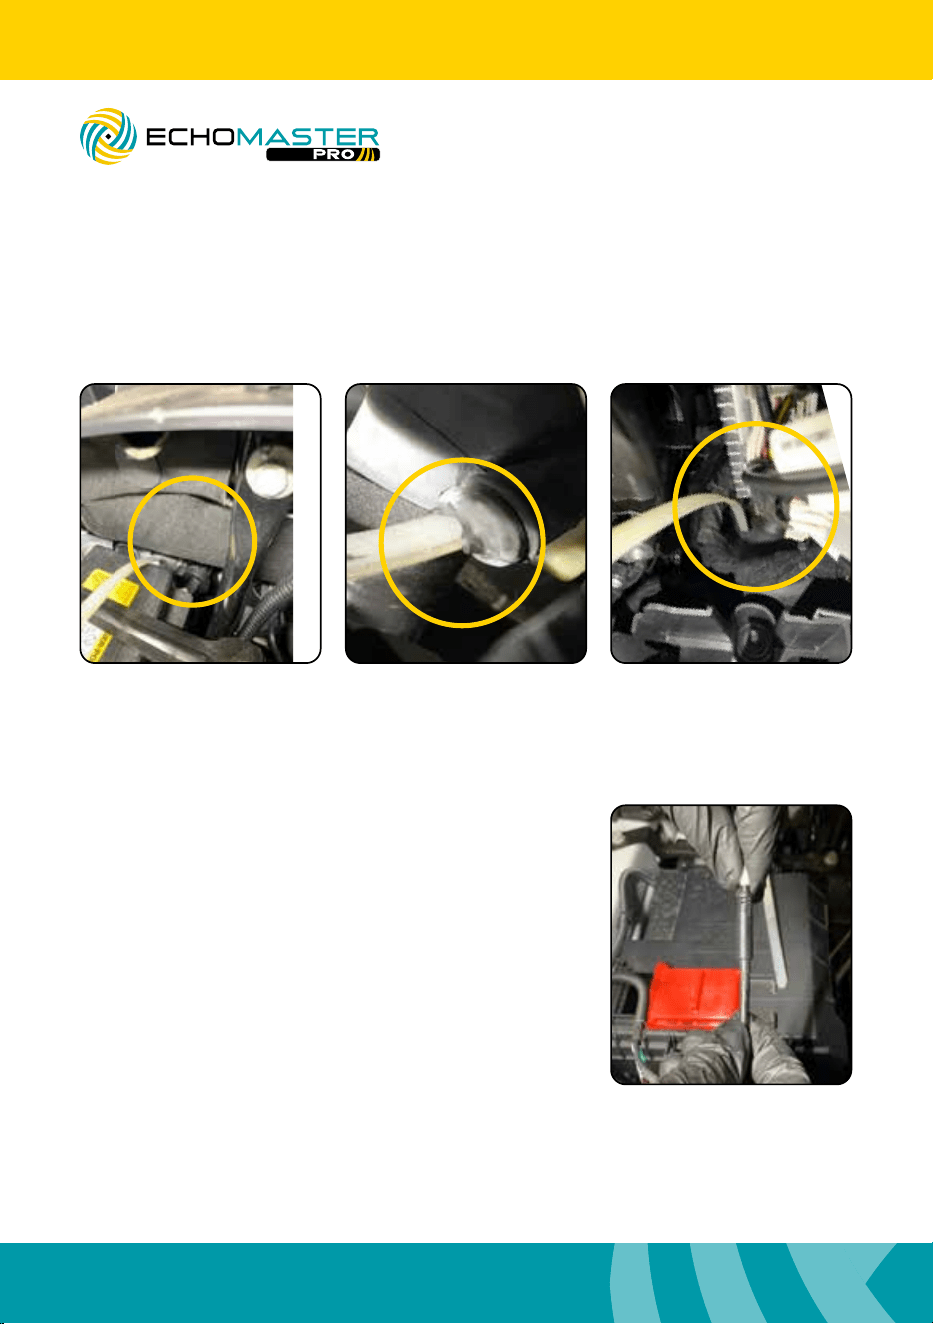
Routing the Camera Extension Harness
Connect the camera cable to the camera
extension cable.
From the engine bay side, cut a small slit or X in the aftermarket tunnel provision of
the large grommet located just behind the battery. Feed a wire fishing tool through the
opening and into the cab of the vehicle.
Installation Guide
7
email - gmsupport@echomaster.com (US) - tel - 866-766-2267
Illustrations are typical and may not match exact vehicle details
PCAM-11FF
Front Camera Kit
email - gmsupport@echomaster.com (US) - tel - 866-766-2267
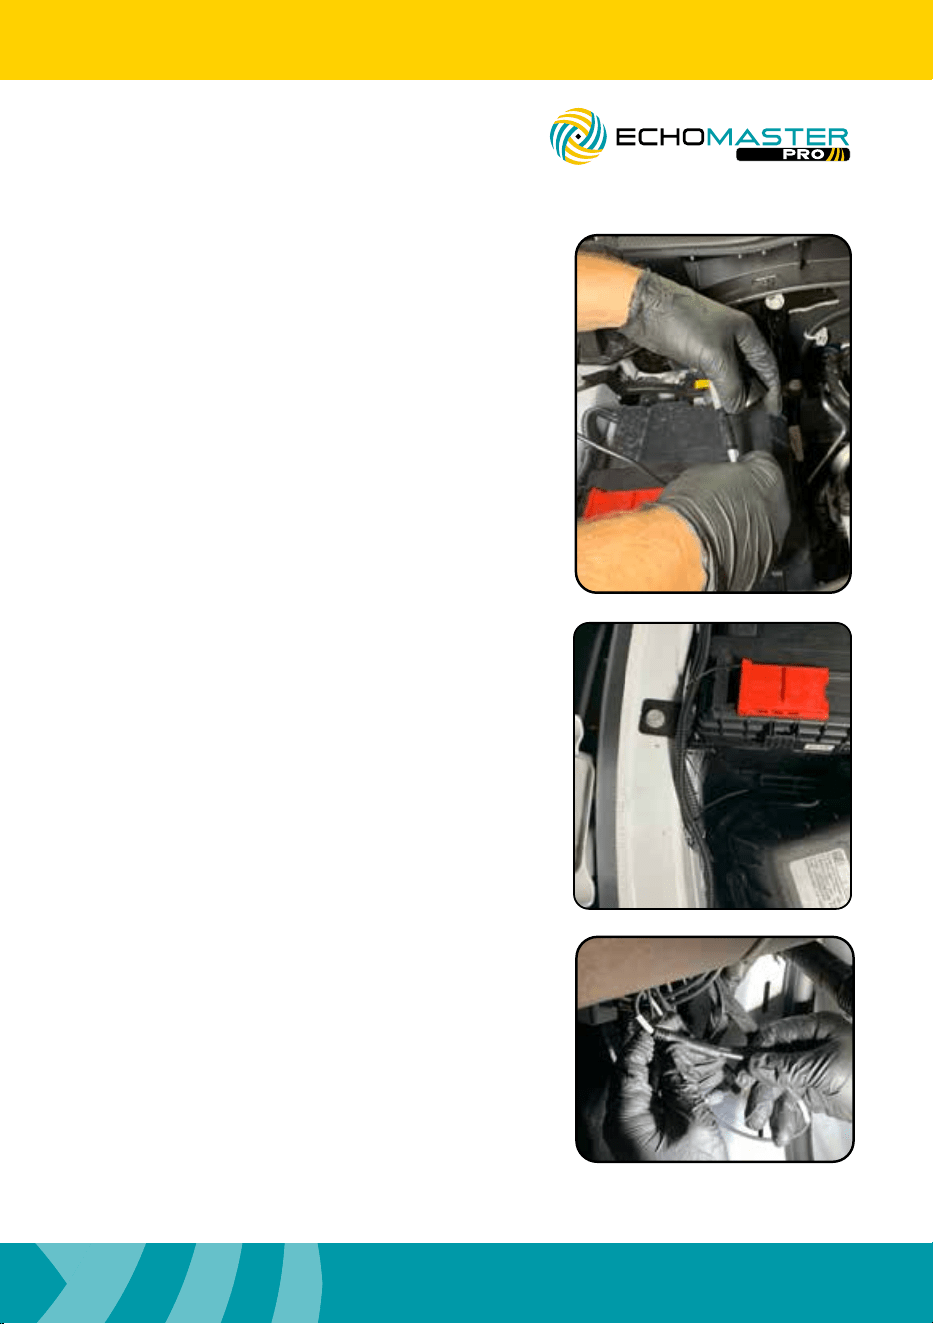
Attach the loose end of the camera
extension cable to the wire fishing tool
using electrical tape. From inside the cab,
pull the wire fishing tool/cable into the
vehicle. Seal the wire to the grommet using
sealant like black RTV.
Secure wiring to existing factory wiring
and away from sharp and moving
objects.
Once inside the vehicle’s cab, connect
the front camera extension cable to
the connector from the module labeled
“Front”.
9
email - gmsupport@echomaster.com (US) - tel - 866-766-2267
8
Installation Guide
email - gmsupport@echomaster.com (US) - tel - 866-766-2267
Illustrations are typical and may not match exact vehicle details
PCAM-11FF
Front Camera Kit
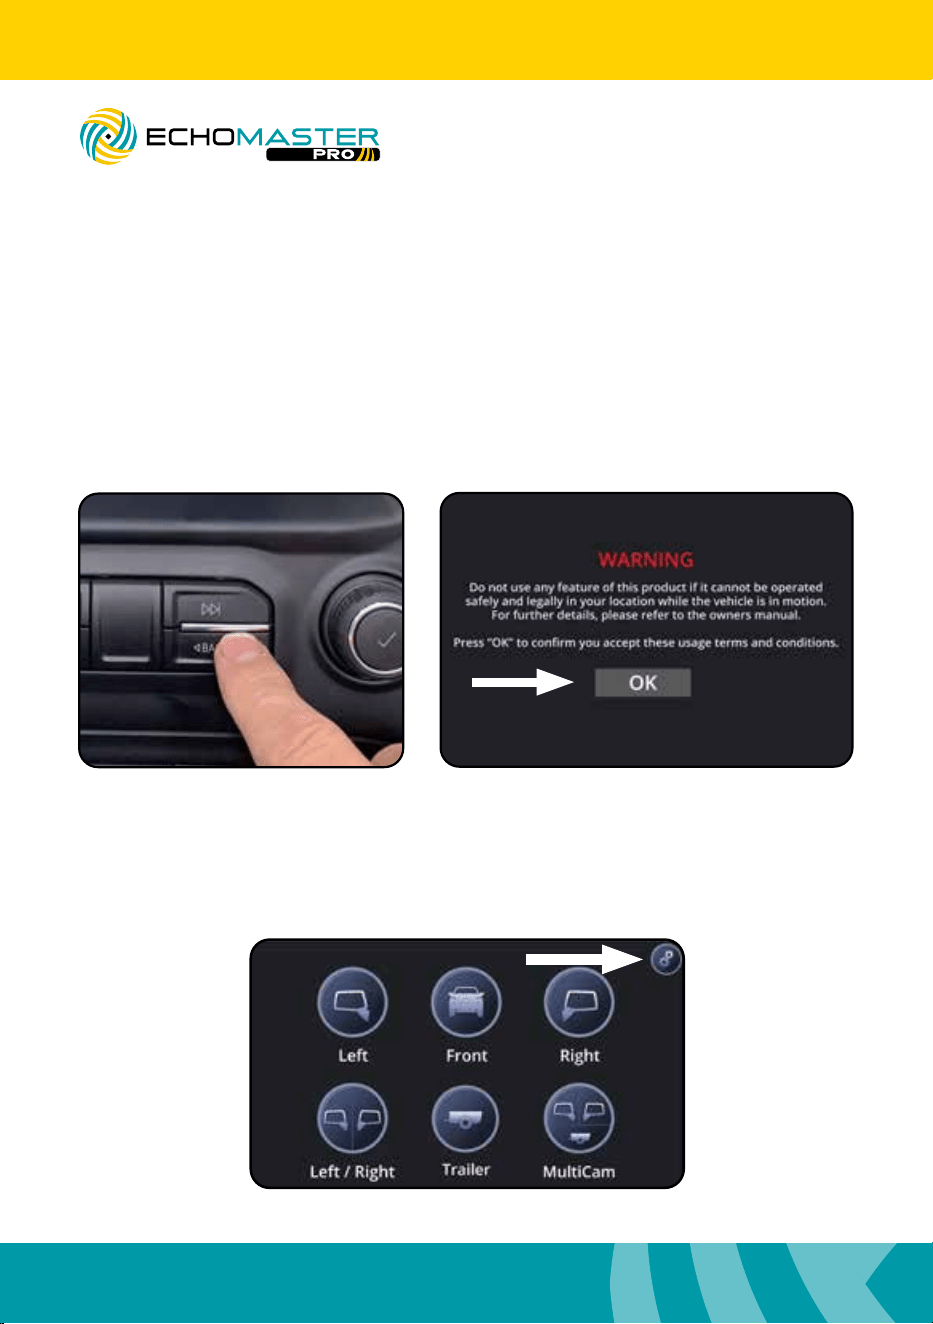
Enabling the Front Camera
Access the Camera menu by pressing and holding the “BACK” button on the
factory dash panel (Fig. A) for three seconds. Press OK to accept the terms
and continue (Fig B.).
Fig A. Fig B.
Fig C.
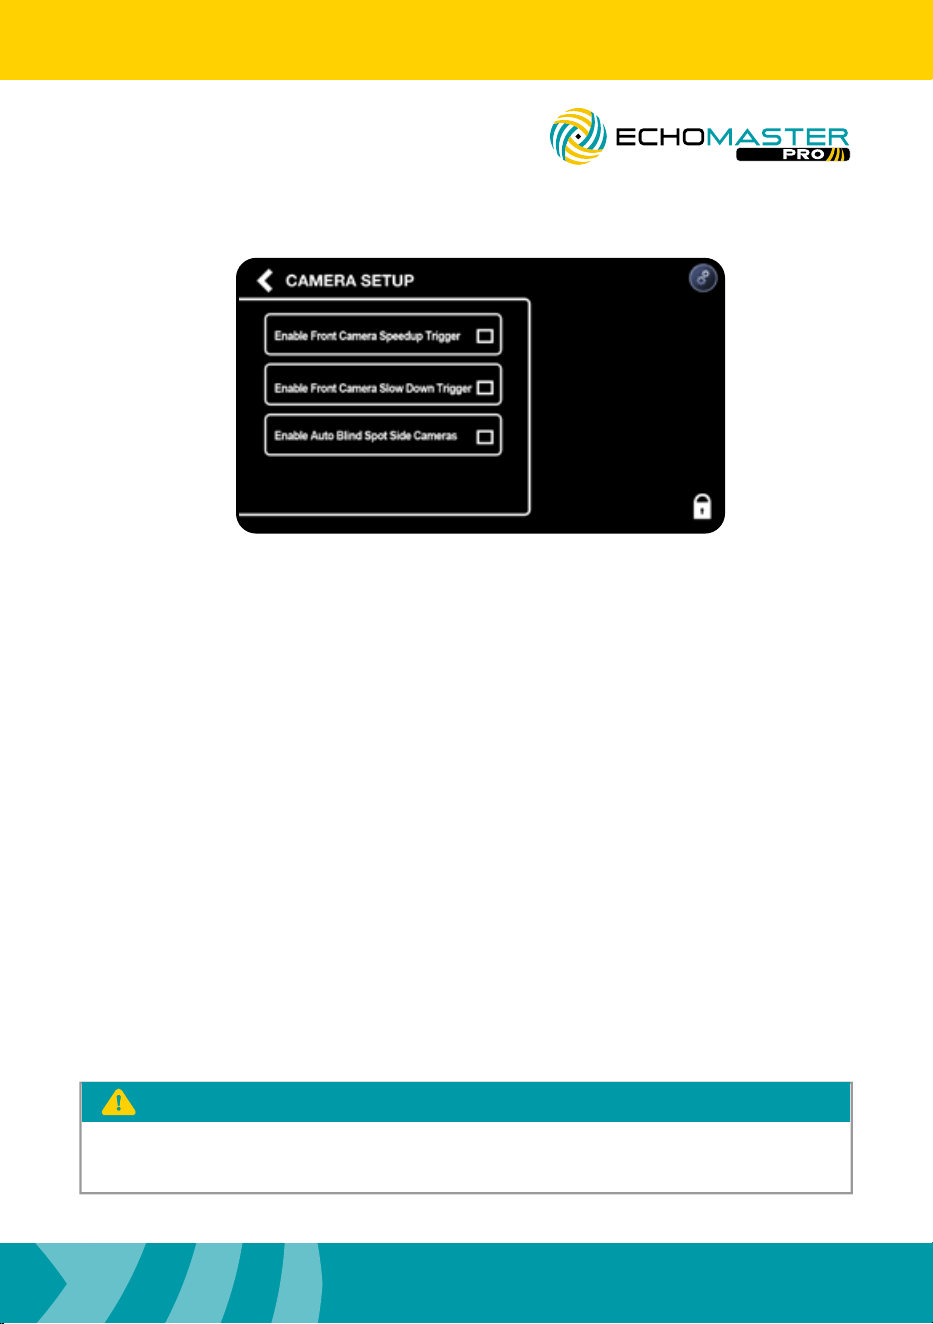
Access the Camera Setup menu by pressing the gear icon in the top right
corner (Fig C.) to enter the camera setup menu.
Installation Guide
9
email - gmsupport@echomaster.com (US) - tel - 866-766-2267
Illustrations are typical and may not match exact vehicle details
PCAM-11FF
Front Camera Kit
email - gmsupport@echomaster.com (US) - tel - 866-766-2267
PLEASE NOTE
The IntelliHaul camera is accessible after 7 seconds while in reverse. Press and
hold the “BACK” button.
Enabling one of the two Front camera options from the Camera Setup menu
will enable the front camera in the camera menu.
1. Enable Front Camera Speedup Trigger - When enabled, the front camera
will display when exiting reverse and turn off after 8 MPH.
2. Enable Front Camera Slow Down Trigger - When enabled, the front
camera will display when speed is reduced below 10MPH and the steering
wheel is turned more than 15 degrees. This prevents unwanted front camera
activation in stop and go traffic. (Note: Vehicle speed must first exceed 15
MPH to activate this feature)

11
email - gmsupport@echomaster.com (US) - tel - 866-766-2267
10
Installation Guide
email - gmsupport@echomaster.com (US) - tel - 866-766-2267
Illustrations are typical and may not match exact vehicle details
PCAM-11FF
Front Camera Kit
NOTES:

Installation Guide
11
email - gmsupport@echomaster.com (US) - tel - 866-766-2267
Illustrations are typical and may not match exact vehicle details
PCAM-11FF
Front Camera Kit
email - gmsupport@echomaster.com (US) - tel - 866-766-2267
NOTES:

Clearwater Florida 33760
EchoMaster is a Power Brand of AAMP Global.
www.echomaster.com
email - gmsupport@echomaster.com - tel - 866-766-2267 (US)
AGREEMENT: End user agrees to use this product in compliance with the instructions and terms
of use above and with all State and Federal laws. EchoMaster provides instructions and safety
warnings with respect to this product and disclaims all liability for any use not in conformity with
those instructions or other misuse of its product. If you do not agree, please discontinue use
immediately and contact EchoMaster. This product is intended for off-road use and passenger
use only.
REV. 012521