E&OE © 3 Jet-USA
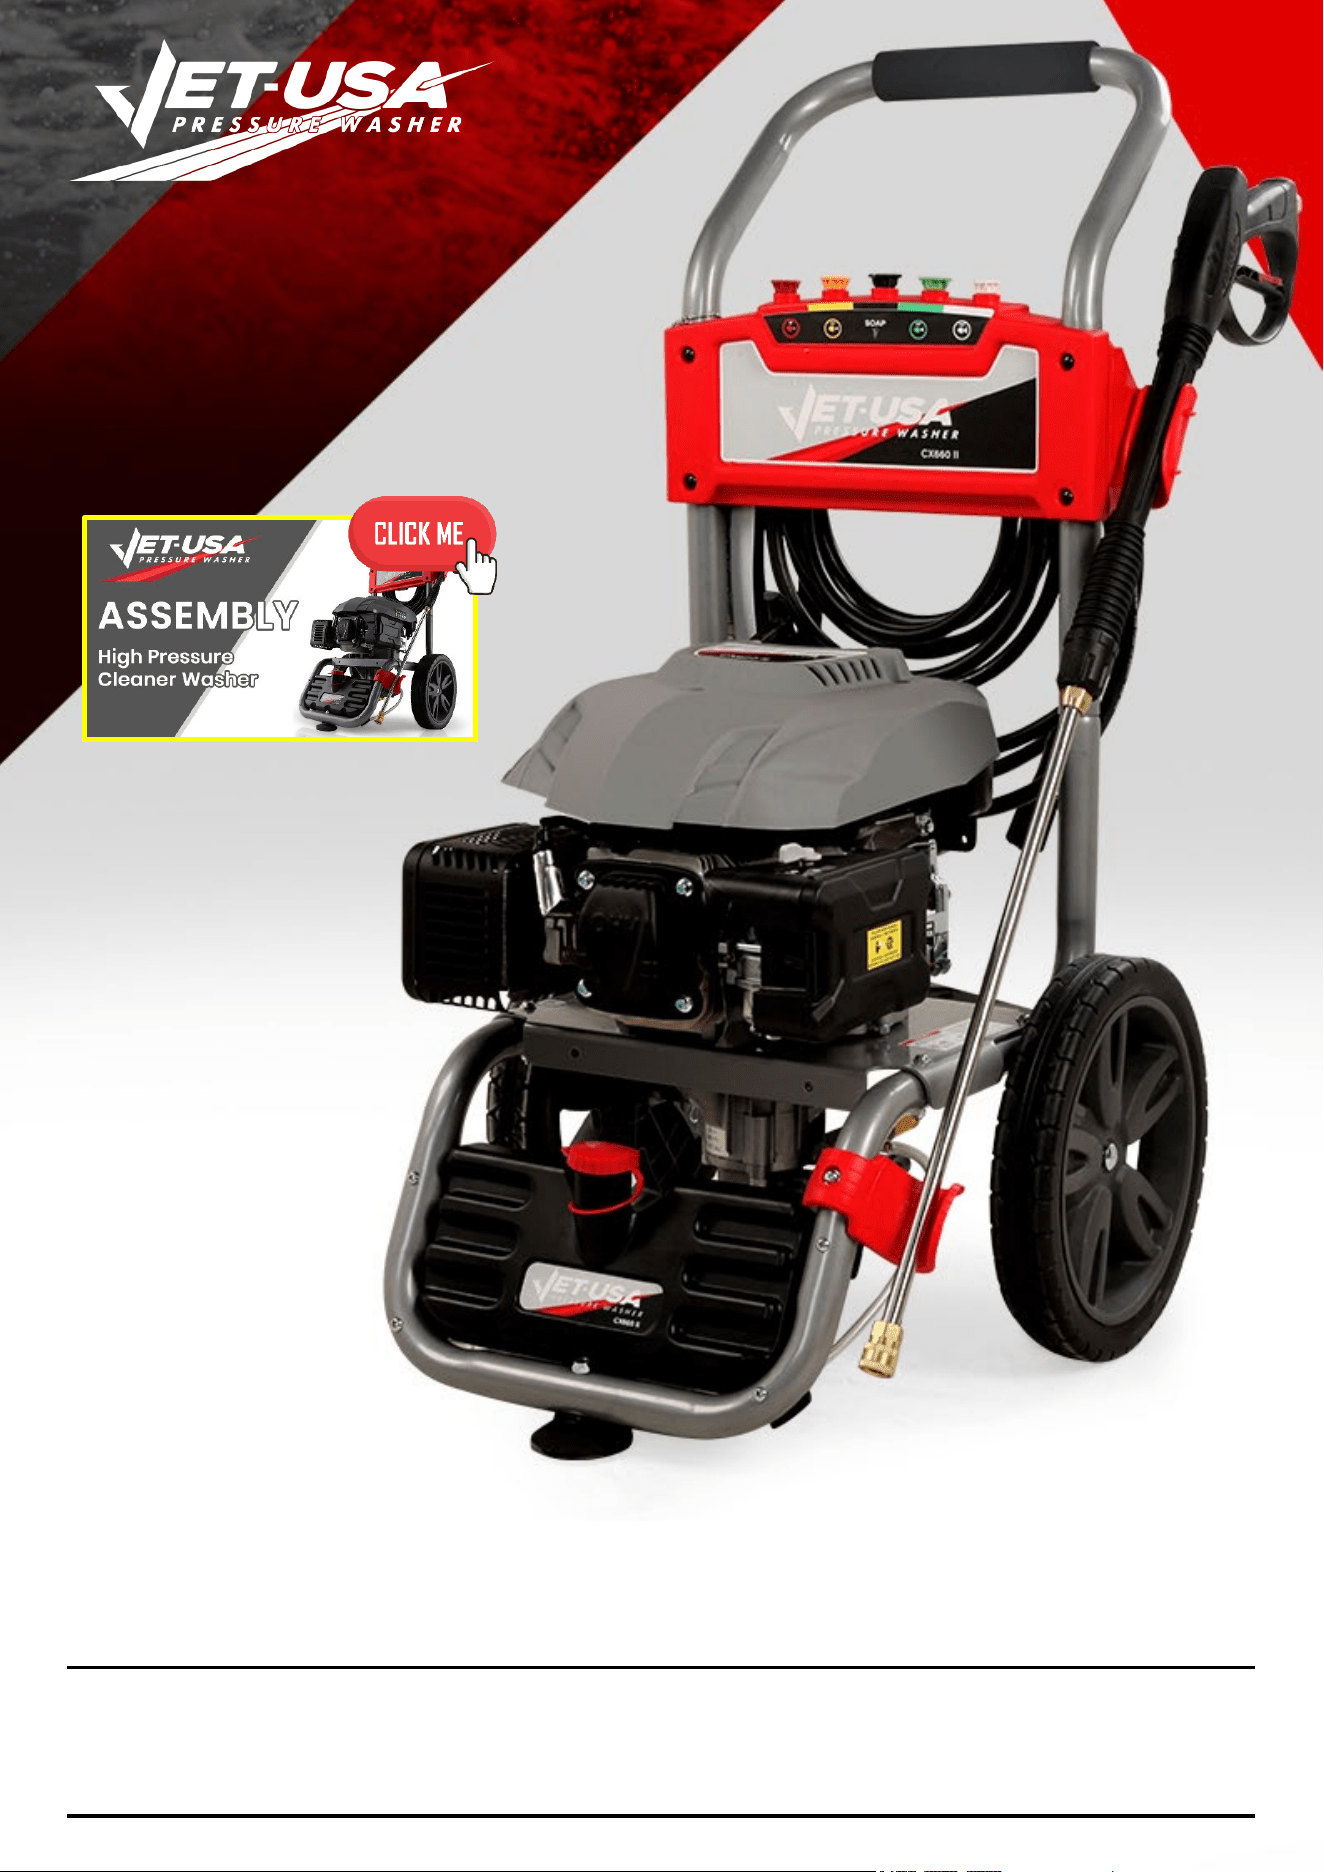
CX660
User Manual
[Revision 12.0]
READ THIS MANUAL CAREFULLY BEFORE USE – FAILURE TO DO SO MAY RESULT IN INJURY, PROPERTY DAMAGE AND
MAY VOID WARRANTY. • KEEP THIS MANUAL FOR FUTURE REFERENCE. • Products covered by this manual may vary in
appearance, assembly, inclusions, specifications, description, and packaging.
The product is NOT supplied with engine oil, although traces of oil from the manufacturing process may be present. It is essential to
add adequate engine oil of the correct type to the engine before use. Failure to add engine oil will void the product warranty.
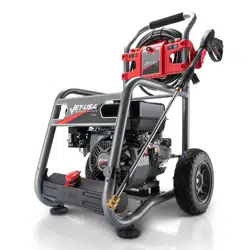
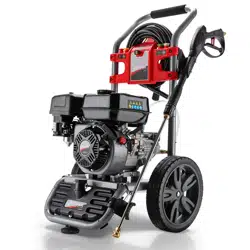
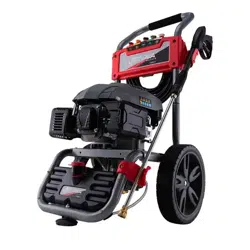
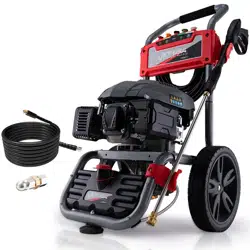
Petrol-Powered Pressure Cleaner Washer - CX660
E&OE © Jet-USA 2
Safety
Safety messages are designed to alert you to possible dangers or hazards that could cause death, injury or
equipment or property damage if not understood or followed. Safety messages have the following symbols:
You WILL be KILLED or
SERIOUSLY INJURED if you do
not follow instructions.
You CAN be KILLED or
SERIOUSLY INJURED if you do
not follow instructions.
You CAN be INJURED if you do
not follow instructions or equipment
damage may occur.
It is vital that you read and understand this
user manual before using the product,
including safety warnings, and any assembly
and operating instructions. Keep the manual
for future reference.
Safety precautions and recommendations
detailed here must be fully understood and
followed to reduce the risk of injury, fire,
explosion, electrical hazard, and/or property
damage.
Safety information presented here is generic
in nature – some advice may not be
applicable to every product. The term
"equipment" refers to the product, be it
electrical mains powered, battery powered or
combustion engine powered.
• Before Use - If you are not familiar with the
safe operation/handling of the equipment or
are in any way unsure of any aspect of
suitability or correct use for your
application, you should complete training
conducted by a person or organization
qualified in safe use and operation of this
equipment, including fuel/electrical handling
and safety.
• Do NOT operate the equipment in
flammable or explosive environments, such
as in the presence of flammable liquids,
gases or dust. The equipment may create
sparks or heat that may ignite flammable
substances.
• Keep clear of moving parts.
• Equipment may be a potential source of
electric shock or injury if misused.
• Do NOT operate the equipment if it is
damaged, malfunctioning or is in an
excessively worn state.
• Do NOT allow others to use the equipment
unless they have read this manual and are
adequately trained.
• Keep packaging away from children - risk
of suffocation! Operators must use the
equipment correctly. When using the
equipment, consider conditions and pay
due care to persons and property.
General Work Area Safety
• Work areas should be clean and well it.
• Do not operate the equipment if
bystanders, animals etc are within
operating range of the equipment or the
general work area.
• If devices are provided for connecting dust
extraction / collection facilities, ensure
these are connected and used properly.
Dust collection can reduce dust-related
hazards.
General Personal Safety
• Wear appropriate protective equipment
when operating, servicing, or when in the
operating area of the equipment to help
protect from eye and ear injury, poisoning,
burns, cutting and crush injuries. Protective
equipment such as safety goggles,
respirators, non-slip safety footwear, hard
hat, hearing protection etc should be used
for appropriate equipment / conditions.
Other people nearby should also wear
appropriate personal protective equipment.
Do not wear loose clothing or jewellery,
which can be caught in moving parts. Keep
hair and clothing away from the equipment.
• Stay alert and use common sense when
operating the equipment. Do not over-
reach. Always maintain secure footing and
balance.
• Do not use the equipment if tired or under
the influence of drugs, alcohol or
medication.
• This equipment is not intended for use by
persons with reduced physical, sensory or
mental capabilities.
General Fuel Safety
• Petrol/fuel/gasoline is extremely flammable
– keep clear of naked flames or other
ignition sources.
• Do not spill fuel. If you spill fuel, wipe it off
the equipment immediately – if fuel gets on
your clothing, change clothing.
• Do NOT smoke near fuel or when
refuelling.
• Always shut off the engine before
refuelling.
• Do NOT refuel a hot engine.
• Open the fuel cap carefully to allow any
pressure build-up in the tank to release
slowly.
• Always refuel in well ventilated areas.
• Always check for fuel leakage. If fuel
leakage is found, do not start or run the
engine until all leaks are fixed.
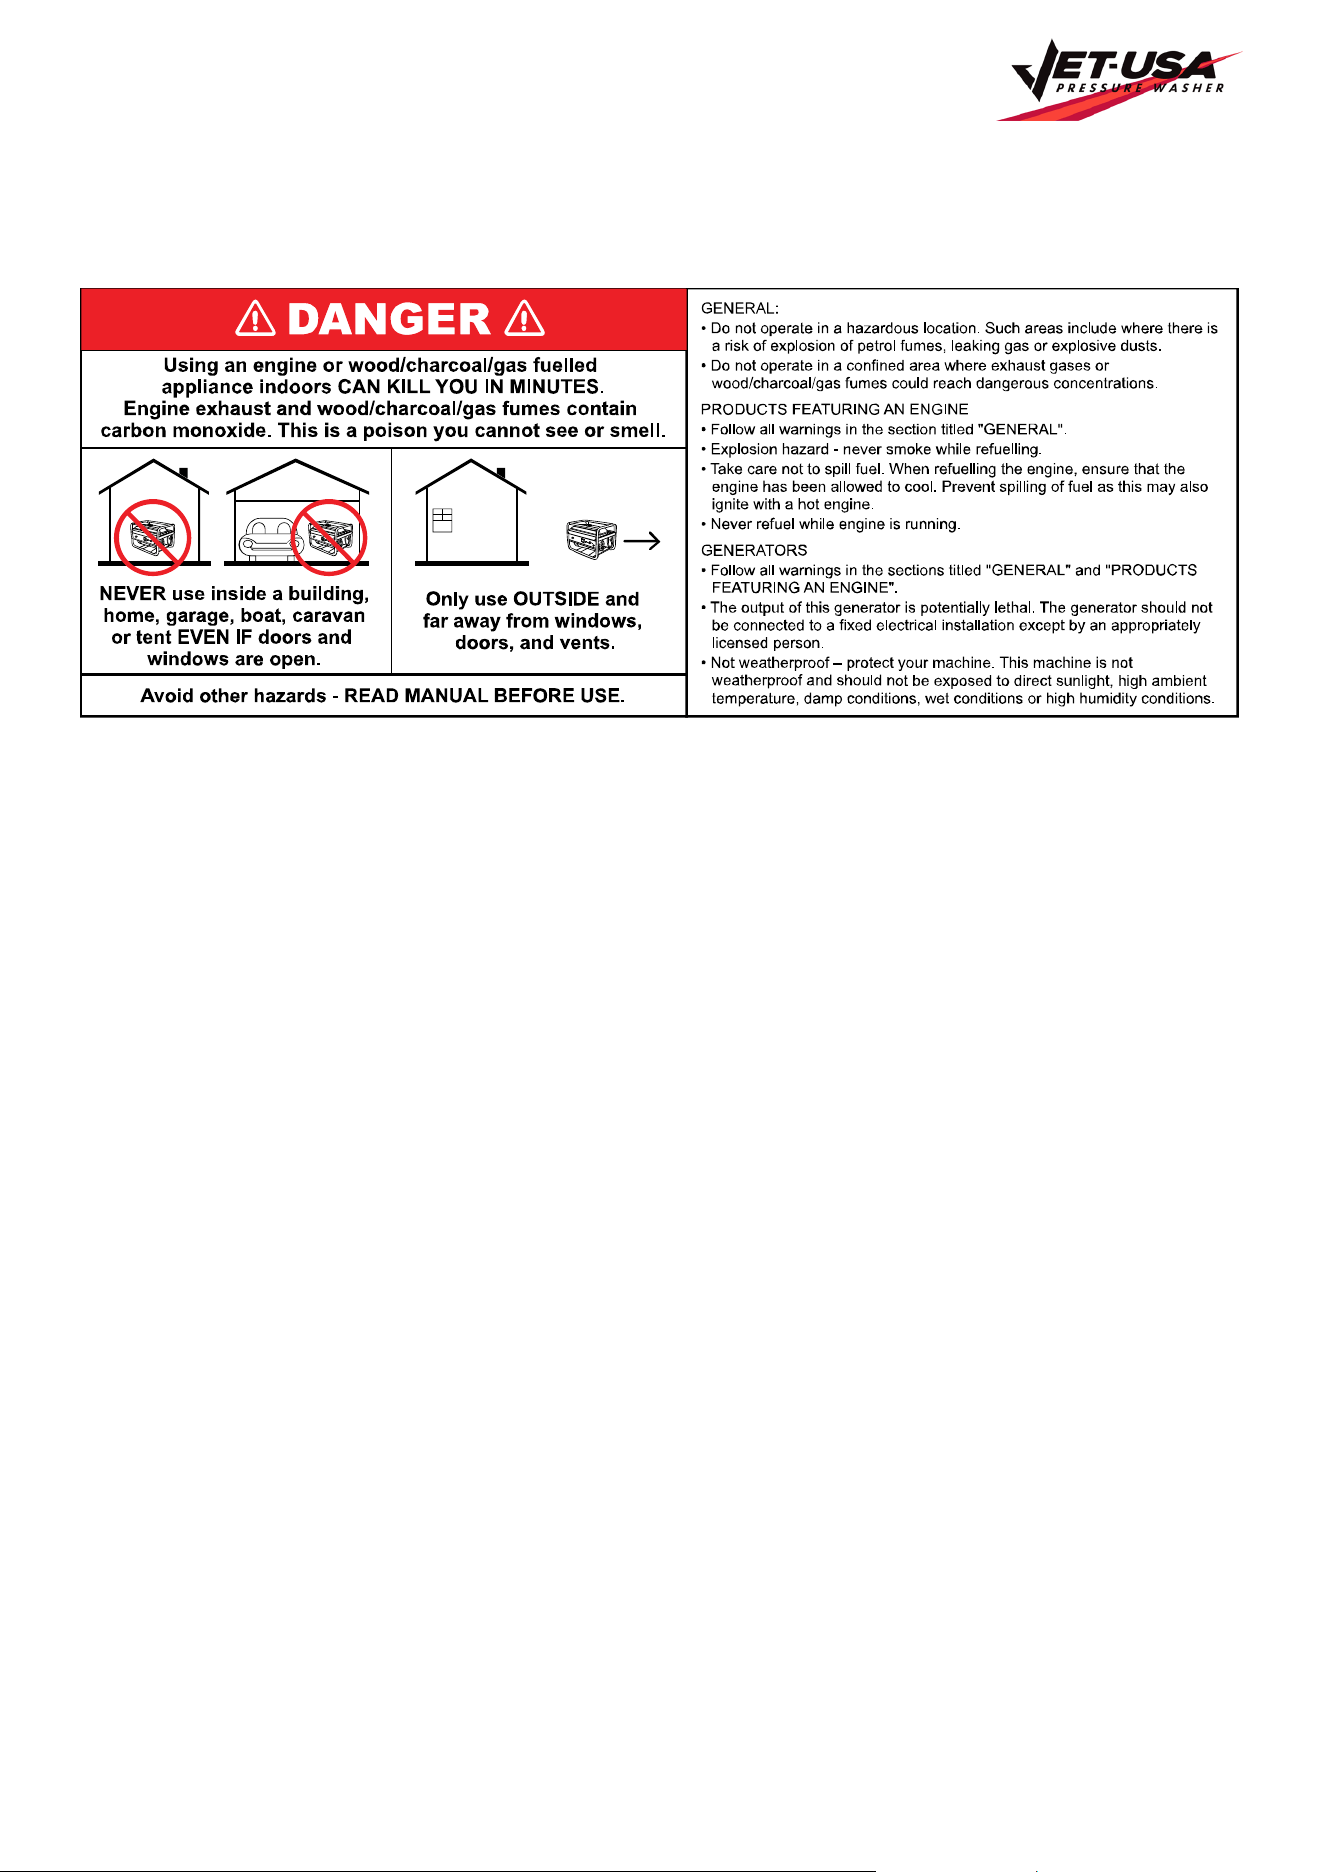
General Carbon-Monoxide Safety
• Using a combustion engine indoors CAN
KILL IN MINUTES. Engine exhaust
contains carbon-monoxide – a poison you
cannot smell or see.
• Use combustion engines OUTSIDE only,
and far away from windows, doors and
vents.
General Equipment Use and Care
• The equipment is designed for domestic
use only.
• Handle the equipment safely and carefully.
• Before use, inspect the equipment for
misalignment or binding of moving parts,
loose components, damage or any other
condition that may affect its operation. If
damaged, have the equipment repaired by
an authorised service centre or technician
before use.
• Prevent unintentional starting of the
equipment - ensure equipment and power
switches are in the OFF position before
connecting or moving equipment. Do not
carry equipment with hands or fingers
touching any controls. Remove any tools or
other items that are not a part of the
equipment from it before starting or
switching on.
• Do not force the equipment. Use the
correct equipment for your application.
Equipment will perform better and be safer
when used within its design and usage
parameters.
• Use the equipment and accessories etc. in
accordance with these instructions,
considering working conditions and the
work to be performed. Using the equipment
for operations different from those intended
could result in hazardous situations.
• Always keep equipment components
(engines, hoses, handles, controls, frames,
housings, guards etc) and accessories
(cutting tools, nozzles, bits etc) properly
maintained. Keep the equipment clean and,
where applicable, properly lubricated.
• Store the equipment out of reach of
children or untrained persons. To avoid
burns or fire hazards, let the equipment
cool completely before transporting or
storing. Never place or store the equipment
near flammable materials, combustible
gases or liquids etc.
• The equipment is not weather-proof, and
should not be stored in direct sunlight, at
high ambient temperatures or locations that
are damp or humid.
• Do not clean equipment with solvents,
flammable liquids or harsh abrasives.
• For specific equipment safety use and care,
see Equipment Safety.
Petrol-Powered Pressure Cleaner Washer - CX660
E&OE © Jet-USA 3
General Electrical Safety
• Inspect electrical equipment, extension
cords, power bars, and electrical fittings for
damage or wear before each use. Repair or
replace damaged equipment immediately.
• Ensure all power sources conform to
equipment voltage requirements and are
disconnected before connecting or
disconnecting equipment.
• When wiring electrically powered
equipment, follow all electrical and safety
codes.
• Always use a Residual Current Device
(RCD) (GFCI) / Earth Leakage Circuit
Breaker / Safety Switch when operating this
item (electrical items only).
• High voltage / high current power lines may
be present. Use extreme caution to avoid
contact or interference with power lines.
Electrical shock can be fatal.
General Electrical Safety
• Electrically grounded equipment must have
an approved cord and plug and be
connected to a grounded electrical outlet.
• Do NOT bypass the ON/OFF switch and
operate equipment by connecting and
disconnecting the electrical cord.
• Do NOT use equipment that has exposed
wiring, damaged switches, covers or
guards.
• Do NOT use electrical equipment in wet
conditions or in damp locations.
• Do NOT use electrical cords to lift, move or
carry equipment.
• Do NOT coil or knot electrical cords, and
ensure electrical cords are not trip hazards.
General Service Information
• The equipment must be serviced or
repaired at authorised service centres by
qualified personnel only.
• Replacement parts must be original
equipment manufacturer (OEM) to ensure
equipment safety is maintained.
• Do NOT attempt any maintenance or repair
work not described in this manual.
• After use, the equipment and components
may still be hot – allow the equipment to
cool and disconnect spark plugs and/or
electrical power sources and/or batteries
from it before adjusting, changing
accessories or performing repair or
maintenance.
• Do NOT adjust while the equipment is
running.
• Perform service related activities in suitable
conditions, such as a workshop.
• Replace worn, damaged or missing
warning/safety labels immediately.
Pressure Cleaner Washer Safety
DANGER: CARBON MONOXIDE
Using a pressure washer indoors CAN KILL YOU IN MINUTES. Pressure washer exhaust contains carbon monoxide (CO). This is a poison gas you
cannot see or smell. If you can smell the pressure washer exhaust, you are breathing CO. But even if you cannot smell the exhaust, you could be
breathing CO.
NEVER use a pressure washer inside homes, garages, crawlspaces, or other partly enclosed areas. Deadly levels of carbon monoxide can build up
in these areas. Using a fan or opening windows and doors does NOT supply enough fresh air. ONLY use a pressure washer outside and far away
from windows, doors, and vents. These openings can pull in pressure washer exhaust.
Even if you use a pressure washer correctly, CO may leak into the home. ALWAYS use a battery-powered or battery-backup CO alarm in the
home. If you start to feel sick, dizzy, or weak after the pressure washer has been running, move to fresh air RIGHT AWAY. See a doctor. You may
have carbon monoxide poisoning.
WARNING: The exhaust from this product contains chemicals known to cause cancer, birth defects, or other reproductive harm.
WARNING: This pressure washer may emit highly flammable and explosive petrol vapours, which can cause severe burns or even death if ignited.
A nearby open flame can lead to explosion even if it isn’t directly in contact with petrol.
• Do not operate near open flame.
• Do not smoke near pressure washer.
• Always operate on a firm, level surface.
• Always turn pressure washer off before refuelling. Allow pressure washer to cool for at least 2 minutes before removing fuel cap. Loosen cap
slowly to relieve pressure in tank.
• Do not overfill fuel tank. Petrol may expand during operation. Do not fill to the top of the tank. Allow for expansion.
• Always check for spilled fuel before operating.
• Empty fuel tank before storing or transporting the pressure washer.
• Do not allow children or non-qualified persons to operate.
WARNING: This pressure washer produces heat when running. Temperatures near exhaust can exceed 1500 F (650 C).
Do not touch hot surfaces. Pay attention to warning labels on the pressure washer identifying hot parts of the machine.
Allow pressure washer to cool down after use before touching the engine or areas of the pressure washer that become hot during operation.
CAUTION: Misuse of this pressure washer r can damage it and shorten its life. Only use the pressure washer for its intended purposes.
Turn the engine switch to “OFF” position when the engine is not running.
The high pressure stream of water can cut through skin and cause serious injury. Do not aim the stream of water at yourself or at any one else,
including animals.
Hoses and tubes can become damaged from coming in to contact with a hot engine or muffler. Always double check the hose for perforations
before starting up the machine and keep it clear of the engine and the muffler.
Kickback from operation can cause the user to fall. Always operate the pressure washer on a level and non- elevated surface to prevent the risk of
falling.
Always wear safety goggles to protect from possible mishaps with the stream or detergents. Always be aware of the dangers associated with the
detergents and chemicals that you are working with.
Attach all hoses before starting the engine.
Petrol-Powered Pressure Cleaner Washer - CX660
E&OE © Jet-USA 4
SAVE THESE INSTRUCTIONS – This manual contains important instructions for the P1PE Pressure Washer that should be followed during
installation and maintenance of the pressure washer.
Pressure washers vibrate in normal use. During and after the use of the pressure washer, inspect both the pressure washer as well as extension
and power supply cords for damage resulting from vibration. Have damaged items repaired or replaced as necessary. Do not use plugs or cords
that show signs of damage such as broken or cracked insulation.
Petrol-Powered Pressure Cleaner Washer - CX660
E&OE © Jet-USA 5
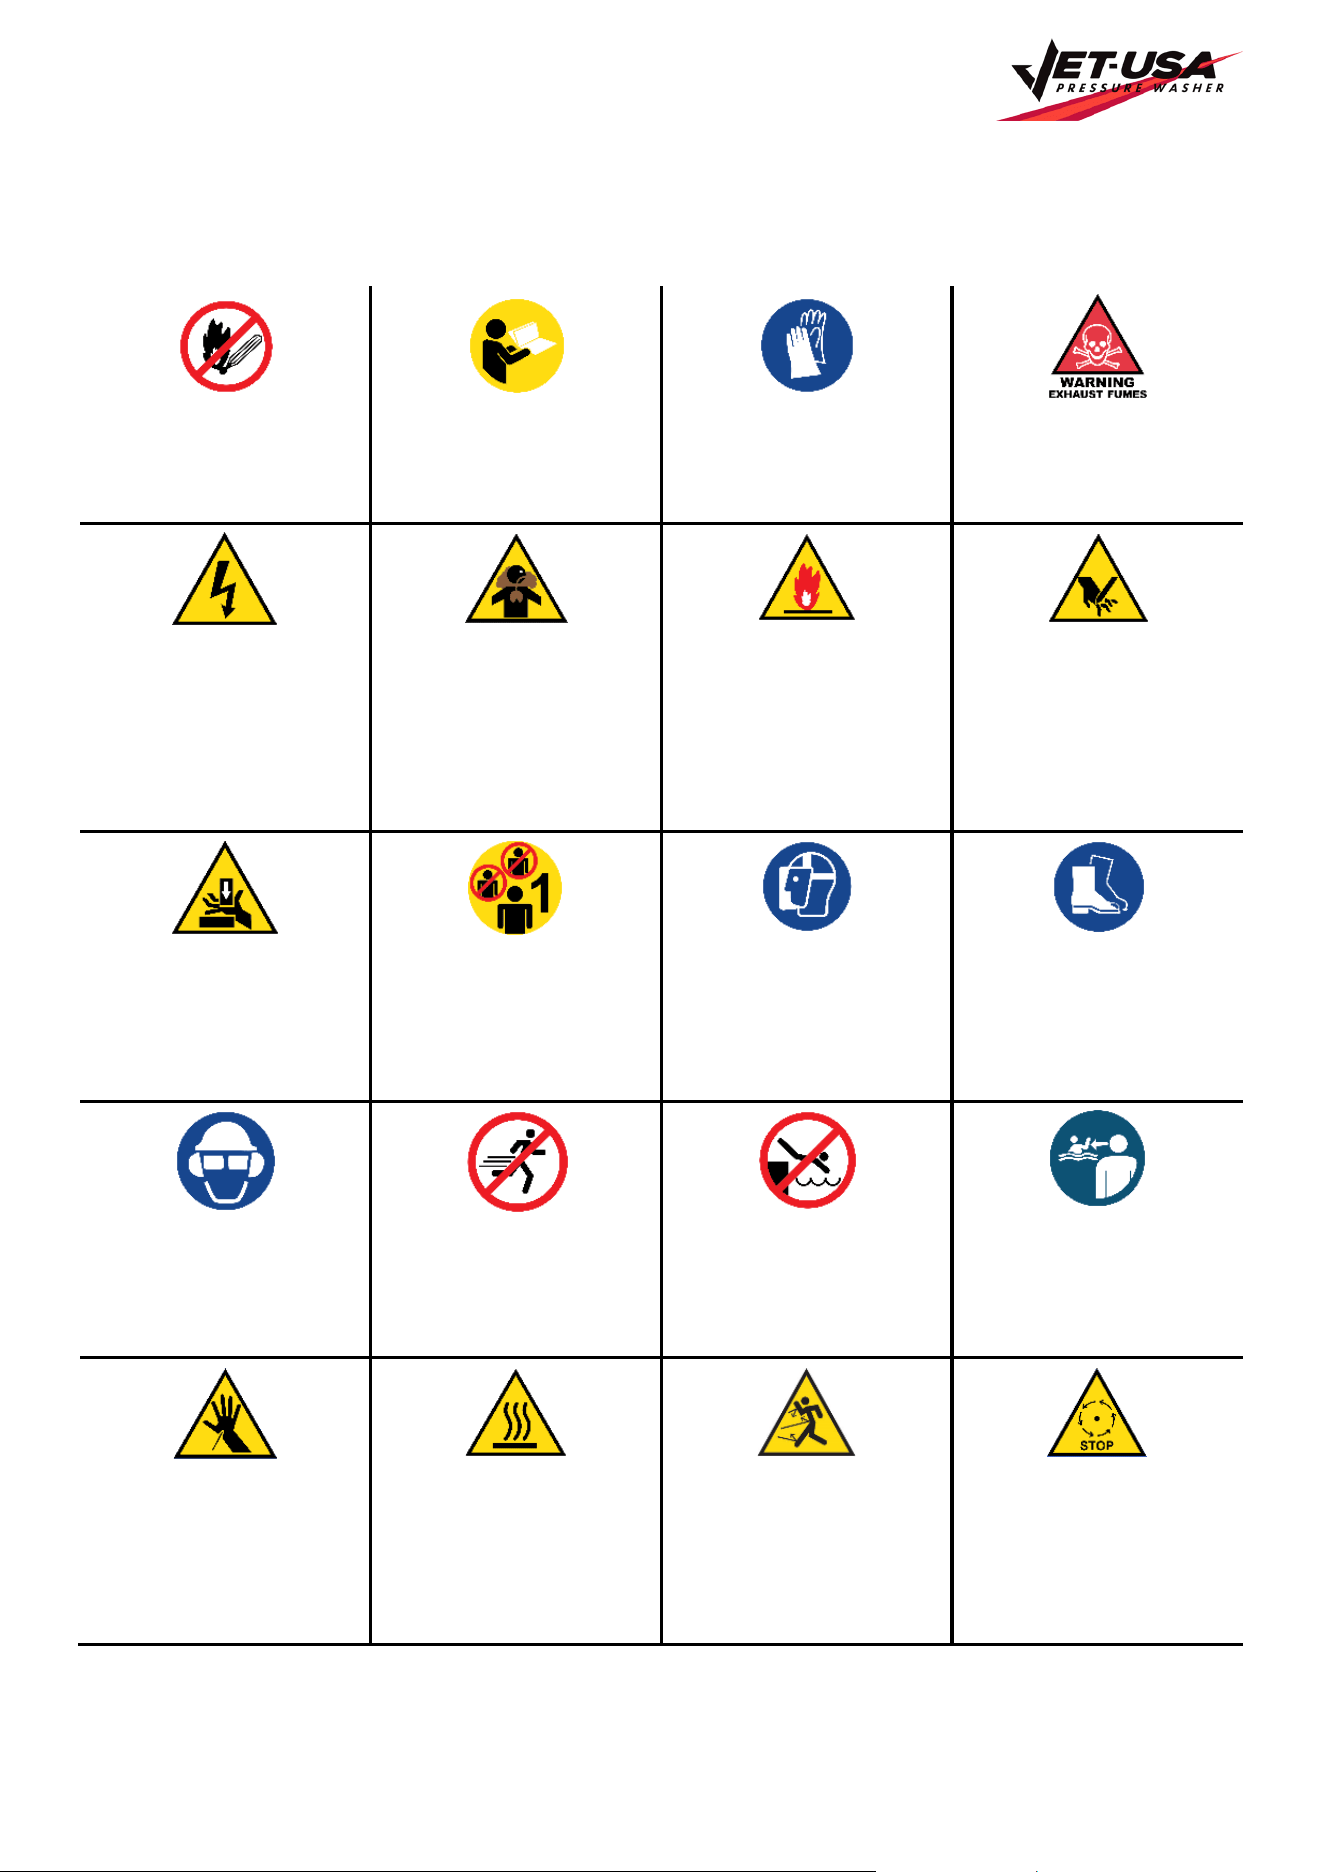
Safety Symbols
The product may have safety warning labels attached to it, explained below. Understand the symbols on your
product and their meanings. If any stickers become unreadable, unattached etc., replace them.
Flammable Material Hazard
Flammable liquids, gases or
substances etc may present.
Avoid ignition sources and open
flames. Danger of fire.
Read User Manual
Read and fully understand
product safety warnings,
operation, procedures etc before
using the product.
Use Hand Protection
Wear appropriate hand protection
and take due care as the product
or use of the product may present
hand hazards.
Carbon-Monoxide Hazard
Do not use the product in
confined areas or without
adequate ventilation. Carbon-
monoxide poisoning can be fatal.
Electrocution / Electrical Shock
Hazard
High voltage or high current
electricity may be present or
required by the product. Take
due care when handling electrical
products, cables, plugs and
leads. Electrical shock can be
fatal.
Toxic Fumes / Dust Hazard
Using the product or by-products
from use may produce fumes,
smoke or particles that could be
harmful if inhaled. Wear
appropriate breathing protection
and have adequate ventilation.
Explosive Material Hazard
Combustible liquids, gases or
substances etc may be present.
Avoid ignition sources and open
flames. Danger of explosion.
Cutting / Amputation Hazard
The product may have blades,
edges or mechanical devices that
can cause severe cut injury to
fingers, limbs etc. Take due care
when handling and using the
product.
Crush Hazard
The product may have blades,
edges or mechanical devices that
can cause severe crush injury to
fingers, limbs etc. Take due care
when handling and using the
product.
Single Operator Only
The product must be operated by
a single person only. More than
one person operating the product
may introduce additional hazards.
Use Face Protection
Wear appropriate full-face
protection and take due care as
the product or use of the product
may present face and eye
hazards.
Use Foot Protection
Wear appropriate foot protection
and take due care as the product
or use of the product may present
foot hazards.
Use Eye / Ear / Head Protection
Wear appropriate eye and / or
ear and / or head protection and
take due care as the product or
use of the product may present
eye, hearing and head hazards.
Running Hazard
Do not run on or near the product
as doing so may present a fall
hazard.
Diving Hazard
Do not dive into the product as
doing so may present a neck /
head injury hazard.
Adult Supervision Required
Always supervise children and
other users of a product to
prevent drowning or injury.
Skin Penetration / Puncture
Hazard
The product may produce
pressure, emit liquids or objects
that can cause severe injury to
fingers, limbs, blood etc. Take
due care when handling and
using the product.
Hot Surface Hazard
Be aware that the product may
produce high temperatures and
hot surfaces that can cause burn
injuries.
Flying Debris Hazard
Be aware that the product or use
of the product may present
hazards produced by flying
debris. Wear appropriate clothing
and protective devices.
Moving Parts Hazard
Be aware that the product
contains or uses mechanical
devices that move or rotate.
Always wait for moving parts to
stop fully before handling the
product, adjusting, maintenance
etc.
Petrol-Powered Pressure Cleaner Washer - CX660
E&OE © Jet-USA 6
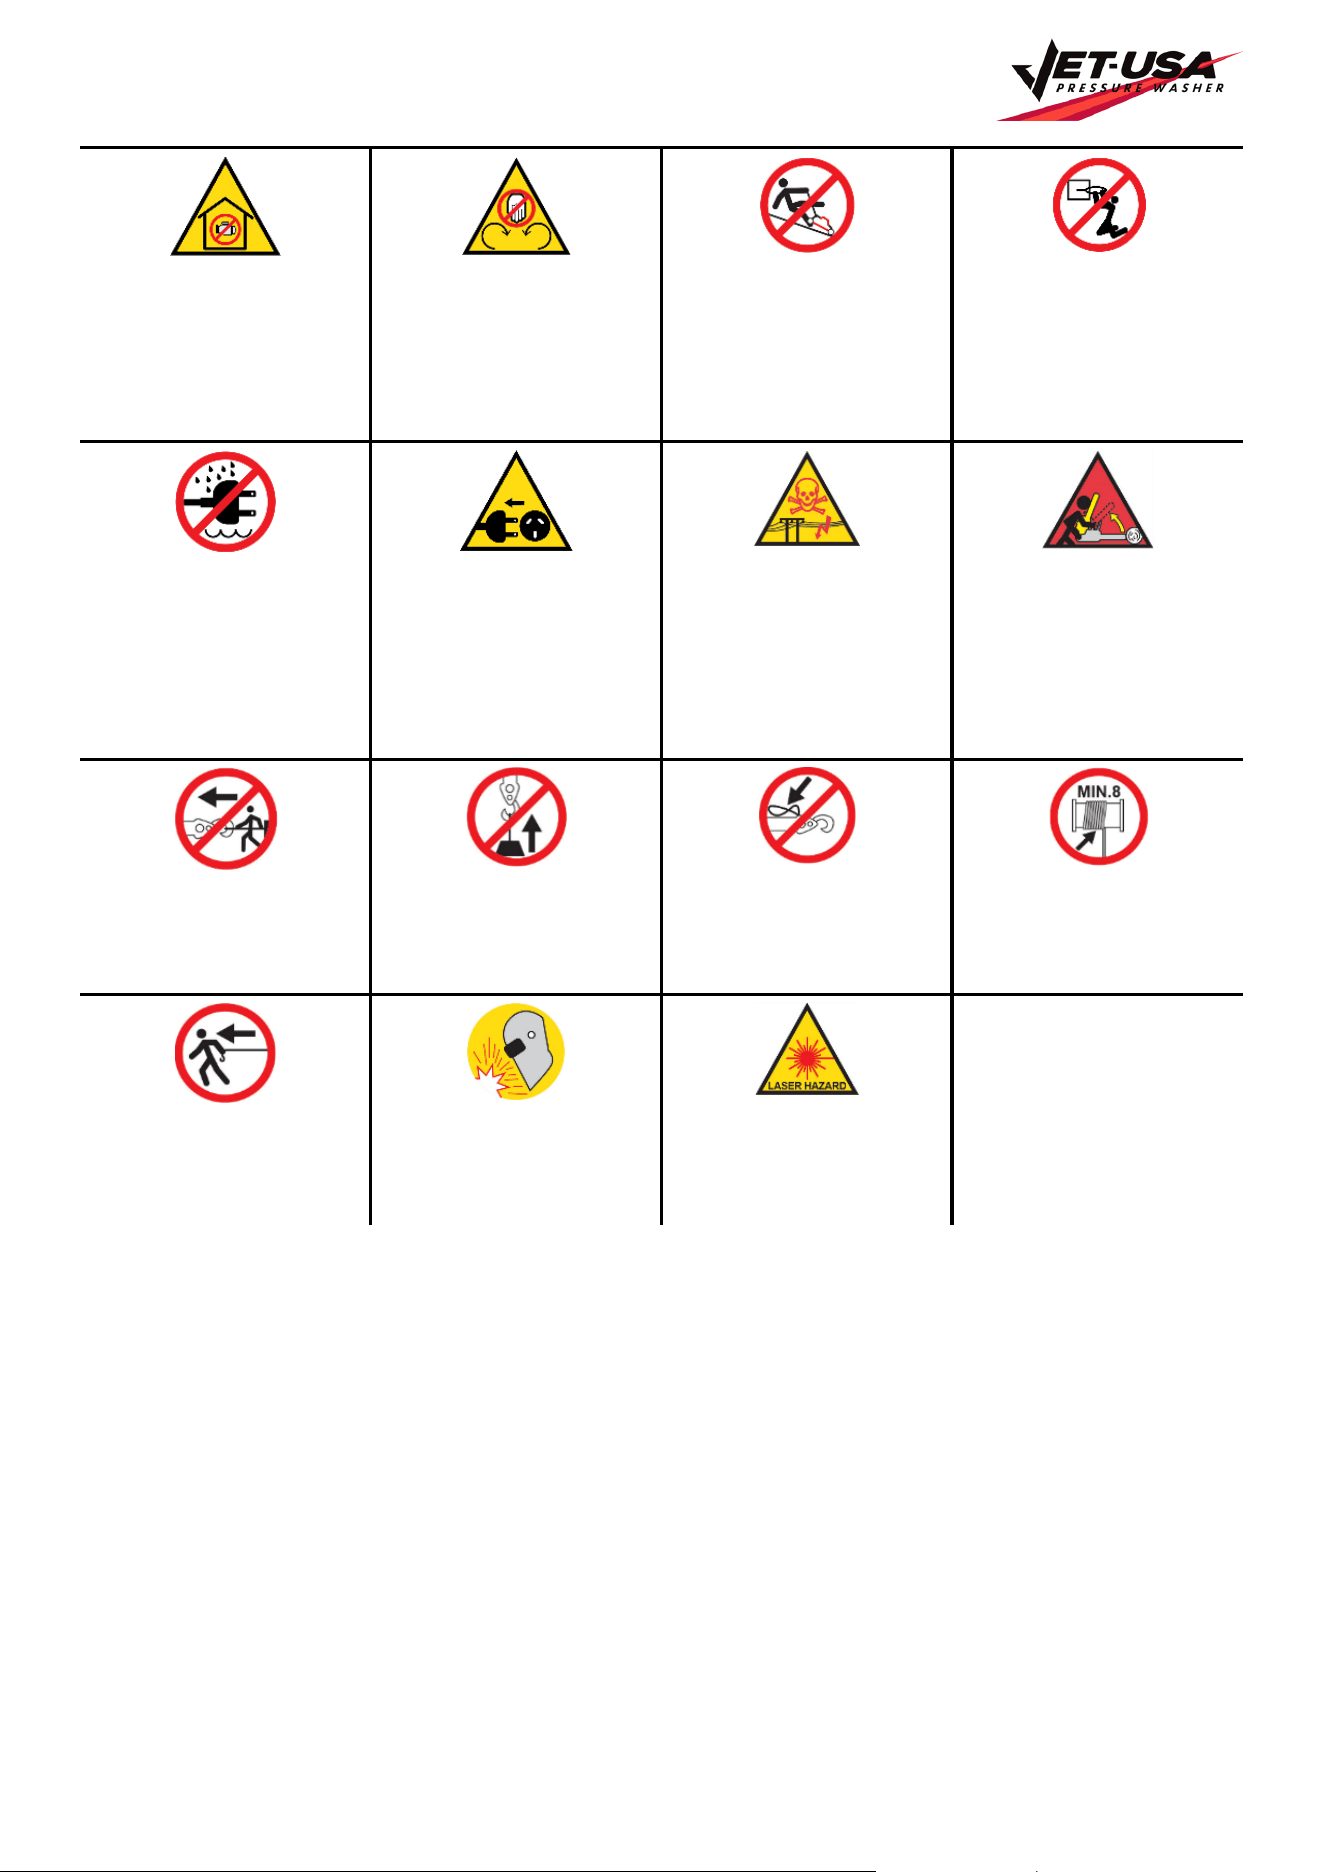
Carbon-Monoxide Hazard
Do not use the product in
confined areas or without
adequate ventilation. Carbon-
monoxide poisoning can be fatal.
Pull Hazard
Be aware that the product
contains or uses mechanical
devices that can pull in objects
and can cause severe injury to
fingers, limbs etc. Take due care
when handling and using the
product.
Slope / Fall Injury Hazard
Be aware that using the product
on sloping surfaces or in slippery
conditions may present additional
dangers from falls and contact
with blades, moving parts, hot
surfaces etc.
"Slam Dunk" Warning
Do NOT attempt "slam dunk"
manoeuvres as this may result in
severe injury due to falling,
product breakage or collapse etc.
Electrocution / Electrical Shock
Hazard - Outdoor
High voltage or high current
electricity may be present or
required by the product. Do NOT
use in rain, damp or wet
conditions. Electrical shock can
be fatal.
Electrocution / Electrical Shock
Hazard - Disconnect
High voltage or high current
electricity may be present or
required by the product. Always
disconnect the product from the
electrical supply before handling
the product, adjusting,
maintenance etc.
Power Line Electrocution
Hazard
High voltage / high current power
lines may be present. Use
extreme caution to avoid contact
or interference with power lines.
Electrical shock can be fatal.
"Kick-Back" Hazard
High level of "kick-back" hazard
that can cause the machine to
suddenly rotate towards operator.
Kick-back injury can be fatal.
Winch Operator Position
Hazard
Do NOT stand between winch
and load. Do NOT use winch to
move people.
Winch Lift Hazard
Do NOT LIFT load vertically. Use
machine to PULL only.
Cable Hazard
Ensure that load bearing cable is
not kinked or knotted.
Winch Cable Hazard
Ensure that there is a minimum
number of cable coils on
winching mechanism.
Winch Hook Hazard
Carry hook to load – do NOT
throw or run.
Flash / Blinding Hazard
Wear appropriate eye protection
for welding. Direct exposure to
weld arcs may cause permanent
eye injury.
Laser Hazard
Laser may be in use – do NOT
look directly at laser or allow
others to.

Petrol-Powered Pressure Cleaner Washer - CX660
E&OE © Jet-USA 7
Table of Contents
Safety ....................................................................................................................................................................... 2
Safety Symbols .................................................................................................................................................... 5
Parts Identification ................................................................................................................................................. 9
Spare Parts ............................................................................................................................................................ 10
Assembly ............................................................................................................................................................... 11
Attaching the Foot Assembly.............................................................................................................................. 11
Installing the Handle .......................................................................................................................................... 12
Attaching the Upper and Lower Gun Hooks........................................................................................................ 12
Attaching the Accessory Hook............................................................................................................................ 13
Attaching the Spray Gun .................................................................................................................................... 13
Adding / Checking the Engine Oil ....................................................................................................................... 13
Adding Fuel ....................................................................................................................................................... 14
Connecting a Garden Hose to the Pressure Washer .......................................................................................... 14
Connecting the High-Pressure Hose to the Pump............................................................................................... 15
Operation ............................................................................................................................................................... 16
Pre-Operation Checklist ..................................................................................................................................... 16
Starting the Pressure Washer ............................................................................................................................ 16
Stopping the Pressure Washer........................................................................................................................... 17
Using the Spray Gun.......................................................................................................................................... 18
Using the Spray Nozzles .................................................................................................................................... 18
Applying Detergent ............................................................................................................................................ 19
Rinsing with the Pressure Washer...................................................................................................................... 19
Moving the Pressure Washer ............................................................................................................................. 19
Maintenance .......................................................................................................................................................... 20
Maintenance Schedule ...................................................................................................................................... 20
Pre-Operation Steps .......................................................................................................................................... 20
After Each Use .................................................................................................................................................. 20
Checking the Oil ................................................................................................................................................ 21
Changing the Oil ................................................................................................................................................ 21
Air Filter Maintenance ........................................................................................................................................ 22
Draining the Fuel Tank ....................................................................................................................................... 22
Draining the Soap .............................................................................................................................................. 23
Spark Plug Maintenance .................................................................................................................................... 23
Checking the Detergent Siphoning Tube ............................................................................................................ 24
Checking the High-Pressure Hose ..................................................................................................................... 24
Checking the Spray Gun .................................................................................................................................... 24
Checking the Spray Nozzle ................................................................................................................................ 24
Hose Care ......................................................................................................................................................... 24
Storage and Transportation ................................................................................................................................ 25

Petrol-Powered Pressure Cleaner Washer - CX660
E&OE © Jet-USA 8
Troubleshooting ................................................................................................................................................... 26
Specifications ....................................................................................................................................................... 27
Petrol-Powered Pressure Cleaner Washer - CX660
E&OE © Jet-USA 9
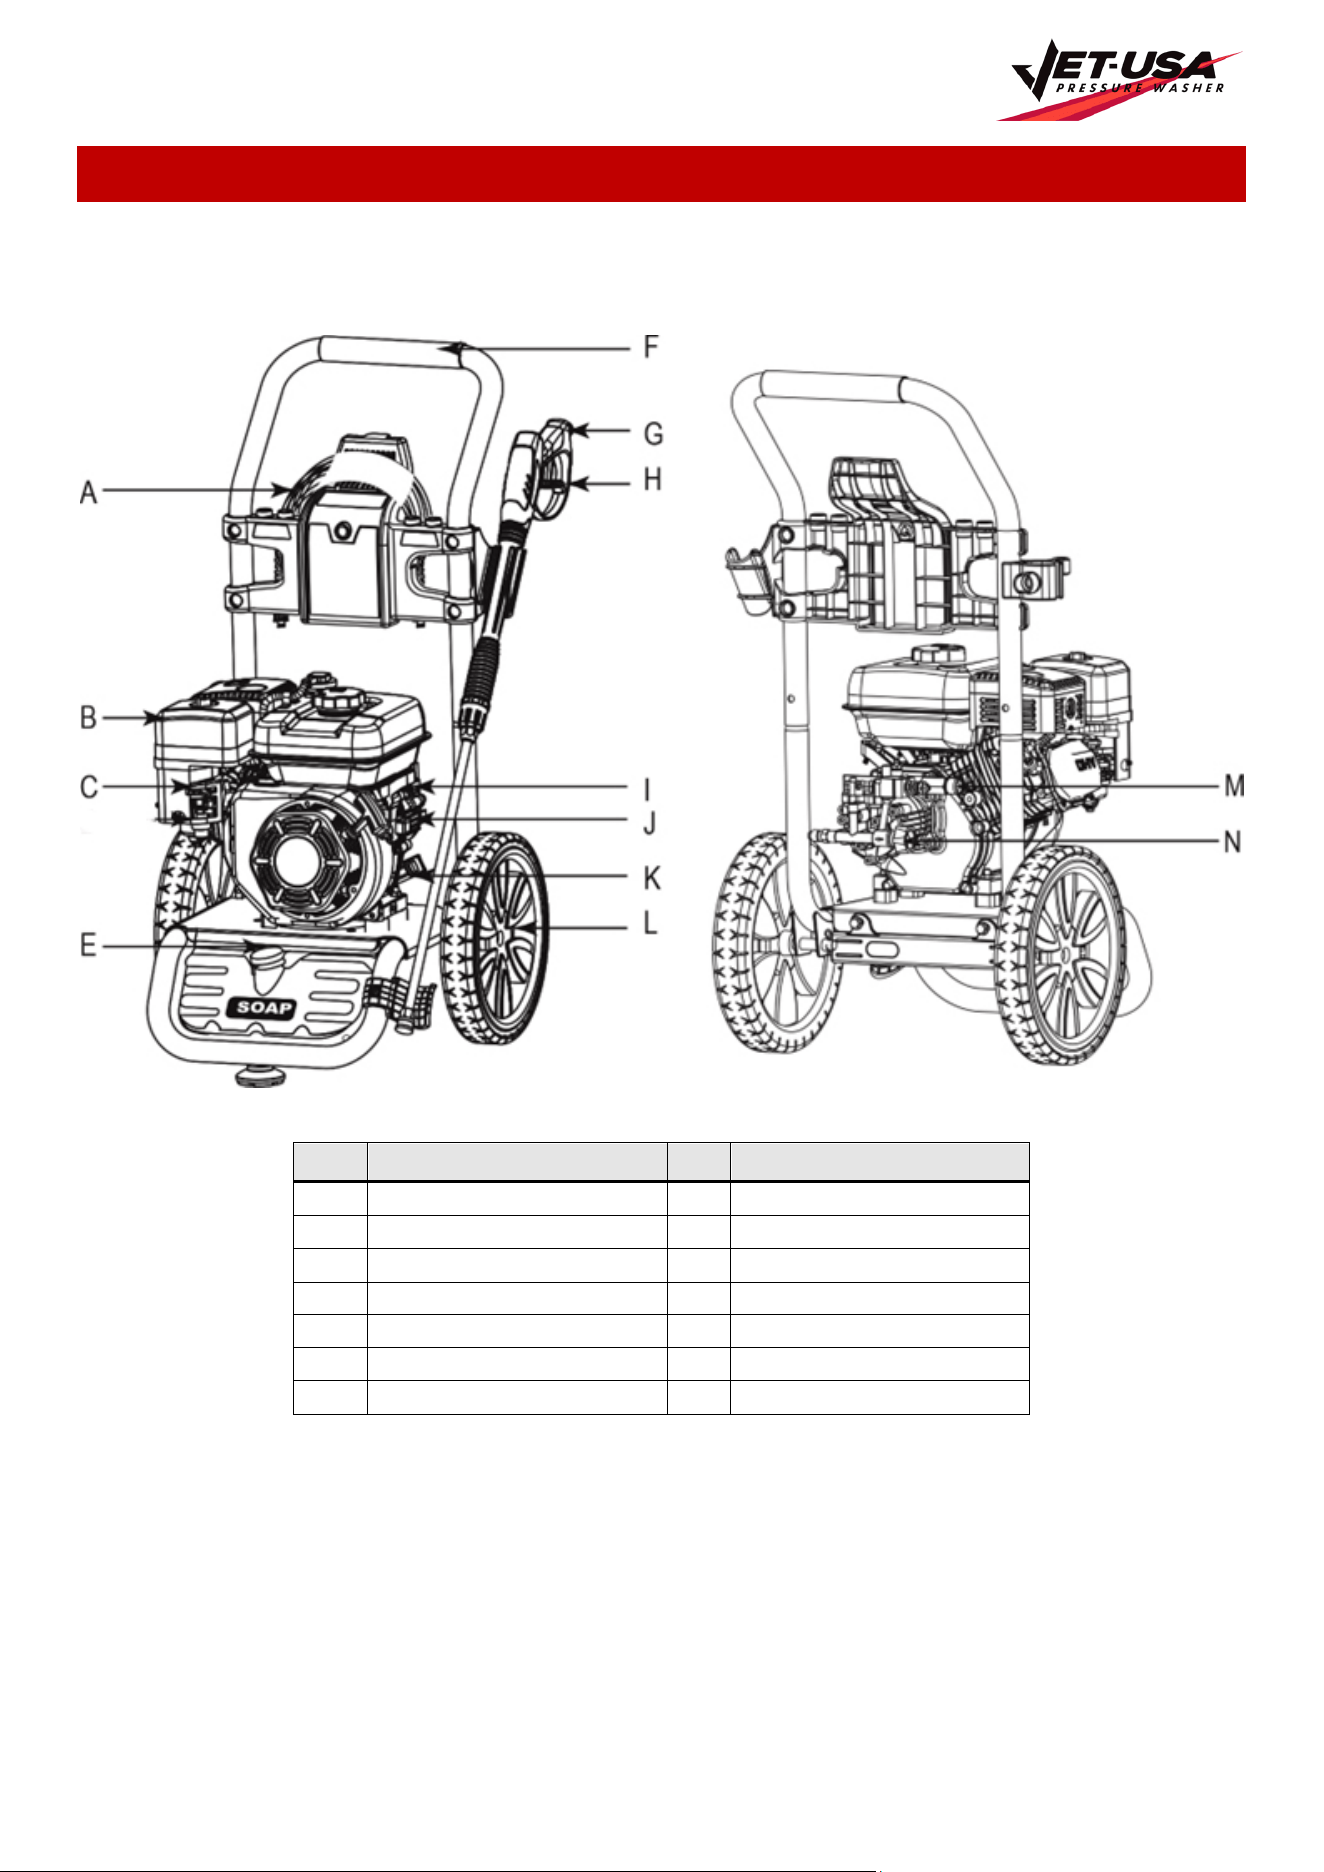
Parts Identification
Use the illustrations below to become familiar the locations and functions of the various components and
controls of this pressure washer.
No. Name No. Name
A
High Pressure Hose
H
Locking Trigger
B Fuel Tank I Pull Cord
C
Choke
J
Engine Switch
D
-
K
Dipstick
E Soap Tank L No-Flat Foam-Filled Tyres
F
Handle
M
High Pressure Hose Outlet
G
Spray Gun
N
Water Inlet
Petrol-Powered Pressure Cleaner Washer - CX660
E&OE © Jet-USA 10
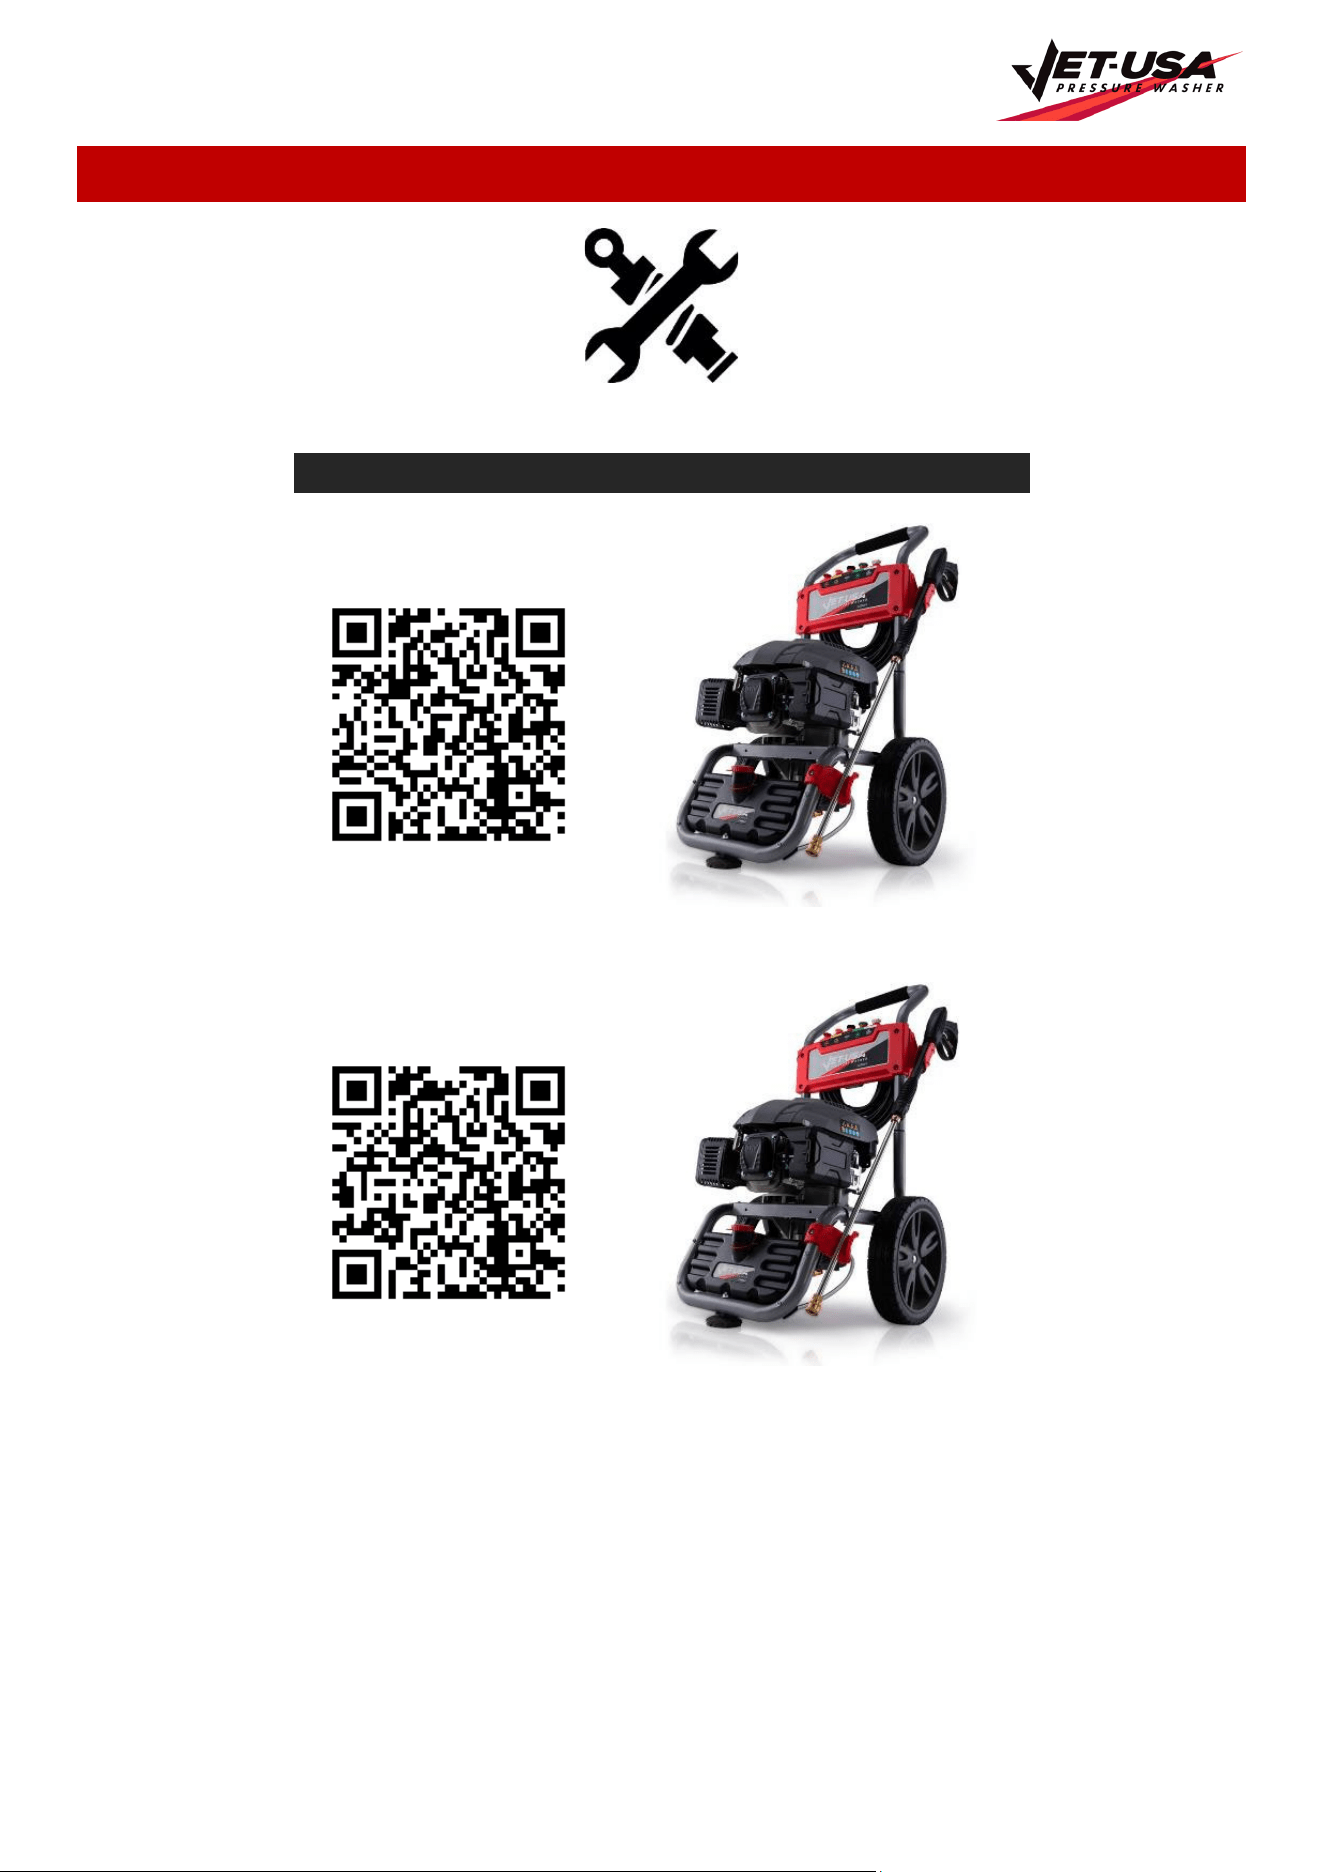
Spare Parts
Spare parts available for purchase, scan QR codes below:
QR Code SKU
PRWPTLJETE660
PRWPTLJETE660-KIT
Petrol-Powered Pressure Cleaner Washer - CX660
E&OE © Jet-USA 11
Assembly
Do not attempt to assemble or operate this pressure washer until you have read and
understood this entire manual. If you have any problems assembling or operating this
unit, please contact an authorised dealer or service centre.
Do not operate this pressure washer if any of the parts are damaged or missing until the part is
replaced. Using this product with damaged or missing parts can cause damage to the machine or result
in serious injury or death.
Open the packaging and take out all loose parts from the box. Make sure all the components are accounted for
before discarding the packaging. If any part is missing or broken, please contact an authorised dealer or service
centre.
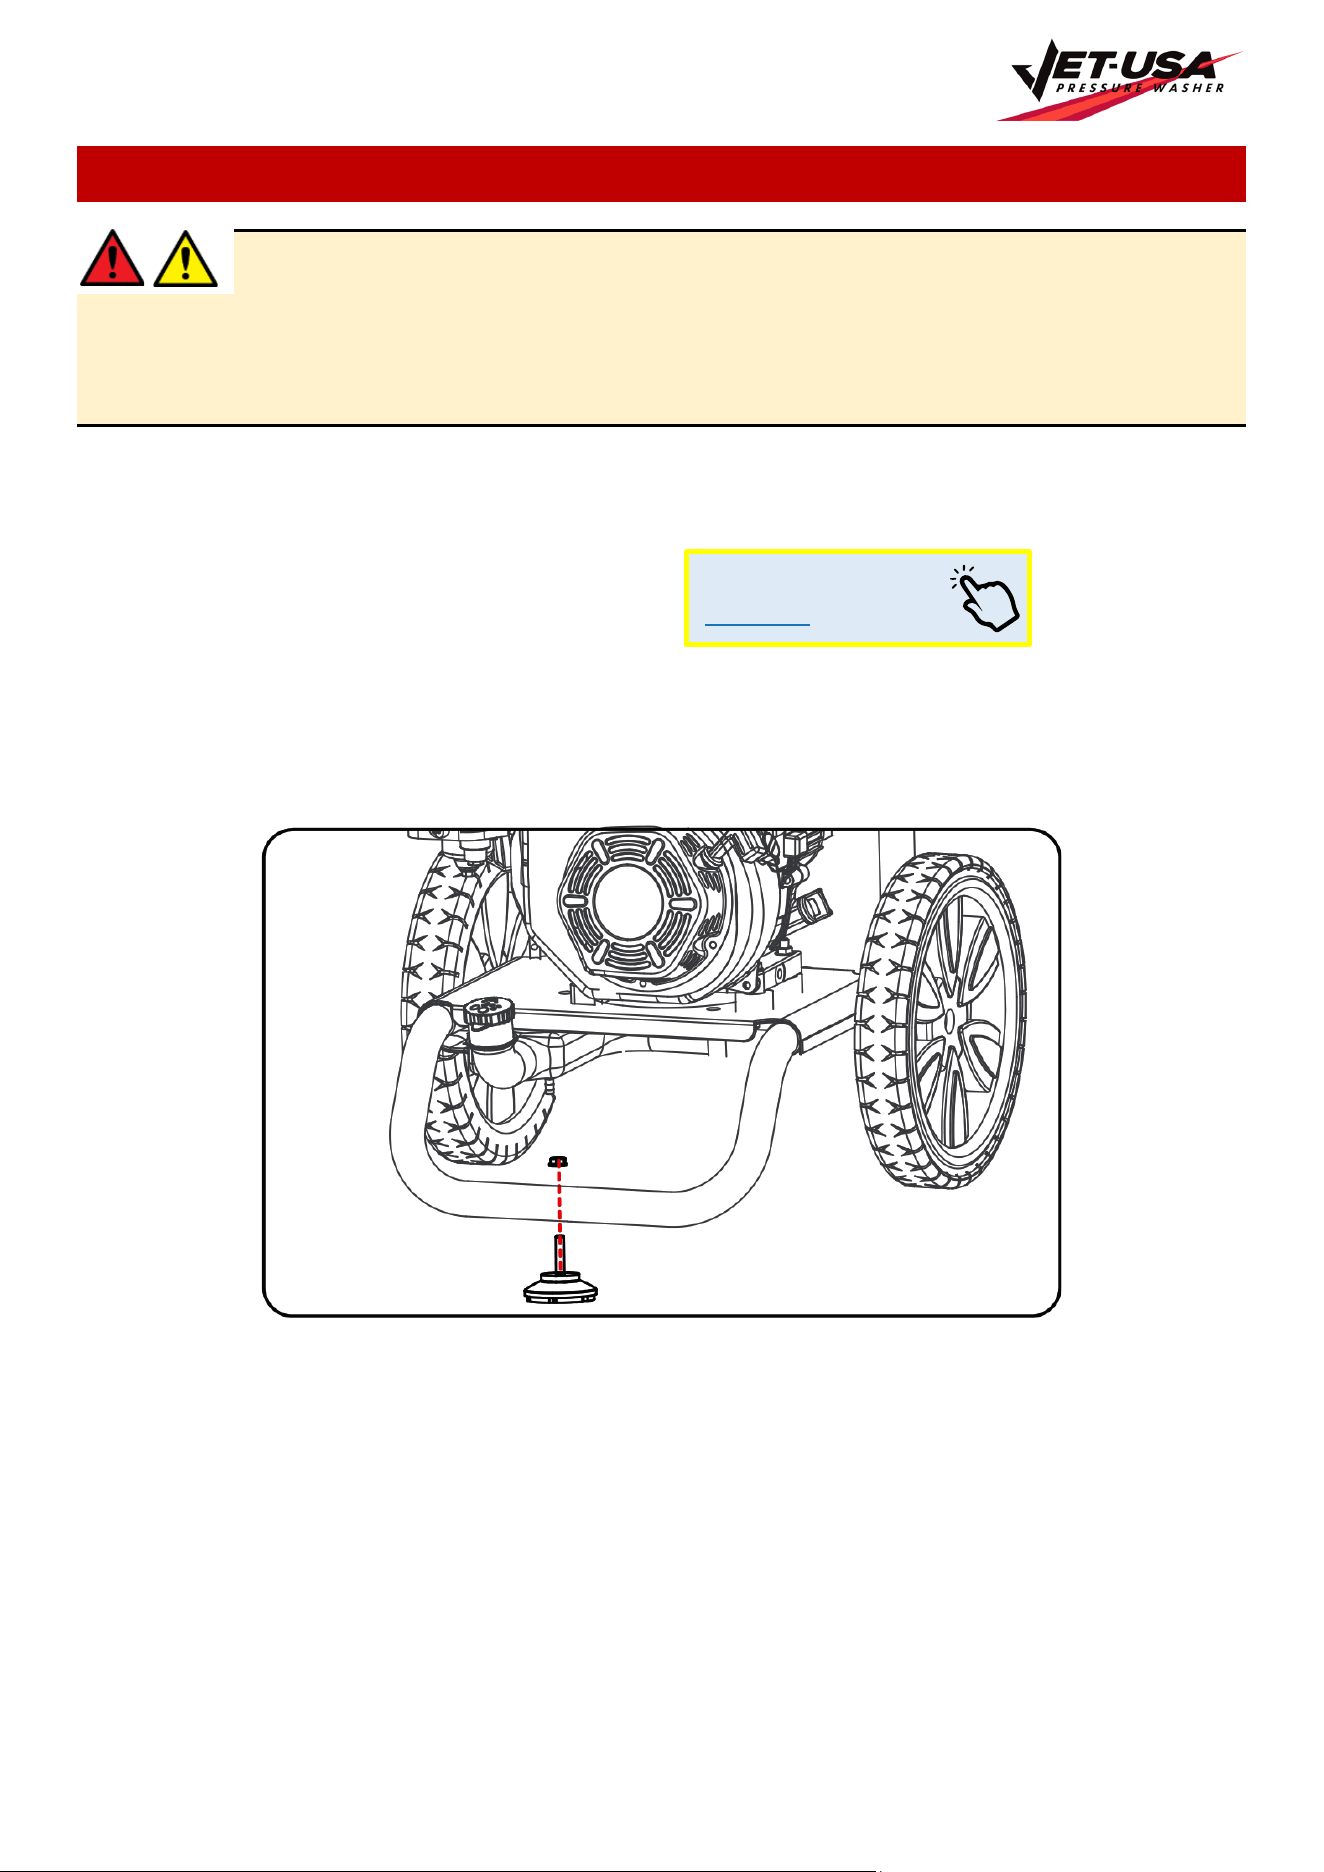
Attaching the Foot Assembly
PARTS NEEDED: 1 foot, 1 M8 lock nuts
1. Raise or tilt pressure washer so you can line up foot with the hole located at the centre of the frame.
2. Align the rubber foot with the hole in the frame where the foot is to be located. Attach foot by inserting the
bolt from the bottom up and install the acorn nut. Wrench-tighten until there is a slight crush on the frame
tube. (Do not over tighten).
Video Tutorial:
Assembly
Petrol-Powered Pressure Cleaner Washer - CX660
E&OE © Jet-USA 12
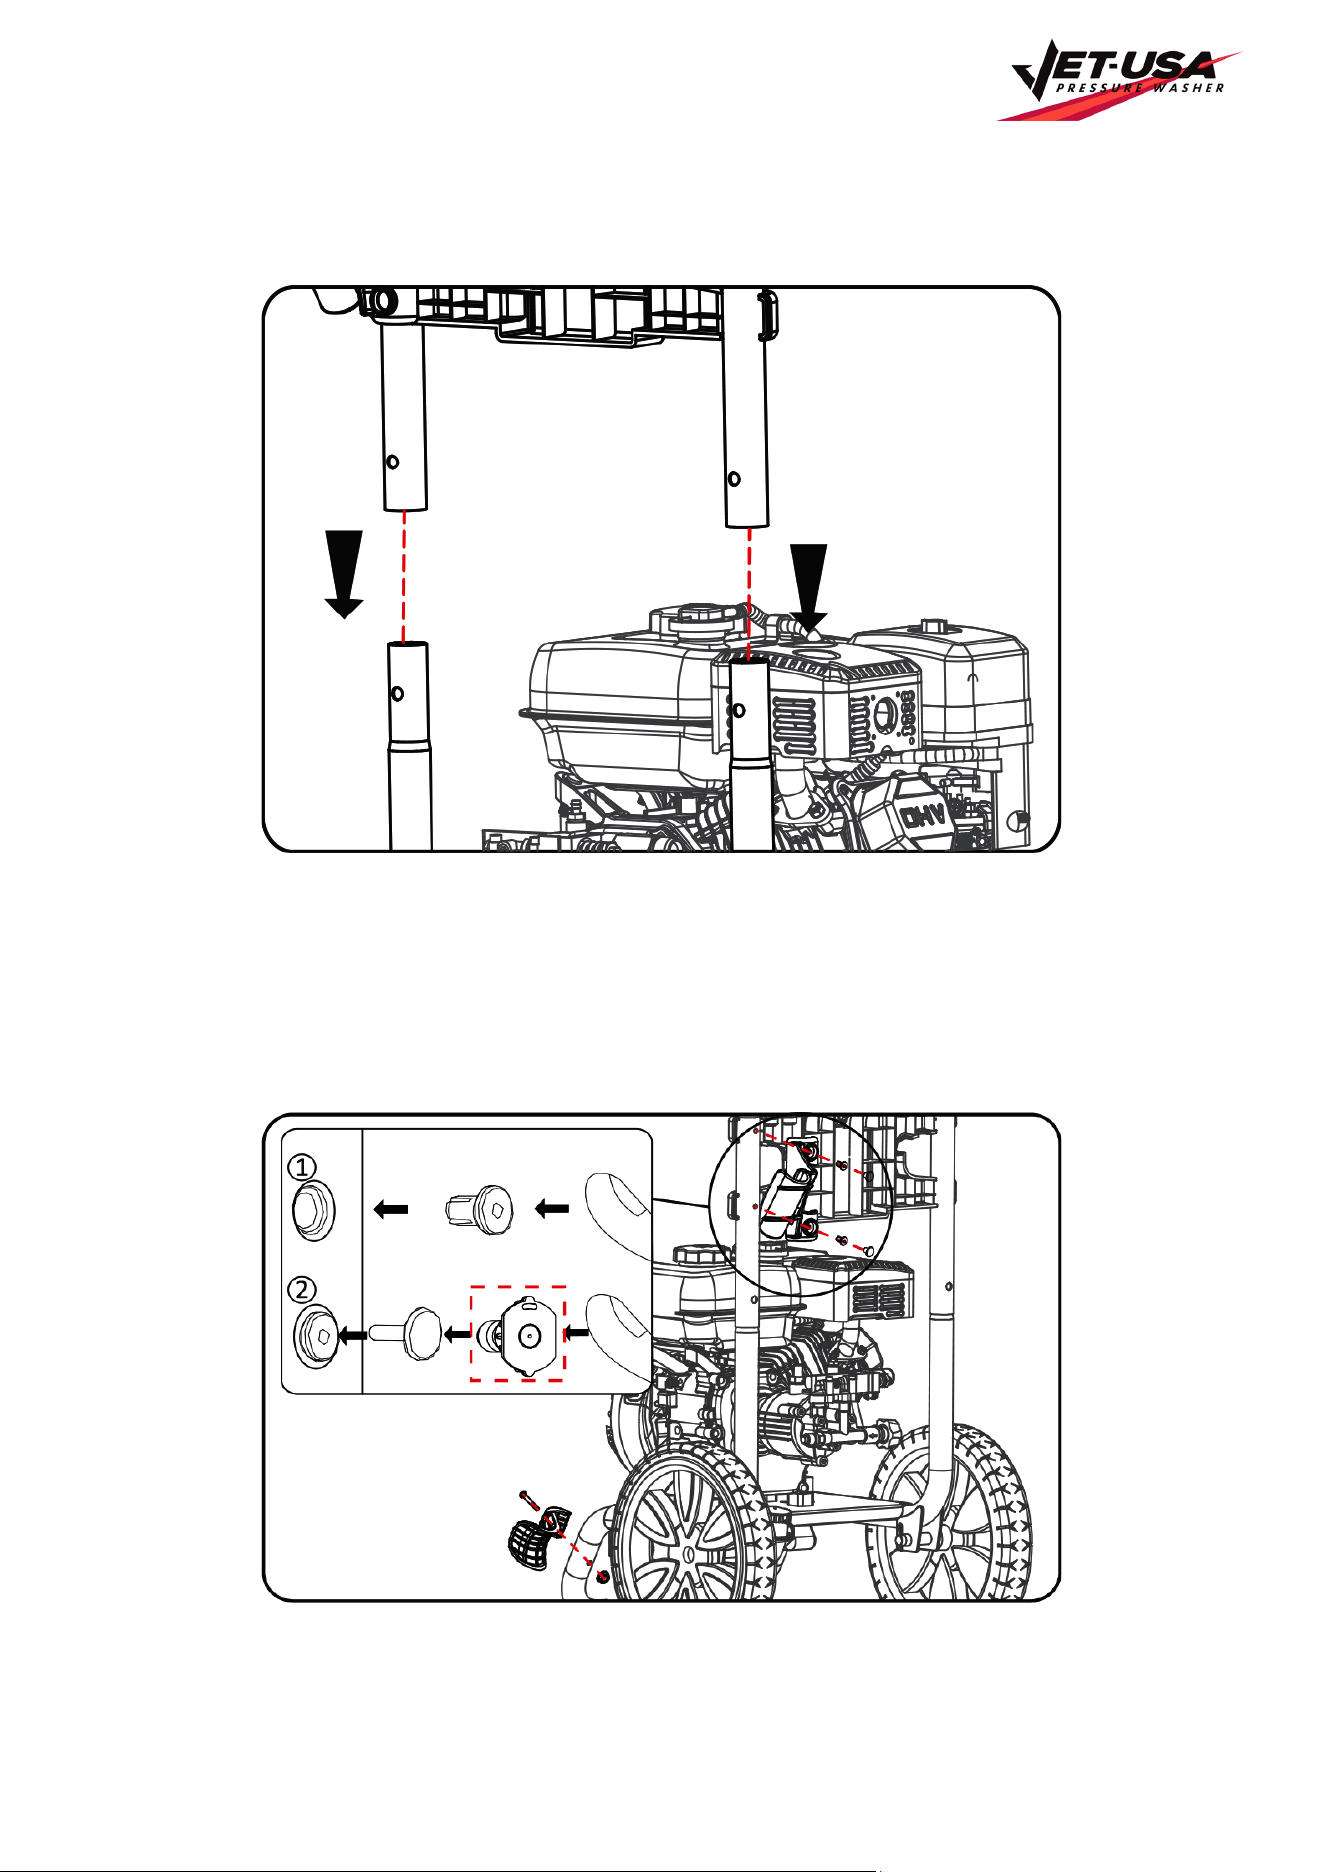
Installing the Handle
Install upper frame (handle) onto the lower frame by sliding the handle over the two upright tubes on the lower
frame and pressing down firmly until the handle is seated and the two detent pins snap in place.
Attaching the Upper and Lower Gun Hooks
1. Attach the upper gun hook, install two plastic rivets, until the plastic rivets are snug, you may need to tap
with a mallet or small hammer to seat the lock pin (If you don’t have a mallet or hammer, you can use one of
the pressure nozzles to push in the rivet, as shown in the image below).
2. Attach the lower gun hook, install the M6 screw & lock nut, wrench tighten until the nut is snug, do not over
tighten.
Petrol-Powered Pressure Cleaner Washer - CX660
E&OE © Jet-USA 13
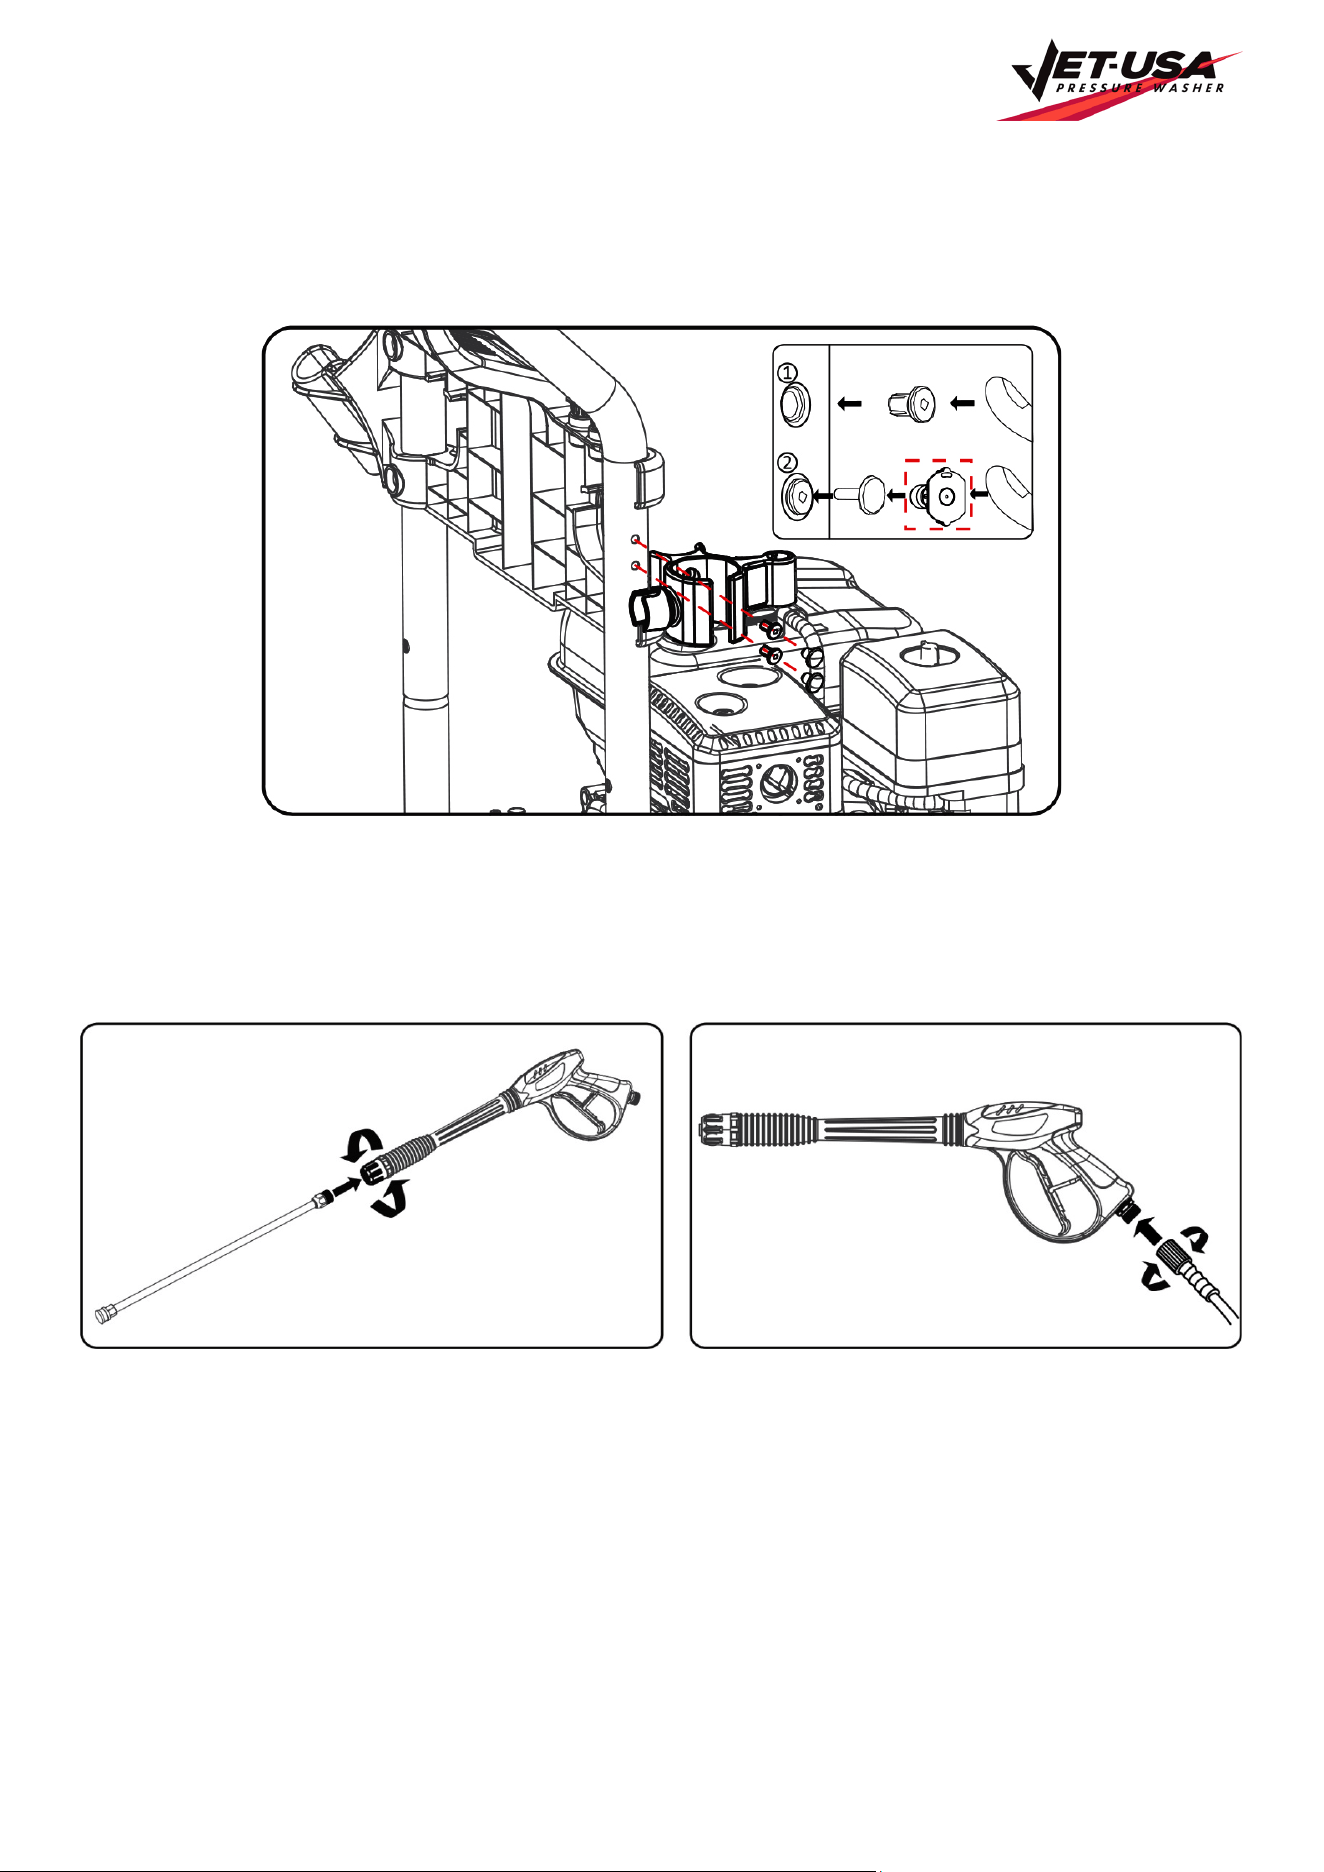
Attaching the Accessory Hook
1. Attach the accessory hook.
2. Install two plastic rivets, until the plastic rivet is snug.
3. You may need to tap with a mallet or small hammer to seat the lock pin.
Attaching the Spray Gun
1. Screw the spray wand and the trigger handle together until they are secure.
2. Insert the inlet coupler of the spray hose into the threaded fitting on the high-pressure spray gun and thread
the black nut on by turning clockwise until it is hand tight.
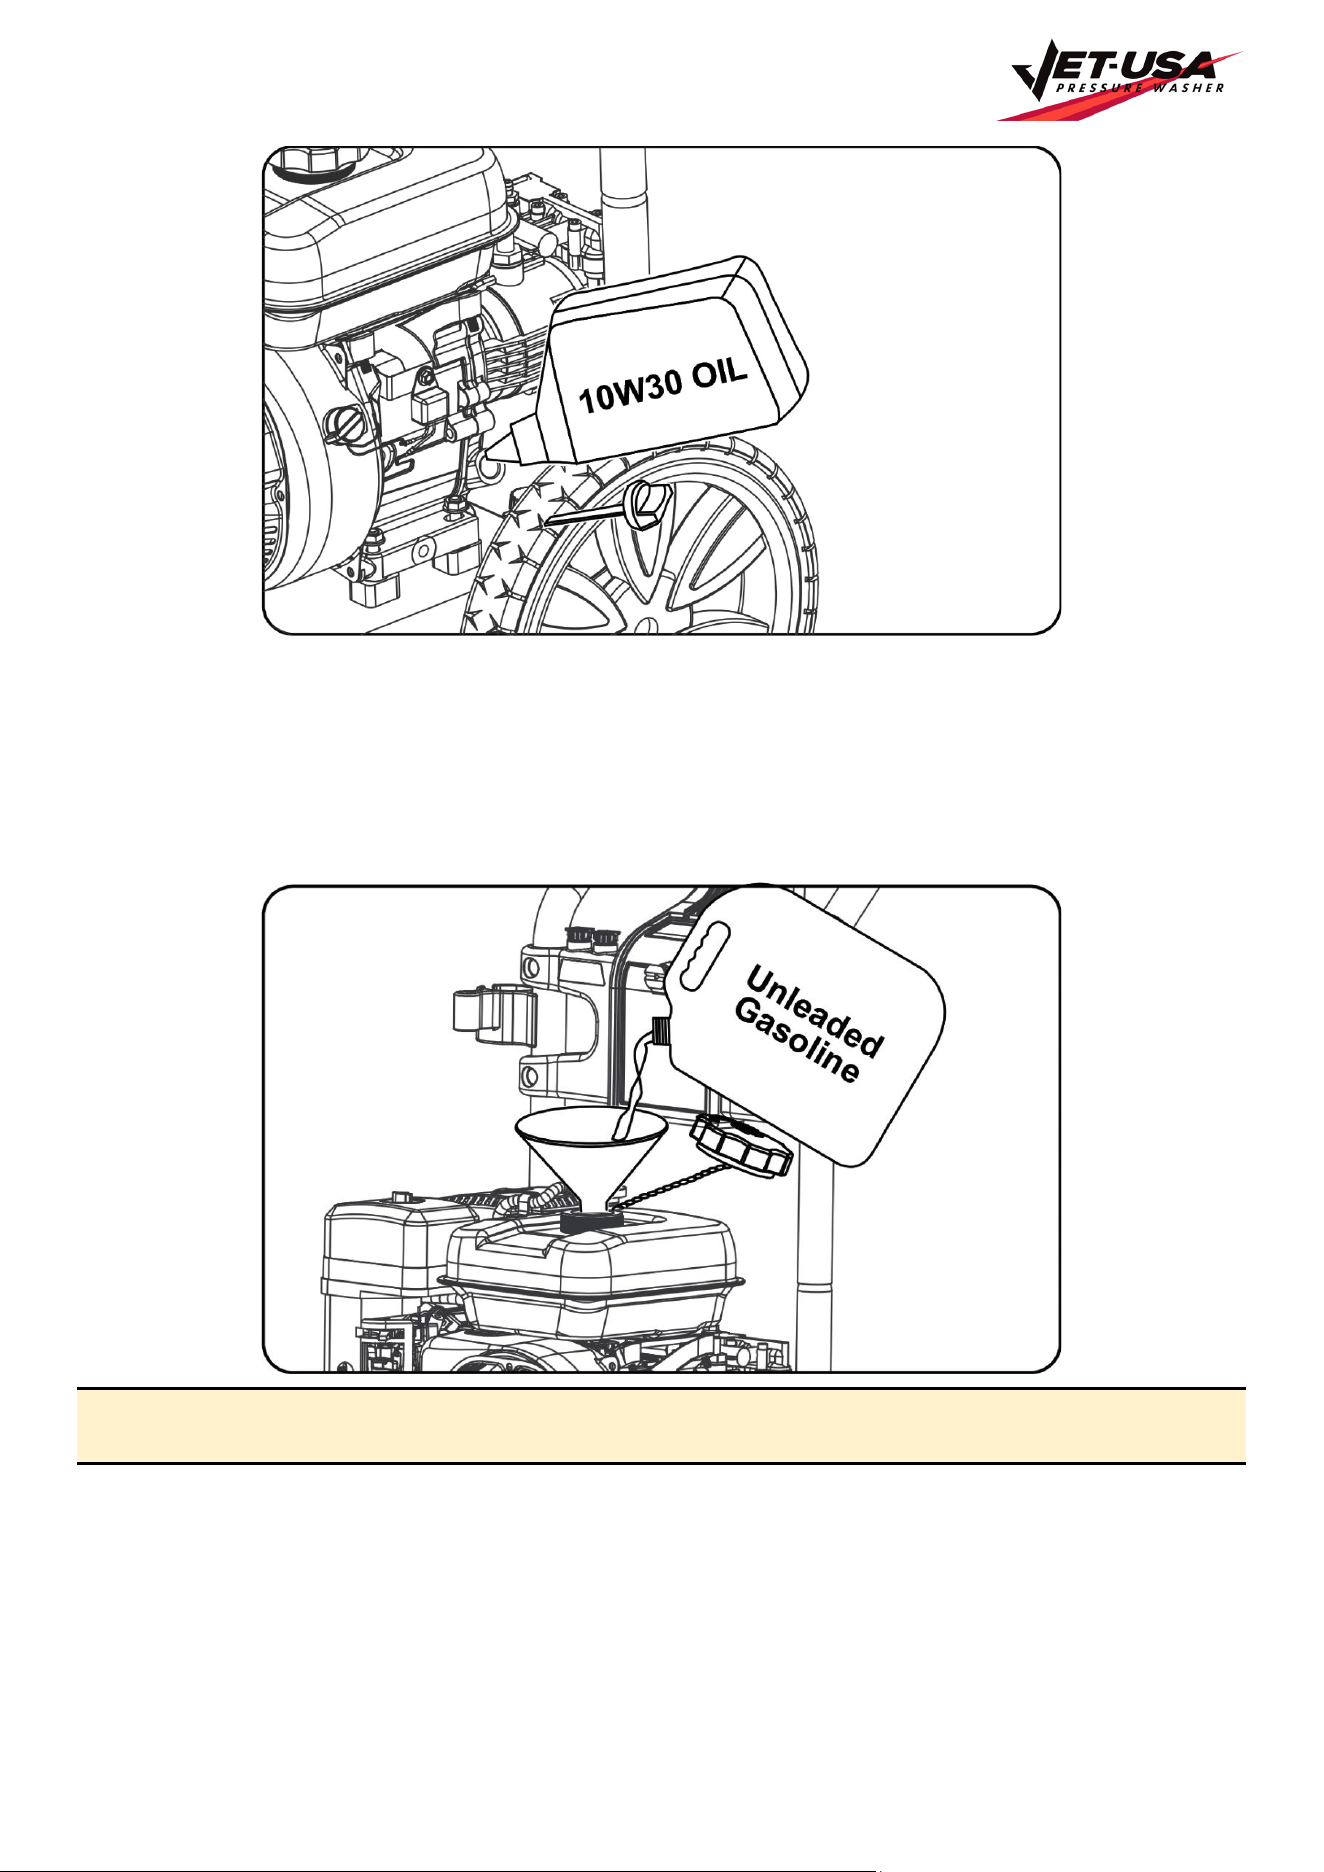
Adding / Checking the Engine Oil
1. Place pressure washer on a level surface.
2. Remove one or both of the crankcase dipsticks to ensure you do not overfill the engine.
3. Carefully add between 520 ml (17.6 oz) of 4-Cycle engine oil (SAE10W30) to empty reservoir until oil
reaches the outer edge of the oil fill hole (Crankcase Dipstick hole).
4. Be sure to replace both dipsticks before attempting to start the engine.
5. To check oil, set pressure washer on a level surface, wipe dipstick clean, then reinsert dipstick without re-
threading.
Petrol-Powered Pressure Cleaner Washer - CX660
E&OE © Jet-USA 14
Adding Fuel
1. Set pressure washer on a clean and level surface in an area that is well ventilated.
2. Remove fuel cap.
3. Insert a funnel into the fuel tank and carefully pour gasoline into the tank until fuel level reaches 1 1/2 inches
below the top of the neck.
CAUTION! Oil must be added to unit prior to first use. To avoid spillage, do not overfill fuel tank as
gasoline expands.
Connecting a Garden Hose to the Pressure Washer
1. Run water through the hose for a few seconds to flush any debris from the hose.
2. Inspect inlet screen and remove any debris.
3. Connect hose to water inlet and tighten by hand. There must be a minimum of 10 feet of unrestricted hose
between pressure washer and faucet or shut off valve.
4. Turn on water.
Petrol-Powered Pressure Cleaner Washer - CX660
E&OE © Jet-USA 15
5. Purge the system’s pump of air by releasing the safety and squeezing the trigger of the spray gun.
CAUTION! Do not run pump without connecting to the water supply and turning water on. Failure to do
so could damage the pressure washer. Failure to follow these instructions will void product warranty.
The unit is not suitable for use with a drinking water supply!
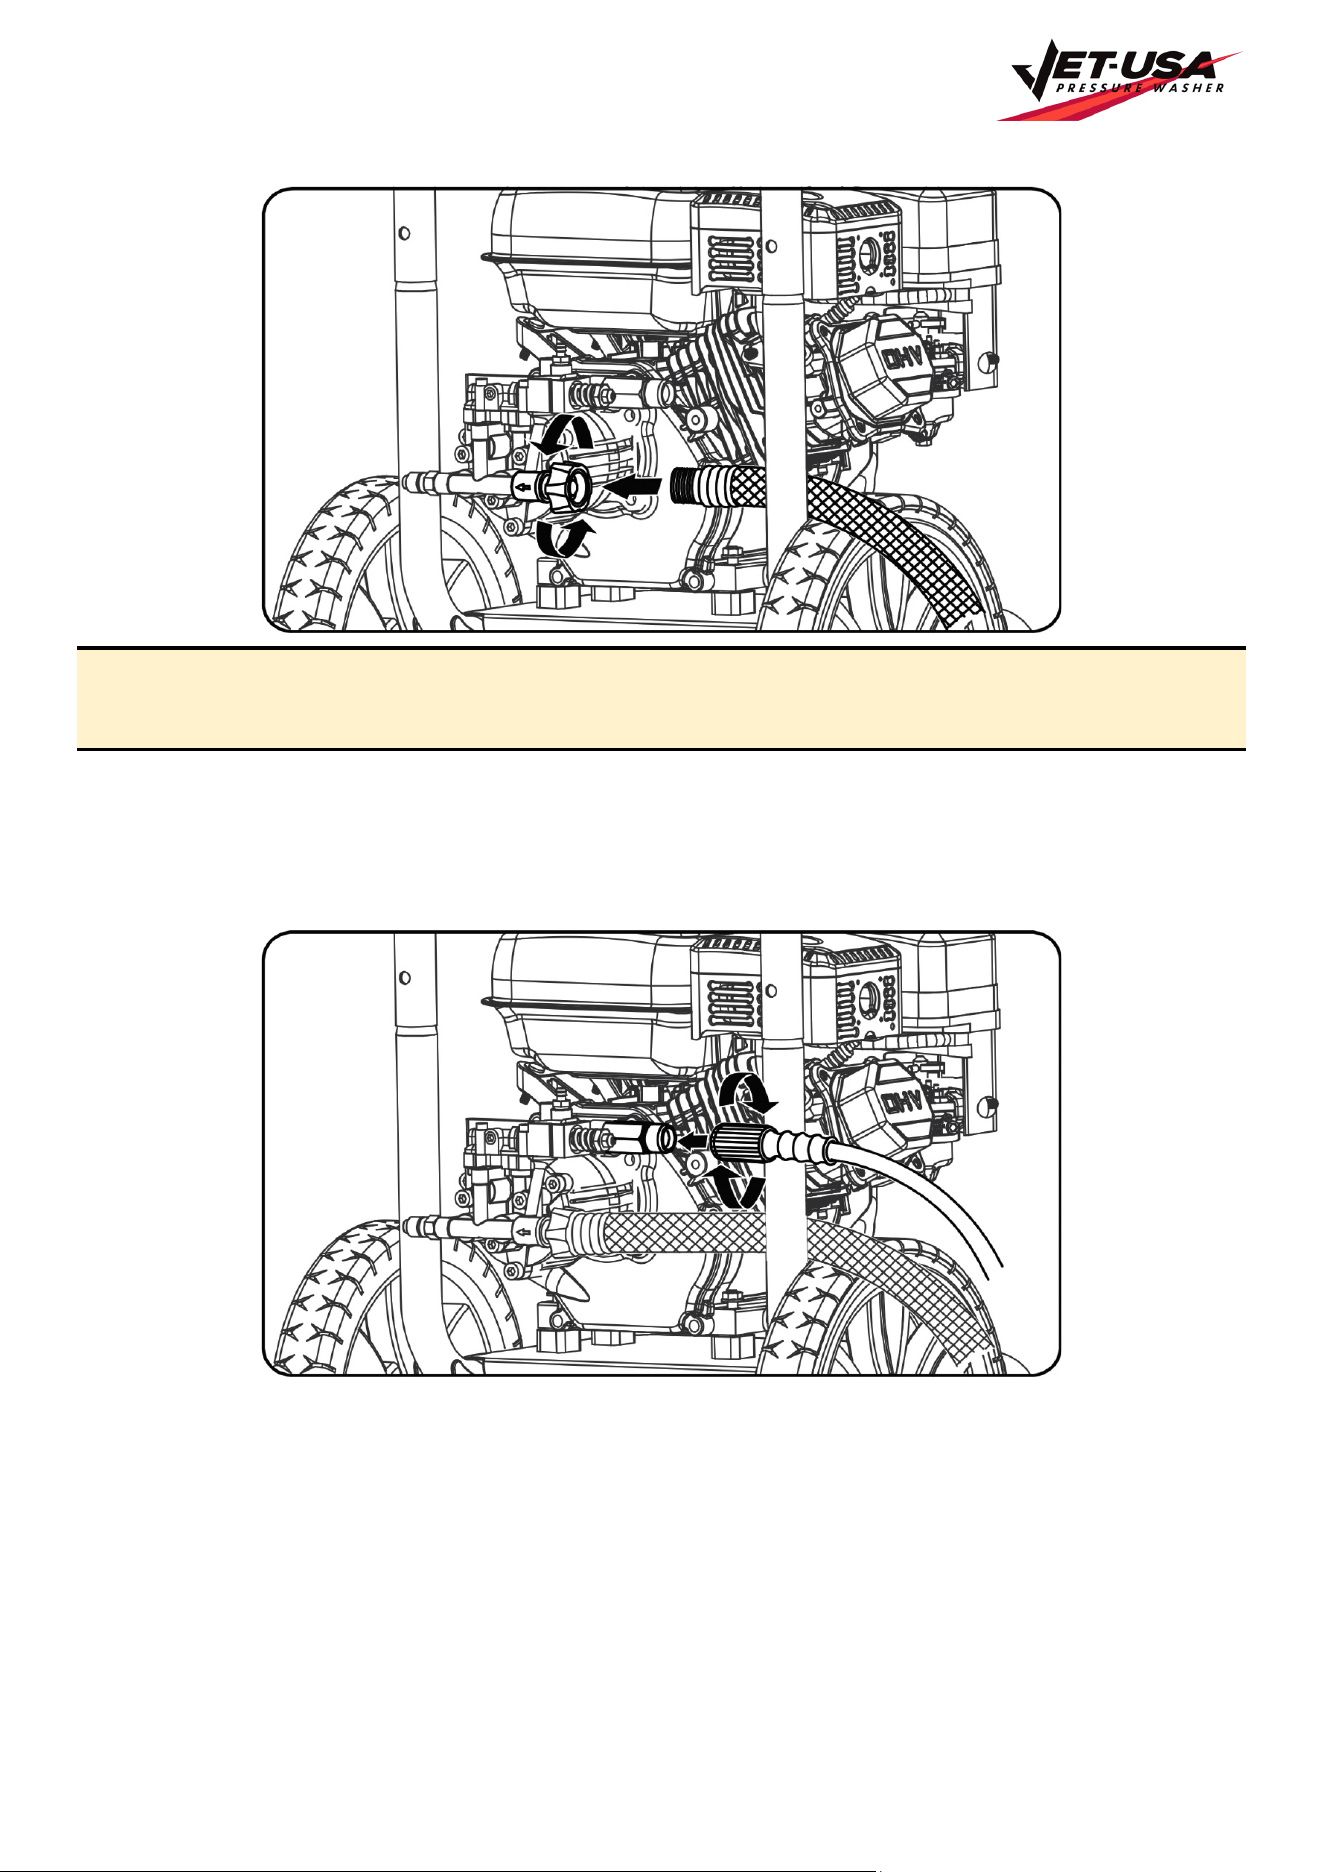
Connecting the High-Pressure Hose to the Pump
1. Attach end of high-pressure hose to the high-pressure outlet on pump.
2. Follow the same procedure with opposite end to attach high pressure hose to spray wand.

Petrol-Powered Pressure Cleaner Washer - CX660
E&OE © Jet-USA 16
Operation
Before starting the pressure washer, ensure that you have read and performed the steps
in the Assembly section of this manual.
DANGER: CARBON MONOXIDE! Using a pressure washer indoors CAN KILL YOU IN MINUTES! Do not
operate indoors or in a confined space preventing dangerous carbon monoxide gas from dissipating.
Carbon monoxide gas is a poisonous, odorless gas that can cause headache, confusion, fatigue,
nausea, fainting, sickness, seizures, or death. If you start to experience any of these symptoms,
IMMEDIATELY get fresh air and seek medical attention. Never use indoors, in a covered area, or in a
confined space, even if doors and windows are open. Keep exhaust from this unit from entering a
confined area through windows, doors, vents, or other openings. When working in areas where
vapours could be inhaled, use a respirator mask according to all its instructions.
CAUTION! Do not run pressure washer with a damaged hose. Do not run pressure washer without first
connecting and turning on water supply or damage to the pressure washer could result. F AILURE TO
FOLLOW THESE INSTRUCTIONS WILL VOID PRODUCT WARRANTY.
Pre-Operation Checklist
•
Read and understand this operator manual in its entirety before operating pressure washer.
•
Check oil level and add oil to the proper level if low.
•
Check fuel level and add fuel if needed.
•
Check connections of handle and all hoses to make sure they are secure.
•
Check all hoses for kinks and damage.
•
Check flow of water supply and make sure it is adequate (2.8 - 5.6bar).
Starting the Pressure Washer
1. Place pressure washer on a level surface.
2. Turn on water.
3. Purge the system’s pump of air by releasing the safety and squeezing the trigger of the spray gun.
4. Attach wand/lance to spray gun.
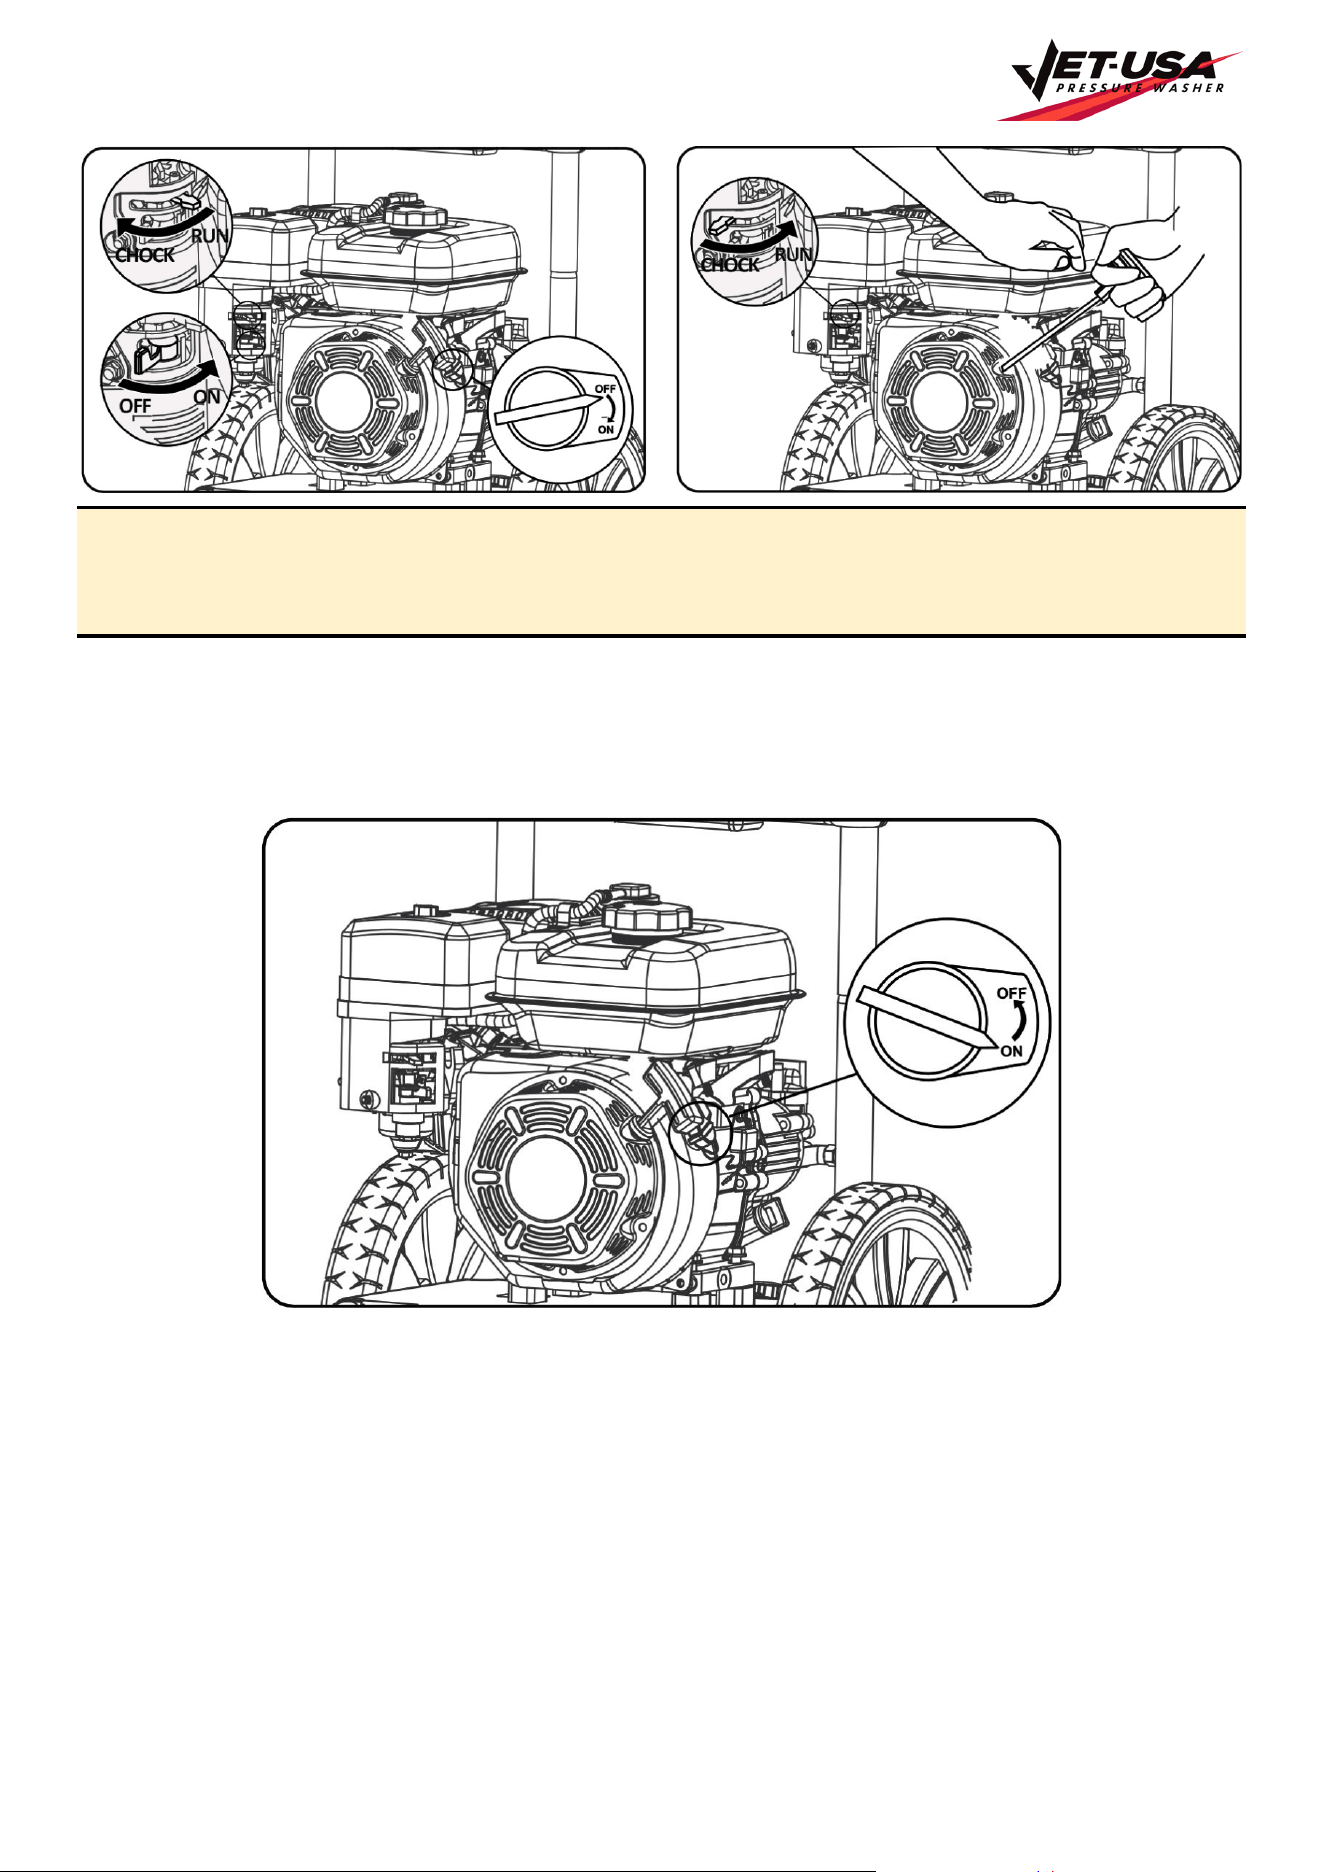
5. Slide the choke lever to the “Choke” position.
6. Turn the engine OFF/ON switch to the “ON” position.
7. Holding the machine with your hand, pull the recoil handle (starter cord) slowly until resistance is felt, then
pull rapidly. Squeeze the Gun trigger and release the pressure after every failed attempt to start the pressure
washer (This will reduce the back pressure).
8. Let engine run for several seconds and then gradually slide the choke lever to the RUN position as the
engine warms up until the choke is fully slid to the RUN position.
Petrol-Powered Pressure Cleaner Washer - CX660
E&OE © Jet-USA 17
WARNING! Pull cord recoils rapidly and pulls arm towards engine faster than you can let go which could
result in injury. Always relieve pressure from spray gun before pulling starter cord, including every
failed attempt to start engine. To avoid recoil, pull starter cord slowly until resistance is felt, then pull
rapidly.
Stopping the Pressure Washer
1. Turn the ON/Stop switch to the OFF position.
2. Turn OFF water and squeeze the trigger handle to release all water pressure.
Petrol-Powered Pressure Cleaner Washer - CX660
E&OE © Jet-USA 18
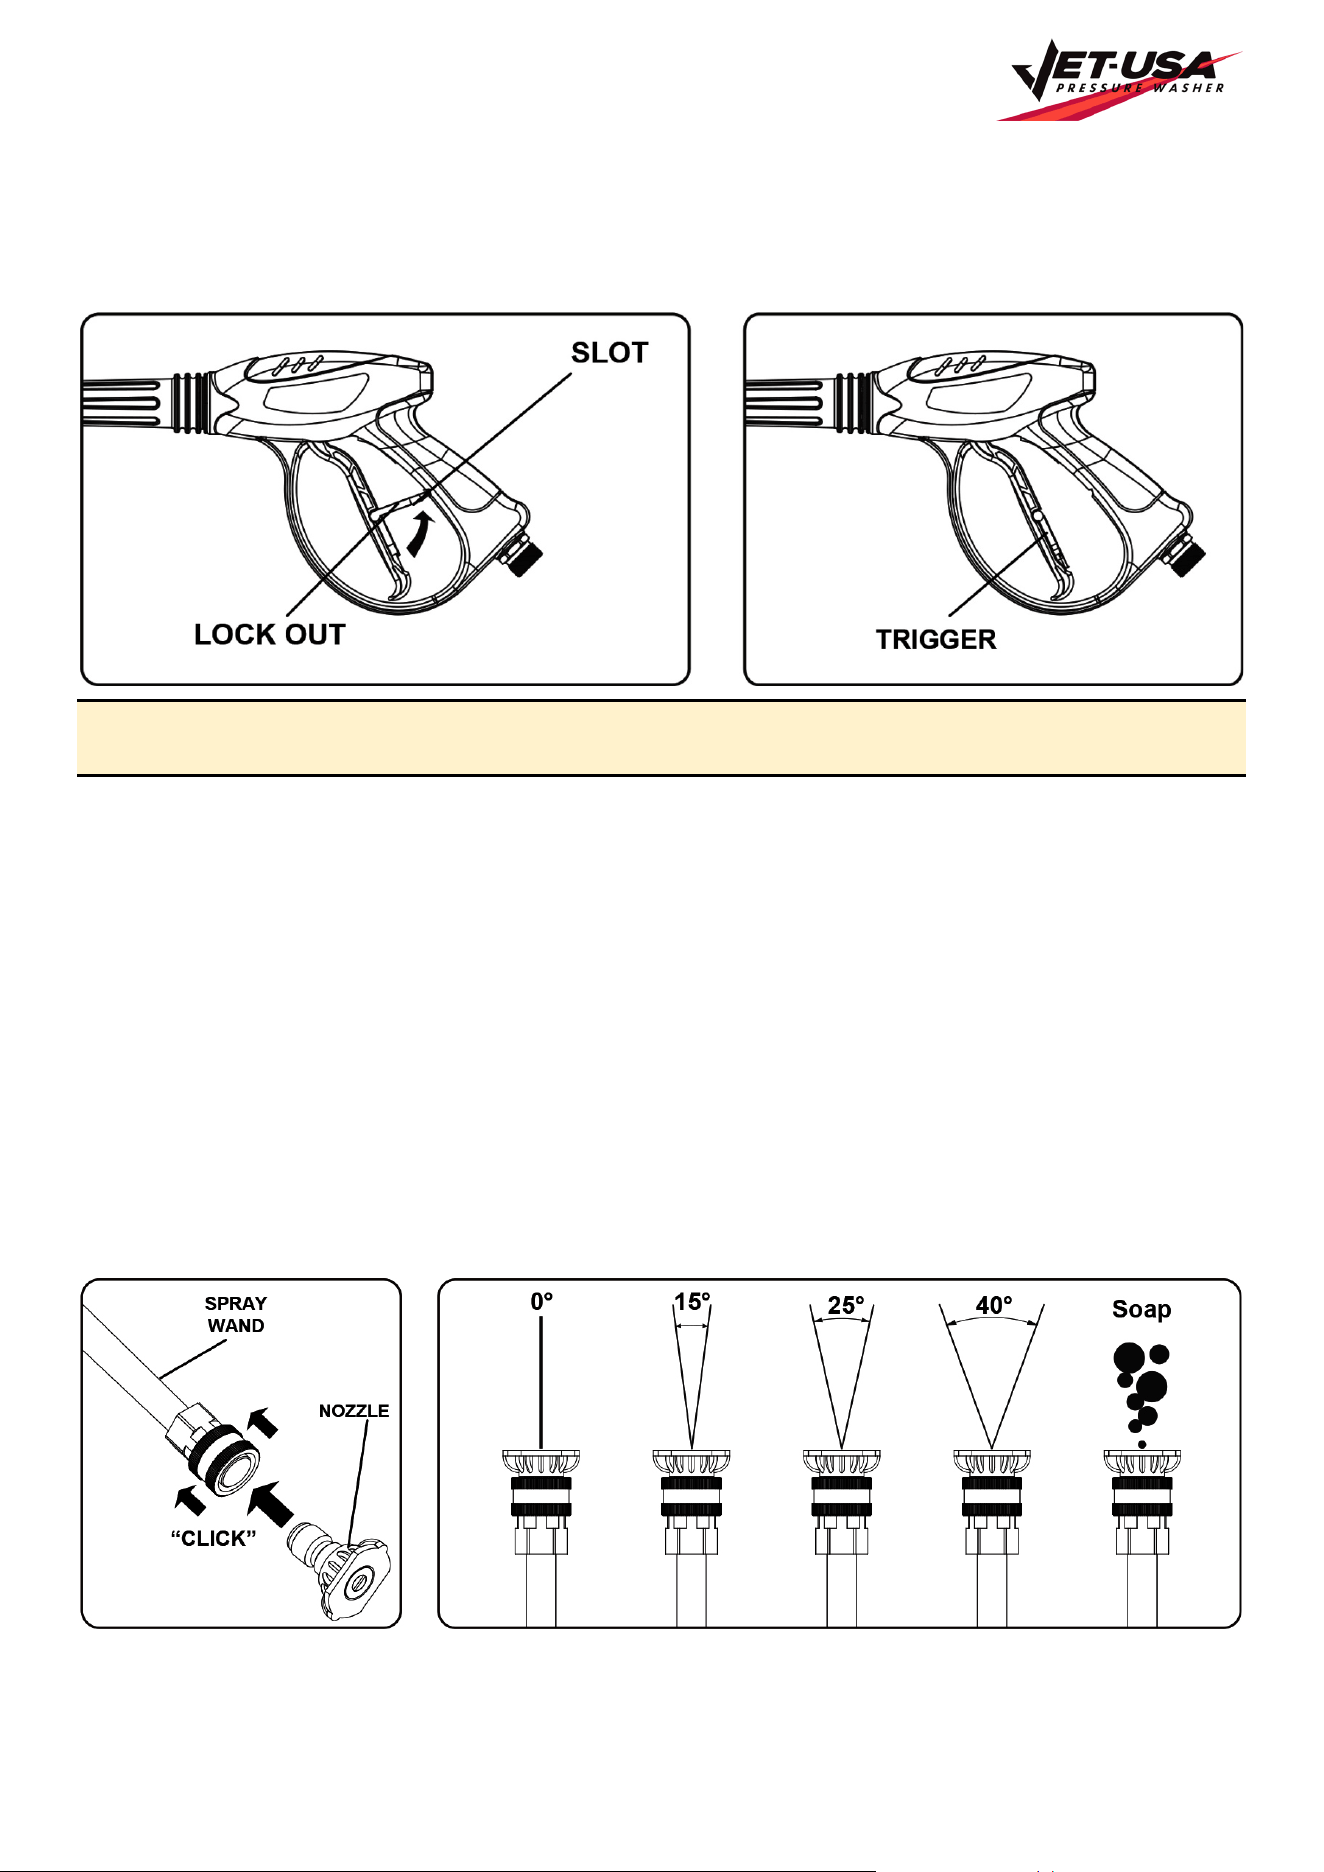
Using the Spray Gun
1. Flip the lock tab behind the trigger up or down until it clicks to apply or remove the safety. Pull back on the
trigger to begin operating pressure washer.
2. To stop water flow, release trigger.
WARNING! Kickback forces result from pressing the trigger! Always hold the spray gun with both
hands! Pay attention to safe posture! Improper handling can lead to injuries!
Using the Spray Nozzles
1. To connect or disconnect spray tip, pull back on the quick-connect collar. Insert or remove spray tip then
release collar.
2. When spray tip is connected, pull on the spray tip to make sure it is secured.
3. For general cleaning use the 40° spray tip. This option is for cement walkways.
4. For stripping, spot cleaning, blasting, and hard to reach areas use the 15° spray tip. This option is for
removing paint, rust, mildew, marine growth off boats, or grease stains. This option can be used for reaching
second story surfaces, or for the removal of paint, rust, oil stains, tar, gum, and other stubborn substances.
Use extreme caution when using this nozzle.
5. For applying pressure washer safe detergent, use the black soap nozzle.
6. The angle of the nozzles shown indicates the spray “fan shape” projected from the nozzle when the trigger of
the spray gun is pulled, and high-pressure water is passing through the nozzle. The pressure and flow will
not change significantly due to the various fan patterns (Nozzles).
Petrol-Powered Pressure Cleaner Washer - CX660
E&OE © Jet-USA 19
Applying Detergent
1. Rinse surface with cool water before applying cleaner.
2. Prepare detergent as required by job. For best results follow detergent directions as supplied from
manufacturer.
3. Remove cap from detergent container and fill.
4. Spray detergent on surface. For best results use long, even, and overlapping strokes. Allow detergent to set
for about 3 minutes before rinsing, but do not allow detergent to dry on surface or it may cause streaking or
cause damage to the surface. Use good judgment.
5. To clean equipment after use, flush water through the spray nozzle for 1-2 minutes then shut off engine.
Soak nozzle in a bucket of clean water to remove detergent.
WARNING! Only use mild, environmentally friendly detergents intended for use in pressure washers.
Ask at your specialist dealer about these special products. Never use aggressive chemicals (e.g.,
bleach), abrasive detergents, or similar, to avoid damage to your health, the product, and the
environment. Avoid skin contact with detergents, in particular contact with eyes! If detergents get in
your eyes flush your eyes with clean water and seek immediate medical attention!
Rinsing with the Pressure Washer
1. Rinse from top to bottom using long, overlapping strokes.
2. Test a small area first to avoid surface damage.
Moving the Pressure Washer
1. Turn the pressure washer OFF.
2. Tilt unit towards you until it is balanced on its wheels.
3. Roll machine to desired location.
Petrol-Powered Pressure Cleaner Washer - CX660
E&OE © Jet-USA 20
Maintenance
Never perform maintenance operations with the pressure washer still running.
Proper routine maintenance of the pressure washer will help prolong the life of the machine. Please perform
maintenance checks and operations according to the maintenance schedule as shown below.
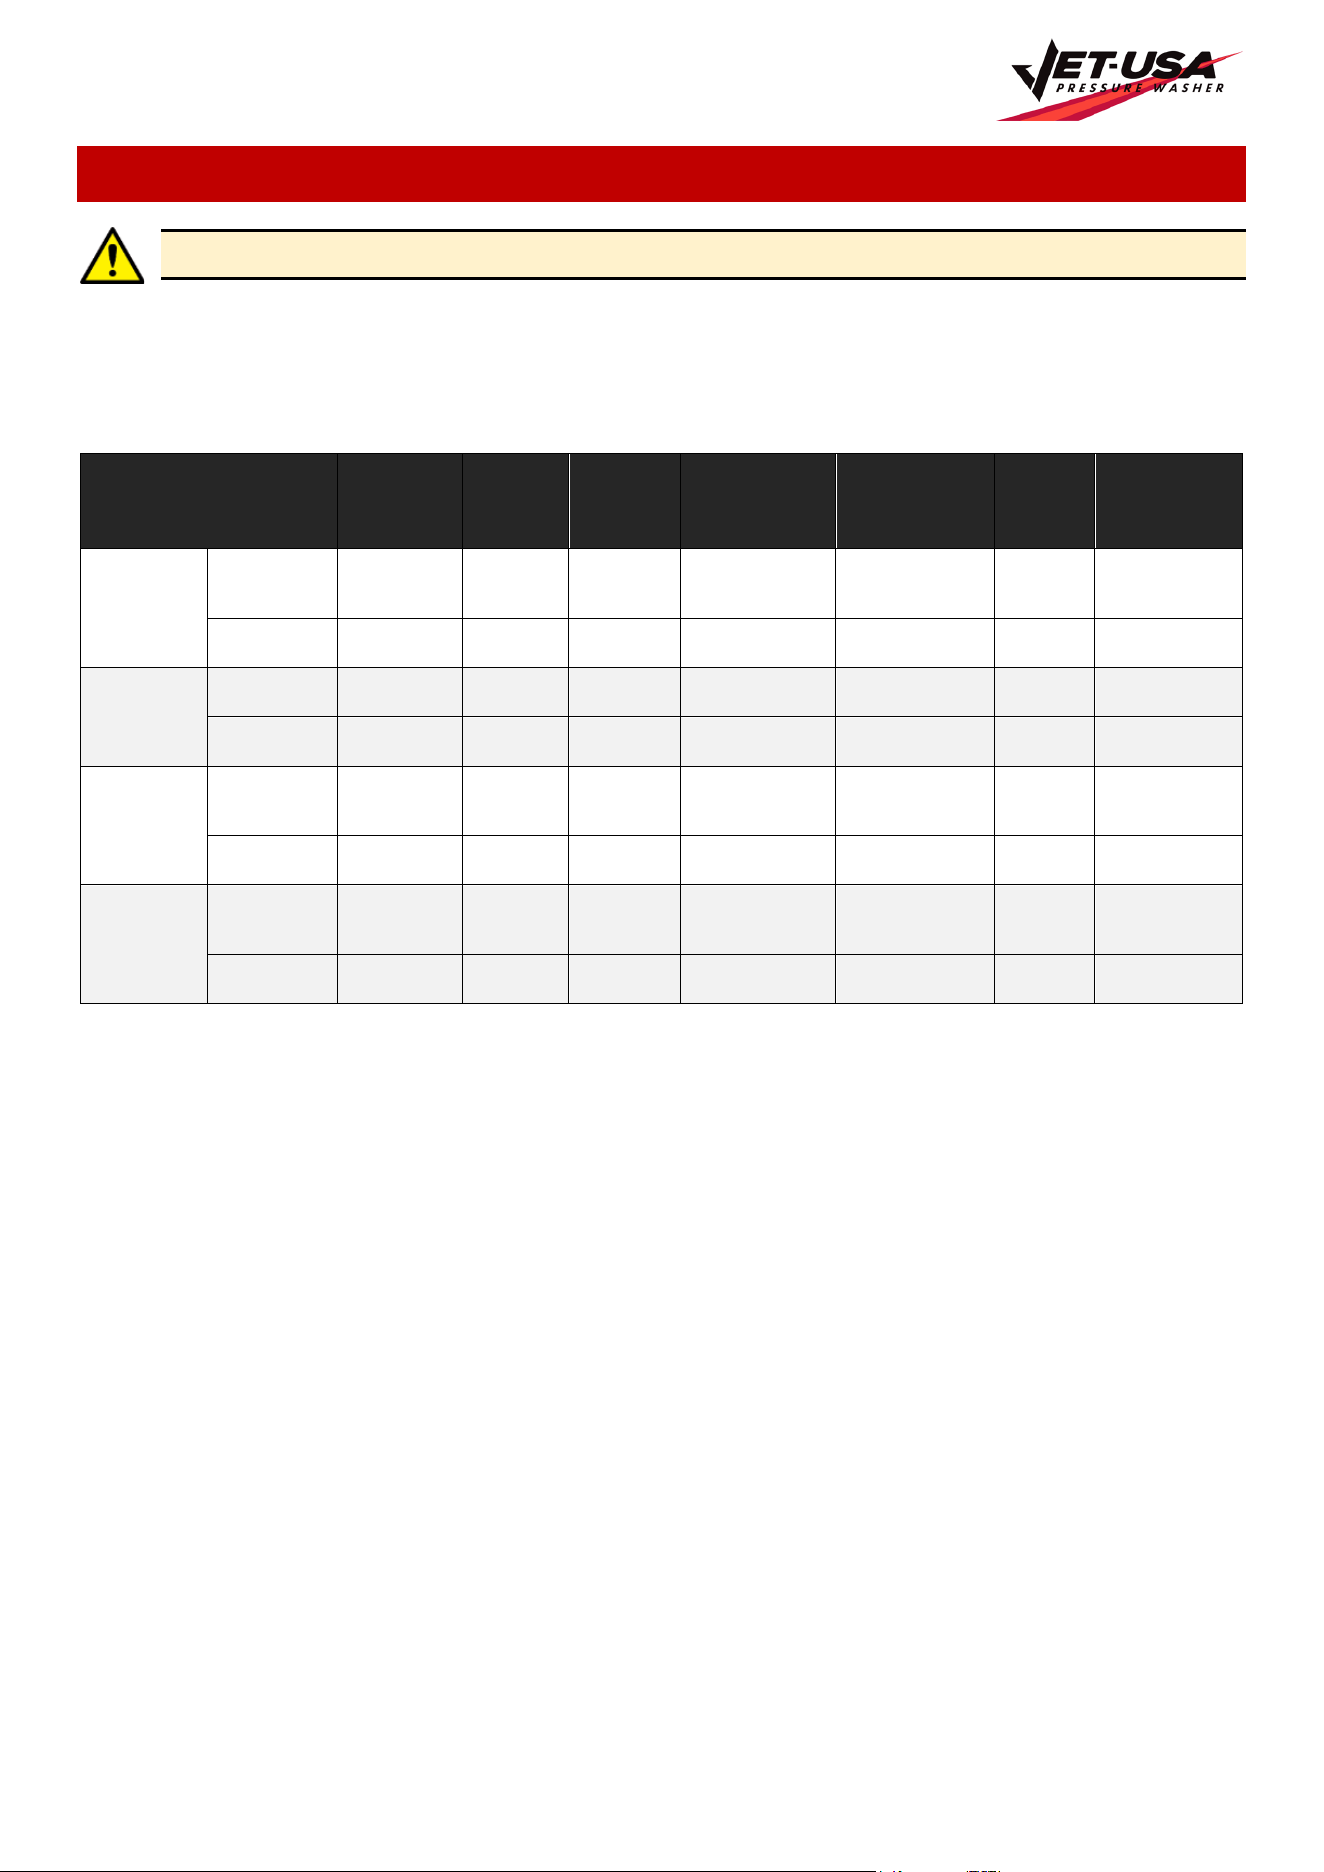
Maintenance Schedule
Recommended
Maintenance
Schedule
Each 8
hours or
daily
First 8
hours
Every
25
hours
Every 3
months or
50 hours
Every 6
months or
100 hours
Every
year
As
necessary
Engine
oil
Check
level
✔
Replace
✔
✔
*
✔
*
✔
Air filter
Check
✔
✔
Clean
✔
Spark
plug
Check /
clean
✔
Change
✔
✔
Fuel
tank
Check
level
✔
Clean
✔
*clean/change more frequently under dusty conditions or heavy load.
Pre-Operation Steps
Before starting the engine, perform the following pre-operation steps:
1. Check the level of the engine oil and the fuel tank.
2. Make sure the air filter is clean.
3. Remove any debris that has collected on the pressure washer.
4. Check high pressure hose for damage.
5. Briefly run garden hose to flush out any debris or insects.
6. Inspect the work area for hazards.
7. Clean any debris that has collected around or behind the muffler, air filter and controls.
8. Use a damp cloth to wipe exterior surfaces. If dirt is caked on, use a soft bristle brush.
After Each Use
Follow these procedures after each use:
1. Shut off engine and turn off water supply. Release water pressure by pointing spray gun in a safe direction
and squeezing the trigger.
Petrol-Powered Pressure Cleaner Washer - CX660
E&OE © Jet-USA 21
2. Disconnect high pressure hose, spray gun, and nozzle. Drain water from items and use a rag to wipe down
the outside of the hose and spray gun.
3. Empty the water from the pump by pulling the recoil starter 6 times.
4. Store unit in a clean and dry area after it has had a chance to cool down.
5. Use of a pressure washer pump conditioner is recommended. Follow the instructions provided by the
manufacturer of the pump conditioner.
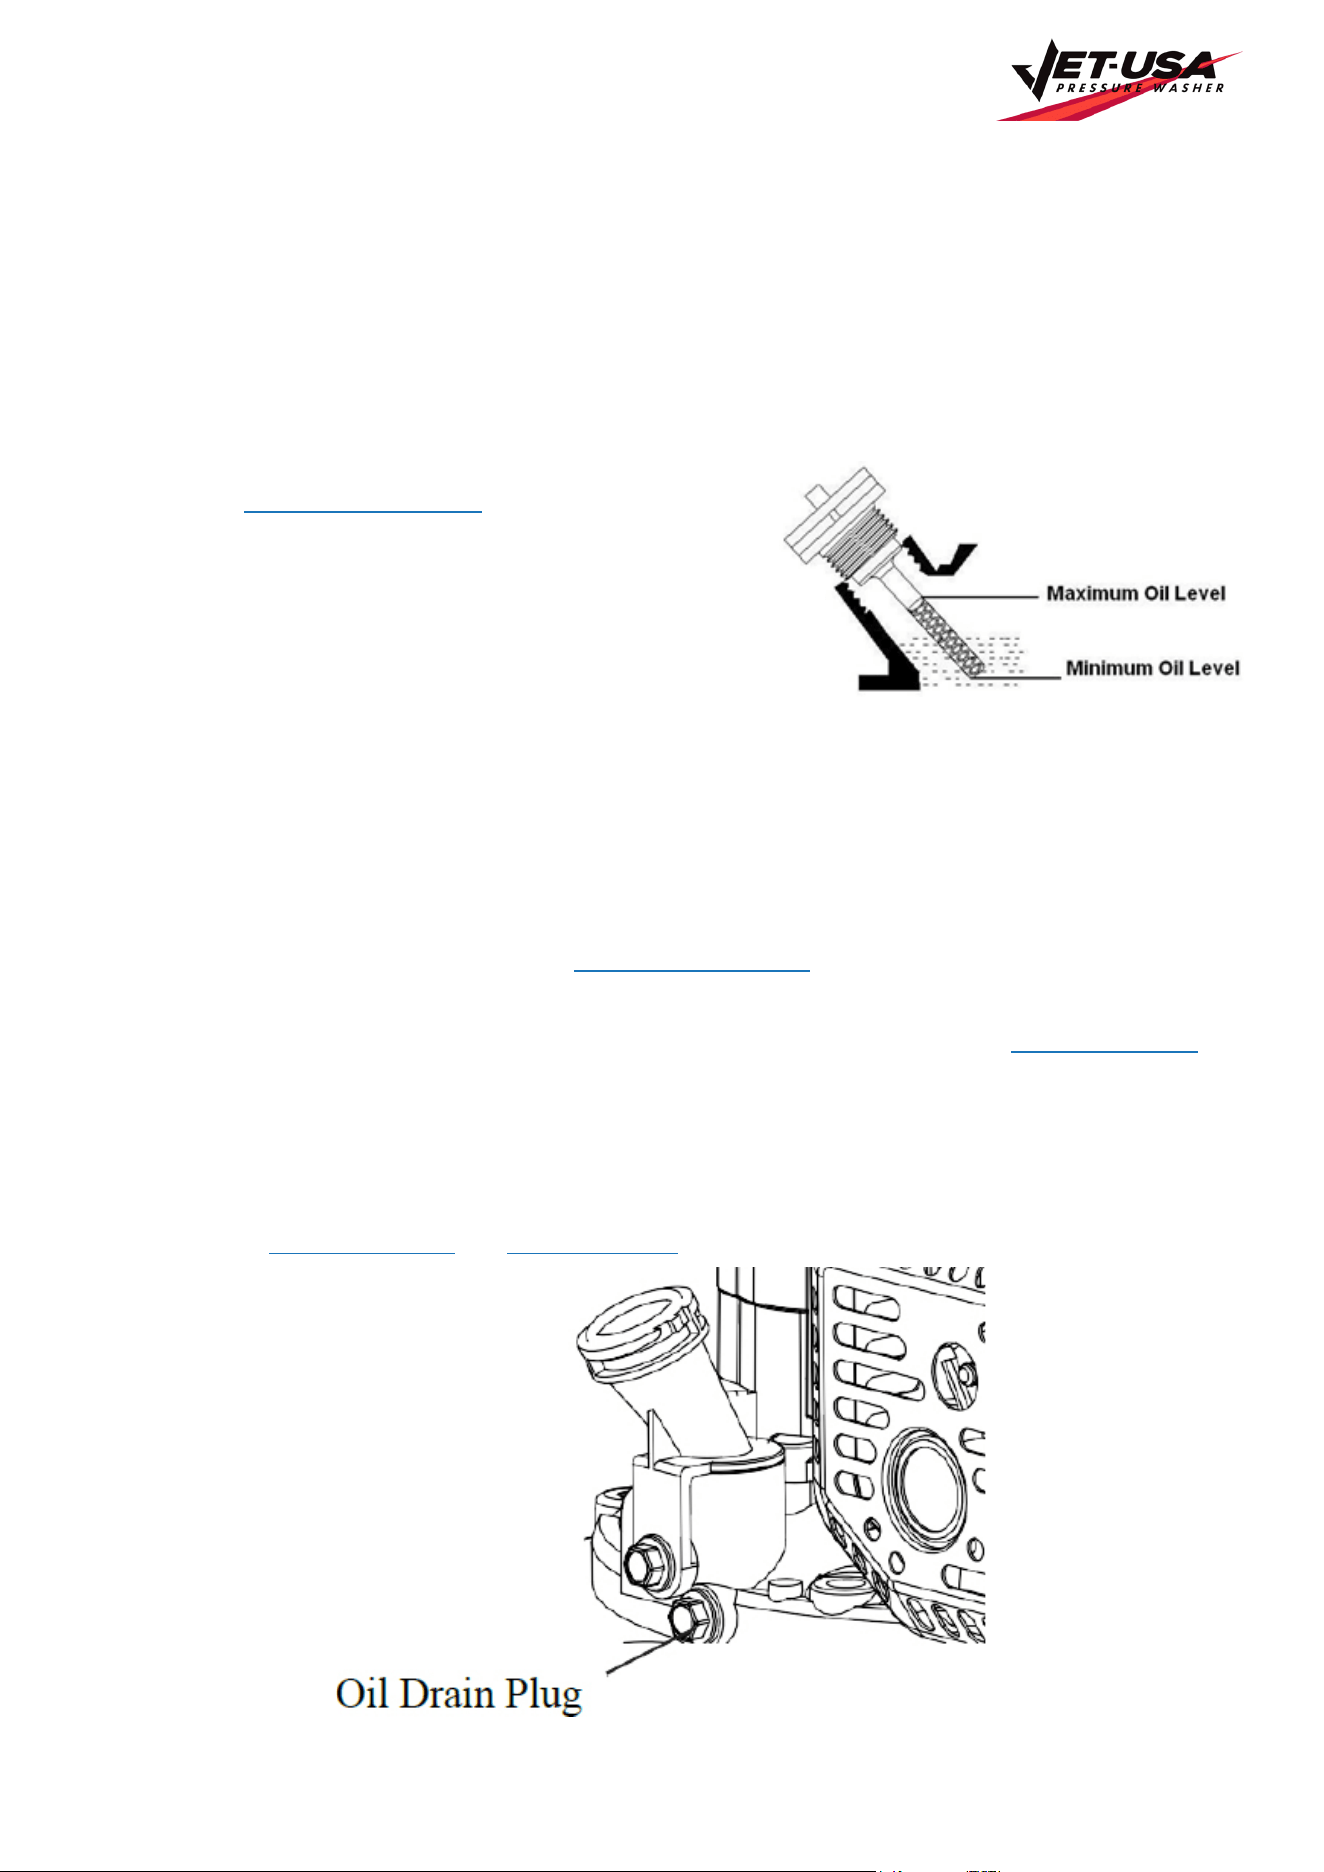
Checking the Oil
Check the oil level of the pressure washer according to the
Recommended Maintenance Schedule
. The pressure washer
should be checked before each use for proper oil level. This is a
critical step for proper engine starting. To check the oil level:
1. Make sure the pressure washer is on a level surface.
2. Clean around oil fill. Remove dipstick and wipe the dipstick
with a clean rag. Insert the dipstick into the oil fill opening
without screwing in. Remove the dipstick to check the oil
mark. Add oil if the oil mark covers less than one half of the dipstick.
3. Slowly add more oil and repeat step 2 until the oil mark reaches to the top of dipstick. Do not over fill the
crankcase. Reinstall oil dip- stick.
Changing the Oil
Change the oil according to the Recommended Maintenance Schedule. Change the oil when the outside
temperature is warm to allow for complete drainage. Change oil more often if operating under heavy load or high
ambient temperatures. It is also necessary to drain the oil from the crankcase if it has become contaminated with
water or dirt. Add oil when the oil level is low. For proper type and weight of oil refer to the
Adding Engine Oil
section. To change oil:
1. Shut off engine. Clean the area around the oil fill cap/dipstick to keep out debris then remove oil fill
cap/dipstick.
2. Place an oil pan on the ground to catch oil. Remove oil drain plug to empty out the oil from the crankcase.
3. Once oil is completely drained, install the oil drain plug. Refill the engine with new oil as instructed in the
manual under Adding Engine Oil and Checking the Oil
.
Petrol-Powered Pressure Cleaner Washer - CX660
E&OE © Jet-USA 22
Air Filter Maintenance
Routine maintenance of the air filter helps maintain proper airflow to the carburettor. Occasionally check that the
air filter is free of excessive dirt. Refer to Recommended Maintenance Schedule
.
1. Open the air filter cover.
2. Remove the air filter element from the casing.
3. Check and clean the air filter element. Replace with a new one if the element is damaged. Good element
can be washed in soapy water, dried and reused. There is no need to add oil to the element.
4. Wipe off excessive oil from the air filter case. Small amount of oil in the element is normal and necessary for
the engine to work properly.
5. Reinstall the air filter element and cover.
Running the engine with dirty, damaged or missing air filter element will cause the engine to
wear out prematurely.
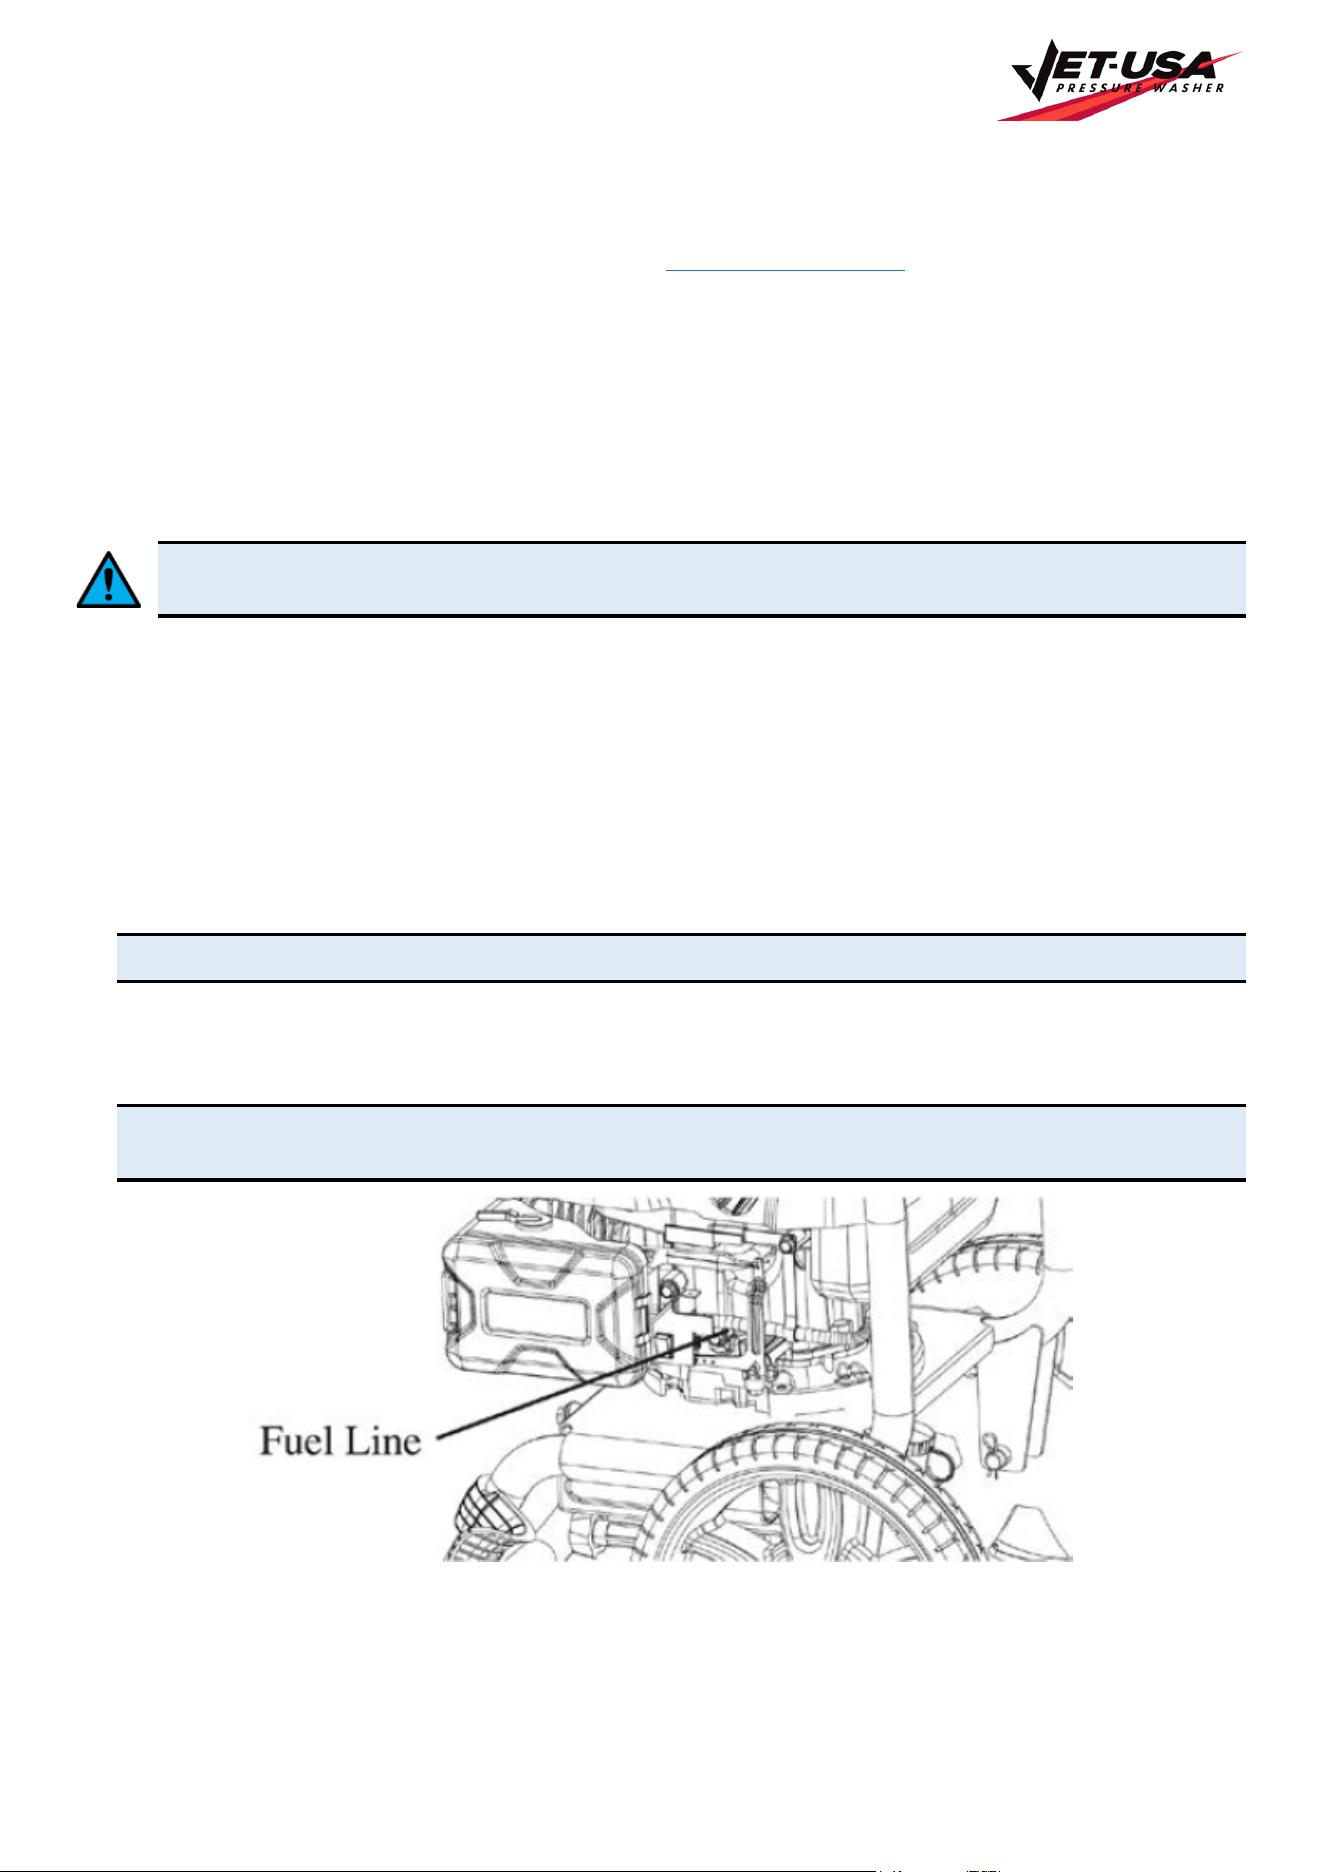
Draining the Fuel Tank
Clean the fuel tank each year or before storing the pressure washer for extended periods of time. To drain the
fuel tank and carburettor:
1. Prepare a container to collect the drained fuel.
2. Clamp the fuel line near the carburettor. The fuel will flow out as soon as the fuel line is unplugged, so be
sure to clamp it. Remove the fuel line from the carburettor and bring it to the back of the pressure washer to
drain out the fuel.
CAUTION: Fuel will leak out during removal.
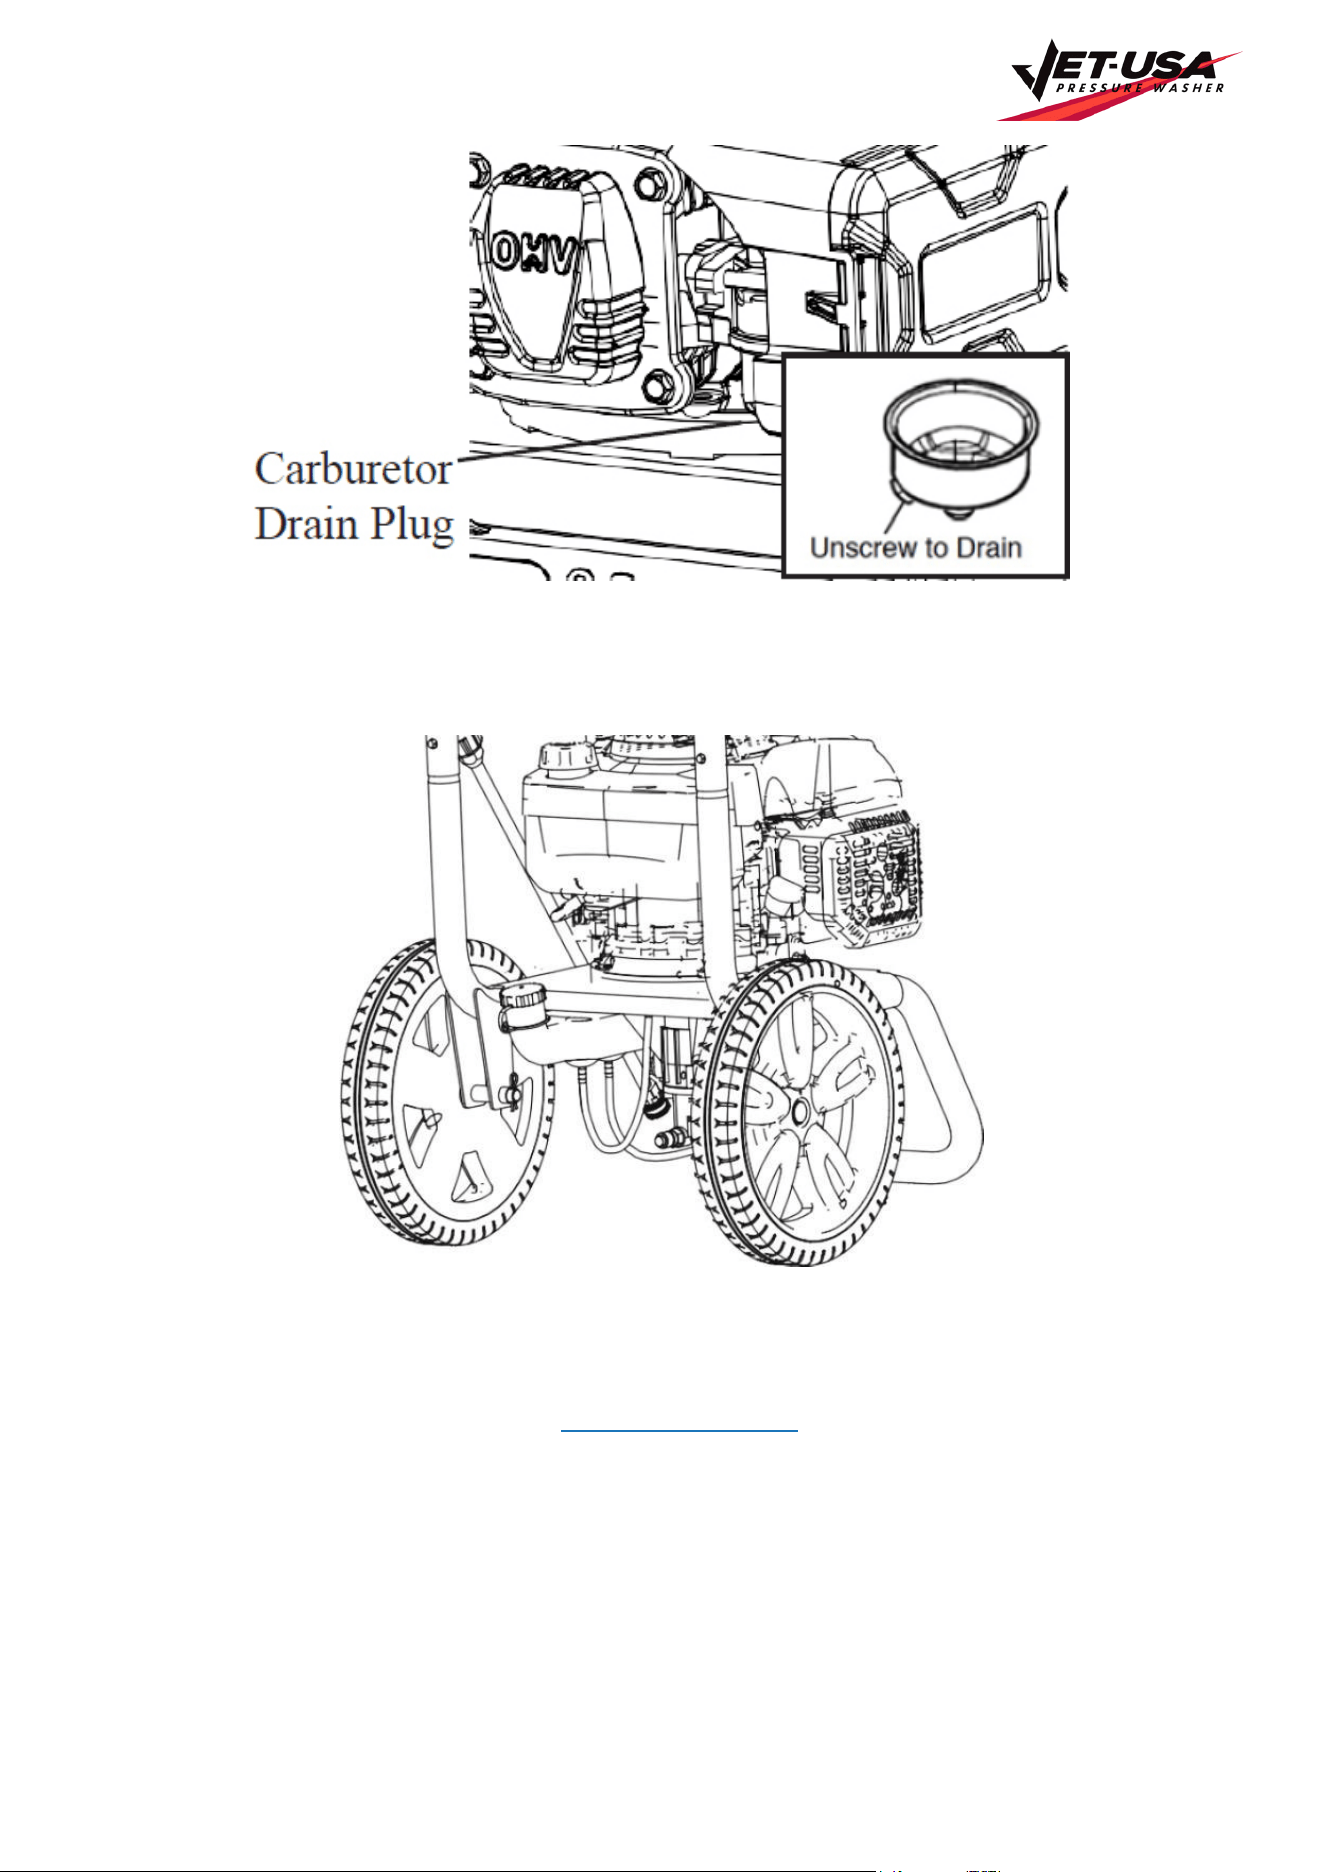
3. Unscrew the carburettor plug to drain the carburettor. Be sure to drain the carburettor so the machine can
function properly for the next use.
4. Re-attach the fuel line to the exposed end of carburettor.
CAUTION: Do not dispose of the fuel in general waste. Make sure to collect it and take the fuel to your local
recycling centre. Do not store fuel for more than 3 months.
Petrol-Powered Pressure Cleaner Washer - CX660
E&OE © Jet-USA 23
Draining the Soap
To drain the soap, unplug the hose. Use a container to hold the draining soap.
Spark Plug Maintenance
The spark plug is important for proper engine operation. A good spark plug should be intact, free of deposits,
and properly gapped. Refer to Recommended Maintenance Schedule
. To inspect the spark plug:
1. Remove spark plug boot. Be careful not to tear insulation or wiring.
2. Unscrew the spark plug from the engine using the spark plug wrench provided. There is limited space for the
wrench to turn. Use both rows of holes in the spark plug wrench to gain leverage to loosen the plug.
3. Visually inspect the spark plug for cracks or excessive electrode wear. Replace with a new spark plug.
4. Measure the plug gap with a wire gauge. The gap should be 0.7 – 0.8mm (0.028 – 0.031in).
5. If re-using the spark plug, use a wire brush to remove any dirt from around the spark plug base then re-gap
the spark plug.
Petrol-Powered Pressure Cleaner Washer - CX660
E&OE © Jet-USA 24
6. Screw the spark plug back into the spark plug hole using the spark plug wrench. Do not over-tighten spark
plug. Recommended tightening of spark plug is ½ to ¾ of a turn after the spark plug gasket contacts the
spark plug hole. Reinstall the spark plug boot.
Checking the Detergent Siphoning Tube
1. Check the detergent siphoning tube for clogs, leaks, or tears.
2. Ensure that the tube fits tightly in to the pump fitting.
3. Replace siphoning tubes if damaged.
Checking the High-Pressure Hose
1. Inspect hose for cuts, bulges, or leaks which can develop from kinking or wear. If damage is found,
immediately replace hose.
2. Inspect couplings for damage. Immediately replace hose if damage is found.
Never repair a high pressure hose or use unit if the hose is damaged. If the hose is damaged,
replace with identical part.
Checking the Spray Gun
1. Ensure that the spray gun is connected securely.
2. Inspect the spray gun safety and make sure the spray gun trigger springs back upon release.
Checking the Spray Nozzle
If a pulsing sensation is felt while squeezing the trigger, the spray nozzle may be dirty or clogged and should be
cleaned immediately. To clean the nozzle:
1. Shut off the engine and turn off the water.
2. Remove the nozzle from the spray wand, making sure that the nozzle is pointing away from you and in a
safe direction.
3. Use the nozzle cleaner or a small paper clip to dislodge any foreign materials
which are clogging or restricting the spray tip. Flush debris out of the nozzle
by back flushing with a garden hose for 30-60seconds.
4. Reconnect the nozzle to the spray wand.
5. Turn the water supply back on and start engine.
Hose Care
•
To extend your hose life, you’ll want to drain the hose after use. Don’t rely on the nozzle to cut the water
when you are done. If you do, the water pressure builds up inside the hose and can burst it. The better
procedure for the hose upkeep is to turn off the water at the spigot and allow the hose to drain.
•
Another way to keep your hose in good shape for longer is to avoid dragging it by the spray trigger
assembly. This weakens the coupler connection and causes leaks.
•
Also, don’t just leave it in a pile when you are finished with it. Using the included hose reel prevents kinks
that create tears.
Petrol-Powered Pressure Cleaner Washer - CX660
E&OE © Jet-USA 25
•
Finally, there is the issue of storing a hose over winter. If you live in a cold winter region, you’ll want to bring
the hose into the garage (or somewhere inside) to prevent freezing. Drain the entire hose first, then coil it on
a hose reel and carry it inside.
Storage and Transportation
Never place any type of storage cover on the pressure washer while it is still hot.
If the pressure washer is being stored for short period of time (30 to 60 days), add
stabilised fuel to the fuel tank until full. NOTE: Filling the tank reduces the amount of air in the tank and
helps reduce deterioration of fuel.
Run the engine for 2 – 3 minutes allowing stabilized fuel mixture to circulate through the carburettor.
Do not store or transport this unit on anything other than a 90-degree angle. Tilting or laying the unit on
its side will result the carburettor flooding with oil which will lock up the engine.
Storing the Pressure Washer for Extended Periods
1. Drain the fuel tank (see Draining the Fuel Tank).
2. Change the oil.
3. Do not obstruct any ventilation openings.
4. Keep the pressure washer in a cool dry area.
Transporting the Pressure Washer
1. Tighten the fuel cap. Drain the fuel tank if possible (see Draining the Fuel Tank section).
2. Always keep the pressure washer upright. Do not lay it down sideways.
Petrol-Powered Pressure Cleaner Washer - CX660
E&OE © Jet-USA 26
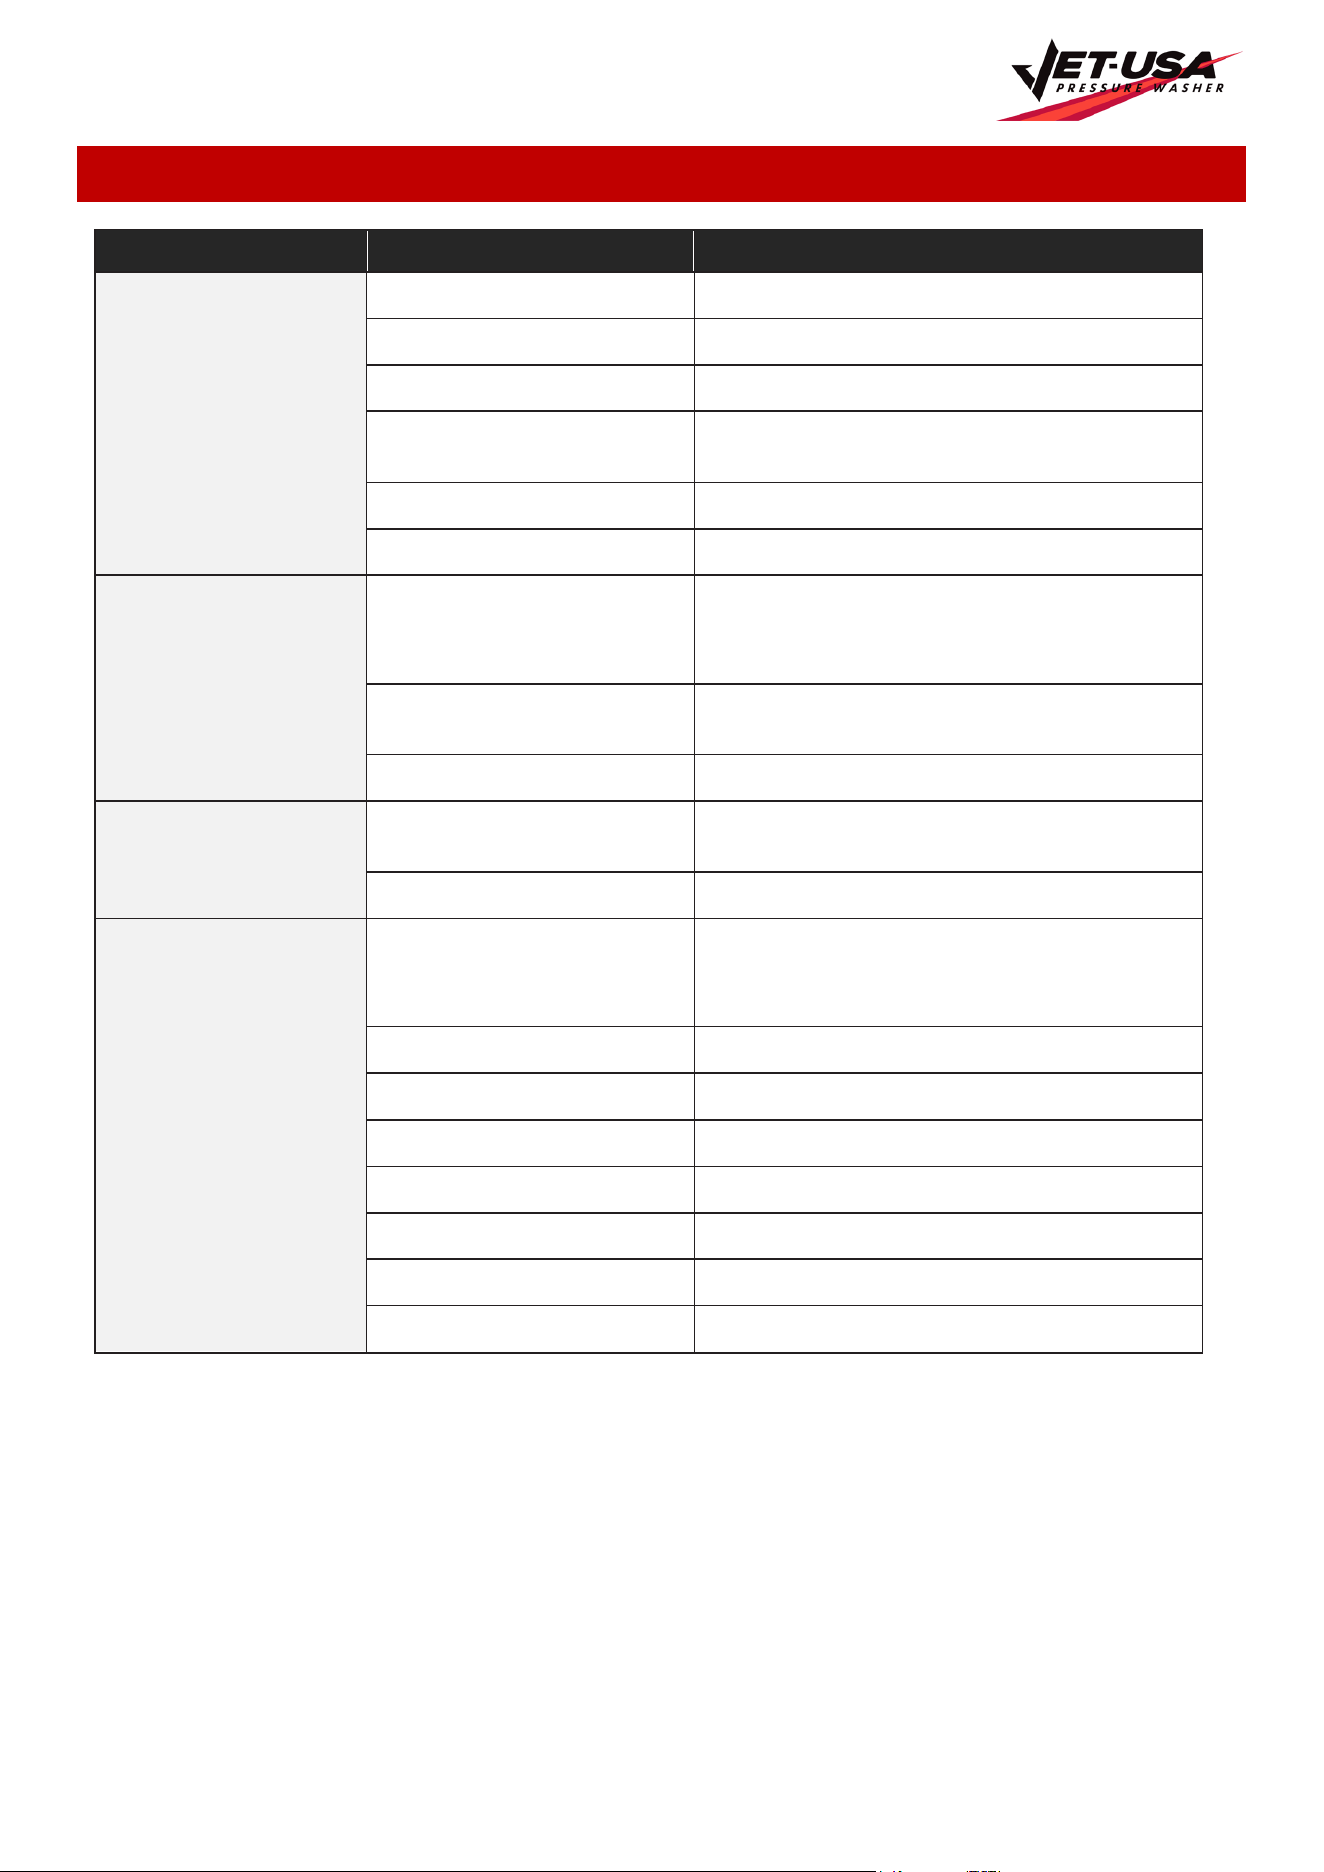
Troubleshooting
Problem Cause Solution
Engine will not start Engine switch is set to “OFF” Set engine switch to “ON”.
Choke lever is set to “Run” Turn choke lever to “Start”
Engine is out of fuel Add petrol
Engine is filled with
contaminated or old petrol
Change the petrol in the fuel tank
Spark plug is dirty Clean spark plug
Spark plug is broken Replace with a new spark plug
Water pressure is weak
Water supply is restricted
Inspect garden hose for leaks. Make sure you are
using a large enough garden hose (min.
3/4 inch diameter)
Water not turned on to full
power
Turn on water source all the way
Not using high pressure nozzle Change nozzle
Detergent and spray do
not mix
Detergent hose is not sub-
merged or has disconnected
Make sure hose is connected and submerged in
the detergent
Black soap nozzle is needed Use the black soap nozzle
Pump fails to produce
pressure or pressure is
inconsistent
Water supply is restricted
Inspect garden hose for leaks. Make sure you are
using a large enough garden hose (min.
3/4 inch diameter)
Water not turned on full power Open water source all the way
Nozzle is clogged Clean nozzle
Spray gun leaks Check spray gun connection or replace spray gun
Air trapped in line Squeeze trigger handle to remove air
Inlet hose screen is clogged Clean inlet
Water supply is over 100°F Use cool water supply
Pump is faulty Contact service department
Petrol-Powered Pressure Cleaner Washer - CX660
E&OE © Jet-USA 27
Specifications
Max Pressure
4800PSI
Continual Rated Pressure
3100PSI
Displacement
212cc Air Cooled 4-Stroke
Orientation
Vertical
Starting Method
Recoil
Choke
Automatic
Tank Volume
1.2L
Pump Type
Axial cam
Rated Flow
9.5L/Min
Max. Water Temperature
50°C
High Pressure Hose length
10m
Detergent Tank
3.6L
Wheels
12” Flat Free
Turbo Nozzle Connector Size
Standard 1/4" BSP Quick Connect
Some experts believe that the incorrect or prolonged use of almost any
product may cause serious injury or death. To help reduce your risk of
serious injury or death, refer to the information below. For more information,
see www.datastreamserver.com/safety
Consult all documentation, packaging,
and product labelling before use. Note
that some products feature
documentation available online. It is
recommended to print and retain the
documentation.
Before each use, check the product for
loose/broken/damaged/missing parts,
wear, or leaks (if applicable). Never use a
product with
loose/broken/damaged/missing parts,
wear, or leaks.
Products must be inspected and serviced
(if applicable) by a qualified technician
every 6 months. This is based on
average residential use by persons of
average size and strength, and on a
property of average metropolitan size.
Use beyond these recommendations may
require more frequent
inspections/servicing.
Ensure that all users of the product have
completed a suitable industry recognised
training course before being allowed
access to the product.
The product has been supplied by a general merchandise
retailer that may not be familiar with your specific
application or description of application. Be sure to attain
third-party approval from a qualified specialist for your
application before use, regardless of any assurances from
the retailer or its representatives.
This product is not intended for use where fail-safe
operation is required. As with any product (for example,
automobile, computer, toaster), there is the possibility of
technical issues that may require the repair or
replacement of parts, or the product itself. If the possibility
of such failure and the associated time it may take to
rectify could in any way inconvenience the user, business,
or employee, or financially affect the user, business, or
employee, then the product is not suitable for your
requirements. This product is not intended for use where
incorrect operation or a failure of any kind, including but
not limited to, a condition requiring product return,
replacement, parts replacement, or service by a
technician may cause financial loss, loss of employee
time or an inconvenience requiring compensation.
If this product has been purchased in error when
considering the information presented here, contact the
retailer directly for details of their returns policy, if
required.
© Jet-USA. All rights reserved. No part of this document, including descriptive content, concepts, ideas,
diagrams or images may be reproduced or transmitted in any form or by any means, electronic or
mechanical, including photocopying, scanning or recording, or any information storage and retrieval system,
without express permission or consent from the publisher.