1000W INDUCTION HEATER
MODEL NO: VS240.V2
Thank you for purchasing a Sealey product. Manufactured to a high standard, this product will, if used according to these instructions,
and properly maintained, give you years of trouble free performance.
IMPORTANT: PLEASE READ THESE INSTRUCTIONS CAREFULLY. NOTE THE SAFE OPERATIONAL REQUIREMENTS, WARNINGS & CAUTIONS. USE
THE PRODUCT CORRECTLY AND WITH CARE FOR THE PURPOSE FOR WHICH IT IS INTENDED. FAILURE TO DO SO MAY CAUSE DAMAGE AND/OR
PERSONAL INJURY AND WILL INVALIDATE THE WARRANTY. KEEP THESE INSTRUCTIONS SAFE FOR FUTURE USE.
1. SAFETY
1.1. ELECTRICAL SAFETY
WARNING! It is the user’s responsibility to check the following:
Check all electrical equipment and appliances to ensure that they are safe before using. Inspect power supply
leads, plugs and all electrical connections for wear and damage. Sealey recommend that an RCD
(Residual Current Device) is used with all electrical products. You may obtain an RCD by contacting your
local Sealey stockist. If the heater is used in the course of business duties, it must be maintained in a safe
condition and routinely PAT (Portable Appliance Test) tested.
9 Electrical safety information, it is important that the following information is read and understood.
9 Ensure that the insulation on all cables and on the appliance is safe before connecting it to the power supply.
9 Regularly inspect power supply cables and plugs for wear or damage and check all connections to ensure that they are secure.
9 Ensure that the voltage rating on the appliance suits the power supply to be used and that the plug is tted with the
correct fuse - see fuse rating in these instructions.
8 DO NOT pull or carry the appliance by the power cable.
8 DO NOT pull the plug from the socket by the cable.
8 DO NOT use worn or damaged cables, plugs or connectors.
9 This product is tted with a BS1363/A 13 Amp 3 pin plug.
If the cable or plug is damaged during use, switch o the electricity supply and remove from use.
9 Replace a damaged plug with a BS1363/A 13 Amp 3 pin plug. If in doubt contact a qualied electrician.
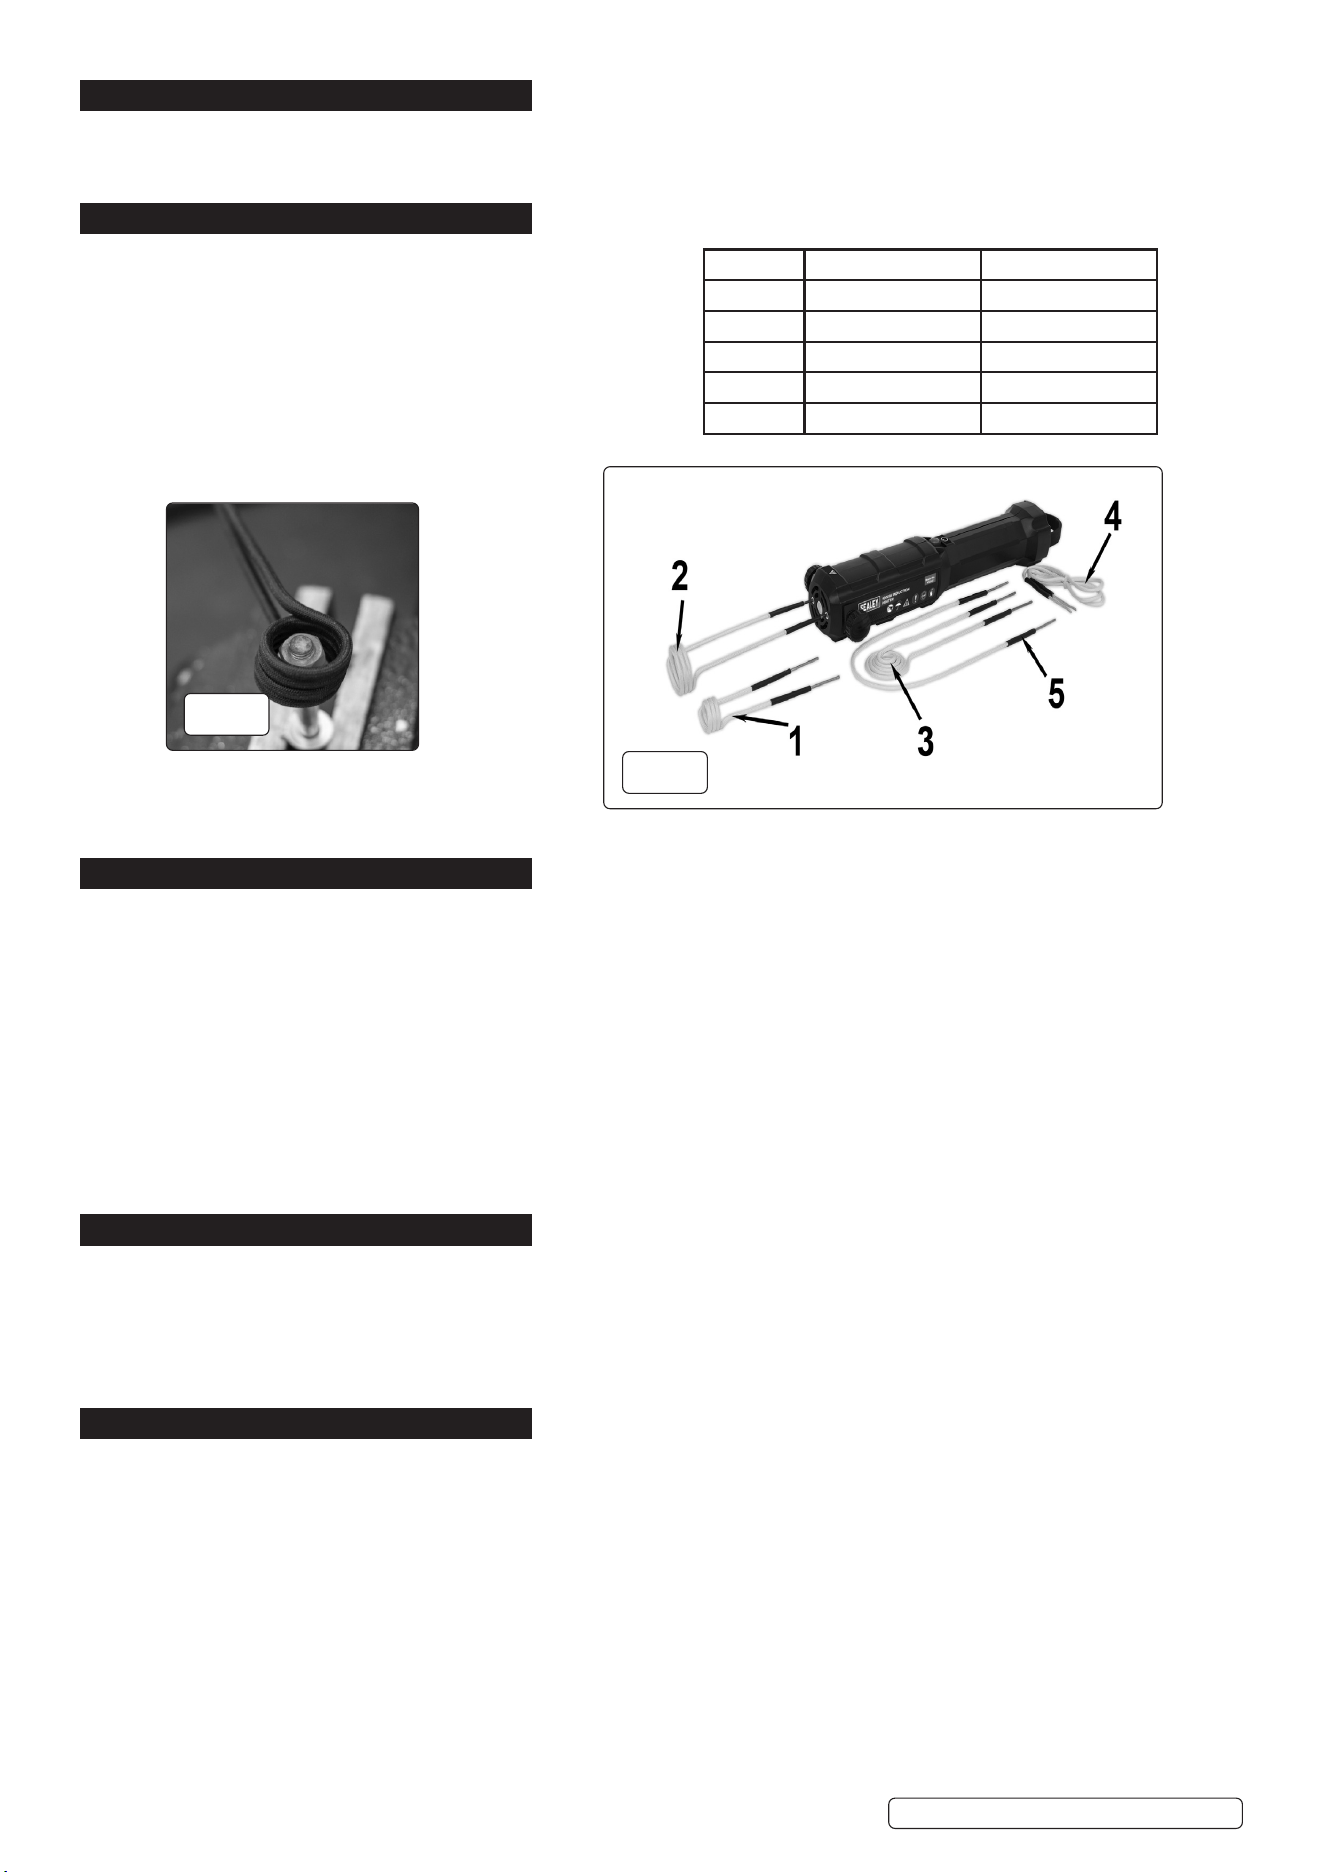
a) Connect the GREEN/YELLOW earth wire to the earth terminal ‘E’.
b) Connect the BROWN live wire to the live terminal ‘L’.
c) Connect the BLUE neutral wire to the neutral terminal ‘N’.
Ensure that the cable outer sheath extends inside the cable restraint and that the restraint is tight.
9 Sealey recommend that repairs are carried out by a qualied electrician.
9 Only use one single extension cable at a one time. DO NOT daisy chain extension cables. Unwind the
extension cable fully.
1.2. GENERAL
8 DO NOT touch heating parts with bare hands.
8 DO NOT touch live electrical parts or electrodes with bare skin or wet clothing.
8 DO NOT operate in the vicinity of containers under pressure, or in the presence of explosive dust, gases
8 or fumes.
8 DO NOT cover or stick objects into any of the ventilation holes on the equipment.
WARNING! The magnetic elds created by high currents may aect the operation of pacemakers. Wearers
of vital electronic equipment or those who have metallic surgical implant should consult their Doctor before using Induction heater.
8 DO NOT wear clothing with metallic components e.g. belt buckles, buttons, zips when working with the induction heater as it can
cause such items to heat up.
9 Remove any metallic components e.g. keys, chains, tools etc. while you operate the induction heater and DO NOT wear any metallic
objects such as jewellery, watches, piercings etc. on your body.
8 DO NOT use the heating element within 10cm of any airbag component.
8 DO NOT use the induction heater in the rain or in humid conditions or immerse it in water.
8 DO NOT leave the induction heater unattended whilst turned on.
8 DO NOT attempt to repair or service the induction heater.
9 Ensure area is adequately ventilated and dry.
9 Ensure ambient temperature is between -10 to 40 °C
9 Avoid using in bright sunshine or rain.
8 DO NOT not use the machine in an environment where the air is polluted with conductive dust or gases.
8 DO NOT attempt to heat aerosol and paint cans or any pressurised containers used for storing fuel, gases and liquids.
8 DO NOT use any heating coil if insulation has been breached to avoid sparking on contact with a metal surface.
WARNING! Due to the heat generated by the induction coils blistering of painted surfaces will happen if over heated.
WARNING! Fumes and smoke from hot/burning adhesives are toxic. Wear a suitable mask in such circumstances.
Recommended fuse rating
10 Amp
Original Language Version
© Jack Sealey Limited
Refer to
instructions
Electrical
shock
hazard
Hot surfaces Do not use in
the vicinity of a
pacemaker
Wear eye
protection
Wear protective
gloves
Warning
magnetic eld
Indoor use
only
Wear
respiratory
mask (fumes)
VS240.V2 Issue 1 04/04/23
2. iINTRODUCTION
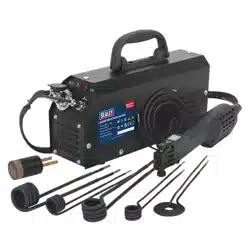
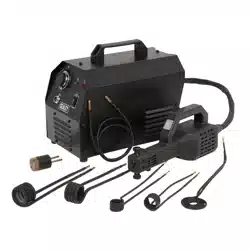
Mobile induction heater for fast heat delivery. Install appropriate coil and place over or around ferrous metal. Ideal for loosening stubborn
and seized fixings. Supplied with induction pad for plastic trim/sticker removal. Induction element delivers high heat fast and effectively.
Supplied in storage case.
3. i SPECIFICATION
Model No ...............................................................VS240.V2
Supply ............................................................................ 230V
Frequency ................................................................. 50/60Hz
Fuse Rating .....................................................................10A
Power ..........................................................................1000W
Power Supply Cable Length ...........................................2.8m
Net weight ..................................................................... 1.7kg
4. OPERATION
4.1. WORK CYCLE - two minutes on, 5 minutes o.
4.2. NOTE: DO NOT use the induction heater longer than for one work cycle. The circuit board has overheating protection but
the electrodes do not.
4.3. DIRECT COIL/SIDE COIL
4.3.1. Coil to heat nuts/bolts, screws etc. g.2. Keep gap of 3-4mm between coil and object being heated. DO NOT reuse bolts as heat may
have eected the physical properties of the bolt.
4.4. PAD COIL Ø55MM
4.4.1. Use Pad coil for heating of sheet steel to assist with the removal of decals, stickers, sealants/putties, use the coil approximately 5mm
away from the surface of the steel sheet.
WARNING! Over heating will damage painted surfaces. No liability will be accepted for damage caused by improper use.
4.5. FLEX COIL 830MM
4.5.1. Use Flex coil when it is not possible to use direct coils due to space, or position of object to be heated. Can be used on exhaust pipes
and suspension parts, by wrapping the coil around the part before connecting to the torch.
5. MAINTENANCE
WARNING! Before maintenance and any repair, the power supply must be turned o and the plug removed from the socket.
5.1. Remove dust by using clean dry compressed air regularly, if operating in a dusty environment this should be done on a daily basis.
5.2. Check cables for any sign of damage, if any part of the heater is damaged replace or repair. If in doubt contact a qualied electrician.
5.3. Avoid water and steam entering the machine, if this happens disconnect from power source and allow to dry, DO NOT use unless it
has been checked by a qualied electrician.
5.4. If not in use the machine and attachments should be stored in a dry, childproof area.
6. TROUBLESHOOTING
6.1. The induction heater switches itself o when it overheats, however, the electrodes DO NOT have protection against overheating. This
is the reason for a work cycle (4.1).
6.2. If the induction heater switches o suddenly and the LED lamp changes to blinking mode make sure that the power supply is not
interrupted. If you are using an extension cord, make sure there are no kinks in it. Let the device cool down for at least 15 minutes and
then try again.
6.3. If the problem persists, please contact your Sealey stockist.
fig.
2
fig.
1
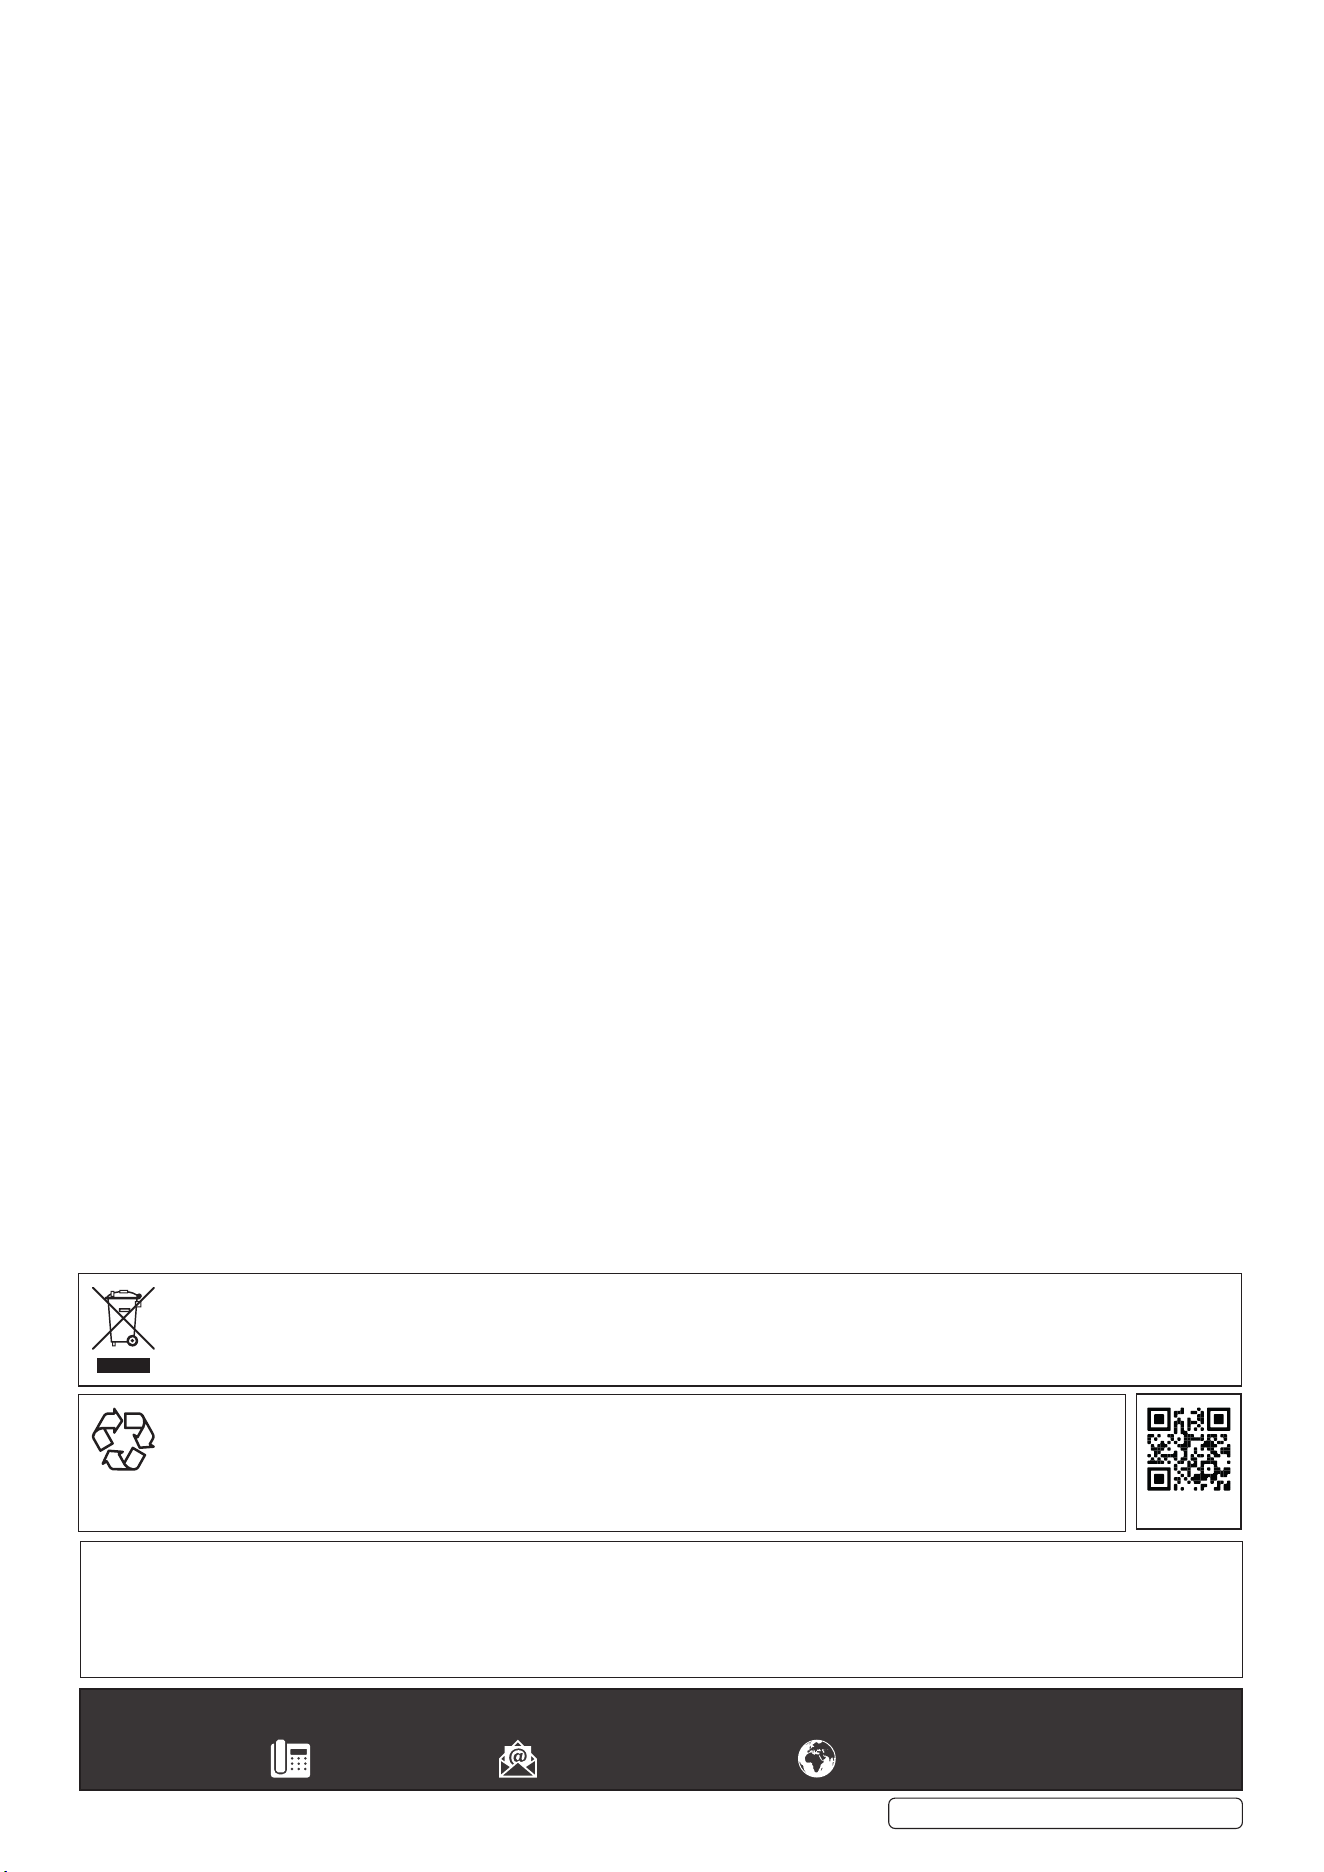
Item No. Description Part No:
1 Ø20mm Direct coil VS2303
2 Ø32mm Direct coil VS2407
3 Ø55mm Pad coil VS2309
4 Flex coil - 830mm VS2410
5 U-coil - 430mm VS2411
VS240.V2 Issue 1 04/04/23Original Language Version
© Jack Sealey Limited
WEEE REGULATIONS
Dispose of this product at the end of its working life in compliance with the EU Directive on Waste Electrical and Electronic Equipment
(WEEE). When the product is no longer required, it must be disposed of in an environmentally protective way. Contact your local solid
waste authority for recycling information.
Original Language Version
© Jack Sealey Limited
Sealey Group, Kempson Way, Suffolk Business Park, Bury St Edmunds, Suffolk. IP32 7AR
01284 757500 sales@sealey.co.uk www.sealey.co.uk
ENVIRONMENT PROTECTION
Recycle unwanted materials instead of disposing of them as waste. All tools, accessories and packaging should be sorted,
taken to a recycling centre and disposed of in a manner which is compatible with the environment. When the product
becomes completely unserviceable and requires disposal, drain any fluids (if applicable) into approved containers and
dispose of the product and fluids according to local regulations.
Note: It is our policy to continually improve products and as such we reserve the right to alter data, specifications and component parts without prior
notice. Please note that other versions of this product are available. If you require documentation for alternative versions, please email or call
our technical team on technical@sealey.co.uk or 01284 757505.
Important: No Liability is accepted for incorrect use of this product.
Warranty: Guarantee is 12 months from purchase date, proof of which is required for any claim.
REGISTER YOUR
PURCHASE HERE
VS240.V2 Issue 1 04/04/23