Loading ...
Loading ...
Loading ...
28
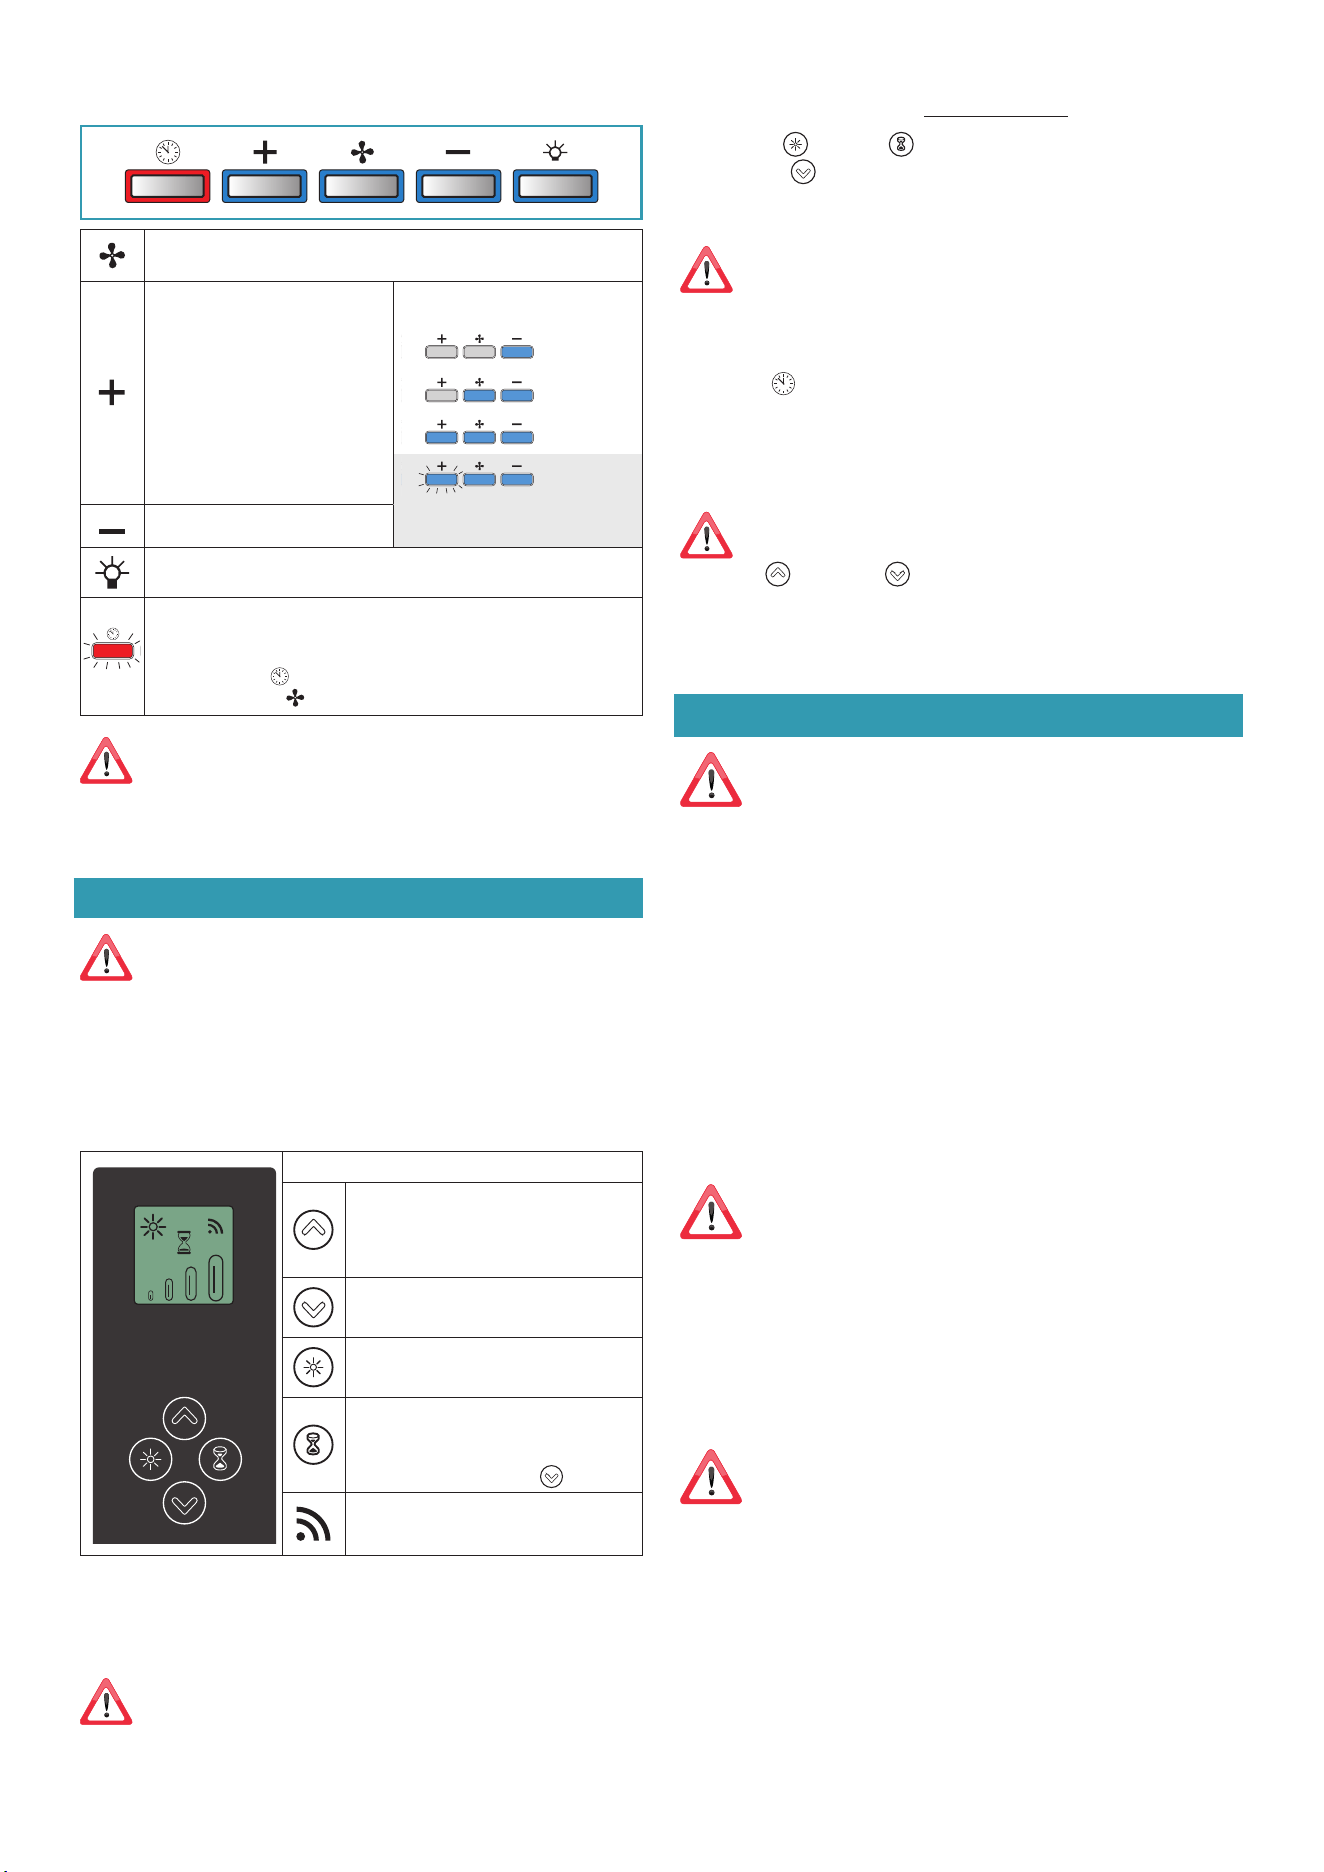
ELECTRONIC PUSHBUTTON PANEL
Motor ON/OFF
Upon start-up, the speed is that stored at the previous operation.
Increase speed
from 1 to MAX
Maximum speed with SRS
disabled:
Speed 4 is only active for a few
minutes, then it goes back to
speed 3.
Maximum speed with SRS
enabled:
Speed 3 or speed 2.
The speeds are indicated by the
LEDs on the keys:
Speed 1
Speed 2
Speed 3
Speed 4
("+" LED flashing)
with SRS disabled
Reduce speed from 4 to 1
Light on/o
TIMER (red LED flashing)
Auto switch-off after 15 min.
The function deactivates (red LED off) if:
- The TIMER key ( ) is pressed again.
- The ON/OFF key ( ) is pressed.
If the pushbutton panel is completely inactive, before contacting
the Technical assistance service, disconnect power temporarily to
the appliance (about 5“), possibly by acting on the main switch, to
restore normal operation.
If this measure has no eect, contact the Technical assistance service.
USING THE RADIO CONTROL
WARNINGS!:
Place the hood away from sources of electromagnetic waves (e.g.
microwave ovens), which could interfere with the radio control and
with the hood electronics. The maximum operating distance is 5 metres,
that may vary according to the presence of electromagnetic interferences.
Radio control operated at 433.92MHz.
The radio control consists of two parts:
- the receiver built into the hood;
- the transmitter shown here in the gure.
DESCRIPTION OF TRANSMITTING COMMANDS
UP
Motor switch-on and speed increase
from 1 to 4. Speed 4 is only active for a
few minutes.
DOWN
Speed decrease and motor switch-off.
Light ON-OFF
TIMER ON: The motor automatically
switches off after 15 min.
The function is automatically disabled if
the motor is switched off ( key)
Command transmission active
RADIO CONTROL CODE CHANGE
With only one radio control, go directly to point 2.
With several radio controls in the same room, a new code can be created by
following the procedure below.
Disconnect the power to the hood before starting the procedure.
1) - CREATE A NEW CODE
The procedure is to be carried out on the radio control.
• Press LIGHT and TIMER simultaneously until the display starts flashing.
• Press DOWN on the radio control: saving is confirmed by three brief flash-
es of the display. The new code cancels and replaces the previous default
code.
Reconnect the hood to the electrical power supply, making sure
that the lights and motor are o.
2) - ASSOCIATING THE RADIO CONTROL WITH THE HOOD
USING THE ELECTRONIC PUSHBUTTON PANEL
press TIMER ( ) on the hood pushbutton panel for 2 seconds:
the red LED lights up.
press any key on the radio control within 10 seconds.
RESTORING DEFAULT CODE
the procedure is to be carried out if the hood is disposed of, sold or transferred.
Disconnect the power to the hood before starting the procedure.
• Press UP and DOWN simultaneously on the radio control for more
than 5 seconds: reset is confirmed by three brief flashes of the display.
• Reconnect the hood to the electrical power supply.
• Proceed with associating the hood and the radio control, as described in point 2.
MAINTENANCE
Before cleaning or carrying out maintenance operations, discon-
nect the equipment by removing the plug or switching o the
main switch.
Do not use detergents containing abrasive, acidic or corrosive substances
or abrasive cloths.
Regular maintenance guarantees proper operation and performance over time.
Special attention is to be paid to the metal anti-grease lters : frequent clean-
ing of the filters and their supports ensures that no flammable grease is accu-
mulated.
CLEANING OF EXTERNAL SURFACES
You are advised to clean the external surfaces of the hood at least once every
15 days
to prevent oily substances and grease from sticking to them. To clean
the brushed stainless steel hood, the Manufacturer recommends using "Magic
Steel" wipes.
Alternatively and for all the other types of surfaces, it can be cleaned using a
damp cloth, slightly moistened with mild, liquid detergent or denatured alcohol.
Complete cleaning by rinsing well and drying with soft cloths.
Do not use too much moisture or water around the push button
control panel and lighting devices in order to prevent humidity
from reaching electronic parts.
The glass panels can only be cleaned with specific, non-corrosive or non-abra-
sive detergents using a soft cloth.
The Manufacturer declines all responsibility for failure to comply with these in-
structions.
CLEANING OF INTERNAL SURFACES
Do not clean electrical parts, or parts related to the motor inside
the hood, with liquids or solvents.
For the internal metal parts, see the previous paragraph.
Loading ...
Loading ...
Loading ...