
CTMULTILEAD.5
Universal Patch Lead
Installation Guide
www.connects2.com
The information provided in this document is subject to change without notice due to manufacturer changes and/or improvements
to the product/s. This instruction manual is based on documented data and research. The manufacturer of this product cannot be
held responsible for any changes made to the vehicle by the manufacturer or damages that may occur through the installation of this
DISCLAIMER
Note: Application data is subject to change at any time
FEATURES
• Can be paired with any Connects2 aftermarket harness
when upgrading the aftermarket stereo
• Accepts signals from multiple brands of stereo
• Quick & simple installation
www.connects2.com
2
CTMULTILEAD.5 - INSTALLATION MANUAL
J1 J2 J3 J4 Systems Connector
1 0 0 1 JVC
Jack (old), Key1(new)
0 1 0 1 BEAT/Philips/Nakamichi Key1
1 1 0 1 Clarion Jack
0 0 1 1 Kenwood Key1
1 0 1 1 Alpine Jack
0 1 1 1 Panasonic Key1
1 1 1 1 Sony/LG/Pioneer Jack
1 1 1 0 Pioneer (Type 2) Jack
1 (Pin12) 1 (Pin10) 0 1 Zenec Key1
1 1 1 1 Chinese Learning Brands Key1, Key2, GND
0 1 0 1 Grundig Key1
12
11
10
9
8
7
6
5
4
3
2
1
J1 J2 J3
Conguration Assignments (1 = Link Made, 0 = No Link)
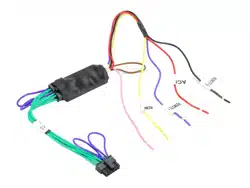
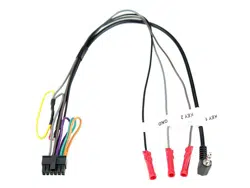
Pin Description Colour
1
2
3
Not populated
Not populated
Not populated
N/A
N/A
N/A
4 Analog 2 SWC Grey
5 Ground SWC Black
6 Analog 1 SWC Brown/White
7 Link J3 Purple
8 Link J3 Purple
9 Link J2 Green
10 Link J2 Green
11 Link J1 Orange
12 Link J1 Orange
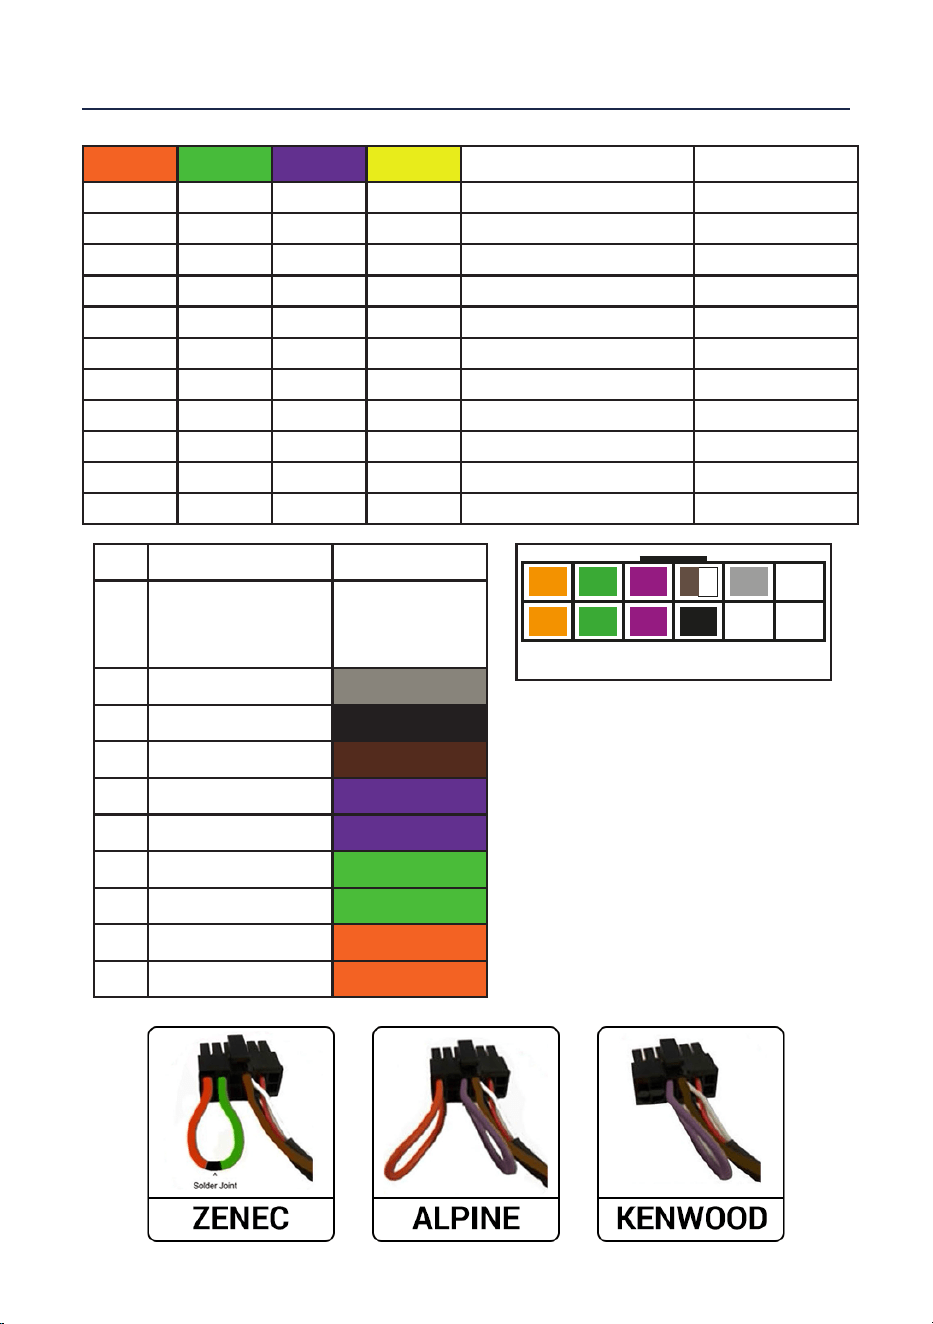
Examples of lead congurations:
ALPINE - Cut connection between J2,
then use the Jack connection for the
new stereo.
KENWOOD: Cut connections between
J1 and J2, then use the wired
connections for the new stereo.
ZENEC - Cut the connection between
J1, J2 and J3. Solder together the wires
from Pin 10 (J2) and Pin 12 (J1). Then
use the wired connections for new
stereo.