
Loading ...
4
Enrollment
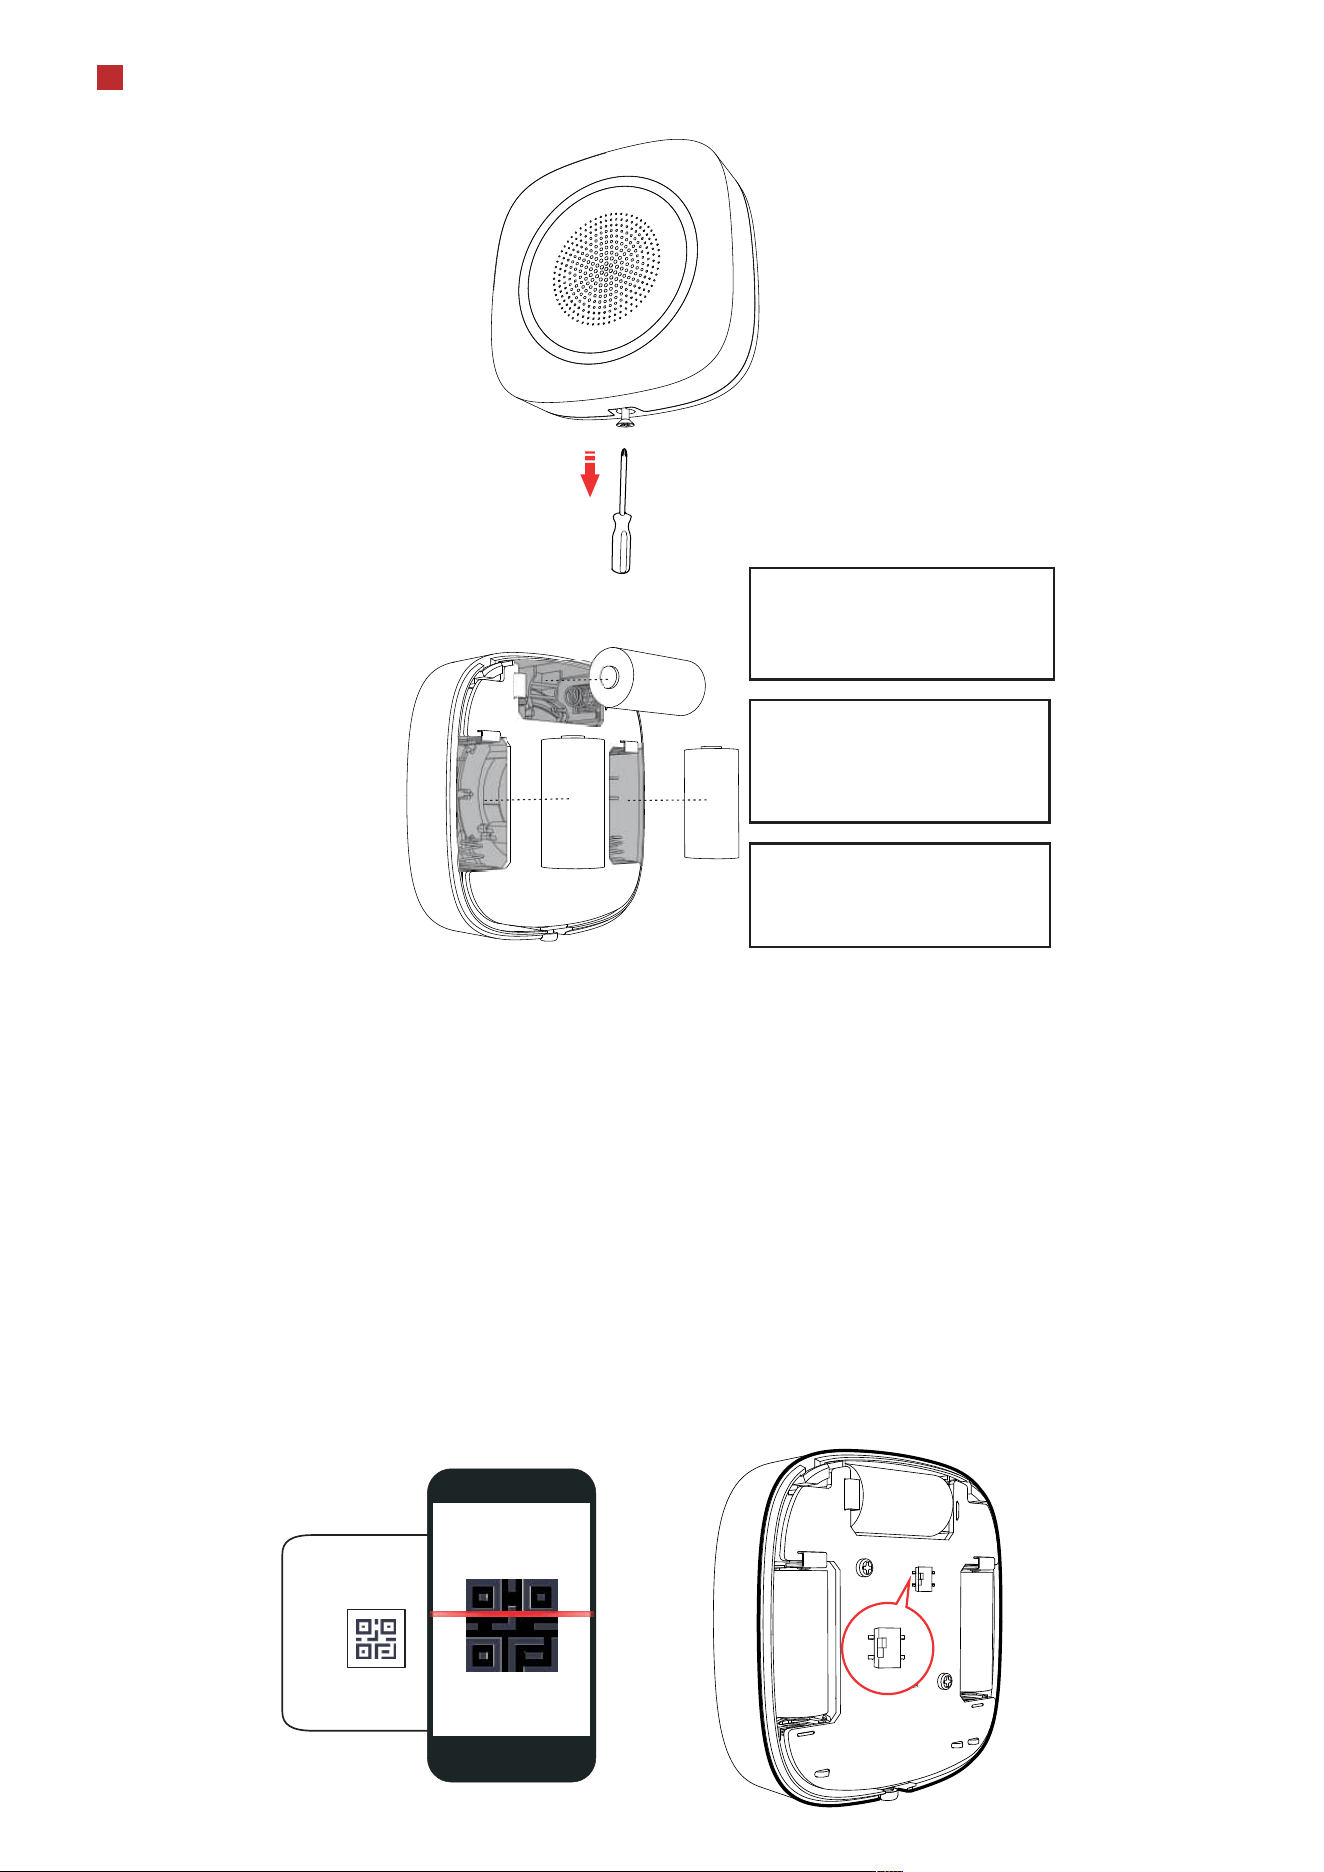
1. Remove the screw on the bottom of the sounder, and disassemble the peripheral and remove the rear panel..
2. Insert the batteries.
Note: for re-enrollment, you need to hold the tamper button while powering the peripheral on simultaneously.
2
CAUTION
RISK OF EXPLOSION IF BATTERY IS
REPLACED BY AN INCORRECT TYPE.
DISPOSE OF USED BATTERIES
ACCORDING TO THE INSTRUCTIONS
CHEMICAL BURNING DANGER
DO NOT SWALLOW THE BATTERY
KEEP NEW AND USED BATTERIES
AWAY FROM THE CHILDREN
ON
OF F
ON
OF F
Enroll the Peripheral Locally
Enroll the Peripheral with APP
1. In the APP, tap the "Enrollment Mode" button on the control panel page to make the control panel enter the enroll-
ment status.
2. Push the power switch of the peripheral to on, and it will be automatically enrolled to the control panel.
1. In the APP, tap the icon "+"and scan the QR code on the peripheral or enter the serial No. (Last 5 digit) of the peripheral.
2. Push the power switch of the peripheral to on, and it will be automatically enrolled to the control panel.
3. Log in to the APP Store, download and install App.
4. Power on the security control panel.
5. Log in the APP and tap the icon "+" . Scan the QR code or input the control panel serial No. (Last 5 digit) to add the
control panel.
6. Enroll the peripheral locally, with OR code, or with serial No..
INSTALL THE BATTERIES ACCORDING
TO THE POLARITY MARK ON THE
BATTERY HOLDER. THE OPPOSITE
POLARITY MAY CAUSE DEVICE
DAMAGE
Loading ...
Loading ...