Thank you for purchasing a Sealey product. Manufactured to a high standard, this product will, if used according to these instructions,
and properly maintained, give you years of trouble free performance.
IMPORTANT: PLEASE READ THESE INSTRUCTIONS CAREFULLY. NOTE THE SAFE OPERATIONAL REQUIREMENTS, WARNINGS & CAUTIONS. USE
THE PRODUCT CORRECTLY AND WITH CARE FOR THE PURPOSE FOR WHICH IT IS INTENDED. FAILURE TO DO SO MAY CAUSE DAMAGE AND/OR
PERSONAL INJURY AND WILL INVALIDATE THE WARRANTY. KEEP THESE INSTRUCTIONS SAFE FOR FUTURE USE.
Refer to
instruction
manual
1. SAFETY
WARNING! It is the user’s responsibility to ensure the safe use of the blow torch. The following safety instructions are a guide only, and
not an exhaustive list of potential hazards.
NOTE: The torch is for use with propane only.
9 Check torch and hose are in good condition and not damaged. Take immediate action to repair or replace damaged parts.
9 Use genuine parts only. Unauthorised parts may be dangerous and will invalidate the warranty.
9 Use and store gas cylinders in accordance with all government and local authority regulations applicable to such items.
9 Turn the gas cylinder tap on rst, then the regulator, and nally the torch tap. Reverse procedure to shut o.
9 Ensure nothing is standing or passing in front of the torch as the torch is ignited, and ensure you use a controlled source of ignition.
9 Ensure continuous ventilation is provided to the torch operating area, and that the area is clean and tidy.
9 The use of safety gloves is recommended. Remove ill tting clothing. Remove ties, watches, rings and other loose jewellery and
contain long hair.
9 Always keep an appropriate re extinguisher at hand.
9 Ensure there are no non essential persons in the working area.
9 Ensure the torch is correctly turned o when not in use.
8 DO NOT point torch at yourself or others. DO NOT leave torch lying unattended. Place in an appropriate holder when pilot only is
operating, or to cool.
8 DO NOT use torch near ammable material, liquids, solids, or gases, and materials that may be accidentally ignited i.e. wood, cloth,
plastic etc.
8 DO NOT point the torch at the gas cylinder or hoses, and DO NOT use the torch to remove any ice that may form on the gas cylinder.
8 DO NOT heat items the substance of which (or surface residues) contain any materials that become hazardous when heated.
8 DO NOT operate the torch when you are tired or under the inuence of alcohol, drugs or intoxicating medication.
8 DO NOT touch the torch or the work-piece until all parts have completely cooled.
8 DO NOT allow untrained persons to ignite or use the torch.
8 DO NOT leave the torch operating when unattended.
8 DO NOT try to make the torch “nozzle hole” larger.
WARNING! If the torch is used for prolonged periods at maximum power, ice may form on the propane cylinder. This is due to
excessive evaporation. In such a case DO NOT use the torch to de-ice the cylinder.
2. INTRODUCTION
Professional torch and accessories for jobs including, but not limited to, plumbing, soldering and braze-welding. Provided with a Nitrile
Butadiene Rubber hose which has excellent resistance to oil, fuel and chemicals, making it ideal for the workshop environment. Hose
connectors rotate 360° for ease of use and to prevent twists and kinks in the hose. Quickly and easily xed between torches using
the integrated xing wrenches on the hose. The soldering and brazing torch features a turbo trigger which intensies the ame whilst
pressed. Supplied in a metal case for storage and transporting.
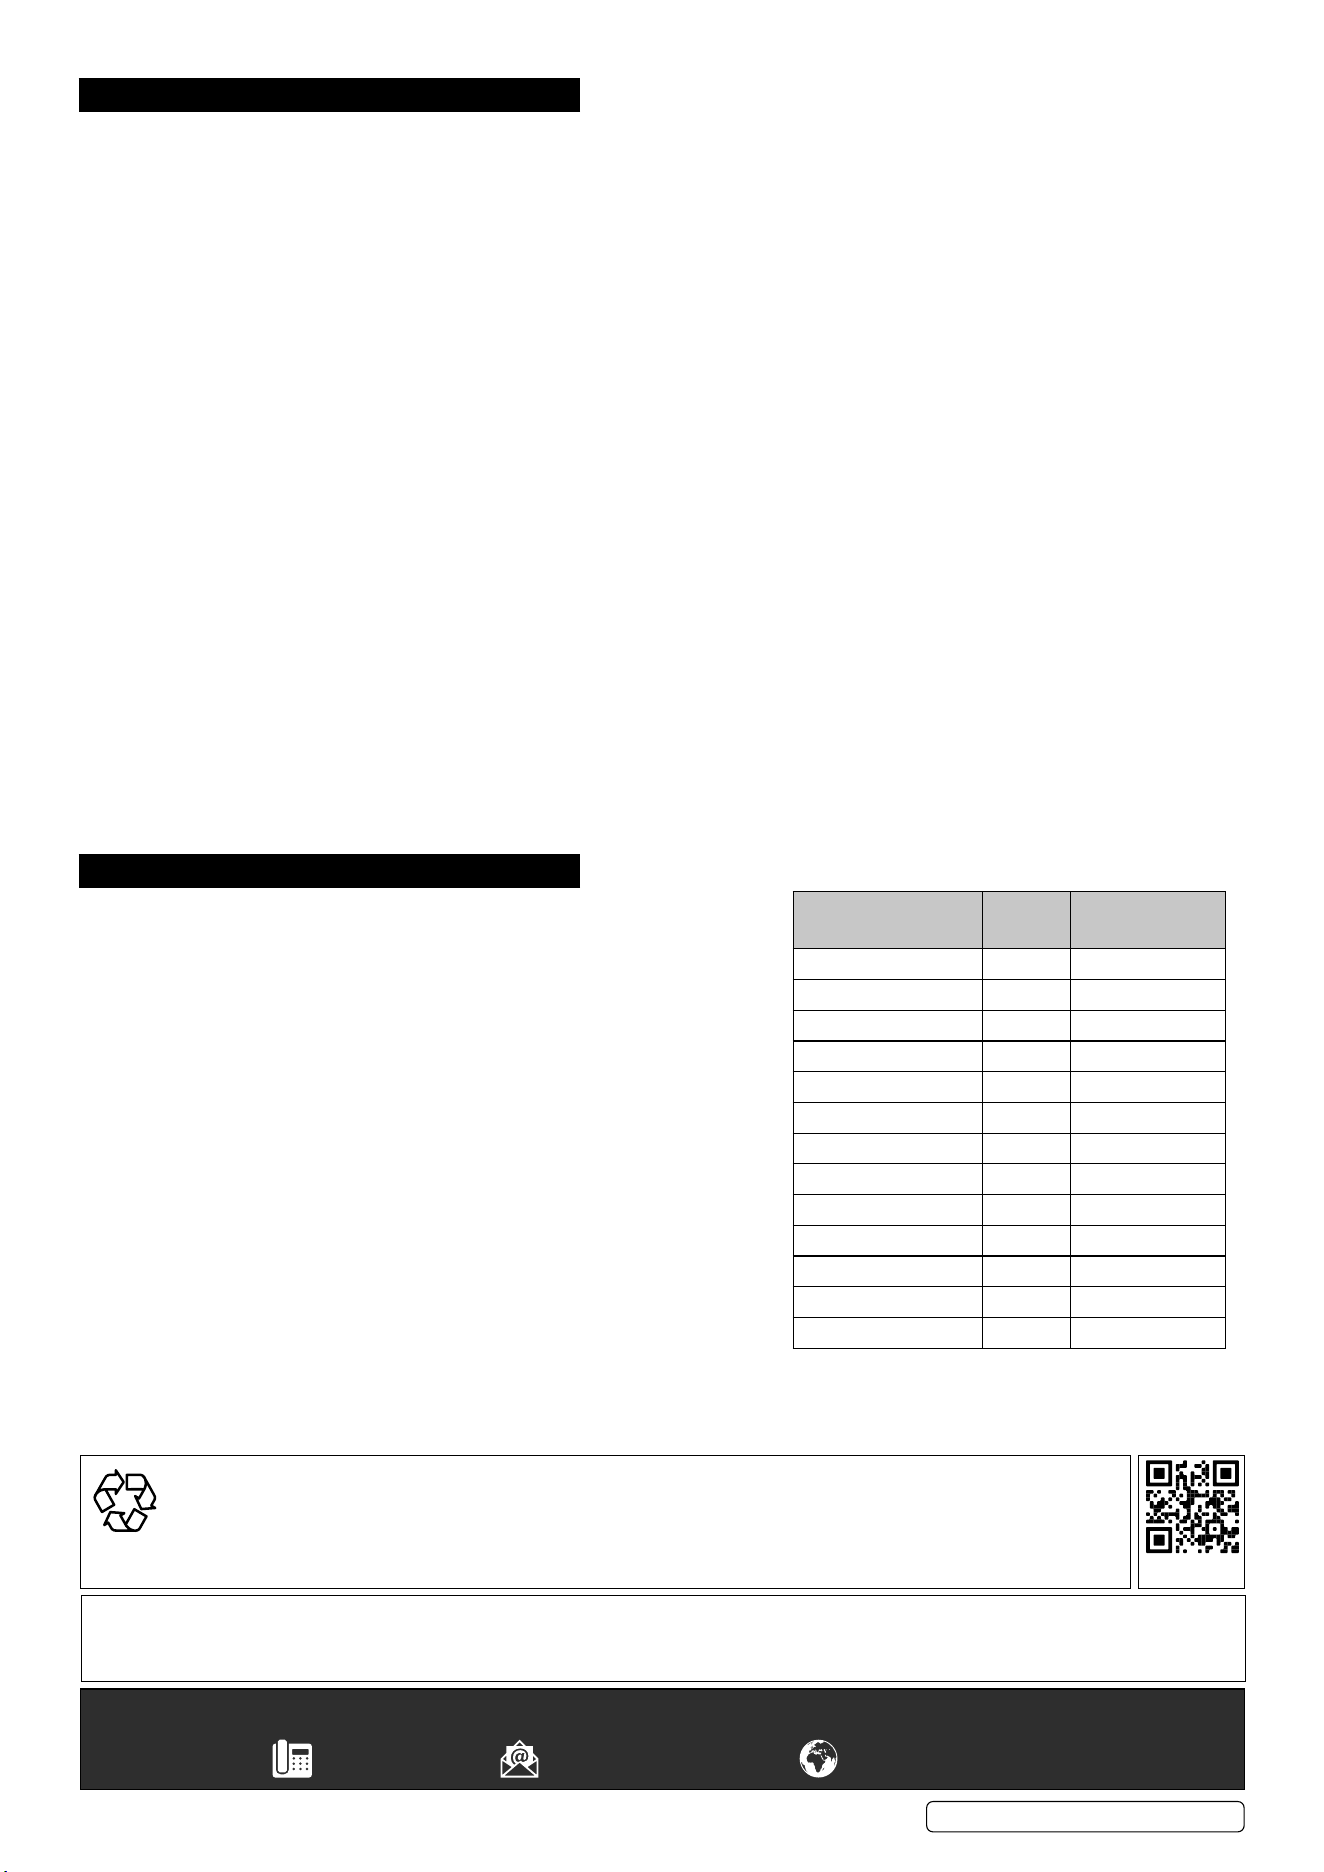
LPT7
g.2
LPT14
g.1
LPT7, LPT14 Issue 5 (2) 05/12/23
Original Language Version
© Jack Sealey Limited
PROPANE TORCH KIT
MODEL NO: LPT7, LPT14
3. OPERATION
WARNING! It is the user’s responsibility to ensure the safe use of the blow torch.
3.1. CONNECTING THE TORCH TO THE GAS CYLINDER. THE TORCH SHOULD ONLY BE USED WITH PROPANE GAS and must be
used in conjunction with the pressure regulator supplied. The torch will work with pressures between 1 - 7 Atm. See Table below for
description of power/energy consumption.
3.1.1. Ensure that the rubber hose for connecting the torch to the regulator/gas cylinder is in good condition.
3.1.2. For LPT7 the burners connect directly to the torch. For LPT14 select either the short or long extension and connect it to the torch.
Then select the desired burner for the task in hand and attach it to the torch (or extension) ensuring that the joints are properly seated
and fully tightened.
3.1.3. Attach the regulator to the gas cylinder and connect the torch using the rubber hose ensuring that the hose connections are properly
seated and fully tightened.
3.1.4. LEAK TESTING Before lighting the torch all connections must be leak tested using a thick soap solution such as washing up liquid
or ideally a proprietary leak detection spray. Close the burner control on the torch. Open the gas cylinder tap and then the regulator.
Spray every joint on the regulator, hose and torch with leak detection uid and check for leaks. Tighten any joints as necessary and
retest. If any joints still leak turn o the gas, disassemble and investigate. On LPT14 check condition of “O ring” seals. Do not proceed
to lighting the torch until all joints are gas tight.
3.2. IGNITION
NOTE: Pilot light control. The burners on the LPT7 are tted with a pilot light control in the form of a brass sleeve on the burner tube
which will slide over the air inlet holes at the base of the burner stem (see g.2.3.). This has the eect of turning a blue ame to a more
visible yellow ame when only a pilot light is required. (Only the pipe heating burner on the LPT14 has this feature.)
3.2.1. Ensure that the burner control tap (g.2.1.) is turned o.
3.2.2. Open the gas cylinder tap rst and then screw the regulator tap downwards to open it.
3.2.3. Open the control tap (1) a small amount only until the gas can be heard escaping .
3.2.4. Draw your ame igniter up to the underside of the torch burner opening.
3.2.5. Once the torch “pilot”has ignited remove and extinguish the source of ignition.
3.3. USING THE TORCH If the ame is set for a yellow pilot light slide the pilot light sleeve away from the air inlet holes so that the ame
burns blue.
3.3.1. For increased ame intensity depress the trigger. (g.2.2.)
3.3.2. Release the trigger to return the ame to the “pilot” light.
3.3.3. Flame intensity can be controlled using the burner control tap (g.2.1.). As the tap is opened up the ame gets larger. As the tap
approaches fully open the trigger is overridden and only comes back into play again when the tap is partly closed.
3.3.4. Turn the control tap (1) o to extinguish the torch completely, and then turn the gas cylinder tap o.
4. MAINTENANCE
WARNING! Before commencing service or maintenance turn all gas
taps o and disconnect the torch from the gas supply.
NOTE: From time to time the burner nozzle and injector may require
cleaning. Refer to relevant section below.
4.1. LPT7 MAINTENANCE
To dismantle the nozzle and injector from a burner insert a 4mm hex
key into the hexagonal hole to be seen in the base of each burner stem.
Unscrew the injector from the nozzle using a 7mm socket or spanner.
Wash the nozzle and injector carefully in petrol or similar cleaning
uid. DO NOT dislodge the lter gauze to be found in the base of the
ne injectors. Blow out the injector with compressed air from the lter
end only. WARNING! DO NOT clean the injector with a thin steel wire
as this may enlarge the hole in the injector making it unsafe to use
and invalidating your warranty. Reassemble ensuring that the loose
connector nut is held in place by the injector/nozzle assembly.
4.2. LPT14 MAINTENANCE
The nozzle/injector assemblies are mounted at the base of each burner
head and serve to connect the heads to the torch extensions. Unscrew
the nozzle/injector from the burner head using a 13mm spanner.
Unscrew the injector from the nozzle and proceed as above.
BURNER
DIAMETER mm
POWER
kW
CONSUMPTION
gr/hr
10 1.4 100
14 1.7 120
17 2 140
20 2.1 150
25 3.7 265
35 6.3 450
45 19.5 1400
50 28 2000
60 35 2500
76 54 3850
45 TURBO 29.5 2100
50 TURBO 33 2350
60 TURBO 54 3850
Sealey Group, Kempson Way, Suffolk Business Park, Bury St Edmunds, Suffolk. IP32 7AR
01284 757500 sales@sealey.co.uk www.sealey.co.uk
Note: It is our policy to continually improve products and as such we reserve the right to alter data, specications and component parts without prior notice.
Important: No Liability is accepted for incorrect use of this product.
Warranty: Guarantee is 12 months from purchase date, proof of which is required for any claim.
ENVIRONMENT PROTECTION
Recycle unwanted materials instead of disposing of them as waste. All tools, accessories and packaging should be
sorted, taken to a recycling centre and disposed of in a manner which is compatible with the environment. When
the product becomes completely unserviceable and requires disposal, drain any uids (if applicable) into approved
containers and dispose of the product and uids according to local regulations.
REGISTER YOUR
PURCHASE HERE
LPT7, LPT14 Issue 5 (2) 05/12/23
Original Language Version
© Jack Sealey Limited