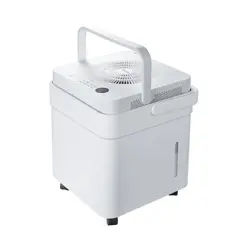
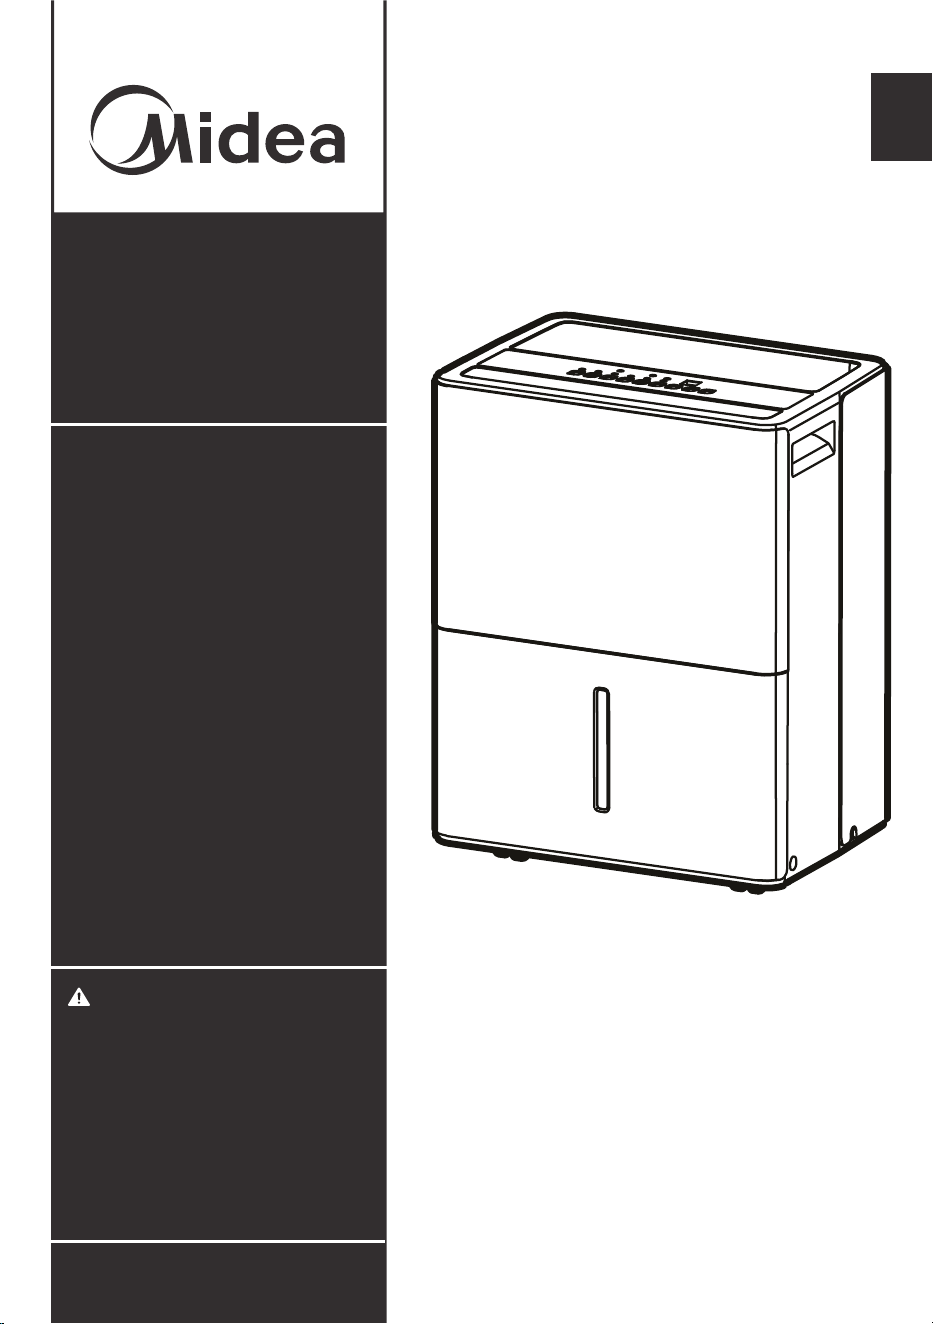
Dehumidifier
MAD22C1AWS
MAD35C1AWS
MAD50C1AWS
MAD50P1AWS
MAD50PS1WS
www.midea.com
USER MANUAL
en
MAD
Warning notices:
Before using this product,
please read this manual carefully
and keep it for future reference.
The design and specifications
are subject to change without
prior notice for product
improvement.
Consult with your dealer or
the manufacturer for details.
Rated voltage: 115V
Frequency: 60Hz
WARNING
version A - 10 - 2022 (PREVIEW02)
Page 2
Read This Manual
Inside you will find many helpful hints on how to use and maintain your air conditioner
properly. Just a little preventive care on your part can save you a great deal of time
and money over the life of your air conditioner. You’ll find many answers to common
problems in the troubleshooting tips - you should be able to fix most of them quickly
before calling service. These instructions may not cover every possible condition of
use, so common sense and care for safety is required when installing, operating and
maintaining this product.
• For support, please call the Service Center at 1-866-646-4332
• This appliance is not intended for use by persons (including children) with reduced
physical, sensory or, or lack of experience and knowledge, unless they have been
given supervision or instruction concerning use of the appliance by a person
responsible for their mental capabilitie safety.
• Children should be supervised to ensure that they do not play with the appliance
• The appliance shall be installed in accordance with national wiring regulations.
Owner’s Manual
1
2
3
4
5
6
Safety Precautions ............................................................................ 3
Unit Specifications and Features ................................................... 7
Installation Instructions .................................................................... 8
Operating Instructions ..................................................................... 9
Care and Cleaning ........................................................................... 19
App Instructions .................................................................................... 15
6
Troubleshooting Tips ....................................................................... 20
7
Warranty ............................................................................................... 21
CAUTION
Page 3
Safety
Precautions
To prevent injury to the user or personal and property damage, these instructions must
be followed. Incorrect operation due to ignoring of instructions may cause harm or
damage. The level of risk is shown by the following indications.
WARNING
This symbol indicates a hazardous situation which, if not
avoided, could result in death or serious injury.
CAUTION
This symbol indicates a hazardous situation, which, if not
avoided, could result in minor or moderate injury.
NOTICE
This symbol addresses practices not related to physical injury.
• Plug in power plug properly.
Otherwise, it may cause electric shock or fire due to excess heat generation.
• Do not modify power cord length or share the outlet with other appliances.
It may cause electric shock or fire due to overheating.
• Always ensure effective grounding.
Incorrect grounding may cause electric shock.
• Unplug the unit if strange sounds, smells, or smoke come from it.
A damaged product may cause fire and electric shock.
• Ventilate room before operating the unit if there is a gas leak from other appliances.
• Do not operate or stop the unit by inserting or pulling out the power plug.
It may cause electric shock.
• Do not allow water to enter into electric parts.
It may cause failure or electric shock.
• Do not use the power outlet if it is loose or damaged.
It may cause fire and electric shock.
• Do not use or keep the power cord close to heating appliances or heat sources
such as fireplaces.
It may cause fire and electric shock.
• Do not disassemble or modify unit.
It may cause failure and electric shock.
• Do not damage or use an unspecified power cord.
It may cause fire and electric shock.
• If the power cord is damaged, it must be replaced by the manufacturer or an
authorized service center or a similarly qualified person in order to avoid electrical risk.
• Do not use the unit near flammable gas or combustibles, such as gasoline,
benzene, thinne
r, etc.
It may cause fire.
WARNING

Page 4
Safety
Precautions
• Before cleaning, turn off the power and unplug the unit.
• Be sure the dehumidifier has been securely and correctly installed according to the
installation instructions in this manual. Save this manual for possible future use in
removing or installing this unit.
• Do not operate with wet hands.
It may cause electric shock.
• Do not open the unit during operation.
It may cause electric shock.
• Avoid fire hazard or electric shock.
Do not use an extension cord or an adaptor plug. Do not remove any prongs from
the power cord.
• Be sure the dehumidifier is properly grounded. To minimize shock and fire hazards,
proper grounding is important.
The power cord is equipped with a three-prong grounding plug for protection
against shock hazards.
• Your dehumidifier must be used in a properly grounded wall receptacle. If the
wall receptacle you intend to use is not adequately grounded or protected by a
time delay fuse or circuit breaker, have a qualified electrician install the proper
receptacle. Ensure the receptacle is accessible after the unit installation.
• Be sure the electrical service is adequate for the model you have chosen. This
information can be found on the serial plate, which is located on the side of the
cabinet and behind the grille.
• Do not drink the water from the bucket.
• Before cleaning, turn off the power and unplug the unit.
• Do not use the unit in small spaces or place in a sink or shower.
Lack of ventilation can cause overheating and fire.
WARNING

Page 5
Safety
Precautions
• Do not use in places where water may splash onto the unit.
Water may enter the unit and degrade the insulation. It may cause an electric
shock or fire.
• Place the unit on a level, sturdy section of the floor.
If the unit falls over, it may cause water to spill and damage belongings, or cause
electrical shock or fire.
• Never insert your finger or other foreign objects into grills or openings. Take
special care to warn children of these dangers.
It may cause failure or electric shock.
• Do not climb up on or sit on the unit.
You may be injured if you fall or if the unit falls over.
• Always insert the filters securely, and take caution to avoid injuries to hand and
fingers. Clean filter once every two weeks.
• If water enters the unit, turn the unit off and disconnect the power, contact a
qualified service technician.
• Do not place flower vases or other water containers on top of the unit.
Water may spill inside the unit, causing insulation failure and electrical shock or fire.
• If the unit is knocked over during use, turn off the unit and unplug it from the
main power supply immediately. Visually inspect the unit to ensure there is no
damage. If you suspect the unit has been damaged, contact customer service or
a qualified technician.
• In a thunderstorm, the power should be disconnected t
o the unit due to lightning.
• Do not run power cord under carpeting. Do not cover cord with throw rugs,
runners, or similar coverings. Do not route cord under furniture or appliances.
Arrange cord away from traffic area and where it will not be tripped over.
• Clean the bucket regularly.
CAUTION
Page 6
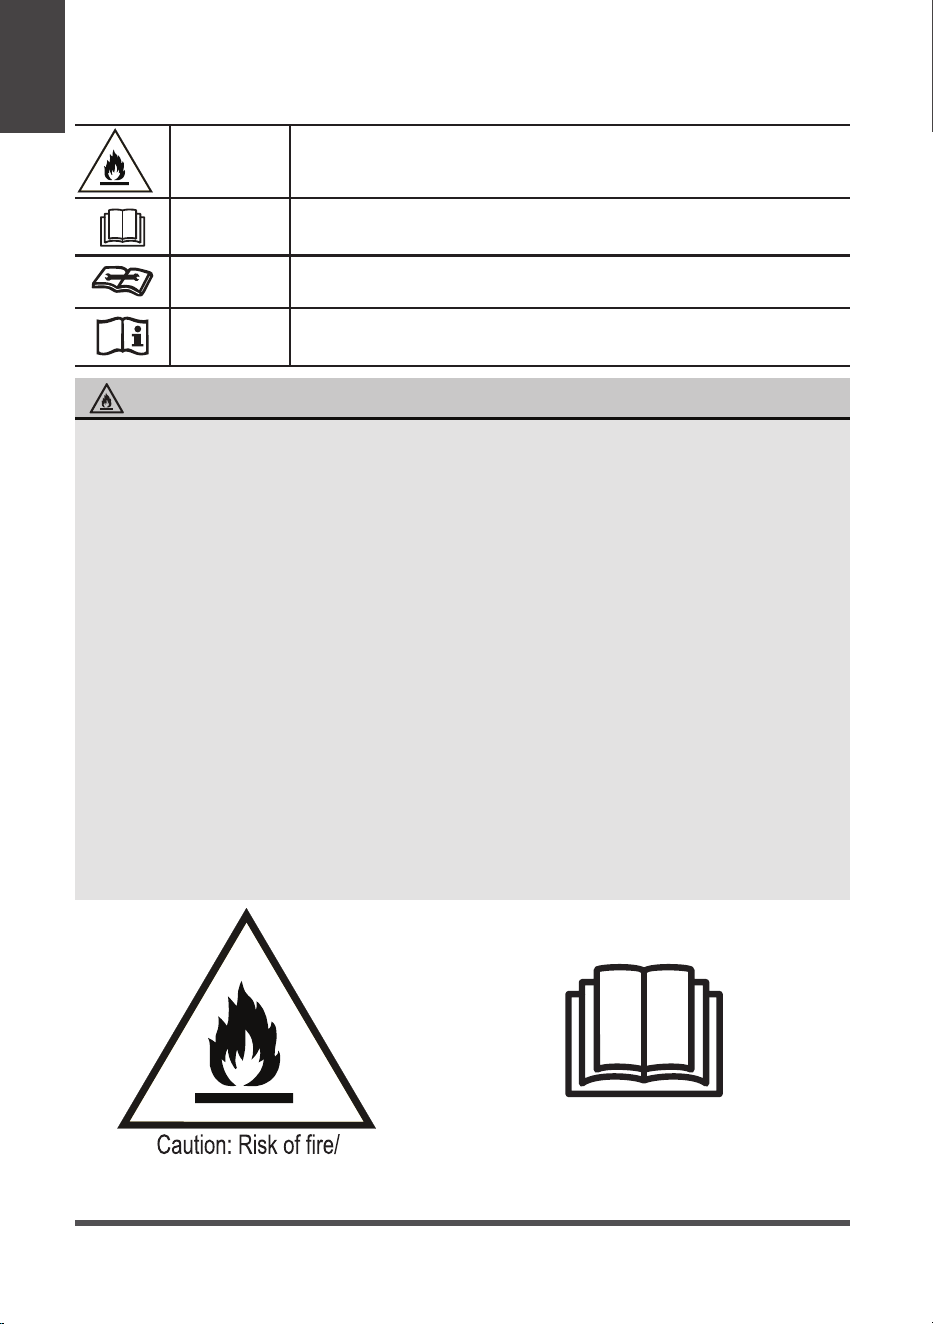
WARNING
This symbol shows that this appliance used a flammable
refrigerant. If the refrigerant is leaked and exposed to an
external ignition source, there is a risk of fire.
CAUTION
This symbol shows that the operation manual should be read
carefully.
CAUTION
This symbol shows that a service personnel should be handling
this equipment with reference to the installation manual.
CAUTION
This symbol shows that information is available such as the
operating manual or installation manual.
EXPLANATION OF SYMBOLS DISPLAYED ON THE UNIT
• Do not try to accelerate the defrosting process or methods of cleaning that are
not recommended by the manufacturer.
• The appliance shall be stored in a room without a continuously operating ignition
source (for example, open flames or an operating gas appliance) or an ignition
source (for example, an operating electric heater) close to the appliance. The
appliance shall also be stored in a room without ignition sources.
• Do not pierce or burn.
• Be aware that the refrigerants may not contain an odor.
• Keep ventilation openings clear of obstruction.
• Unit is only to be serviced by a Midea authorized servicer, please call Customer
Service at 1-866-646-4332 for support.
• Flammable refrigerant R32 is used within air conditioner. Please
follow the
instructions carefully to handle, install, clean, and service the air conditioner
to avoid damage or hazard.
Do not dispose of air conditioner in regular trash.
Contact qualified agency for proper disposal.
• No open fire or devices that generate spark/arcing shall be around the air
conditioner to avoid causing ignition of the flammable refrigerant used. Please
follow the instructions carefully to store or maintain the air conditioner to
prevent mechanical damage from occurring.
WARNING
flammable materials
(Required for R32 units only)
IMPORTANT NOTE:Read this manual
carefully before installing or operating
your new air conditioning unit. Make sure
to save this manual for future reference.
Safety
Precautions
A2L
ISO 817
A2L
ISO 817
Page 7
Unit
Specifications
and Features
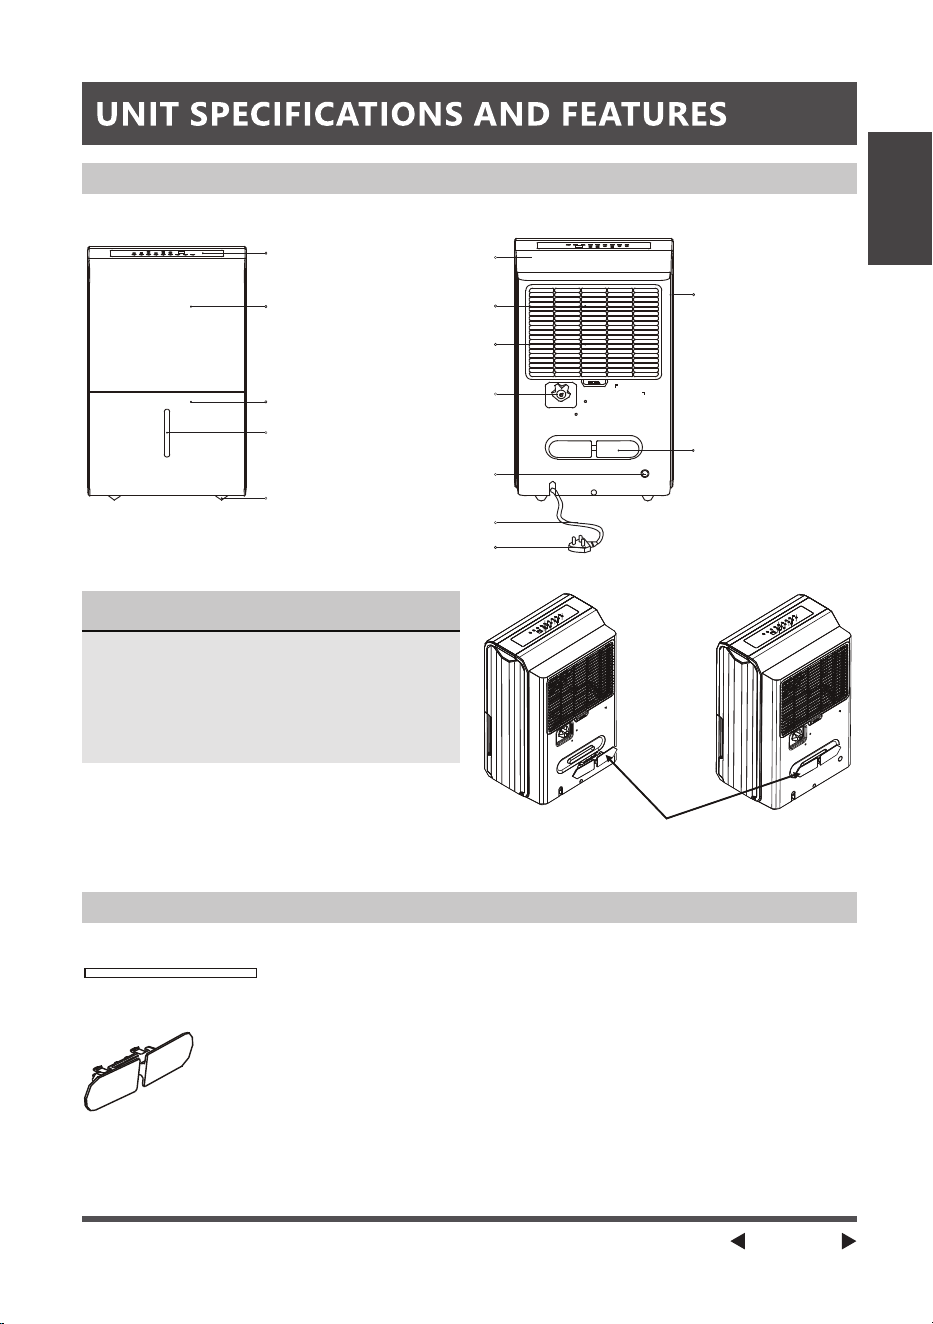
Control panel
Panel
Handle
(both sides)
Air intake
Air filter
(behind the grill)
Water bucket
Water level
window
Caster
Power cord
Power plug
Air outlet
Continuous
drain hose outlet
Pump drain
hose outlet
(on some models)
Power cord buckle
(placed in the water
bucket, used only
when storing the unit.)
Installed as shown below
RearFro n t
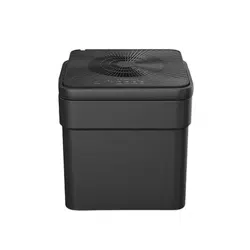
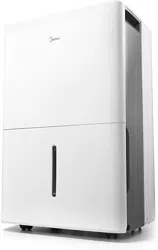
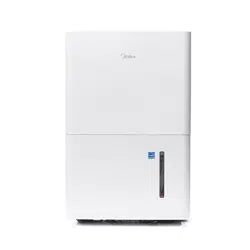
Product overview
Accessories
NOTICE
All the pictures in this manual are
for illustrative purposes only. The
actual shape of the dehumidifier you
purchased may be slightly different, but
its operations and functions are similar.
Pump drain hose (1 pc) (only for units with the drain pump feature)
Power cord buckle (1 pc)
Insert the power cord buckle into the unit.
Fig. 1
Fig. 2
Page 8
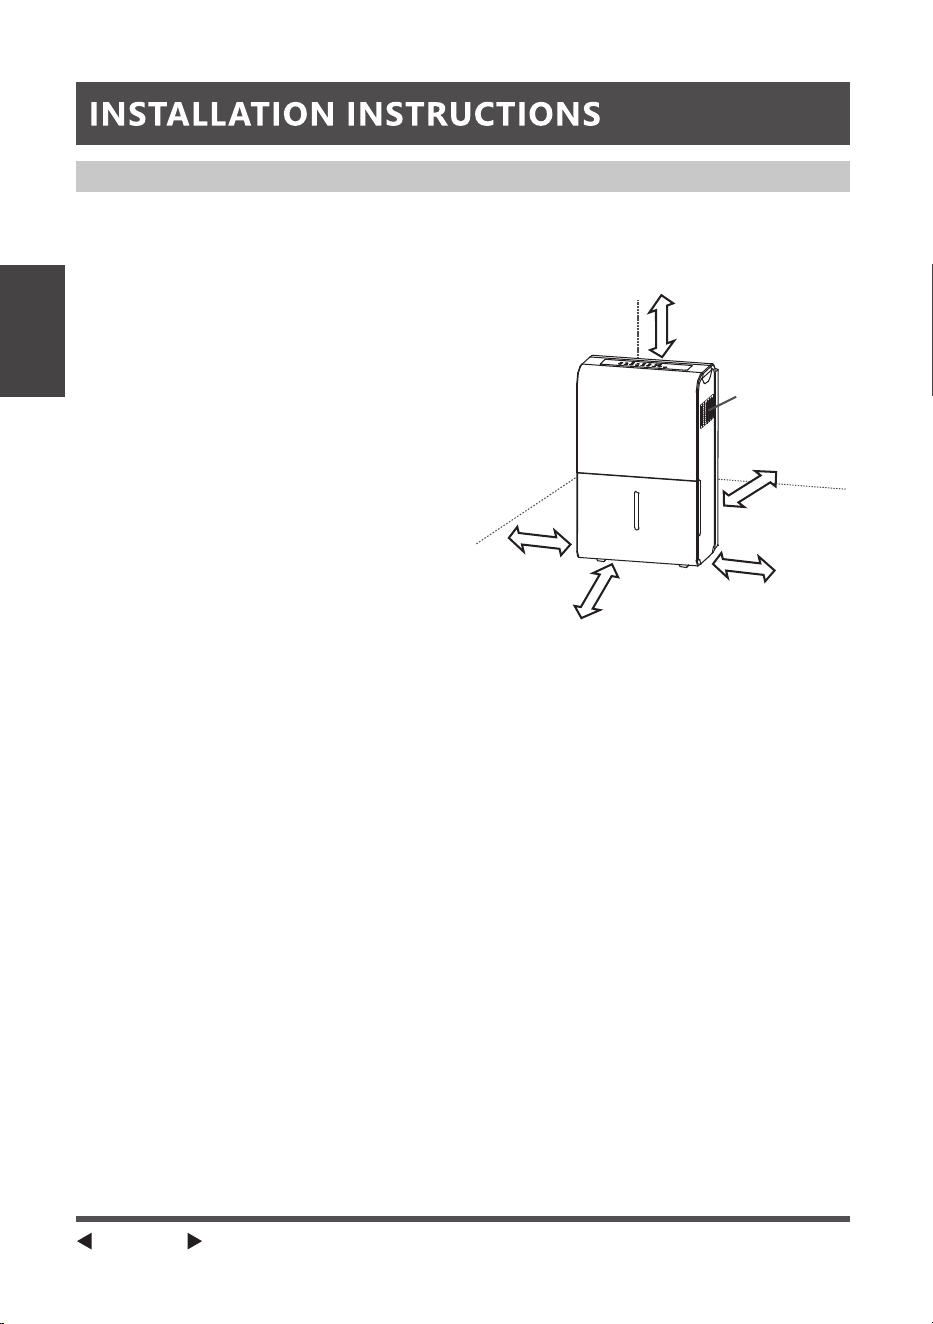
Positioning the Unit
more than 16”
Air outlet
more than
8”
more than 8”
more than
8”
more than
16”
A dehumidifier operating in a basement will have little or no effect in drying an
adjacent enclosed storage area, such as a closet, unless there is adequate circulation
of air in and out of the area. (See Fig. 3)
• Do not use outdoors.
• This dehumidifer is intended for indoor
residential applications only. This
dehumidifier should not be used for
commercial or industrial applications.
• Place the dehumidifier on a smooth,
level floor strong enough to support
the unit with a full bucket of water.
• Allow at least 8” of air space on all
sides of the unit for air circulation (at
least 16” for air outlet).
• Place the unit in an area where the
temperature will not fall below 41°F
(5°C). The coils can become covered
with frost at at lower temperatures,
which may reduce performance.
• Place the unit away from any clothes
dryer, heater or radiator.
• Close all doors, windows and other
outside openings to the room.
Fig. 3
Installation
Instructions
Page 9
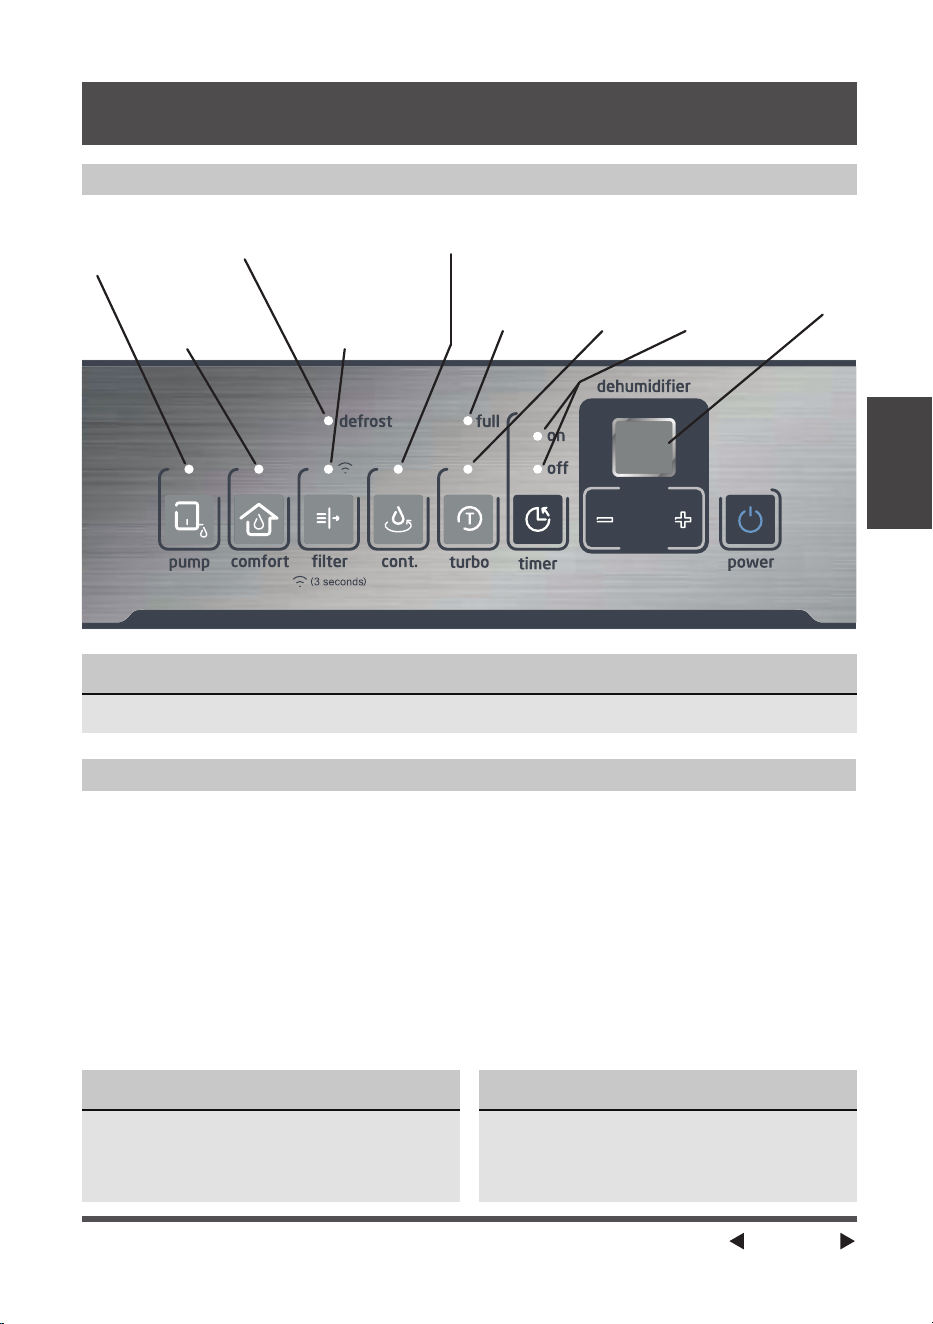
Key Pad Features
Control Pads
NOTICE
The appearance of the control panel on your unit may vary slightly. Functions will be similar.
When you push the button to change
operation modes, the unit will make a
beep sound to indicate that it is changing
modes.
(PUMP) Button
(PUMP Models Only)
Press to activate the pump operation.
Comfort
dehumidifying
operation on
indicator light
Bucket full
indicator
light
Timer on/off
indicator
light
High fan
indicator
light
Continuous operation
on indicator light
Auto defrost operation
on indicator light
Clean filter
indicator light
Wireless Indicator
(some models)
Pump
indicator
light
LED
Display
NOTICE
When CONTINUOUS function is turned
on, the humidity set point cannot be
changed manually.
(FILTER) Button
This feature is a reminder to clean the Air
Filter for more efficient operation. The
LED (light) will flash after 250 hours of
operation. To reset after cleaning the filter,
press the Filter button and the light will go
off. The 250 hour counter will reset.
(CONTINUE) Button
Press to activate the continuous
dehumidifying operation.
(COMFORT) Button
Press to activate the comfort dehumidifying
operation.
NOTICE
Note: When using this function, the
humidity level can not be selected. On
some models, pressing the Up/Down
button will cancel this function.
OPERATING INSTRUCTIONS
Operating
Instructions

Page 10
(TURBO) Button
Control the Turbo speed. Press to select
either Turbo or normal fan speed. Set
the Turbo control to high for maximum
moisture removal. When room humidity
is at your preferred level, it is advised to
turn off Turbo speed.
(TIMER) Button
Starts the Timer ON and Timer OFF
function setting.
Up/Down Buttons (
/ )
• Humidity Set Control Buttons
The humidity level can be set within a
range of 35% RH (Relative Humidity)
to 85% RH (Relative Humidity) in 5%
increments.
For drier air, press the
button and
set to a lower value (%).
For damper air, press the
button and
set a higher value (%).
• TIMER Set Control Buttons
Use the
and key buttons to set
the Timer ON or Timer OFF from 0 to
24 hours.
(POWER) Button
Press to turn the dehumidifier on and off.
LED Display
Shows the set % humidity level from 35%
to 85% or auto start/stop time (0 ~ 24)
while setting, then shows the actual (+/- 5%
accuracy) room % humidity level in a range
of 30% RH (Relative Humidity) to 90% RH
(Relative Humidity).
Wireless Indicator
When connecting your air conditioner
to Wireless, press the Filter button for 3
seconds to initiate the Wireless connection
mode. The display shows ‘AP’ t
o indicate
the unit is in the Wireless connection mode.
Refer to the instructions within the app
to complete the connection process. If
connection is successful within 8 minutes,
the unit will exit Wireless connectio
n
mode automatically and the Wireless
indicator illuminates. If connection failed
within 8 minutes, the unit exits Wireless
connection mode automatically and the
Wireless indicator does not illuminate.
After Wireless connection is successful,
you can control the Dehumidifier within
the MSmartHome app.
Operating
Instructions
Error Codes and Protection Code:
AS - Humidity sensor error - Unplug
the unit and plug it back in. If error
persists, contact Customer Service.
ES - Tube Temperature sensor of the
evaporator error - Unplug the unit
and plug it back in. If error persists,
contact Customer Service.
P2 - Bucket is full or bucket is not in right
position - Empty the bucket and
replace it in the right position. (only
available for the unit with no pump
feature.)
P2 - Bucket is full - Empty the bucket.
(only available for the unit with
pump feature.)
EC - Refrigerant leakage detection -
Displ
ay area will show EC when the
unit detects refrigerant leakage. If
error persists, contact Customer
Service.
Eb - Bucket is removed or not in right
position - Replace the bucket in the
right position. (only available for the
unit with pump feature.)

Page 11
Bucket Full Light
Lights up when the bucket is ready to be
emptied.
Auto Shut Off
The dehumidifier shuts off when the bucket
is full, or when the bucket is removed or not
replaced in the proper position. When the
set point humidity level is reached, the unit
will be shut off automatically. The fan motor
will continue operating.
Auto Defrost
When frost builds up on the evaporator
coils, the compressor will cycle off
and Auto Defrost function will run
automatically.
3 minute compressor operation delay
protection
After the unit has stopped, it can not be
restarted in the first 3 minutes to protect
compressor operation. The unit will restart
automatically after 3 minutes.
Auto-Restart
If the unit stops unexpectedly due to a
power cut, it will restart with the previous
function setting automatically when the
power resumes.
Setting the Timer ON and Timer OFF
• When the unit is on, first press the
Timer button, the Timer OFF indicator
light illuminates. It indicates the Timer
OFF program is initiated. Press it
again the Timer ON indicator light
illuminates. It indicates the Timer ON is
initiated.
• When the unit is off, first press the
Timer button, the Timer ON indicator
light illuminates. It indicates the Timer
ON program is initiated. Press it
again the Timer OFF indicator light
illuminates. It indicates the Timer OFF
is initiated.
• Press or hold the
and key buttons
to change the Timer by 0.5 hour
increments, up to 10 hours, then at
1 hour increments up to 24 hours.
The control will count down the time
remaining until start.
• The selected time will register
in 5 seconds and the system will
automatically revert back to display
the previous humidity setting.
• When the Timer ON and Timer
OFF times are set, within the same
program sequence, indicator lights
illuminate identifying both ON and
OFF times are now programmed.
• Turning the unit ON or OFF at any time
or adjusting the timer setting to 0.0
will cancel the Timer function.
• When LED display window displays
the code of P2, the Auto Start/Stop
function will also be cancelled.
NOTICE
• Before operating the unit, make sure
the plug for the drain hose outlet is
securely installed.
• When first using the dehumidifier,
operate continuously for 24 hours.
• This unit is designed to operate with
a working environment between
5°C/41°F and 32°C/90°F.
• Make sure the water bucket is
positioned correctly so that the unit
can operate properly. When the
water in the bucket reaches a certain
level, please be careful while moving
the unit to avoid spill.
Other Features
Operating
Instructions
Page 12
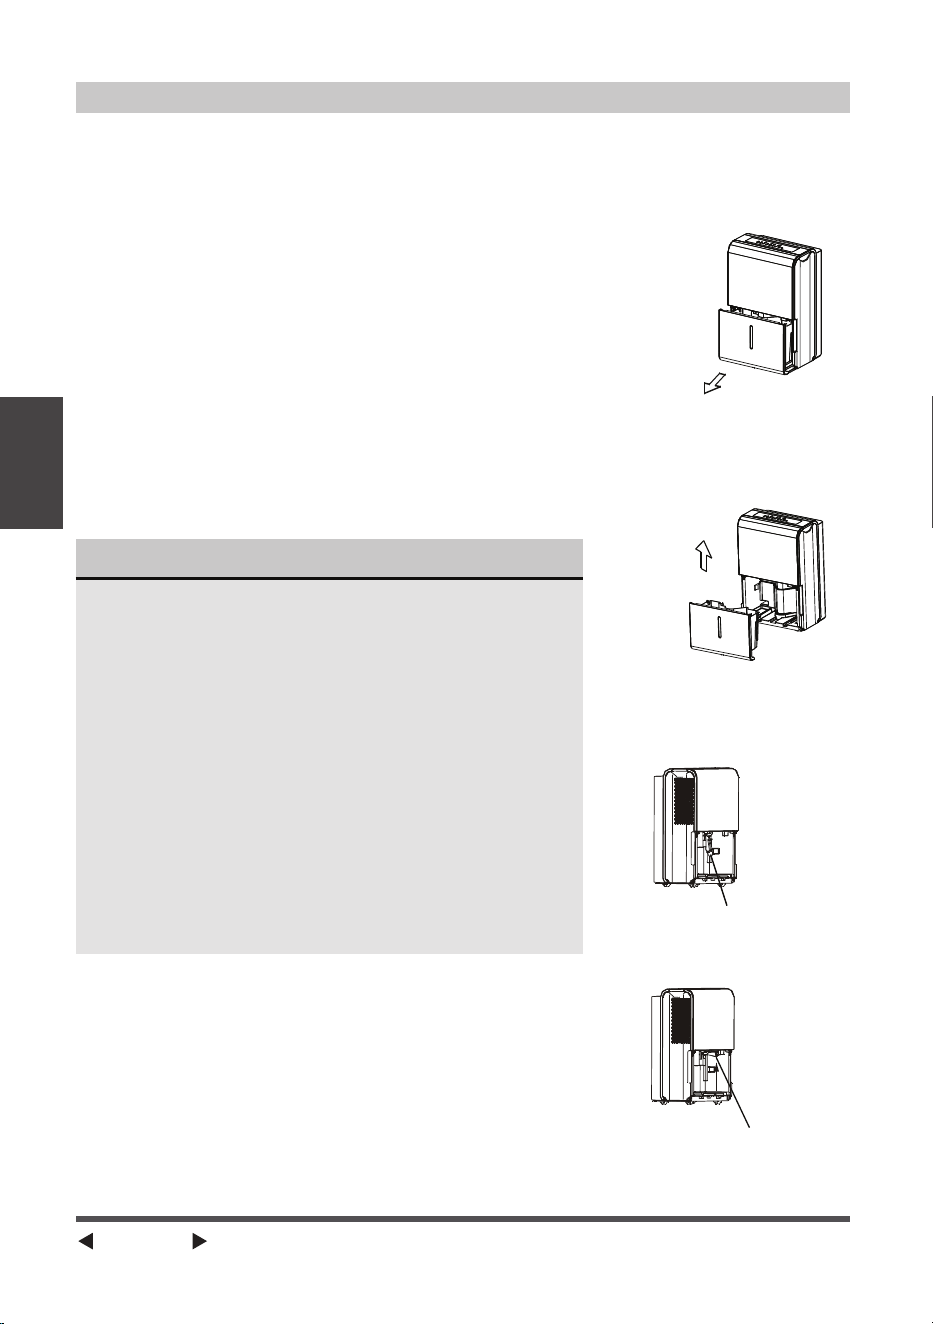
Removing Collected Water
There are three ways to remove collected water:
1. Use the bucket
• When the unit is off, if the bucket is full, the Full
indicator light will light.
• When the unit is on, if the bucket is full, the
compressor and the fan turn off, and the Full
indicator light will light, the digital display shows P2.
• Slowly pull out the bucket. Grip the left and right
handles securely, and carefully pull out straight so
water does not spill. Do not put the bucket on the
as because the bottom of the bucket is uneven.
Otherwise water may be spilled.
• Empty the water and reposition the bucket.
• The unit will restart operation when the bucket is
back in place.
1. Pull out the bucket.
2. Hold both sides of the
bucket evenly, and pull
it out from the unit.
3. Pour the water out.
Fig. 4
Fig. 5
NOTICE
• When you remove the bucket, do not touch any
parts inside the unit. Doing so may damage the
product.
• Be sure to push the bucket gently all the way into
the unit.
• If the pump hose falls off when you remove the
bucket (see Fig. 6), you must reinstall the pump
hose properly to the unit before replacing the
bucket into the unit (see Fig. 7).
• When the unit is on, if the bucket is removed, the
compressor and the fan turn off, then the unit will
beep 8 times and the digital display shows Eb.
• When the unit is off, if the bucket is removed,
the unit will beep 8 times and the digital display
shows Eb.
Fig. 7
Fig. 6
Pump hose drops
Reinstall pump
hose properly
Operating
Instructions
Page 13
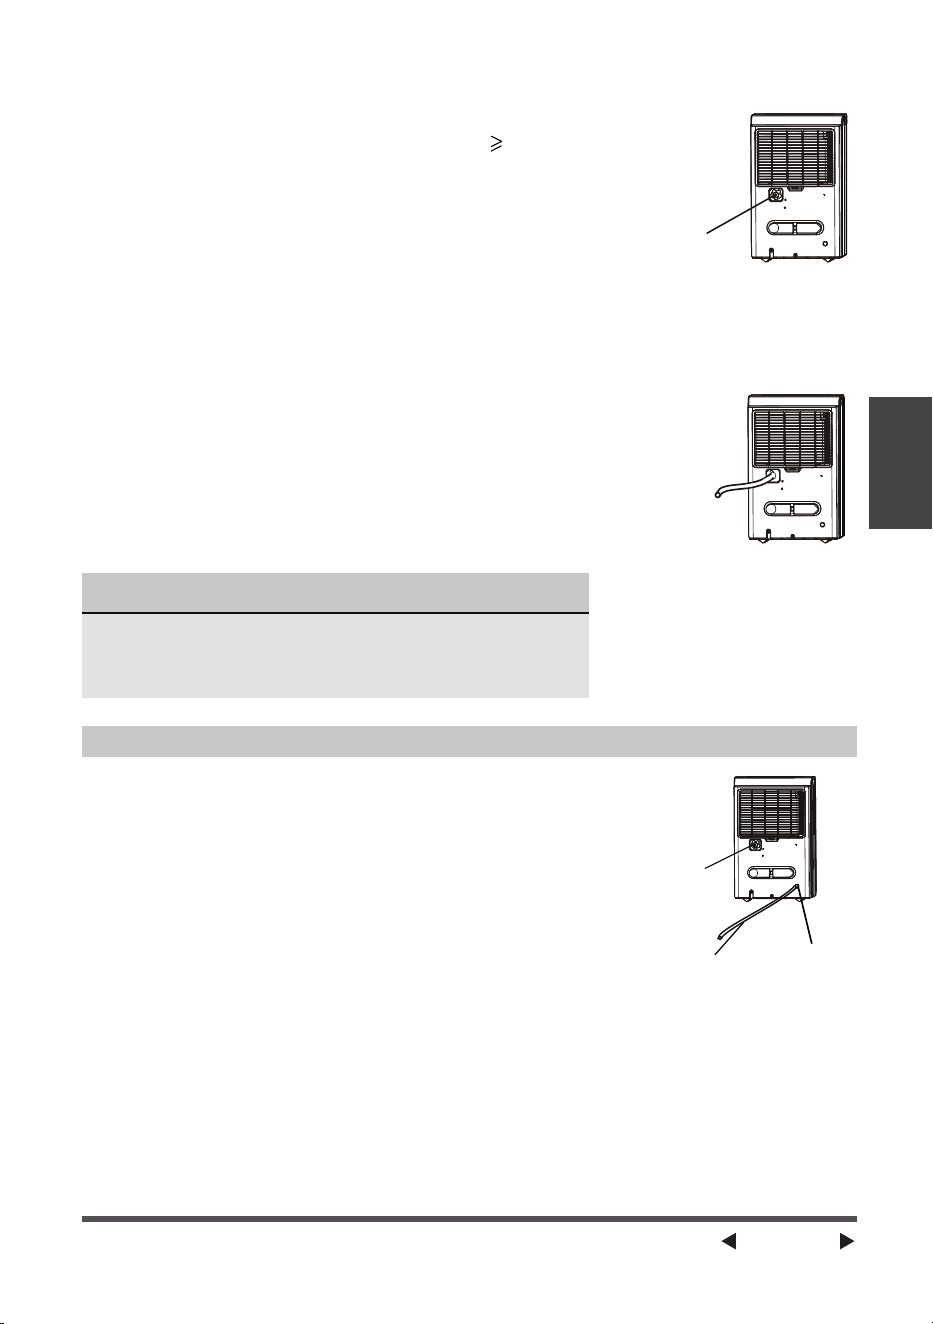
NOTICE
When the continuous draining feature is not being used,
remove the drain hose from the outlet, and dry the water
in the continuous drain hose outlet.
2. Continuous draining
• Water can be automatically emptied into a floor drain
by attaching the unit with a water hose (Id
Ø 5/16”,
not included) with a female threaded end (ID: M = 1”,
not included).
• Remove the plastic cover from the back drain outlet
of the unit and set aside, then insert the drain hose
through the drain outlet of the unit and lead the
drain hose to the floor drain or a suitable drainage
facility. (See Fig. 8 and Fig. 9)
• When you remove the plastic cover, if there is some
water in the back drain outlet of the unit you must
dry it. Make sure the hose is secure so there are
no leaks and the end of the hose is level or sloping
downwards to let the water flow.
• Direct the hose toward the drain, making sure that
there are no kinks that will stop the water flowing.
• Select the desired humidity setting and fan speed on
the unit for continuous draining to start.
Fig. 9
Fig. 8
Remove the
plastic cover
rotating counter-clockwise
Drain hose
Removing the Collected Water (cont.)
Fig. 10
3. Pump draining (Pump models only)
Water can be automatically emptied into a floor drain or
a suitable drainage facility by attaching the pump drain
out with a pump drain hose (Ø od = 1/4”, supplied).
• Remove the continuous drain hose from the unit and
install the plastic cover to the continuous drain hose
outlet of the unit by clockwise rotation. (See Fig. 10)
• Insert the pump drain hose into the pump drain hose
outlet for at least 15 mm (See Fig. 10), then lead the
water hose to the floor drain or a suitable drainage
facility.
• Press the pump pad on the unit to activate the
pump operation. When the bucket is full the pump
starts to work.
Pump drain
hose
Pump drain
hose outlet
Reinstall the
plastic cover
Operating
Instructions
Page 14
• Make sure the hose is secure so there are no leaks.
• Direct the hose toward the drain, making sure that
there are no kinks that will stop the water flowing.
• Place the end of the hose into the drain.
• Select the desired humidity setting and fan speed
on the unit for pump draining to start.
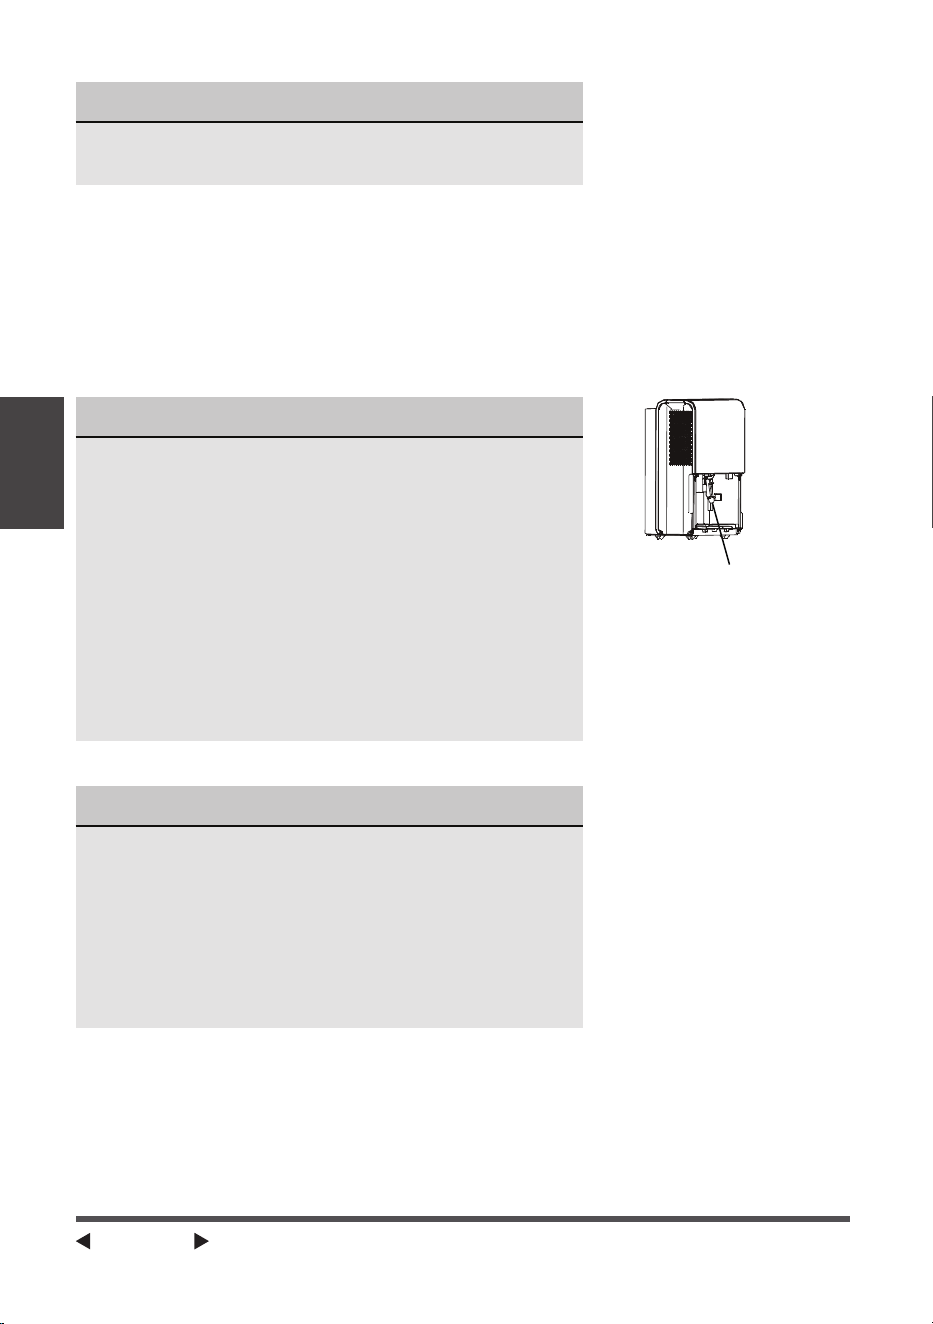
NOTICE
The pump may generate a loud noise for the first 3~5
minutes of operation.
NOTICE
The pump operation light blinks when a failure occurs.
Please turn off the unit and disconnect the power cord.
Check the following items:
• Cleaning the pump filter:
- Remove the bucket from the unit, take down the
pump and clean the pump filter (See Fig. 11).
• Check if the drain hose is clean and free of debris.
• Empty the water from the bucket.
• Check the hose connection and the bucket for
proper fitment. If the error persists, contact
Customer Service.
Fig. 11
NOTICE
Do not use this operation when the outdoor
temperature is equal to or less than 0°C (32°F),
otherwise water may freeze ice causing the water
hose to be blocked and the unit to stop operating.
Make sure to empty the bucket at least once a week
when using the pump draining feature. When the
pump draining feature is not being used, remove the
pump drain hose from the outlet.
Filter of the pump
Operating
Instructions
Page 15
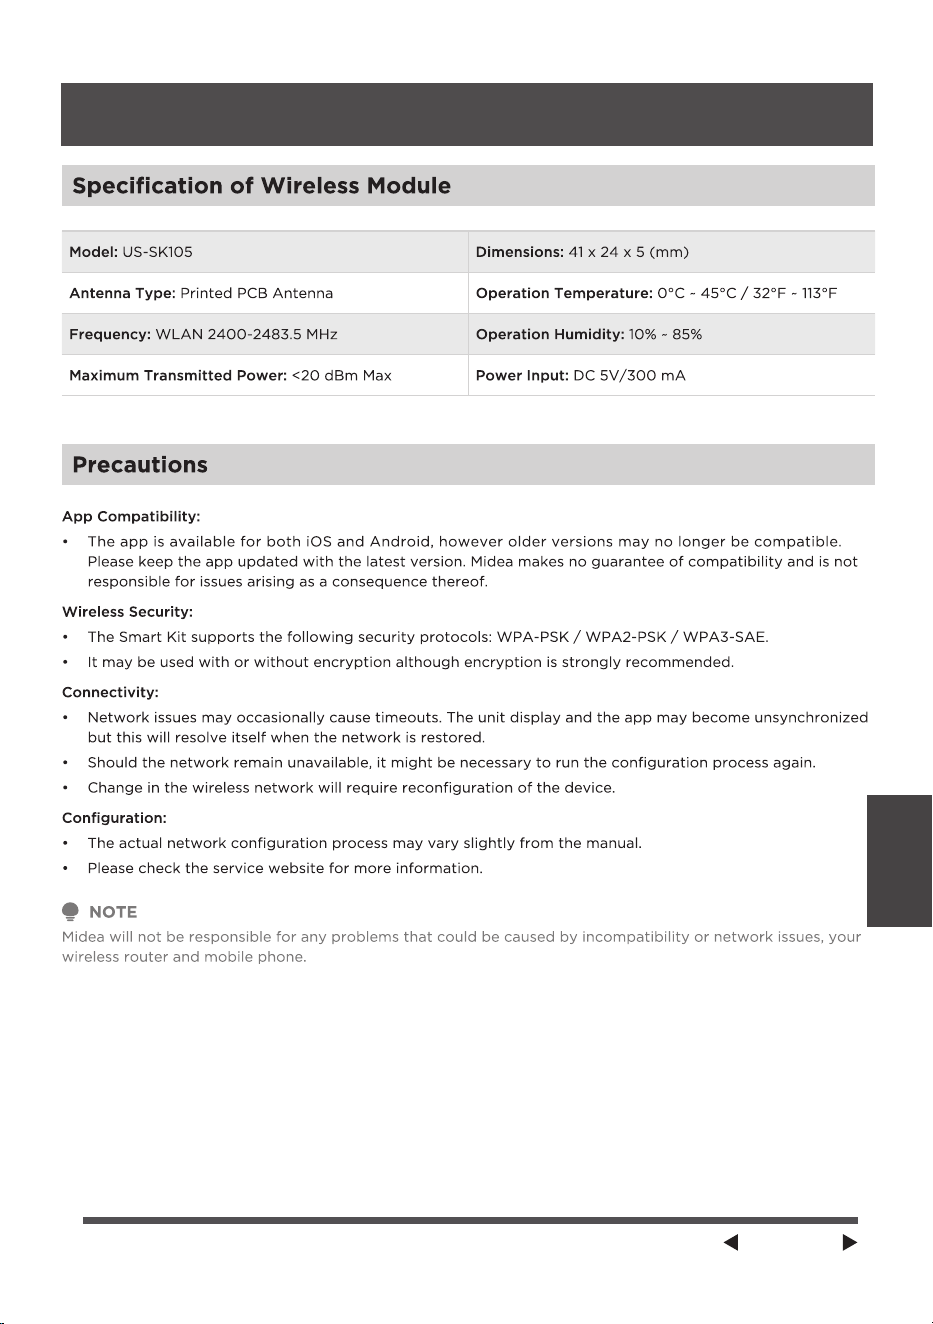
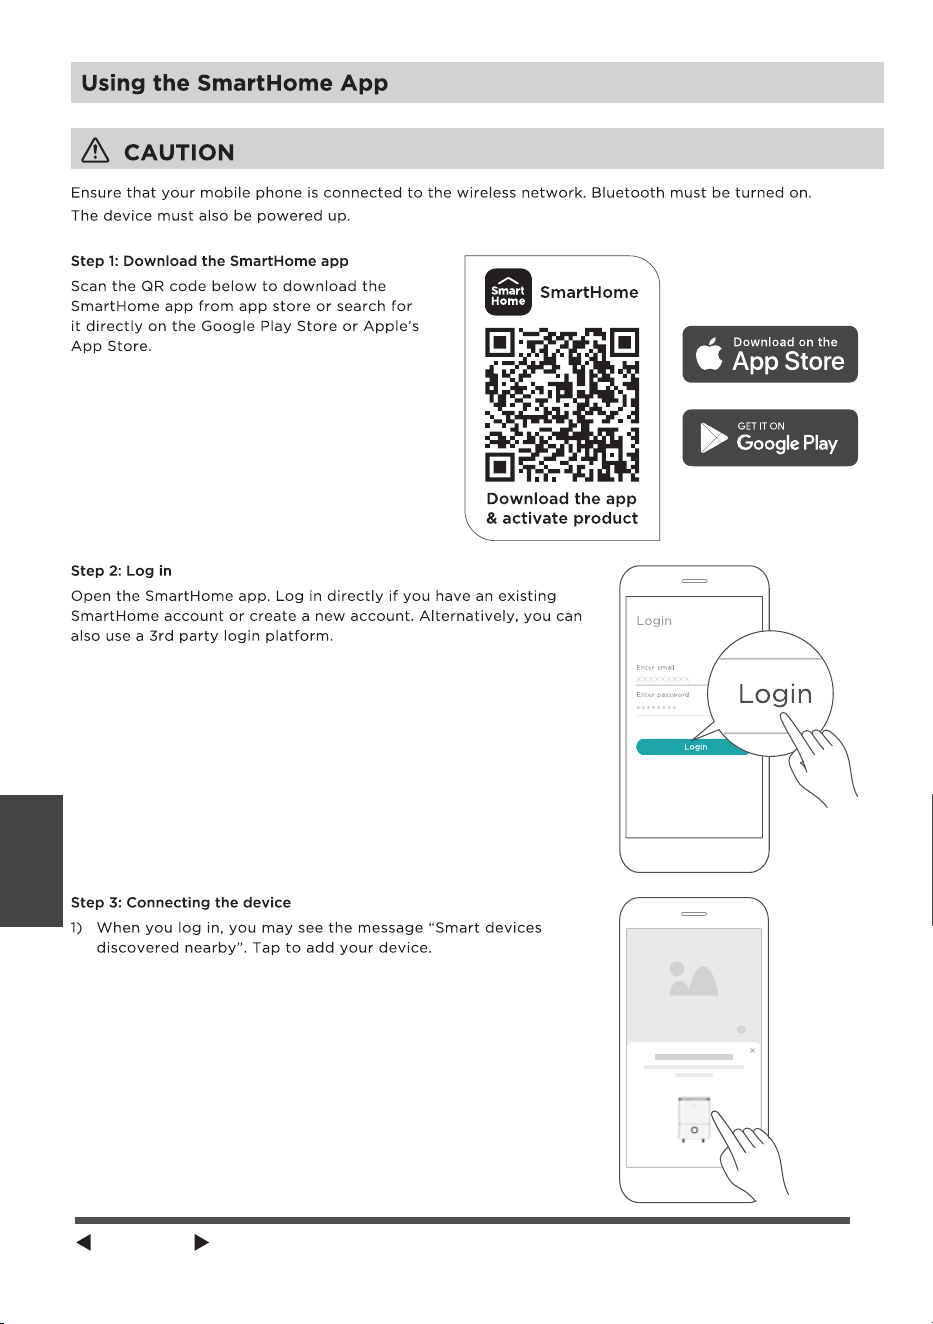
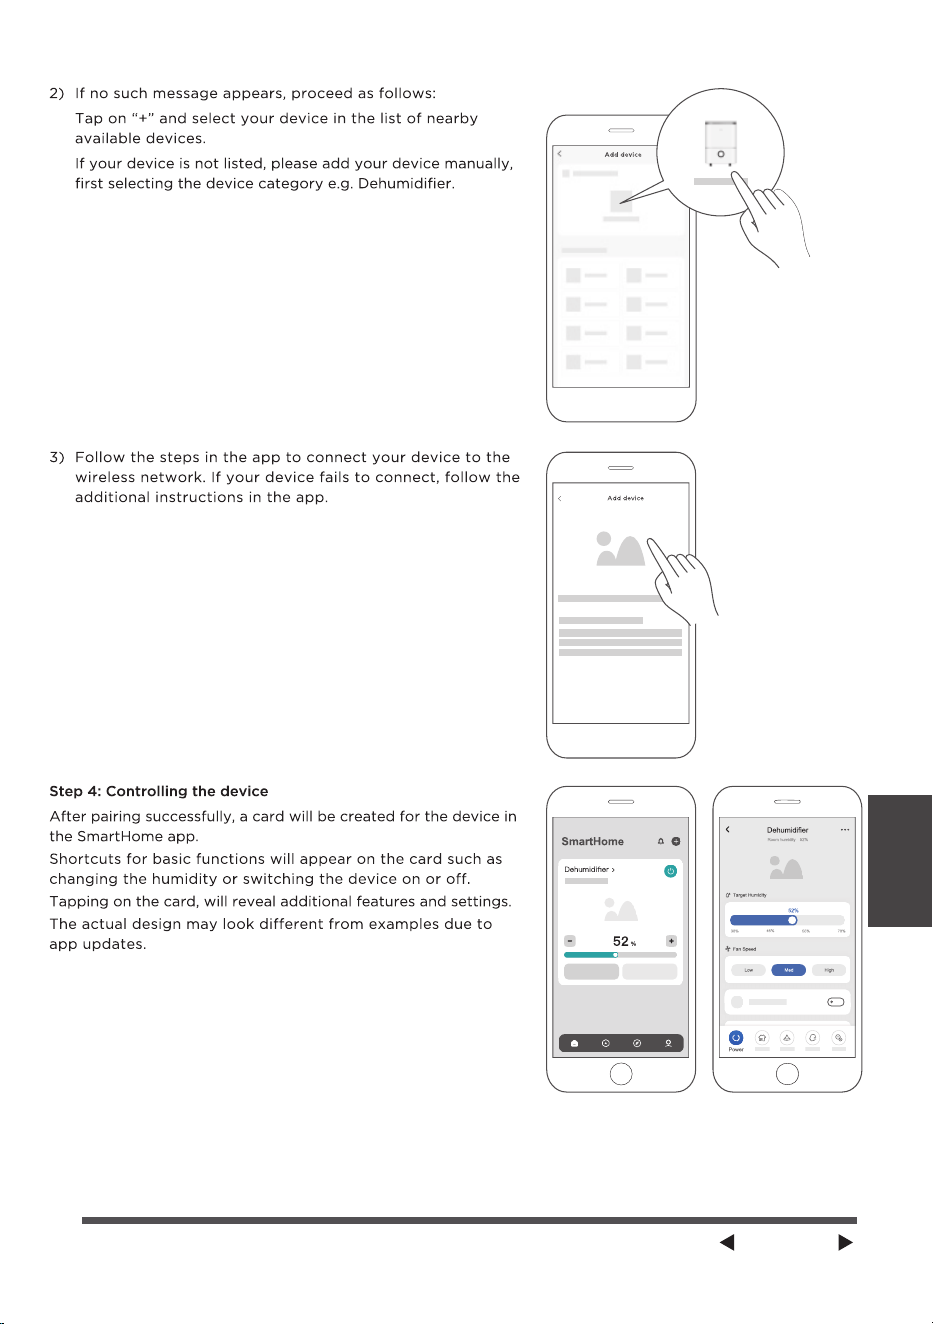
App
Instructions
APP INSTRUCTIONS
Page 16
App
Instructions
Page 17
App
Instructions
Page 18
App
Instructions
Page 19
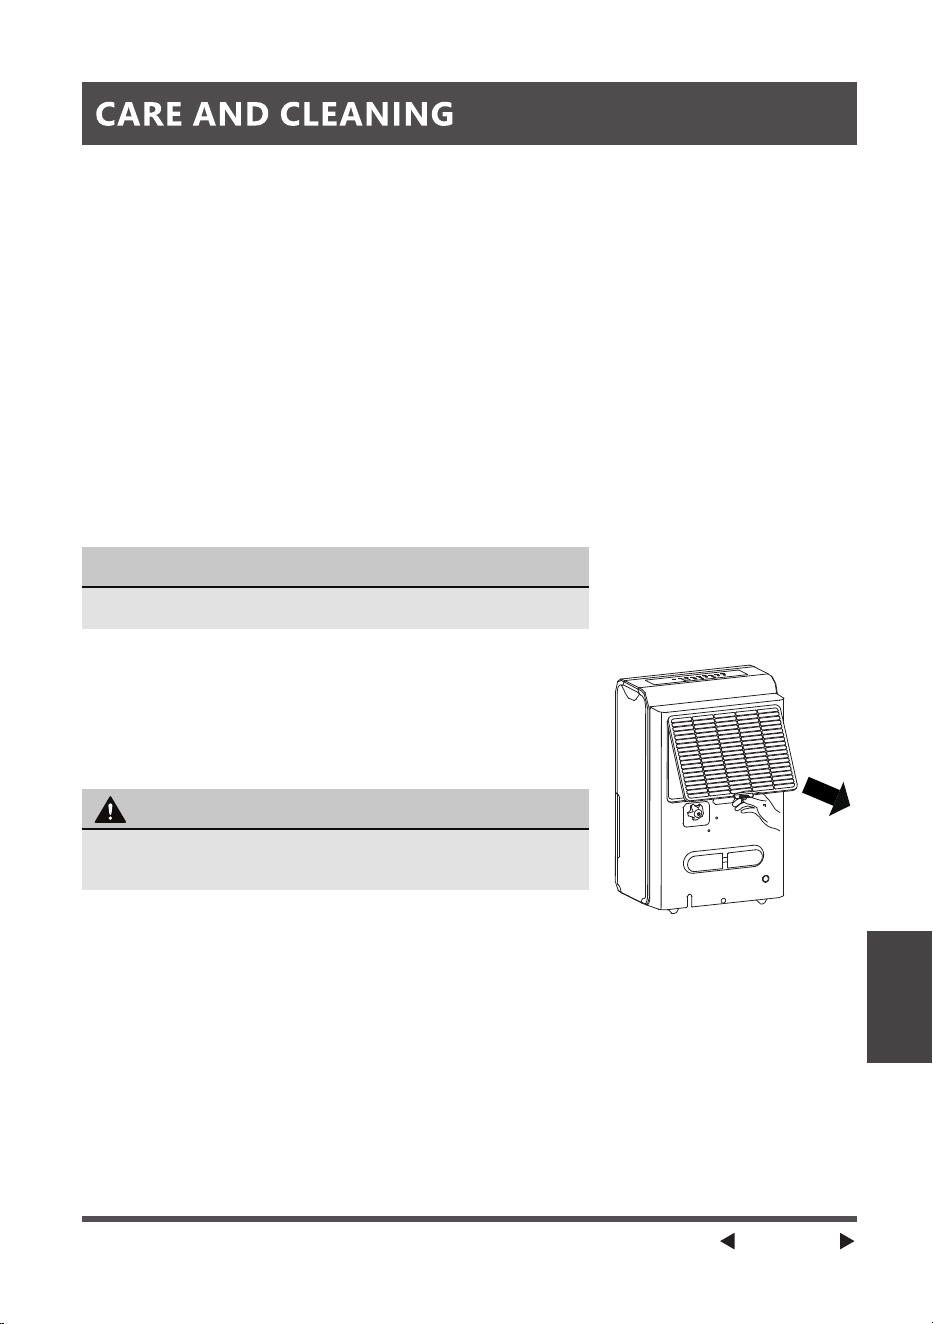
Turn the dehumidifier off and disconnect the plug from the power source before cleaning.
Care and
Cleaning
1. Clean the Grill and Case
• Use water and a mild detergent. Do not use bleach or
abrasives.
• Do not splash water directly onto the unit. Doing so
may cause an electrical shock, cause the insulation to
deteriorate, or cause the unit to rust.
• The air intake and outlet may get dirty during
operation, use a vacuum cleaner or brush to clean.
2. Clean the bucket
Every few weeks, clean the bucket thoroughly to
prevent growth of mold, mildew and bacteria. Partially
fill the bucket with clean water and mild detergent.
Swish it around in the bucket, empty and rinse.
3. Clean the air filter
• To remove the filter, pull filter outwards (See Fig. 12).
• Wash the filter with clean water then dry.
• Re-install the filter, replace bucket.
4. When not using the unit for long time periods
• Before storing the unit, let it rest for one full day so
that the system can dry out naturally.
• Clean the unit, water bucket and air filter.
• Wrap the cord with the power cord buckle.
• Cover the unit with a plastic bag.
• Store the unit upright in a dry, well-ventilated area.
NOTICE
Do not use a dishwasher to clean the bucket.
Fig. 12
DO NOT operate the dehumidifier without a filter to
avoid loss of performance and damage to the unit.
CAUTION
Page 20
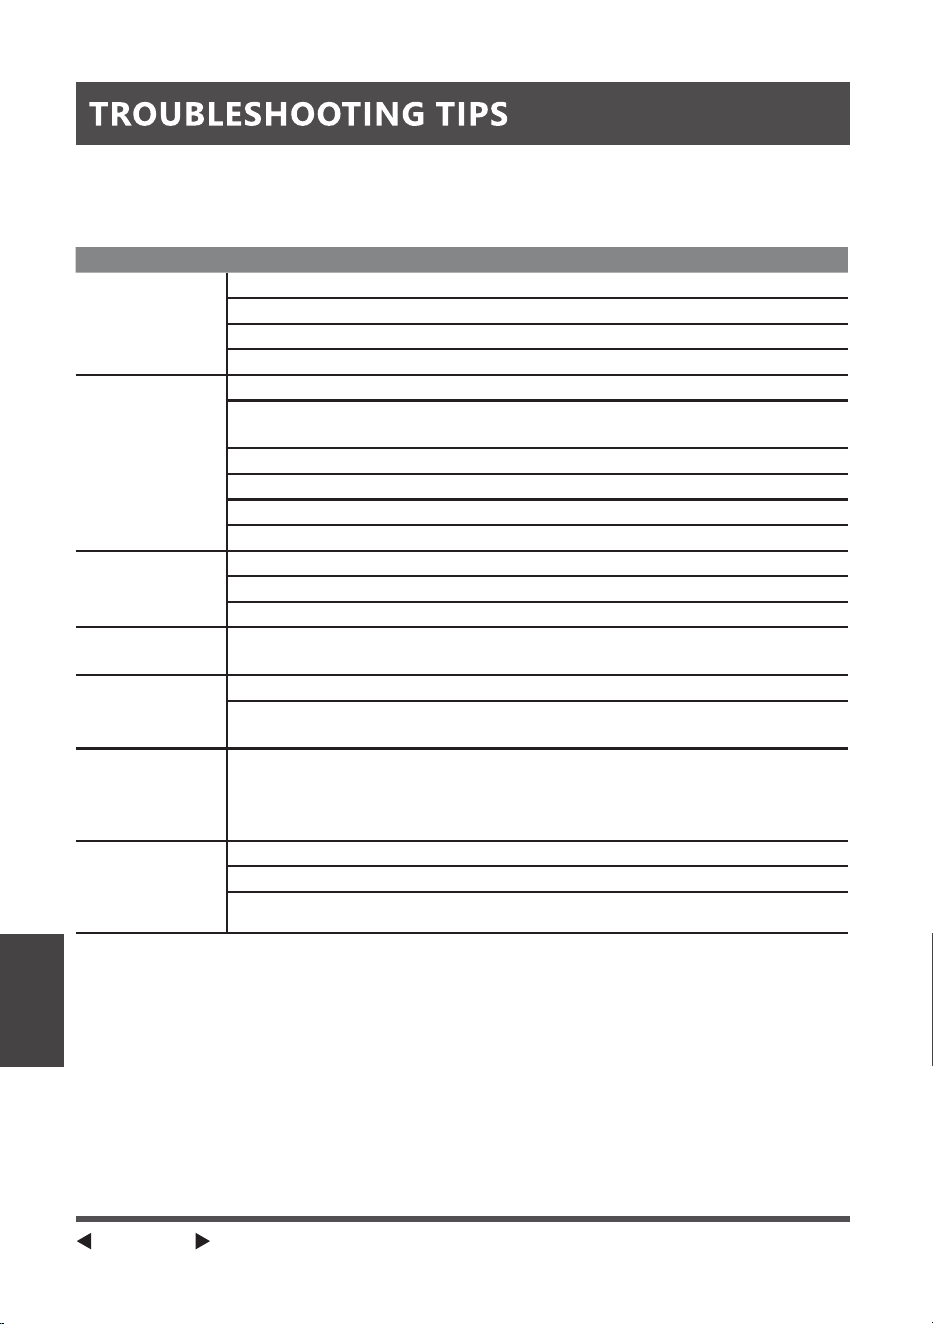
Troubleshooting
Tips
Before calling for service, review this list. It may save you time and money. This list
includes common occurrences that are not the result of defective workmanship or
materials in this appliance.
Problem Solution
Unit does not
start
Make sure the dehumidifiers plug is connected firmly into the wall outlet.
Check the house fuse/circuit breaker box.
Dehumidifier has reached its preset level or bucket is full.
Water bucket is not in the proper position.
Dehumidifier
does not dry
the air as it
should
Not enough time to remove the moisture.
Make sure there are no curtains, blinds or furniture blocking the front
or back of the dehumidifier.
The humidity control may not be set low enough.
Check that all doors, windows and other openings are securely closed.
Room temperature is too low, below 5°C (41°F).
There is a water v
apor source in the room.
The unit makes
a loud noise
when operating
Air filter may be dirty. Clean filter. Refer to Care and Cleaning section.
The unit is tilted instead of upright as it should be.
The floor surface is not level.
Frost appears
on the coils
This is normal. The dehumidifier has Auto defrost feature.
Water on floor
Hose to connector or hose connection may be loose.
Intended to use the bucket to collect water, but the back drain plug is
removed.
ES, AS, P2,
EC, Eb and E3
appear in the
display
These are error codes and protection code. Check Operating
Instructions.
The pump
operation on
light blinks at
1 Hz
Clean the pump filter.
Check the pump hose is not blocked or leaking.
E
mpty the water bucket.

Dehumidifier Limited Warranty
Your product is protected by this Limited Warranty:
Warranty service must be obtained from Midea Consumer Services or an authorized Midea servicer.
Warranty
• One year full warranty from original purchase date.
Midea, through its authorized servicers will:
• Pay all costs for reparing or replacing parts of this appliance which prove to be defective in materials
or workmanship.
Consumer will be responsible for:
• Diagnostics, removal, transportation and reinstallation cost required because of service.
• Costs of service calls that are a resu
lt of items listed under NORMAL RESPONSABILITIES OF THE CONSUMER**
Midea replacement parts shall be used and will be warranted only for the original warranty.
NORMAL RESPONSABILITIES OF THE CONSUMER**
This warranty applies only to products in ordinary household use, and the consumer is responsible for
the items listed below:
1. Proper use of the appliance in acordance with in
structions provided with the product.
2. Routine maintenance and cleaning necessary to keep the good working condition.
3. Proper installation by an authori
zed service professional in accordance with instructions provided with the
appliance and in accordance with all local plumbing, electrical and/or gas codes.
4. Proper connection to a grouded power supply of sufficient voltage, replacement of blown fuses, repair of
loosen connections or defects in house wiring.
5. Expenses for making the appliance accessible for servicing.
6. Damages to finish after installatio
n.
EXCLUSIONS
This warranty does not cover the following:
1) Failure caused by damage to the unit while in your possesion (other than damage caused by
defect or malfunction), by its improper installation, or by unreasonable use of the un
it, including
without limitation, failure to provide reasonable and necessary maintenance or to follow the written
installation and Operating Instructions.
2) Damages caused by services performed by persons other than those authorized by Midea customer
service; or external causes such as abuse, misuse, inadequate power supply or acts of God.
3) If the unit is put to commercial, business, rental, or other use or application other than for consumer
use, we make no warranties, express or implied, including but not limited to, any implied warranty of
merchantability or fitness for use or purpose.
4) Products without original serial numbers or products that have serial numbers which have been altered
or cannot be readily determined.
NOTICE: Some states d
o not allow the exclusions or limitation of incidental or consequential damages.
So this limitation or exclusion may not apply to you.
IF YOU NEED SERVICE
Keep your bill of sale, delivery slip, or some other appropriate payment Record.
The date on the bill establishes the warranty period, should service be required.
If service is performed, its your best interest to obtain and keep all receipts.
This written warranty gives you specific legal rights. You may also have other rights that vary from state to state.
Service under this warranty must be obtained by following these steps, in order:
1)
Contact Midea Consumer Services or an authorized Midea services at 1 866 646 4332.
2) If there is a question as to where to obtain service, contact our consumer relations Departament.
WARRANTY
Page 21
WARRANTY