
1
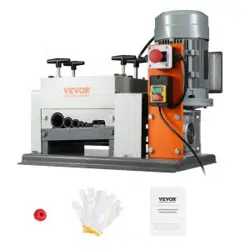
Full-automatic Computer
Wire Stripping Machine
Operation Manual
2
Fast operation example
Note: The small of the knife value is , the deeper of the cutting is; the
thicker of the wire is, the larger of the knife retreat value should be. The
following table is the reference parameter data for the set-up of knife
value and knife retreat value:
3
Operating instructions
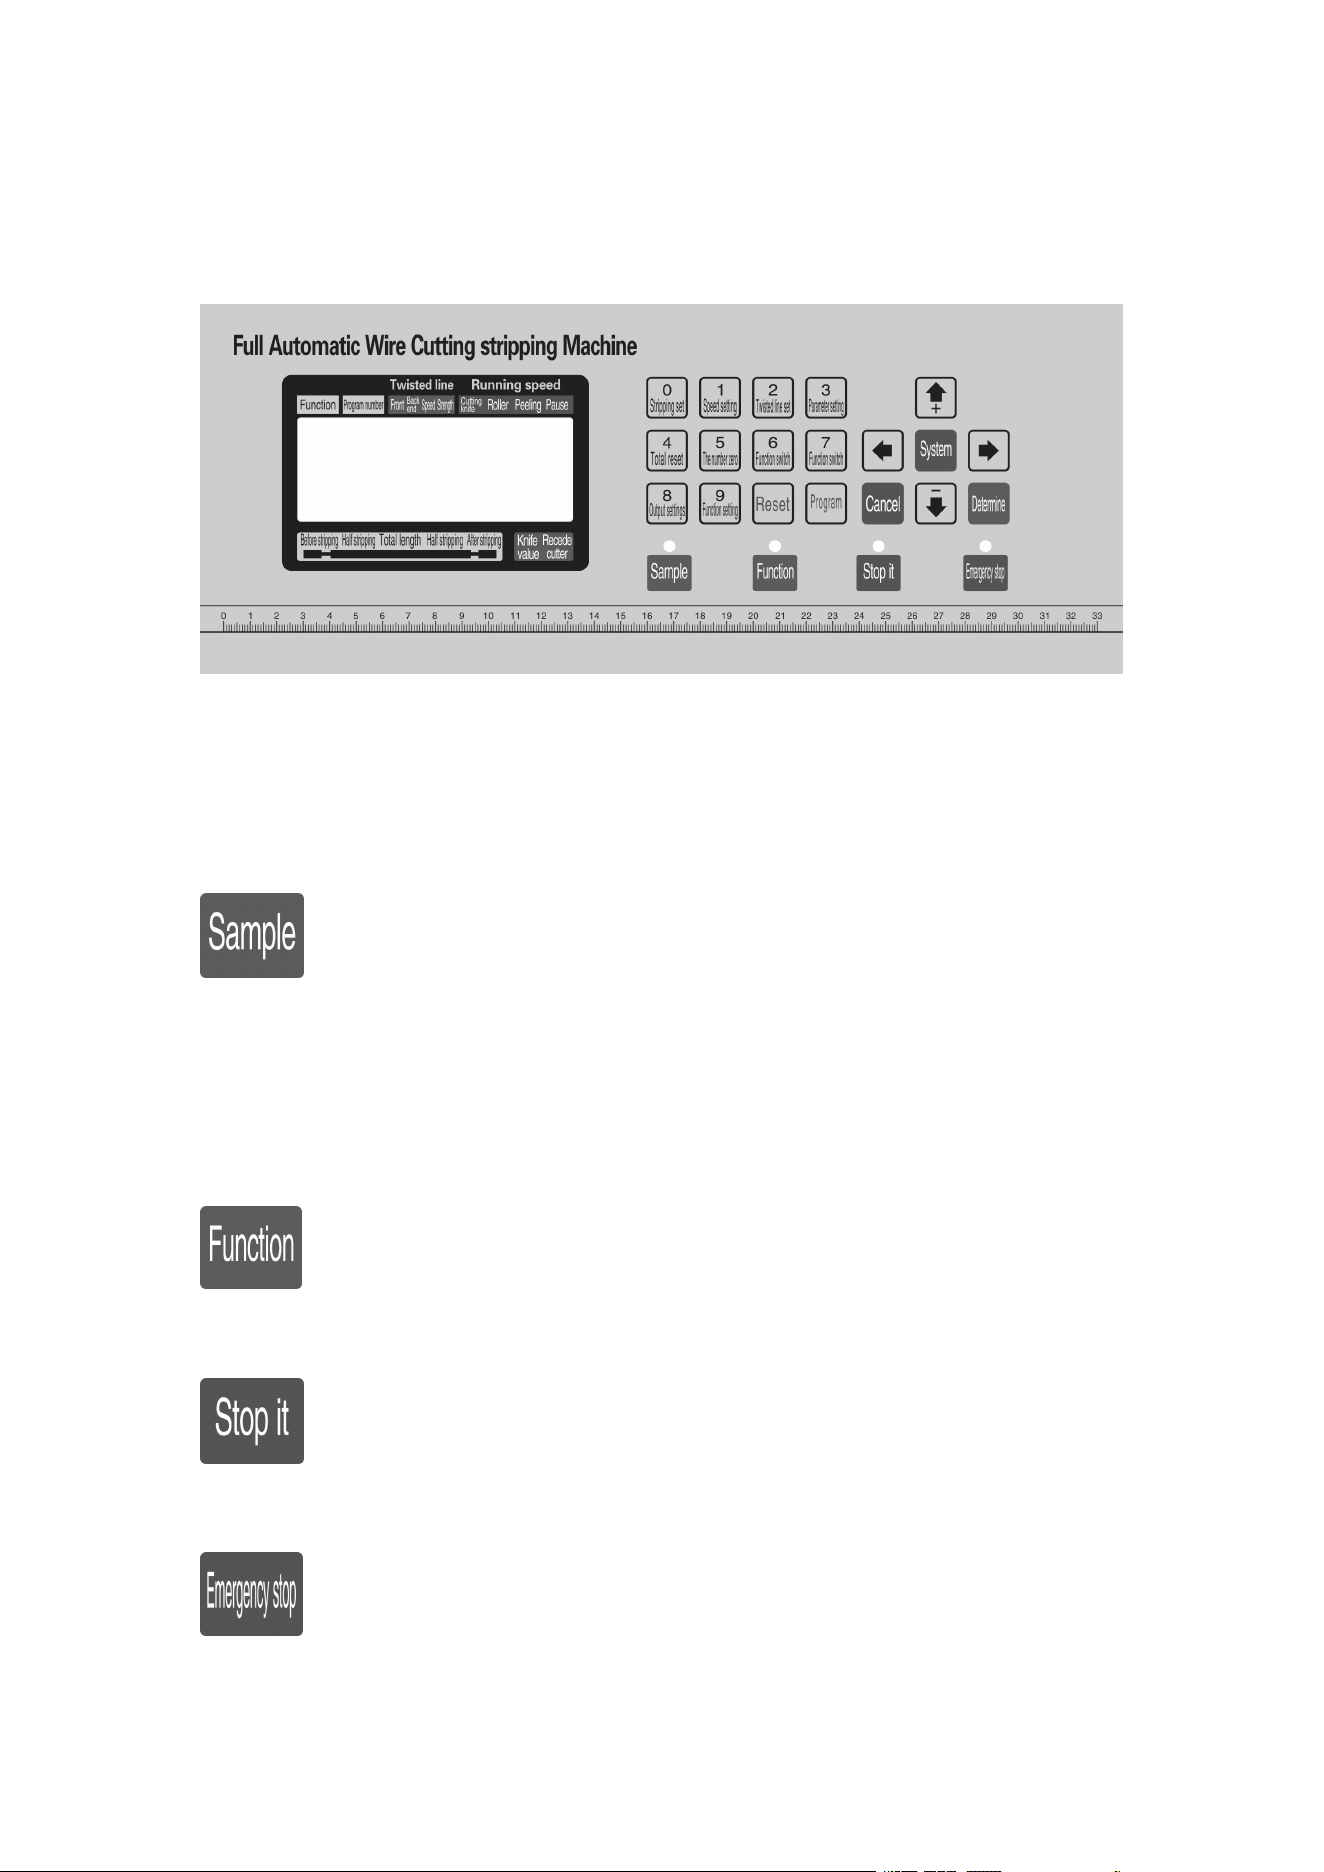
Drawing of control panel
The system interface is composed of 23 keys and a 192
×
64 dot
matrix LCD display, the following will be introduced to each key
function
:In the standby mode, each short press once, machine performs a
single-step, cyclic; even following the press more than about 3
seconds, the machine will automatically run a loop; the button in
the machine control effect is very big;
:In the standby mode, press this button, the machine begins to
work;
:
In the working statue, press this button, the machine will finish
the work after shutdown;
:
In the standby mode, press this button, the machine will perform
a reset action; in the working state, press this button, the

4
machine to shut down, after the implementation of the reset
action;
: In a data input state press this key, enter the number 0; in the
standby state press this button, the machine will enter the
stripping parameter setup state;
: In a data input state press this key, enter the number 1; in the
standby state press this button, the machine will enter the speed
parameter setup state;
: In a data input state press this key, enter the number 2; in the
standby state press this button, the machine will enter the
twisting parameter setup state;
: In a data input state press this key, enter the number 3; in the
standby state press this button, the machine will according to the
current function into setting picture corresponding to the
function;
: In a data input state press this key, enter the number 4; in the
standby state press this button, volume 0;
: In a data input state press this key, enter the number 5; in the
standby state press this key, the count of 0;
5
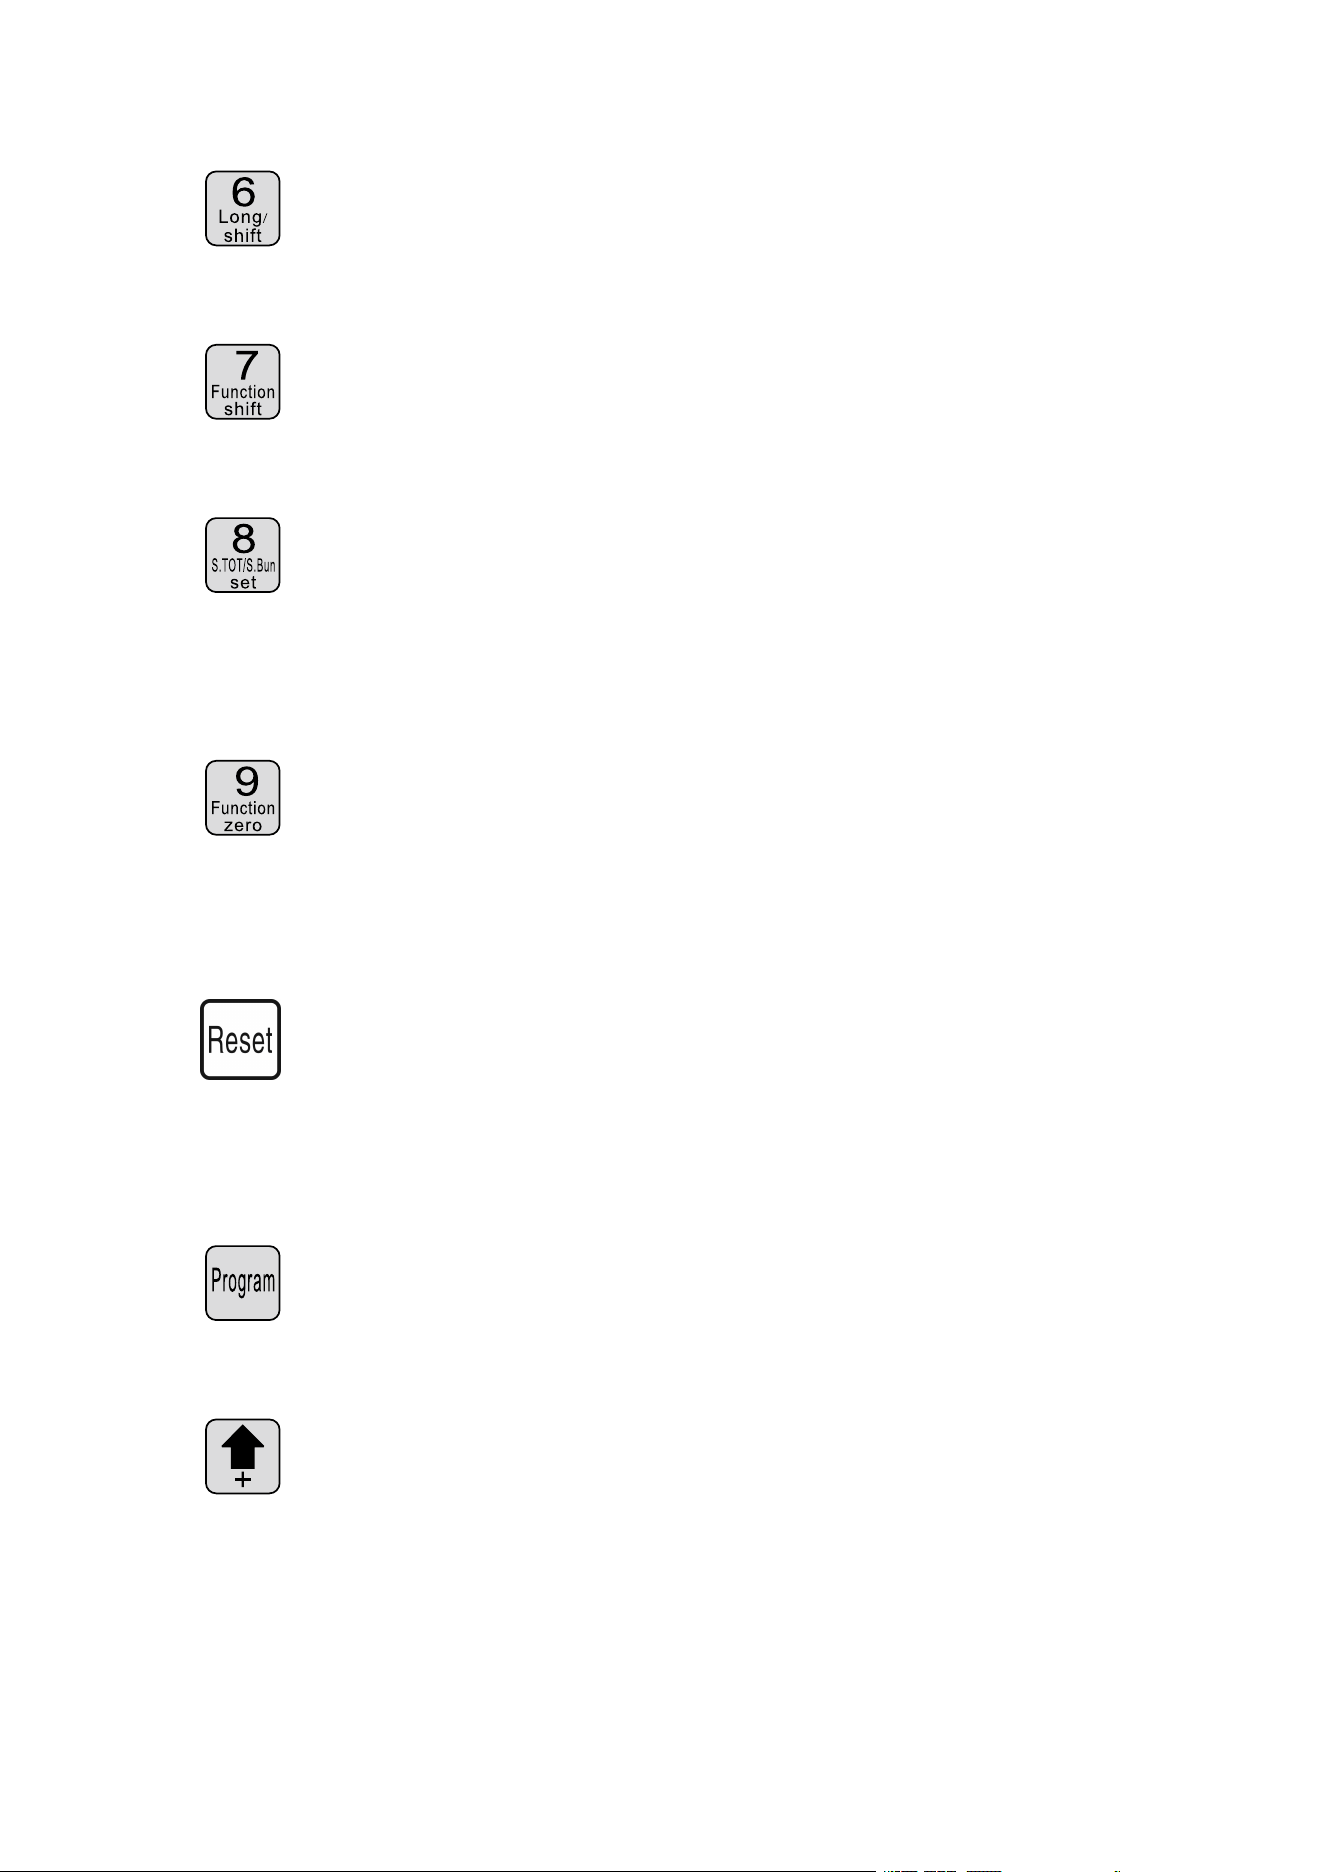
: In a data input state press this key, enter the number 6; in the
standby state press this button, switch machine working mode;
: In a data input state press this key, enter the number 7; in the
standby state press this button, switch machine working mode;
: In a data input state press this key, enter the number 8; in the
standby state press this button, the machin will enter the output
settings;
: In a data input state press this key, enter the number 9; in the
standby state press this button, the machin will enter the
function setting picture;
:
In a data input state press this key, removal of the input data; in
the standby state press this key, total output and the number of
full clear 0;
:In the standby state press this button, the machine will enter the
program settings;
:In the parameter settings by pressing the key, set parameters most
low plus 1; in a parameter setting state press this button, the
knife value plue 1;
6
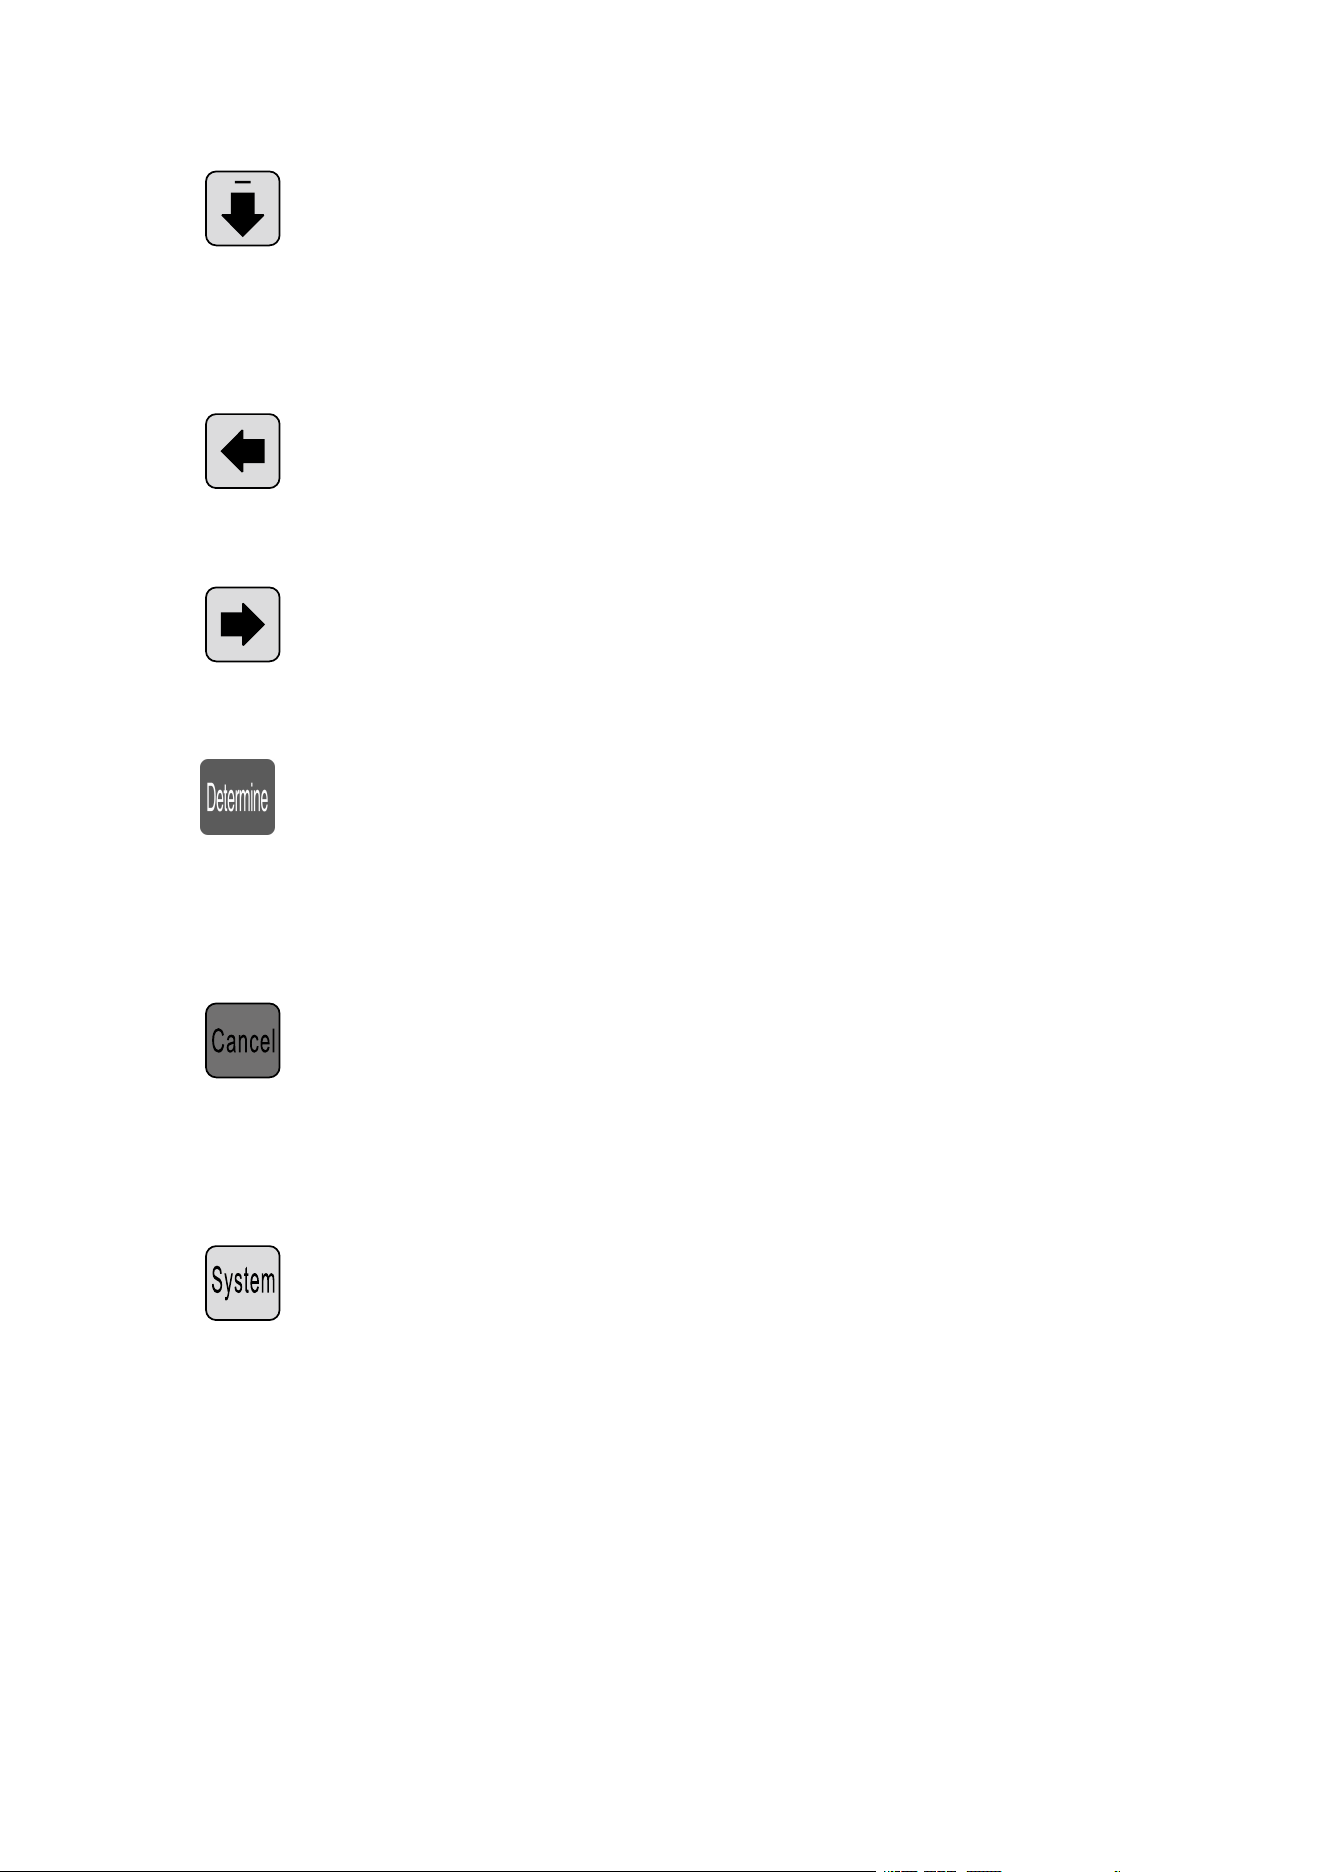
:In the parameter settings by pressing the key, set parameters most
low plus 1; in a parameter setting state press this button, the
knife value minus 1;
:In the parameter settings by pressing the key, the modified data to
give up, the last data into modified object;
:In the parameter settings by pressing the key, the modified data to
give up, the next data into modified object;
:
In the parameter set state press this key, the modified data will be
saved and written to the EEPROM, and the nedxt data into
modified object;
:In the parameter set state press this key, exit parameter setup state;
the function setting screen, segmental stripping setting screen,
system setup screen. Press this key, return to work picture;
: On the standby screen, press the key, enter the system
arrangement of the picture, need to enter the password before
entering, in a setting screen, function; multistage peeling setting
picture picture, system settings, you press the key, enter the
parameter setup state;
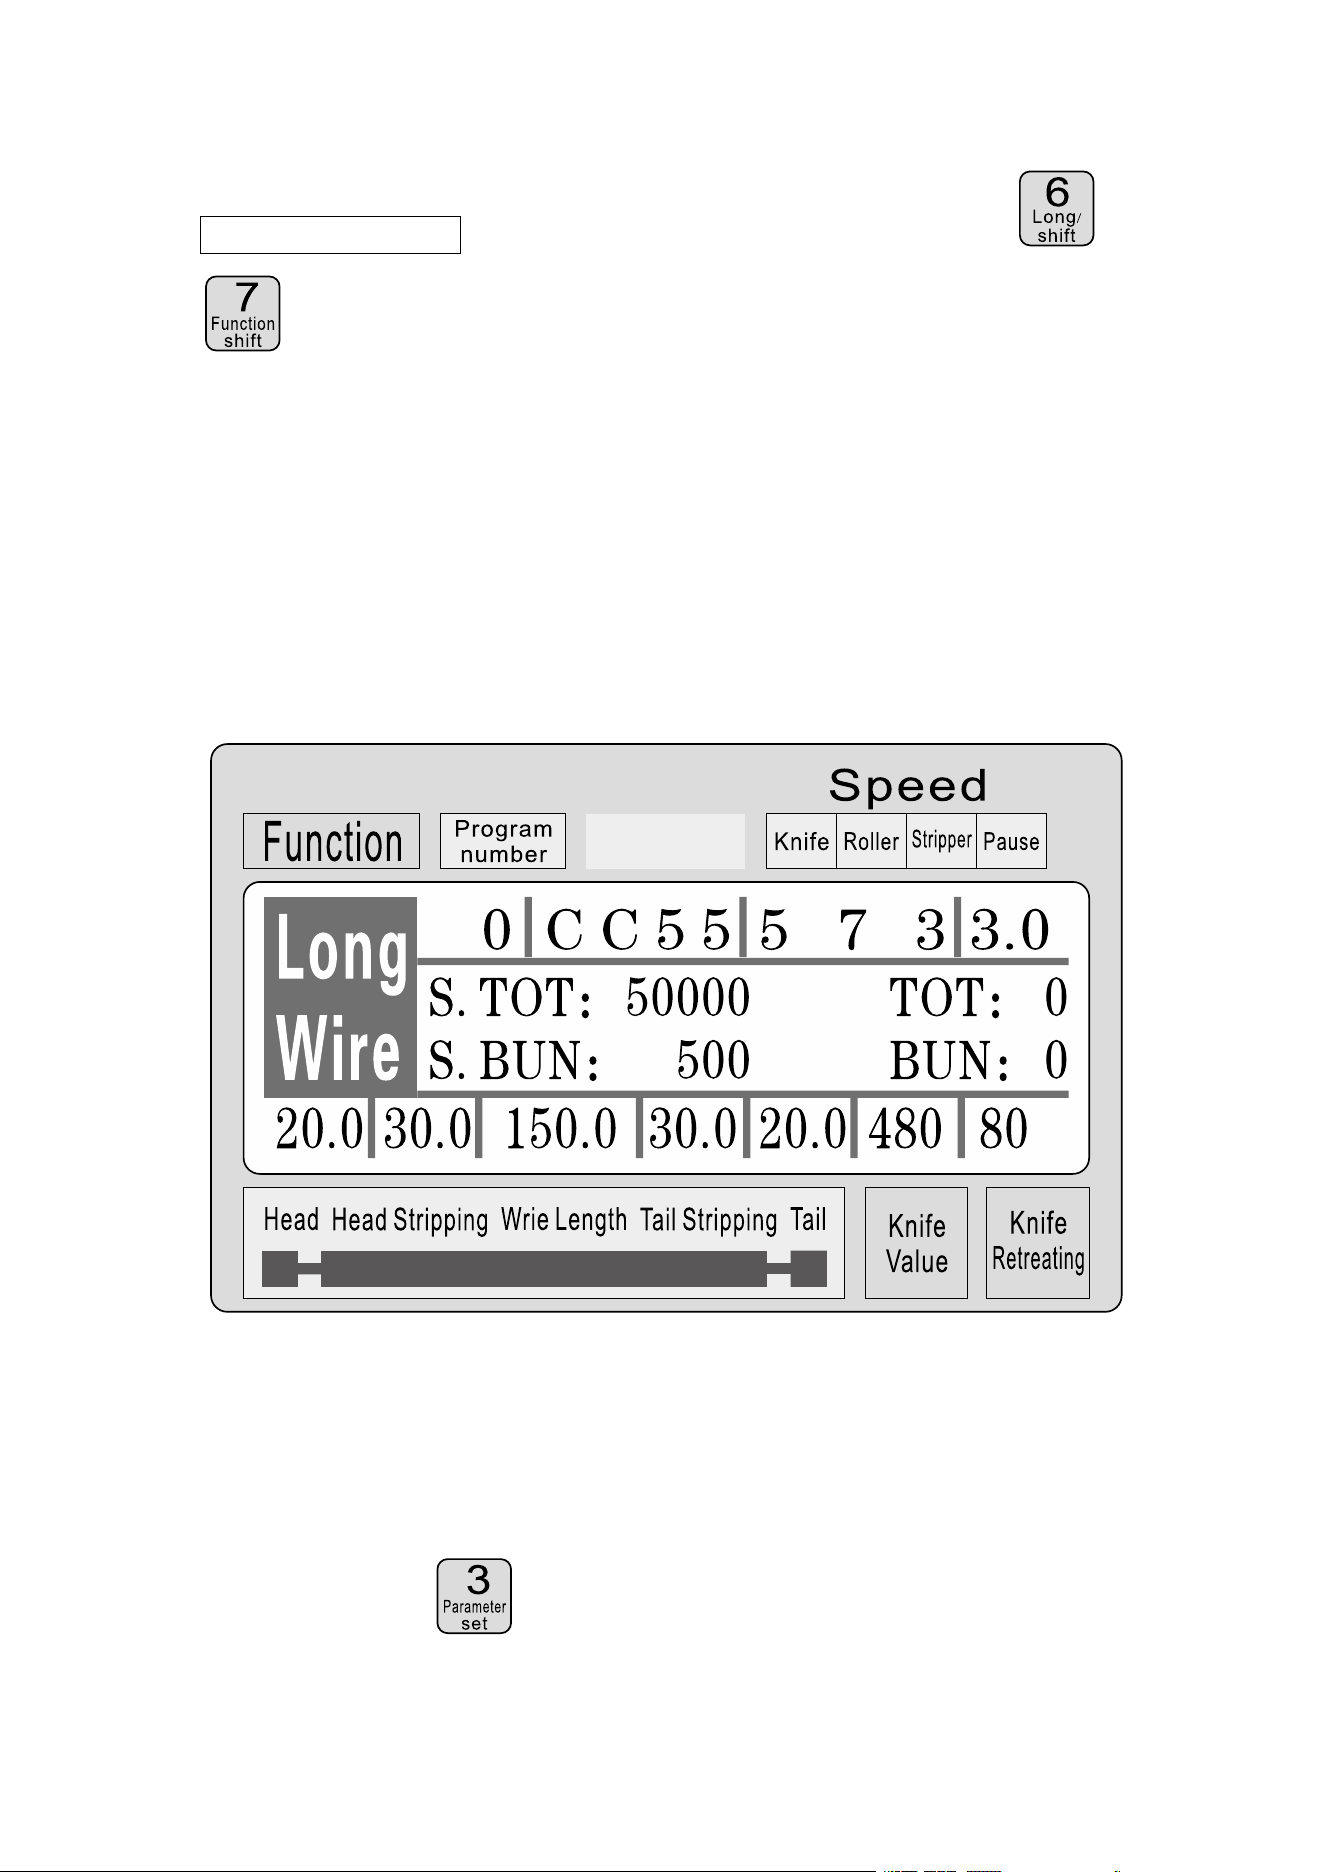
7
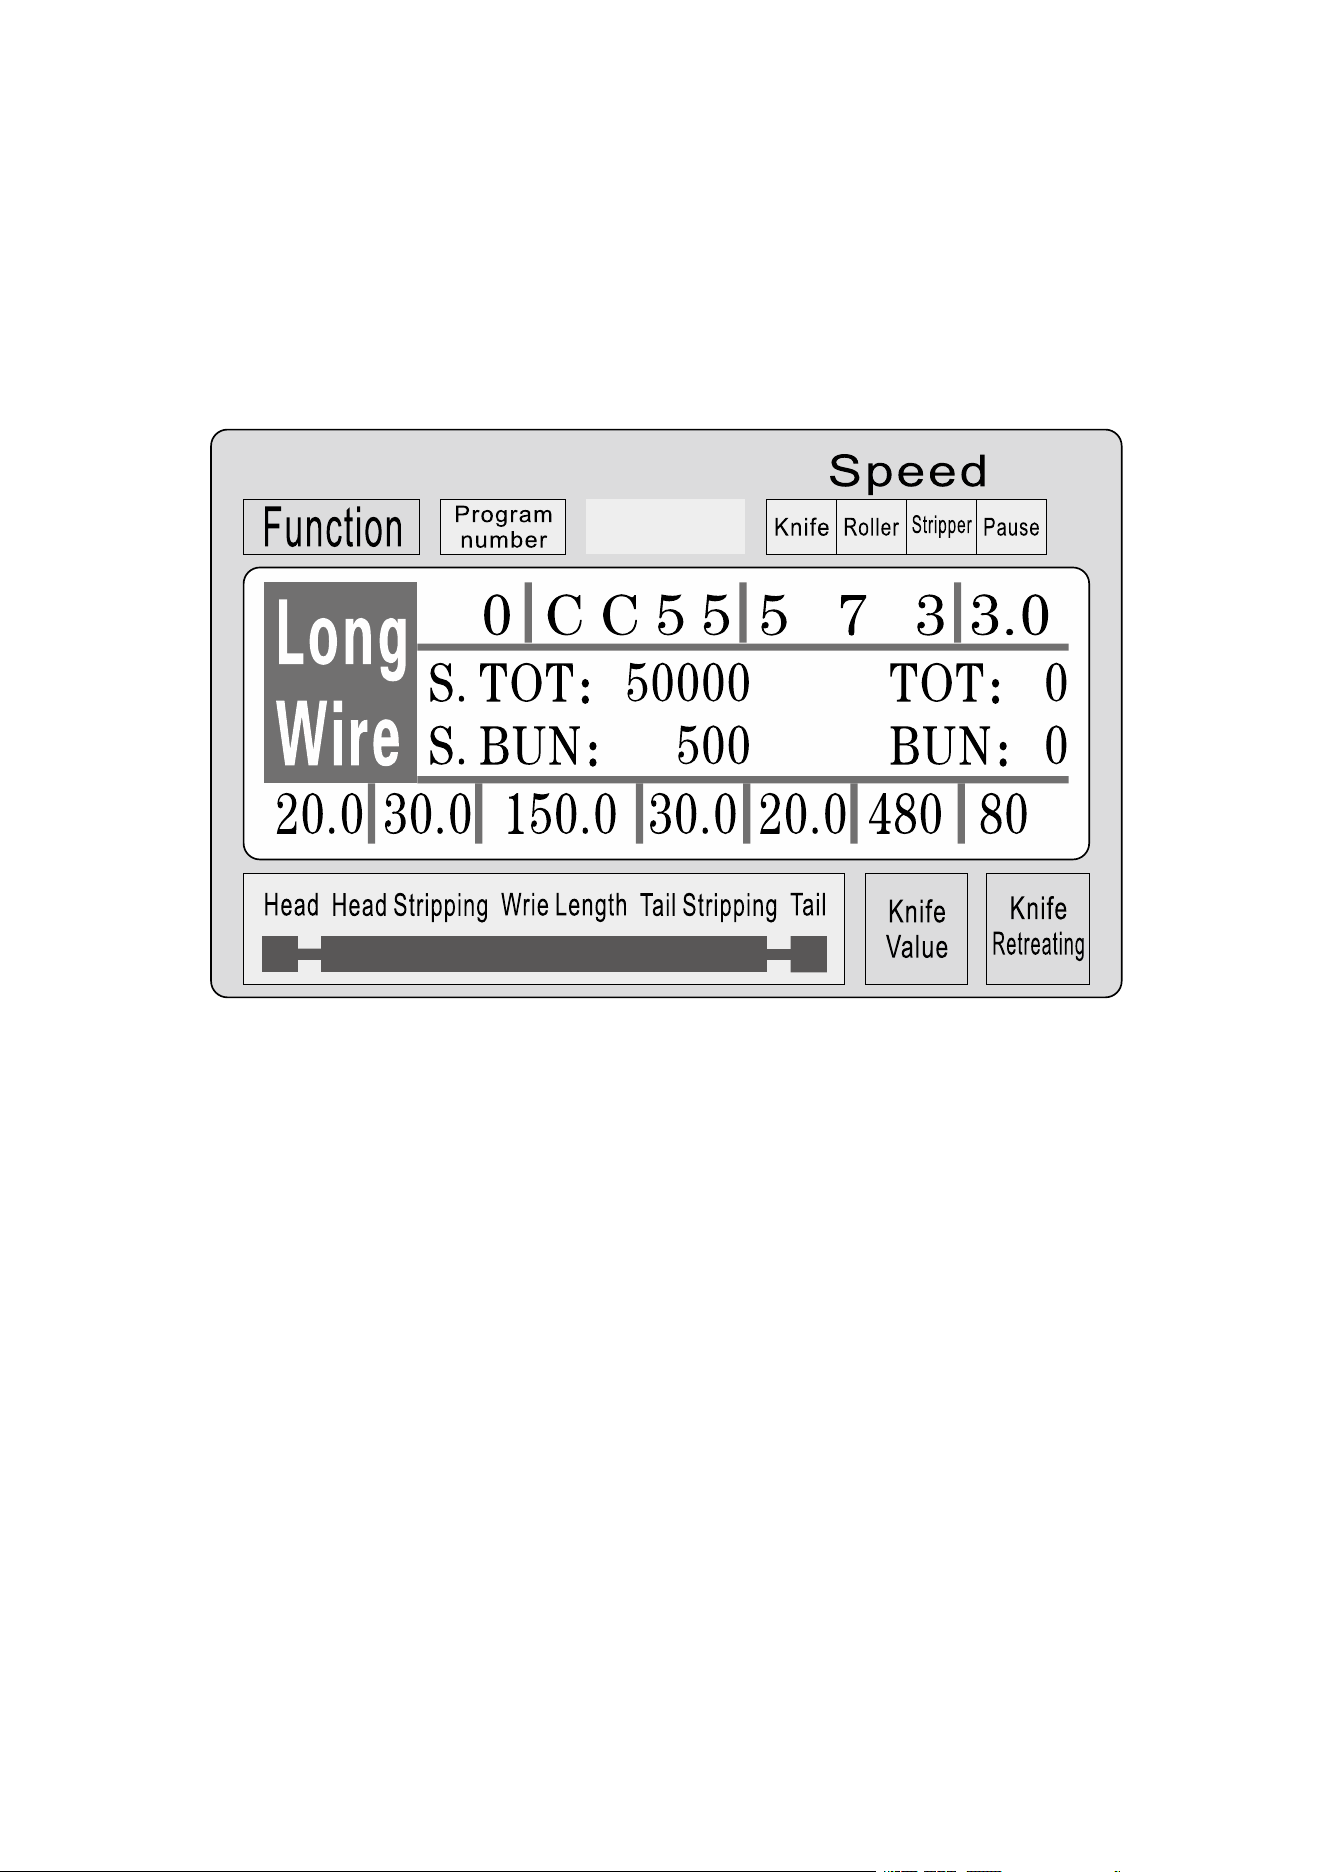
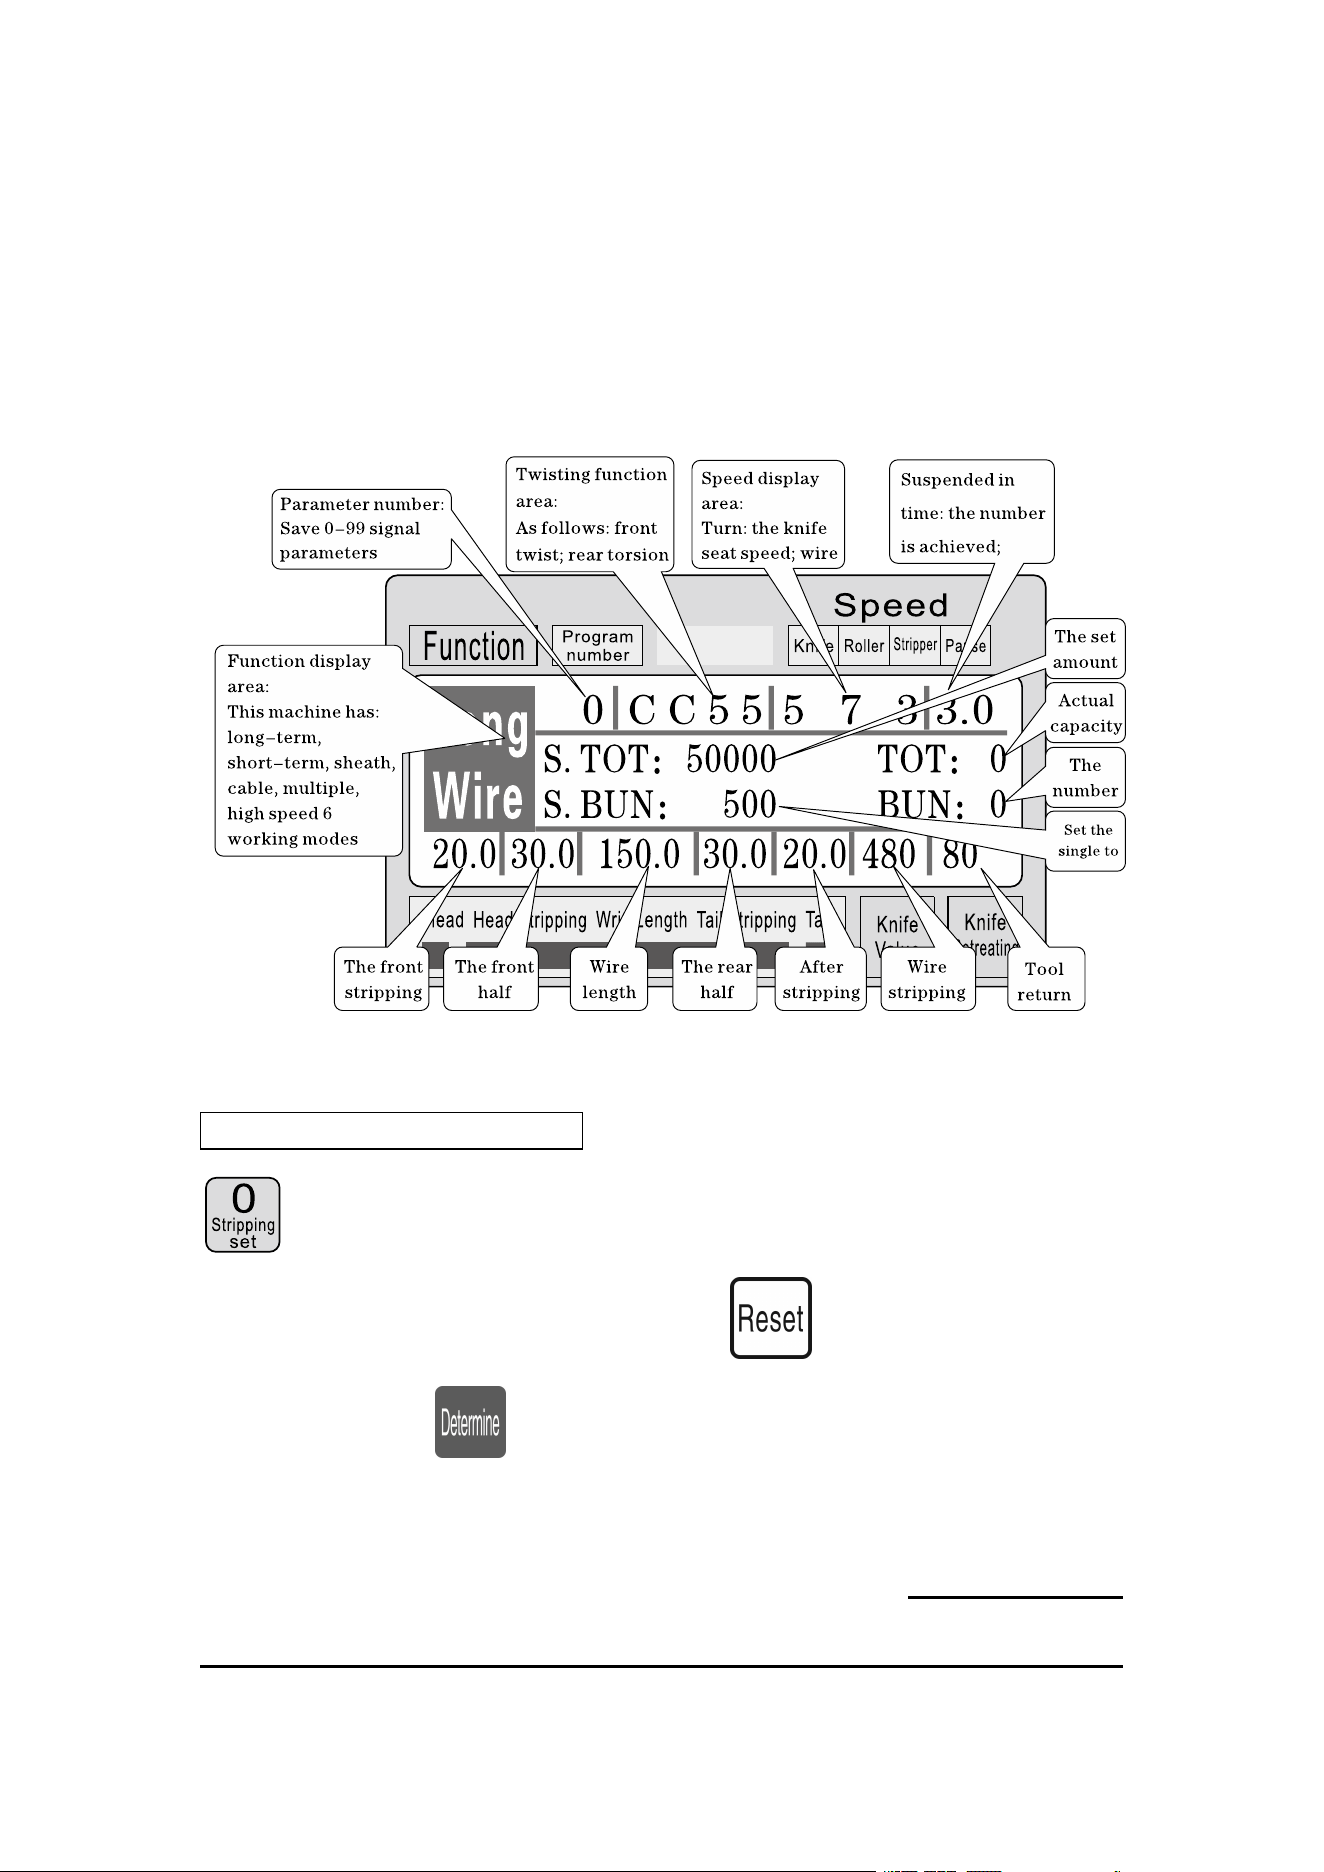
Work screen
Once the machine is powered on, the screen display boot screen,
about three seconds will display this picture; the machine begins to run,
in the picture on the screen; otherwise, the machine could not start;
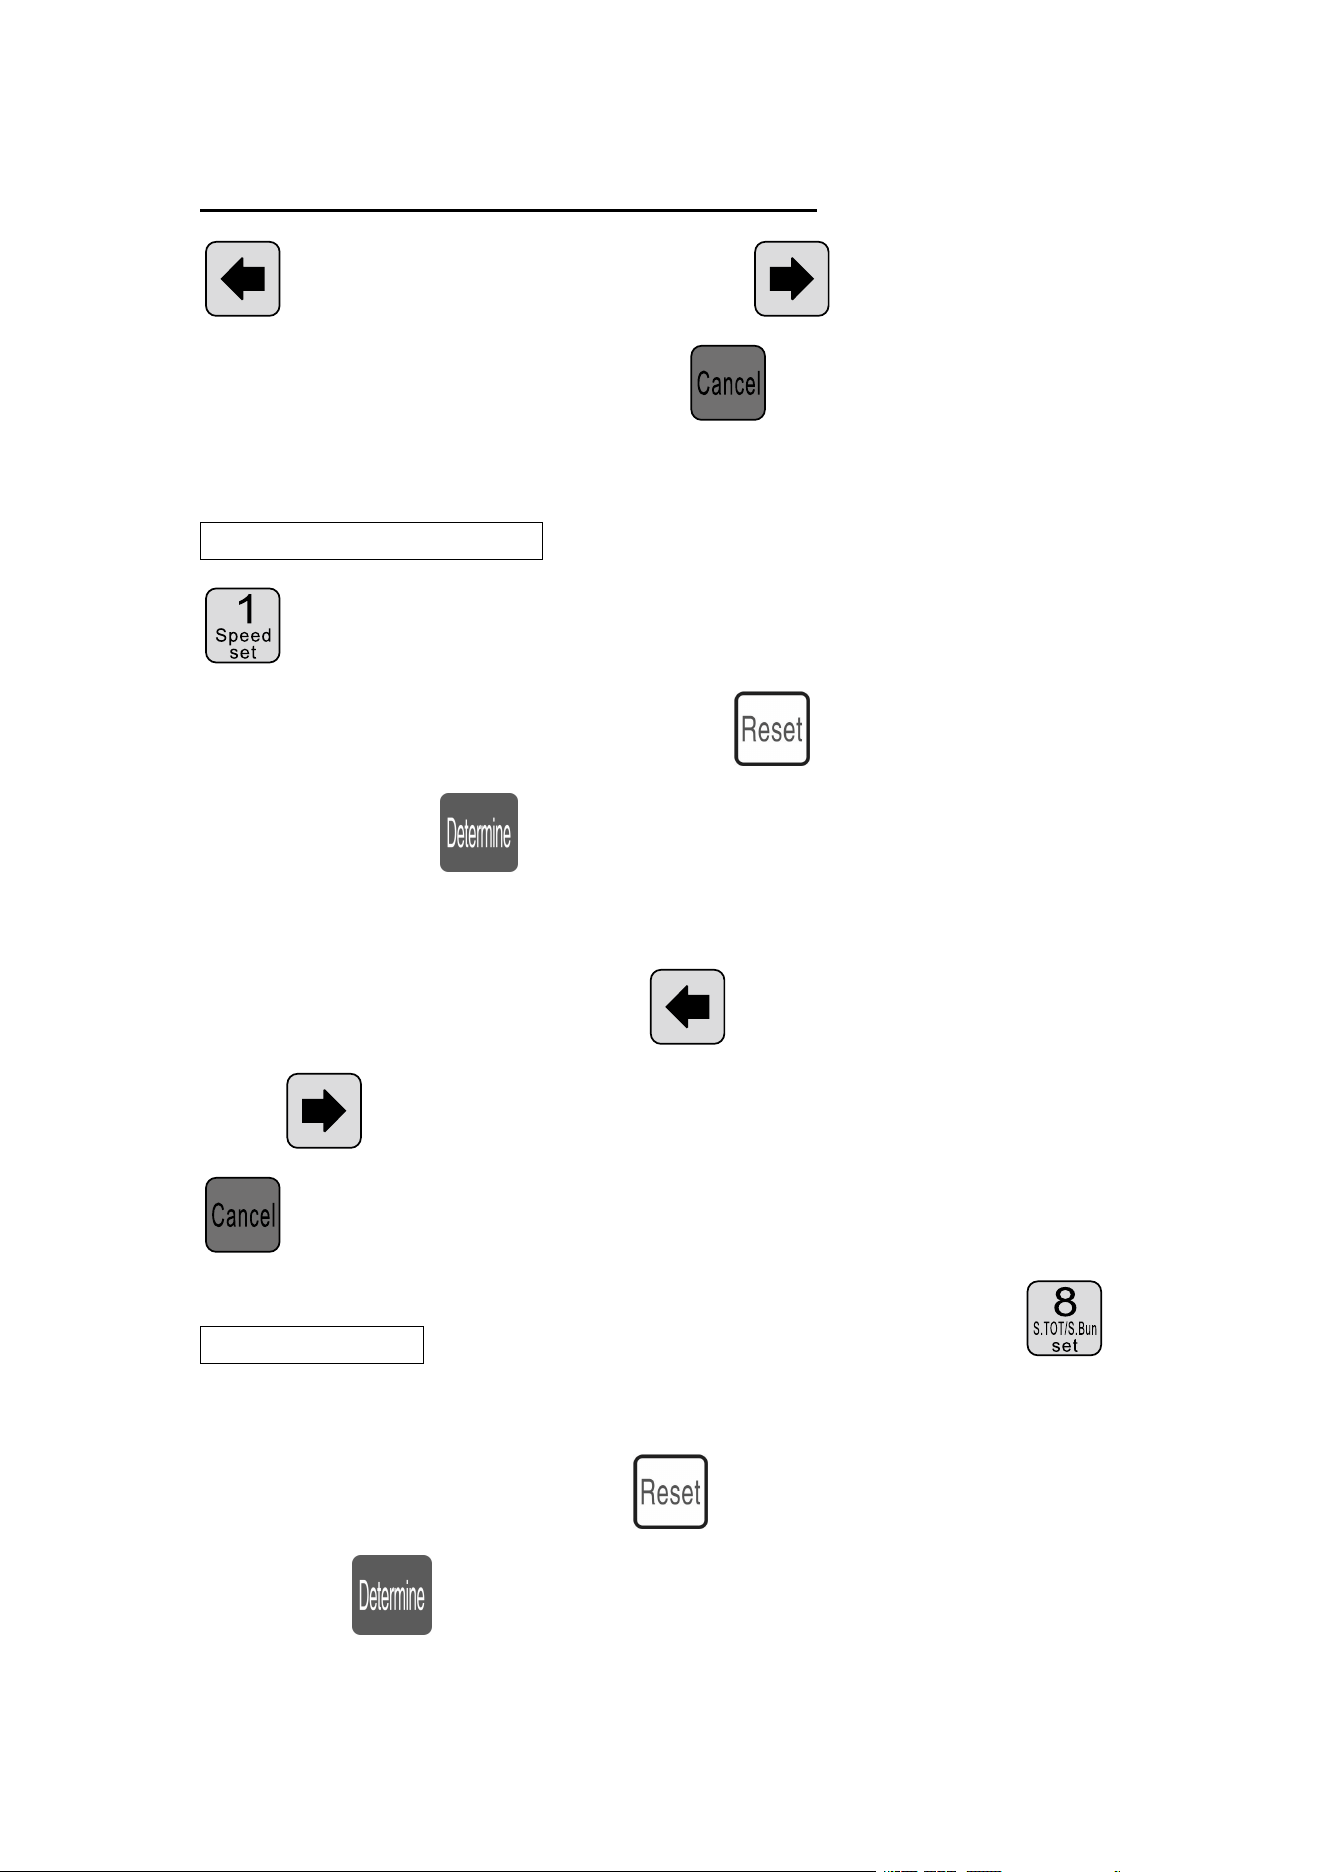
Stripping parameter setting: The machine when in standby mode, press
; front length parameter begin to flicker, at this time can directly
enter the number, if the input error, press clear input digital input
again; then press preservation, and a paremeter flicker, until the
front end length, front half stripping, total length, rear half stripping end
length, cutter, knife back all the input completion value; The small of the
knife value is , the deeper of the cutting is; the thicker of the wire is,
8
0the larger of the knife retreat value should be; Parameter setting press
flashes forward a paremeter; press after the removal of a
blinking parameters; at any time by withdraw from the set of
parameters, back to the standby state;
Stripping speed settings: The machine when in standby mode press
; cutter speed parameter started flashing at this time can directly
enter the number, if the input error, press clear input digital input
again; Then press preservation, and a parameter flicker, until the
cutting speed, feeding speed, stripping speed, pause time all input to
comlete; Parameter setting; press flashes forward a parameter;
press after the removal of a blinking parameters; at any time by
withdraw from the set of parameters, back to the standby state;
Output settings: The machine when in standby mode press ;
gross parameter set to begin to flicker, at this time can directly enter the
number, if the input error, press clear input digital input again;
Then press preservation, and a parameter flicker, until the set, the
9
total number of all input to comlete; Parameter setting; press
flashes forward a parameter; press after the removal of a
blinking parameters; at any time by withdraw from the set of
parameters, back to the standby state;
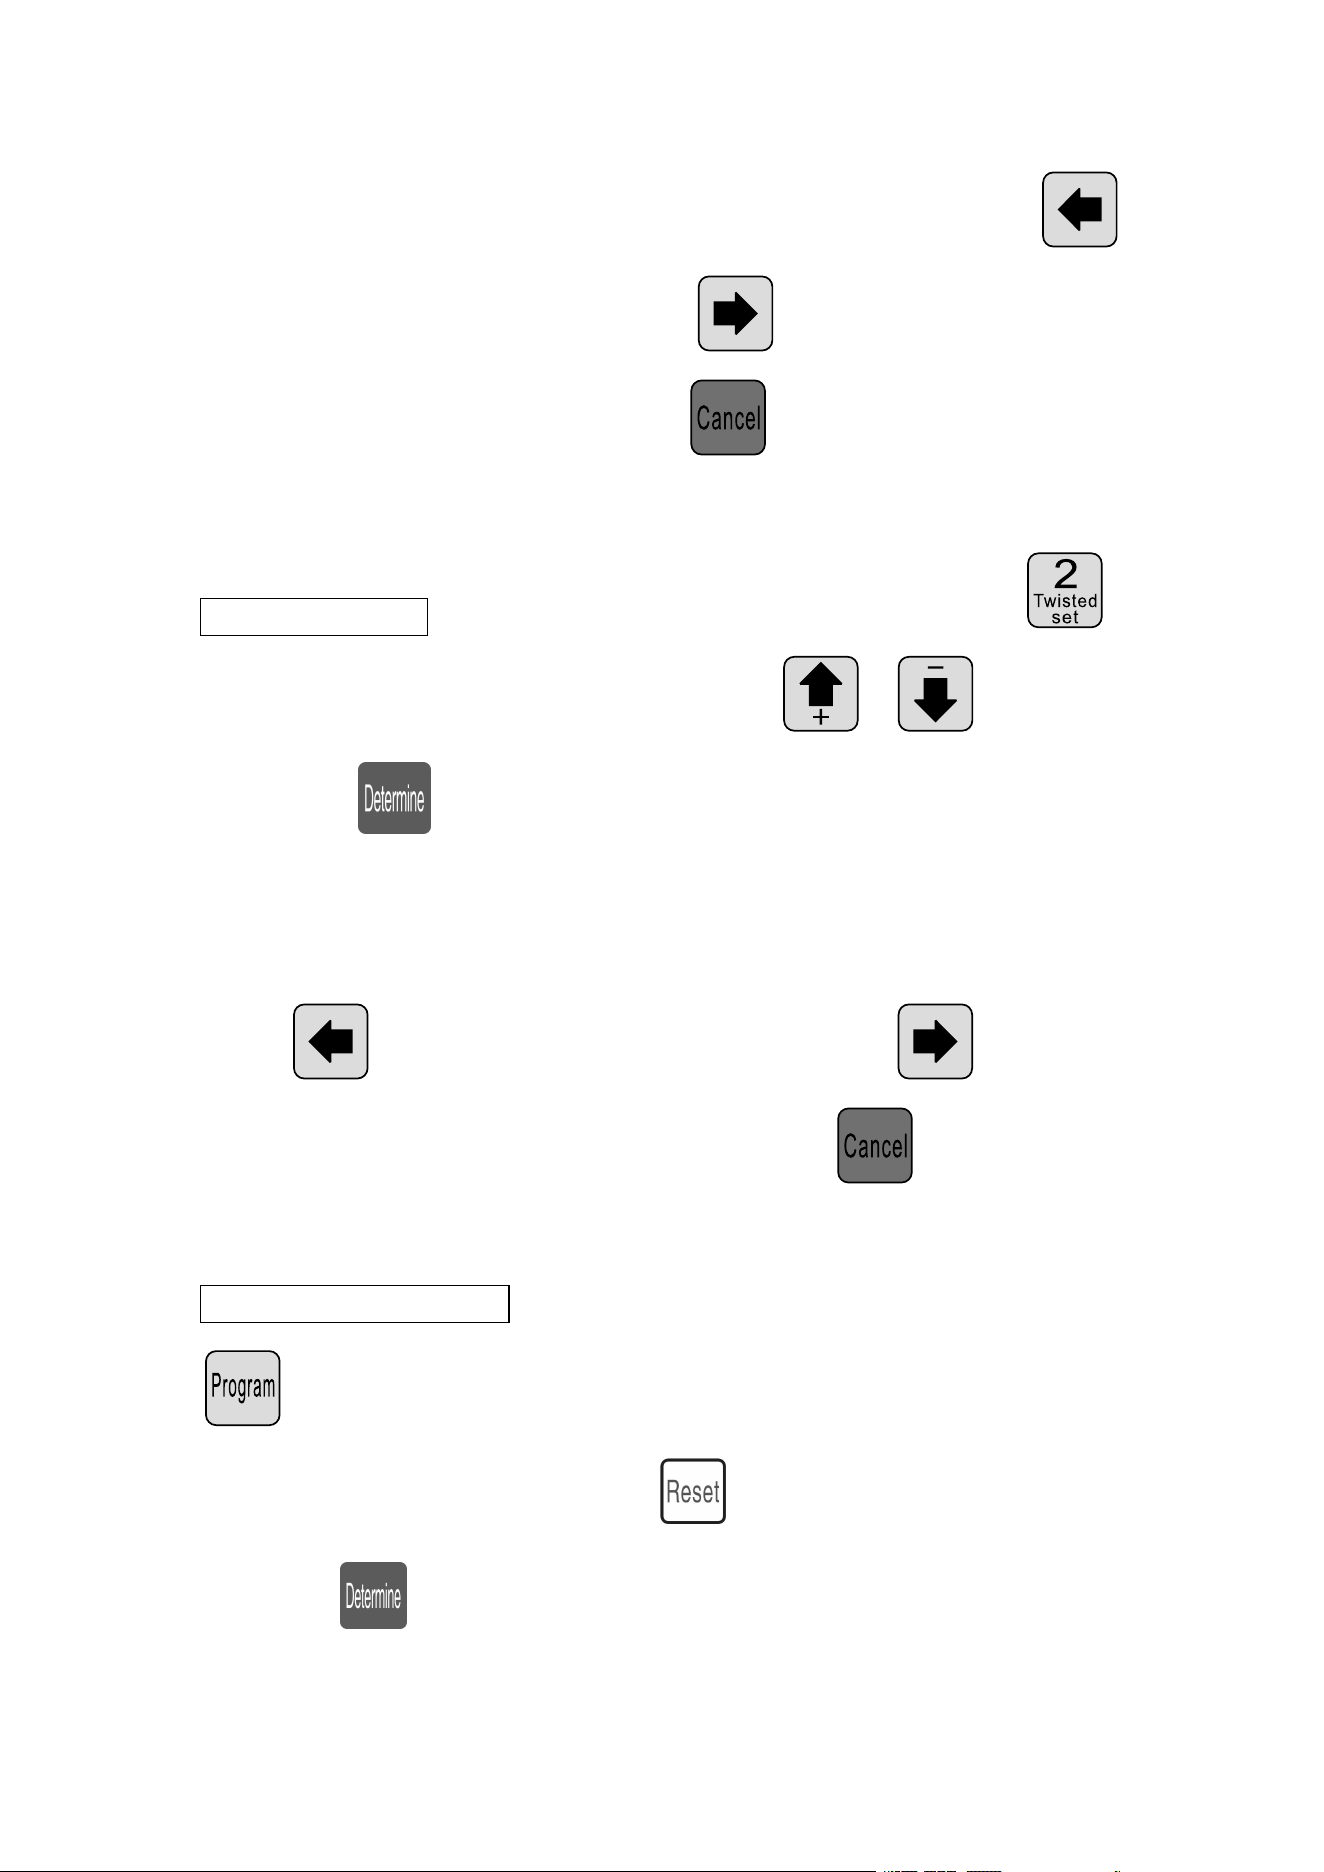
Twisted line set: The machine when in standby mode press ;
Front twist mode scintillation, this time press 、 switching,
Then press preservation, and a parameter flicker, until the front
twist, twist wire mode input mode is completed, then by previous
methods input torsion line speed, twisting strength; Parameter setting;
press flashes forward a parameter; press after the
removal of a blinking parameters; at any time by withdraw from
the set of parameters, back to the standby state;
Program number set: The machine when in standby mode, press
; program arguments begin to flicker, at this time can directly enter
the number, if the input error, press clear input digital input again;
then press preservation, to standby state;
10
Work mode switch: The machine when in standby mode, press 、
work mode switch;
Work mode explain
This machine is a multifunctional wire cutting machine, a total of 6 kinds
of wire cutting & stripping procedure, following picture description:
Line mode:
The model and the traditional 220 wire cutting machine function,
can be mounted wire twisting device to increase the twisted wire, wire
length as shown, only according to the above method to input a desired
size, at this mode function is not available;
11
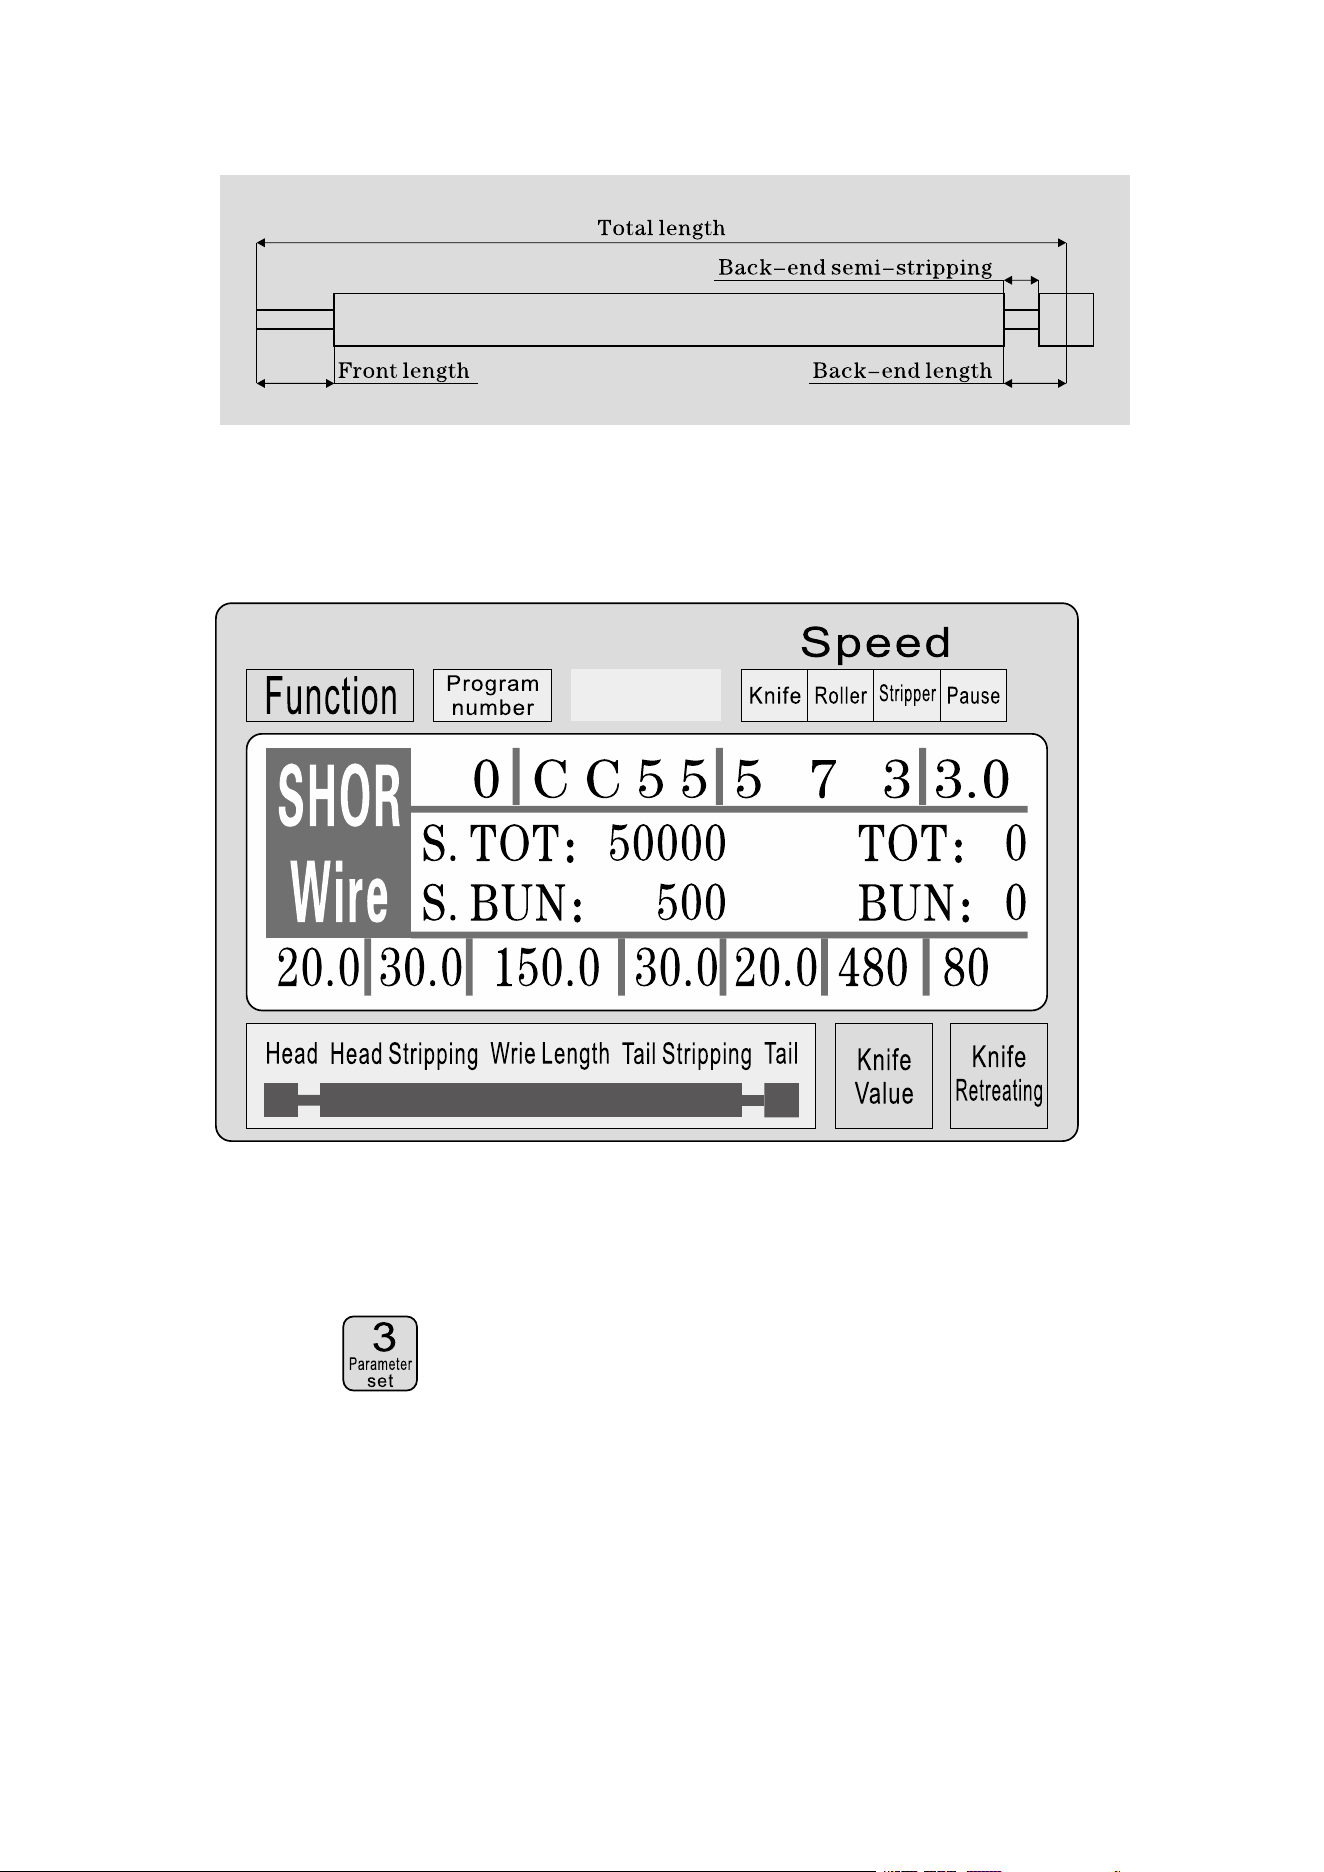
The short-term model:
The model machine and long-term is basically the same, only the
machine stripping action is not the same; and no twisting line function; at
this mode function is not available;
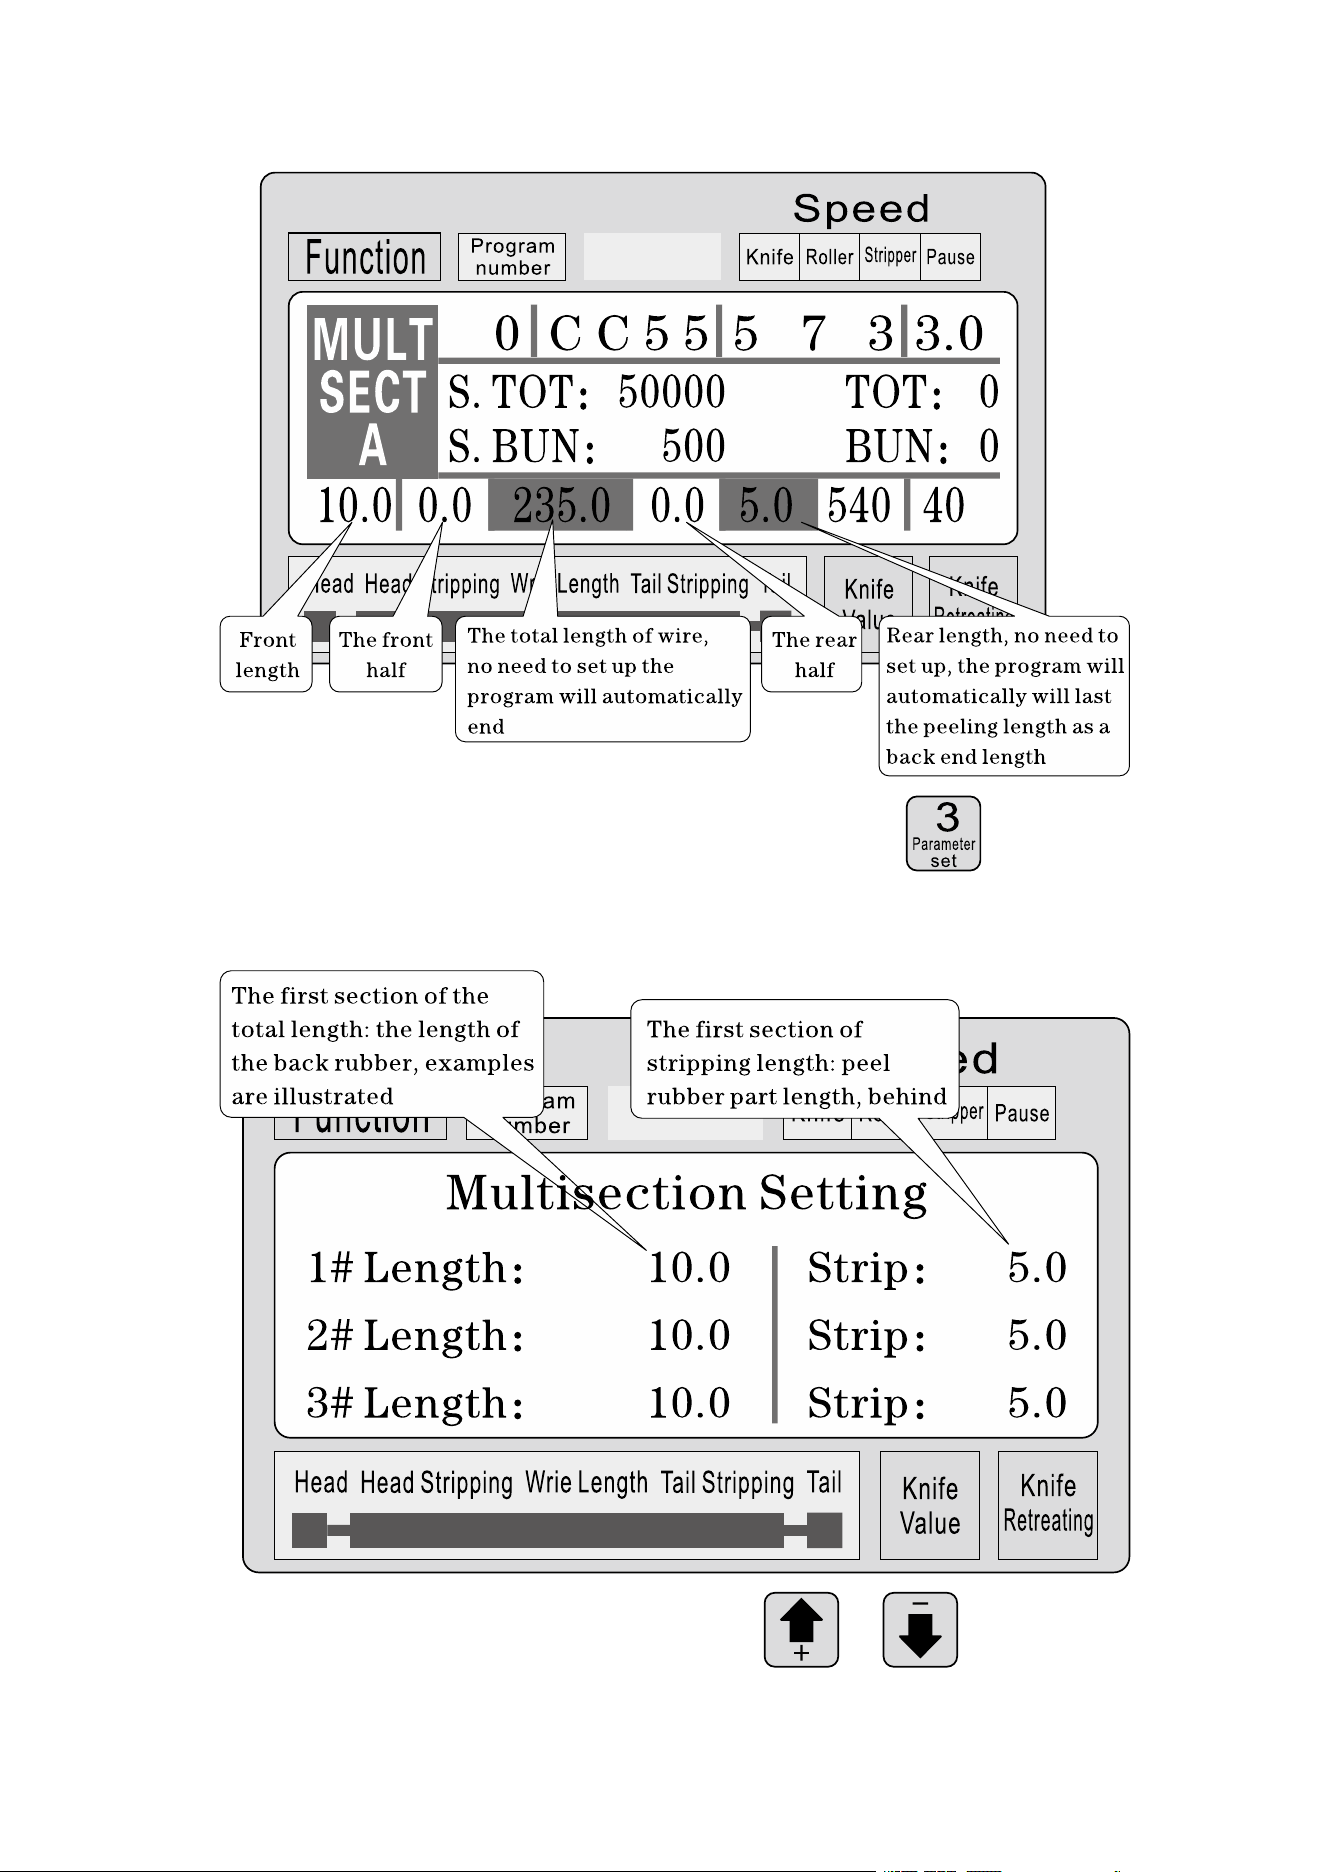
12
This mode without twisting line function; press Function
into the following cable function setting picture:
In a parameter setting condition, press 、 upwared or
13
downward view 1-12 segment set parameters; press set
parameter, Until all parameters input to complete;
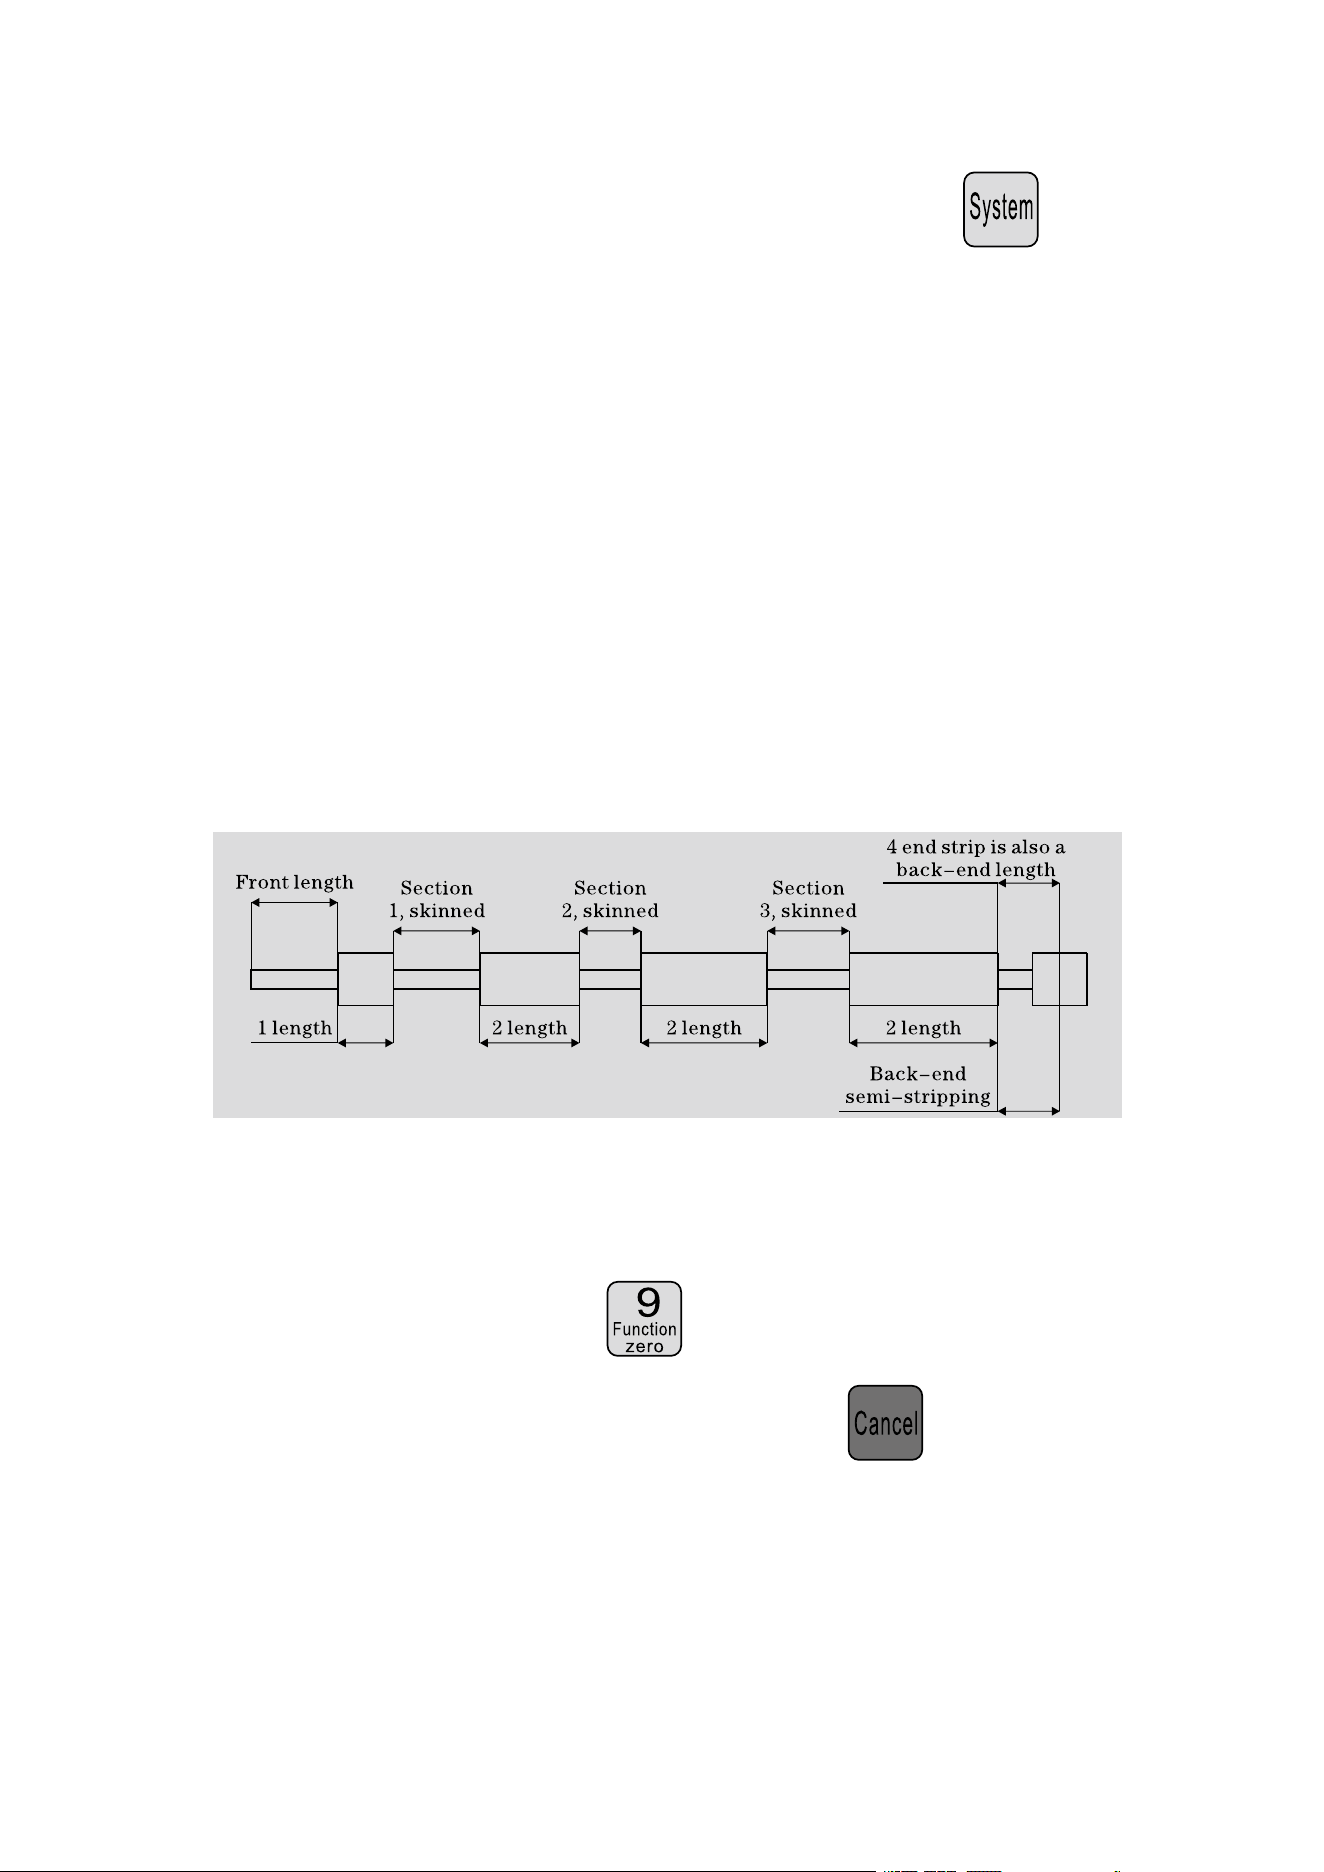
Note: in a multistage model, total is equal to the length of each
wire length and coupled with the front end length, procedures have
been calculated automatically and highight, so set the total length,
the length of the whole no end; end length is the final end of the
length of! Also no need to set up, when the required length is
arranged is completed, a set of 0
Function setting picture
In the standby state, press to enter this screen; in the picture
display, the machina does not start the work, press return to work
picture;
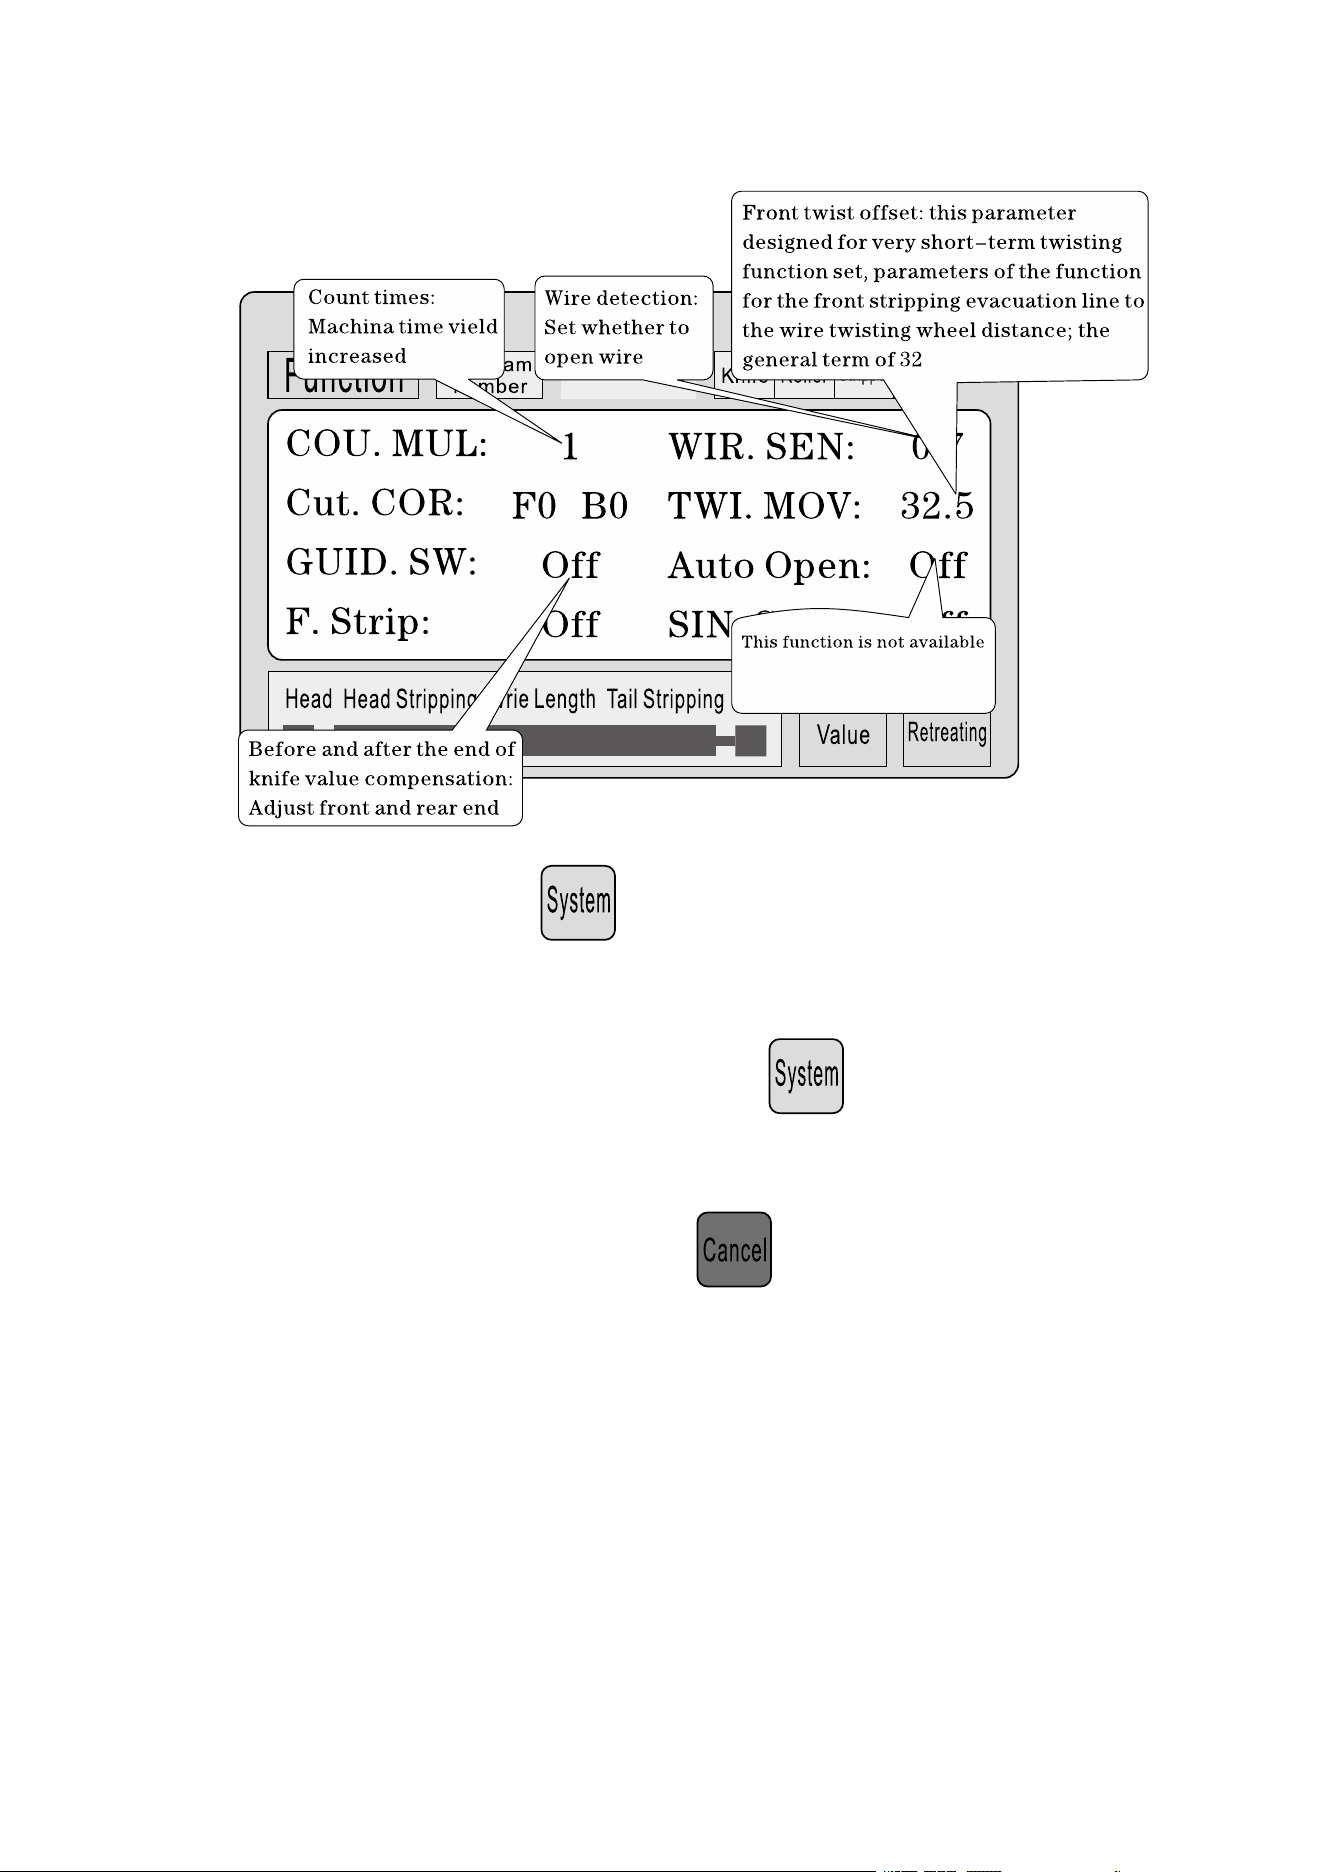
14
Parameter setting: press start settings, until all parameters input
to complete;
System setup screen: Standby state, press to enter this screen;
input password (10010011) to enter this screen; display the picture, the
machine does not start the work, press return to work picture;
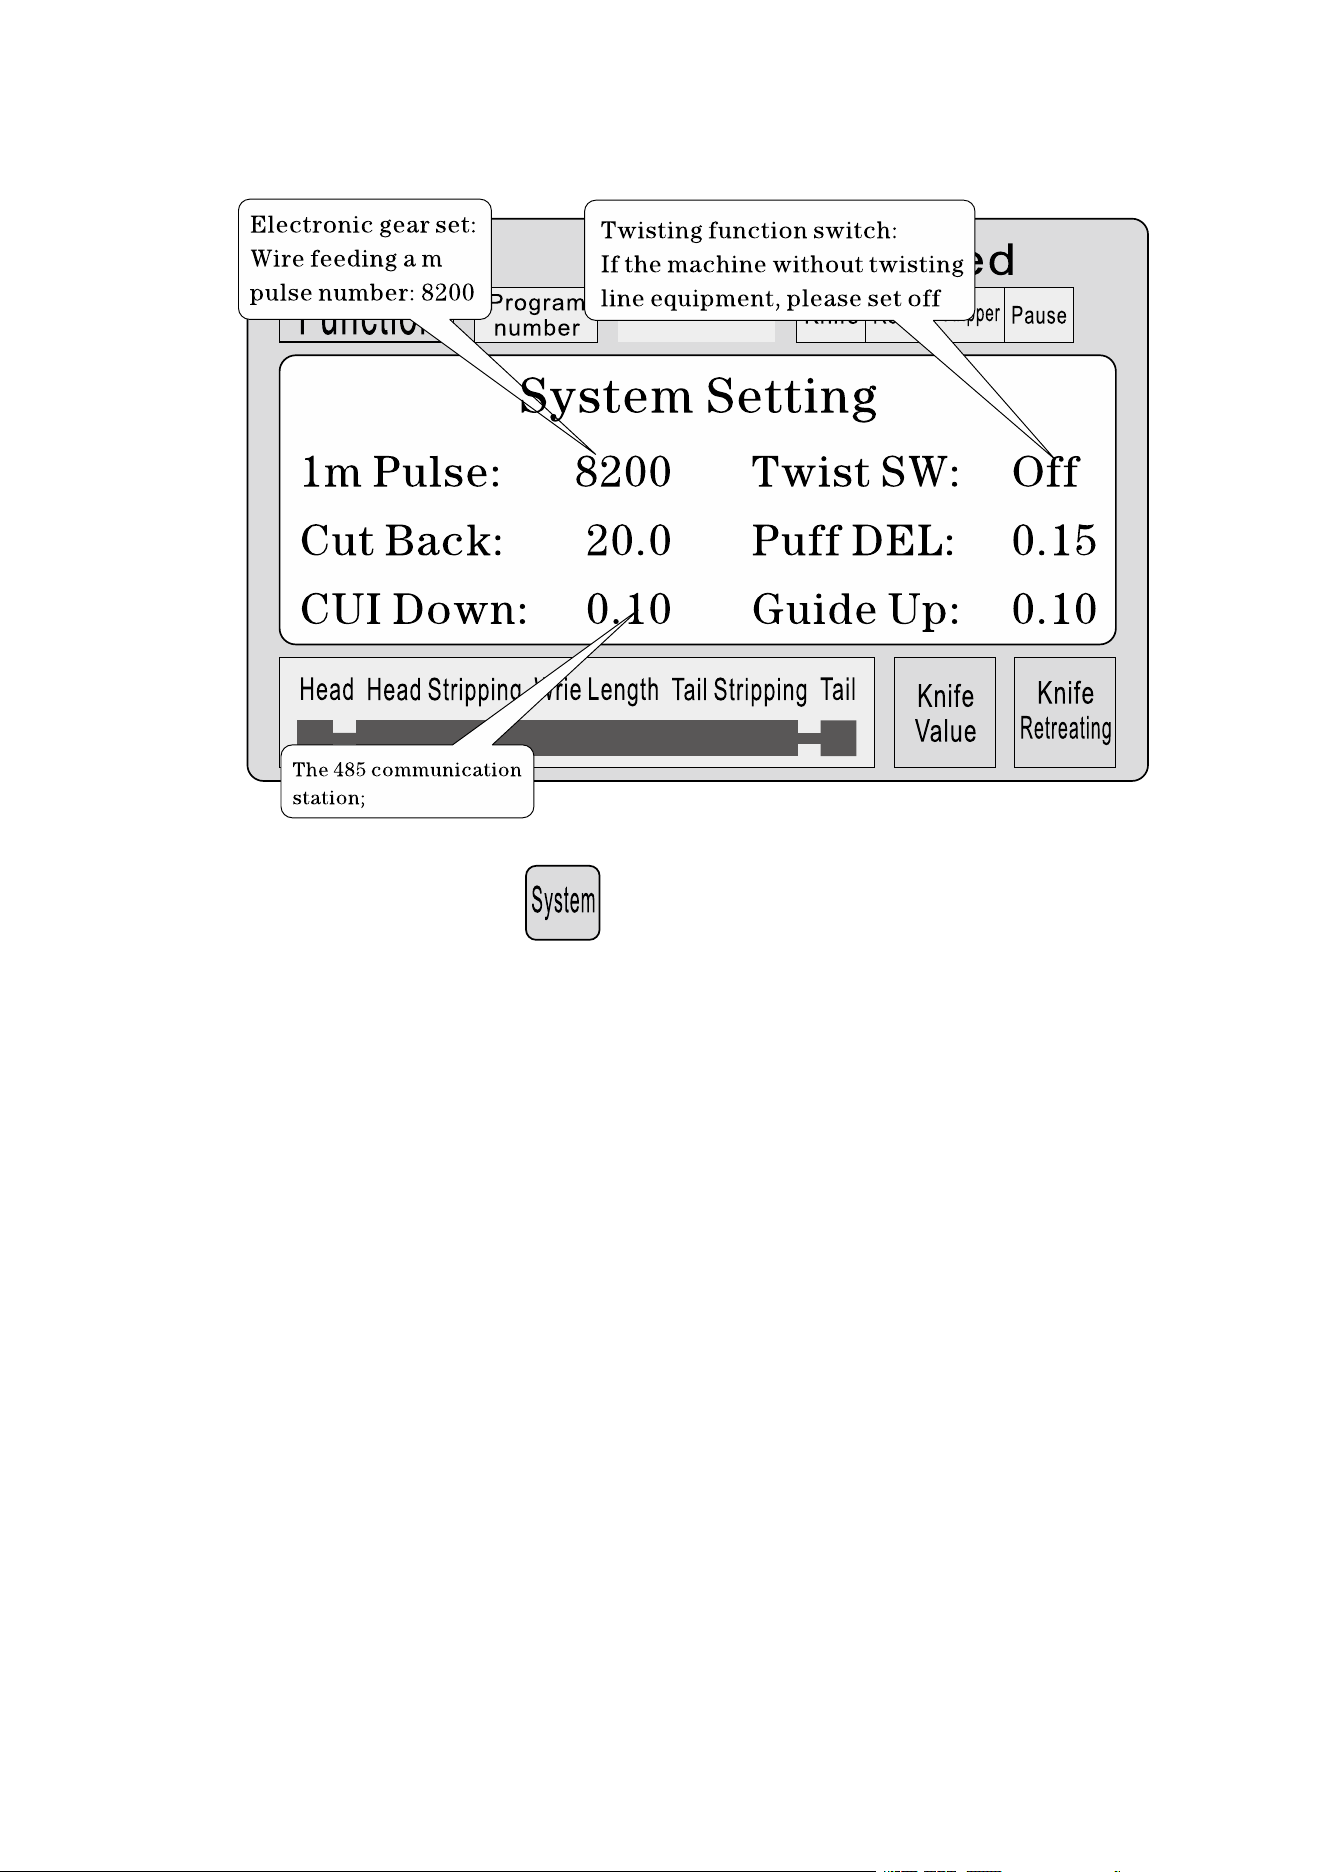
15
Parameter setting: press start settings, until all parameters input
to complete;
Stripping set matters needing attention
1
、
a number of stripping parameter, total length must be greater than the
front end length + back-end length; otherwise the work machine;
2
、
the use of communication control of the machine, must ensure that the
machine in the display screen work and non parameter etup state;
otherwise, the communication control is invalid;
3
、
use the appropriate speed operation;
4
、
in the screen work and non parameter settings, Can be directly press

16
、 the cutter set value without stopping;
5
、
if the four running indicator light flashes, illustrates the setting
parameters, can start the machine;
6
、
twisting line setting: the first torsional offset paremeters is designed for
short-term twisting function set, meaning when the machine off your
front, wire feeding after twisting wheel distance; sometimes can be
fitted to the short-term blade after twisting wheel, then the parameter
set small, reach short-term torsion a line function; general line is set to
32, no need to change; short-term according to the blade and the wire
twisting wheel actual distance adjustment; ( can single-step operation
mode to the step, if the wire feeding more than wire twisting wheel,
can reduce the parameter can be increeased, and vice versa;)
Six, Introduction of communication protocol
The machine is equipped with a standard RS485 communication
function, the user can through the host computer ( PLC, PC ) to directly
control the machine; communication hardware specifications for 38400, 8,
1, N
The following is the machine accepts commands in detail
1
、
the emergency stop command: PC issued three byte hexadecimal
number 16 01, 66, 99; wherein the first 01 is the station number, can
set up a system screen to change, the machine successfully received
17
the order will return received the three bytes of data, this machine has
received notice of the command;
2
、
stop command: PC issued three byte hexadecimal number 16 01, 77,
88; wherein the first 01 is the station number, can set up a system
screen to change, the machine successfully received the order will
return received the three bytes of data, this machine has received
notice of the command;
3
、
stop command: PC issued three byte hexadecimal number 16 01, 88,
77; wherein the first 01 is the station number, can set up a system
screen to change, the machine successfully received the order will
return received the three bytes of data, this machine has received
notice of the command;
Seven, Wire cutting example
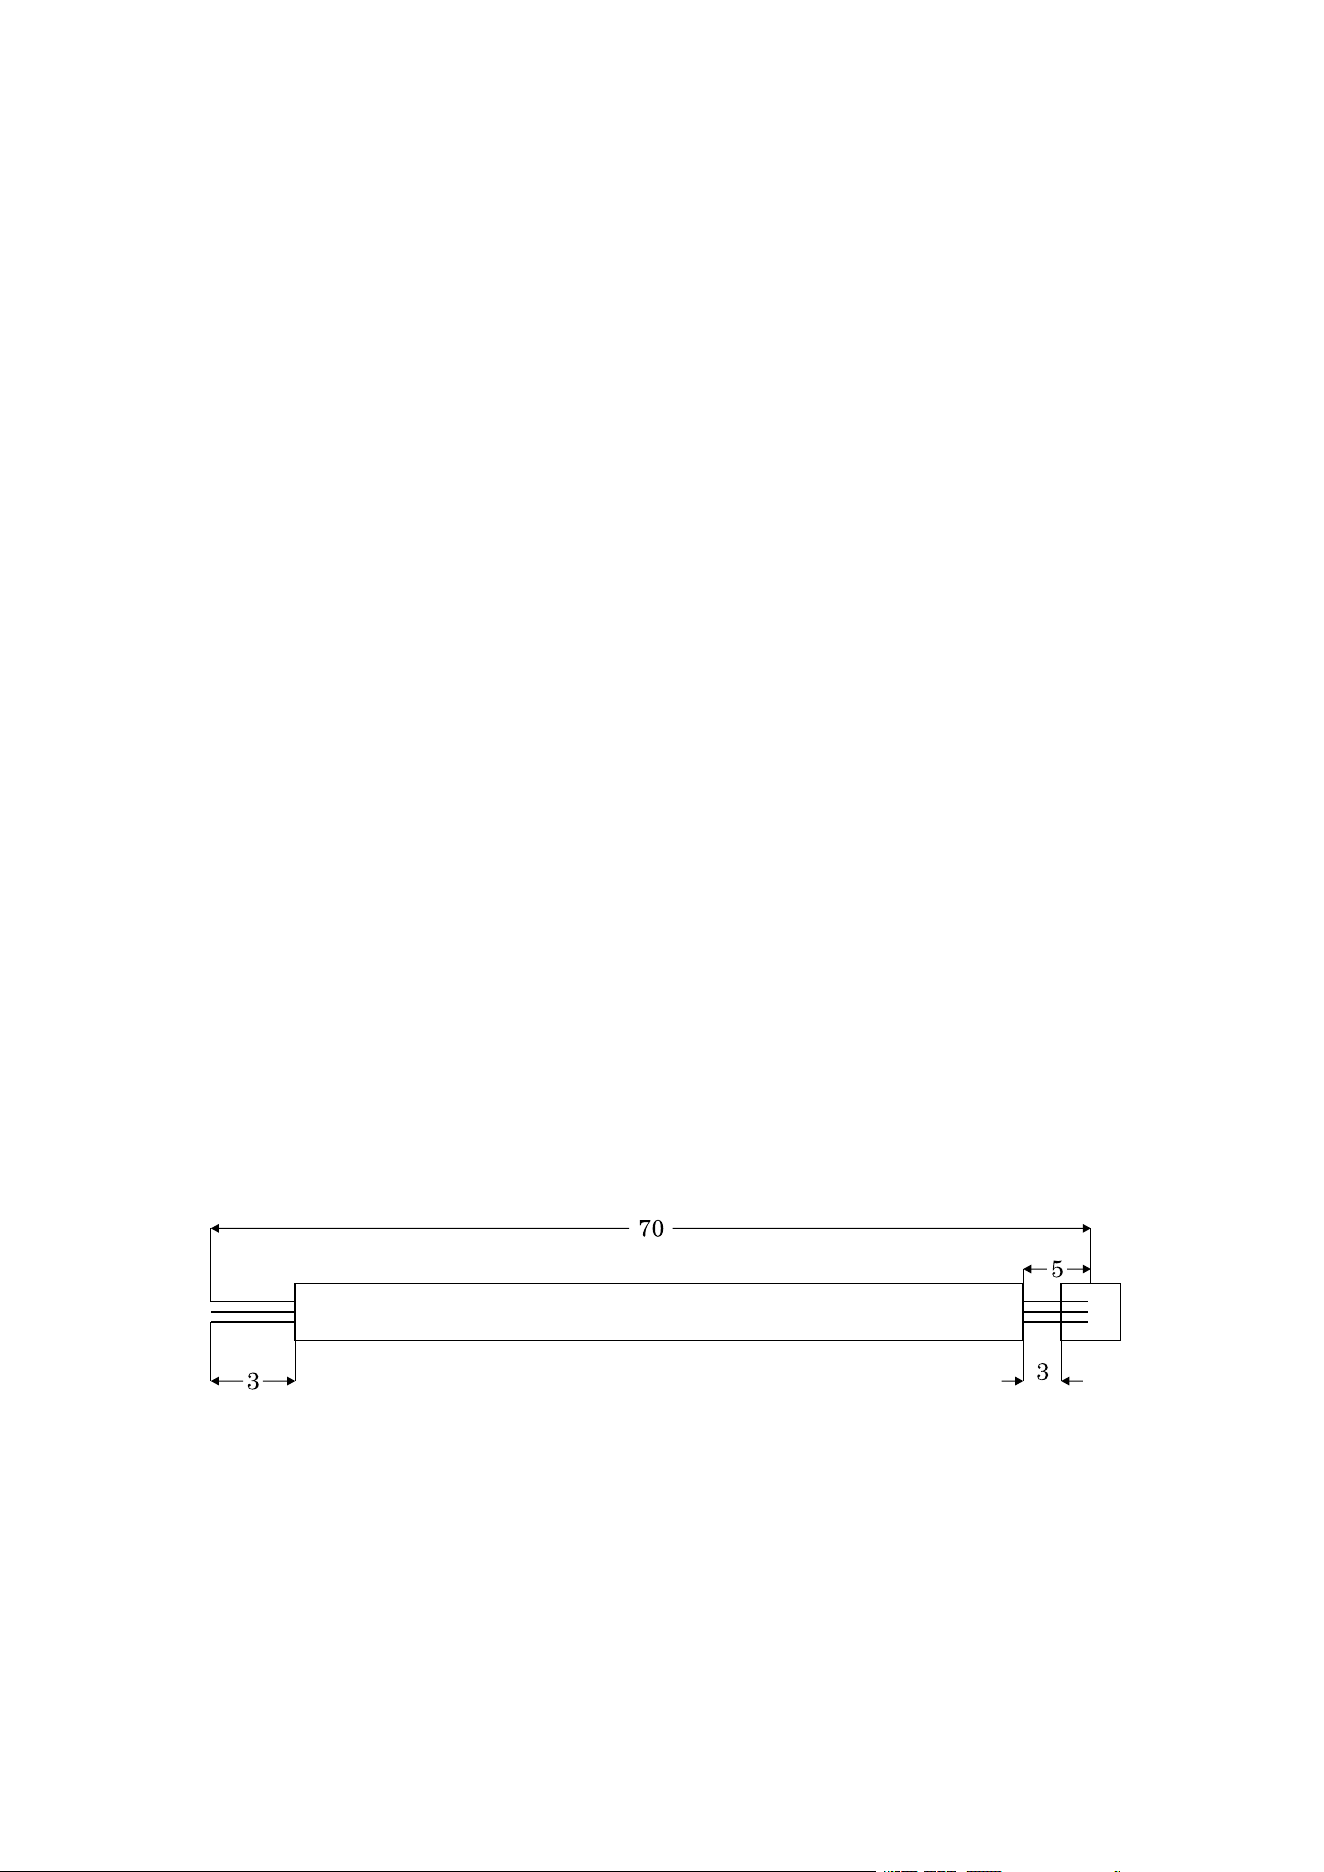
( 1 ) long pattern
1
、
The wire is placed in a roller intermediate, adjust the rool gap to have
just come into contact with the wire and then down 2 big;
2
、
Set size:
18
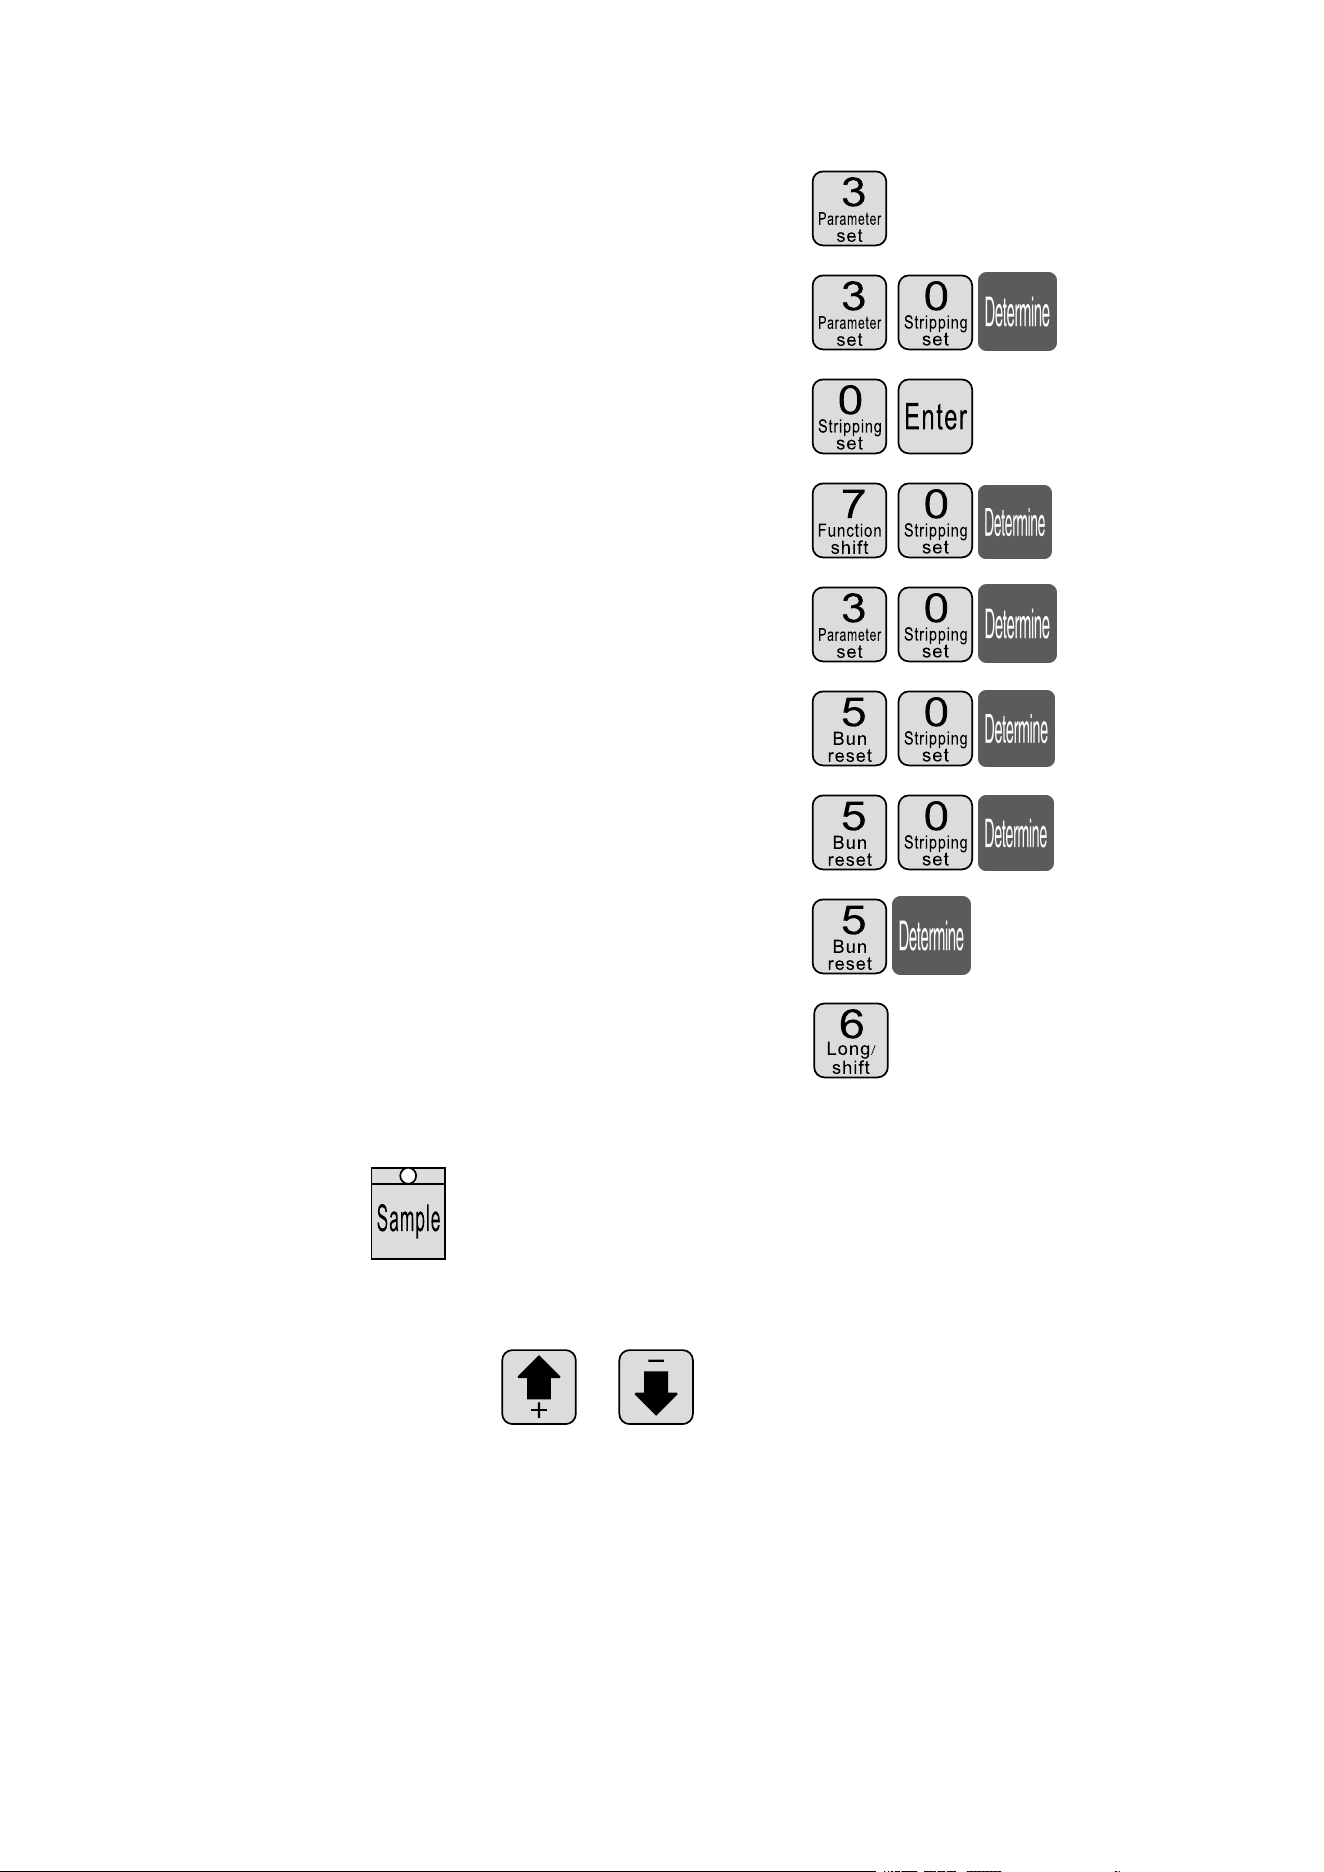
⑴ Enter setup mode: Standby mode press
⑵ Set the front stripping length
⑶ Set the first half stripping length
⑷ Total length
⑸ Set the last half stripping length
⑹ Set back length
⑺ The cutter set value: ( Reference )
⑻ Set back the knife: ( Reference )
⑼ Set line mode: press Set line mode;
3
、
press more than 1 seconds, the machine will stop
automatically after carrying a line, have a look whether the value of the
right knife, directpress 、 correction; Until satisfied;
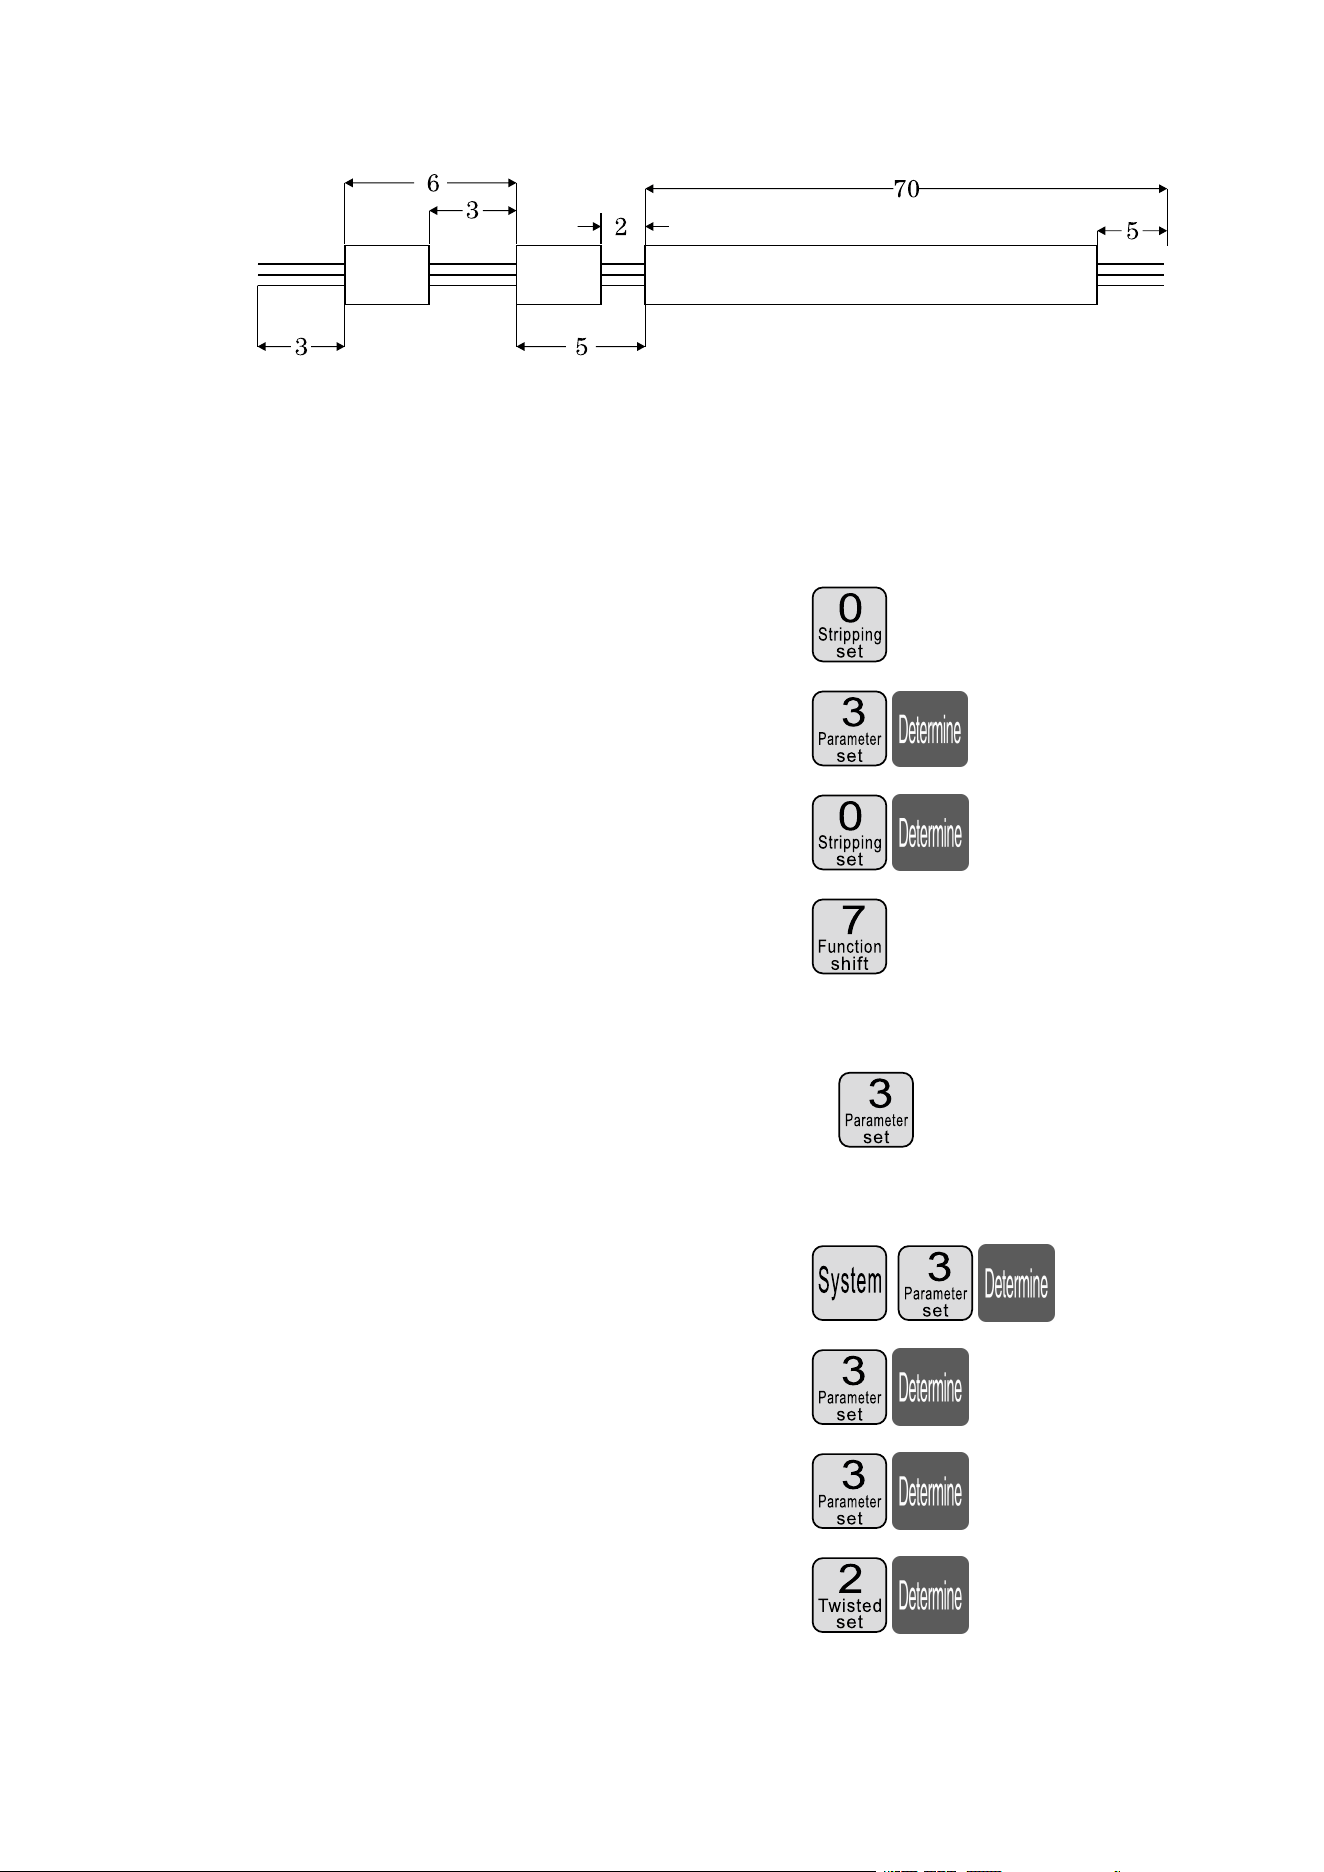
( 2 ) Multi segment peeling
19
1
、
the wire is placed in a roller intermediate, adjust the roll gap to have
just come into contact with the wire and then down 2 big;
2
、
setting size:
⑴ Enter setup mode: Standby mode press
⑵ Set the front stripping length
⑶ Exit strip, parameter setting
⑷ Set multistage mode: press set to multi
segment model;
⑸ Enter the number of segments is set: press set to more
footage;
⑹ Set the first segment length of stay skin
⑺ Set the first segment peeling
⑻ Set second leaving skin length
⑼ Set second
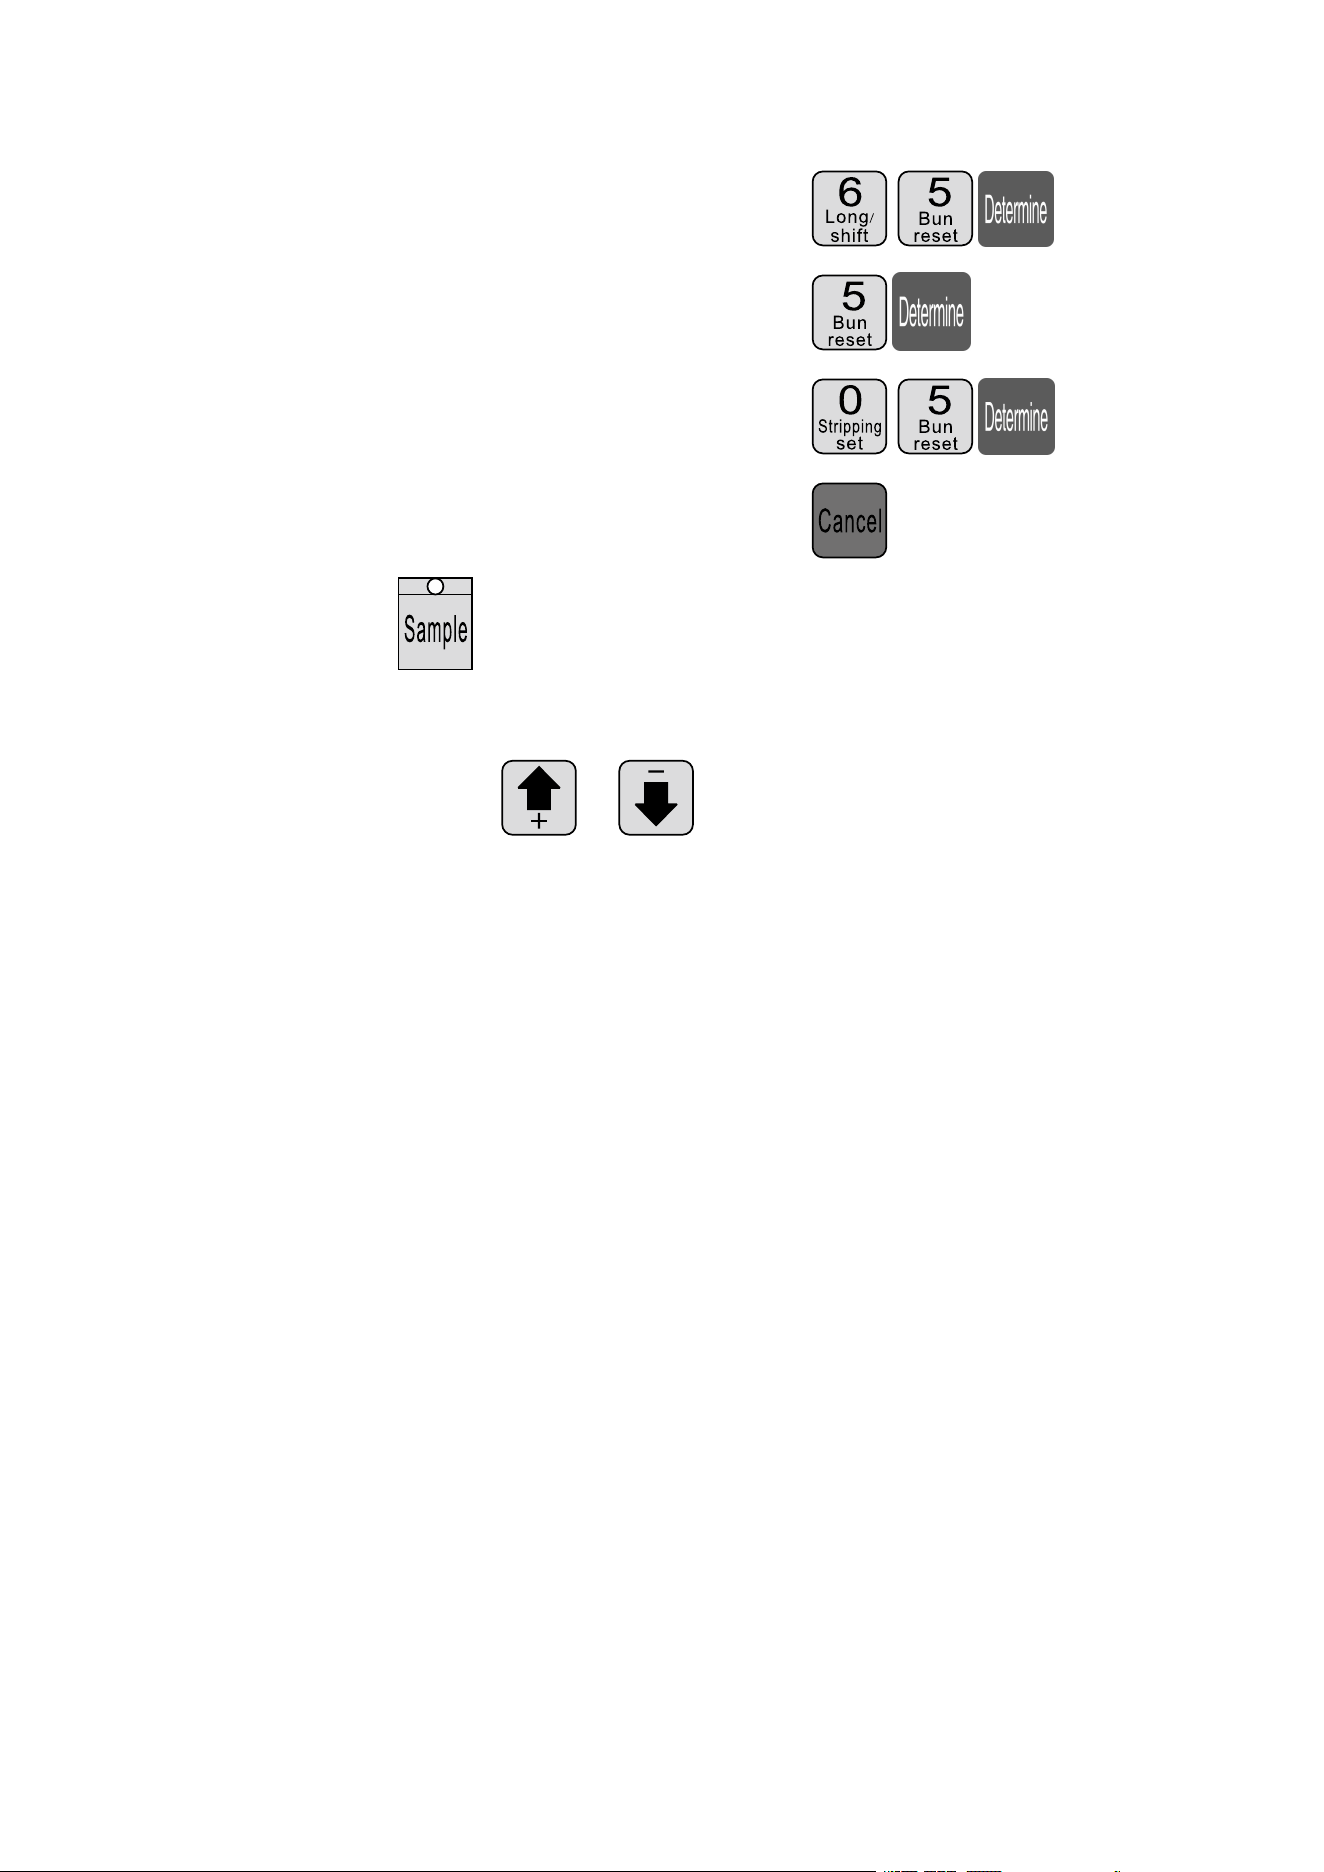
20
⑽ Set third leaving skin length
⑾ Set third leaving skin length
⑿ Set fourth as the length
⒀ Return to work picture
⒁
pree more than 1 seconds, the machine will stop
automatically after carrying a line, have a look whether the value of the
right knife, directpress 、 correction; Until satisfied;
Explain
1
、
if the third set to 0, then the program that you just cut in two, and so on;
if you want to peel the 12section, the 12section of the length of the
whole set;
2
、
multiple stripping mode, twisting line function is invalid;
21
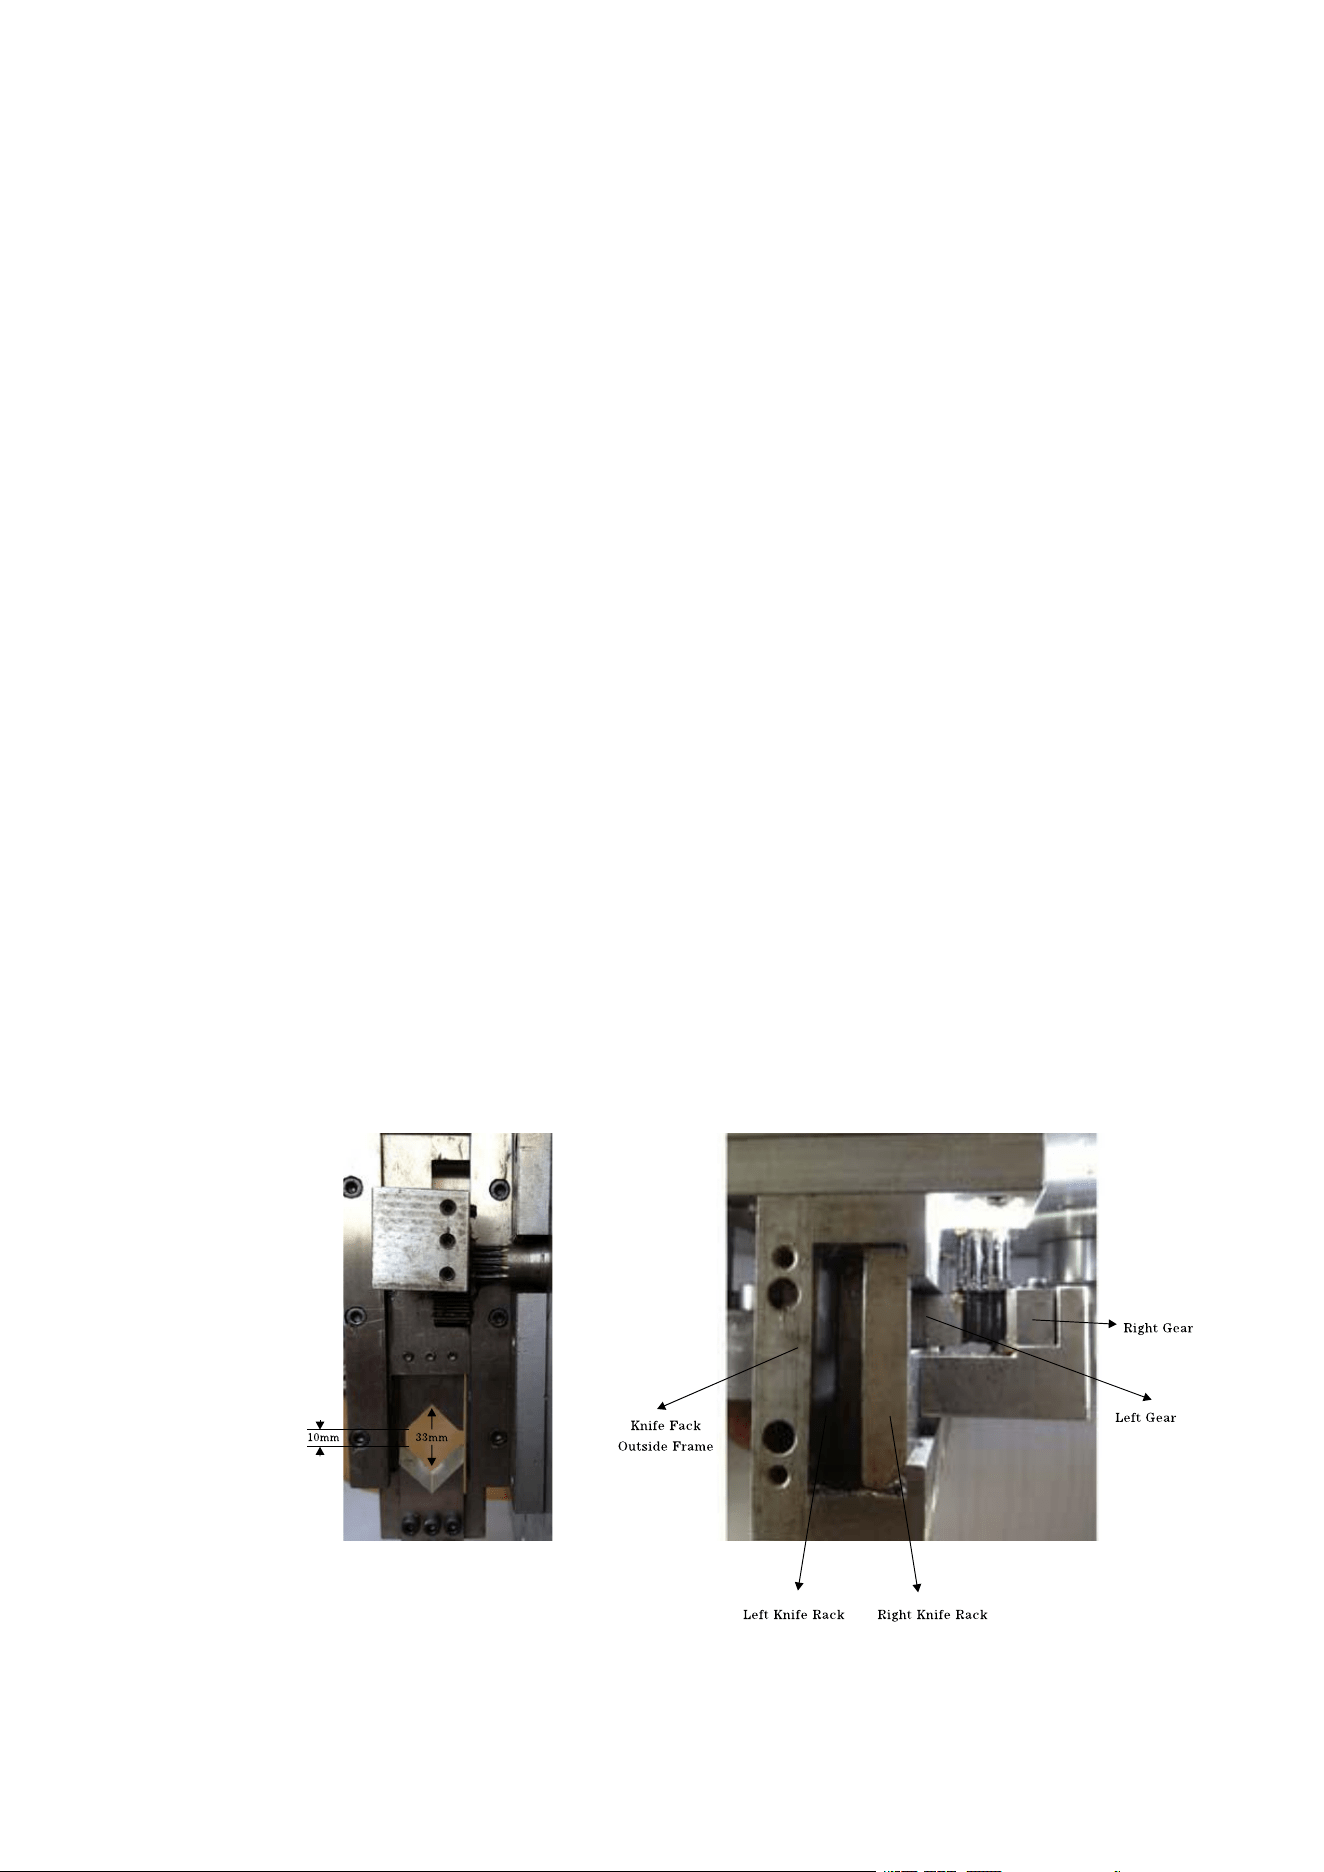
The adjustment o knife cutting position
1. Start the machine.
2. Adjustment of MAX2 knife position: the distance between two knife
blades’ noses should be around 8-10mm while the distance between
two blades’ V shape bottom points should be around 34mm.( See
Picture A)
3. Key points of attention for changing knife blades:
1.The up plane of inner left knife rack should be blow right knife
rack plane with 19mm which also should be lower than knife rack
outside frame with 4mm as shown by picture B.
2.Left gear should be higher than middle gear with 1 gear height
while the right gear should be higher than middle gear with 6 gear
heights.( See picture B)
3. Normally, the distance between two knife blades’ noses should be
around 8-10mm while the distance between two blades’ V shape
bottom points should be around 34mm.( See picture A)
4. After adjustment, insert both sides of knife rack gears into middle
axil tooth and fix the screws of both sides knife rack.
5. Restart the machine and adjust the knife value if the cutting depth
is changed.
(Picture A) (Picture B)

22
Eight, Phenomenon and exclusion
The emergence of the
phenomenon
Processing method
Thread stripping without
1、check the thread cutting depth, cutting marks too shallow for regulating
“ diameter ” smaller.
2、the line wheel pressure is not enough, need to adjust the “ into the line
wheel pressure regulating knob ”, the line wheel pressure.
3 、 the line wheel clearance is too large, need to adjust the “ into the line
wheel clearance adjustment knob ”, the line wheel clearnce is reduced to
a proper position.
4、stripping the first set is greater than or equal to 3.
5、the line wheel if there is dirt, required to be cleaned.
6 、 retreat knife set may be too large, should be appropriate to reduce the
retracting parameter ( reference value 00-10 ).
7、the next tool misalignment, please refer to chapter seventh section 2 test
chart 7-7 alignment condition.
Wire stripping without tail
1 、 check line tail cutting depth, cutting marks too shallow for regulating
“ diameter ” smaller.
2、wire wheel, the pressure is not enough, need to adjust the “ round round
pressure regulating knob ”, the line wheel pressure.
3、wire wheel clearance is too large, is required for the regulation of “ round
round gap adjustment knob ”, make the pulley gap is reduced to a proper
position.
4、stripping the first set is greater than or equal to 3.
5、pulley if there is dirt, required to be cleaned.
6 、 retreat knife set may be too large, should be appropriate to reduce the
retracting parameter ( reference value 00-10 ).
7、the next tool misalignment, please refer to chapter seventh section 2 test
chart 7-7 alignment condition.
Wire skin of severe
barotrauma
1、first judge barotrauma from inlet wheel or pulley, wheel pressing force to
be small.
2、contact with my company, the purchase of rubber tire.
Thrum peel line core cut of
several root
The “ diameter ” tone in 1 or 2, retry until notto hurt the line core.
Length of line, there is
greater than or equal to the
set length
1 、 the line wheel pressure is not enough, and sometimes thread stripping
without phenomenon, thread stripping on line is greater than a
predetermined length, regulating “ into the line wheel pressure regulating
knio ”, so the line wheel pressure.
2、dirt, pulley, required to be cleaned.
A wire inlet wheel clearance is too large, to adjust the “ into the line wheel
clearance adjustment knob ”, and a wire feeding wheel gap smaller.

23
Length of line, there is less
than or equal to the set
length
1、the wire itself line thickness a.
2、a rolling wheel with dirt, required to be cleaned. The conductor surface
wax, lead into, wire wheels slip with sticky wax, wire brush, and gasoline
cleaning four rolling wheel.
3、take out wire, level “ 00 ” air operation phenomenon, be excluded.
4、the wire laying frame having card hysteresis phenomenon, leading to poor
conveying wire.
Head and tail cut or no cut
1、check the head or tail of sevred, wire diameter is too small, should adjust
the “ wire ” bigger. ( a reference value 30-90 )
2、Checking thread tail no cut marks, wire diameter is too lare, should adjust
the “ wire ” smaller. ( a reference value 30-90 )
Sometimes the head or tail
was cut off
1 、 wire wheel, the pressure is not enough, please check and regulation of
“ round round pressure regulating knob ”, make the pulley pressure
becomes great.
2 、 the line wheel clearance is too large, need to adjust the “ into the line
wheel clearance adjustment knob ”, the line wheel clearance reduction.
There are several strands of
wire long thread
1 、 wire diameter is too small, the cut wire, strip with a copper wire, to
increase the diameter of 1-2, try again.
2、retreat knife set too small, it should be increased the retracting parameters
(00-10 )
Sometimes the conducting
wires together no knife
broken
1、the edge parts activities with the ordinary oil, try again (usually 8 hours
filling a ).
2、the speed is slow.
3、check the wire specifications in AWG12# line ( 3 square ).
4、the blade is blunt, flat grinding, or replacement.
5、according to the seventh part of the third inspection.
Press run after shutdown can
only cut a, screen appears
“ short line or knot ”
1、no line of automatic shutdown function, belongs to the normal.
2 、 setting the length should be greater than 32 mm ( except for the 98
procedures ).
3、wire wheel clearance is too large, is required for the regulation of “ round
round gap adjustment knob ” make the pulley reduced gap.
When the power is switched
on the fan to work normally,
screen normal, but according
to “ run ” after the machine
can not move
1、because of the voltage instability or illegal operation of the circuit board in
the insurance pipe burn, need to replace the fuse ( open the case cover,
visible in the circuit board has two 5A insurance tube ).
2、such as changing insurance tube, continue to burn out, and my company
customer service service department or office contact.
Incision inclined tangent
1、wire itself is too curved, the purchase of a straightening device.
2、a lead mouth without facing edge center.
3、a tail tilts, inspect the wire pipe is leaning against the tool too close.