Loading ...
Loading ...
Loading ...
ENGLISH
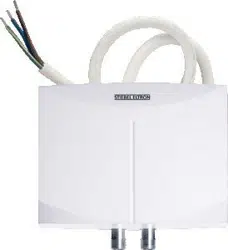
WWW.STIEBEL-ELTRON-USA.COM MINI
™
SERIES TANKLESS ELECTRIC WATER HEATERS | 13
INSTALLATION INSTRUCTIONS
6.6 Maintenance and care
!
Maintenance work, such as checking electrical safety, may
only be carried out by a qualified installer.
WARNING: Always shut off power and water to the unit
prior to removing the filter screen. Failure to do so may
cause serious bodily injury or death.
Regularly clean and descale the filter screen located in the cold water
inlet connection and if necessary replace. Always shut off power and
water to the unit prior to removing the filter screen.
A damp cloth is sufficient for cleaning of the unit's housing. Do not
use any abrasive or corrosive cleaning agents.
7. Installation instructions
Keep these instructions carefully and pass them on to
your successor in the event of a change in ownership, in
the event of maintenance and possible repair work they should be
passed to the qualified installer for his or her reference.
7.1 Mounting the unit
!
Unit must be installed with the plumbing connections
pointing downward or upward only.
WARNING: Do not install unit where it would routinely be
splashed with water. Electric shock or death may result.
» 1. Install Mini as close as possible to the hot water draw-off
point, for example, directly underneath the sink or next to the
shower stall.
» 2. Install Mini in a frost free area. If frost may occur, remove
unit before freezing temperatures set in.
» 3. Leave a minimum of 5" of clearance on all sides for
servicing.
» 4. Remove plastic cover by removing screws located on the left
and right sides of the unit
B
.
» 5. Remove plastic backplate by pulling on the tab with a
screwdriver
B
.
» 6. Mount backplate securely to wall by putting two screws
through mounting holes
A B
.
» 7. Snap unit back onto mounting plate
B
.
» 8. Reinstall cover with screws on left and right side of unit
B
.
Loading ...
Loading ...
Loading ...