
EN FR
THIS INSTRUCTION BOOKLET CONTAINS IMPORTANT SAFETY INFORMATION. PLEASE READ AND KEEP FOR FUTURE REFERENCE.
Follow Costway
Please give us a chance to make it right and do better!
Contact our friendly customer service department for help first.
Replacements for missing or damaged parts will be shipped ASAP!
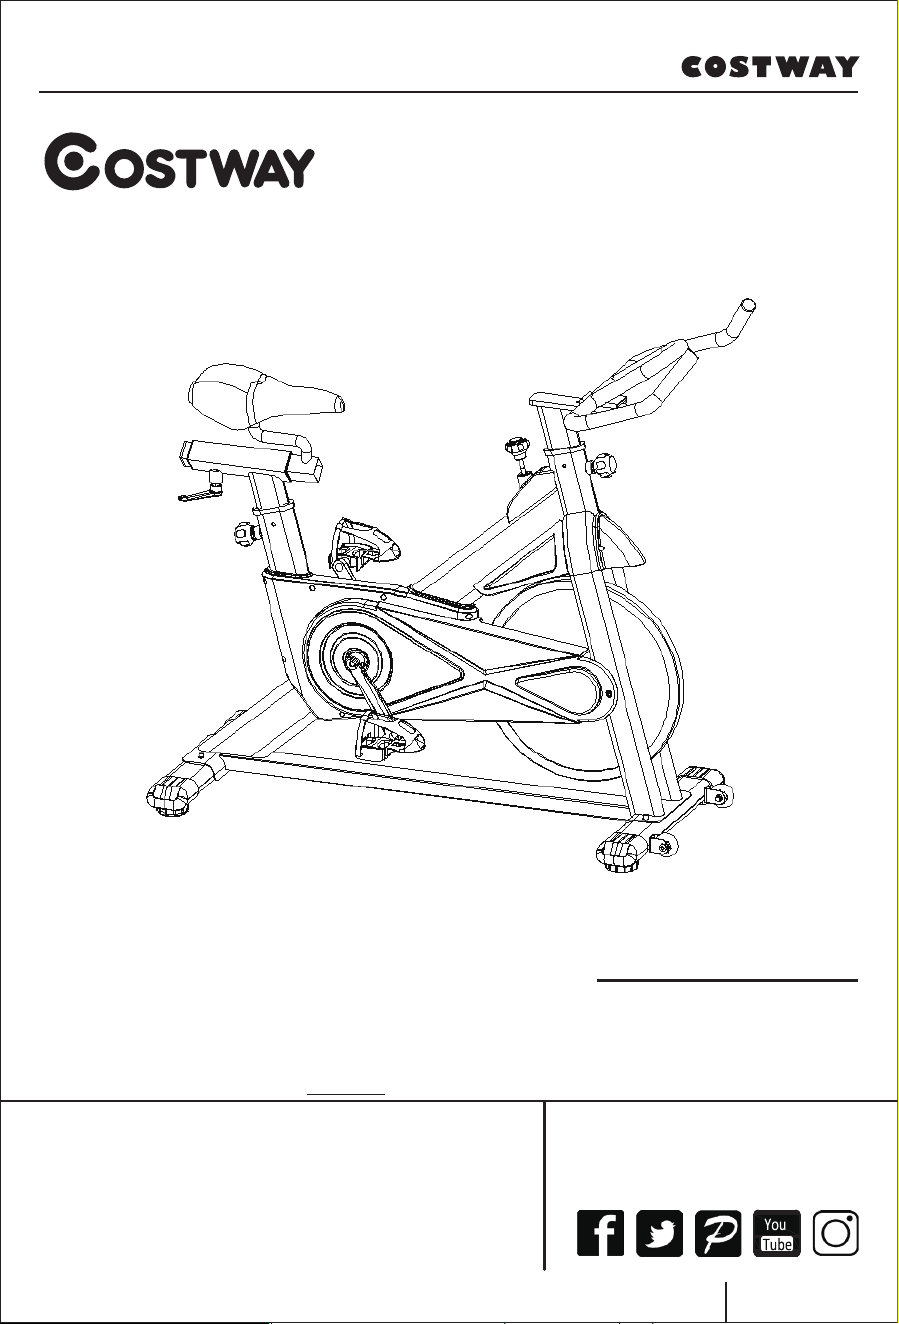
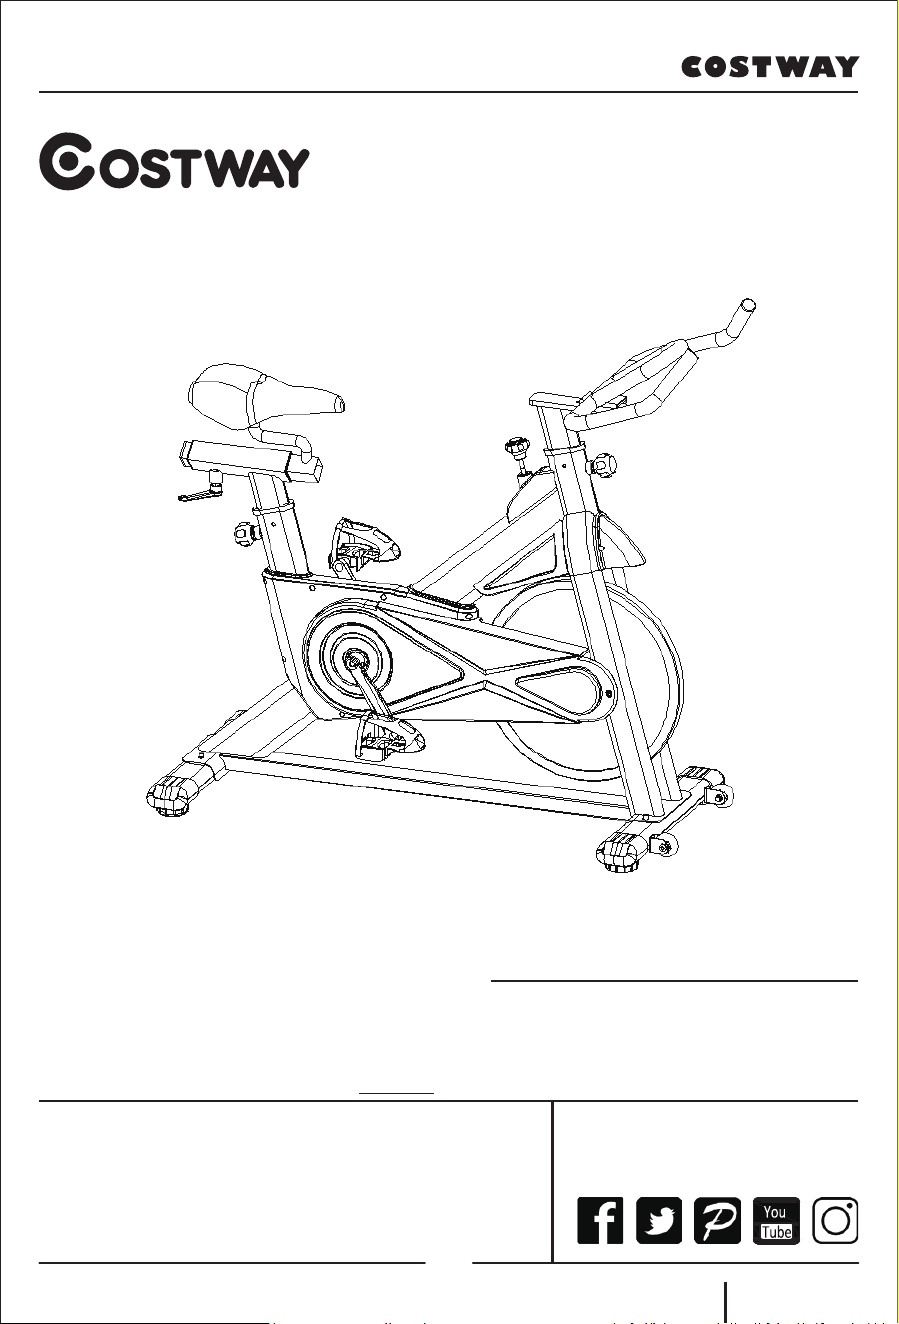
USER’S MANUAL
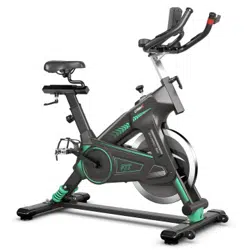
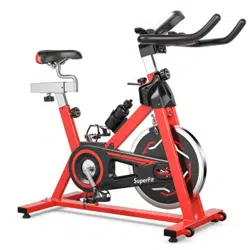
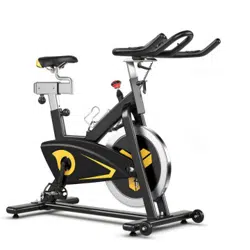
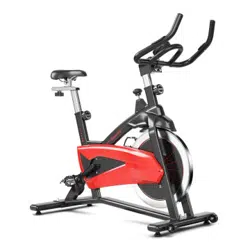
Exercise Bike
SP37672
Contact Us!
Do NOT return this item.
Contact our friendly customer service department for help first.
E-mail
US: cs.us@costway.com
UK: cs.uk@costway.com
Before You StartBefore You Start
Please read all instructions carefully.
Retain instructions for future reference.
Separate and count all parts and hardware.
Read through each step carefully and follow the proper order.
We recommend that, where possible, all items are assembled near to the
area in which they will be placed in use, to avoid moving the product
unnecessarily once assembled.
Always place the product on a flat, steady and stable surface.
Keep all small parts and packaging materials for this product away from
babies and children as they potentially pose a serious choking hazard.
02

Content
1. Warning
2. Spare Parts Diagram
3. Installation Instruction
4. Monitor Operation
5. Maintenance & Troubleshooting
Before you use the bike, please read the instructions carefully to ensure
that you receive the correct information of usage, including the free spare
parts we provided for you.
1). This bike is for home use and the maximum bearing weight is 120 kg.
2). Please use it in strict accordance with the instruction.
3). Please carefully check the machine before first use and check it
according to the principle of installation every 1 to 2 months. Please try to
keep the machine in normal use and use the original accessories.
4). If it does not work well, please contact the customer service.
5). Please keep the machine out of the corrosive cleaner.
6). Please use after the correct installation and careful inspection.
7). Please adjusted the parts to their maximum level before installation.
8). This product is for adults. If children want to use, please make sure they
have a guardian with them.
9). Please don’t do dangerous action and move on this product.
10). Please use this product under the guidance of doctors or fitness
specialists, it will have very good effect.
11). Please make reasonable plans before using the product and use it in
strict accordance with the requirements.
12). The resistance of this product is adjustable. Please select the
appropriate resistance.
13). Please carefully check all the bolts and screw parts to ensure your
safety before use.
1. Warning
03
14). During exercise, make sure to put the feet into pedal covers. Do not
stop immediately during fast rotation, please brake quickly to avoid acci-
dents.
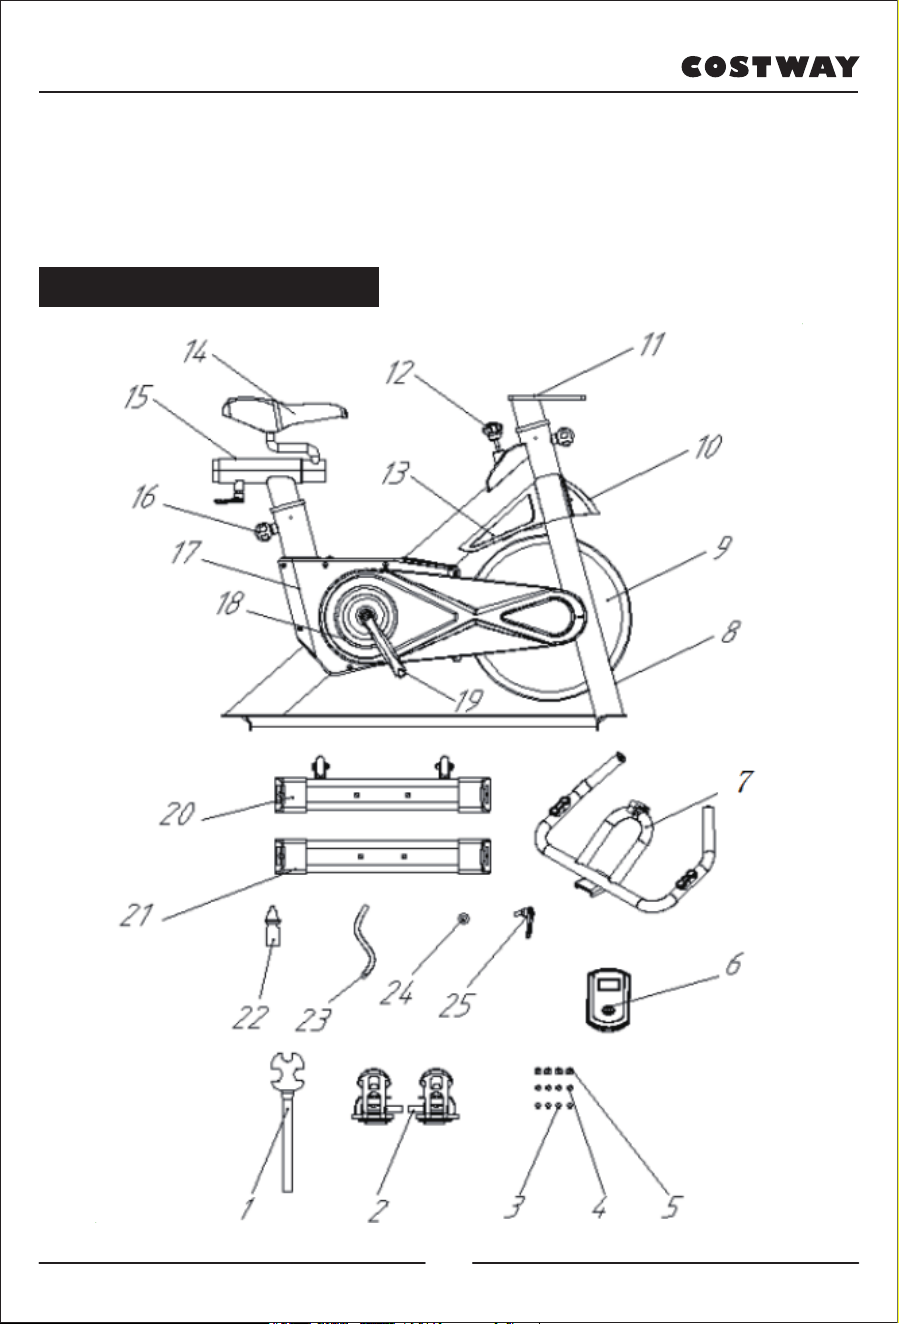
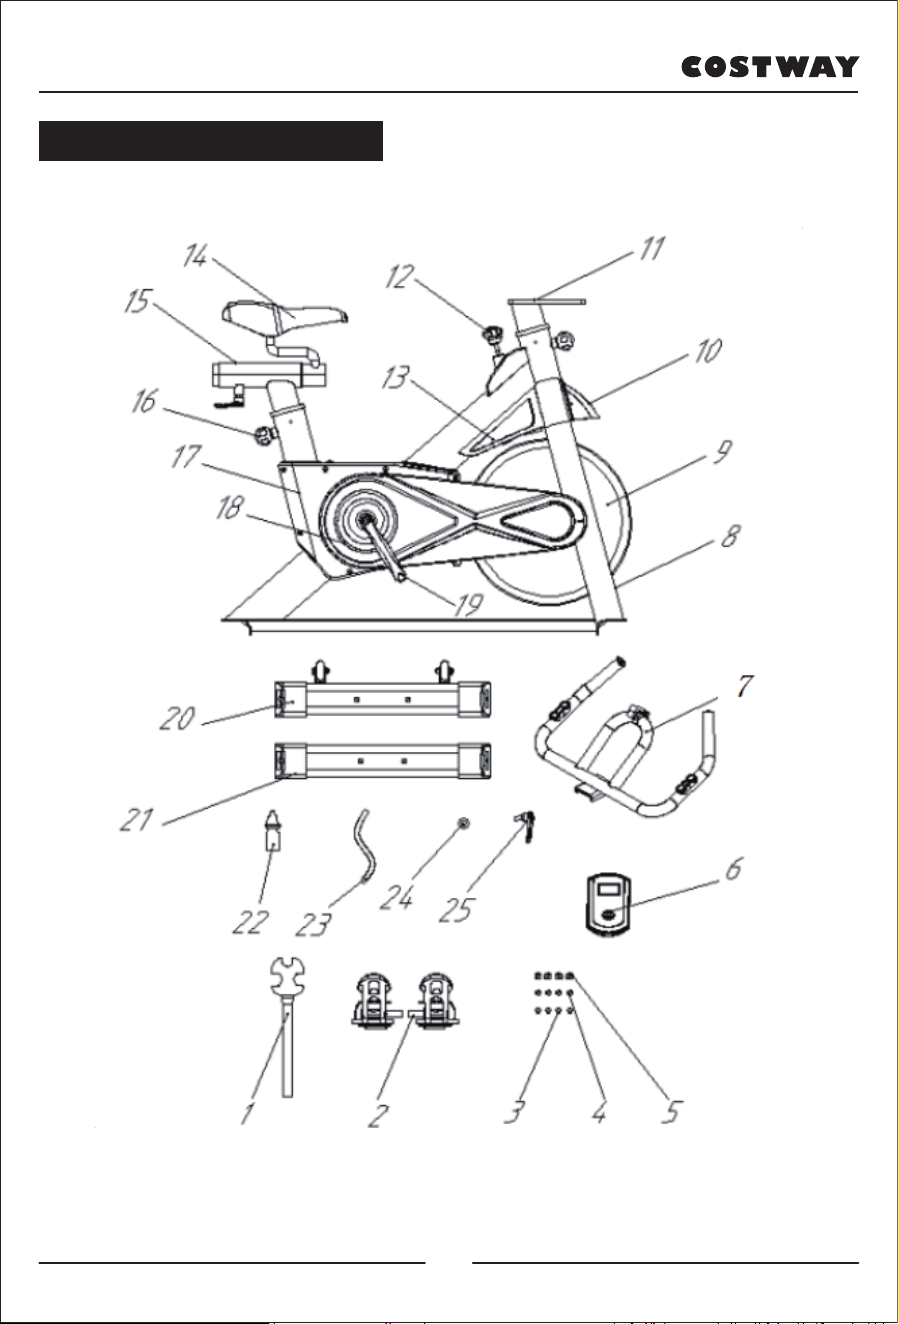
2. Spare Parts Description
04

1. Multifunctional open spanner 2. Pedal
3. Ф10 Flat washer 4. Ф10 Spring washer
5. Cap nut 6. Monitor
7. Handlebar 8. Frame
9. Flywheel 10. Splash guard
11. Handlebar slide rail 12. Brake Knob
13. Wheel cover 14. Saddle
15. Saddle slide rail 16. Adjustable knob
17. Upper chain cover 18. Lower chain cover
19. Crank 20. Front support foot
21. Rear support foot 22. Anti-loose fluid
23. Corrugated pipe 24. Flat washer
25. Locking bolt
05
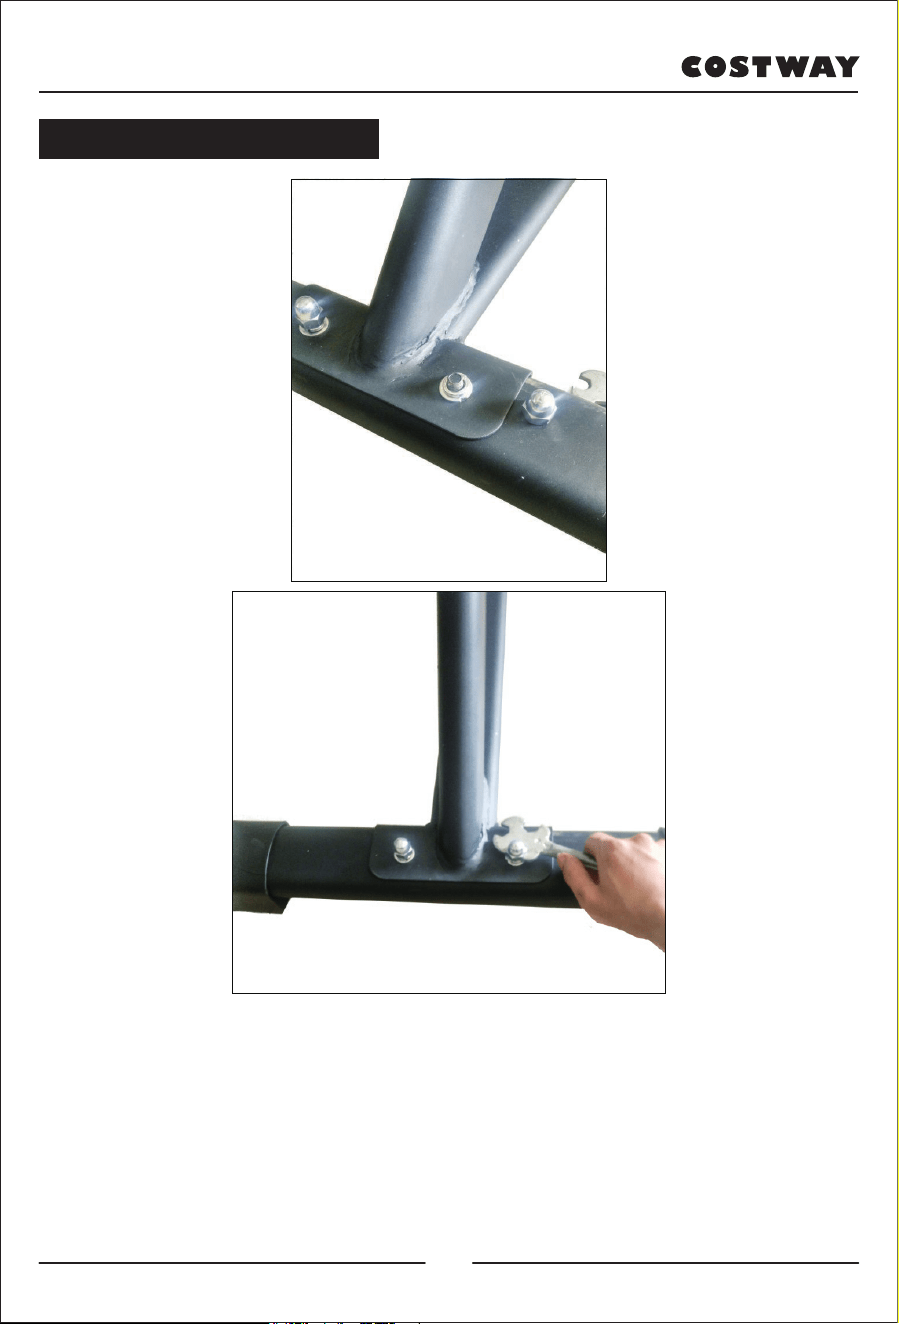
1) Align the rear support foot with the screw holes of the frame, insert the
bolt upward from the bottom of the rear support foot to connect the frame,
insert the Ф10 flat washer and Ф10 spring washer on the bolt in turn, and
then put on the cap nut, using the provided open spanner to lock it. The
installation method of the front support foot is the same as above.
Note: Please adjust the black foot pad to make it balance if it is not stable.
3. Installation Instruction
06
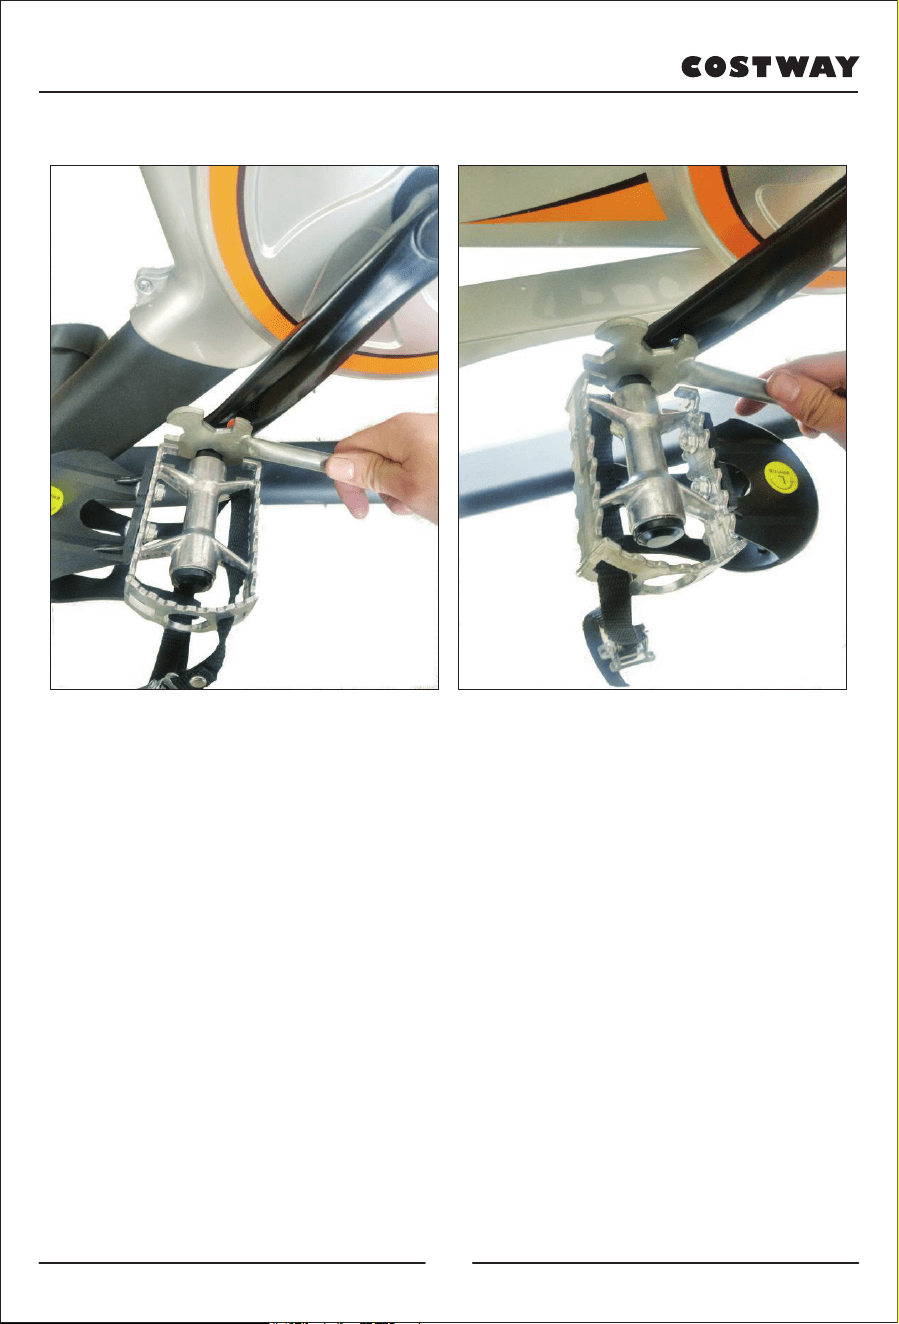
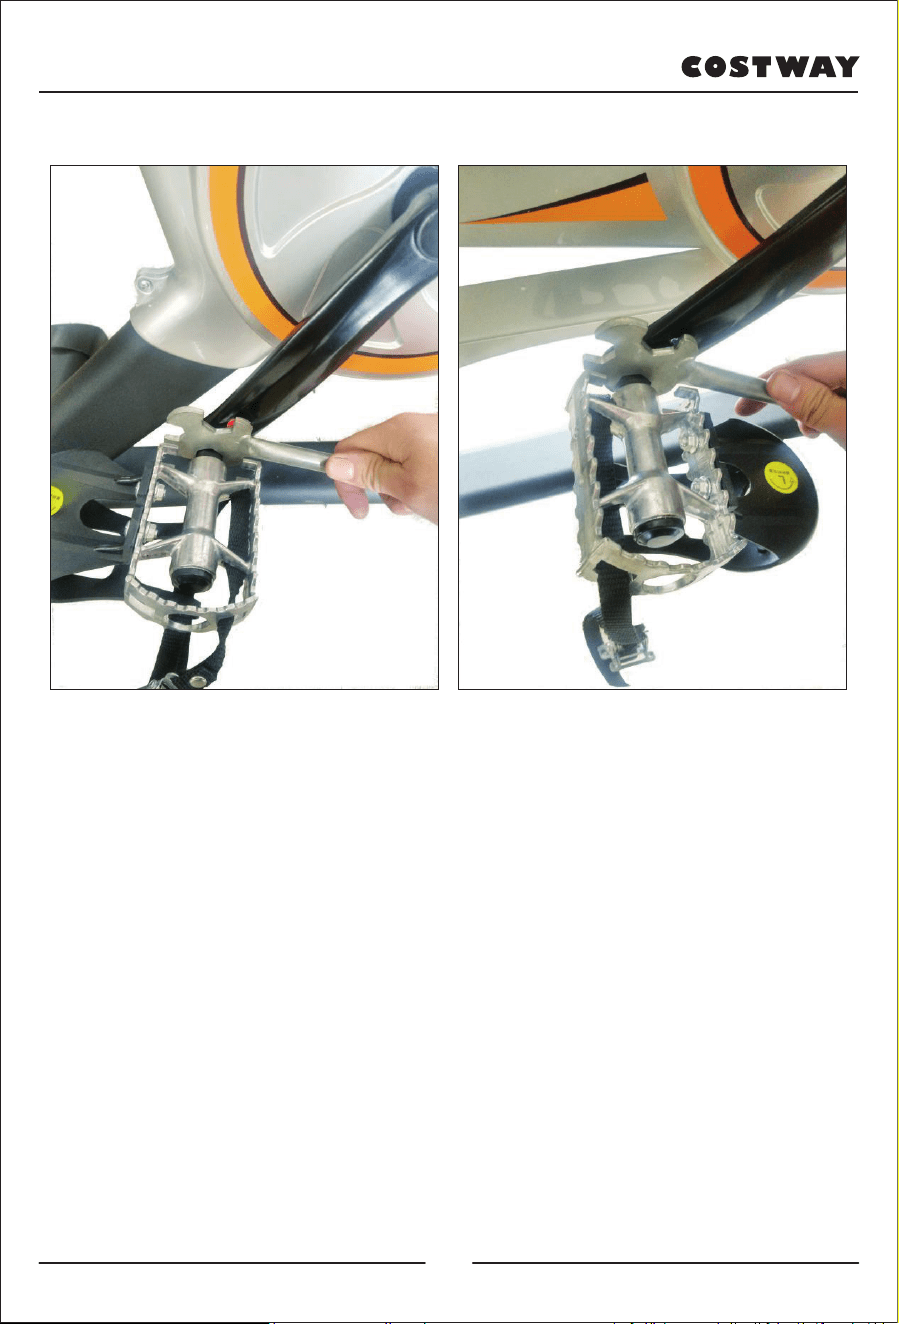
2)Take out the pedals, you will find that the pedals are marked with "L"
and "R". First put two drops of anti-loose fluid on the thread of the "R"
pedal, and then insert it into the threaded hole of the right crank, and turn it
clockwise until it stops, and then lock it with an open spanner. Take out the
"L" pedal, and put two drops of anti-loose fluid on the thread, and insert it
into the threaded hole of the left crank, turn it counterclockwise until it
stops, and then lock it with an open spanner.
(Note: The crank is also marked with "L" and "R" corresponding to the
markings on the pedals. If installed reversely, the slippage of the crank may
damage the product. Besides, the pedals must be locked, otherwise the
pedals may fall off after being used for a long time.)
07

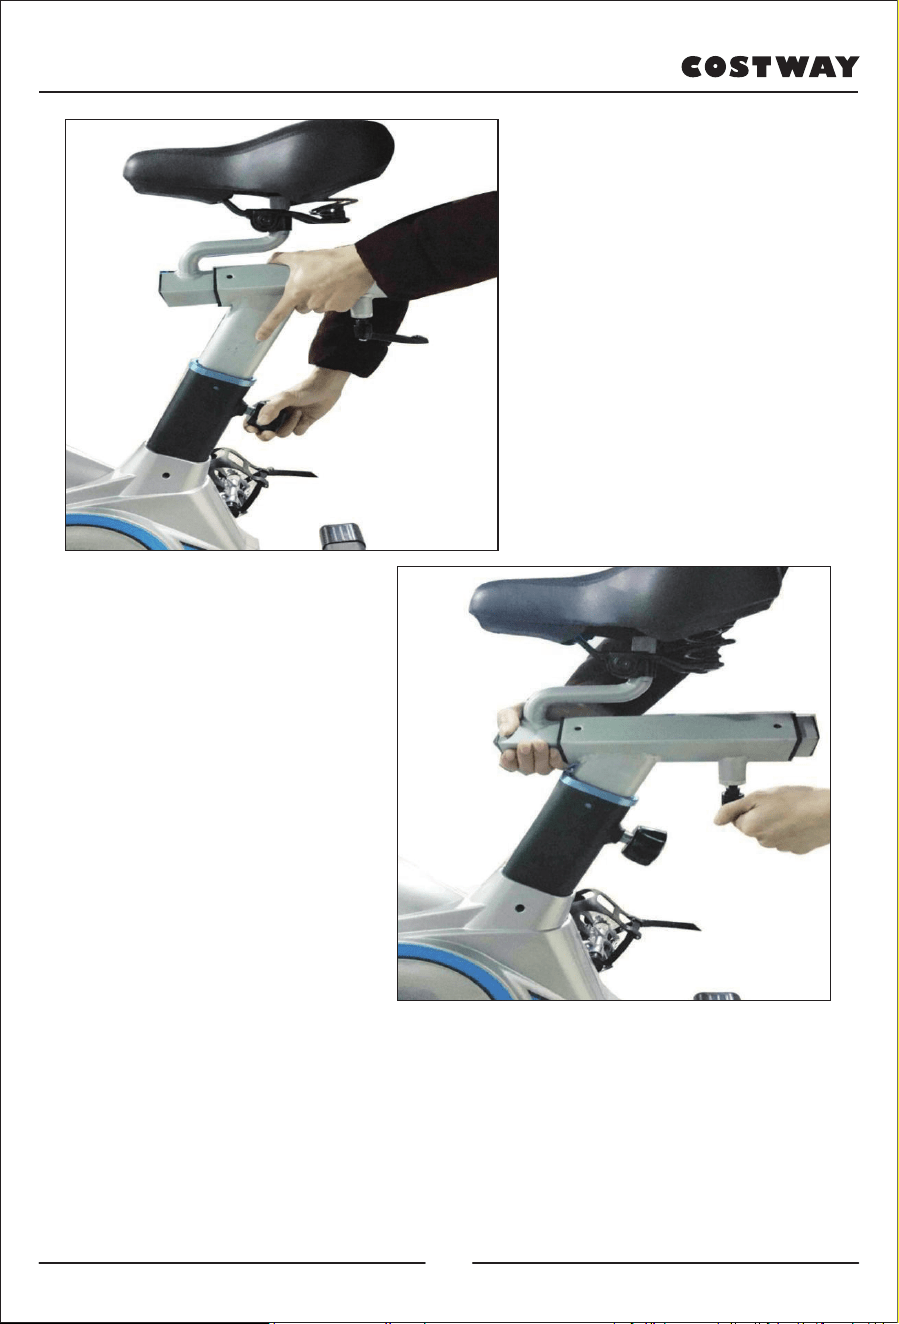
3)Pull out the adjustable knob to adjust the saddle support up to a suitable
height, loosen the adjustable knob and pass the knob through the small hole
of the saddle support, and then lock the adjustable knob.
(Loosen the locking bolt to move the saddle back and forth, and after
adjusting to a comfortable position, tighten the bolt.)
08

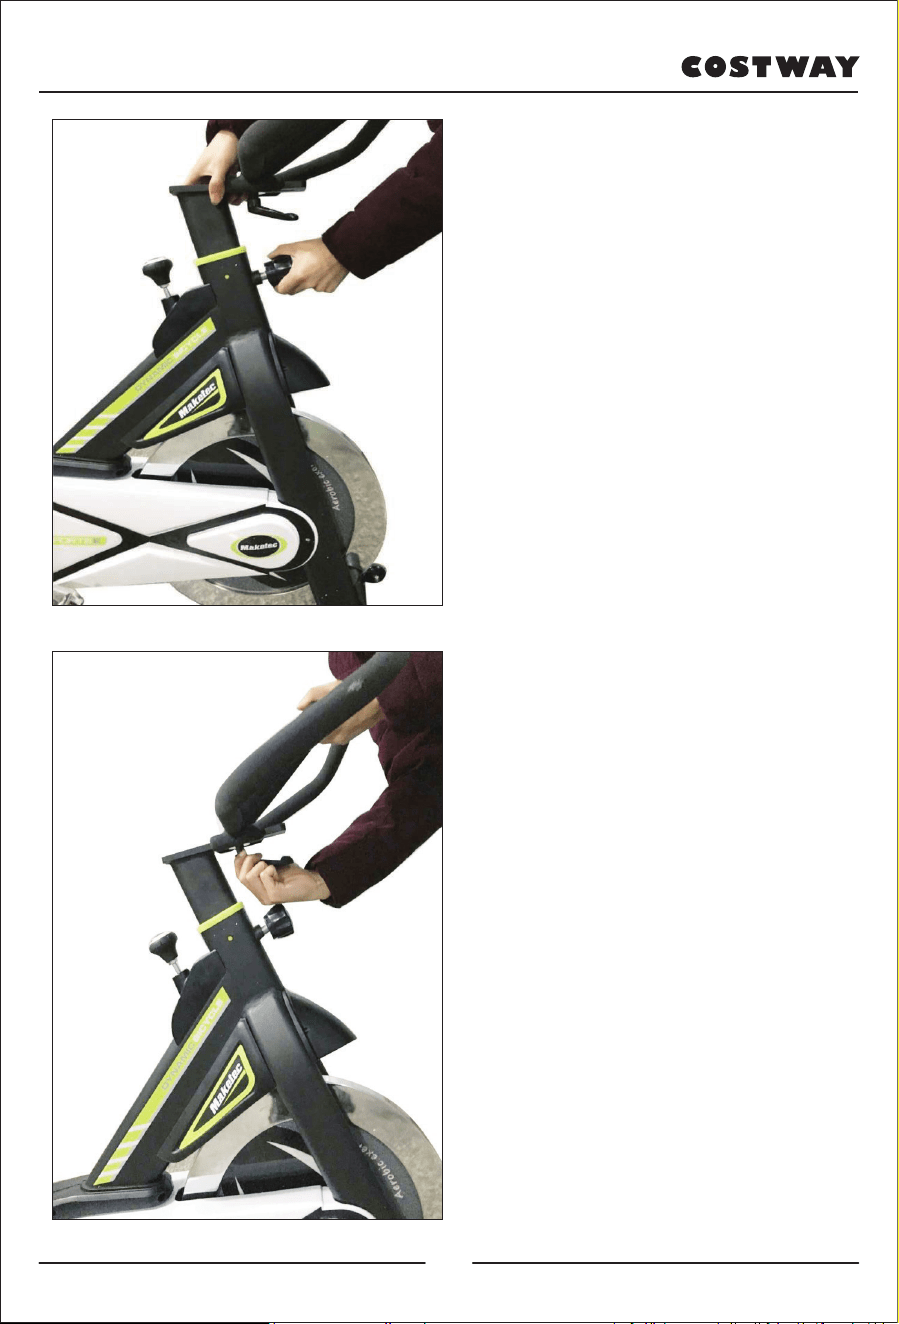
4) Pull the adjustable knob, lift
the handlebar slide rail up to a
suitable height, loosen the
adjustable knob, make the knob
pass through the small hole of
the handlebar slide rail, and then
lock the adjustable knob.
5) Take out the handlebar, first
snap the handlebar fixing plate
slot into the handlebar support,
then take out the locking bolt flat
washer, align it with the screw
hole on the handlebar fixing
support, and lock it.
(Loosen the locking bolt to move
the handlebar back and forth,
and after adjusting to a
comfortable position, tighten the
bolt.)
09
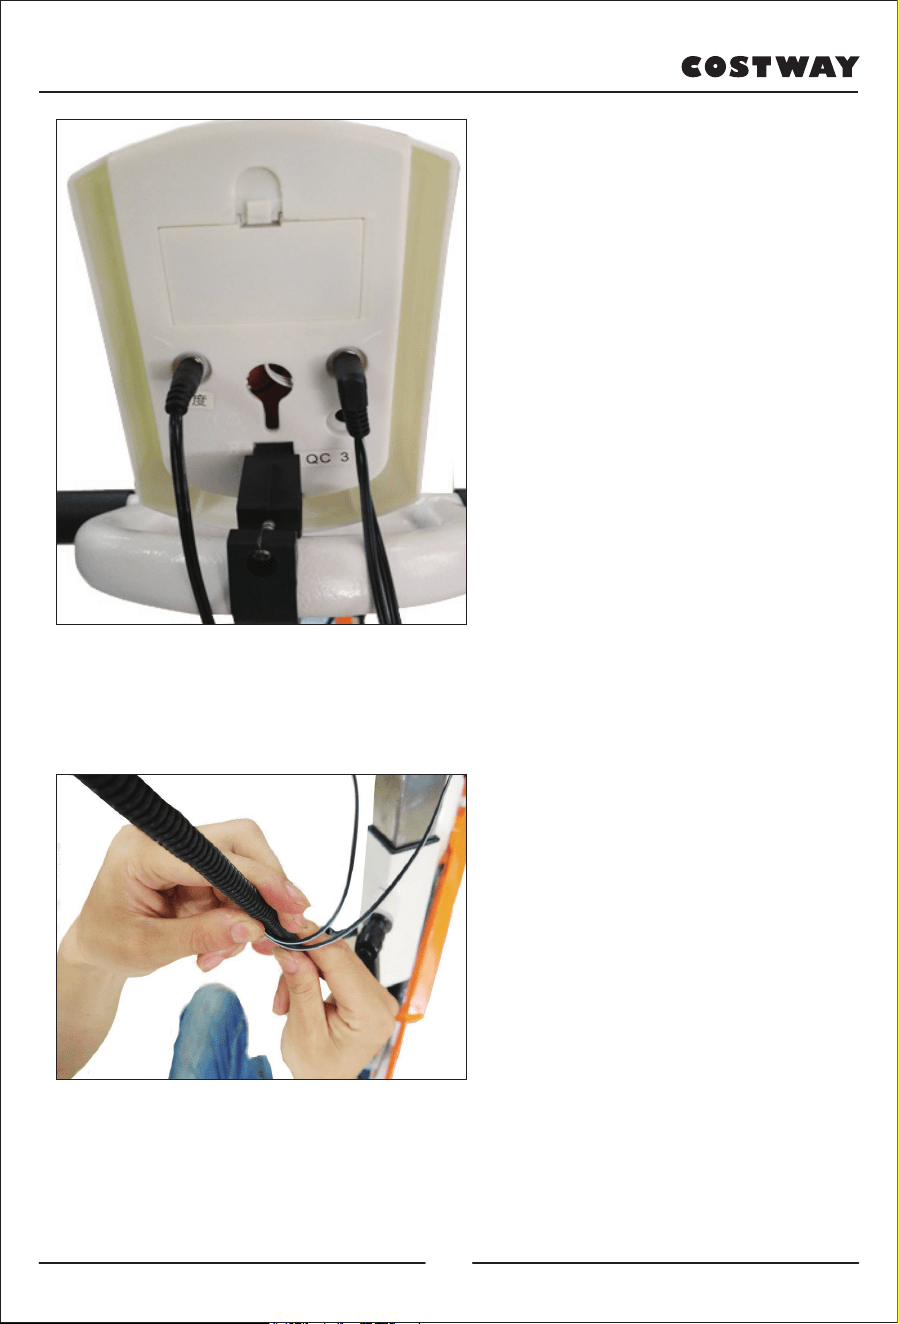
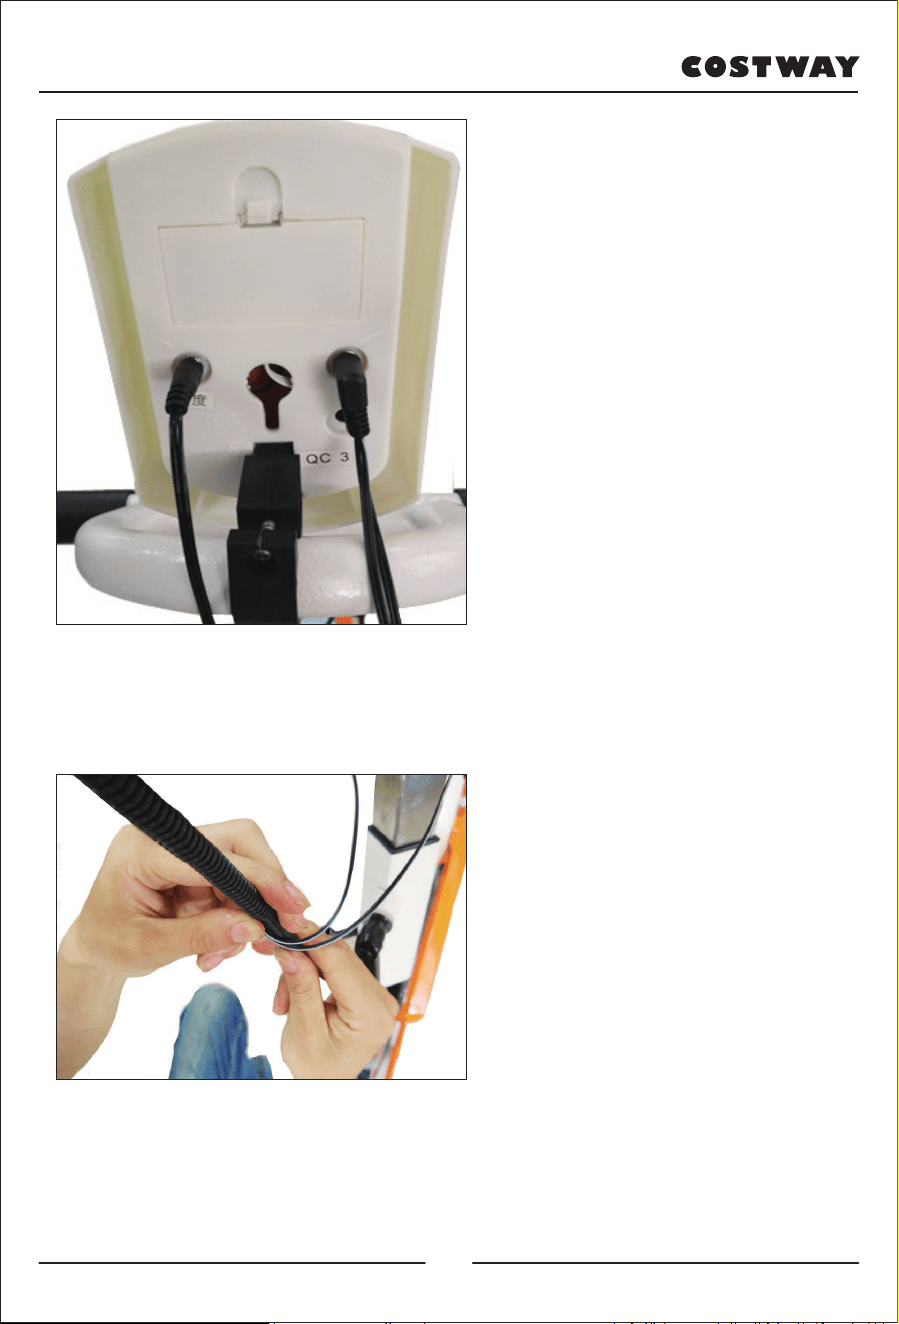
6) Fix the monitor on the
handlebar and connect the cables
to correct ports. (Double cables
connect “PULSE” port and
single cable connects
“SENSOR” port.
7) Put the cables into the cable
covering for tidiness
10
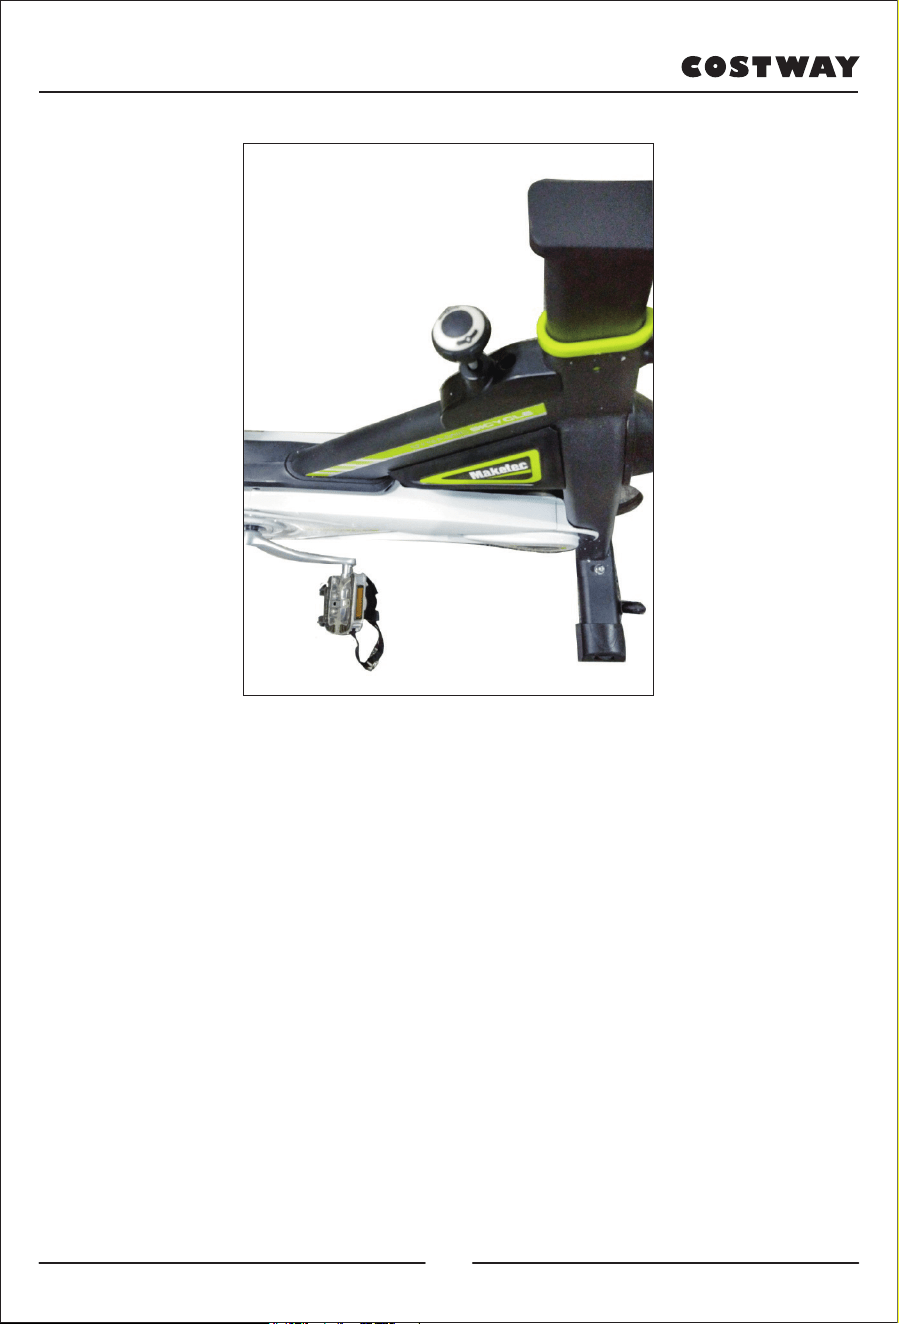
8) Rotate the break knob clockwise to increase resistance and rotate the
break knob anticlockwise to decrease the resistance. Press down the break
knob for emergency stop.
11

4. Monitor Operation
●
MODE: This key lets you select and lock on to a particular function
which you want. Press to choose SCAN or LOCK, if you do not want the
scan mode, press
the Mode key until the pointer is next to the “flashing” function which you
want.
●
AUTO ON /OFF:The monitor will switch on automatically when the
exercise machine is in motion. The monitor will turn off automatically
when the speed has no signal input or no keys are pressed for
approximately 4 minutes.
●
RESET: The unit can be reset by either changing the battery or pressing
the MODE key for 3 seconds.
●
SPEED: Press Mode key until the pointer advances to SPEED. The
Computer will display the current speed.
●
DISTANCE: Press Mode key until the pointer advances to DIST. The
Computer will display each trip distance you have traveled.
●
TIME: Press Mode key until the pointer advances to TIME. The total
working time will be shown when starting exercise.
●
CALORIES: Press Mode key until the pointer advances to CAL. The
Computer will display total calories burns when starting to exercise.
●
ODOMETER: Press the MODE Key until the pointer advance to
ODOMETER. The total accumulated distance will be shown.
Time..............................................................00-00—99:59 Minute: Second
Speed ............................................................00—99.9 km/h
Distance.........................................................0.00—99.99 Km
Odometer.......................................................0.00—999.9 Km
Heart Rate......................................................40—240BPM(Optional)
Calorie............................................................0.999.9Kcal
12

5. Maintenance & Troubleshooting
5.1). Maintenance
5.1.1). Cleaning
Use soft cloth to wipe the dust on the bike. Don’t use abrader or scrubbing
to clean plastic parts. Wipe the sweat after use.
5.1.2). Maintenance
Please avoid direct sunlight, especially the electronic watch which is very
vulnerable. Every week, please check all the bolts and screws to see if they
are loose and keep them fastened. Please keep the bike in clean and dry
environment and be away from children.
5.2).Troubleshooting
5.2.1). To solve the waggling problem of bike, please move and rotate the
pedals until it is stable.
5.2.2). If screen of the electronic watch does not display anything, please
check whether cables in armrest and digital are connected correctly;
whether the battery is installed correctly. If it is out of battery, please
replace the battery.
5.2.3). If it does not replay the heartbeat rate or replay it abnormally, please
check whether the cable in armrest is connected correctly. Please make sure
you hold the armrest sensors; please do not grasp the sensors too tight.
5.2.4). If there is abnormal sound during usage, Please check if the bolts
are loose and ensure the bolts are tightened.
13
Welcome to visit our website and purchase our quality products!
We would like to extend our hear�elt thanks to
all of our customers for taking �me to assemble
this product and giving us valuable feedbacks.
With your inspiring rating, COSTWAY will be more consistent to offer you
EASY SHOPPING EXPERIENCE, GOOD PRODUCTS and EFFICIENT SERVICE!
US office: Fontana, California
UK office: Ipswich
Reward Points
Exclusive Customer Service
Personalized Recommenda�ons
Permanent Shopping Cart
Order History
14
CE MANUEL D’INSTRUCTIONS CONTIENT DES INFORMATIONS IMPORTANTES SUR LA SÉCURITÉ. VEUILLEZ LIRE ET CONSERVER POUR LA RÉFÉRENCE FUTURE.
MANUEL D'UTILISATION
VEUILLEZ NOUS DONNER UNE
OCCASION DE L’AMELIORER ET FAIRE MIEUX!
Contactez d’abord notre service à la clientèle amical pour l’aide.
Les replacements pour les pièces manquantes ou endommagées
seront envoyés le plus vite possible!
Suivez Costway
Vélo d'appartement
SP37672
EN FR
15
Contactez-nous !
Ne retournez pas cet article.
Contactez d’abord notre service à la clientèle amical pour l’aide.
E-mail
CA:service@costway.com
Avant de Commencer
Veuillez lire attentivement toutes les instructions.
Conservez les instructions pour la référence future.
Séparez et comptez toutes les pièces et les outils de matériel.
Lisez attentivement chaque étape et suivez le bon ordre.
Nous recommandons que, si possible, tous les éléments soient
assemblés à proximité de la zone dans laquelle ils seront utilisés, afin
d'éviter de déplacer inutilement le produit une fois assemblé.
Placez toujours le produit sur une surface plane, solide et stable.
Gardez toutes les petites pièces et le matériel d'emballage de ce produit
hors de portée des bébés et des enfants car ils pourraient provoquer un
risque grave d’étouffement.
16

Contenu
1. Avertissement
2. Description des éléments
3. Instructions d'installation
4. Fonctionnement de la console
5. Entretien et dépannage
Avant d'utiliser le vélo, veuillez lire attentivement les instructions afin de
vous assurer que vous disposez des consignes complètes d'utilisation, y
compris les pièces fournies.
1). Ce vélo est destiné à un usage domestique et le poids maximal supporté
est de 120 kg.
2). Veuillez l'utiliser en respectant rigoureusement les indications du mode
d'emploi.
3). Veuillez inspecter soigneusement l'appareil avant la première utilisation
et effectuer une révision tous les 1 à 2 mois, conformément au guide
d’installation. Veuillez essayer de maintenir l'appareil dans des conditions
normales d'utilisation et utilisez les accessoires d'origine.
4). Dans le cas où l'appareil ne fonctionne pas correctement, veuillez
contacter le service clientèle.
5). Veillez à ne pas exposer l'appareil à des produits corrosifs.
6). Veuillez utiliser l'appareil uniquement après une installation correcte et
une inspection minutieuse.
7). Veuillez régler les pièces à leur niveau maximum avant l'installation.
8). Ce produit est destiné aux adultes. En cas d'utilisation par des enfants,
veillez à ce qu'ils soient accompagnés d'un adulte.
9). Veuillez ne pas entreprendre d'actions ou de mouvements dangereux sur
cet appareil.
1. Avertissement
17

10). Veuillez utiliser cet appareil sur les conseils de médecins ou de
spécialistes du fitness pour en optimiser l’utilisation.
11). Veuillez établir un programme raisonnable avant d'utiliser le produit
et le mettre en place en respectant strictement les exigences.
12). La résistance de ce produit est réglable. Veuillez sélectionner une
résistance adaptée.
13). Veuillez vérifier soigneusement tous les boulons et les vis avant
l'utilisation, afin d'assurer votre sécurité.
14). Pendant la séance, veillez à mettre les pieds dans les étriers des
pédales. Ne vous arrêtez pas immédiatement pendant une rotation rapide :
veuillez freiner rapidement pour éviter tout accident.
18
2. Description des éléments
19

1. Clé ouverte multifonctionnelle 2. Pédale
3. Ф10 Rondelle plate 4. Ф10 Rondelle élastique
5. Écrou borgne 6. Console
7. Guidon 8. Cadre
9. Volant d'inertie 10. Protection
11. Glissière du guidon 12. Bouton de frein
13. Enjoliveur de roue 14. Selle
15. Glissière de la selle 16. Bouton de réglage
17. Cache-chaîne supérieur 18. Cache-chaîne inférieur
19. Manivelle 20. Pied avant
21. Pied arrière 22. Liquide anti-desserrage
23. Tuyau ondulé 24. Rondelle plate
25. Boulon de serrage
20

1)Alignez le pied arrière avec les trous de vis du cadre, insérez le boulon
vers le haut en partant du bas du pied arrière pour relier le cadre, insérez la
rondelle plate Ф10 puis la rondelle élastique Ф10 sur le boulon. Placez
ensuite l'écrou borgne, en utilisant la clé ouverte fournie pour le verrouiller.
Le procédé d'installation du pied avant est le même que ci-dessus.
Remarque : veuillez ajuster le patin noir pour équilibrer l'appareil en cas
d’instabilité.
3. Instructions d’installation
21
2)Retirez les pédales : vous remarquerez que les pédales sont marquées "L"
et "R". Appliquez d'abord deux gouttes de frein filet (colle anti-desserrage)
sur le filetage de la pédale "R"/Droite, puis insérez-la dans le trou fileté de
la manivelle droite. Tournez-la dans le sens des aiguilles d'une montre
jusqu'à ce qu'elle s'arrête, puis verrouillez-la avec une clé ouverte. Retirez
la pédale "L"/Gauche, appliquez deux gouttes de frein filet sur le filetage,
puis insérez-la dans le trou fileté de la manivelle gauche. Tournez-la dans
le sens inverse des aiguilles d'une montre jusqu'à la butée, puis
verrouillez-la avec une clé ouverte.
(Remarque : la manivelle est également marquée d'un "L" et d'un "R"
correspondant aux repères des pédales. En cas d'installation inversée, le
glissement de la manivelle peut endommager l'appareil. En outre, les
pédales doivent être verrouillées, autrement, elles peuvent tomber après
une utilisation prolongée.)
22
3) Tirez sur le bouton de réglage pour ajuster le support de la selle à une
hauteur convenable. Desserrez le bouton et passez-le dans le petit orifice
du support de la selle, puis verrouillez-le.
(Desserrez la molette de verrouillage pour déplacer la selle d'avant en
arrière ; après l'avoir ajustée sur une position confortable, resserrez la
molette.)
23
4) Tirez le bouton de réglage,
soulevez la glissière du guidon à
une hauteur appropriée,
desserrez le bouton de réglage,
faites passer le bouton dans le
petit orifice de la glissière du
guidon, puis verrouillez le
bouton de réglage.
5)Retirez le guidon, emboîtez
d'abord la fente de la plaque de
fixation du guidon dans le
support du guidon. Sortez
ensuite la rondelle plate du
boulon de verrouillage,
alignez-la avec l'orifice de la vis
sur le support de fixation du
guidon, et verrouillez-la.
(Desserrez le boulon de
verrouillage pour déplacer le
guidon d'avant en arrière, et
après l'avoir ajusté à une position
confortable, resserrez le boulon).
24
6) Fixez la console sur le guidon
et connectez les câbles aux ports
correspondants. (Des câbles
doubles relient le port « PULSE
» et un câble simple relie le port
« SENSOR »)
7) Placez les câbles dans le
cache-câbles pour les ranger.
25

8) Tournez le bouton de freinage dans le sens des aiguilles d'une montre
pour augmenter la résistance. Tournez-le dans le sens inverse des aiguilles
d'une montre pour diminuer la résistance. Appuyez dessus pour un arrêt
d'urgence.
26

4. Fonctionnement de la console
●
MODE : Cette touche vous permet de sélectionner et de verrouiller une
fonctionnalité choisie. Appuyez sur cette touche pour choisir le mode
SCAN ou LOCK. Si vous ne voulez pas du mode SCAN, appuyez sur la
touche Mode jusqu'à ce que le curseur soit à côté de la fonction «
clignotante » que vous souhaitez.
●
AUTO ON /OFF : la console s'allume automatiquement lorsque
l'appareil est en marche. Elle s'éteindra automatiquement lorsque la vitesse
n'a pas d'entrée de signal ou qu'aucune touche n'est pressée pendant
environ 4 minutes.
●
RÉINITIALISATION : L'appareil peut être réinitialisé soit en
changeant la pile, soit en appuyant sur la touche MODE pendant 3
secondes.
●
VITESSE : Appuyez sur la touche Mode jusqu'à ce que le curseur
avance sur SPEED. L'ordinateur affichera la vitesse en cours.
●
DISTANCE : Appuyez sur la touche Mode jusqu'à ce que le curseur
avance sur DIST. L'ordinateur affiche chaque distance parcourue.
●
TIME (HEURE) : Appuyez sur la touche Mode jusqu'à ce que le
pointeur avance sur TIME. La durée totale de fonctionnement s'affiche au
début de la séance.
●
CALORIES : Appuyez sur la touche Mode jusqu'à ce que le curseur
avance sur CAL. L'ordinateur affichera le nombre total de calories brûlées
au début de la séance.
●
ODOMÈTRE/Compteur kilométrique : Appuyez sur la touche MODE
jusqu'à ce que le curseur avance sur ODOMÈTRE. La distance totale
parcourue s'affiche.
Temps..........................................................00-00—99 :59 Minute : Seconde
Vitesse.........................................................00—99.9 km/h
Distance.......................................................0.00—99.99 km
Odomètre/Compteur kilométrique...............0.00—999.9 km
Rythme cardiaque........................................40—240BPM (En option)
Calories........................................................0.999.9 Kcal
27

5. Entretien et dépannage
5.1). Entretien
5.1.1). Nettoyage
Utilisez un chiffon doux pour dépoussiérer le vélo. N'utilisez pas d'abrasif
ou de grattoir pour nettoyer les pièces en plastique. Essuyez la sueur après
utilisation.
5.1.2). Entretien
Veuillez éviter la lumière directe du soleil, en particulier pour la montre
électronique qui est très fragile. Toutes les semaines, vérifiez tous les
boulons et vis pour vous assurer qu'ils ne sont pas desserrés, autrement,
resserrez-les. Gardez le vélo dans un environnement propre et sec et hors
de portée des enfants.
5.2). Dépannage
5.2.1). Pour résoudre le problème de balancement du vélo, veuillez
déplacer et faire tourner les pédales jusqu'à ce qu'elles soient stables.
5.2.2). Lorsque l'écran de la montre électronique n'affiche aucun message,
vérifiez si les câbles de l'accoudoir et de la console numérique sont
correctement connectés et si la pile est correctement installée. Si la pile est
épuisée, remplacez-la.
5.2.3). Lorsque la console ne transmet pas le rythme cardiaque ou le
transmet de manière anormale, vérifiez que le câble de l'accoudoir est
correctement connecté. Veillez à tenir les capteurs de l'accoudoir ; ne les
saisissez pas trop fort.
5.2.4). En cas de bruit anormal pendant l'utilisation, vérifiez que les
boulons ne sont pas desserrés ; autrement, assurez-vous qu'ils sont bien
serrés.
28
Bienvenue pour visiter notre site et acheter nos produits de qualité!
Nous tenons à vous présenter nos remerciements
sincères à tous nos clients qui prennent beaucoup
de temps pour assembler ce produit et nous donner
des commentaires précieux.
Avec votre évaluation inspirante, COSTWAY sera plus professionnel pour vous offrir une
BONNE EXPÉRIENCE D’ACHATS, de BONS PRODUITS et un SERCIVE EFFICACE !
CA office : Unité 1, 45 Rue de Quarterman, Guelph, Ontario, Canada
Points de Récompense
Service à la Clientèle Exclusif
Recommanda�ons Personnalisées
Panier Permanent
Historique des Commandes
merci
29