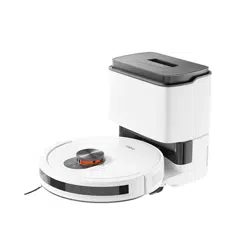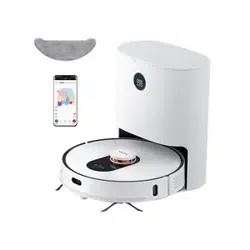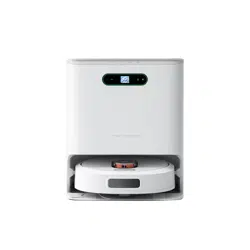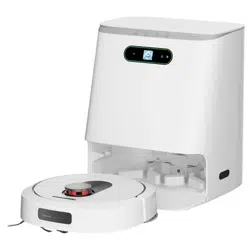
Robot Vacuum and Mop Cleaner Operation Manual
Read this operation manual carefully before using the product, and store the manual safely.
Scan the QR code for manuals
in multiple languages

2
3
4
5
5
6
8
8
9
10
11
12
12
14
14
15
16
17
18
19
19
20
20
7
Table of contents
Safety instructions
Warning
Caution
Product overview
Main unit
Two-in-one water tank and mopping module
Dust collection station
Product installation
Installation of dust collection station
Installation of mopping module
App installation and use
ROIDMI APP installation
Mi Home APP
Turning on/off and cleaning modes
Indicator status description
Device disassembly and cleaning
Disassembly and cleaning of rolling brush components
Disassembly and cleaning of side brush
Disassembly and cleaning of the two-in-one water tank and filter
Disassembly and cleaning of mop
Cleaning of components
Cleaning of dust collection station
Troubleshooting
FAQs
Technical data
Disposal
Warranty and limitations of liability
Warranty card
Maintenance records
1
EN

Safety instructions
Please read the manual before use.
Warning: To avoid injury to yourself and others, and to avoid unnecessary property damage, read carefully before using the product and observe the following
“Safety instructions”. The safety instructions are divided into two sections, “Warning” and “Caution”. The “Warning” and “Caution” sections contain important
information for safe use of the product and must be followed.
Hereby, [ROIDMI Information Technology Co., Ltd.] declares that the radio equipment type [2.4GHz WLAN Module] is in compliance with Directive 2014/53/EU.
The full text of the EU declaration of conformity is available at the following internet address:hp://doc.roidmi.com/web/#/27?page_id=0
1. Do not use this product in wet places such as bathrooms or near water sources;
2. Do not use it to clean up liquids, matches and wet garbage;
3. Do not pull out/insert the power cord plug or touch the socket with wet hands;
4. Do not use damaged power plugs or loose sockets;
5. Do not use the main unit to clean flammable liquids such as kerosene, gasoline, objects with sparks, toner cartridges, toner and other combustible dust; do not
use the device near the above items, or in environments with flammable and explosive gases to avoid fires;
6. Do not disassemble, repair, or modify the product on your own, to avoid fire, injury, or damage, except for the replacement of consumables in accordance with the
manual;
7. Do not charge non-rechargeable baeries. Please use an AC power supply with a rated voltage rather than a generator or a DC power supply to avoid fire hazards
and electric shocks;
8. Please use a dry cloth to clean the dust on the plug regularly to avoid a fire hazard caused by poor insulation and other reasons;
9. Please make sure to insert the plug firmly to avoid electric shock, short circuits, and fire;
10. Please immediately cut off the power and stop using the device in case of any malfunction to avoid smoke, fire, or electric shock;
11. If the device deforms, overheats abnormally, emits a burning smell, or makes an unusual noise during charging or use, immediately disconnect the power supply
and unplug the device. Place it in an open and non-flammable area to ensure safety. Faulty products shall be replaced and repaired by the manufacturer or its
maintenance specialist to avoid danger;
12. Please make sure to pull the plug from the power socket before conducting any cleaning and maintenance to avoid electric shock and injury;
13. If the rolling brush malfunctions during use, please first turn off the power buon and immediately check whether the rolling brush is entangled with hair or other
long fibres, and clean it in a timely manner;
14. Do not spray water on the product body and plug, or immerse them in water;
Important safety instructions to prevent death or serious injury from incorrect operations.
Warning
Warning
Important safety instructions to prevent minor injury or device damage from incorrect operation.
Caution
15. When pulling out the plug, please make sure to hold the insulated part of the power cord and do not pull the power cord directly;
16. The baery is a sealed unit, and there is no safety hazard under normal circumstances; If liquid leaks out of the baery in extreme cases, it may cause irritation
or burns. If you accidentally come into contact with the liquid, take the following instructions: ① skin contact - wash with soapy water; ② eye contact - immediately
rinse with water for at least 15 minutes and seek medical help;
17. This device is not suitable for children or individuals with poor physical, sensory, and mental abilities or those who lack relevant experience and knowledge. Please
provide supervision during use;
18. Please keep the robot vacuum and mop cleaner away from electromagnetic equipment in hospitals; instruct children not to play with the device as a toy; the
device should only be used with the original accessories provided;
19. This power cord is only applicable for use with the robot vacuum and mop cleaner as specified by the merchant;
20. Before charging the device, check whether the power cord specifications match the required power voltage;
21. The appliance is only to be used with the power supply unit provided with the appliance;
22. This appliance contains baeries that are only replaceable by skilled persons;
23. Warning: The dust collection station against recharging non-rechargeable baeries;
24. If the supply cord is damaged, it must be replaced by the manufacturer, its service agent or similarly qualified persons in order to avoid a hazard.
2
EN

1. Do not use this product in wet places such as bathrooms or near water sources;
2. Do not use it to clean up liquids, matches and wet garbage;
3. Do not pull out/insert the power cord plug or touch the socket with wet hands;
4. Do not use damaged power plugs or loose sockets;
5. Do not use the main unit to clean flammable liquids such as kerosene, gasoline, objects with sparks, toner cartridges, toner and other combustible dust; do not
use the device near the above items, or in environments with flammable and explosive gases to avoid fires;
6. Do not disassemble, repair, or modify the product on your own, to avoid fire, injury, or damage, except for the replacement of consumables in accordance with the
manual;
7. Do not charge non-rechargeable baeries. Please use an AC power supply with a rated voltage rather than a generator or a DC power supply to avoid fire hazards
and electric shocks;
8. Please use a dry cloth to clean the dust on the plug regularly to avoid a fire hazard caused by poor insulation and other reasons;
9. Please make sure to insert the plug firmly to avoid electric shock, short circuits, and fire;
10. Please immediately cut off the power and stop using the device in case of any malfunction to avoid smoke, fire, or electric shock;
11. If the device deforms, overheats abnormally, emits a burning smell, or makes an unusual noise during charging or use, immediately disconnect the power supply
and unplug the device. Place it in an open and non-flammable area to ensure safety. Faulty products shall be replaced and repaired by the manufacturer or its
maintenance specialist to avoid danger;
12. Please make sure to pull the plug from the power socket before conducting any cleaning and maintenance to avoid electric shock and injury;
13. If the rolling brush malfunctions during use, please first turn off the power buon and immediately check whether the rolling brush is entangled with hair or other
long fibres, and clean it in a timely manner;
14. Do not spray water on the product body and plug, or immerse them in water;
1. Do not use this device outdoors, on non-flat surfaces, or in commercial or industrial environments;
2. Do not use the product in environments without protective fencing (such as duplex floors, open balconies, furniture tops);
3. Do not use it in environments above 35℃, below 0℃, or where there is any liquid or sticky substance on the floor;
4. Do not block the air outlet to avoid deformation, malfunction, or fire caused by overheating;
5. Do not drag the device to avoid scratching the floor;
6. Do not swing the device or allow young children to play with it to avoid injury or damage to the device;
7. Do not drop the device or collide it with other objects, or apply pressure to it to avoid fire or electric shocks caused by malfunctions;
8. Make sure to install the rolling brush and filter before using the device to avoid damage to the motor and device;
9. Check whether the power cord is intact before charging;
10. Before using the robot vacuum and mop cleaner for the first time or replacing the designated filter, turn off the main power and ensure the filter is properly installed;
11. Used baery packs should be properly disposed off. Do not discard them randomly;
12. Before using the product, arrange the desks, chairs, household items, floor objects, etc. neatly, and clear power cords and small items laying on the ground to avoid
the product being blocked during cleaning;
13. When the machine is running, keep curtains and tablecloths away from the ground, and keep the carpet flat, so as to prevent the product from being blocked
during operation and causing damage to your valuables;
14. Before the first use, make sure all room doors are open for the device to build a complete home map;
Caution
15. When pulling out the plug, please make sure to hold the insulated part of the power cord and do not pull the power cord directly;
16. The baery is a sealed unit, and there is no safety hazard under normal circumstances; If liquid leaks out of the baery in extreme cases, it may cause irritation
or burns. If you accidentally come into contact with the liquid, take the following instructions: ① skin contact - wash with soapy water; ② eye contact - immediately
rinse with water for at least 15 minutes and seek medical help;
17. This device is not suitable for children or individuals with poor physical, sensory, and mental abilities or those who lack relevant experience and knowledge. Please
provide supervision during use;
18. Please keep the robot vacuum and mop cleaner away from electromagnetic equipment in hospitals; instruct children not to play with the device as a toy; the
device should only be used with the original accessories provided;
19. This power cord is only applicable for use with the robot vacuum and mop cleaner as specified by the merchant;
20. Before charging the device, check whether the power cord specifications match the required power voltage;
21. The appliance is only to be used with the power supply unit provided with the appliance;
22. This appliance contains baeries that are only replaceable by skilled persons;
23. Warning: The dust collection station against recharging non-rechargeable baeries;
24. If the supply cord is damaged, it must be replaced by the manufacturer, its service agent or similarly qualified persons in order to avoid a hazard.
15. Do not stand in front of the device while it is operating to avoid obstructing the device from identifying the area to be cleaned;
16. If not used for a long time, the robot vacuum and mop cleaner should be fully charged before it is turned off. It is recommended to charge the device at least once
every 3 months to avoid the baery damage;
17. Do not use or keep the device under extreme adverse conditions, such as extreme temperatures. It is recommended to use it in an indoor ambient environment
and keep it in a cool and dry place.
3
EN
1. Do not use this device outdoors, on non-flat surfaces, or in commercial or industrial environments;
2. Do not use the product in environments without protective fencing (such as duplex floors, open balconies, furniture tops);
3. Do not use it in environments above 35℃, below 0℃, or where there is any liquid or sticky substance on the floor;
4. Do not block the air outlet to avoid deformation, malfunction, or fire caused by overheating;
5. Do not drag the device to avoid scratching the floor;
6. Do not swing the device or allow young children to play with it to avoid injury or damage to the device;
7. Do not drop the device or collide it with other objects, or apply pressure to it to avoid fire or electric shocks caused by malfunctions;
8. Make sure to install the rolling brush and filter before using the device to avoid damage to the motor and device;
9. Check whether the power cord is intact before charging;
10. Before using the robot vacuum and mop cleaner for the first time or replacing the designated filter, turn off the main power and ensure the filter is properly installed;
11. Used baery packs should be properly disposed off. Do not discard them randomly;
12. Before using the product, arrange the desks, chairs, household items, floor objects, etc. neatly, and clear power cords and small items laying on the ground to avoid
the product being blocked during cleaning;
13. When the machine is running, keep curtains and tablecloths away from the ground, and keep the carpet flat, so as to prevent the product from being blocked
during operation and causing damage to your valuables;
14. Before the first use, make sure all room doors are open for the device to build a complete home map;
Product overview
Main unit
Laser distance sensor
Collision sensor (×2)
Indicator
Infrared lens
Mop holder
Two-in-one water tank
Charging electrode plate (×2)
Dust collection inlet
Cliff sensor (×3)
Omni wheel
Power buon
• Press and hold the buon to power on/off the device
• Press the buon to start/pause cleaning
Power buon + Recharge buon
• Press and hold the two buons simultaneously for 3
seconds to reset Wi-Fi and enter network seings
• Press two buons and hold for 15 seconds for a
factory reset
Recharge buon
• Press the buon to pause during operation
• Press the buon to return to recharge during pause
Baery
Side brush
Wheel (×2)
Rolling brush
Rolling brush cover
Mop
15. Do not stand in front of the device while it is operating to avoid obstructing the device from identifying the area to be cleaned;
16. If not used for a long time, the robot vacuum and mop cleaner should be fully charged before it is turned off. It is recommended to charge the device at least once
every 3 months to avoid the baery damage;
17. Do not use or keep the device under extreme adverse conditions, such as extreme temperatures. It is recommended to use it in an indoor ambient environment
and keep it in a cool and dry place.
4
EN

Two-in-one water tank and mopping module
Two-in-one water tank
release buon
Rubber cap
Dust bin
Dust bin cover
Water tank
Mop
Mop holder
Power cord
Dust collection station
Dust collector cover
Indicator
Charging pin
Infrared lens
Dust suction inlet
5
EN
Caution
1. Before use, please remove the anti-collision protection strips on both sides of the main unit, the protective film on the front collision lens, and the infrared lens protective film on the dust collection station;
2. During charging, do not install the mopping module to prevent damp mops from leaking and damaging the floor;
3. Please put away the power cord, otherwise it may be dragged by the robot, causing the dust collection station to shi or power off;
4. Do not use this device in a room with infants and young children, and keep it away from them;
5. When the main unit is charging on the dust collection station, children or pets shall not be allowed to approach or collide with the main unit, to avoid danger;
6. In order to facilitate the smooth return of the main unit to the dust collector aer cleaning, it is recommended to start the appliance from the dust collector and that you do not move the dust collector
during the cleaning process;
7. The dust collection station has the function of dust collection and charging, and a new dust bag has been installed before the product leaves the factory.
Product installation
Installation of dust collection station
Step 1: Find a suitable location against the wall to place the dust collection station and connect
it to the power supply;
Step 2: When using the device for the first time, press and hold the buon to power it on,
then manually place the main unit against the dust collection station for charging.
6
EN
>0.5 m
>0.5 m
>1.5 m
Caution
1. Do not pour hot water into the two-in-one water tank to avoid deformation of the water tank; do not flush or soak the two-in-one water tank;
2. Do not use detergents, disinfectants, solid detergents, and other cleaning products to prevent corrosion and blocking of the two-in-one water tank;
3. Due to production testing reasons, there may be a small amount of water residue in the two-in-one water tank, which is a normal phenomenon;
4. When mopping the floor, set up virtual walls or a no-go area in carpeted areas; do not use the mopping function on the carpet;
5. When the device is charging or not in use, remove the mopping module, pour out the excess water in the water tank, and clean the mop to avoid mildew or odours;
6. It is recommended to clean the mop aer each use to ensure the water output speed and cleaning effect. If necessary, the mop can be replaced with a new one;
7. When the main unit is charging on a wooden floor, timely remove the mopping module to prevent the mop from leaking and damaging the floor.
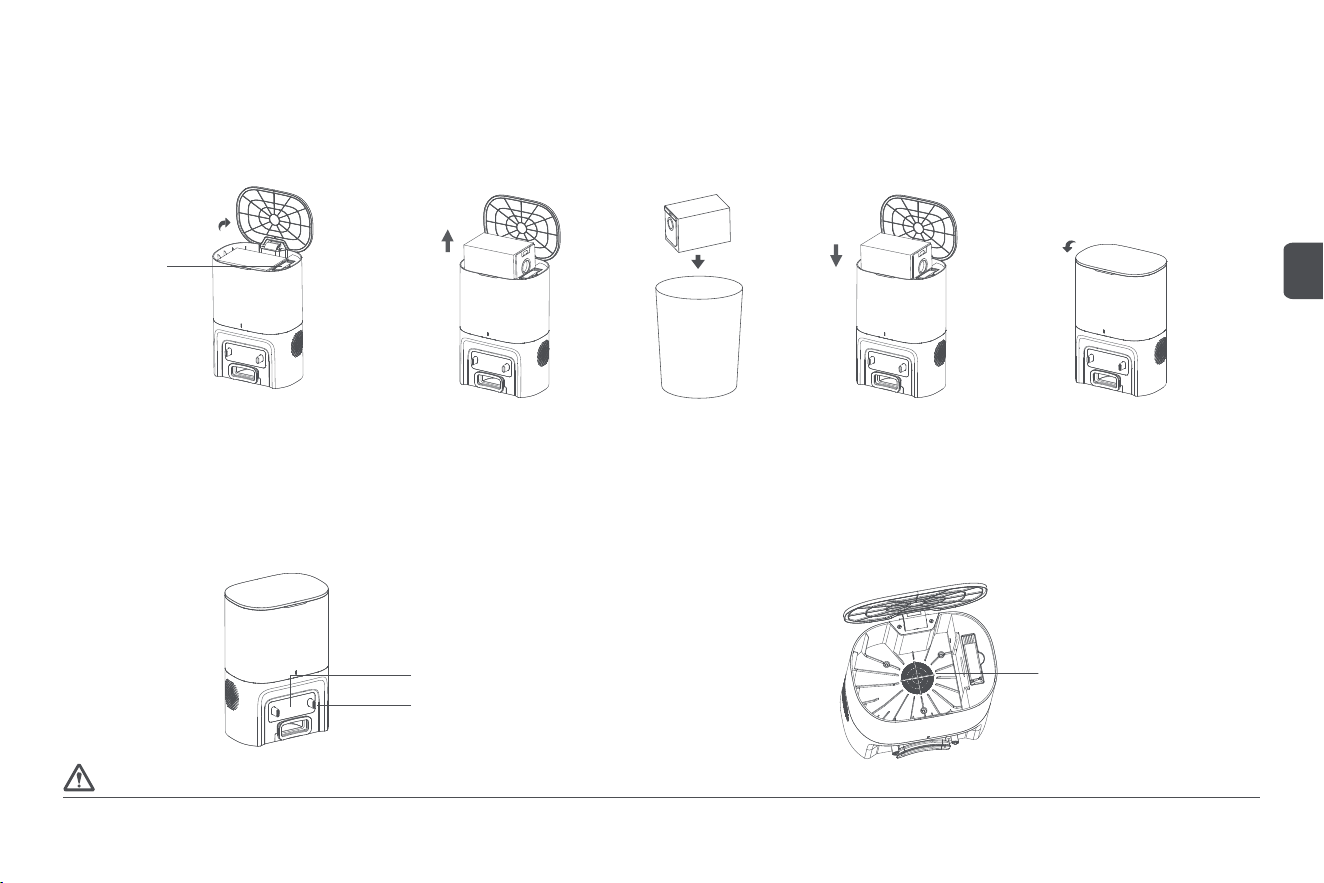
Installation of mopping module
Step 1: Install the mop
Insert the wrung damp mop into the mop holder and paste it on the Velcro;
Step 2: Fill the two-in-one water tank with water
Open the rubber cap of the two-in-one water tank inlet, pour clean water into the tank, then
fasten the rubber cap;
Step 3: Install the mopping module
Install the mopping module into the boom of the two-in-one water tank according to the direction
shown in the diagram;
Step 4: Install the two-in-one water tank
Install the two-in-one water tank into the main unit according to the direction shown in the
diagram, until you hear a "click" sound.
7
EN
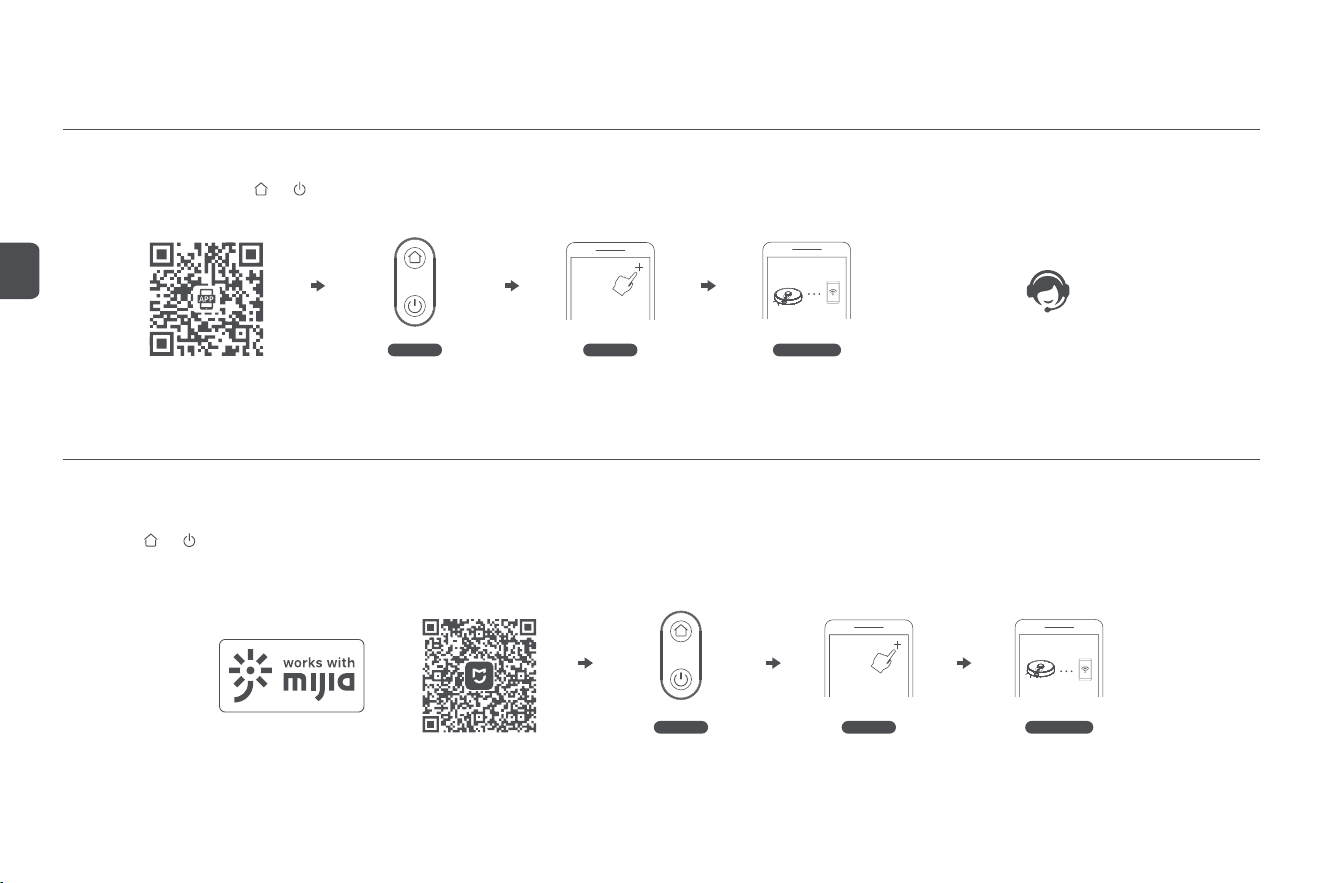
App installation and use
This appliance is compatible with the ROIDMI Platform, and can be controlled by the "ROIDMI" App. It supports both Android and iOS systems.
1. Scan the QR code below or search for "ROIDMI" on the app store to download and install;
2. Sign in to the app. Long press and buons on the robot cleaner at the same time for longer than 3 seconds to reset it. Click “+” at the upper right on the app’s homepage to add device. Select the
robot cleaner from the device list and connect it to Wi-Fi according to the prompts.
3. If you have any questions, please consult customer service or check the official website.
ROIDMI APP installation
Mi Home APP
Reminder: Actual operations may vary due to upgrade and update of Mi Home app. Please follow the instructions in the app.
Please note that “works with mijia” only certifies the product is compatible with Mi Home app.
Xiaomi and Mijia are not liable for any problems related to the product itself and its manufacturer’s production, executive standards, quality control, etc.
* Some overseas regions do not support connection to Mi Home APP
* This product only supports 2.4G Wi-Fi
Add device
Configure network
Reset Wi-Fi
Add device
Reset Wi-Fi
Configure network
This product works with mijia (Mi Home). It can be controlled via Mi Home app and interconnected with other smart devices.
1. Scan the QR code below, or search for “Mi Home” in the app store to download and install the app;
2. Turn on Mi Home app, register an account or sign in to the app;
3. Long press and buons on the robot cleaner at the same time for longer than 3 seconds to reset it. Click “+” at the upper right on the app ’s homepage to add device;
4. In the device category list find the “Robot Cleaner” category, then click your ROIDMI robot cleaner model to enter Network Configuration interface;
5. Perform follow-up operations according to the app’s prompts on network configuration.
8
EN

Turning on/off and cleaning modes
1. Power on/off
Press and hold the power buon for 3 seconds. The power buon indicator turns on, and the
main unit enters standby mode. When the main unit is stationary, press and hold the power
buon to turn it off, and the indicator will turn off.
When the main unit is in operation, pressing any buon will pause the main unit. Aer a pause,
press the power buon again to continue cleaning.
8. Fixed-point cleaning
Select fixed-point cleaning in the app, then set the target point on the map. The main unit will
automatically plan the route to the target point and clean in a 1.6×1.6 m square area with the
target point as the centre. The main unit will automatically return to the dust collection station to
recharge aer the cleaning is finished.
9. Scheduled cleaning
Use the app to set the time of scheduled cleaning, and the main unit will automatically start
cleaning at the specified time and automatically return to the dust collection station aer the
cleaning is finished.
If the Do-Not-Disturb Mode is enabled, the scheduled cleaning will not be executed during the
Do-Not-Disturb period.
10. Add water or clean the mop during operation
During the cleaning process, if you need to add water or clean the mop, pause the device by
pressing the power buon, remove the two-in-one water tank and mopping module, add water
or clean the mop, and then install the two-in-one water tank and mopping module. Finally, press
the power buon to continue working.
11. Sleep mode
If the main unit is not charging and there is no operation for more than 10 minutes, it will automatically
enter sleep mode. If it stays in sleep mode for more than 6 hours, it will automatically turn off.
To wake up the main unit, press any buon or use the app.
12. Resume cleaning
During the cleaning process, if the baery is low, the main unit will automatically return to the
dust collection station to recharge. Aer recharging, the main unit will automatically return to
where it le off and continue the cleaning process. If you manually stop cleaning, then move
or operate the main unit during the charging process, the resume cleaning will be cancelled.
13. Virtual wall/No-go area
In the app, you can set up virtual walls or no-go areas to prevent the main unit from entering
areas that do not need to be cleaned.
Before using the virtual wall/no-go area function, you need to save the map in the app. Moving
the main unit or major changes in the environment can cause the original map to become invalid
and result in the loss of virtual walls/no-go areas.
2. Return to recharge/Dust collection
In standby mode, press the recharge buon, and the main unit will return to the dust collection
station to recharge. When the main unit has finished cleaning, it will automatically return to the
dust collection station to recharge, and the indicator will flash white. If the baery is low during
cleaning, it will automatically return to the dust collection station to recharge. While the main
unit is charging, the dust collection station will automatically collect dust.
Within 2 minutes, the dust collection station will not collect dust multiple times. In the
Do-Not-Disturb Mode, the main unit will return to the dust collection station to recharge, but
the station will not collect dust.
3. Quick map building
When the main unit is powered on for the first time, there is no map in the app. Place the main
unit into the dust collection station, select quick map building in the app, and the main unit
will only build a map without cleaning. Aer the main unit automatically returns to the dust
collection station, the map will be completed and saved automatically.
4. Memory map
Aer the main unit successfully completes a quick map building or cleaning and returns to the
dust collection station to recharge, the app will automatically save and update the map. Aer
the map is successfully built, you can divide, merge areas or customise room names in the app.
5. Full house cleaning
Start full house cleaning through the app or by pressing the power buon. The main unit will
first carry out full house cleaning along a set path, then carry out edge cleaning, and automatically
return to the dust collection station to recharge aer the cleaning is finished.
6. Edge cleaning
Select Edge Cleaning in the app, and the main unit will automatically recognise the cleaning
area and perform edge cleaning, and automatically return to the dust collection station to
recharge aer the cleaning is finished.
7. Area cleaning
Users can select an area (quadrilateral) on the map, this area can be scaled and moved, and by
clicking on the node with a "+" sign to increase the number of variables into a polygon (up to 10
sides), you can also set the number of times the area is cleaned. Aer determining the cleaning
area, click the power buon to start cleaning the area, and automatically recharge aer each
cleaning task.
9
EN

14. Do-Not-Disturb Mode
During the Do-Not-Disturb period, the main unit will not execute resume cleaning and scheduled
cleaning or actively broadcast voice prompts. The Do-Not-Disturb Mode is enabled by default
from 23:00 to 9:00. You can enable/disable the Do-Not-Disturb Mode or set the time period of
the mode.
During the do-not-disturb time period, the indicator will go off aer the main unit has been
charged for one minute.
16. Factory reset
Press two buons and hold for 15 seconds for a factory reset. The main unit needs to
reconnect to the app, and all related seings in the app will be cleared.
17. Firmware upgrade
The device's firmware can be upgraded through the app. During the upgrade process, the main
unit must be in the dust collection station or have a baery power more than 30%. It is not allowed
to start cleaning during the upgrade process.
15. Reset Wi-Fi
When the mobile phone cannot connect to the main unit aer reseing the password or for
other reasons, reset the Wi-Fi connection by following the actions in the app download of this
manual.
Caution
1. It is recommended to place the main unit in the charging position of the dust collection station
before starting cleaning;
2. Before using the product, arrange the desks, chairs, household items, floor objects, etc. neatly,
and clear power cords and small items laying on the ground to avoid the product being blocked
during cleaning;
3. Do not stand in front of the device while it is operating to avoid obstructing the device from
identifying the area to be cleaned;
4. It is recommended not to turn off the main unit aer it has finished working, but to keep it
in the charging state for beer performance in the next cleaning.
Indicator status description
Status description of main unit indicator
Status description of dust collection station indicator
10
EN
Flashing
Indicator Status
Charging/Powering on
Connecting to network/ No network
Recharge/ Dust collection
Power-on finished/Charging finished/Network
configeration success/Network connected
Standby-low power state/Dust collection
errors/Exceptionse
White light
White light Red light
Power off/Sleeping
X
X
X
X
X
X
Off
Off
Off
Off
OffOff
Off
Always-on
Always-on
Flashing
Breathing
Always-on
Indicator Status
Malfunctions
Power supply not connected
Charging
White Light
Powered on/Main unit fully charged
Flashing
Breathing
Off
Device disassembly and cleaning
Please perform the following cleaning steps when the power is off!
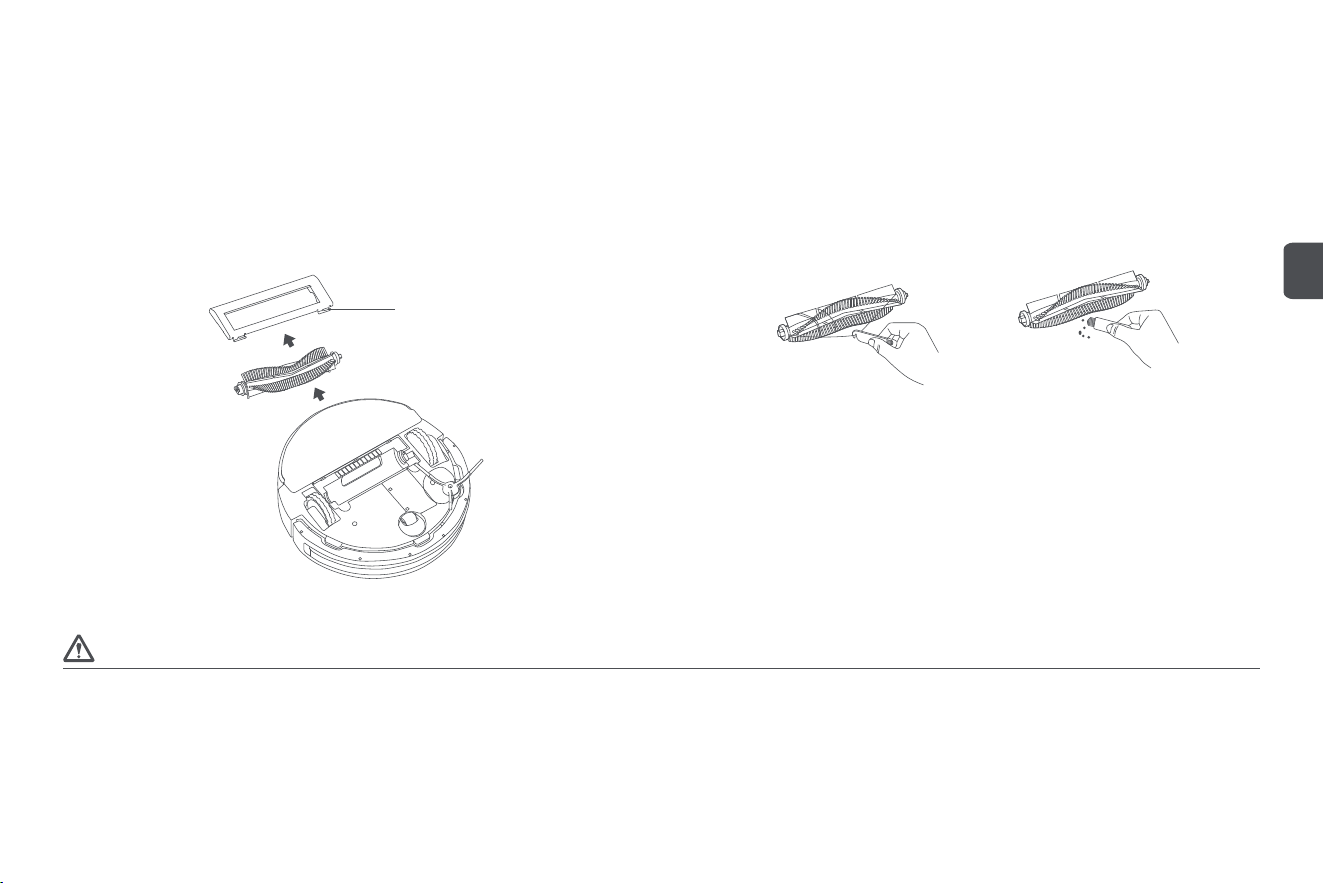
Disassembly and cleaning of rolling brush components
Step 1: Disassemble the rolling brush
Turn the main unit over, li the buckle and take out the rolling brush cover, and then take out
the rolling brush;
Buckle
Step 2: Clean the rolling brush
Use a cleaning brush to pick up and cut off the hair and fibre aached to the rolling brush, separate
them from the rolling brush, and clean the surface dirt. It is recommended to replace the rolling
brush every 6-12 months.
1. Turn off the power before replacing the rolling brush;
2. The cleaning brush has sharp blades used to cut through tangled debris that is difficult to clean. Keep the cleaning brush out of reach of children.
Caution
11
EN

Disassembly and cleaning of side brush
Step 1: Disassemble the side brush
Turn the main unit over, use a screwdriver to remove the screws, and take out the side brush;
Step 2: Clean the side brush
Use a cleaning brush to pick up and cut off the hair and fibre aached to the side brush, separate
them from the side brush, and clean the surface dirt. It is recommended to replace the side brush
every 3-6 months.
1. Please replace the side brush with an original one to avoid damaging the main unit due to product differences;
2. Please be careful when using a screwdriver to replace the side brush to avoid scratching yourself.
Caution
Disassembly and cleaning of the two-in-one water tank and filter
Step 1: Disassemble the two-in-one water tank
Press the release buon on the two-in-one water tank to take the water tank out;
Step 2: Dump the rubbish in the two-in-one water tank
Open the cover of the two-in-one water tank dust bin and dump the rubbish. Use a cleaning
brush to clean the dust bin;
12
EN
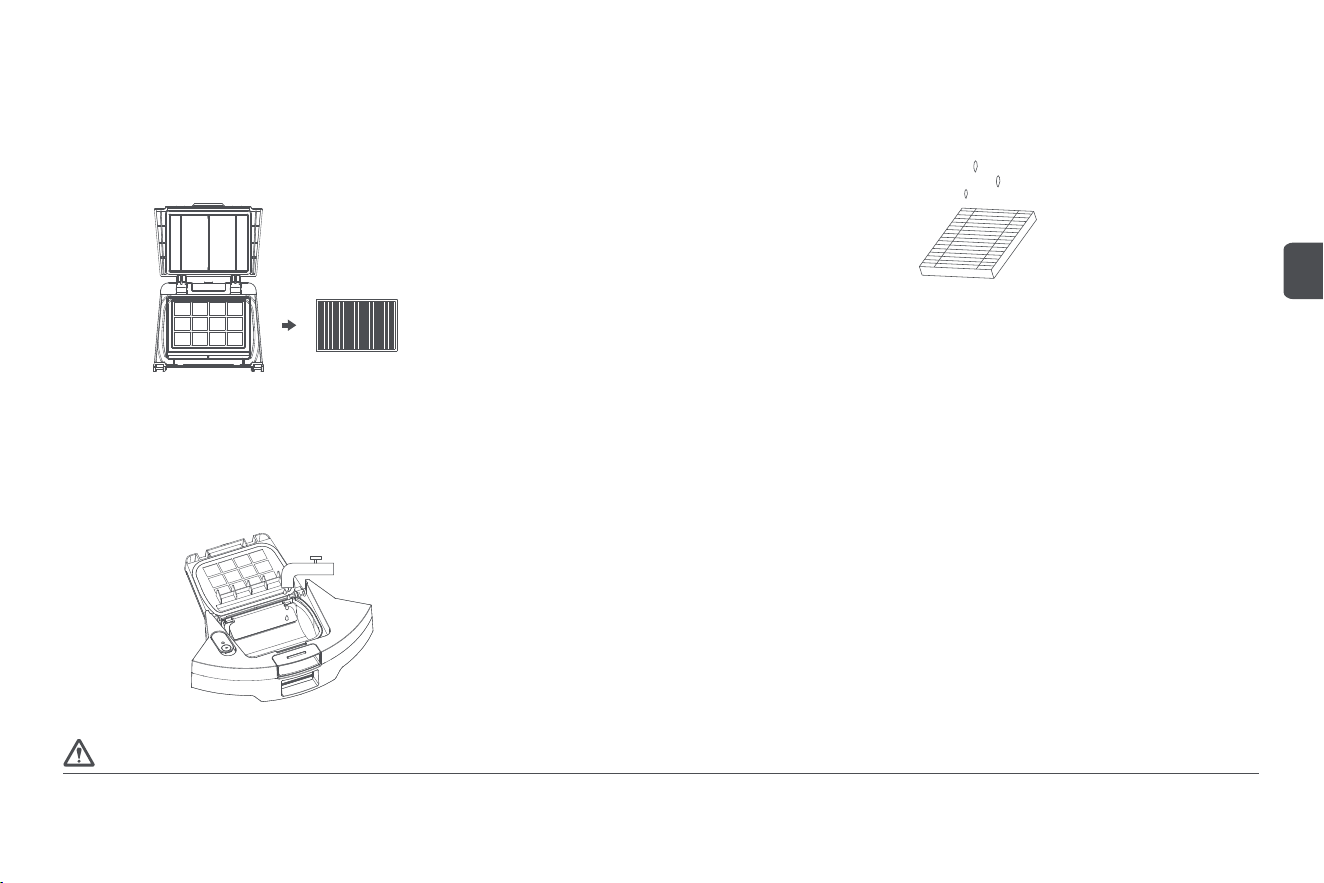
Step 3: Disassemble the filter
Open the cover,remove the filter, and clean it with a cleaning brush;
Step 4: Clean the filter
Rinse the filter with clean water and allow it to air dry before using it again to prevent dust clumping;
Step 5: Clean the two-in-one water tank
Rinse the two-in-one water tank dust bin with clean water and allow it to air dry for 24 hours before
using it again to prevent dust clumping.
1. Do not flush or soak the two-in-one water tank while cleaning the two-in-one water tank dust bin;
2. It is recommended to replace the filter with an original one every 3-6 months to ensure cleanliness.
Caution
13
EN
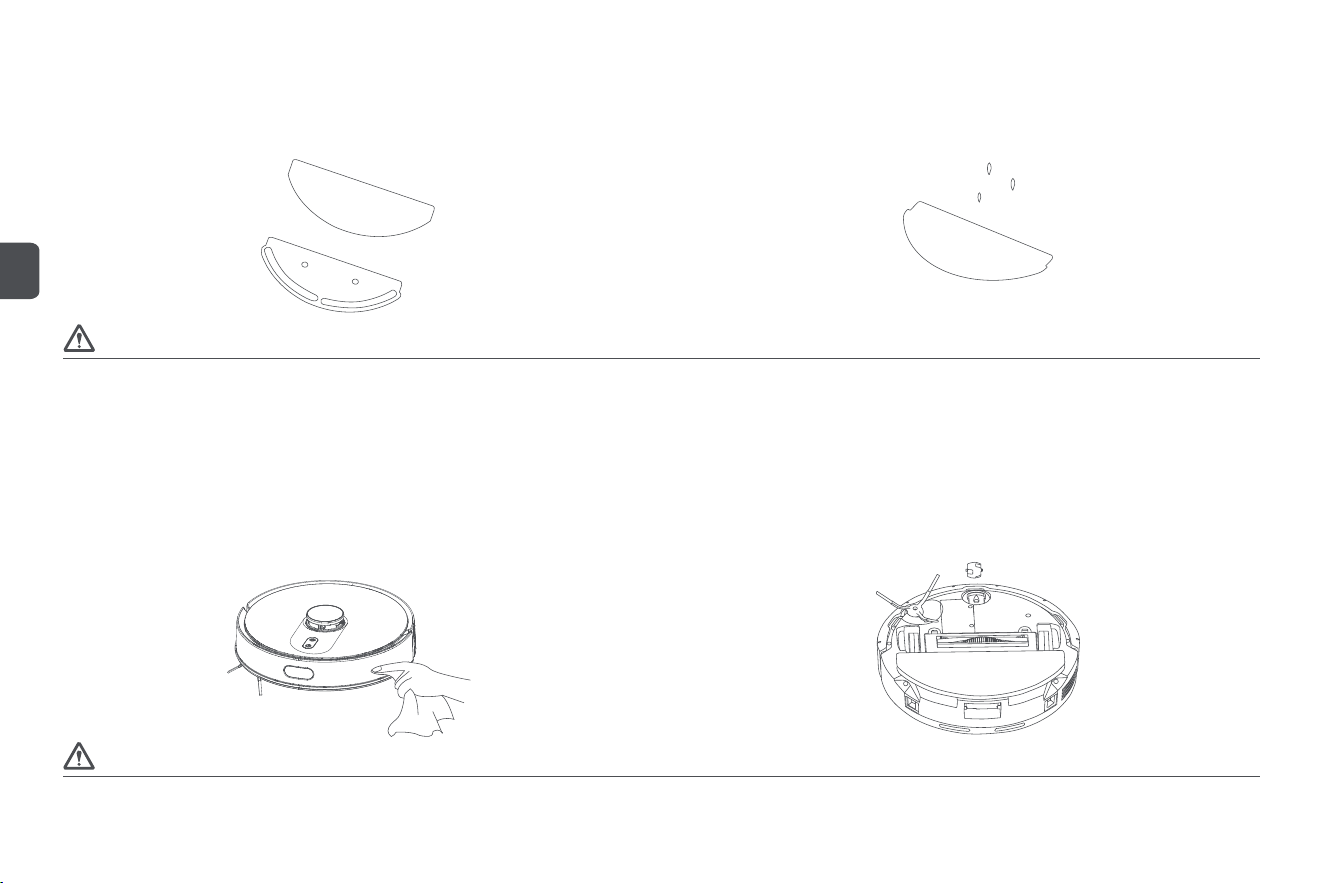
Disassembly and cleaning of mop
Step 1: Remove the mop
Remove the mopping module from the two-in-one water tank and take the mop off the mop holder;
Step 2: Clean the mop
Rinse the mop with clean water and allow it to air dry before using it again to prevent dust clumping.
1. Please replace the mop with an original one to avoid affecting the cleaning effect due to product differences;
2. It is recommended to replace the mop with an original one every 3-6 months to ensure cleanliness.
Caution
Cleaning of components
Step 1: Clean sensors in the main unit
Use a so and clean cloth to wipe the laser distance sensor, infrared lens, charging electrode
plates, and cliff sensors of the main unit;
1. Do not use wet wipes, detergents, sprays, or other chemical products to clean the sensors, infrared recharging sensors, or charging electrode plates of the main unit;
2. Please be careful when using a screwdriver to replace components to avoid scratching yourself.
Caution
Step 2: Clean the omni wheel
Turn the device over and use a screwdriver to remove the omni wheel, and clean the hair and
dirt on the wheel.
14
EN
Cleaning of dust collection station
Step 1: Replace the dust bag
When the dust bag is full, please replace it in time to avoid affecting the next dust collection;
Open the dust
collector cover
Close the dust
collector cover
Cleaning brush
Take out the dust
bag upwards
Replace the dust bag
with a new one
Dispose of the used
dust bag
Do not use wet wipes, detergents, sprays, or other chemical products to clean the infrared lens, charging pins, and fan filter holder of the dust collection station.
Caution
Step 2: Clean infrared lens and charging pins
Use a so and clean cloth to wipe and clean the infrared lens and charging pins of the dust collection
station to ensure they are clean and free of debris;
Step 3: Clean the fan filter holder
Check the fan filter holder for any foreign objects or debris wrapped around it. Use a so and
clean cloth to wipe and clean the holder to ensure it is clean and free of debris.
Charging pin
Infrared lens
Fan filter holder
15
EN

Troubleshooting
When the robot vacuum and mop cleaner shows abnormal behaviour during operation, the main unit buon flashes yellow and gives a voice prompt. Please refer to the following table for troubleshooting.
Malfunction prompt Solution
Please ensure that the laser distance sensor is
unobstructed before starting
Please place the main unit on a level surface
before starting
Please check whether the laser distance sensor is blocked or obstructed by foreign objects. Remove obstacles or foreign objects.
Please do not use the main unit outdoors under direct sunlight or in strong light. Move the main unit indoors to use it.
If the above methods are ineffective, move the main unit to a new location to start.
If there is still an abnormal prompt, please contact our aer-sales service centre.
If the wheels are suspended, please move the main unit to a new location before starting.
Low baery power, please charge the device The baery power is low, and the main unit cannot start normally. Please charge the main unit before use.
Please ensure that the two-in-one water tank is
installed properly
Please put the two-in-one water tank back and ensure that it is installed properly.
Please wipe the cliff sensors and move the main
unit to a new location before starting
If the main unit is suspended, please move the main unit to a new location before starting.
The cliff sensors are too dirty and are blocked by dust or other debris. Please wipe the cliff sensors.
Please check the collision sensors for foreign
objects and clear them
Please put the main unit back in the dust collection
station
Please check if the collision sensors are stuck and clear any foreign objects around them.
If there is no foreign object, please move the main unit to a new location before starting.
If there is still an abnormal prompt, please contact our aer-sales service centre.
If the main unit fails to return to the dust collection station to recharge, please put the main unit back in the dust collection station.
Please clear obstacles around the main unit and
try again
Low baery power. Please wait for the charging
to finish
Please check if the main unit is stuck or trapped by any obstacles and clear the obstacles around it.
The main unit has a low baery power and is charging in the dust collection station. Please wait for the charging to finish before restarting.
Please ensure that the mop is installed properly
The main unit has shut down due to a low baery
power
Please put the mop back and ensure that the mop holder is properly installed.
The main unit will automatically shut down when its voltage is lower than 12 V. Please put the main unit back in the dust collection station
for charging.
The side brush malfunctions. Please check and
clear the side brush
The wheels malfunction. Please check and clear
the wheels
Please check if the side brush is tangled with any foreign objects and clear it.
Please check if the wheels are stuck and clear any foreign objects.
16
EN
17
Malfunction prompt Solution
The rolling brush malfunctions. Please check and
clear the rolling brush
Please check if the rolling brush is tangled with any foreign objects and clear it.
A virtual wall or no-go area is detected. Please move
the main unit away from this area
Tip: Some anomalies can be eliminated by reseing the system.
Please restart the main unit aer moving it away from the virtual wall or no-go area.
FAQs
Malfunction type Solution
The baery power is low. Please put the main unit back in the dust collection station for charging before use.
The dust collection station is not powered on. Please make sure the power supply is connected. The charging electrode plates are not in good
contact. Please clean the charging pins of the dust collection station and the charging electrode plates of the main unit. The ambient
temperature is too low (below 0℃) or too high (above 35℃).
Fail to power on
Fail to charge
There are too many obstacles near the dust collection station. Please place the dust collection station in an open area. The distance between
the main unit and the dust collection station is too far. Please place the main unit near the dust collection station and try again.
Please turn off the robot and restart it.
The rolling brush, side brush, wheels, or omni wheel may be entangled with foreign objects. Please turn off the robot and clear it.
The two-in-one water tank dust bin is full. Please clear the dust bin. The filter is blocked, and please clean it. The rolling brush is entangled
with foreign objects, and please clean it.
Fail to return to the dust collection station to recharge
Abnormal operation
Abnormal noise during cleaning
Reduced cleaning capability or dust collection
capability
The mopping module does not release water, or
the amount of water released is small
Please check if there is water in the water tank; please use the mobile app to adjust the water volume to the maximum level; please install the
mop and mop holder properly according to the manual.
The Wi-Fi function is not activated. Please reset the Wi-Fi and try again.
The Wi-Fi signal is weak. Please reset the main unit in an area with a strong Wi-Fi signal.
The Wi-Fi connection is abnormal. Reset the Wi-Fi, download the latest mobile app, and try to connect again.
Fail to connect to Wi-Fi
Please ensure that the main unit has been successfully connected to the network and always stays in the Wi-Fi signal-covered area.
Main unit in offline status
Please make sure the main unit is not in the Do-Not-Disturb Mode because the scheduled cleaning cannot be executed in this mode.
Please make sure the main unit is connected to the network. Otherwise, the scheduled cleaning will not start because the main unit cannot
synchronise the time.
Fail to perform scheduled cleaning
EN
Malfunction type Solution
Please ensure that the main unit is not in the Do-Not-Disturb Mode, which does not allow resume cleaning. In addition, if you make the main
unit return to recharge by the app, press the recharge buon, or move it back to the dust collection station directly, the main unit will not
resume cleaning.
Fail to perform resume cleaning
Does the main unit consume power when it
remains in the dust collection station?
Do I need to charge the main unit for 16 hours
for the first 3 uses?
The lithium baery has no memory effect and can be charged as needed without waiting for an additional period before use.
When the main unit remains in the dust collection station, it consumes power at a very low rate, which is beneficial for maintaining the baery
at optimal performance.
Product name
Rated voltage
Baery capacity
Net weight
Dust bin capacity
Water tank capacity
Product model
Rated power
Rated input
Product dimension
Noise (quiet level/standard level/strong level/max level)
Baery type
Technical data
Robot vacuum and mop cleaner
14.4 V
3200 mAh
Approx. 3.2 kg
Approx. 250 ml
Approx. 300 ml
SDJ03RM
45 W
20 V 0.6 A
330 x 330 x 100 mm
≤ 78 dB (A)
Lithium-ion rechargeable baery
Device requirement: Devices supporting Android 5.0 or iOS 10 and later versions (iPhone 5 and later).
This device contains a Wi-Fi module that supports the 802.11b/g/n transmission protocol.
Dust collection station
650 W
20 V 0.6 A
Approx. 2.2 kg
Approx. 12 seconds
Product name
Rated power
Rated output
Net weight
Dust collecting duration
Product model
Rated input
Product dimension
Noise
Dust bag capacity
JCZ03RM
200-240 V~, 50/60 Hz
228 x 162 x 330 mm
≤ 83 dB (A)
Approx. 3 L
18
EN

Disposal
Correct disposal of this product
This marking indicates that this product should not be disposed with other household wastes throughout the EU. To prevent possible harm to the environment or human
health from uncontrolled waste disposal, recycle it responsibly to promote the sustainable reuse of material resources. To return your used device, please use the return
and collection systems or contact the retailer where the product was purchased. They can take this product for environmental safe recycling.
Warranty and limitations of liability
This product is guaranteed for a period of 24 months (defined by local law) from the date of purchase against any failure resulting from manufacturing or material defects.
This warranty does not cover damage caused by improper installation, improper use, or normal wear and tear of the product.
More specifically, the warranty does not cover:
• Dust bag, side brush, filter, mop, rolling brush and rolling brush cover are not covered by the warranty as they are consumable items;
• Damage or problems caused by improper use, accident, alteration or electrical connection of improper intensity or voltage;
• Modified products, those whose warranty seal or serial number have been damaged, altered, removed or oxidized;
• Failure of the baery due to overcharging or failure to observe the safety instructions explained in the instruction manual;
• Cosmetic damage, including scratches, dents, or any other element;
• Damage caused by any intervention carried out by an unauthorised person;
• Defects caused by normal wear and tear or due to normal ageing of the product;
• Soware updates due to a change in network seings;
• Product failures due to the use of third party soware to modify, change or adapt the existing soware;
• Product failures caused by use without accessories approved by the manufacturer.
• Oxidised products.
Terms and conditions of implementation:
To obtain a warranty service, you are requested to return your product to the customer service desk of your retail outlet with your proof of purchase (receipt, invoice, …), the product and its supplied
accessories, with its original packaging.
It is important to have the date of purchase, the model and the serial or IMEI number on hand as information (this information usually appears on the product, the packaging or your proof of purchase).
Failing this, you must return the product with the accessories necessary for its proper operation (power supply, adaptor, etc.).
In the event that your claim is covered by the warranty, the aer-sales service may, within the limits of local law, either:
• Repair or replace defective parts;
• Exchange the returned product with a product that has at least the same functionality and that is equivalent in terms of performance;
• Refund the product at the purchase price of the product mentioned on the proof of purchase.
If one of these 3 solutions is used, this do es not give rise to the extension or renewal of the warranty period.
19
EN

Warranty card
Maintenance records
Customer name
Mailing address
Contact information
Product name and model
Main unit serial number
Purchase date
This warranty card contains customers’ personal information, keep it safe
Servicing center Fault description Replacement parts Servicing engineer Servicing date
www.roidmi.com/en
Correct disposal
of this product
for indoor
use only
class Ⅱ
equipment
Our products and packaging are recyclable, do not throw them away!
Find where to drop them off on the website www.quefairedemesdechets.fr
20
EN
Manufacturer: ROIDMI Information Technology Co., Ltd.
Address: 4F,C8 BUILDING,NO.1699 HUISHAN ROAD,LIFE SCIENCE AND TECHNOLOGY PARK,HUISHAN DISTRICT, WUXI,JIANGSU,PRC
Executive standards:
Service email: service@ roidmi.com
Website: www.roidmi.com/en
NO.03.2024
Only applicable to the robot vacuum and mop cleaner model SDJO3RM
Made in China
EN 300 328 V2.2.2:2019, EN 301 489-1 V2.2.3:2019, EN 301 489-17 V3.2.4:2020, EN IEC 55014-1:2021, EN IEC 55014-2:2021
EN IEC 61000-3-2:2019+A1, EN 61000-3-3:2013+A1:2019, EN IEC 62311:2020, EN 60335-1:2012+A11+A13+A1+A2+A14+A15
EN 60335-2-2:2010+A11+A1, EN 62233:2008
IEC 60335-2-2:2019,with lEC 60335-1:2010, COR1:2010, COR2:2010, AMD1:2013, COR1:2014, AMD2:2016, COR1:2016
COMMISSION REGULATION (EC) No 1275/2008 of 17 December 2008
Commission Regulation (EU) No 801/2013 of 22 August 2013
EN 50564:2011
protection
fuse: T 1.6A
T1.6A