
Loading ...
Loading ...
Loading ...
K9-12 FlexShaft
™
Drain Cleaning Machine
999-995-413.10_REV. E
7
damage the cable or injure the operator.
Extending the drain back to the Drain
Cleaning Machine also makes it easier to
feed cable assembly into drain.
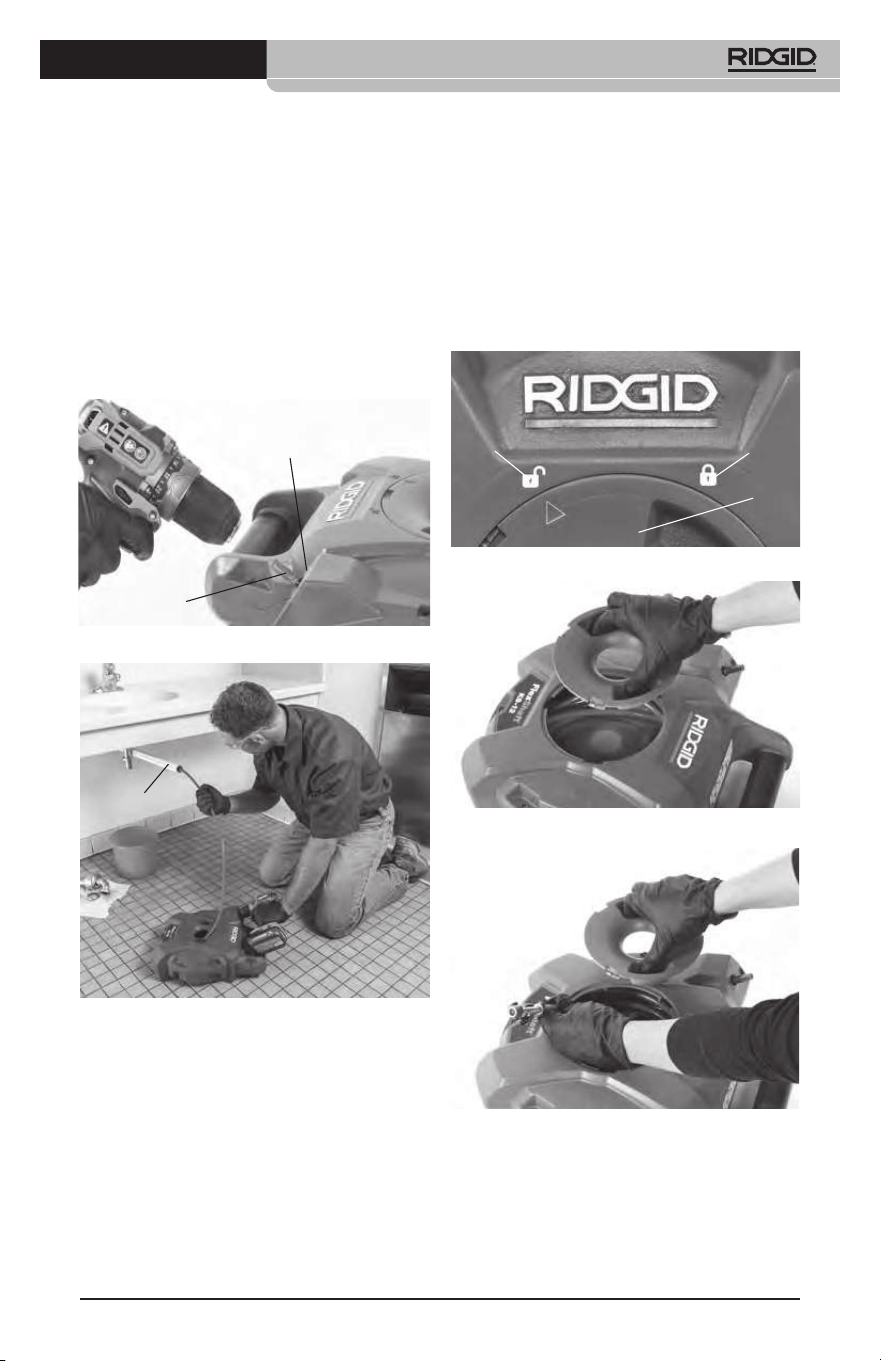
9. Rotate the cable cap to move the arrow
to unlock position and remove the cap
(Figure 6). Retrieve chain knocker and
cable assembly from the drum. Feed the
chain knocker through the cable cap hole
and lock the cable cap in original position.
(Figure 7).
Figure 6 – Unlock the Cap
Figure 7A – Remove Cap
Figure 7B – Retrieve Chain Knocker/Cable
work area. The drain cleaning process
can be messy.
6. Place the Drain Cleaning Machine on the
ground in the horizontal use position, see
Figure 4. Machine should sit squarely and
firmly on the ground. Do not operate with
the machine in the vertical position. This
will reduce the risk of tipping.
7. Remove the battery from the drill. Properly
set-up the drill. (See Battery Powered
Drill Set-up and Operation section.) Se-
curely attach the drill chuck to the hex of
the input shaft (Figure 4).
Figure 4 – Attaching Drill To Input Shaft
Figure 5 – Example of Extending Drain Access
to within 3’ of Machine Cable Outlet
8. Position the Drain Cleaning Machine so
that the cable outlet is within 3' (1 m) of
the drain access. Greater distances from
the drain access increases the risk of the
cable assembly twisting or kinking. If the
FlexShaft Machine cannot be placed with
the cable outlet within 3' (1 m) of the drain
access, extend the drain access with sim-
ilar sized pipe and fittings (see Figure 5).
Improper cable assembly support can
allow the cable to kink and twist and can
Rotation
Arrow
Input
Shaft
Cap Unlock
Position
Cap Lock
Position
Cap
Drain
Extension
Loading ...
Loading ...
Loading ...