Loading ...
Loading ...
Loading ...
32
INSTALLATION
Check the appliance is electrically safe when you have nished.
Fig. 12.9
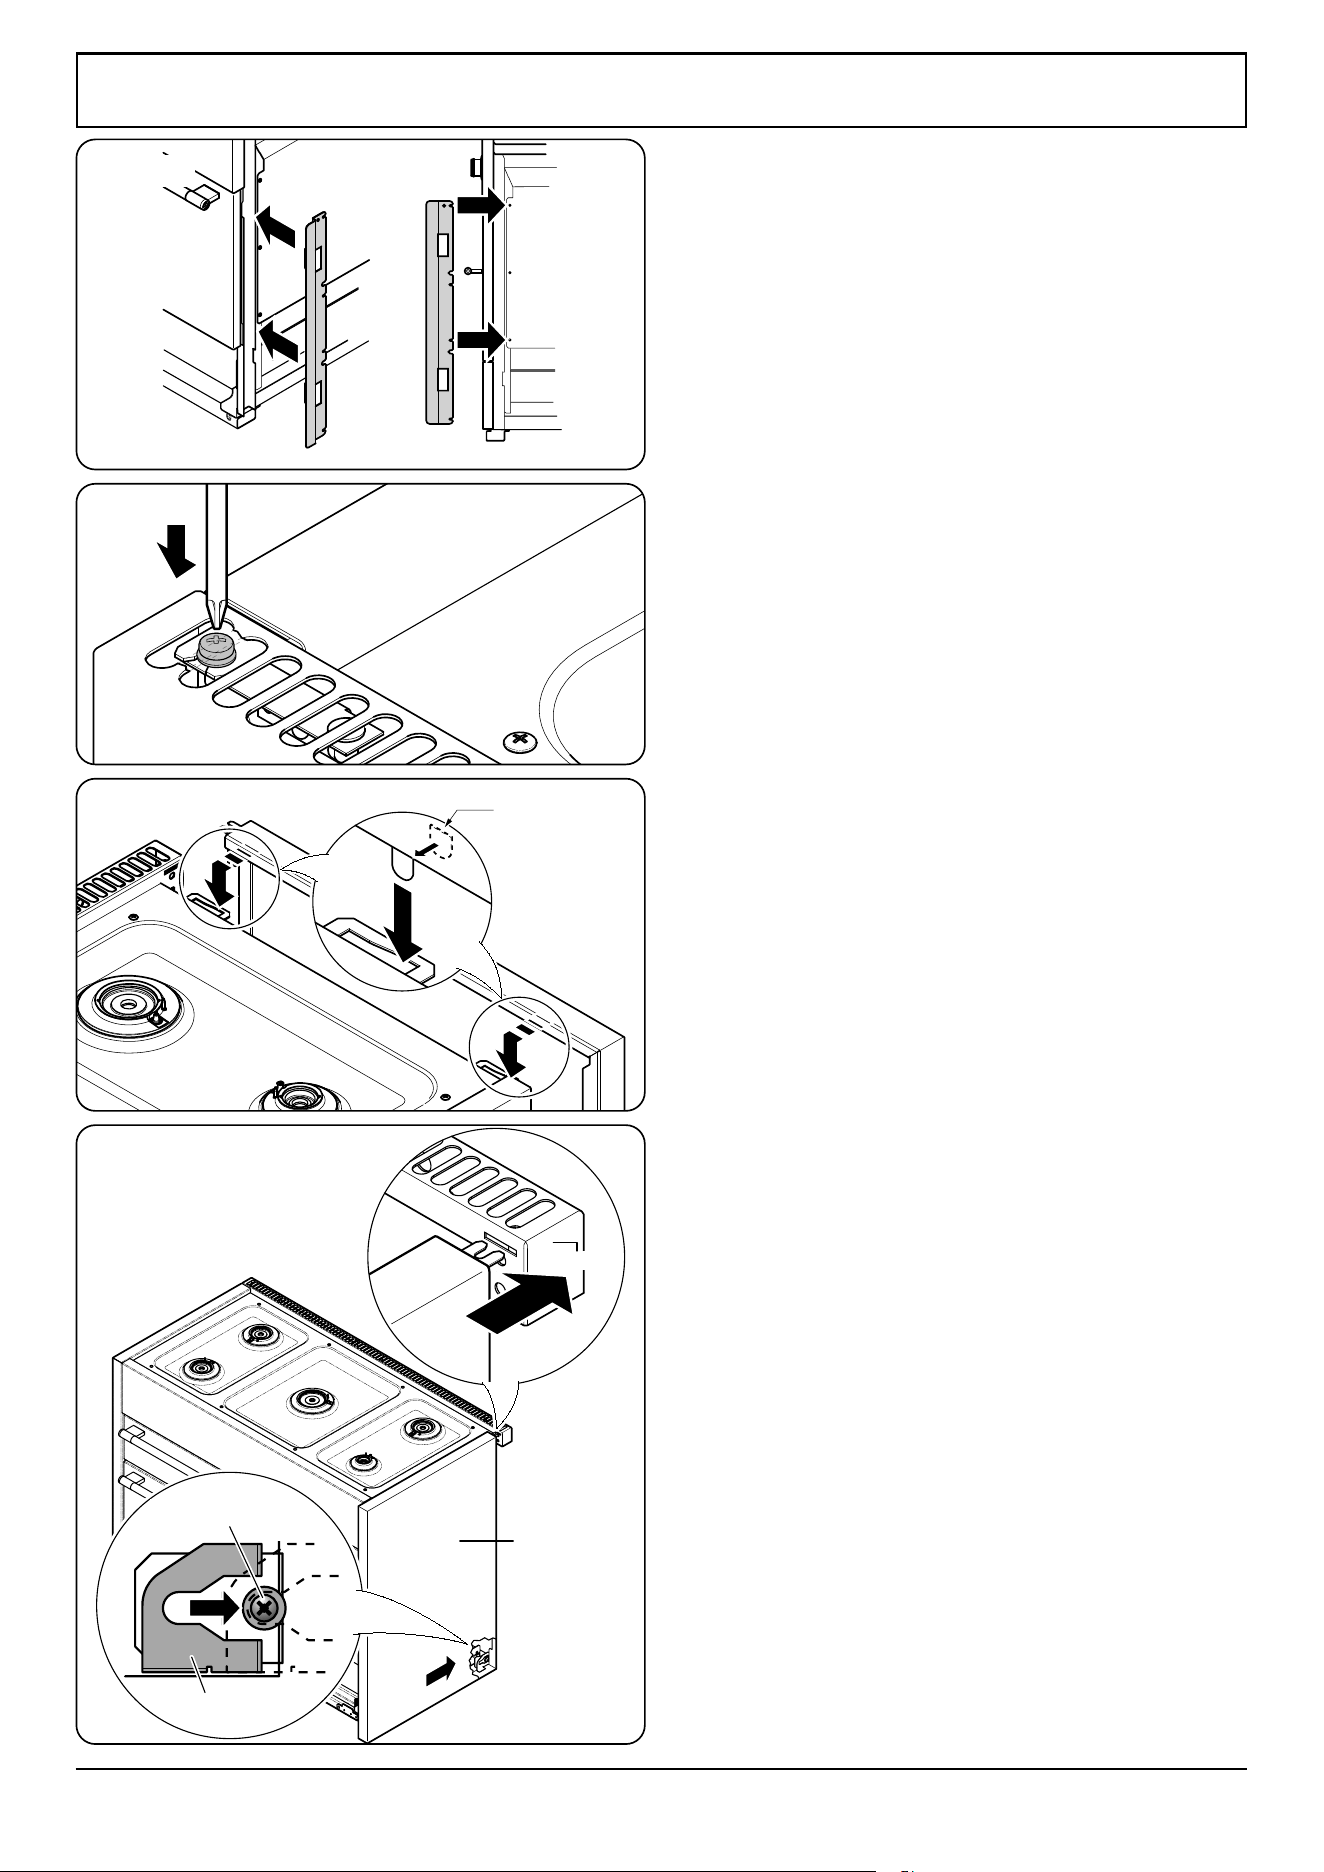
Fitting the obscuring trims
1. Located near the front on each side of the range there
are three screws. Loosen the top and bottom screws
(Fig. 12.9).
2. Slide the trim onto the screws and tighten to secure.
Fitting the side panels
1. Loosen the screw in the ue vent (Fig. 12.10).
2. Inside the top of the side panel top are two tabs. Attach
the self adhesive gaskets to each tab and connect these
tabs into the cut-outs in the top edge of the range
(Fig. 12.11).
3. Slide the side panel back so that the side panel bracket
in the base connects to the rear retaining washer and
the slotted tab at the top rear connects onto the screw
in the ue vent (Fig. 12.12).
4. Check everything is rmly connected and tighten
the screw in the ue vent to secure the side panel in
position (Fig. 12.10).
NOTE: The bottom front of the side panels will be loose.
These are secured once the bottom panel (toe kick) is tted.
NOTE: If a side panel is loose, t one of the extra gaskets to
the inner face of the front bracket locating tabs and ret.
Flue Vent
Side panel bracket
Side Panel
Nylon Retaining
washer
bk
Connect tab into
side bracket
Gasket
Fig. 12.10
Fig. 12.11
Fig. 12.12
Loading ...
Loading ...
Loading ...