

TABLE OF CONTENTS
1 Safety Warnings
1.1
Precautions To Avoid Possible Exposure To Excessive Microwave Energy
1.2
Specifications
1.3
Important Safety Instructions
1.4
Grounding Instructions
1.5
Radio Interference
1.6
Utensils
2 Product Overview
2.1
Setting Up Your Oven
3 Product Installation
3.1
Clearances And Dimensions
3.2
Microwave Drawer Measurements
3.3
Normal Installation Steps Anti-tip Block Installation Instructions
3.4 Drawer Installation
3.5
Model And Serial Number Location
3.6 Care,cleaning And Maintenance
4 Operation Instructions
4.1
Control Panel And Features
4.2
Clock Setting
4.3
Kitchen Timer
4.4
Time Cook
4.5
Add 30sec
4.6
Weight Defrost Function
4.7
Time Defrost Function
4.8
Popcorn
4.9
Sensor Reheat
4.10
Sensor Cook
4.11
Beverage
4.12
Melt
4.13
Soften
4.14
Multiple Cook
4.15
Buzzer On/off
4.16
Lock Function For Children
4.17
Eco Mode
4.18
Inquiring Function
5 Troubleshooting
6 Warranty
1
1
1-3
10
10
10
10
10
7
6
1
11
11
11
12
12
12
12
12
13
13
13
13
13
14
14
14
14
14
15
16
3-4
4
4
1
1 SAFETY WARNINGS
1.1 PRECAUTIONS TO AVOID
POSSIBLE EXPOSURE TO EXCESSIVE
MICROWAVE ENERGY
• Do not attempt to operate this oven with the door open since open door
operation can result in harmful exposure to microwave energy. It is important
not to defeat or tamper with the safety interlocks.
• Do not place any object between the oven front face and the door or allows
soil or cleaner residue to accumulate on sealing surfaces.
• Do not operate the oven if it is damaged. It is particularly important that the
oven door close properly and that there is no damage to the:
- DOOR (bent)
- HINGES AND LATCHES (broken or loosened)
- DOOR SEALS AND SEALING SURFACES
• The oven should not be adjusted or repaired by anyone except properly
1.2 SPECIFICATIONS
Model:
Rated Voltage 120 V~ 60 Hz
Microwave Input 1500 W
Microwave Output 1000 W
1.3 IMPORTANT SAFETY INSTRUCTIONS
When using electrical appliances basic safety precautions should be followed,
including the following:
WARNING
excessive microwave energy:
• Read all instructions before using the appliance.
•
• This appliance must be grounded. Connect only to properly grounded outlet.
2
1 SAFETY WARNINGS
• Install or locate this appliance only in accordance with the provided
installation instructions.
• Some products such as whole eggs and sealed containers - for example,
closed glass jars - are able to explode and should not be heated in this oven.
• Use this appliance only for its intended use as described in the manual. Do
not use corrosive chemicals or vapors in this appliance. This type of oven is
or laboratory use.
• As with any appliance, close supervision is necessary when used by
children.
• Do not operate this appliance if it has a damaged cord or plug, if it is not
working properly, or if it has been damaged or dropped.
•
Contact nearest authorized service facility for examination, repair, or
adjustment.
• Do not cover or block any openings on the appliance.
• Do not store this appliance outdoors. Do not use this product near water - for
example, near a kitchen sink, in a wet basement, near a swimming pool, or
similar location.
• Do not immerse cord or plug in water.
• Keep cord away from heated surface.
• Do not let cord hang over edge of table or counter.
• When cleaning surfaces of door and oven that comes together on closing the
door, use only mild, nonabrasive soaps, or detergent applied with a sponge
or soft cloth.
•
- Do not overcook food. Carefully attend appliance when paper, plastic,
or other combustible materials are placed inside the oven to facilitate
cooking.
- Remove wire twist-ties from paper or plastic bag before placing bag in
oven.
-
breaker panel.
- Do not use the cavity for storage purposes. Do not leave paper products,
cooking utensils, or food in the cavity when not in use.
•
boiling point without appearing to be boiling. Visible bubbling or boiling when
the container is removed from the microwave oven is not always present.
THIS COULD RESULT IN VERY HOT LIQUID SUDDENLY BOILING OVER
WHEN THE CONTAINER IS DISTURBED OR A UTENSIL IS INSERTED
INTO THE LIQUID.
To reduce the risk of injury to persons:
3
- Do not overheat the liquid.
- Stir the liquid both before and halfway through heating it.
- Do not use straight-sided containers with narrow necks.
- After heating, allow the container to stand in the microwave oven for a
short time before removing the container.
- Use extreme care when inserting a spoon or other utensil into the
container.
• Do not operate any heating or cooking appliance beneath the appliance.
• Do not mount unit over or near any portion of heating or cooking appliance.
• Do not mount over sink.
• Do not store anything directly on top of the appliance surface when the
appliance is in operation.
SAVE THESE INSTRUCTIONS
1.4 GROUNDING INSTRUCTIONS
This appliance must be grounded. In the event of an electrical short circuit,
grounding reduces the risk of electric shock by providing an escape wire for the
appliance is equipped with a cord having a grounding wire with a grounding plug.
The plug must be plugged into an outlet that is properly installed and grounded.
WARNING - Improper use of the grounding can result in a risk of electric shock.
completely understood, or if doubt exists as to whether the appliance is properly
grounded. If it is necessary to use an extension cord, use only a 3-wire extension
cord that has a 3-blade grounded plug, and 3-slot receptacle that will accept the
plug on the appliance. The marked rating of the extension cord shall be equal to
or greater than the electrical rating of the appliance.
DANGER - Electric Shock Hazard
Touching some of the internal components can cause serious personal injury or
death. Do not disassemble this appliance.
WARNING - Electric Shock Hazard
Improper use of the grounding can result in electric shock. Do not plug into an
outlet until appliance is properly installed and grounded.
1 SAFETY WARNINGS
4
• A short power-supply cord is provided to reduce the risks resulting from
becoming entangled in or tripping over a longer cord.
• Longer cord sets or extension cords are available and may be used if care is
exercised in their use.
• If a long cord or extension cord is used:
- The marked electrical rating of the cord set or extension cord should be at
least as great as the electrical rating of the appliance.
- The extension cord must be a grounding-type 3-wire cord.
- The longer cord should be arranged so that it will not drape over the
counter top or tabletop where it can be pulled on by children or tripped
over unintentionally.
This device complies with part 18 of the FCC Rules.
1.5 RADIO INTERFERENCE
• Operation of the microwave oven may cause interference to your radio, TV
or similar equipment.
• When there is interference, it may be reduced or eliminated by taking the
following measures:
- Clean door and sealing surface of the oven
- Reorient the receiving antenna of radio or television.
- Relocate the microwave oven with respect to the receiver.
- Move the microwave oven away from the receiver.
-
1.6 UTENSILS
CAUTION - Personal Injury Hazard
Tightly-closed utensils could explode. Closed containers should be opened and
plastic pouches should be pierced before cooking.
There may be certain non-metallic utensils that are not safe to use for
microwaving. If in doubt, you can test the utensil in question following the
procedure below.
1 SAFETY WARNINGS
5
Utensil Test:
• Fill a microwave-safe container with 1 cup of cold water (250ml) along with
the utensil in question.
• Cook on maximum power for 1 minute.
• Carefully feel the utensil. If the empty utensil is warm, do not use it for
microwave cooking.
• Do not exceed 1 minute cooking time.
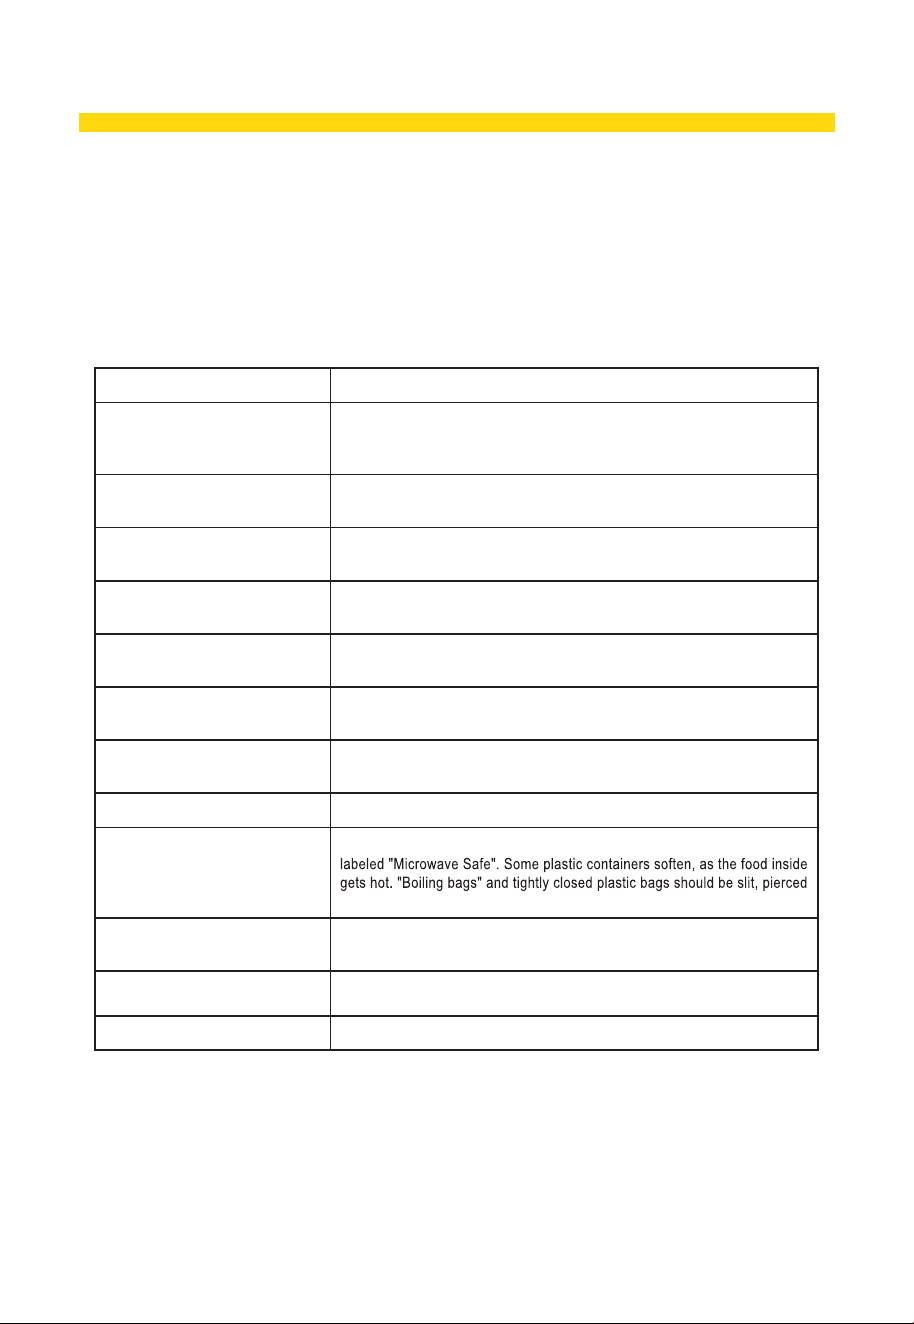
Materials you can use in microwave oven
Utensils Remarks
Browning dish
Follow manufacturer* instructions. The bottom of browning dish must be at
least 3/16 inch (5mm) above the turntable. Incorrect usage may cause the
turntable to break.
Dinnerware
Microwave-safe only. Follow manufacturer's instructions. Do not use cracked
or chipped dishes.
Glass jars
Always remove lid. Use only to heat food until just warm. Most glass jars are
not heat resistant and may break.
Glassware
Heat-resistant oven glassware only. Make sure there is no metallic trim. Do
not use cracked or chipped dishes.
Oven cooking bags
Follow manufacturer* instructions. Do not close with metal tie. Make slits to
allow steam to escape.
Paper plates and cups
Use for short*erm cooking/warming only. Do not leave oven unattended while
cooking.
Paper towels
Use to cover food for reheating and absorbing fat. Use with supervision for a
short-term cooking only.
Parchment paper Use as a cover to prevent splattering or a wrap for steaming.
Plastic
Microwave-safe only. Follow the manufacturer* instructions. Should be
or vented as directed by package.
Plastic wrap
Microwave-safe only. Use to cover food during cooking to retain moisture. Do
not allow plastic wrap to touch food.
Thermometers Microwave-safe only (meat and candy thermometers).
Wax paper Use as a cover to prevent splattering and retain moisture.
1 SAFETY WARNINGS
6
1 SAFETY WARNINGS
Materials to be avoided in microwave oven
Utensils Remarks
Aluminum tray May cause arcing. Transfer food into microwave-safe dish.
Food carton with metal handle May cause arcing. Transfer food into microwave-safe dish.
Metal or metal-trimmed utensils Metal shields the food from microwave energy. Metal trim may cause arcing.
Metal twist ties May cause arcing and could cause a fire in the oven.
Paper bags May cause a fire in the oven.
Plastic foam
Plastic foam may melt or contaminate the liquid inside when exposed to high
temperature.
Wood Wood will dry out when used in the microwave oven and may split or crack.
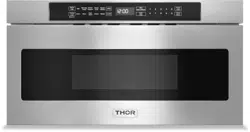
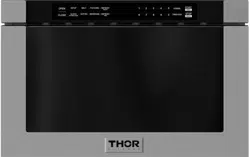
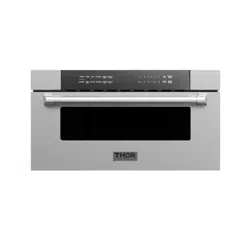
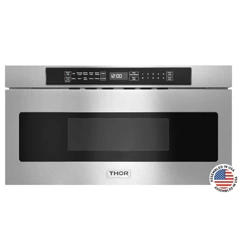
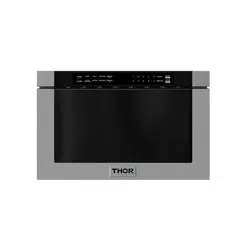
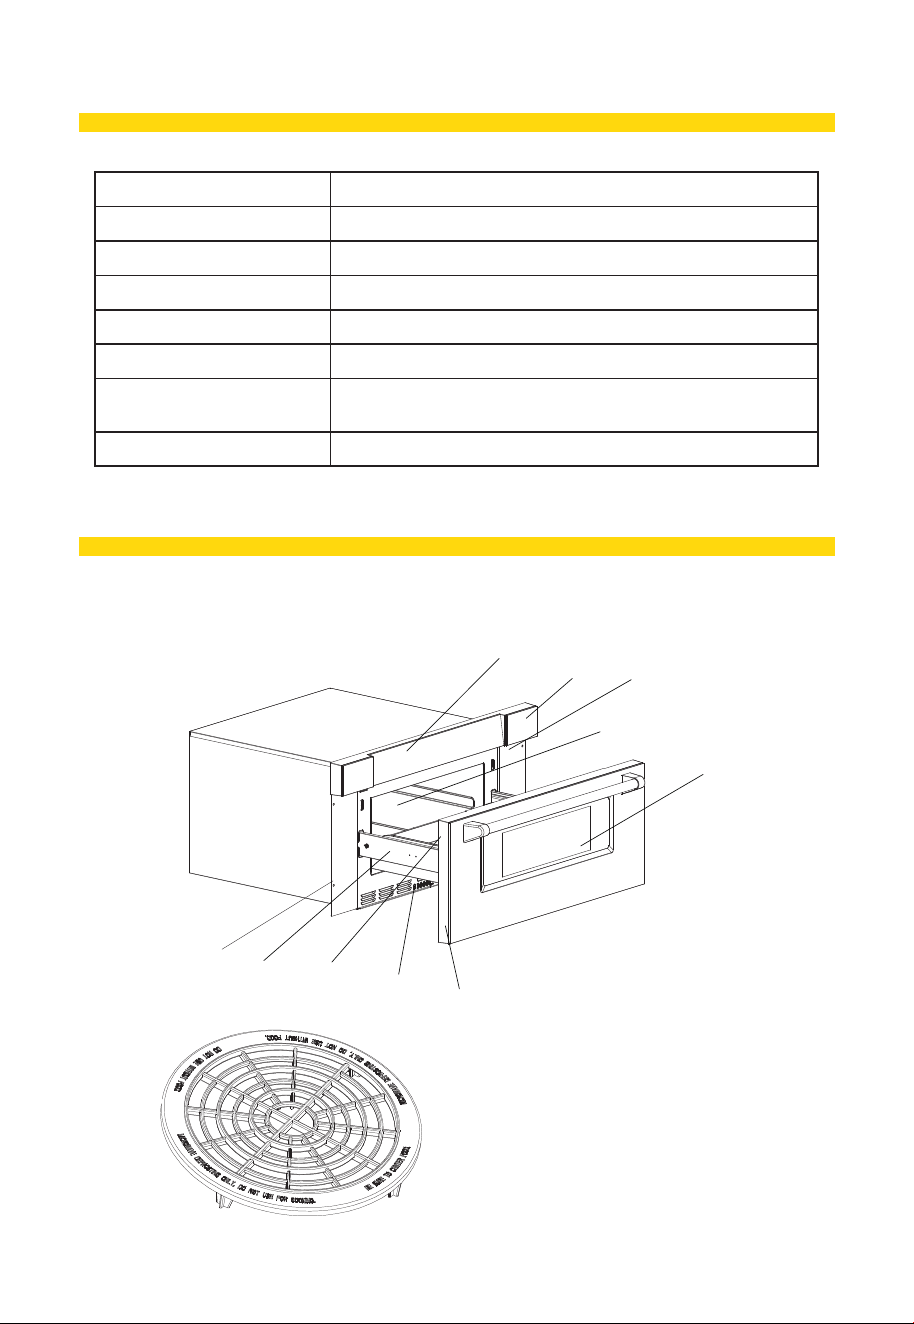
2 PRODUCT OVERVIEW
2.1 SETTING UP YOUR OVEN
Names of Oven Parts and Accessories
Remove the oven and all materials from the carton and oven cavity. Your oven comes with the following accessories:
A
B
C
D
E
F
G
H
I
J
Defrosting Rack( Only be used in defrosting function
and do not use for cooking. Do not use without food )
A) Control Patch
B) Control Box
C) Right Mounting Plate
D) Cavity
E)
F)
Windows
G)
Door Frame
H)
Automatic putter
I)
Drawer
J)
Hinge Joint Board
Left Mounting Plate
7
3.1 CLEARANCES AND DIMENSIONS
• Dimensions that are shown in Figure 1 must be used. Given dimensions provide minimum clearance. Locate
electrical outlet in the shaded area in the upper left-hand corner of the cutout.
See Figure 3
• Contact surface must be solid and level. Pay special attention to the floor on which the Microwave Drawer will sit.
The floor of the opening should be constructed of plywood strong enough to support the weight of the oven (about
100 pounds).
• Check location where the Microwave Drawer will be installed for proper electrical supply
• Your oven can be built into a cabinet or wall by itself or under a gas or electric wall oven.
• Be sure that t he clearance of the floor between the wall oven and the microwave drawer is a minimum of 2-inches.
•
3.2 MICROWAVE DRAWER MEASUREMENTS
Type and quantity of accessories is subject to actual demand.
30
Figure 1
3 PRODUCT INSTALLATION
8
3 PRODUCT INSTALLATION
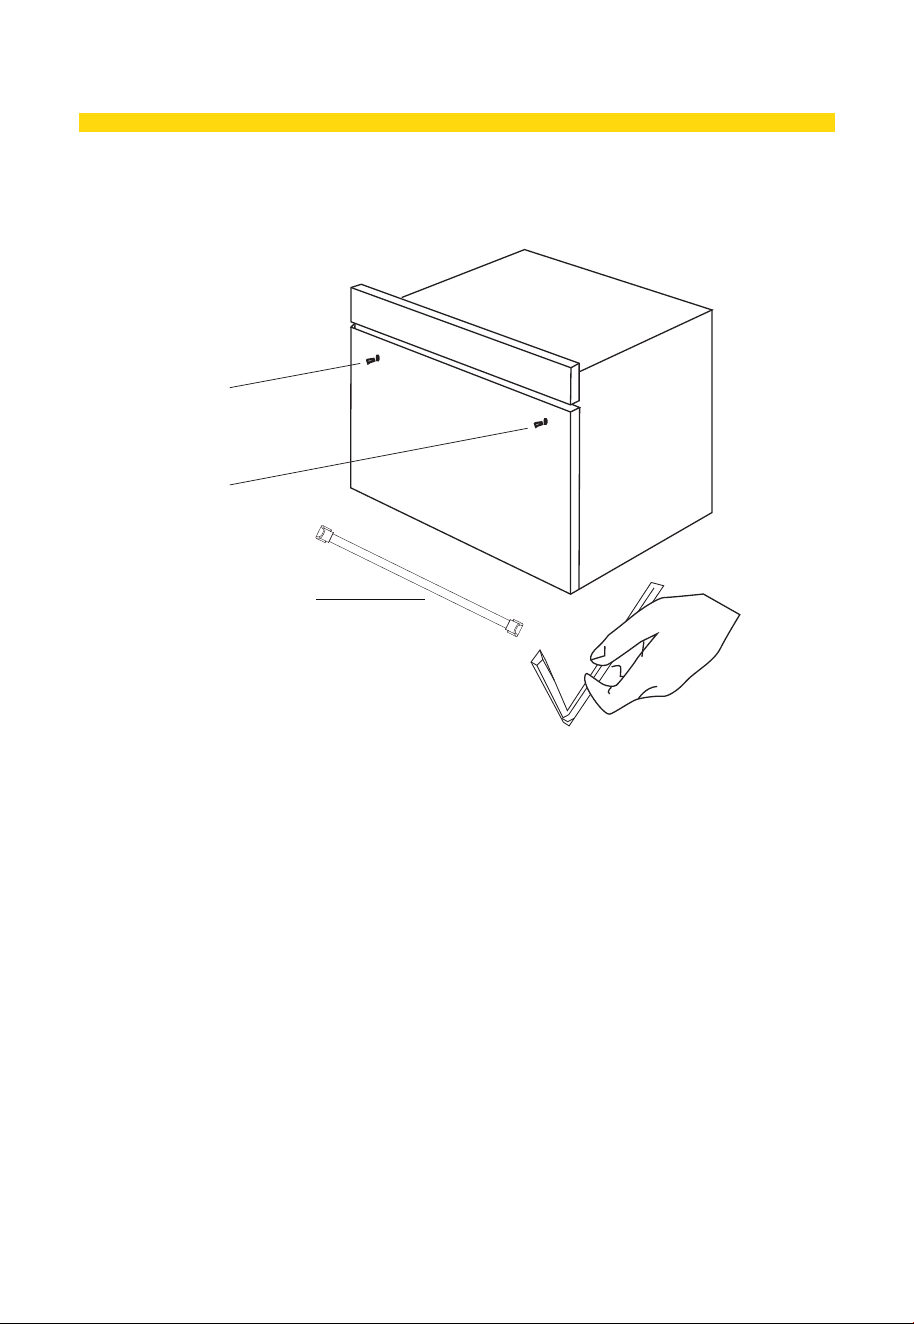
1. Carefully remove the door handle from the packaging. Orientate it according to the
provided diagram. Ensure that both screw holes on the handle are positioned close
to the edge. Align the handle over the designated set bolt.
2. Utilize the small hexagon spanner enclosed in the packaging to fasten the handle
securely. Use this tool to fasten the handle fixing socket head cap screws into both
small threaded holes on the handle. Once tightened, gently test the stability of the
handle by applying slight pressure.
3. In the event of a misalignment between the handle component and the microwave
oven door, adjust the small screw located on the handle tube. Tighten the screw to
align it with the distance between the two threads on the microwave oven door.
Scheme of installation
door handle
Bolt
Bolt
Microwave Door Handle Assembly Instructions
9
3 PRODUCT INSTALLATION
Figure 2
Figures 1 and 2 contain many Microwave Drawer measurements for reference when planning the drawer's location
.This Microwave Drawer can be installed below
any electric or gas wall oven. *Can also be installed using an electrical outlet in an adjacent cabinet within the area
where tire provided electrical cord can reach.
Power cord access hole in cabinet should be a minimum l
diameter hole and debarred of all sharp edges.
NOTE
Always allow sufficient power cord length to the electrical outlet to prevent tension Always check electrical codes for
requirements.
Anti Tip
block
(6 ' ' )
3
1
2
'
Figure 3
Figure 4
Suggested electrical
outlet location
5
''
4
'
'
10
3.3 NORMAL INSTALLATION STEPS ANTI-TIP BLOCK INSTALLATION
To reduce the risk of tipping of the drawer, the Anti-Tip block must be properly 13/16- installed located 14 inches
above the floor on which the Microwave Drawer will sit. The 6-inch Anti-Tip block must be provided by the installer.
See Figures 1 and 3. The Anti-Tip block prevents serious injury that might result from spilled hot liquids. If the
Microwave Drawer is ever moved to a different location, the Anti-Tip block must also be moved and installed , When
installed to the wall make sure that the screws completely penetrate the dry wall and are secured in wood or metal
so that the block is totally stable. When fastening, be sure that the screws do not penetrate electrical wiring or
plumbing. The electrical requirements are a 120 volt 60 Hz, AC only,l5 amp. or more protected electrical supply. It is
recommended that a separate circuit serving only this appliance be provided. The drawer is equipped with a 3-prong
grounding plug, It must be plugged into a wall receptacle that is properly installed and grounded. Should you only
have 2-prong outlet, have a qualified electrician install a correct wall receptacle.
Note: If you have any questions about the grounding or electrical Instructions, consult a qualified electrician or
service person.
*Can also be installed using an electrical outlet in an adjacent cabinet within the area where the provi
ded electrical
cord can reach.Always check electrical codes ,for requirements.
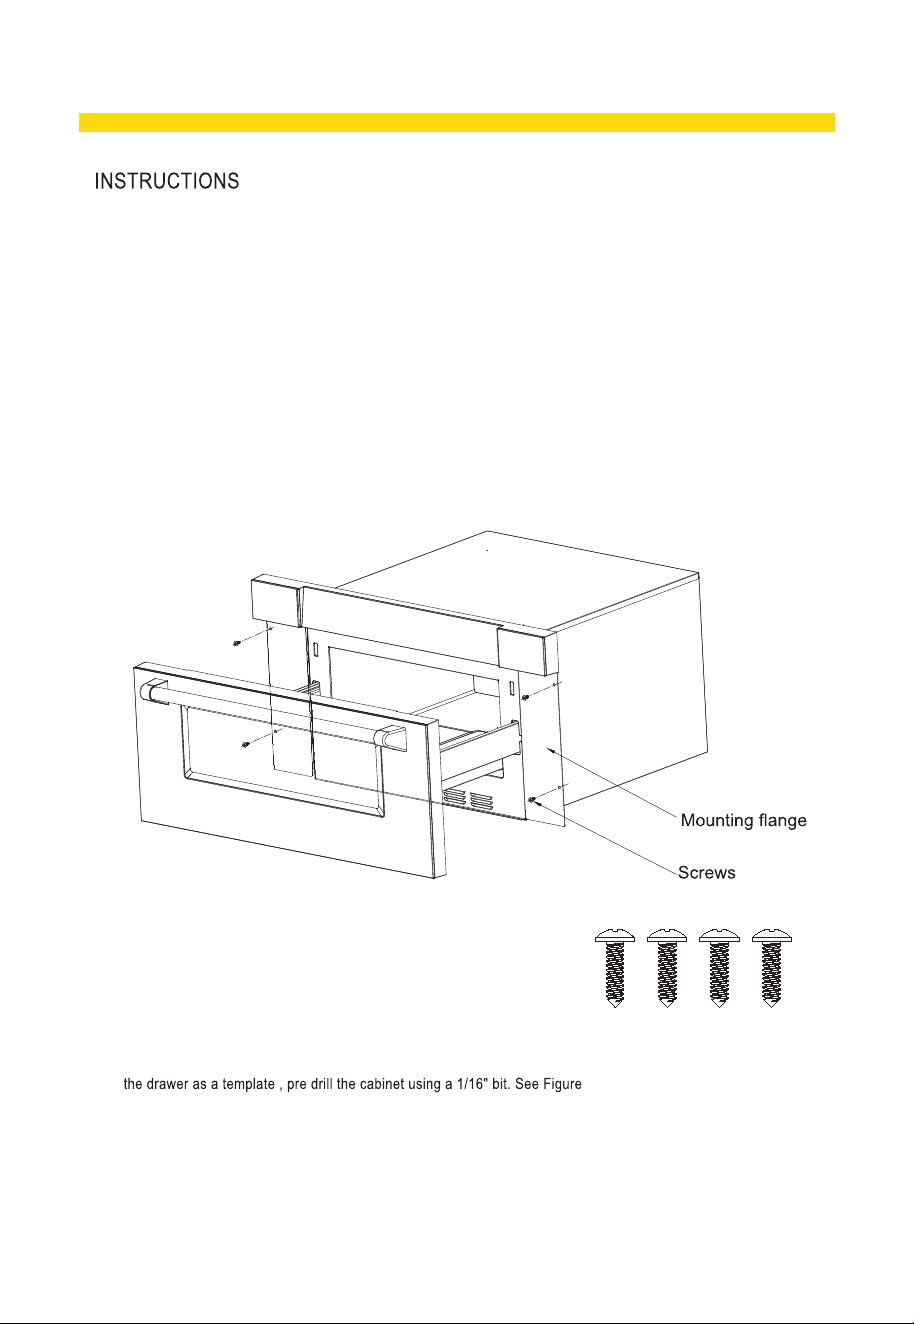
3.4 DRAWER INSTALLATION
Figure 5
1. Place the drawer adjacent to the wall or cabinet opening.Plug the power
supply cord into the electrical outlet.
2. Carefully guide the drawer into the prepared opening. Avoid pinching the
cord between the oven and the wall.
3. Slide the drawer all the way until the mounting
flange is flush with the face of the cabinet.
See Figure 5.
4. Open the drawer. Using the 4 holes on
5.
5. Secure the drawer with the 4 screws supplied. See Figure 6.
44 Sccreews
Figure 6
3 PRODUCT INSTALLATION
3.5 MODEL AND SERIAL NUMBER LOCATION
The name plate includes model and serial number. Open the Microwave Drawer fully. The label is beyond the back wall
of the microwave cavity facing up from the flat surface.
3.6 CARE,CLEANING AND MAINTENANCE
Refer to the Operation Manual for cleaning instructions.
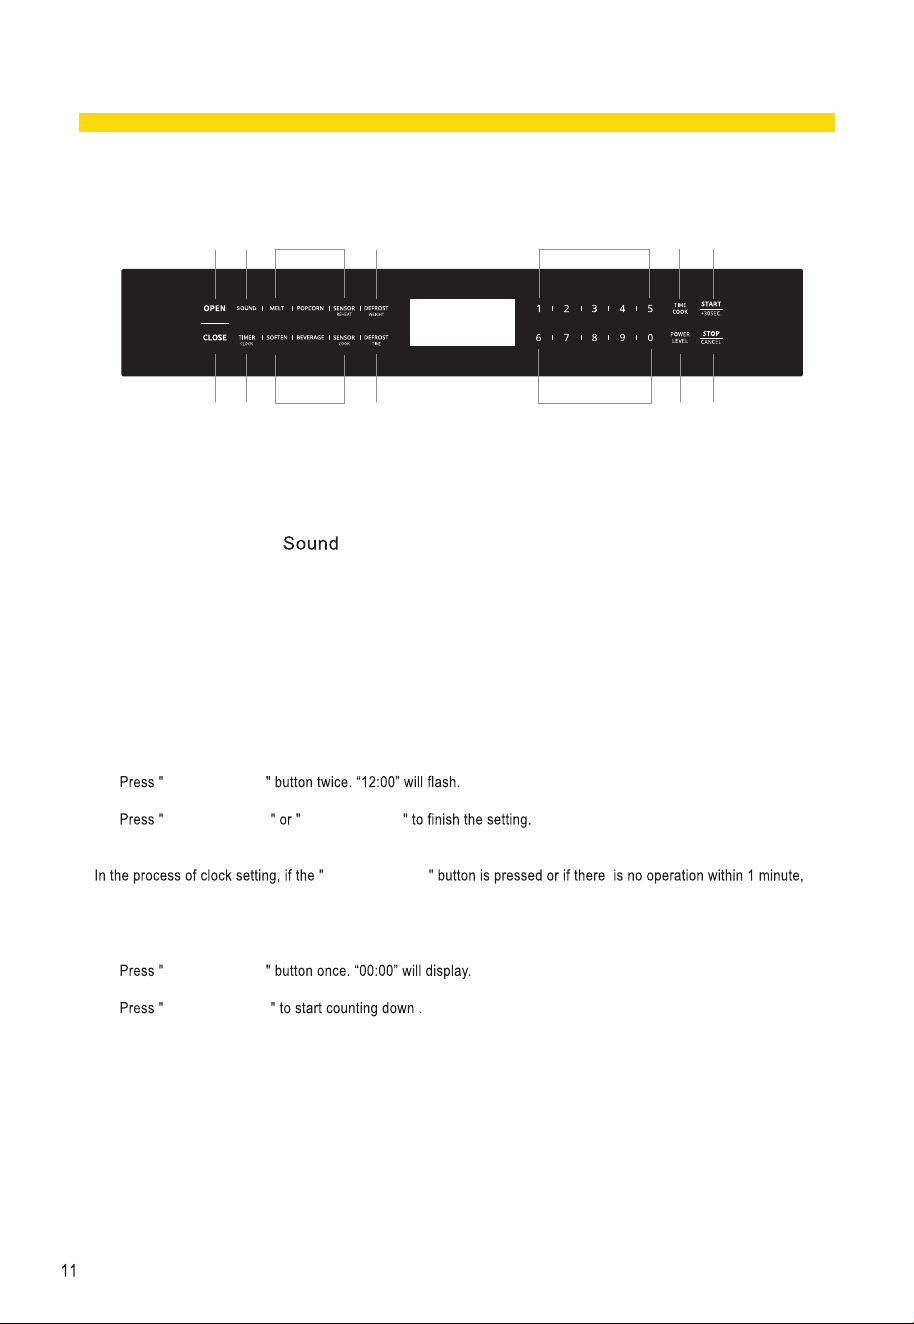
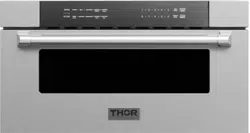
4.1 Control Panel and Features
(1) (2) (3) (4)
(3)(5) (7)
(9)
(11)
(10)
(12)(6)
(8)
(8)
7 )
Defrost Time
8 ) Number Keys
9 ) Time Cook
10 ) Start/+30sec.
11 ) Power Level
12 ) Stop/Cancel
1 ) Open
2 )
3 ) Auto Menu
4 ) Defrost Weight
5 ) Close
6 ) Timer/Clock
4.2 Clock Setting
1. TIMER/CLOCK
2. Press number keys to set the clock,it should be within 1:00~12:59.
3.
START+30SEC. TIMER/CLOCK
Note:
STOP/CANCEL
the oven will go back to former setting automatically.
4.3 Kitchen Timer
1. TIMER/CLOCK
2. Press number keys to set the clock,it should be within 00:01-99:99.
3.
START+30SEC.
4 OPERATION INSTRUCTIONS
4.4 Time Cook
10 power levels are available.
Level Power Display
10 100% L10
9 90% L09
8 80% L08
7 70% L07
6 60% L06
5 50% L05
4 40% L04
3 30% L03
2 20% L02
1 10% L01
1.
TIME COOK
2. Press number keys to set the cook time,it should be within 00:01-99:99.
3.
POWER LEVEL POWER LEVEL
number key to set the power level.
4.
START+30SEC.
4.5 Add 30Sec
1. In waiting state, instant cooking at 100% power level with 30 seconds' cooking time can be started by pressing
START/+30SEC.
2. START/+30SEC.
will increase 30 seconds.
4.6 Weight Defrost Function
1. DEFROST WEIGHT
2. Press numeber buttons to input the weight to be defrosted.
The input weight should be between 0.1-6.0 lbs.
3.
START/+30SEC.
Note:
The buzzer will sound twice to remind you of turning over the food during defrosting.
4.7 Time Defrost Function
1. DEFROST TIME
2. Press number buttons to enter the defrosting time between 00:01-99:99.
3.
START/+30SEC.
Note:
The defrosting power level is PL03.it cannot be changed.
The buzzer will sound twice to remind you of turning over the food during defrosting.
4 OPERATION INSTRUCTIONS
4.8 Popcorn
1. POPCORN
4.9 Sensor Reheat
1. Sensor Reheat
2. Sensor Reheat
3. START+30SEC.
PASTA Sr-1
PIZZA Sr-2
PLATE Sr-3
SOUP Sr-4
4.10 Sensor Cook
1. Sensor Cook
2. Sensor Cook
3. START+30SEC.
Potato Sc-1
Chicken Sc-2
Fish Sc-3
Ground Meat Sc-4
Fresh Veggies Sc-5
Frozen Veggies Sc-6
Canned Veggies Sc-7
4.11 Beverage
1. Beverage
2. Beverage
3. START+30SEC.
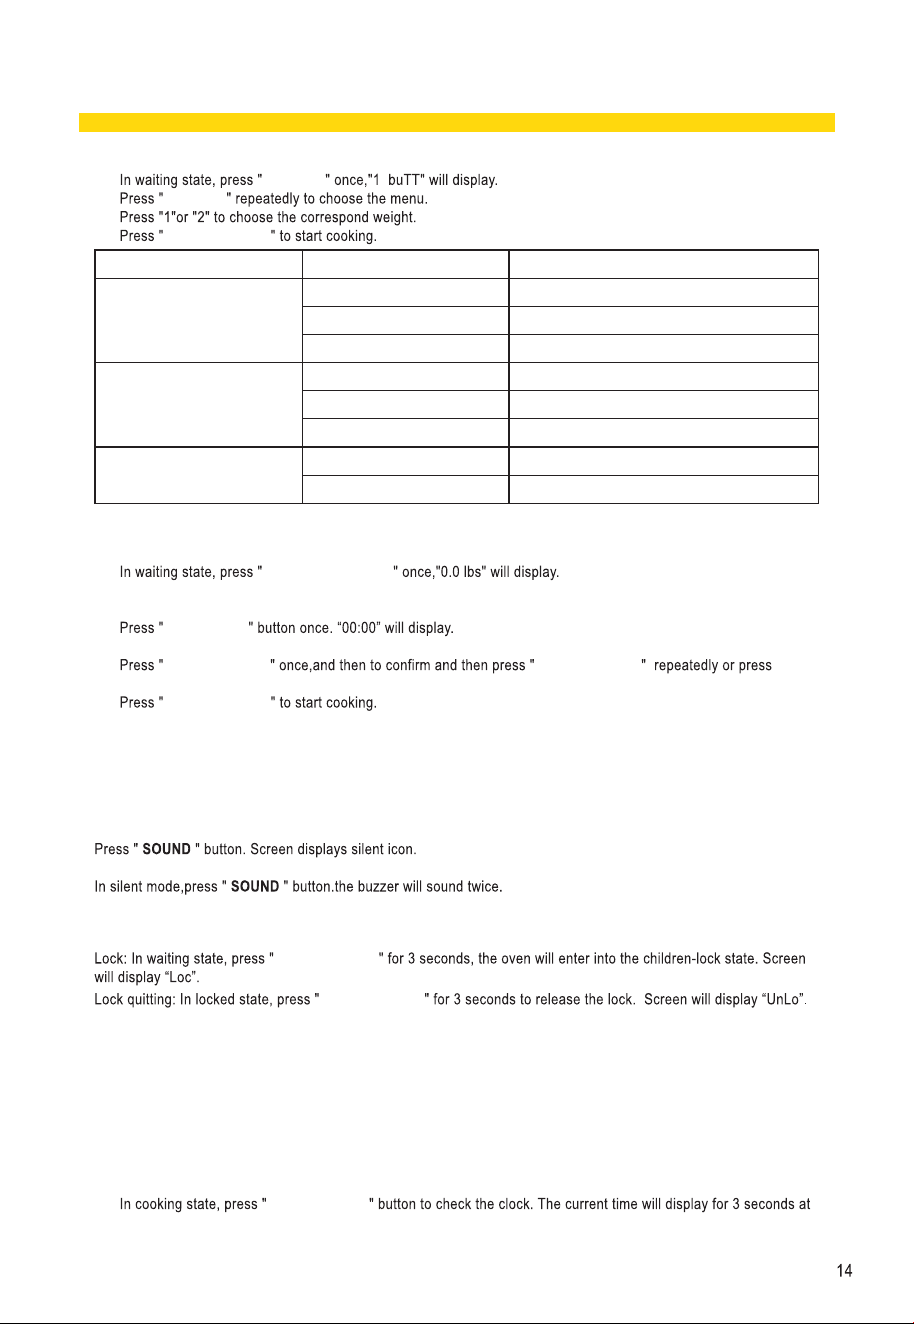
4.12 MELT
1. MELT
2. MELT
3.
4. START+30SEC.
Menu Display Weight
Butter/Margarine
1 buTT
2 buTT
3 buTT
1 (STICK)
2(STICK)
3(STICK)
Chocolate
4 oz Choc
8 oz Choc
4 oz
8oz
Cheese
8 oz CHEE
16 oz CHEE
8oz
16 oz
4 OPERATION INSTRUCTIONS
4.13 SOFTEN
1. SOFTEN
2. SOFTEN
3.
4. START+30SEC.
Menu Display Weight
Butter
1 buTT 1 (STICK)
2 buTT 2(STICHS)
3 buTT 3(STICHS)
Ice cream/ Frozen juice
8 oz ICE 8 oz
16 oz ICE 16 oz
32 oz ICE 32 oz
Cream Cheese
3 oz CHEE 3 oz
8 oz CHEE 8 oz
4.14 Multiple Cook
1. DEFROST WEIGHT
2. Press numeber buttons to input the weight to be defrosted.
The input weight should be between 0.1-6.0 lbs.
3.
TIME COOK
4. Press number keys to set the cook time,it should be within 00:01-99:99.
5.
POWER LEVEL POWER LEVEL
number key to set the power level.
6.
START+30SEC.
Note:
The defrost function only could be one stage of the multiple cook.
Two stage cook can be set at most.
4.15 Buzzer On/Off
To enter silent mode
To cancel silent mode
4.16 LOCK FUNCTION FOR CHILDREN
STOP/CANCEL
STOP/CANCEL
4.17 ECO MODE
To enter eco mode
when the oven door is closed,in waiting state, if there is not any operations in 1 minute.
To cancel eco mode
In eco mode, open the door or press any key to cancel it.
4.18 INQUIRING FUNCTION
1. TIMER/CLOCK
most.
4 OPERATION INSTRUCTIONS

5.1 Troubleshooting
Check your problem by using the chart below and try the solutions for each problem. If the microwave oven still does
not work properly, contact the nearest authorized service center.
TROUBLE POSSIBLE CAUSE POSSIBLE REMEDY
Oven will not start
• Electrical cord for oven is not
plugged in.
• Door is open.
• Wrong operation is set.
• Plug into the outlet.
• Close the door and try again.
• Check instructions.
Arcing or sparking
• Materials to be avoided in microwave
oven were used.
• The oven is operated when empty.
• Spilled food remains in the cavity.
• Use microwave-safe cookware only.
• Do not operate with oven empty.
• Clean cavity with wet towel.
Unevenly cooked
foods
• Materials to be avoided in microwave
oven were used.
• Food is not defrosted completely.
• Cooking time, power level is not
suitable.
• Food is not turned or stirred.
• Use microwave-safe cookware only.
• Completely defrost food.
• Use correct cooking time, power level.
• Turn or stir food.
Overcooked foods
• Cooking time,
power level is not
suitable.
• Use correct cooking time, power level.
Undercooked foods
• Materials to be avoided in microwave
oven were used.
• Food is not defrosted completely.
• Oven ventilation ports are restricted.
• Cooking time, power level is not
suitable.
• Use microwave-safe cookware only.
• Completely defrost food.
• Check to see that oven venti- lation ports
are not restricted.
• Use correct cooking time, power level.
Improper defrosting
• Materials to be avoided in microwave
oven were used.
• Cooking time, power level is not
suitable.
• Food is not turned or stirred.
• Use microwave-safe cookware only.
• Use correct cooking time, power level.
• Turn or stir food.
5 TROUBLESHOOTING
15

Warranty&Service
For Customer Service, please call (877) 288 - 8099
For the most up to date warranty and service policy, please refer to our website
WWW.THORKITCHEN.COM/WARRANTY-REGISTRATION
For in-warranty service requests, please visit our website at
WWW.THORKITCHEN.COM/SERVICE
Please Note: You must provide proof of purchase or installation date for any in-
warranty service requests
This product has been manufactured by Thor , 4651 E Airport Dr, Ontario, CA 91761

WARRANTY REGISTRATION
Scan theQR code or visit
thorkitchen.com/warranty
Input your product info
and select register
You’re done.
Let’s get cookin’.
You chose THOR Kitchen to enhance your culinary journey and
we’re stoked to have you in the club. Think of it as a secret
society of really savvy people, such as yourself, choosing
professional power and performance at an affordable price.
Register your product by following the steps below.
WELCOME
TO THE CLUB
For additional information and product support, visit thorkitchen.com/service