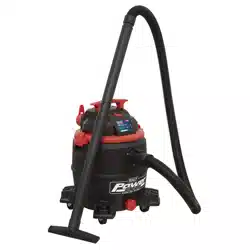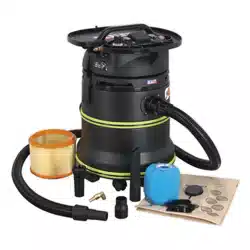
35L DUST-FREE WET & DRY INDUSTRIAL
VACUUM CLEANER PLASTIC DRUM CLASS M
FILTRATION SELF-CLEAN
MODEL NO: DFS35M
Thank you for purchasing a Sealey product. Manufactured to a high standard, this product will, if used according to these
instructions, and properly maintained, give you years of trouble free performance.
IMPORTANT: PLEASE READ THESE INSTRUCTIONS CAREFULLY. NOTE THE SAFE OPERATIONAL REQUIREMENTS, WARNINGS & CAUTIONS. USE
THE PRODUCT CORRECTLY AND WITH CARE FOR THE PURPOSE FOR WHICH IT IS INTENDED. FAILURE TO DO SO MAY CAUSE DAMAGE AND/OR
PERSONAL INJURY AND WILL INVALIDATE THE WARRANTY. KEEP THESE INSTRUCTIONS SAFE FOR FUTURE USE.
1. SAFETY
1.1. ELECTRICAL SAFETY
WARNING! It is the responsibility of the owner and the operator to read, understand and comply with the following:
You must check all electrical products, before use, to ensure that they are safe. You must inspect power cables, plugs, sockets
and any other connectors for wear or damage. You must ensure that the risk of electric shock is minimised by the installation of
appropriate safety devices. A Residual Current Circuit Breaker (RCCB) should be incorporated in the main distribution board. You
must also read and understand the following instructions concerning electrical safety.
9 Ensure that cables are always protected against short circuit and overload.
9 Regularly inspect power supply cables and plugs for wear or damage and check all connections
to ensure that none are loose.
9 Ensure that the voltage marked on the appliance matches the power supply to be
usedandthattheplugisttedwiththecorrectfuse-seefuseratingatright.
8 DO NOT use worn or damaged cables, plugs or connectors. Have any faulty item repaired or
replaced immediately by a competent electrician.
9 It is recommended that this heater is wired directly to a fused isolator switch. If, however, a plug
istted,thefollowingapplies:
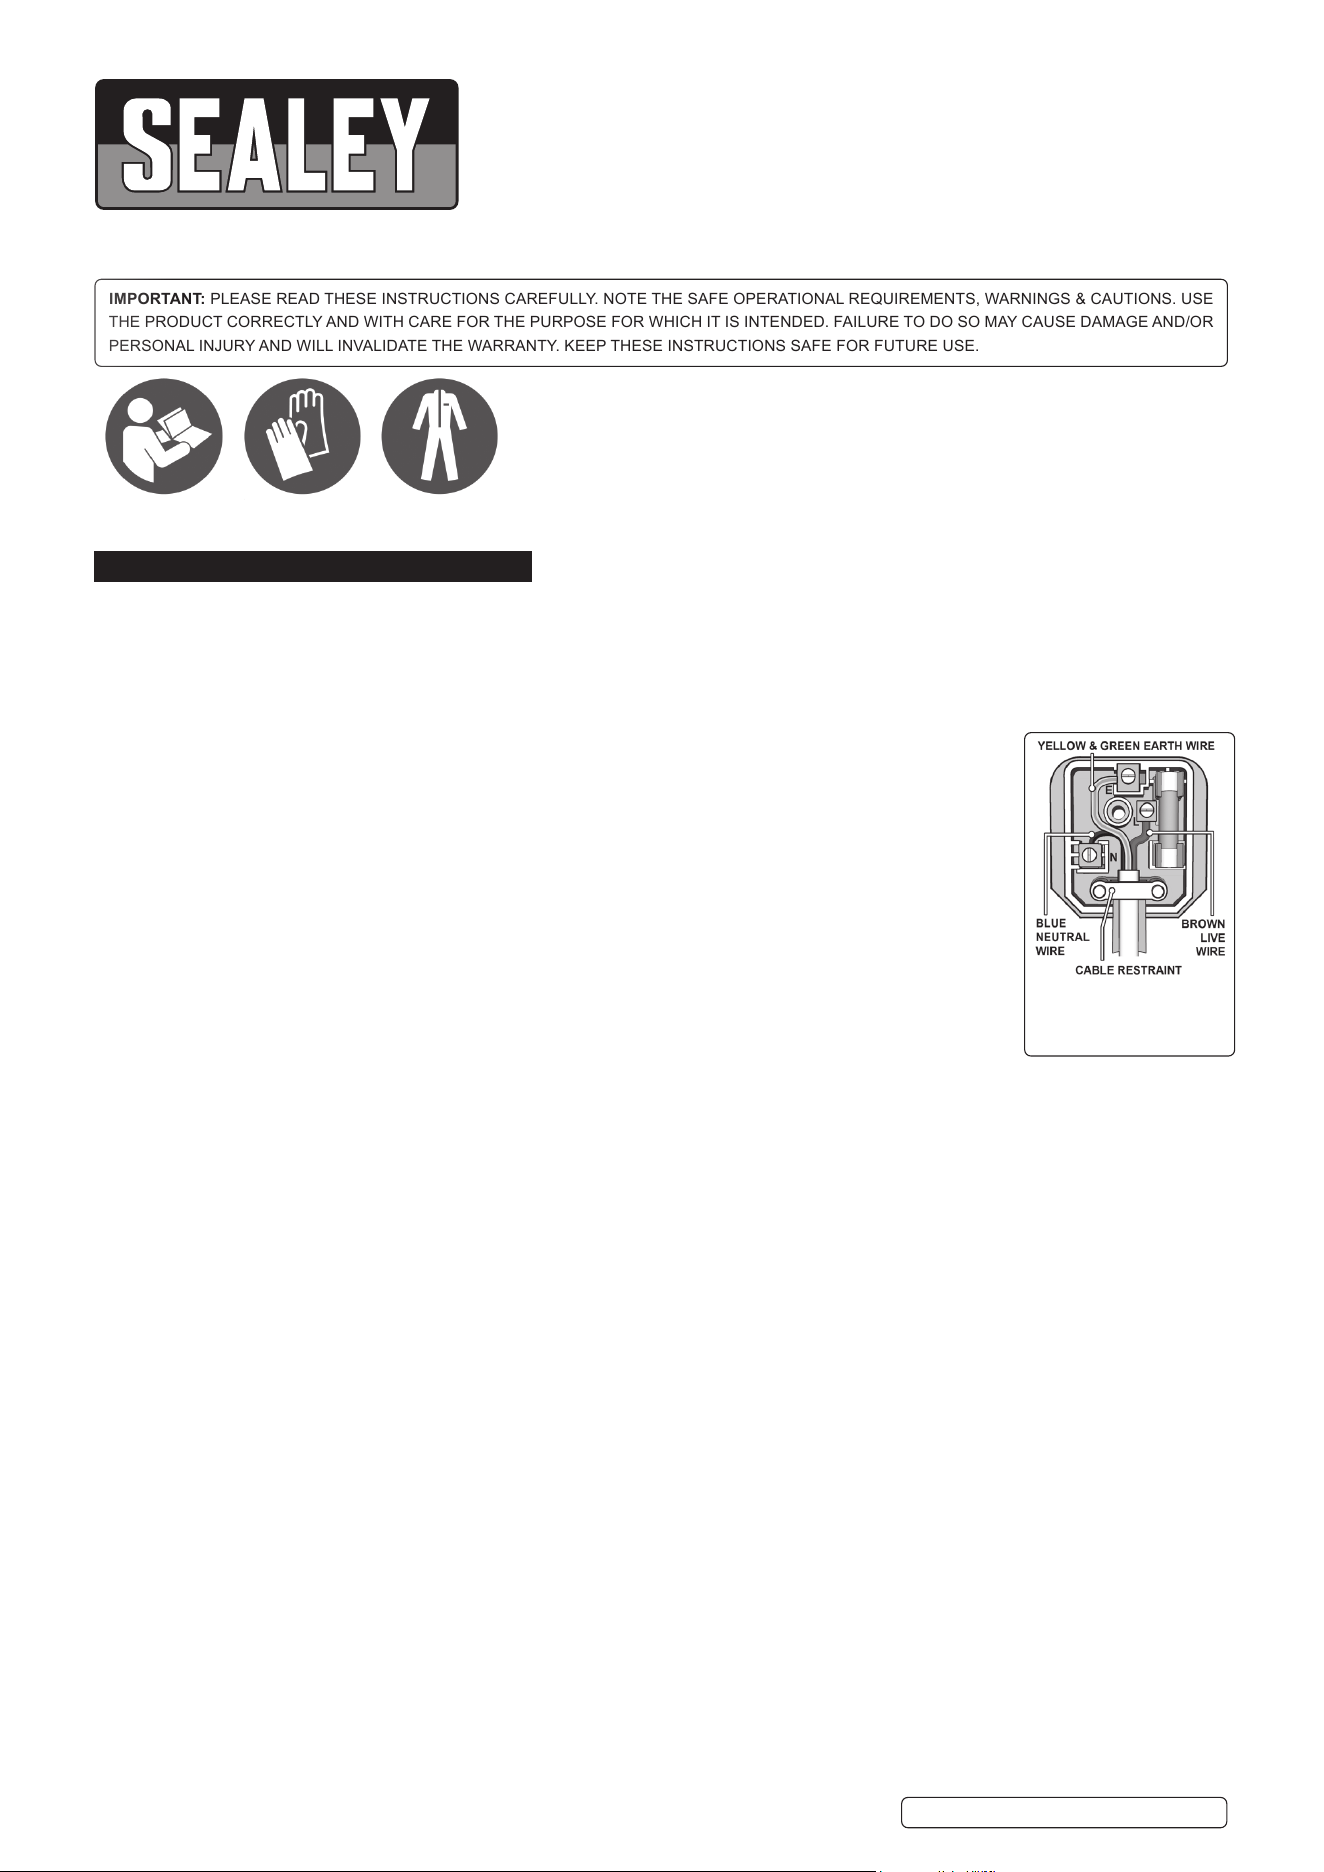
9 Fit a new plug according to the following instructions (UK only).
a) Connect the GREEN/YELLOW earth wire to the earth terminal ‘E’.
b) Connect the BROWN live wire to the live terminal ‘L’.
c) Connect the BLUE neutral wire to the neutral terminal ‘N’.
d) After wiring, check that there are no bare wires, that all wires have been correctly connected,
that the cable restraint is tight.
1.2. GENERAL SAFETY
9 Disconnect the cleaner from the power supply before servicing, changing accessories, or performing any maintenance.
9 Use only genuine parts and accessories. Unauthorised parts and accessories may be dangerous and will invalidate your warranty.
9 Maintain the cleaner in good condition. Use an authorised agent for servicing. Keep machine clean, but DO NOT use solvents.
9 Fordryvacuumingensurethecartridgelterisrmlyinplacebeforeoperatingthecleaner.
8 DO NOToperatetheunitwithoutthecartridgelterinplace(exceptwhenwetvacuuming).Usingthecleanerwithoutacartridgelter
may cause damage to the vacuum cleaner and will invalidate your warranty.
9 Wear protective clothing and gloves.
8 DO NOT allow children or untrained persons to operate the cleaner.
8 DO NOT place attachments close to your face (especially eyes, ears, etc). DO NOT point the hose end at other persons or animals.
▲ DANGER! DO NOTvacuumhotorglowingash,cigaretteends,inammable,explosive,corrosiveorotherdangeroussubstances.
8 DO NOToperatetheunitwithoutthedustbagoroptionalcartridgelter(exceptwhenwetvacuuming).
8 DO NOTusewhentheltersystemisdamaged.
8 DO NOT leave machine running unattended. Turn power supply OFF, and DO NOT leave the vicinity until motor has come to a
complete stop.
8 DO NOToperatethecleanerwhileundertheinuenceofdrugs,alcoholorimpairingmedication,orifyouaretired.
8 DO NOT use the cleaner in the rain or in very damp conditions.
8 DO NOT use the cleaner for a task it is not designed to perform.
9 When not in use, store the cleaner indoors, in a safe, dry, childproof location.
WARNING! The warnings, cautions and instructions in this manual cannot cover all possible conditions and situations that may
occur. It must be understood by the operator that common sense and caution are factors which cannot be built into this product, but
must be applied by the operator.
NOTE: This appliance can be used by children aged from 8 years and above and persons with reduced physical, sensory or mental
capabilitiesorlackofexperienceandknowledgeiftheyhavebeengivensupervisionorinstructionconcerninguseoftheappliance
in a safe way and understand the hazards involved. Children shall not play with the appliance. Cleaning and user maintenance shall
not be made by children without supervision.
Recommended fuse rating
13 Amp
DFS35M Issue 4 14/07/2020
Original Language Version
© Jack Sealey Limited
Refer to
instructions
Wear protective
gloves
Wear protective
clothing
2. INTRODUCTION
Highpoweredunitsdesignedforusewithpowertools.ModelNo.DFS35Misalsosuitableforusewithairpowertools.CertiedforClassM
dustextractioninaccordancewithEUdirectives,whichprotectstheoperatorfromdustparticleshazardoustohealth.SuppliedwithØ36mm
exiblehose,multi-diametertooladaptor,crevicetool,powertoolcordclamps,ClassMbaglter,ClassMcartridgelterandfoamlter,
ModelNo’sPC35110V&PC35230Varealsosuppliedwithinsertsforliquidcollectionandhardoors.Canbesettocontinuoussuctionor
in synchronisation with a power tool via an electronically controlled outlet or pneumatic tool via the air outlet (DFS35M only). Fitted with a
self-cleaningltertechnologydesignedtopreventlterblockageswhilstinuse.Fittedwithfourcastorsformanoeuvrability.Awet&dryoor
cleaning kit is available for DFS35M, order Model No. DFS35MKIT.
3. SPECIFICATION
MODEL NO: ............................................................DFS35M
Airow: .....................................................................180m³/hr
Drum Size: ....................................................................... 35L
Drum Type: ................................................................. Plastic
MaximumVacuumPressure: ................................... 220mbar
Motor Power:...............................................................1000W
Optional Accessories: ....... DFS35MKIT-AccessoryFloorKit
Power Tool Capacity: ..................................................2000W
Supply: ........................................................................... 230V
Vacuum Accessories Diameter: ............................ Ø10-35mm
Consumable Parts:
DFS35CF ..........................................Cartridge Filter Class M
DFS35FF ............................................................. Foam Filter
DFS35PB ................................ Dust Bag Class M (Pack of 5)
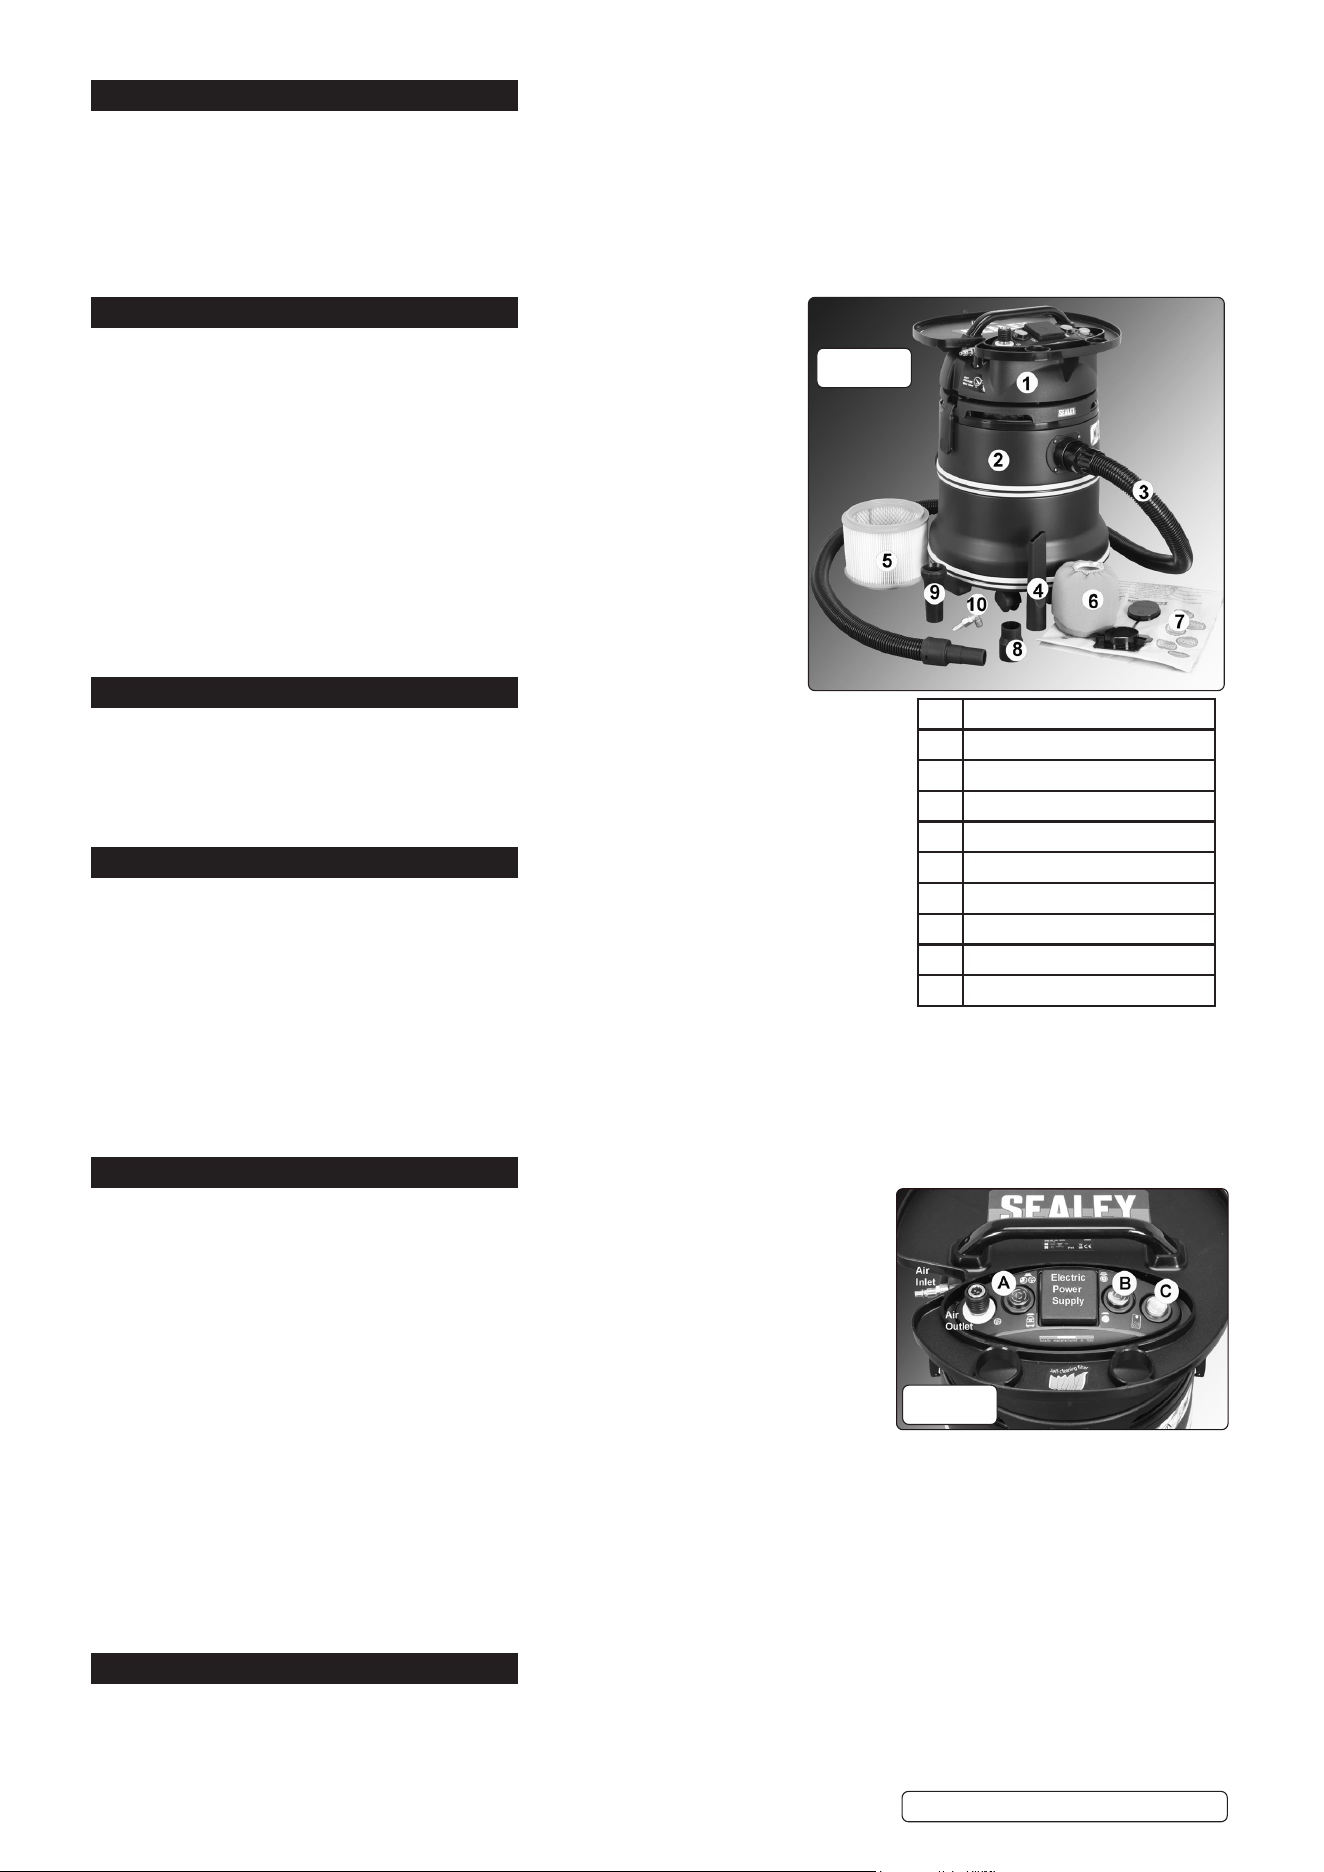
4. CONTENTS
4.1. Unpack the carton carefully.
4.2. Locate the two side clasps which hold the motor housing in place.
4.3. Undo the clasps, remove the motor housing and take out the loose items from the drum.
4.4. Check and identify each component as listed below. If anything is missing or damaged
please contact your Sealey stockist immediately.
5. ASSEMBLY
5.1. Ensure the electrical supply is disconnected.
5.2. Undo the clasps.
5.3. Liftothemotorhousingassembly(g.1).
5.4. Fordryvacuumcleaningusethelockingcartridgeltersupplied.
5.5. For dry vacuum cleaning and containment use the vacuum bag supplied.
5.6. Forwetvacuumcleaningtthesuppliedfoamlter.
NOTE: DO NOToperatethecleanerwithoutalterttedasthiswilldamagethevacuumcleaner
and invalidate your warranty.
5.7. Replace the motor housing onto the container.
5.8. Align the motor housing with the clasps and snap closed by hooking the top of the clasp into the location in the motor housing and
pressing the handles down over centre.
6. CONTROLS
6.1. FUNCTION SYMBOLS
6.1.1. For use as Wet & Dry Cleaner:
6.1.1.1. DepressSelectorSwitch(g.2.A)andPowerSwitch(g.2.B).
6.2. FOR USE WITH AN ELECTRIC POWER TOOL.
6.2.1. LeaveSelectorSwitch(g.2.A)inraisedpositionanddepressthePowerSwitch(g.2.B).
6.2.2. Inthisposition,anysingleelectrictoolcanbeconnected(uptoamaximumof2000W).
Poweringthetoolwillswitchthevacuumcleaneron.Whenthetoolisswitchedo,the
vacuumcleanerwillrunforafurther8/10seconds.Afterthistheltercleaningprocess
will operate.
6.3. FOR USE WITH AN AIR TOOL.
6.3.1. LeaveSelectorSwitch(g.2.A)inraisedpositionanddepressthePowerSwitch(g.2.B).
6.3.2. Connecttheairsupplytotheairinletconnector(g.2)andthetooltotheairoutletconnector(g.2).Aquicktconnectoris
included.Whenairowtothetoolisdetected,thecleanerwilloperate.Whenthetoolisswitchedo,thevacuumcleanerwillrunfor
afurther8/10seconds.Afterthistheltercleaningprocesswilloperate.
NOTE: Continuousoperationoftheselfcleaningsystemformorethan60secondsmaycausethethermalprotectiontotrip,resettingafter
20minutes.(Forfullerltercleaningseesection9.)
6.3.3. Thewarninglamp(g.2.C)willilluminatewhenahighvacuumsituationisdetected.Thiscouldbecausedbyablockedhoseor
nozzle,blockedlterorafullbag.
6.4. Iftheexhaustairspeeddropsbelow20m/secthewarninglamp(g.2.C)illuminates(inaccordancewithIEC/EN60335-2-69).
7. DRY VACUUMING
WARNING! Ensure you read, understand and apply Section 1 ‘Safety Instructions’. Reminder: DO NOT vacuum hazardous
substances,hotashesorembers.Useofanincorrectcartridgelterwillinvalidateyourwarranty.
7.1. Category M Cartridge Filter. To pickup dust of Class M the dust bag MUST be installed in the appliance. To vacuum Class ‘M’ dust
ALWAYSusethelterelementFig.3.
g.1
1 Motor Housing
2 Vacuum Drum
3 Hose
4 Crevicetool36mm
5 Cartridge Filter Class M
6 Foam Filter
7 Dust Bag Class M
8 Adaptor
9 Multi adaptor
10 Air inlet
g.2
DFS35M Issue 4 14/07/2020
Original Language Version
© Jack Sealey Limited
7.1.1. Ensure the machine is unplugged from the power supply.
7.1.2. Removethemotorhousingandwiththeraisedrimuppermostttheltercartridgetubedownoverthelterbasketandpushfully
home.Placethelockingdiscontothetopofthelterandturnthelockingbaruntilthelatchdropsintotheslotinthetopofthelter
cage.Continueturningclockwiseuntilthelterisfullylockeddown.
7.1.3. Reposition the motor housing onto the drum body, and clip in place.
7.1.4. Insertthelargerendoftheexiblehoseintothefrontinletonthecontainerandlockinplace.Pushtherequiredattachment,when
applicable, onto the free end of the hose.
7.1.5. Plug into the power supply.
7.1.6. With the selector switch “A” in position ,switch“B”tothe‘On’(position‘I’).See6.2forintroductionofapowertool.
7.1.7. Whenyouhavecompletedvacuuming,presstheswitch“B”to‘O’(position ‘O’).
WARNING! Ensure you read, understand and apply Section 1 ‘Safety Instructions’. Reminder: DO NOT vacuum hazardous
substances, hot ashes or embers.
7.2. CATEGORY M CONTAINMENT BAG FILTER. Never reuse the bag always replace it.
7.2.1. Ensure the machine is unplugged from the power supply.
7.2.2. Removethemotorhousing.InserttheCategoryMbagintothedrumandttheplasticsocket“x”overthedruminternal“y”spigot
(g.4).
7.2.3. Reposition the motor housing onto the drum body, and clip in place.
7.2.4. Insertthelargerendoftheexiblehoseintothefrontinletonthecontainerdrum.Pushtherequiredattachment,whenapplicable,
onto the free end of the hose.
7.2.5. Plug into the power supply.
7.2.6. With the selector switch “A” in position ,switch“B”tothe‘On’(position‘I’).See6.2forintroductionofapowertool.
7.2.7. Whenyouhavecompletedvacuuming,presstheswitch“B”to‘O’(position‘O’).
7.2.8. Whenthebagis3/4fullorvacuumingeciencydrops,removethebagandsealtheopeningwiththeattachedplug.Disposeofthe
bag in accordance with local regulations. DO NOTre-use.
7.2.9. Avoid using the bag for sharp or damp materials.
8. WET VACUUMING
TheCategoryMlterisNOTforliquids.Vacuumingliquidsisonlyallowedwherethereisnochancethatdustwillbesuckedup.
WARNING! Ensure you read, understand and apply Section 1 ‘Safety Instructions’. Reminder: Remove the plug from power supply
before opening unit. DO NOTvacuumsolvents,explosives,inammableand/orhazardousliquidssuchaspetrol,oil,spirits,paint,
thinners, acids etc.
8.1. Ensure the machine is unplugged from the power supply. Make sure the drum is clean and free from dust and dirt.
8.2. Removethecartridgelterandtafoamlter(NOTsuitableforClassMdust)overthelterbasket.Replacethemotorhousingonto
thecontainerg.5.
8.3. Fitthecrevicenozzletotheexiblehose.
8.4. Ensuretheswitch“B”is‘O’(position ‘O’) before plugging into the power supply.
8.5. With the selector switch “A” in position ,switch“B”tothe‘On’(position‘I’).See6.2forintroductionofapowertool.
NOTE: To vacuum large quantities of liquid, from a sink or tank etc, DO NOTimmersethenozzlecompletelyintheliquid,leaveagap(g.6)
atthetopofthenozzleopeningtoallowanairinow.Themachineisttedwithaoatvalvewhichstopsthesuctionactionwhenthe
tankhasreacheditsmaximumcapacity.Theuserwillnoticeanincreaseinmotorspeed.Whenthishappens,turnothemachine,
disconnect from power supply, remove the head from the container and empty the liquid into a suitable receptacle or drain. To continue
vacuuming,rettheheadandproceed.
Afterwetvacuuming,turnthemachineoandunplugfromthepowersupply.Emptythecontainer,cleananddrytheinsideand
outside before storage.
Remember!Afterwetvacuumingthefoamltermustberemovedandacartridgeltermustbettedbeforedryvacuumingagain.
WARNING! Not designed for liquid storage. Always empty liquids after use before storing.
g.3 g.4
g.5 g.6
DFS35M Issue 4 14/07/2020
Original Language Version
© Jack Sealey Limited
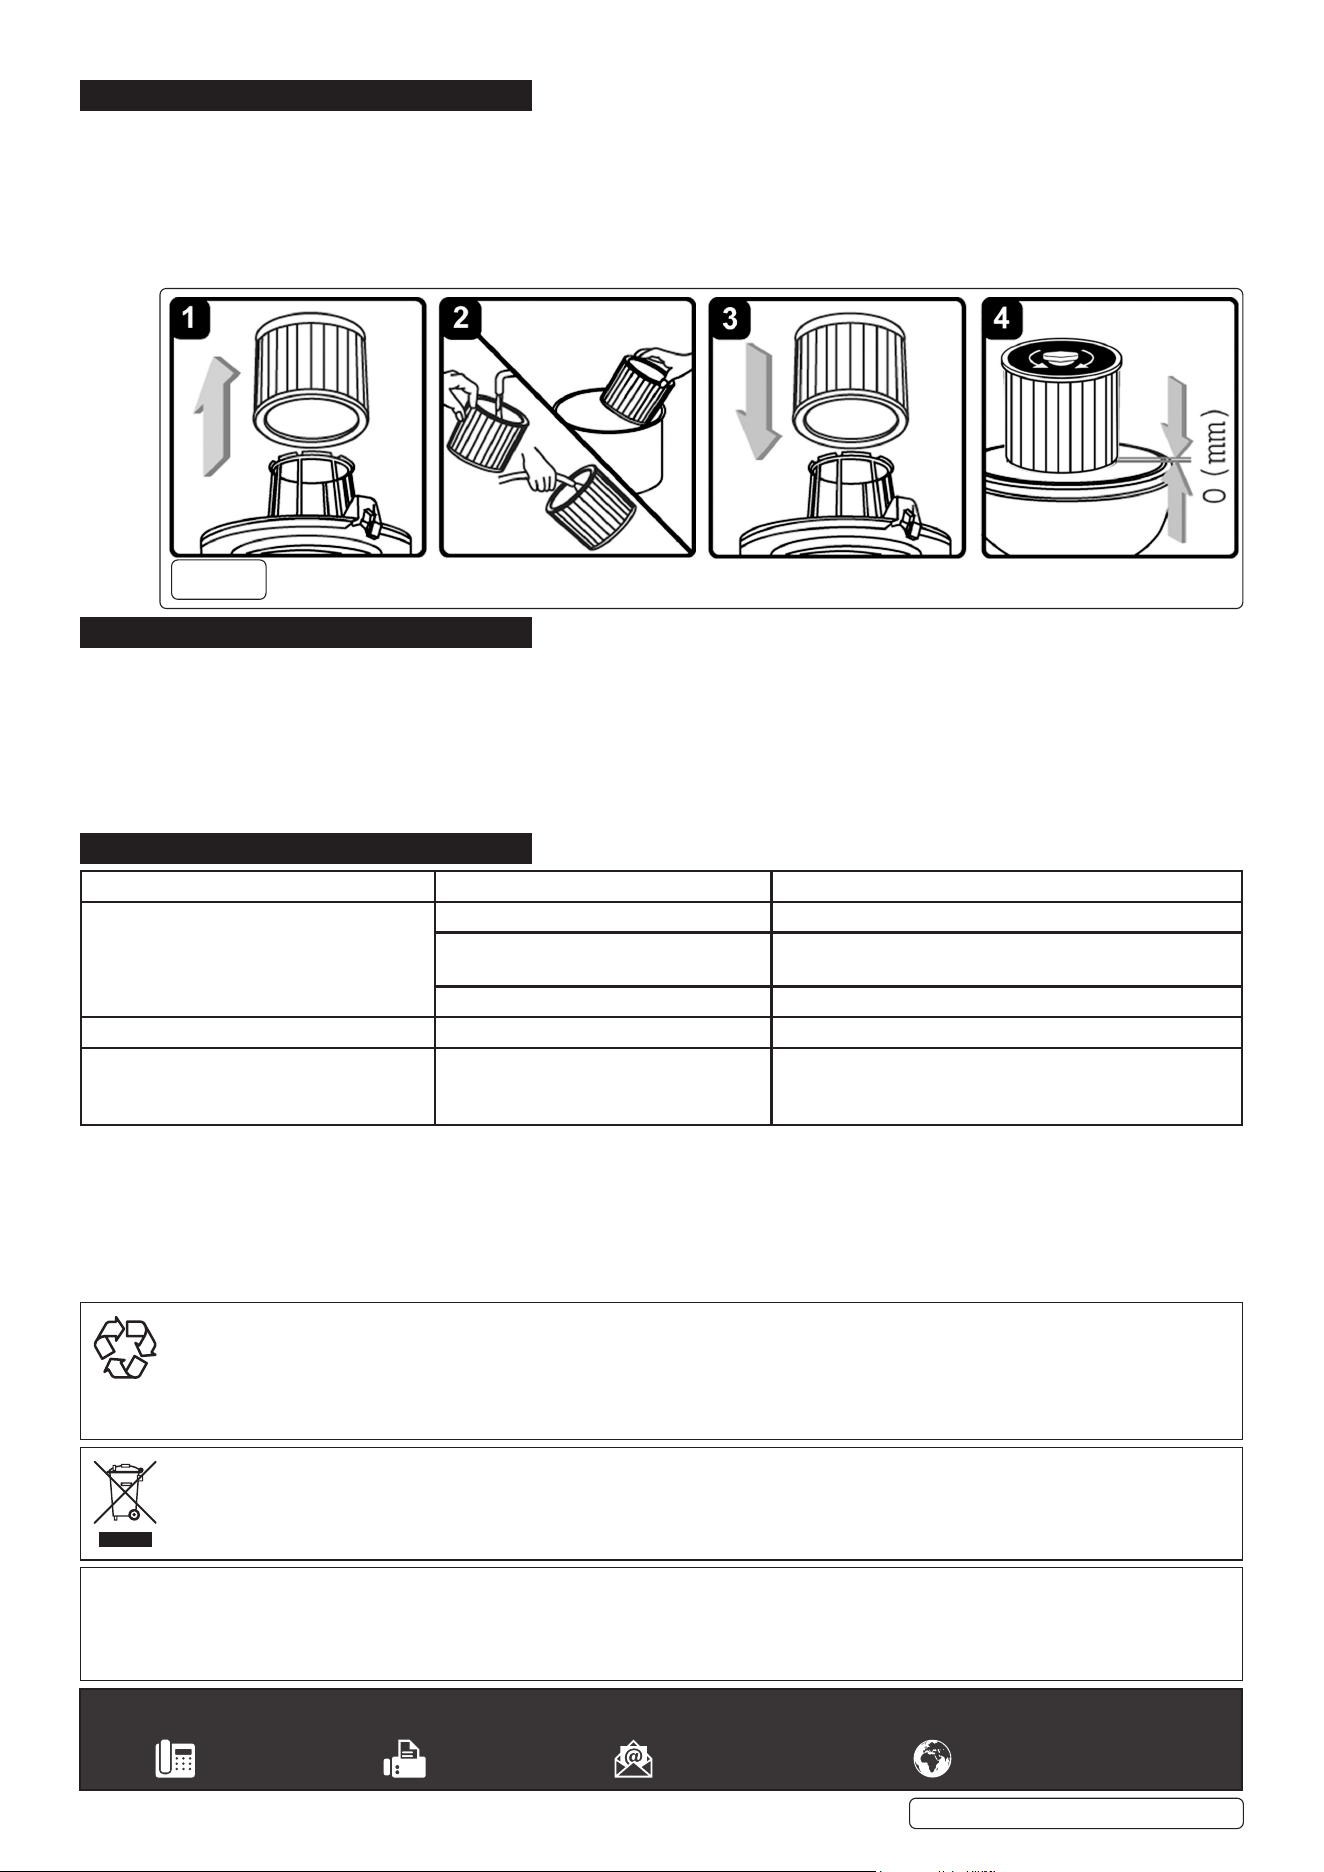
9. FILTER CLEANING FIG.7
9.1. Handletheltercarefullywhencleaningorinstalling.Unlockandcarefullyremovethecartridgelterandinspectitfordamage.Alter
thathassmallholesortearsinitwillnotperformecientlyandshouldbereplaced.
9.2. Tocleanadrylter,tapitinsideawastebin.(Thecartridgelterisdesignedfordryvacuumingonly).Shouldthelterbeinadvertently
wetted it should be rinsed from the inside and allowed to air dry for 24 hours.
8 DO NOTusethelterwetasthelterwillclogquicklyandbeverydiculttoclean.
9.3. Fitanew/cleanedlteroverthelterbasket
9.4. Lock in place as described in 7.1.2. (0mm clearance).
10. MAINTENANCE
10.1. Ensure the machine is unplugged from the power supply.
10.2. Disconnect the hose from the drum container.
10.3. Undo the clasps and remove motor housing from the drum container.
10.4. Clearoutanydirtordebrisfromthedrumcontainerandhoses.Frequentlycleantheseatwherethesafetyoatslidesandperiodically
inspect it to check its integrity.
10.5. Cleanthefoamlterbywashingitinamildsoapysolution.
10.6. Check the power cable to make sure that it is not damaged.
11. TROUBLESHOOTING
g.7
Symptom Possible causes Solutions
Vacuum will not operate No power supply Checkpowersupply-cable,breakers,fuses
Faulty power cable Unplug and check the power cable. If damaged have it
replaced by your local Sealey stockist.
Container full Empty container
Dustexpelledfromthemotorcover Cartridgeltermissingordamaged Fitcartridgelterorreplacedamagedlter
Reducedeciencyandincreasedmotor/
speed vibration/orange light (C)
There is a blockage in the nozzle/hose/
druminlet/lter.
See 7.1.4. Check nozzle, hose and container inlets and
clearanyblockagesfound.Removelterandcleanitor
installnewlter.
Sealey Group, Kempson Way, Suffolk Business Park, Bury St Edmunds, Suffolk. IP32 7AR
01284 757500 01284 703534 sales@sealey.co.uk www.sealey.co.uk
ENVIRONMENT PROTECTION
Recycle unwanted materials instead of disposing of them as waste. All tools, accessories and packaging should be sorted, taken to
a recycling centre and disposed of in a manner which is compatible with the environment. When the product becomes completely
unserviceable and requires disposal, drain any fluids (if applicable) into approved containers and dispose of the product and fluids
according to local regulations.
WEEE REGULATIONS
Dispose of this product at the end of its working life in compliance with the EU Directive on Waste Electrical and Electronic Equipment
(WEEE). When the product is no longer required, it must be disposed of in an environmentally protective way. Contact your local solid
waste authority for recycling information.
Note: It is our policy to continually improve products and as such we reserve the right to alter data, specifications and component parts without prior
notice.
Important: No Liability is accepted for incorrect use of this product.
Warranty: Guarantee is 12 months from purchase date, proof of which is required for any claim.
DFS35M Issue 4 14/07/2020
Original Language Version
© Jack Sealey Limited