Loading ...
Loading ...
Loading ...

999-995-420.10_REV B
9
before cleaning is through visual inspection with a camera.
Improper use of this machine can damage the machine
and the drain. This machine may not clear all blockages.
Machine Assembly
WARNING
To reduce the risk of serious injury during use,
follow these procedures for proper assembly. The
ON/OFF switch should be OFF and battery removed/
power adapter unplugged.
Installing Cable
Do not remove cable carton straps from carton. The
cable is under tension and can whip or strike if released.
When changing cable size, the AUTOFEED
®
unit settings
and the advance display and control panel settings need
to be changed.
Manual Cable Installation
1. Retrieve male coupling end of cable through the
center hole of carton and pull approximately 6' of
cable from carton.
2. Connect male coupling of cable to the pigtail coupling
as shown in Figure 15. Confirm connection is secure.
3. Pull short sections of cable from the carton and
manually feed into the drum. Do not turn machine ON.
Cable Installation with AUTOFEED unit
1. Retrieve male coupling end of cable through center
hole of carton and pull cable from carton. Lay cable
out straight in a flat area (such as an empty paved
parking lot or driveway) with no obstructions or items
that could become wrapped around the cable.
2. When using AUTOFEED unit to load cable, the
rotating cable will tend to walk sideways. To prevent
this, place suitable stops (such as wood blocks) on
either side of the cable at 10-foot intervals.
3. After properly inspecting and setting up the drain
cleaning machine, attach cable to the pigtail as
shown in Figure 15. Make sure that no one is in the
area around cable. Operate the machine/AUTO-
FEED unit per the operating instructions to retrieve
the cable into the drum. When 10' of cable is left
outside of the drum, step off the foot switch and
move the main ON/OFF switch to OFF. Loosen the
AUTOFEED knob and manually feed the remaining
cable into the drum. Do not use the AUTOFEED unit
to put entire cable in the drum. The cable end can
whip around and cause serious injury.
Installing AUTOFEED
®
Unit
1. Loosen the AUTOFEED knob to allow the cable to
pass through AUTOFEED unit.
2. Pull approximately 12" of cable from the drum.
3. Place AUTOFEED unit over the cable and align the
posts with mating holes in the AUTOFEED mount
(Figure 7).
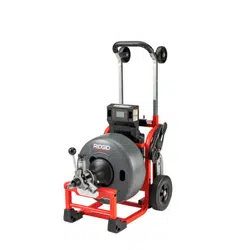
Figure 7 – Installing the AUTOFEED Unit
4. Fully insert posts into frame holes. Confirm secured
in place.
Removing AUTOFEED Unit
1. Pull the plunger pin and open the drum retainer
(Figure 8).
2. Loosen AUTOFEED knob to allow cable to pass
through unit.
3. Pull the AUTOFEED unit straight forward to disen-
gage the pins from the frame.
Figure 8 – Opening Drum Retainer
Adjusting AUTOFEED Unit For Cable Diameter
For proper operation, the AUTOFEED unit must be ad-
justed to the correct setting for the cable it is being used
9
K-4310 FXP Drum Machine
Posts
Grease
Fitting
Plunger
Pin
Drum
Retainer
Loading ...
Loading ...
Loading ...