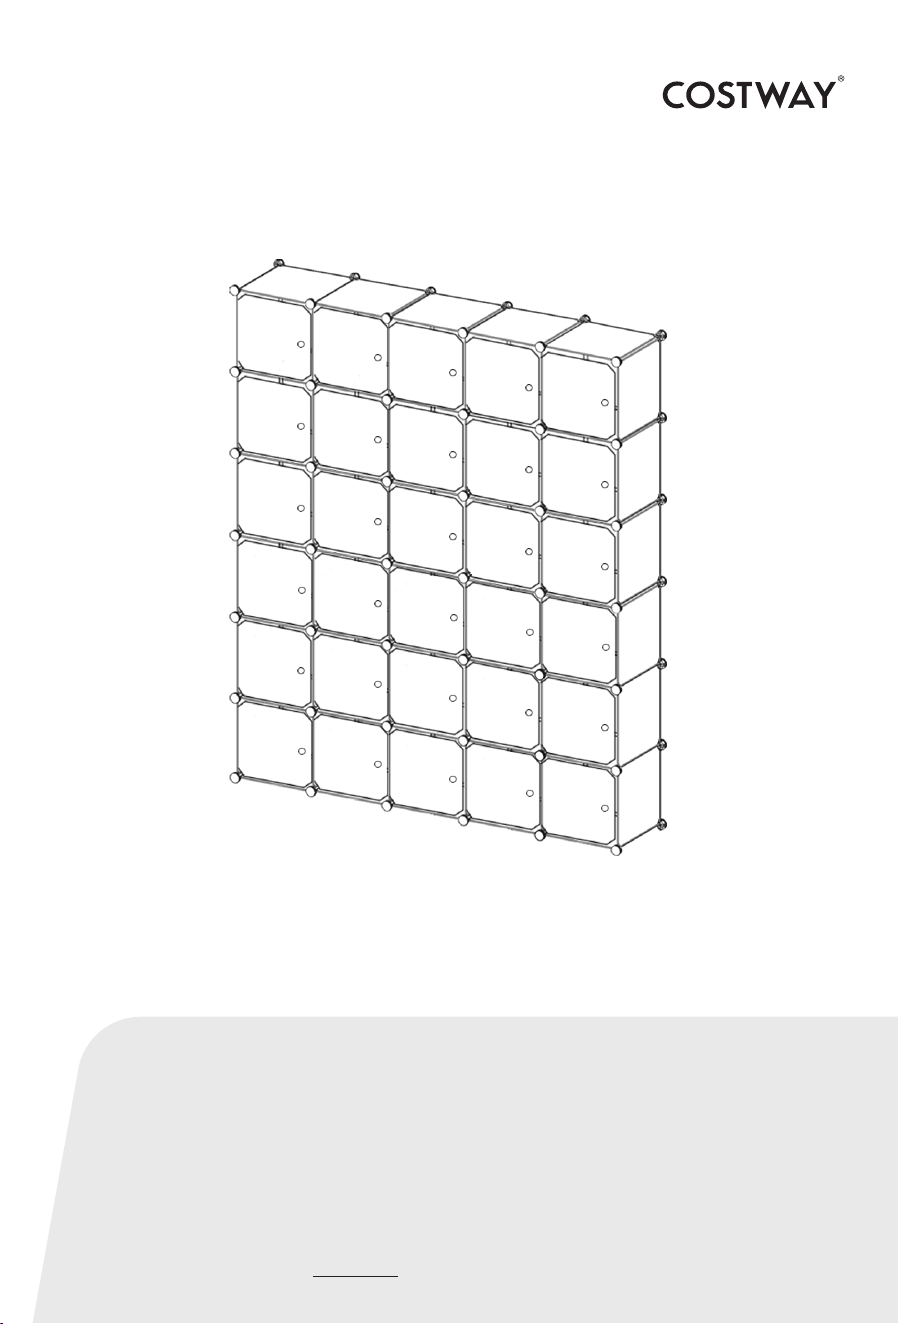
CUBE STORAGE ORGANIZER
HW61412
USER’S MANUAL
THIS INSTRUCTION BOOKLET CONTAINS IMPORTANT SAFETY INFORMATION. PLEASE READ AND KEEP FOR FUTURE REFERENCE.
Before You Start
Please read all instructions carefully.
Retain instructions for future reference.
Separate and count all parts and hardware.
Read through each step carefully and follow the proper order.
We recommend that, where possible, all items are assembled
near to the area in which they will be placed in use, to avoid
moving the product unnecessarily once assembled.
Always place the product on a flat, steady and stable surface.
Keep all small parts and packaging materials for this product
away from babies and children as they potentially pose a serious
choking hazard.
02

usage.
items.
● Please confirm and inspect the parts according to the
assembly drawing.
● Make sure the connectors are assembled in place before
moving on to the next step.
● Please complete the assembly and ensure the stability
before use.
● We provide four extra connectors for free as subsequent
● Children are not allowed to play on the product for fear of
an accident.
● Every single cube organizer holds a weight 22lbs, Do not
place overweight
● Please store it in the dry place when not in use.
● Do not use near fireside or drying machine.
We are very appreciated that you purchased our products.
It is our willingness if you can use it proper l y.
Please confirm if the spare parts are complete .
It can also be assembled as required.
03
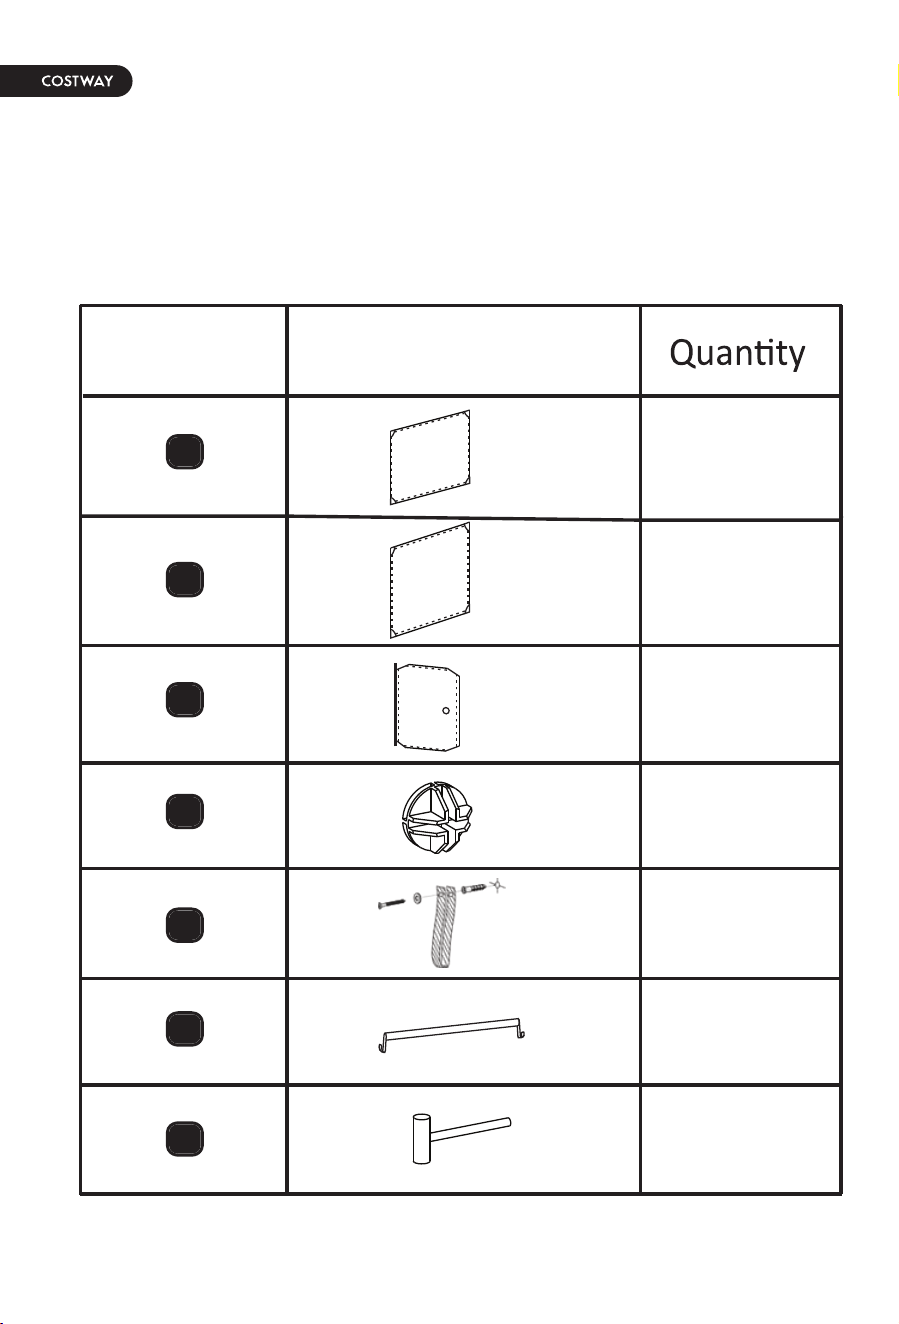
PARTS LIST
A
C
B
D
E
F
G
No.
Part image
30
71
30
88
(4 spare)
1
3
2
13.8”×13.8”
13.8”×17.7”
13.8”×13.8”
04
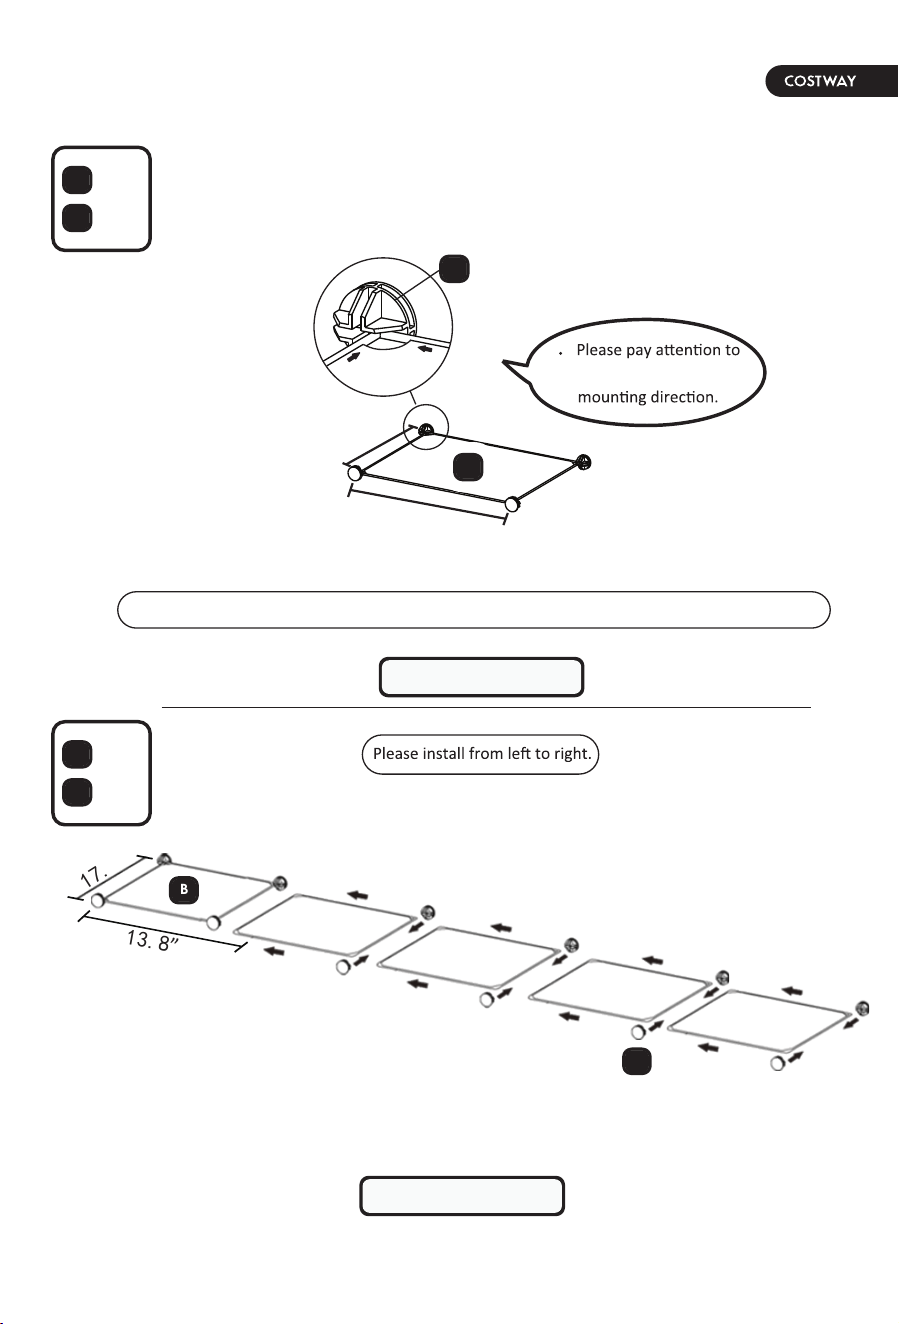
STEP 2
ASSEMBLY STEPS
D
B
17.7”
13.8”
× 4
D
× 8
B
× 1
D
× 4
B
D
the connectors
B
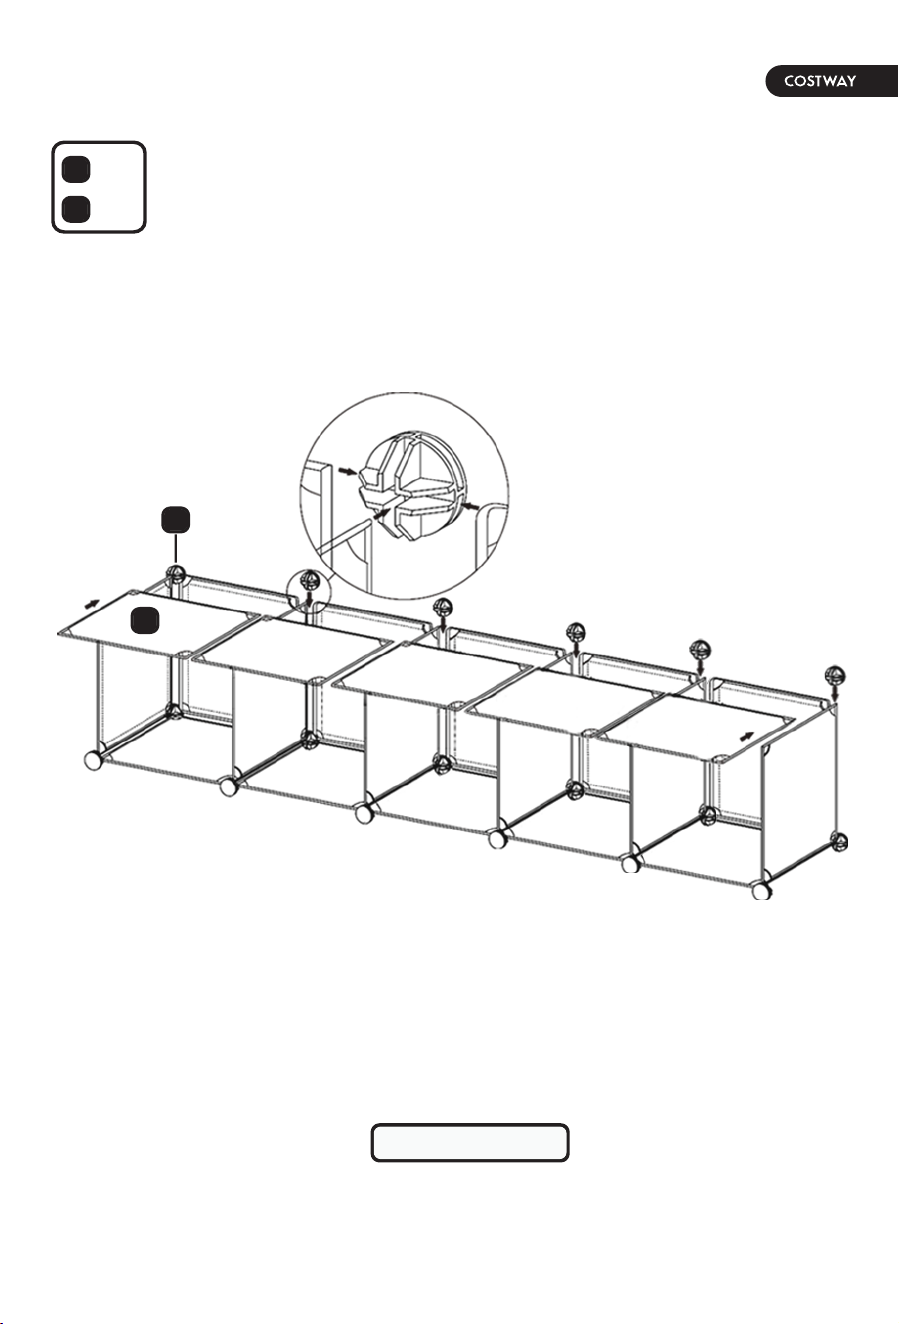
STEP 1
13.8”
17.7”
Before next step, please make sure to assemble the shelf corner to the end of the connector hole.
05
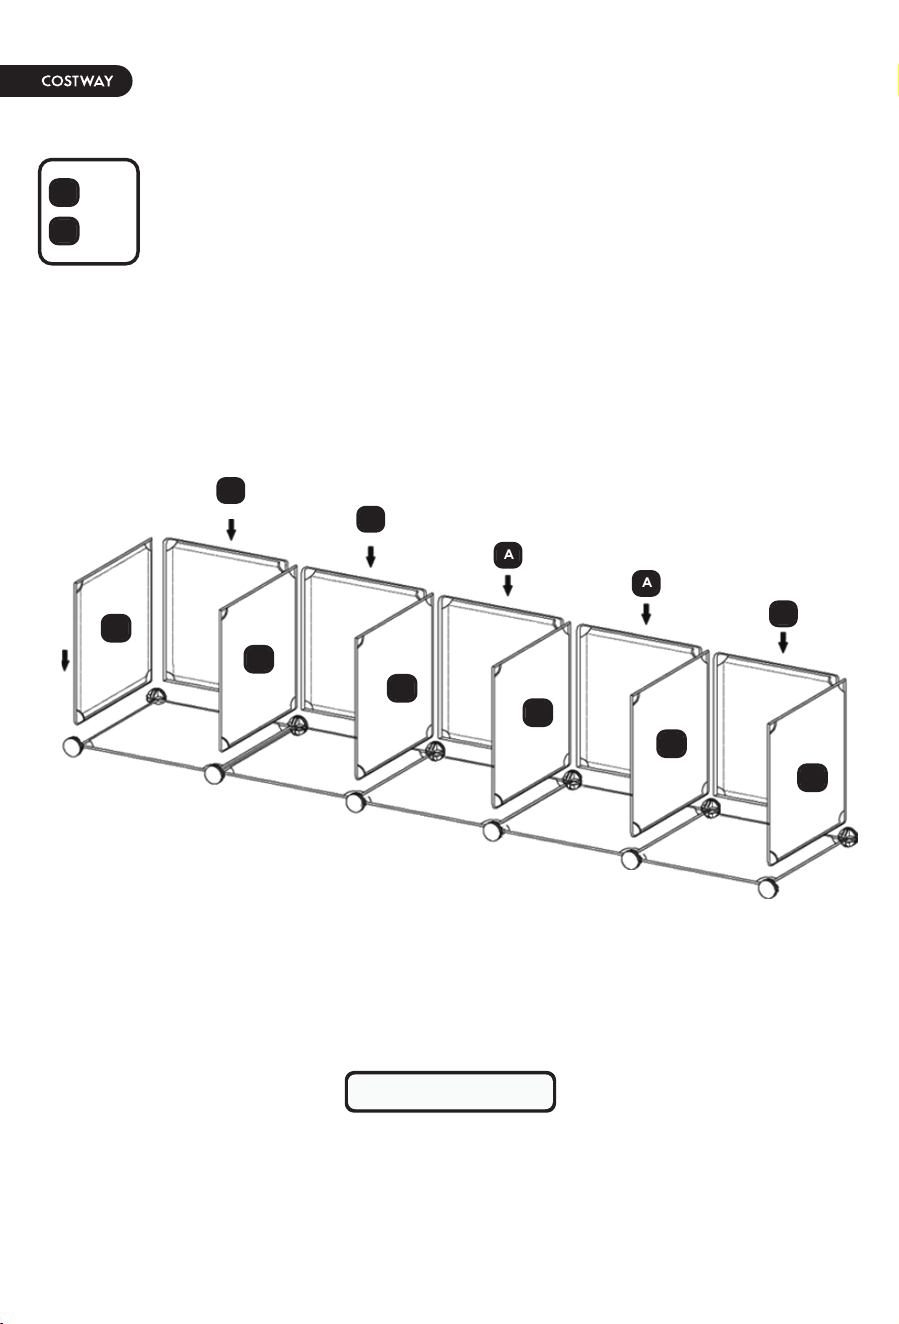
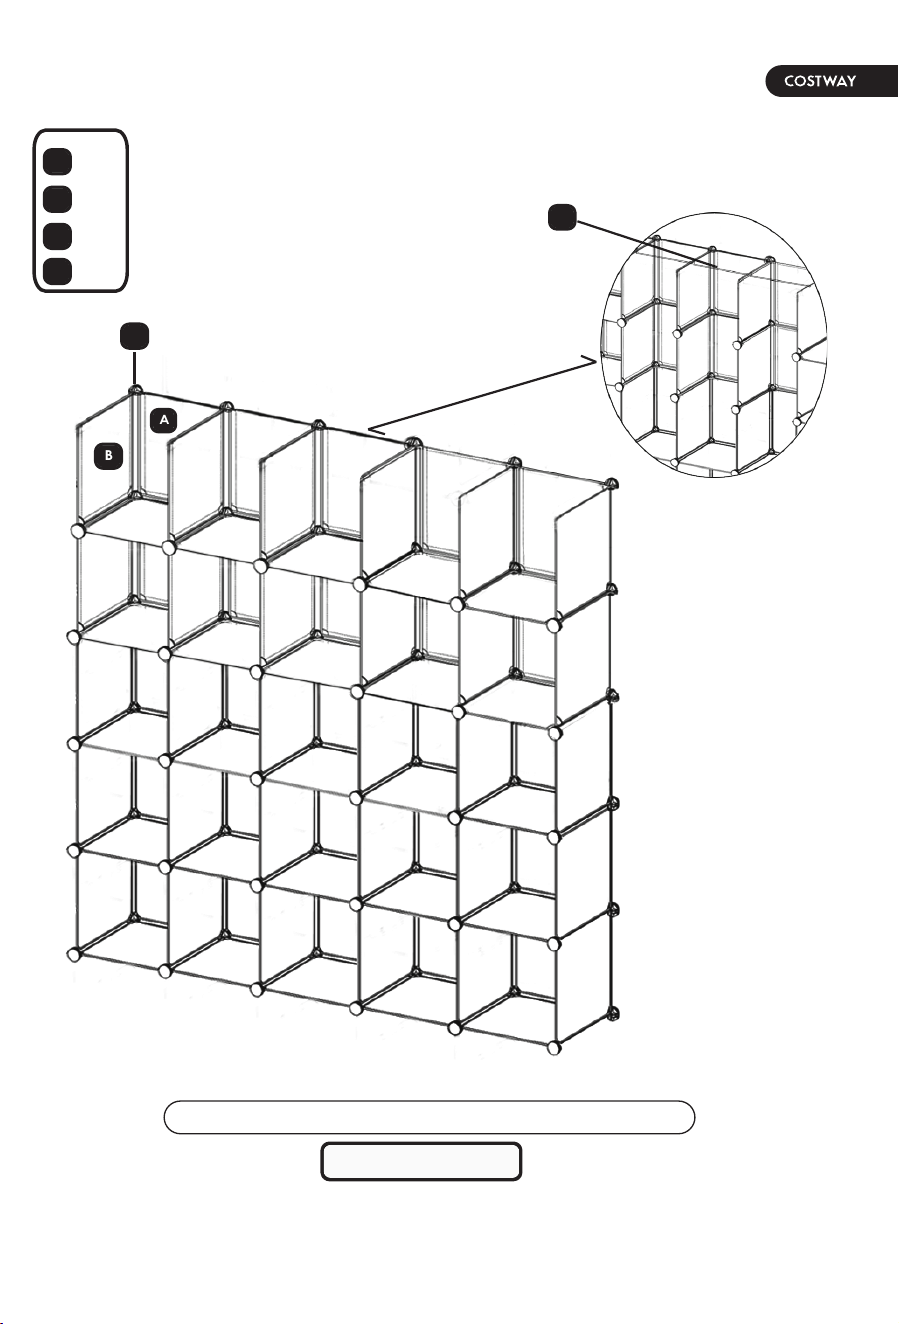
STEP 3
ASSEMBLY STEPS
A
A
A
A
A
A
× 5
× 6
B
B
B
B
B
B
B
06
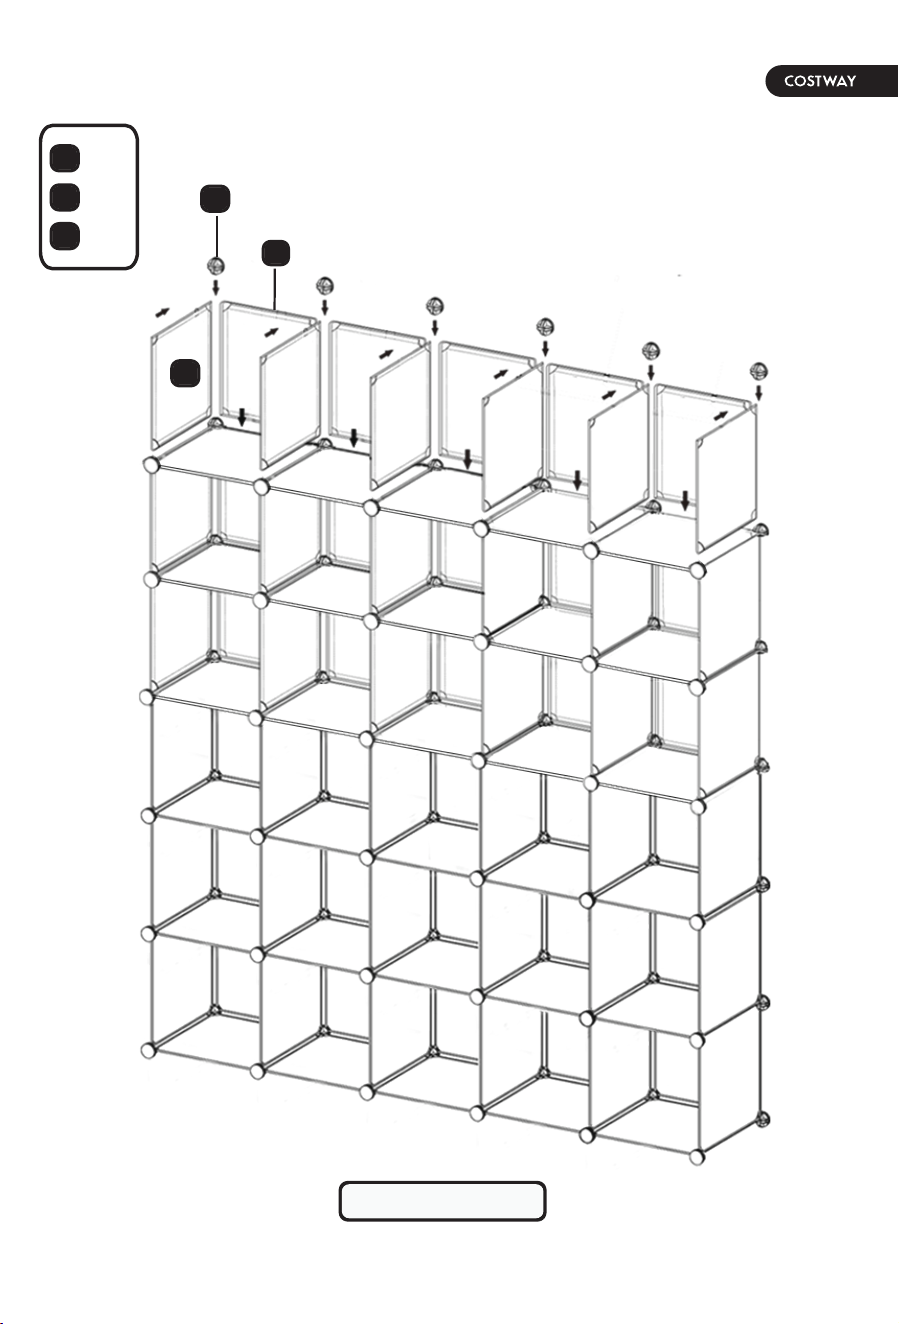
STEP 4
ASSEMBLY STEPS
B
B
× 5
D
D
× 6
07
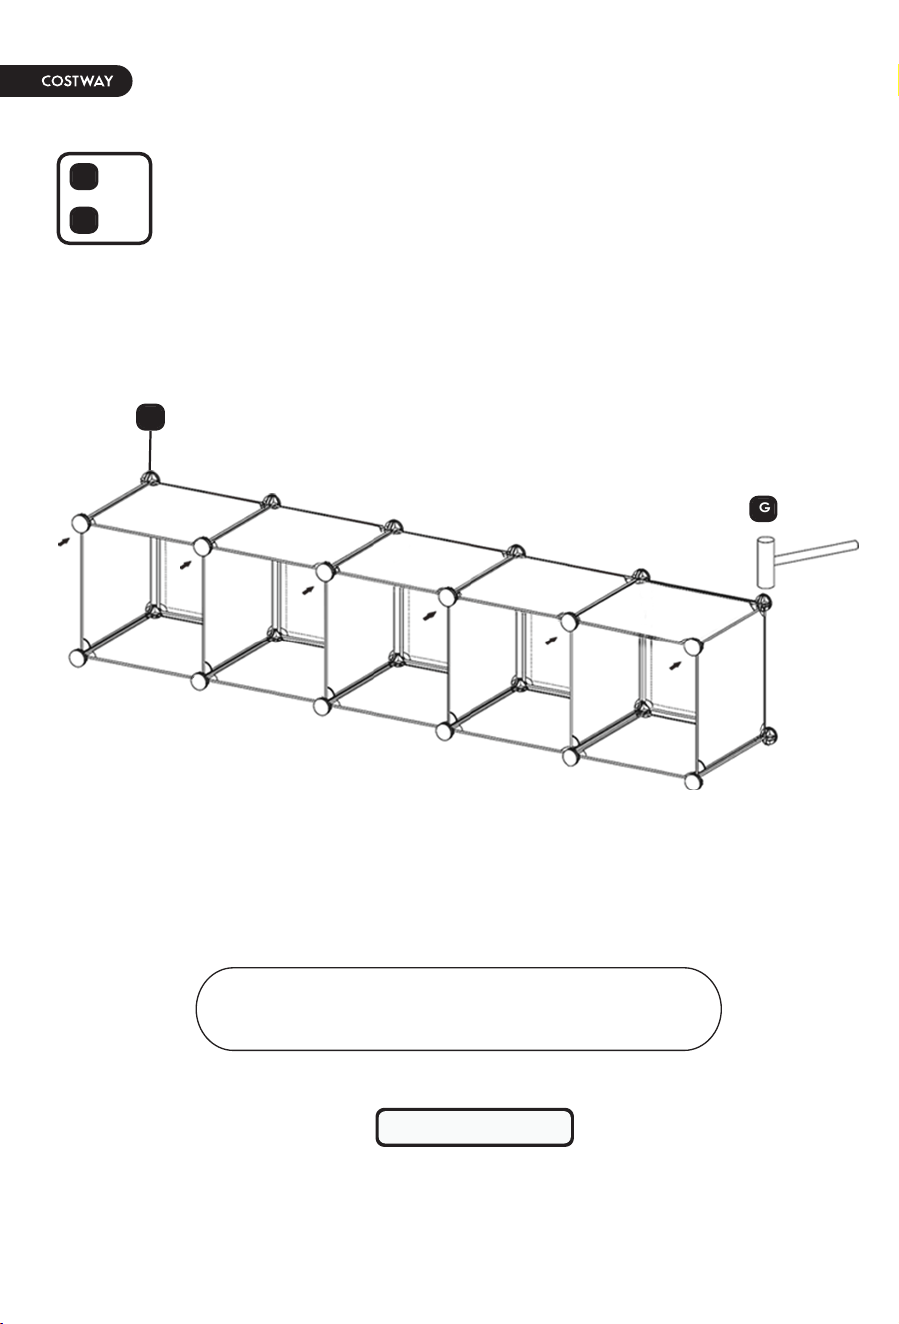
G
STEP 5
ASSEMBLY STEPS
D
D
× 6
G
× 1
To ghten the connecons between the parts, please knock down the
connectors with a rubber hammer to ensure that the shelf corners are
assembled to the end of the connector holes.
08
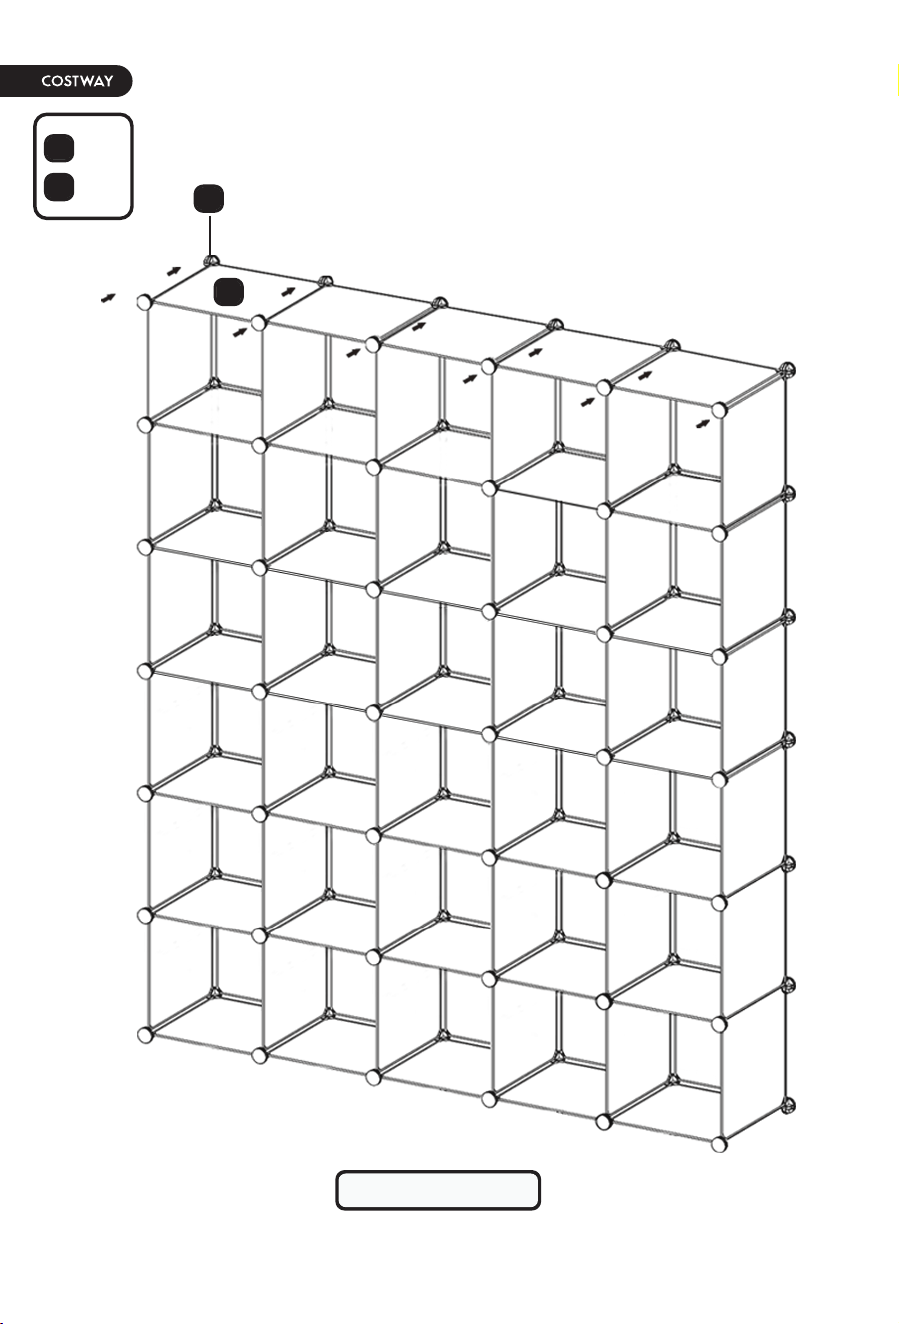
Please repeat step 3 to 5, make sure all connectors are assembled in place
STEP 6
ASSEMBLY STEPS
A
B
D
F
freely change
× 20
B
× 39
D
× 42
F
× 3
A
09

STEP 7
ASSEMBLY STEPS
B
B
× 5
× 6
D
D
10
STEP 8
ASSEMBLY STEPS
× 5
B
× 6
D
× 6
A
A
B
D
11
STEP 9
ASSEMBLY STEPS
B
× 5
D
× 6
B
D
12
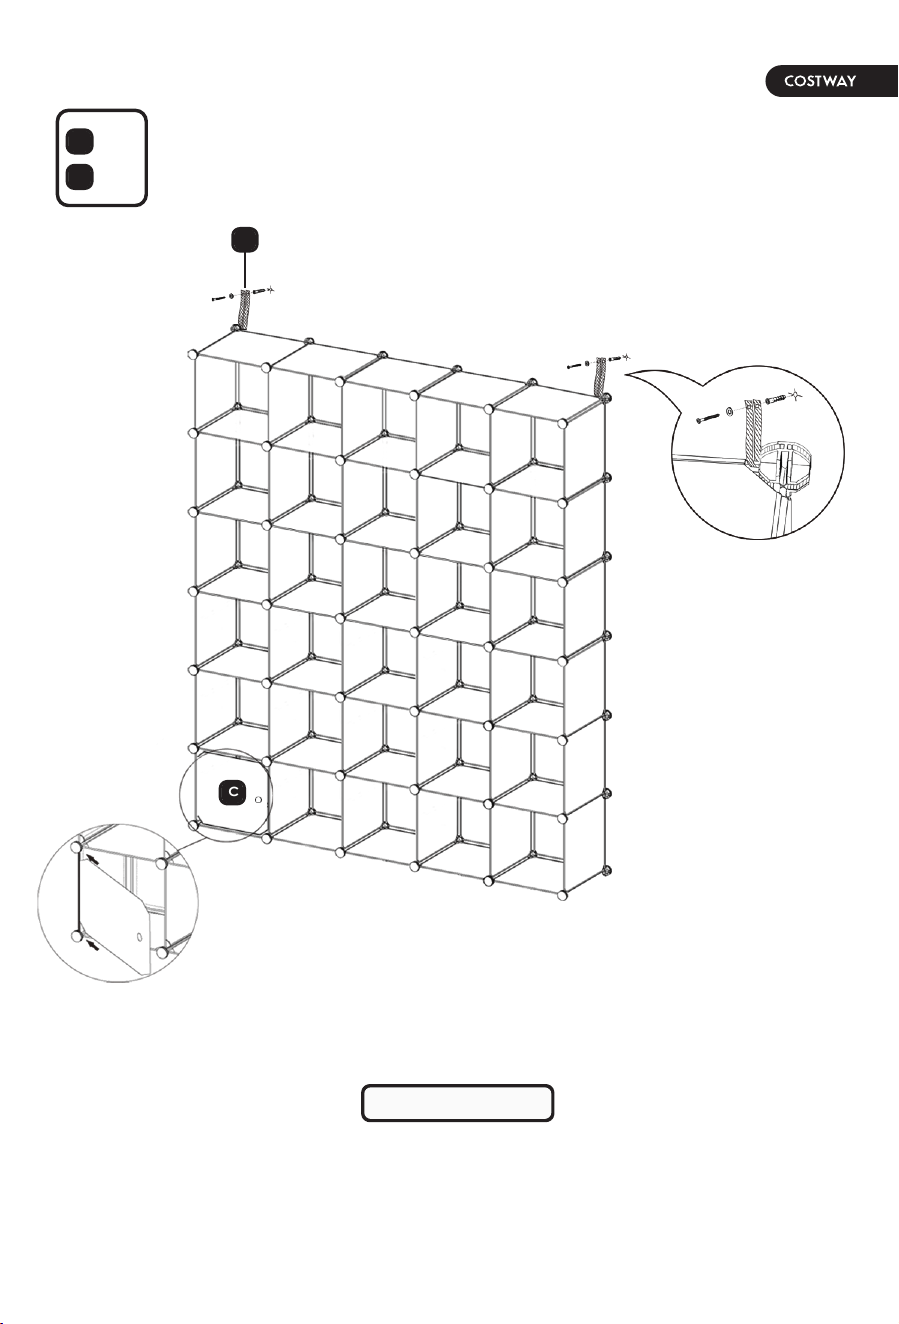
C
E
STEP 10
ASSEMBLY STEPS
C
× 1
E
× 2
13
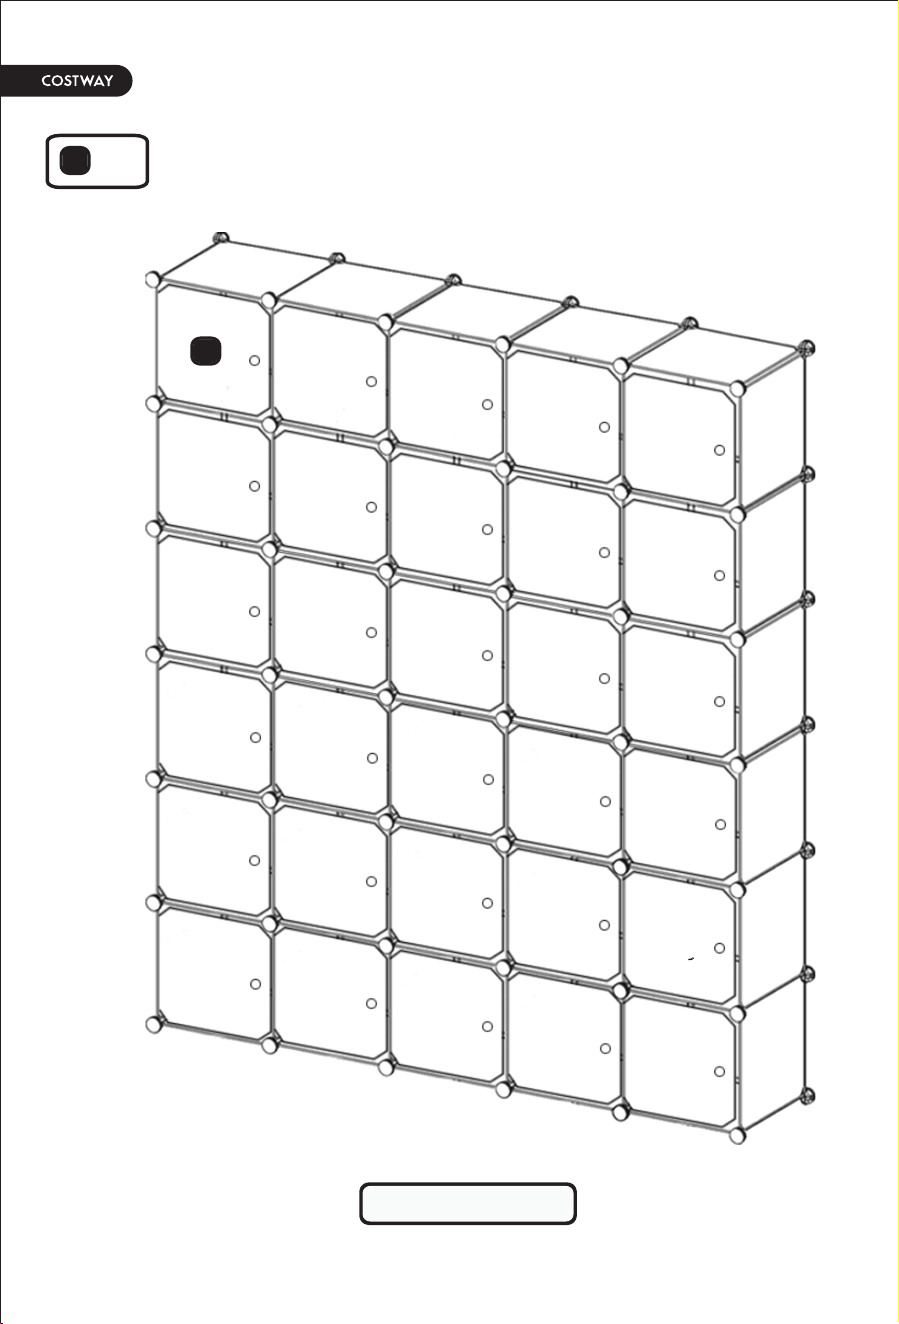
ASSEMBLY STEPS
STEP 11
C
C
× 29
14

Welcome to visit our website and purchase our quality products!
We would like to extend our hearelt thanks to
all of our customers for taking me to assemble
this product and giving us valuable feedbacks.
With your inspiring rating, COSTWAY will be more consistent to offer you
EASY SHOPPING EXPERIENCE, GOOD PRODUCTS and EFFICIENT SERVICE!
US office: Fontana, California
UK office: Ipswich
Reward Points
Exclusive Customer Service
Personalized Recommendaons
Permanent Shopping Cart
Order History
15

Please give us a chance to make it right and do better !
Contact our friendly customer service department for help first.
Replacements for missing or damaged parts will be shipped ASAP !
Contact Us!
Do NOT return this item.
US office: Fontana UK office: Ipswich AU office: Truganina
DE office: Hamburg
FR office: Saint Vigor d'Ymonville
PL office: Gdańsk
US:cs.us@costway.com
UK:cs.uk@costway.com