Loading ...
Loading ...
Loading ...
STRING TRIMMER ATTACHMENT — STA1600/STA1600-FC 29
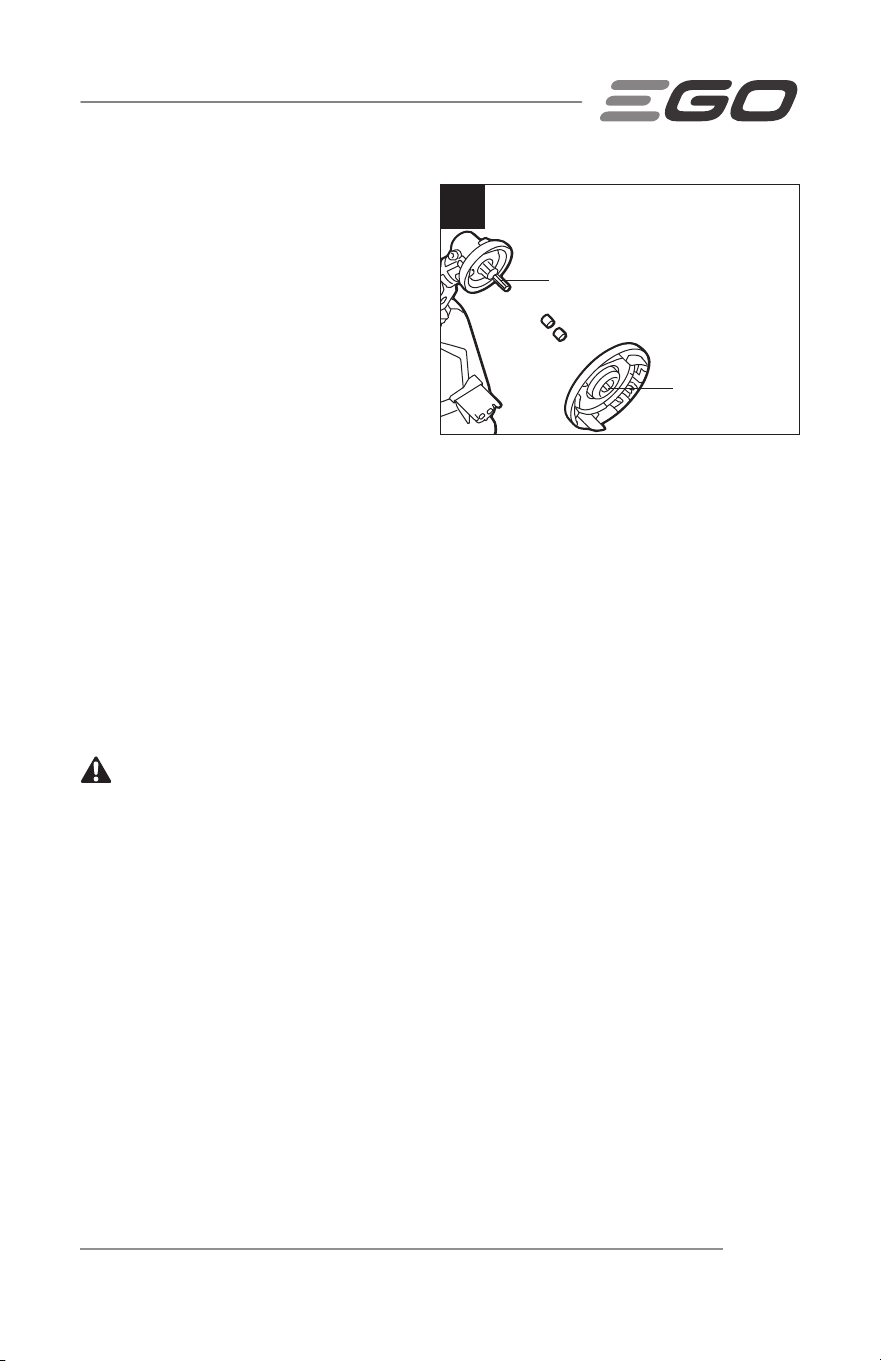
Install the new trimmer head
1. Mount the two bushings on the drive
shaft.
2. Align the flat slot in the upper cover
with the flat in the drive shaft and
mount the upper cover into place
(Fig. 19).
3. Mount the circlip, spool retainer, and
washer in that order (Fig. 17). Use a
14 mm socket or impact wrench on the nut to tighten it COUNTERCLOCKWISE.
4. Following steps 4 and 5 in “RELOADING THE CUTTING LINE” section in this
manual to mount the lower cover assembly.
5. Follow the instructions in “LINE REPLACEMENT” section in this manual to reload
the cutting line.
6. Start the tool to see whether the string trimmer will work normally. If it does not,
reassemble as described above.
SHARPEN THE LINE-CUTTING BLADE
WARNING:
Always protect your hands by wearing heavy gloves when
performing any maintenance on the line-cutting blade.
1. Remove the battery.
2. Remove the line-cutting blade from the guard.
3. Secure the blade in a vise.
4. Wear proper eye protection and gloves and be careful not to cut yourself.
5. Carefully file the cutting edges of the blade with a fine-tooth file or sharpening
stone, maintaining the original cutting edge angle.
6. Replace the blade on the guard and secure it in place with the two screws.
19
Flat
Flat Slot
Loading ...
Loading ...
Loading ...