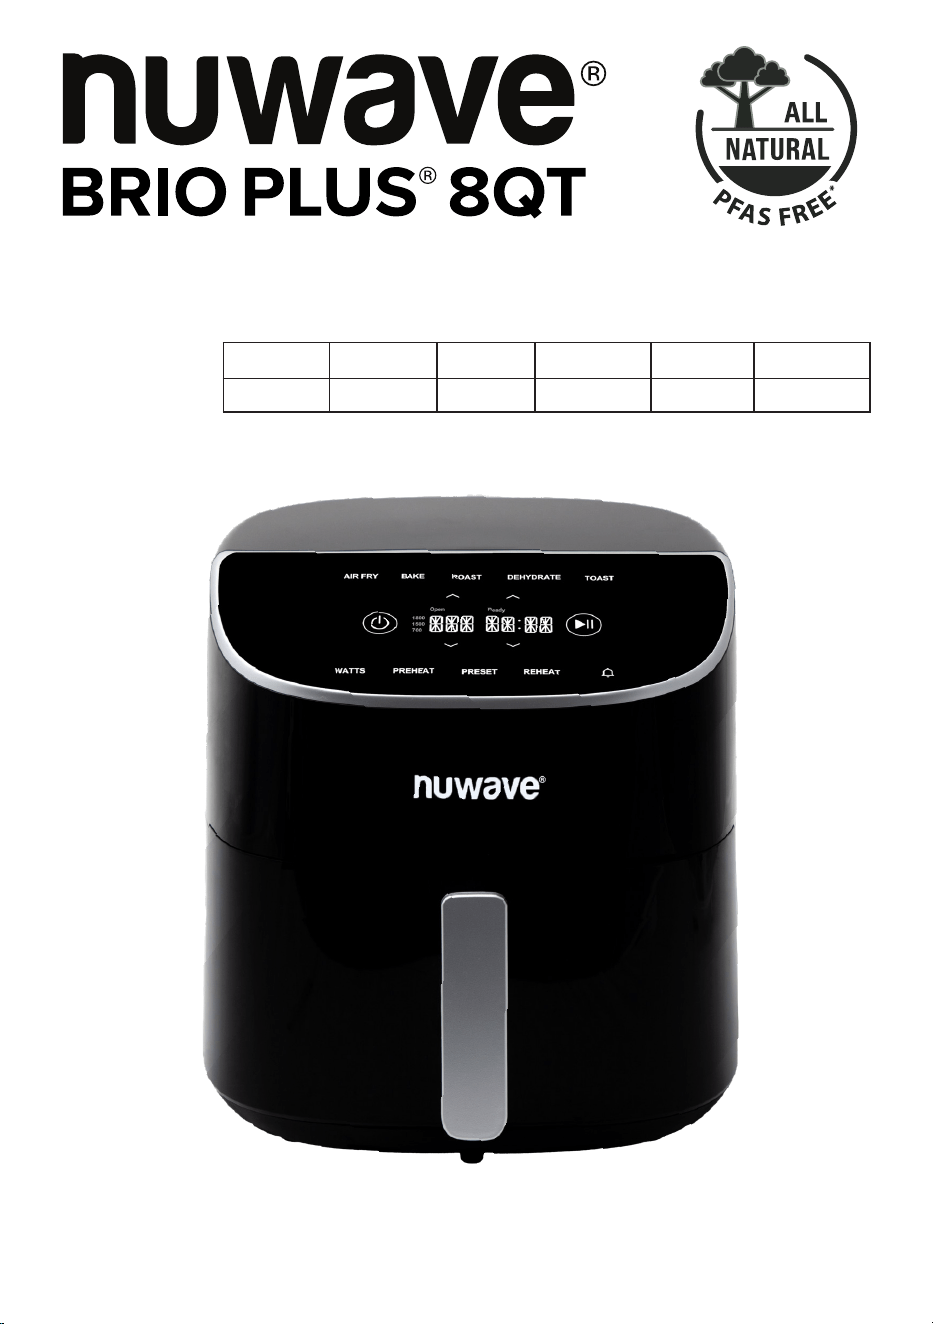
Owner’s Manual
Model #
37401 37402 37403 37404
37405
Color
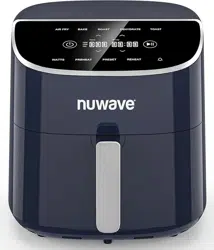
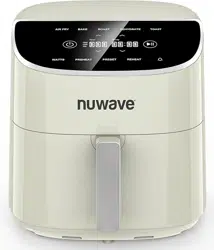
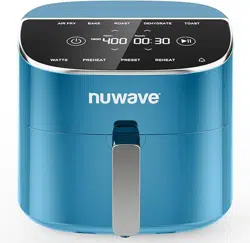
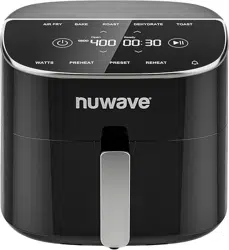
Black Gray Cozy Blue Cream
Deep Blue
*All-natural ceramic coating is applied to the cooking surface making it non-stick, ensuring a
cooking surface that is free from per- and polyfluoroalkyl substances (PFAS).

2 | nuwavenow.com
THANK YOU!
Register Today!
Protecting your investment is easy and rewarding. Simply
scan the QR code or visit nuwavenow.com/register to
register. When you register, simply opt in for an additional
year of warranty. Don’t worry. There is no catch. We are
extending it absolutely FREE to show our appreciation!
nuwavenow.com/register
support@nuwavenow.com
help@nuwavenow.com
For Amazon Purchases For All Other Purchases
Scan to Register
Congratulations on your NuWave® purchase. We know there are many options
available and sincerely appreciate the trust you have placed in us.
For the last 30 years, we have committed to introducing products that promote
healthy living at aordable prices. By combining the highest quality designs with
cutting edge technology, we have always strived to blend feature, function, and
innovation into every product we make. We hope you will agree.
We would love to hear from you. Please feel free to reach out with any feedback
or comments that could improve your experience. We would also enjoy hearing
about your successes.
The best way to reach us is by email:
For Amazon Purchases: support@nuwavenow.com
For All Other Purchases: help@nuwavenow.com
Connect with Us!
#nuwavenow
Visit nuwavenow.com to see other
great products and accessories.
nuwavenow.com | 3
Owner’s Manual
Electrical Information ........................................................................................3
Important Safeguards ....................................................................................4-5
Parts & Accessories ..........................................................................................6
Assembly Guide ................................................................................................7
Operating Instructions .................................................................................. 8-13
Cleaning & Maintenance .................................................................................. 14
Troubleshoot Guide ....................................................................................15-16
Limited Warranty .........................................................................................17-18
CONTENTS
Para la versión en español de este manual, visita www.nuwavenow.com
If the information in this manual doesn’t match your model, we in-
vite you to visit https://www.nuwavenow.com/brio-plus-8qt-manual
for the digital version tailored to your specic model. Our dedica-
tion to excellence ensures you always have the most accurate and
helpful information at your ngertips!
Electrical Information
A short power-supply cord (or detachable power-supply cord) is
provided to reduce the risk of becoming entangled in or tripping over a
longer cord. Longer detachable power-supply cords or extension cords
are available and may be used if care is exercised in their use. If a
longer detachable power-supply cord or extension cord is used:
1. The marked electrical rating of the extension cord should be at least
as great as the electrical rating of the appliance.
2. The longer cord should be arranged so that it will not drape over the
countertop or tabletop where it could be pulled on or tripped over.
3. The appliance has a polarized plug (one blade is wider than the
other). To reduce the risk of electric shock, this plug is intended to fit
into a polarized outlet only one way. If the plug does not fit fully into
the outlet, reverse the plug. If it still does not fit, contact a qualified
electrician. Do not attempt to modify the plug in any way. If the
appliance is of the grounded type, the cord set or extension cord
should be a grounding-type 3-wire cord.

4 | nuwavenow.com
1. Read all directions
2. NEVER immerse the cord, plug, or the Brio in water or other liquids.
3. NEVER operate any appliance with a damaged cord or plug, or after the appliance
malfunctions, or has been damaged in any manner.
4. Close supervision is necessary when any appliance is used by or near children.
5. NEVER let cord hang over edge of table or counter, or touch hot surfaces.
6. Always unplug from outlet when not in use and before cleaning. Allow to cool before
putting on or taking off parts.
7. Do not use appliance for other than intended use.
8. ALWAYS use great caution when operating the Brio or any appliance. Use the handles
or knobs to avoid touching hot surfaces.
9. NEVER use accessories that are not intended for, or are not approved to be used with,
the Brio as doing so may damage the Brio and may lead to accidents.
10. NEVER USE OUTDOORS. FOR HOUSEHOLD USE ONLY. Note: This appliance is
not intended to be used in the staff kitchens of shops, ofces, farms, or other work
environments; nor is it intended to be used by guests in hotels, motels, bed and
breakfasts, and any other non-residential environments.
11. NEVER place or use the Brio on or near hot gas or electric burners, in a heated oven,
close to flammable materials, space heaters or in any wet environment.
12. Save these instructions.
13. Extreme caution must be used when moving an appliance containing hot oil or other
hot liquids.
14. Always attach plug to appliance rst, then plug cord into the wall outlet. To disconnect,
turn any control to “off”. then remove plug from wall outlet.
ALWAYS KEEP THIS MANUAL HANDY FOR FUTURE REFERENCE.
IMPORTANT SAFEGUARDS
HOUSEHOLD USE ONLY • READ ALL INSTRUCTIONS BEFORE USE
When using electrical appliances, basic safety precautions should always be followed to
reduce the risk of fire, electric shock, and/or injury to persons including the following:
ADDITIONAL SAFEGUARDS
1. ALWAYS set up the Brio on a horizontal, even, and stable surface.
2. ALWAYS use extreme caution when moving the Brio. NEVER move or handle the unit
while it is running or before it has cooled.
3. ALWAYS turn the Brio off before unplugging the unit from the wall outlet.
4. ALWAYS keep hands and face away from the steam and hot air released from the air
outlet vent during normal operation and from the Base Tray when opening the unit to
remove or adjust the food.

nuwavenow.com | 5
NOTICE: THE FAILURE TO FOLLOW ANY OF THE IMPORTANT SAFEGUARDS, ADDITIONAL
SAFEGUARDS, OR THE INSTRUCTIONS FOR SAFE USE IS A MISUSE OF YOUR BRIO THAT
CAN VOID YOUR WARRANTY AND CREATE THE RISK OF SERIOUS INJURY.
5. ALWAYS unplug the Brio and contact NuWave Customer Service* if an excess
amount of smoke escapes the unit during operation. Note: A small amount of smoke is
normal when using the Brio for the rst time.
6. NEVER put the Brio against the wall or other appliances or allow anything to block the
air vents. ALWAYS keep at least 3 inches of free space around the Brio.
7. NEVER place anything on top of the Brio.
8. ALWAYS ensure that the Brio is clean prior to use.
9. NEVER operate the Brio with an external timer or separate remote-control system.
10. ALWAYS allow the Brio to cool before cleaning the unit or attaching or removing parts
and accessories.
11. NEVER disassemble the Brio or replace any parts without the prior written consent of
the manufacturer. Note: If any trouble arises during operation, any service MUST be
done by NuWave LLC.
12. NEVER use metal utensils with the coated Base Tray, and Air Circulation Riser as
doing so can damage the surface.
13. Please refer to the Cleaning & Maintenance section for regular maintenance of the
appliance.
14. To eliminate a choking hazard for young children, remove and discard the protective
cover tted on the power plug of this appliance.
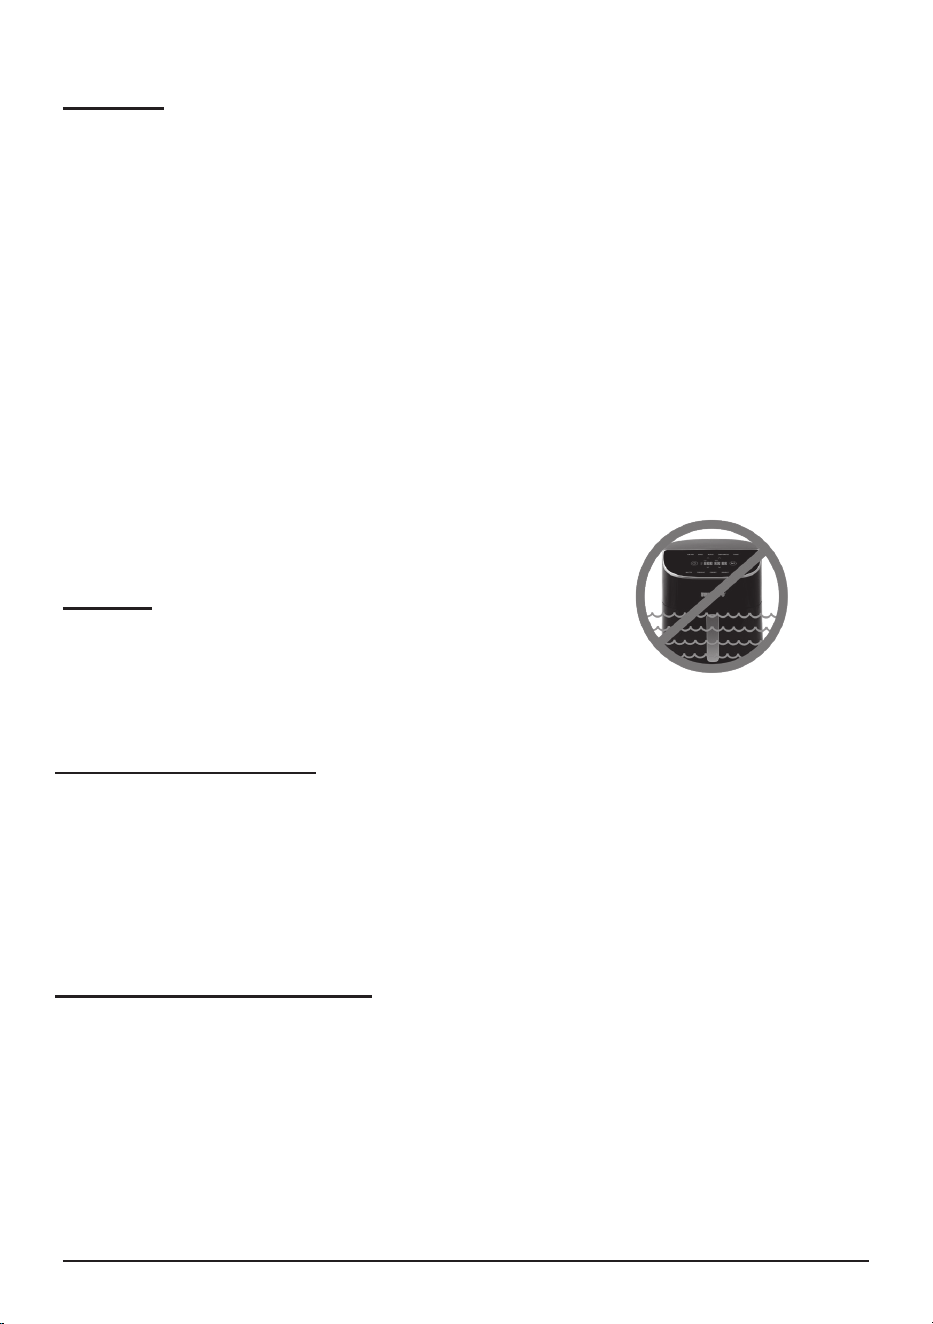
15. NEVER use in moving vehicles or boats. NEVER use outdoors. Misuse may cause
injury.
16. The Air Circulation Riser will become extremely hot during the cooking process. Avoid
physical contact while removing the Air Circulation Riser and place on a heat-resistant
surface after removing.
17. NEVER touch the Air Circulation Riser during or immediately after cooking.
18. NEVER line the Base Tray or wrap the Air Circulation Riser with aluminum foil.
19. Allow the Base Tray and Air Circulation Riser to cool before immersing in water.
20. Remove any burnt remnants during cleaning and before each use when cooking in
batches.
21. Never pour oil into the Base Tray, as this may create a re hazard.
22. Never touch the insides of the appliance while it is operating.
23. The amount of ingredients used should comply with directions listed in the Quick Start
Guide.
6 | nuwavenow.com
Ready
Open
700
1500
1800
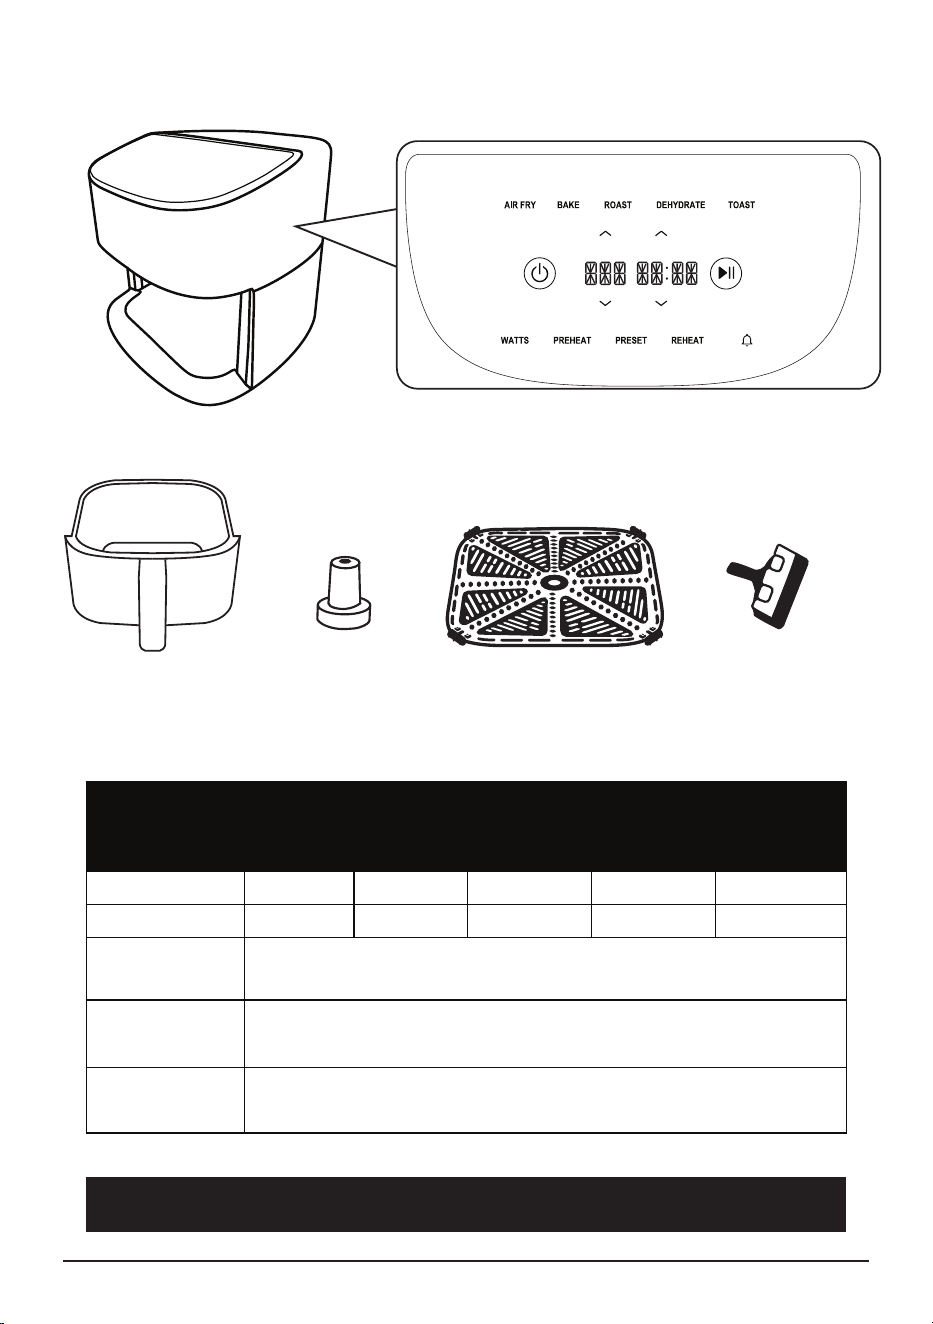
To order replaceable parts visit NuWaveNow.com.
Base Tray
Power Base
Silicone
Tabs
Rubber
Feet
Air Circulation
Riser
PARTS & ACCESSORIES
Silicone Tabs
Rubber Feet
(4 feet)
Color
(Model Number)
Black
(37401)
Gray
(37402)
Cozy Blue
(37403)
Cream
(37404)
Deep Blue
(37405)
Powerbase BYA1 BYA2 BYA3 BYA4 BYA5
Base Tray BYA6 BYA7 BYA8 BYA9 BYA10
Air Circulation
Riser
BYA11
BYP1
BYP2
nuwavenow.com | 7
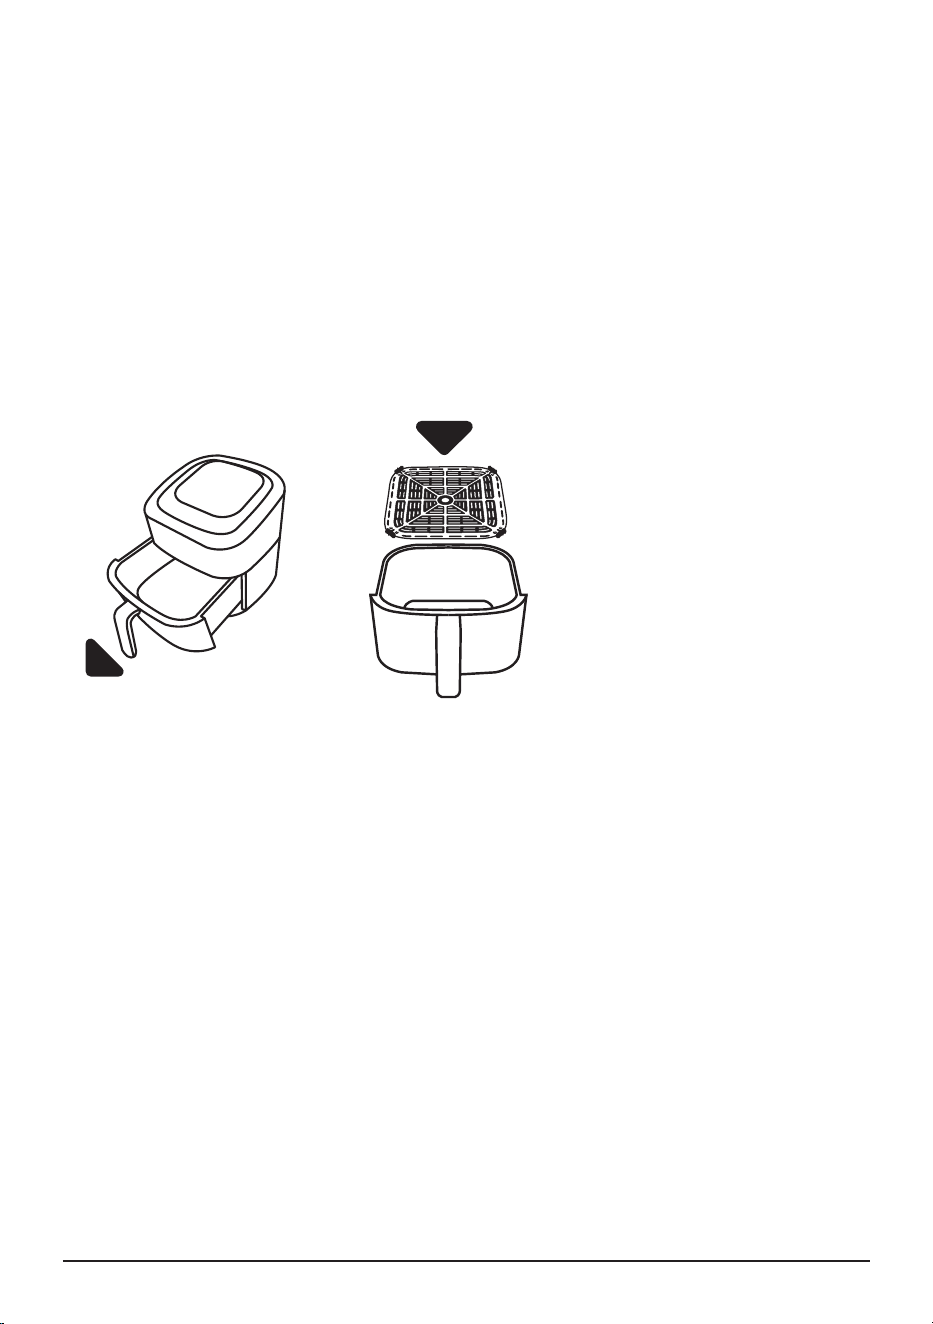
Assembling the Brio
After Use:
• NEVER use the Brio without the Base Tray or Air Circulation Riser.
• NEVER touch the inside of the Base Tray or Air Circulation Riser immediately
after cooking.
• NEVER use utensils to remove the Air Circulation Riser, they may scratch the
coating.
• When removing food from the Base Tray use a silicone utensil or partially tip
the Base Tray and carefully shake the food onto the serving dish.
ASSEMBLY GUIDE
1. Using the handle, pull the Base Tray straight out from the Power Base and
remove the Air Circulation Riser by poking a hole in the center of the paper
and lifting.
2. Remove any paper or plastic inside the Power Base or Base Tray.
3. Remove the paper wrapped around the Air Circulation Riser, then slide it back
into the Base Tray, ensuring it fits snugly inside.
Removing the Base Tray & Air Circulation Riser
8 | nuwavenow.com
NOTE: For best results, use the recommended amount of ingredients as listed in
the Quick Start Guide. May need to cook in batches for optimal results.
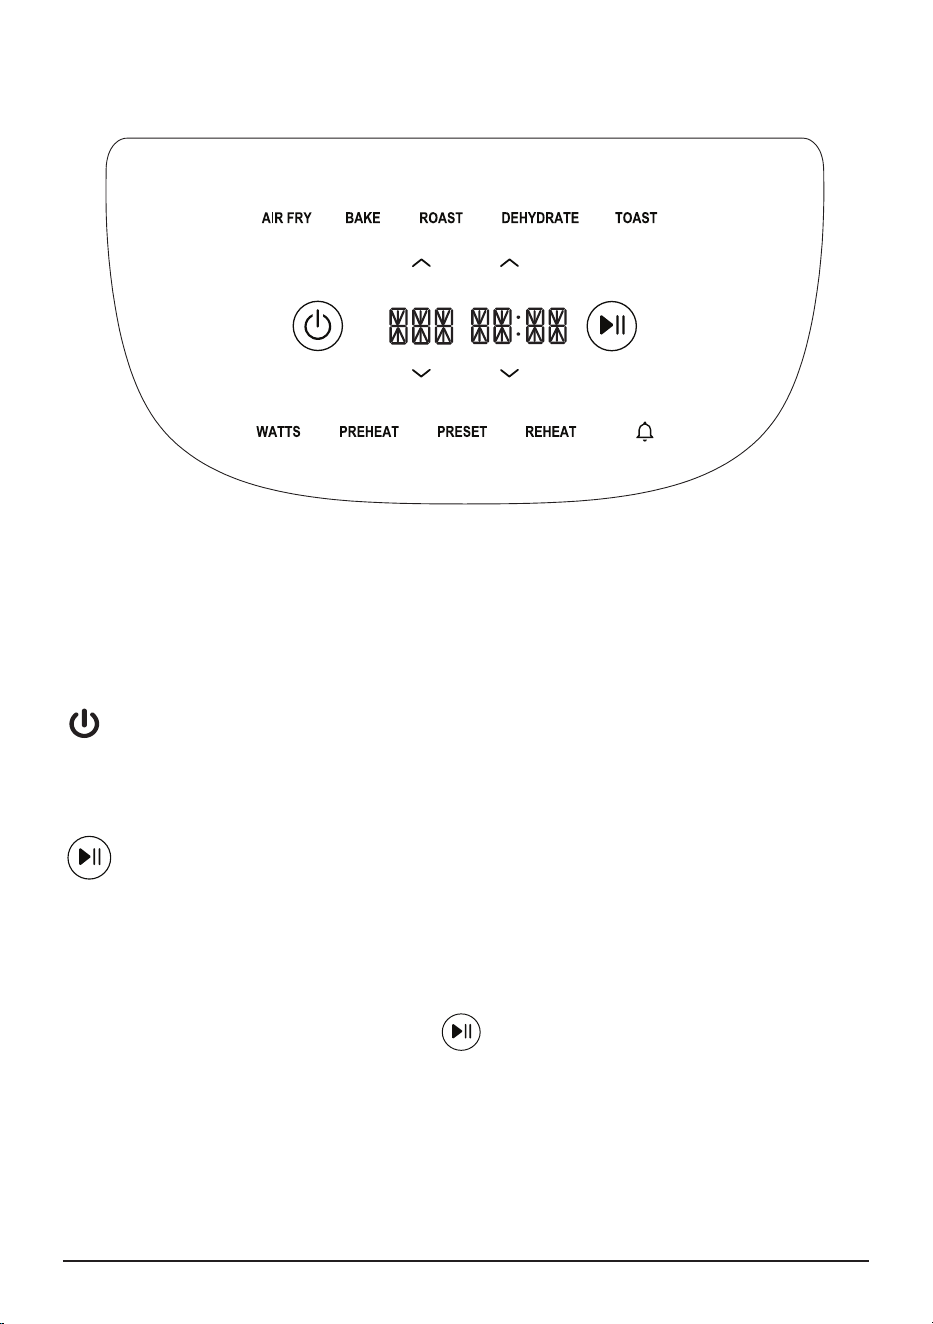
On/Off
Turns the Brio On or Off and cancels all functions. The default is 350°F for 15
minutes.
Start/Pause
Press to start, pause, or resume coking. When cooking, the time (:) will ash and
when paused the time (:) will not ash.
Note
• When the Brio is turned on, press and cooking will begin at the default
temperature and time.
• Cooking can be paused anytime during preheat and cooking.
• Opening the Base Tray will pause cooking, “Open” will be in the display
OPERATING INSTRUCTIONS
Ready
Open
700
1500
1800
nuwavenow.com | 9
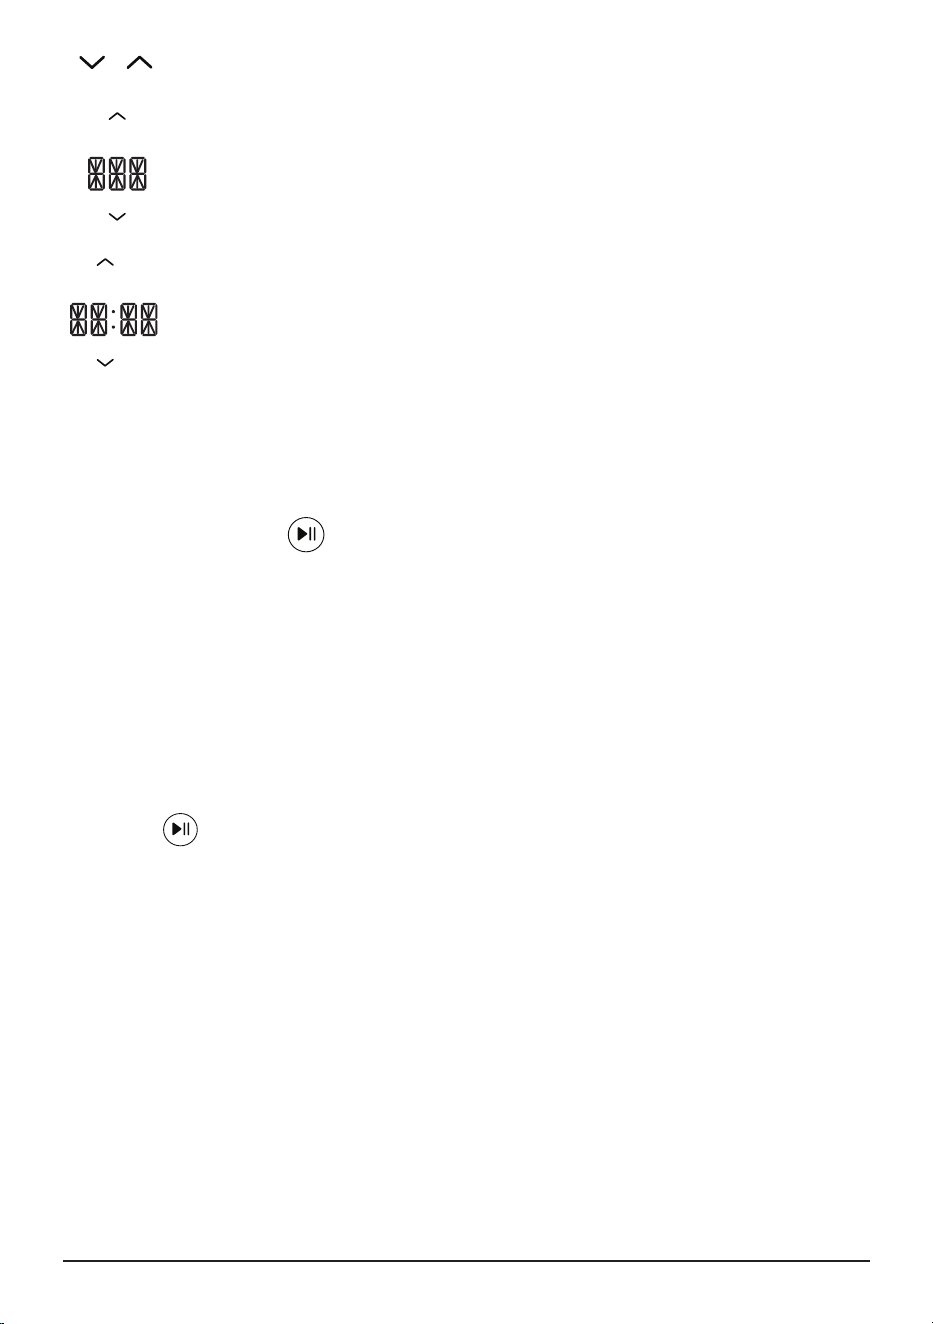
Up and Down Arrows
Press to adjust cooking temperature, time, or select a preset*.
To change Temperature Press the up or down arrow on the left to
increase or decrease temperature in 5-degree increments between
50°F and 400°F. Hold the arrows down to adjust in larger increments.
To change the TIME press the up or down arrow on the right to
increase or decrease time in 1-minute increments up to 99 hours and
59 minutes. Hold the arrows down to adjust in larger increments.
*Please refer to Preset for instructions.
How to change the default cooking temperature or time
1. Turn the Brio on.
2. Set your desired temperature and/or time.
3. Press and hold the .
4. The Brio will beep twice indicating the default has been changed.
Note:
• The new default settings will remain when the Brio is turned off or unplugged.
Preheat: Heats the Brio to the set temperature before the timer starts. Must
press preheat before starting to cook.
1. Turn the Brio on and press PREHEAT.
2. Adjust settings to desired cooking temperature and time.
3. Press to begin the cooking cycle.
4. PREHEAT and set temperature will ash, indicating the Brio is preheating.
5. When preheated, the Brio will beep twice, “Ready” will display to indicate the set
temperature has been reached. A 10 second countdown will begin to place the
food into the Brio.
6. Open the Base Tray, this will pause the cooking, “Open” will display along with 2
beeps.
7. Close the Base Tray, cooking will begin, when nished the Brio will beep 3 times
and display “END”.
Note
• If the food is not placed in the Brio, the unit will beep 1 time then begin the
cooking cycle.
Ready
Open
700
1500
1800
Ready
Open
700
1500
1800

10 | nuwavenow.com
Preset
There are 100 named preprogrammed presets and are set to automatically
preheat. These are listed in the Quick Start Guide and Recipe Book. There are 50
user presets.
Using the 100 Presets
1. Press PRESET once, “1” and the preset name will scroll on the display.
2. Use the Up/Down arrows on the left to select the preset number for the recipe
you want to make.
Notification
The notication will inform you when it is time to shake the basket or flip your
food halfway through cooking. The notication will ash when selected or if it is
included in a preset. It must be selected before the cooking cycle begins.
Adding notification to your own recipe or user preset
1. Before beginning your cooking cycle, select the notication.
1. The notication will flash indicating it has been selected and will notify you
when it is time to shake, flip, or turn your food along with 3 triple beeps.
2. The flashing notication will display for approximately 8 seconds.
3. When the cooking cycle is nished, the Brio will beep 3 times and display
“END”.
Note
• If no action is taken when the notication happens, the flashing will
display for approximately 8 seconds.
• A preset that has the notication cannot be deleted.
• Once the cooking cycle has started, notication cannot be added or
deleted.
• When added to a preset or a user preset, will only display the word :FLIP”.
Auto Preheat
The Brio can be set to automatically preheat prior to cooking.
1. Press and hold PREHEAT.
2. The Brio will beep twice, indicating the auto preheat has been turned on.
3. Repeat to disable automatic preheat.
Note
• Auto Preheat will remain enabled even when the Brio is turned off or unplugged.

nuwavenow.com | 11
3. Once selection is made, press the Up/Down arrows on the right once to
display the temperature and time and adjust if desired.
4. Press to begin the cooking cycle.
5. When nished the Brio will display “END” and beep 3 times.
Making your own Presets 101-150:
1. Press PRESET twice, 101 will appear in the display.
2. Use the Up/Down on the left to select custom preset (101-150).
3. Once selection is made, press the Up/Down arrows on the right one time, to
display the temperature and time and adjust to your desired settings.
4. Preheat and notication can also be added to the preset.
5. Press and hold PRESET to save your custom settings. The Brio will beep
twice and show the preset number and SAVE on the display.
6. Press to begin cooking.
Making Preset from adjusted 100 Presets User preset are 101-150.
1. Press PRESET once, “1” and the preset name will scroll on the display.
2. Use the Up/Down arrows on the left to select the preset number for the recipe
you want to adjust.
3. Once selection is made, press the Up/Down arrows on the right once to
display the temperature and time and adjust to your desired settings.
4. Press PRESET twice, “101” will appear on the display.
5. Use the Up/Down arrows on the left to select the user preset you wish to save
the adjusted recipe under (101-150).
6. When the preset number is selected, press and hold PRESET. The Brio will
beep twice and SAVE will appear on the display.
7. Press to begin cooking.
Note
• Presets can be saved before, during, and after cooking.
• Wattage can be adjusted for any preset.
• User presets can be overridden.
• Custom presets cannot be named.
• Presets will always cook at the locked wattage.

12 | nuwavenow.com
Watts
For your convenience the Brio has 3 different wattages to suit your needs (1800W,
1500W, 700W). This allows the Brio to be used in places like dorms, RVs, or older
homes that don’t support 1800W.
1. Change the wattage by pressing WATTS to your selection.
To Lock in the Wattage
1. Select the wattage to be locked in.
2. Press and hold Watts until 2 beeps are heard, indicating the selected wattage
has been locked in.
3. Repeat to unlock.
Note
Locked wattage will reset when the Brio is unplugged.
Cooking Functions
The cooking functions below are frequently used cooking features. All functions
have a default temperature and time. Each has a set temperature range, that
cannot go below or above that set range.
1. Make your selection.
2. Adjust the temperature and time if desired.
3. Add preheat and notication to ip or shake, if desired.
4. Press Start and the cooking cycle will begin.
5. When the cooking cycle has nished the Brio will beep 3 times and display
“END”.
REHEAT: the default is 350°F for 10 minutes. Range: 300°F~400°F.
AIR FRY: the default is 350°F for 15 minutes. Range: 250°F~400°F.
BAKE: the default is 325°F for 25 minutes. Range: 250°F~400°F.
ROAST: the default is 350°F for 30 minutes. Range: 250°F~400°F.
DEHYDRATE: the default is 100°F for 2 hours. Range: 90°F~200°F.
TOAST: the default is 400°F for 5 minutes. Range: 350°F~400F.

nuwavenow.com | 13
50F – 275F 99:59 (99 hours and 59 minutes)
280F - 350F 24:00 (24 hours)
355F - 400F 1:00 (1 hour)
The maximum selectable cooking time differs depending on the
selected cooking temperature.
Mute- To mute the Brio, press and hold Bake until you hear 2 beeps. Repeat to
unmute.
Lock- To lock the settings press AIR FRY + BAKE simultaneously. Lock will
appear in the display. When locked all buttons are disabled except the power
button and AIR FRY + BAKE. Repeat to unlock the Brio.
WARNING
Do not place the unit on or near a hot gas burner, electric burner, or in a heated oven or on a stovetop.
NOTICE
It is perfectly normal for your new unit to produce a heated plastic smell when used for the first time.
This will go away after the first few uses.
14 | nuwavenow.com
Cleaning
Clean the Brio after every use or in between batches. The Base Tray and
Air Circulation Riser have a non-stick coating. Do not use metal utensils or
harsh abrasives when cleaning as these can damage the coating.
1. Unplug the appliance and make sure it cools completely.
2. Use a damp cloth to wipe the outside of the appliance.
3. Clean the Base Tray and inside components with a nonabrasive
sponge, hot water, and mild detergent.
4. To clean the display panel spray window cleaner on a clean cloth,
Then wipe display panel.
Note: Remove the Base Tray and place it on a heat-resistant surface to help
cool the appliance faster. If using the dishwasher for the Base Tray, and Air
Circulation Riser use the top rack only.
Tip: If there is residual food on the Base Tray, and Air Ciruclation Riser,
add some hot water and let them soak separately for about 10 minutes.
Then, use a soft cleaning brush to remove any lingering
food.
Storage
1. Unplug the Brio and let it cool down completely.
2. Make sure that all parts are clean and dry.
IMPORTANT - Do not immerse the Brio in water or
attempt to clean the appliance in the dishwasher.
Cleaning Silicone Tabs
The Circulation Riser comes with 4 Silicone Tabs.
1. Let the Circulation Riser cool completely.
2. Grasp the Circulation Riser by the central handle and pull it straight up to
remove it from the Base Tray.
3. Carefully pull the Silicone Tabs up to slide them off the metal tabs, then
pull each of them out.
Note: Wash the Air Circulation Riser and Silicone Tabs with warm, soapy
water and sponge. The Circulation Riser can be washed in a dishwasher, top
rack only. DO NOT wash the Silicone Tabs in the dishwasher.
CLEANING & MAINTENANCE
Replacing the Silicone Tabs
1. Insert the locking mechanism into the tab hole.
2. Slide the Silicone Tab over the metal tab.
3. Pull the locking mechanism until securely locked in place.

nuwavenow.com | 15
The Brio is not turning on or working.
1. The Brio is not plugged in.
2. You did not press the Power button.
3. The Base Tray is not properly in the Brio.
Insert the plug into an appropriate grounded power socket. Press the Power button. Place
the Base Tray into the Brio.
The ingredients fried in the Base Tray are not completely cooked.
1. Too many ingredients were used.
2. The cooking temperature is too low.
3. The cooking time is too short.
Remove some ingredients from the Base Tray; smaller batches air-fry more evenly. Cook
at a higher temperature. Set the Brio to air-fry for a longer time.
The food is fried unevenly.
1. Certain types of ingredients need to be shaken or ipped halfway through the cooking
process.
Fried snacks are not crispy when they come out of the Brio.
1. You used a type of snack meant to be prepared in a traditional deep fryer.
Use snacks designed to be baked in a traditional oven, or lightly brush some oil onto the
snacks before placing them into Brio for crispier results.
Cannot properly slide the Base Tray into the appliance.
1. The Base Tray is overlled.
Do not ll the Base Tray more than 4/5 full. Push the Base Tray into the Brio until you
hear a click.
White smoke is coming out of the Brio.
1. You are frying greasy food.
2. The Base Tray and Rack contains greasy residue from previous uses.
When preparing greasy ingredients in the air fryer, substantial amounts of oil can smoke
and infiltrate Base Tray. The oil will produce white smoke and the Base Tray might
become hotter than usual. This will not affect the final cooking result. White smoke is
caused by grease heating up in the Base Tray. Make sure you clean the Base Tray and
Riser properly after each use.
TROUBLESHOOTING GUIDE

16 | nuwavenow.com
Error Message: Solution(s):
Er1
The Brio has over-heated. Turn off and allow to cool completely.
Err1
The Brio has short circuited.
Err2
The Brio circuit has broken.
French fries are fried unevenly in the Brio.
1. You did not soak the potato sticks properly before air-frying them.
2. You did not use the right potato type, or they were not fresh.
Soak the potato sticks in a bowl of water for at least 30 minutes, remove them, and dry
them with paper towels. Use fresh potatoes and make sure they stay firm during air-
frying.
French fries are not crispy when they come out
of the Brio.
1. The crispiness of the fries depends on the amount of oil and water in the fries.
Make sure you dry the potato sticks properly before adding oil. Cut the potato sticks
smaller and dry them for a crispier result. Put slightly more oil on the potatoes before
placing them in the Brio for crispier results.
TROUBLESHOOTING GUIDE
If you still have any questions about operatiion or warranty of the product, please contact
NuWave LLC.
For Amazon Purchases: support@nuwavenow.com
For All Other Purchases: help@nuwavenow.com

nuwavenow.com | 17
THE MANUFACTURER WARRANTS
NuWave, LLC warrants the Brio Plus 8Q will be free from manufacturer defects for 1 year
from the date of purchase, under normal household use, and when operated in accordance
with the Manufacturer’s written instructions. The Limited Warranty covers the Original
Purchaser only. The Manufacturer will provide the necessary parts and labor to repair the
product at the NuWave LLC Service Department. After the expiration of the warranty, the
cost of the parts and labor will be the responsibility of the owner.
THE WARRANTY DOES NOT COVER
The Limited Warranty is voided if repairs are made by an unauthorized dealer, or the serial
number data plate is removed or defaced. Normal deterioration of nish due to use or
exposure is not covered by this Warranty. This Limited Warranty does not cover failure,
damages, or inadequate performance due to accident, acts of God (such as lightning),
uctuations in electric power, alterations, abuse, misuse, misapplications, corrosive-type
atmospheres, improper installation, failure to operate in accordance with the Manufactur-
er’s written instructions, abnormal use, commercial or rental uses, or resold units. NuWave
LLC reserves the right to void the Limited Warranty, where allowable by law, for products
purchased from an unauthorized dealer.
TO OBTAIN SERVICE
The owner shall have the obligation and responsibility to pay for all services and parts not
covered by the warranty; prepay the freight to and from Service Department for any part
or system returned under this warranty; and carefully package the product using ade-
quate padding material to prevent damage in transit. The original container is ideal for this
purpose. Include in the package the owner’s name, address, daytime telephone number,
a detailed description of the problem, and RGA (Return Goods authorization number). To
obtain the RGA number, email us at:
For Amazon Purchases: [email protected]
Provide the product, model, & serial number and proof of date of purchase (a copy of the
receipt) when making claims under this warranty.
MANUFACTURER’S OBLIGATION
The Manufacturer’s obligation under this Limited Warranty is limited, to the extent allow-
able by law, to repairing or replacing any part covered by this Limited Warranty which upon
examination is found to be defective under normal use. The Limited Warranty is applicable
only within the continental United States and only to the original purchaser of the manufac-
turer’s authorized channels of distribution. THE LIMITED WARRANTY MAY NOT BE AL-
TERED, VARIED OR EXTENDED EXCEPT BY A WRITTEN INSTRUMENT EXECUTED
BY THE MANUF ACTURER. THE REMEDY OF REPAIR OR REPLACEMENT AS PRO-
VIDED UNDER THIS LIMITED WARRANTY IS EXCLUSIVE. IN NO EVENT SHALL THE
MANUFACTURER BE LIABLE FOR ANY CONSEQUENTIAL OR INCIDENTAL DAMAG-
ES TO ANY PERSON, WHETHER OR NOT OCCASIONED BY NEGLIGENCE OF THE
MANUFACTURER, INCLUDING WITHOUT LIMITATION, DAMAGES FOR LOSS OF
USE, COSTS OF SUBSTITUTION, PROPERTY DAMAGE, OR OTHER MONEY LOSS.
Some states do not allow the exclusion or limitation of incidental or consequential damag-
es, so the above limitation exclusions may not apply. This Limited Warranty gives specic
legal rights, and there may also be other rights which vary from state to state. EXCEPT AS
OTHERWISE EXPRESSLY PROVIDED ABOVE, THE MANUFACTURER MAKES NO
WARRANTIES EXPRESSED OR IMPLIED ARISING BY LAW OR OTHERWISE,
LIMITED WARRANTY

18 | nuwavenow.com
INCLUDING WITHOUT LIMITATION, THE IMPLIED WARRANTIES OF MERCHANTABI-
LITY AND FITNESS FOR A PARTICULAR PURPOSE TO ANY OTHER PERSON. READ
YOUR OWNER’S MANUAL. IF YOU STILL HAVE ANY QUESTIONS ABOUT OPERA-
TION OR WARRANTY OF THE PRODUCT, PLEASE CONTACT NUWAVE LLC.
DISPUTE RESOLUTION PROCEDURE
For disputes relating to use of the website or use or purchase of a NuWave product or ser-
vice (collectively “Disputes”), you agree to rst contact NuWave LLC at legal@nuwavenow.
com. If we cannot resolve your dispute informally, any and all disputes shall be submitted
to nal and binding arbitration. You may start the arbitration process by submitting in writing
a demand to the American Arbitration Association (“AAA”) and sending a copy to NuWave.
NuWave will pay all ling costs. A single arbitrator of the AAA will conduct the arbitration in
a location convenient to you or by phone. The arbitrator’s award will be binding and may be
entered as a judgment in a court of competent jurisdiction. The arbitration will be conduct-
ed in accordance with the provisions of AAA’s Commercial Arbitration Rules and Mediation
Procedures in eect at the time of submission of your demand for arbitration. See https://
www.adr.org/sites/default/les/CommercialRules_Web.pdf. Except as may be required by
law as determined by an arbitrator, no party or arbitrator may disclose the existence, con-
tent, or results of any arbitration hereunder without prior written consent of both parties.
A. WAIVER OF RIGHT TO SUE. By agreeing to arbitration, you understand that, to the maximum
extent permitted by law, you are agreeing to waive your right to le suit in any court, to a court
hearing, a judge trial, or a jury trial.
B. CLASS ACTION WAIVER. To the maximum extent permitted by law, you expressly agree
to refrain from bringing or joining any claims in any representative or class-wide capacity,
including but not limited to, bringing or joining any claims in any class action or class-wide
arbitration.
C. OPT OUT PROCEDURE. To request to opt out of arbitration you must contact NuWave LLC
at legal@nuwavenow.com, NuWave LLC, 560 Bunker Ct., Vernon Hills, IL 60061, U.S.A. You
will have thirty (30) days from the date of product delivery to opt out of arbitration with respect
to any dispute arising out of or relating to use or purchase of any NuWave product. If more
than 30 days have passed, you are not eligible to opt out of arbitration and will have waived
your right to sue or participate in a class action with respect to the dispute arising out of your
purchase or use of a NuWave product. For any dispute arising out of your use of NuWave’s
website, you have thirty (30) days from the date you provided information to the website to opt
out of arbitration. If more than 30 days have passed, you are not eligible to opt out of arbitra-
tion and you will have waived your right to sue and participate in a class action with respect to
the dispute arising out of your use of NuWave’s website.
D. SOME MATTERS ARE NOT SUBJECT TO ARBITRATION. Notwithstanding the foregoing,
the following shall not be subject to arbitration and may be adjudicated only in the state and
federal courts of Illinois: (i) any dispute, controversy, or claim relating to or contesting the
validity of our intellectual property rights and proprietary rights, including without limitation,
patents, trademarks, service marks, copyrights, or trade secrets; (ii) an action by a party for
temporary, preliminary, or permanent injunctive relief, whether prohibitive or mandatory, or
other provisional relief; or (iii) interactions with governmental and regulatory authorities. You
expressly agree to refrain from bringing or joining any claims in any representative or class-
wide capacity, including but not limited to, bringing or joining any claims in any class action or
any class-wide arbitration.
LIMITED WARRANTY

nuwavenow.com | 19
NOTES

BM37401
Rev.1-V3-JL
02-13-24
FOR HOUSEHOLD USE ONLY
120V, 60Hz, 1800 Watts
Model: 37401-37405
Rev.1
Para la versión en español de este manual,
visita www.nuwavenow.com.
For patent information please go to:
www.nuwavenow.com/legal/patent
Designed & Developed in USA
NuWave LLC
560 E. Bunker Ct.
Vernon Hills, IL 60061, U.S.A.
Made in China
©2024 NuWave LLC • All Rights Reserved.