4X4ALTIMETER
Integrated Information
Display
User & Installation
Guide
4X4ALTIMETER_IUG _en-GB_v1
2
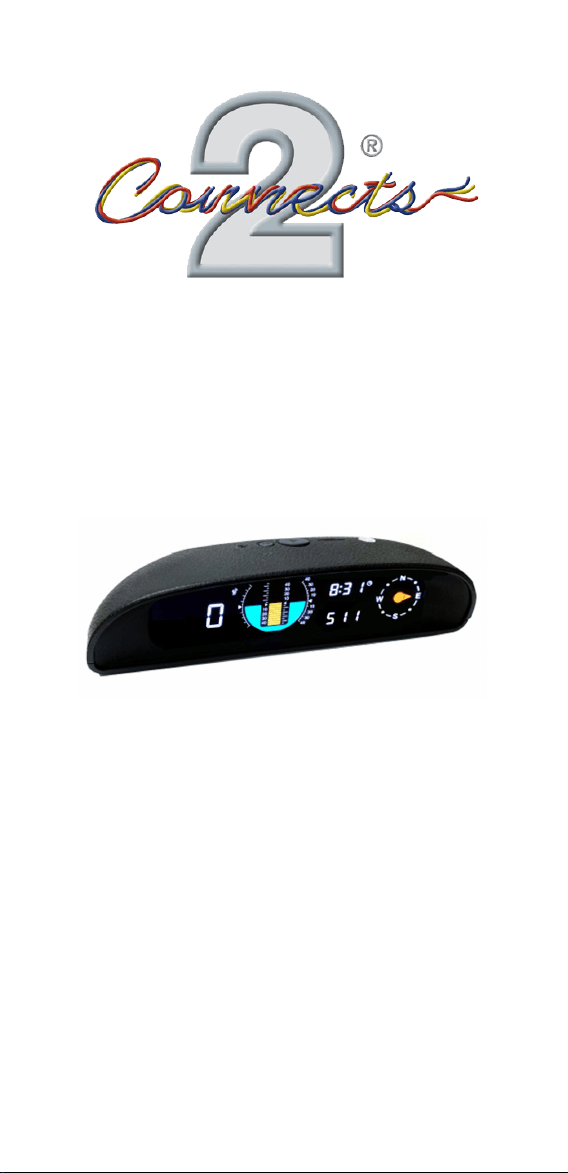
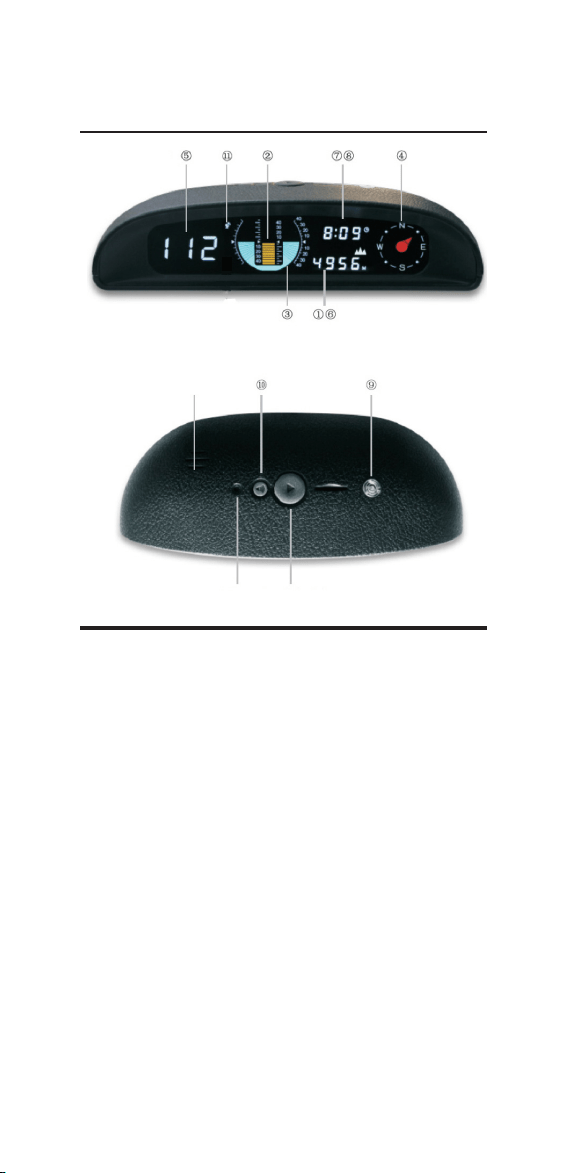
Display
Pair
Button
Power
Button
Integrated
Speaker
(1) (6) Elevation Altitude / Temperature
Display cycles between elevation altitude and internal temperature
every 10 seconds
(2) (3) Pitch Angle / Roll Angle
Displays current pitch angle. To reset/zero, press and hold the
Power Button whilst the device is on for 3-5 seconds. This is recom-
mended whenever the device is repositioned in the vehicle
(7) (8) Time / Voltage
Display cycles between current time (hours/minutes) and voltage
every 10 seconds. Correct time is automatically calibrated by GPS
(5) Speed
Displays the current speed of the vehicle
(9) Light Sensor
Automatically adjusts the brightness of the display relative to
outside brightness to reduce glare
(4) Electronic Compass
Displays vehicle orientation (Automatically calibrated by GPS)
(11) GPS Data
Icon will be displayed when a successful GPS connection has been
established
(10) Volume
Adjust device volume. Each press will cycle up through the values
(+/-/Mute)
3
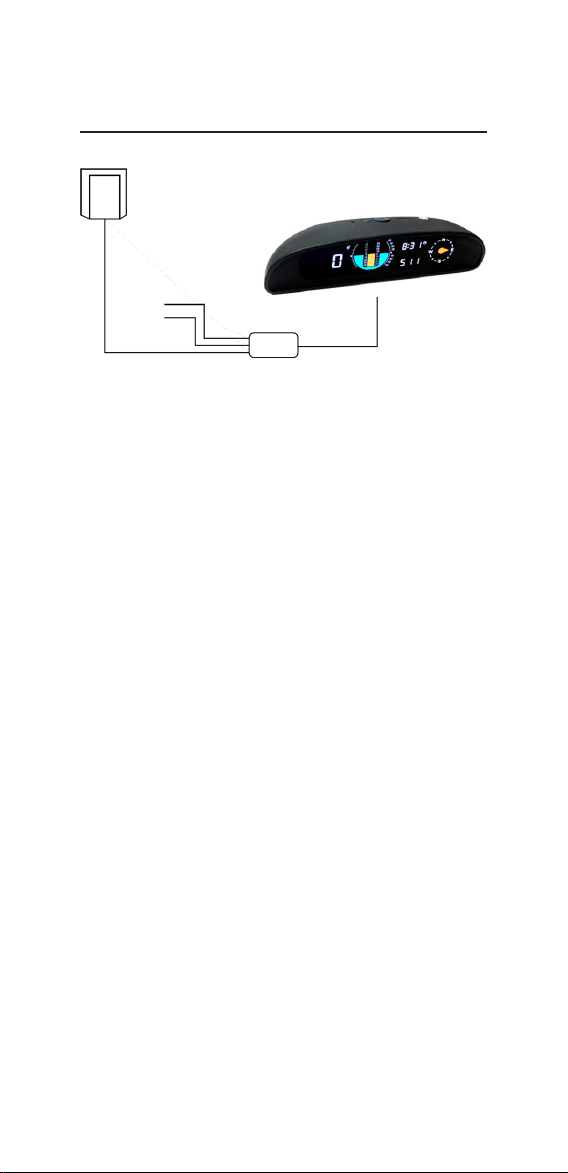
Installation
1. Connect the ACC wire to the ACC power supply of the car, and
connect the GND wire to a suitable ground point.
2. Position the GPS module in a suitable location in the vehicle to
receive optimal signal (e.g. A pillar, roof liner etc).
3. It is recommended that the display is installed on the centre of
the dashboard, close to the windscreen to enable wires to be hidden
and ensure a good view for the driver. Install the display using 3M
tape after rst cleaning the surface.
4. After turning on the device for the rst time, or after having
moved the device, press and hold the power button whilst the
device is powered on for 3-5 seconds to reset/zero the pitch and roll
angle to ensure that the values are accurate.
Changing Time Zone Settings
To change the default time zone of the device, press and hold the
power button whilst the device is off. Turn the device on and the
current time zone setting will be displayed on the Speed display (5).
Note: the default time zone is set to GMT.
Press the power button to cycle to the desired value and then turn
off the device. When the device is next powered on, the time zone
will be set to the chosen value.
Changing Measurement Settings
The measurement readings (speed, altitude, temperature) of the
device can be adjusted from metric to imperial.
Note: the device is set to Metric by default.
Metric Imperial
Speed Km/h Mph
Altitude m ft
Temp. °C °F
To change the measurement type, press and hold the pair button
whilst the device and vehicle ignition are switched off. Then switch
on the vehicle ignition. A ‘C’ (Metric) or ‘F’ (Imperial) will be dis-
played on screen. To cycle between the options, turn off the ignition
and press and hold the pair button to display the next option. Once
the desired option has been set, turn on the device.
ACC (Red)
GND
(Black)
Altimeter
External GPS Module

4
Pitch Angle -40 ° ~+40 °
Roll Angle -40 ° ~+40 °
Temp. Accuracy +/- 1 °C
Clock Error < 1 Min
Voltage Measurement Range DC 5-30V
Speed Precision <0.36Km/h
Operating Temp. -40 °C ~+80 °C
Power Supply DC 10V ~ 30V
Specication