Loading ...
Loading ...
Loading ...
Installations (refer to page 4 & 11 for parts):
Measure the distance between stove top and the bottom1.
of range hood. A distance of 28” to 31” is required.
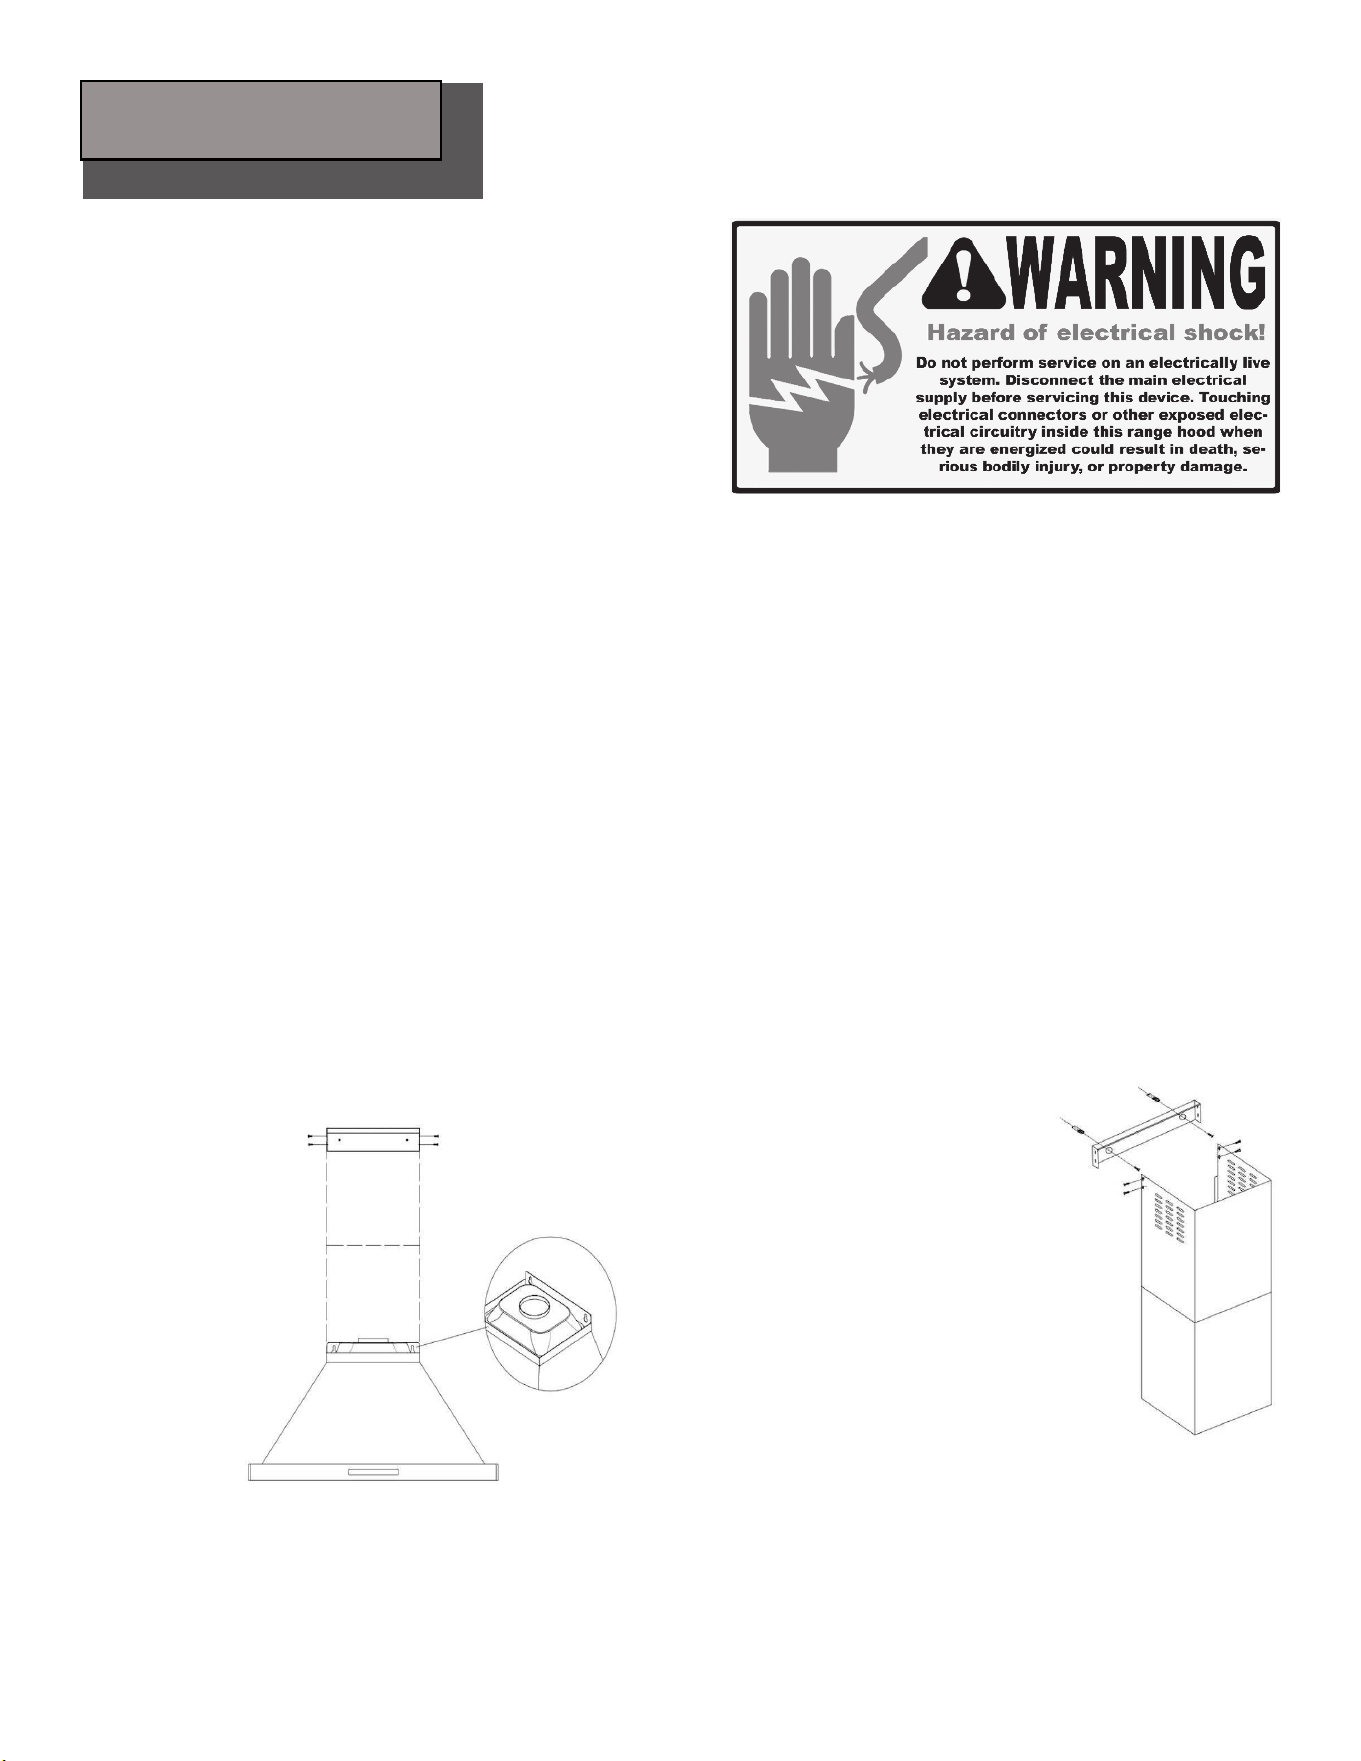
Make sure the range hood is level and not tilted. Mark2.
the locations of the hanging bracket holes on the wall as
shown in Figure 3A and Figure 3B.
Place the mounting bracket 3. directly above the range
hood, level it, and mark the locations of the mounting
bracket holes on the wall.
Place aside all equipments, locate marked regions and drill holes. Attach range hood to wall using anchors4.
recommended for your type of wall:
Sheet rock wall: Attach range hood to stud blockings if possible. If stud blockings are not available, it is•
required to build a supporting structure behind the sheet rock for best weight support.
Concrete wall: Use designated screws (not provided).•
Wood wall: Use at least 5 cm long wood screws (not provided).•
Fasten two Type “A” anchors (for range hood and for mounting bracket or air diverter) on the wall as shown6.
in Figure 4. Loosely fasten two Type “B” screws onto anchors, DO NOT fasten screws all the way. Hang the
range hood on the Type “B” screws and hand tighten them.
Leave approximately 1/8” of gap from the wall to the
range hood.
Place the mounting bracket against the wall and align the holes from mounting bracket with holes from Type7.
“A” anchors, fasten two Type “B” screws through the holes onto the anchors as shown in Figure 5. Leave ap-
proximately 1/8” of gap from the wall to the mounting bracket.
Page 10
Installation
Figure 3A
Figure 4
Secure
upper
support
frame
Figure 3B
Fasten mounting
bracket
Slide up and secure
upper chimney to
mounting bracket
Hold in position and
secure lower chimney
to range hood
Figure 5
Loading ...
Loading ...
Loading ...