Loading ...
Loading ...
Loading ...
reversing the door
Your XO Ice Maker is shipped with the hinge on the right hand side but it can be easily reversed.
IMPORTANT NOTE: Stainless Steel door models and Panel Ready models use different hinges
and Panel Ready models require additional steps when reversing the door.
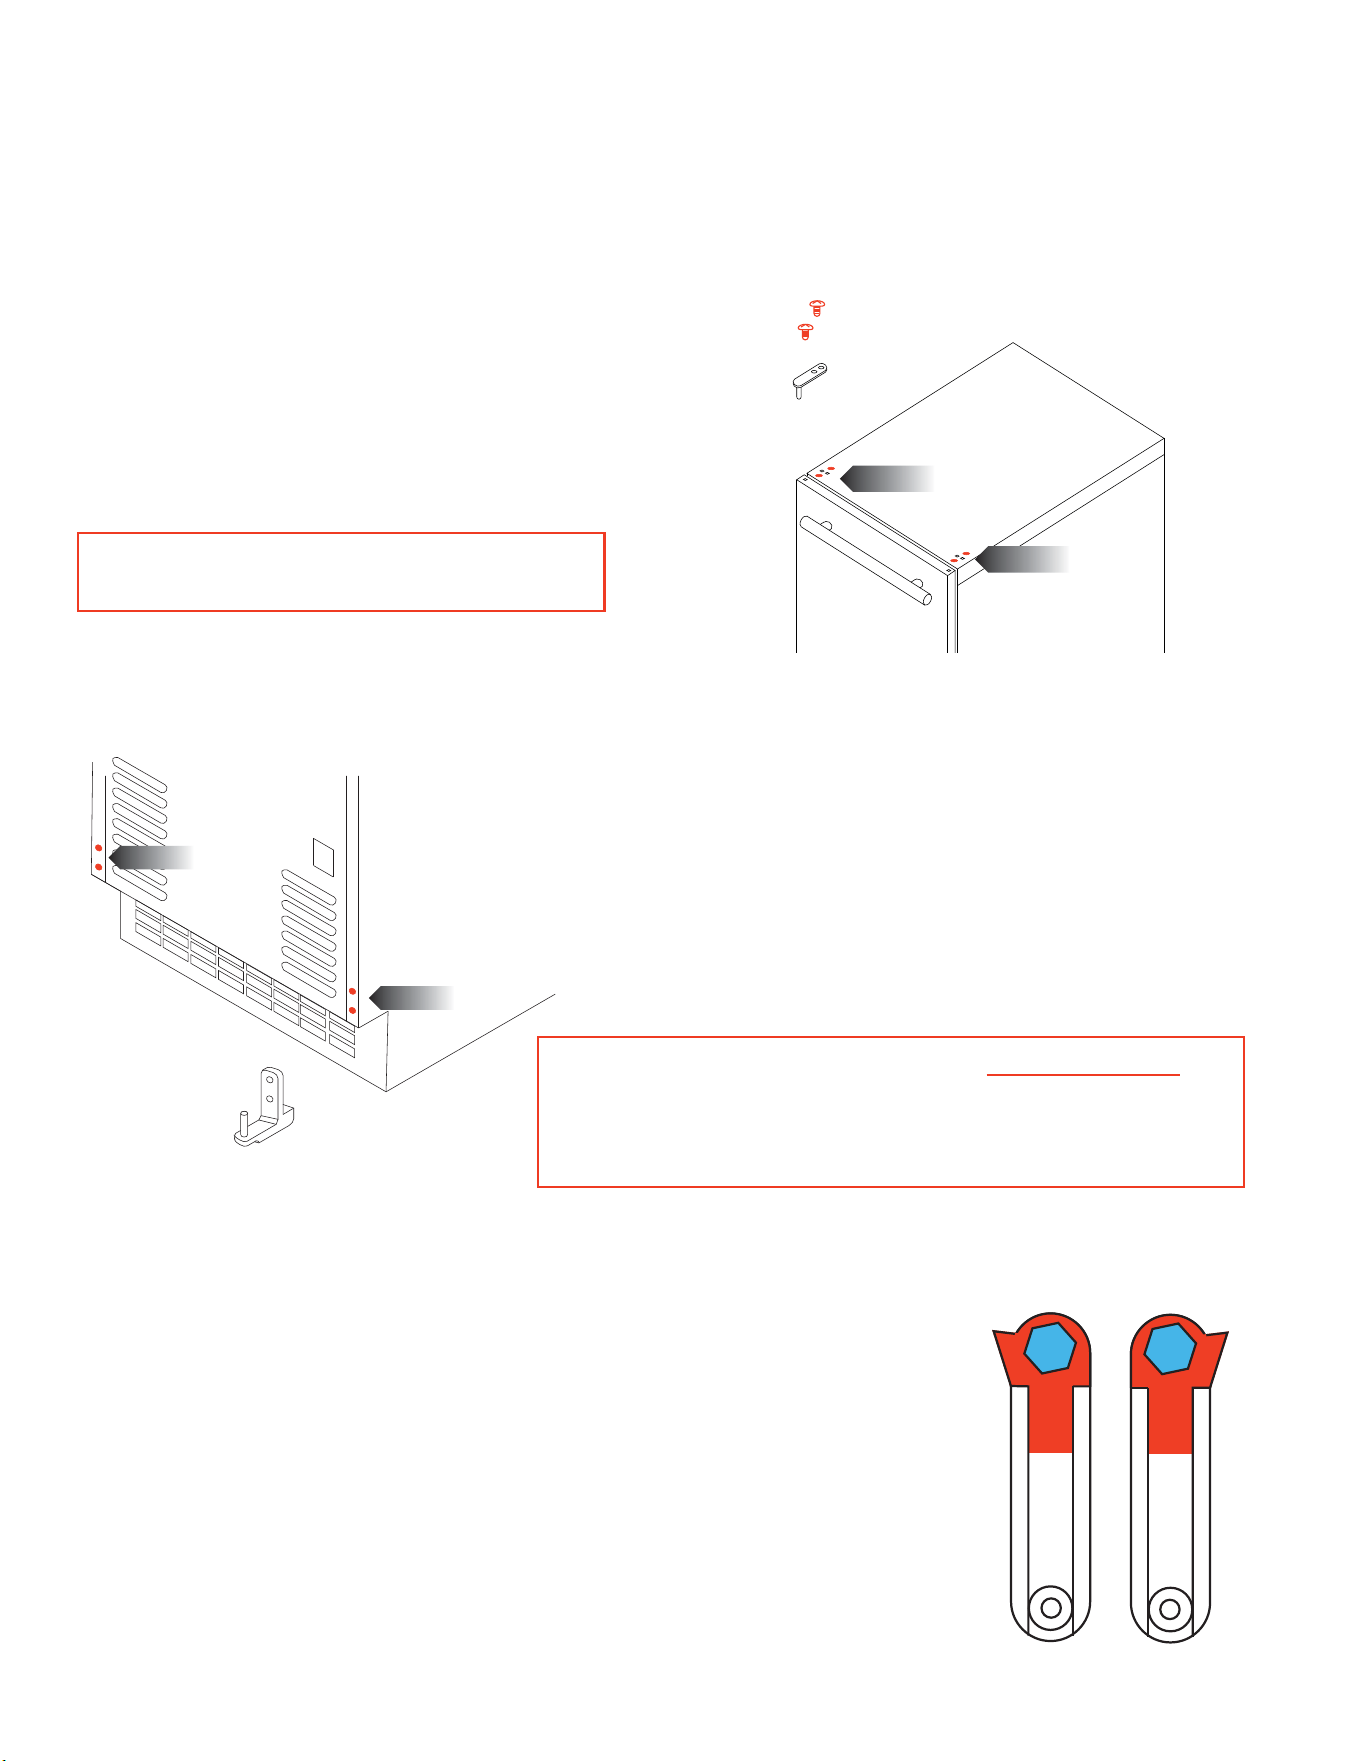
1. While supporting the door, remove the two (2) screws
(shown in RED) that hold the Top Hinge in place.
The Top Hinges are virtually the same for
Stainless Steel and Panel Ready models.
Remove the door by lifting it straight up.
2. Remove the two (2) screws that hold the Bottom Hinge in
place. Remove the two (2) corresponding screws on the left
hand side. Install the Bottom Hinge in the left hand position
and install the remaining two (2) screws into the holes on the
r
NOTE: The Panel Ready unit has an additional screw that
comes up from the bottom that must be also be removed.
In addition, you must reverse the DOOR STOP INSERT
shown in Step 2A before re-installing.
ight hand side.
.
TOP HINGE
RIGHT HAND
POSITION
LEFT HAND
POSITION
15
BOTTOM HINGE
RIGHT HAND
POSITION
LEFT HAND
POSITION
2A.
on the left side, you must reverse the DOOR STOP INSERT located
on the underside of the bottom hinge. Simply remove the hex head
bolt that doubles as the hinge pin (shown in BLUE) -
flip the stop over (shown in RED)
and re-install the hex head bolt.
Panel Ready Units Only: Before re-installing the bottom hinge
VIEWS OF
BOTTOM HINGE
SEEN FROM BELOW
BEFORE AND AFTER
REVERSING THE STOP
Loading ...
Loading ...
Loading ...