Loading ...
Loading ...
Loading ...
11
1b.
1c.
J
I
1b
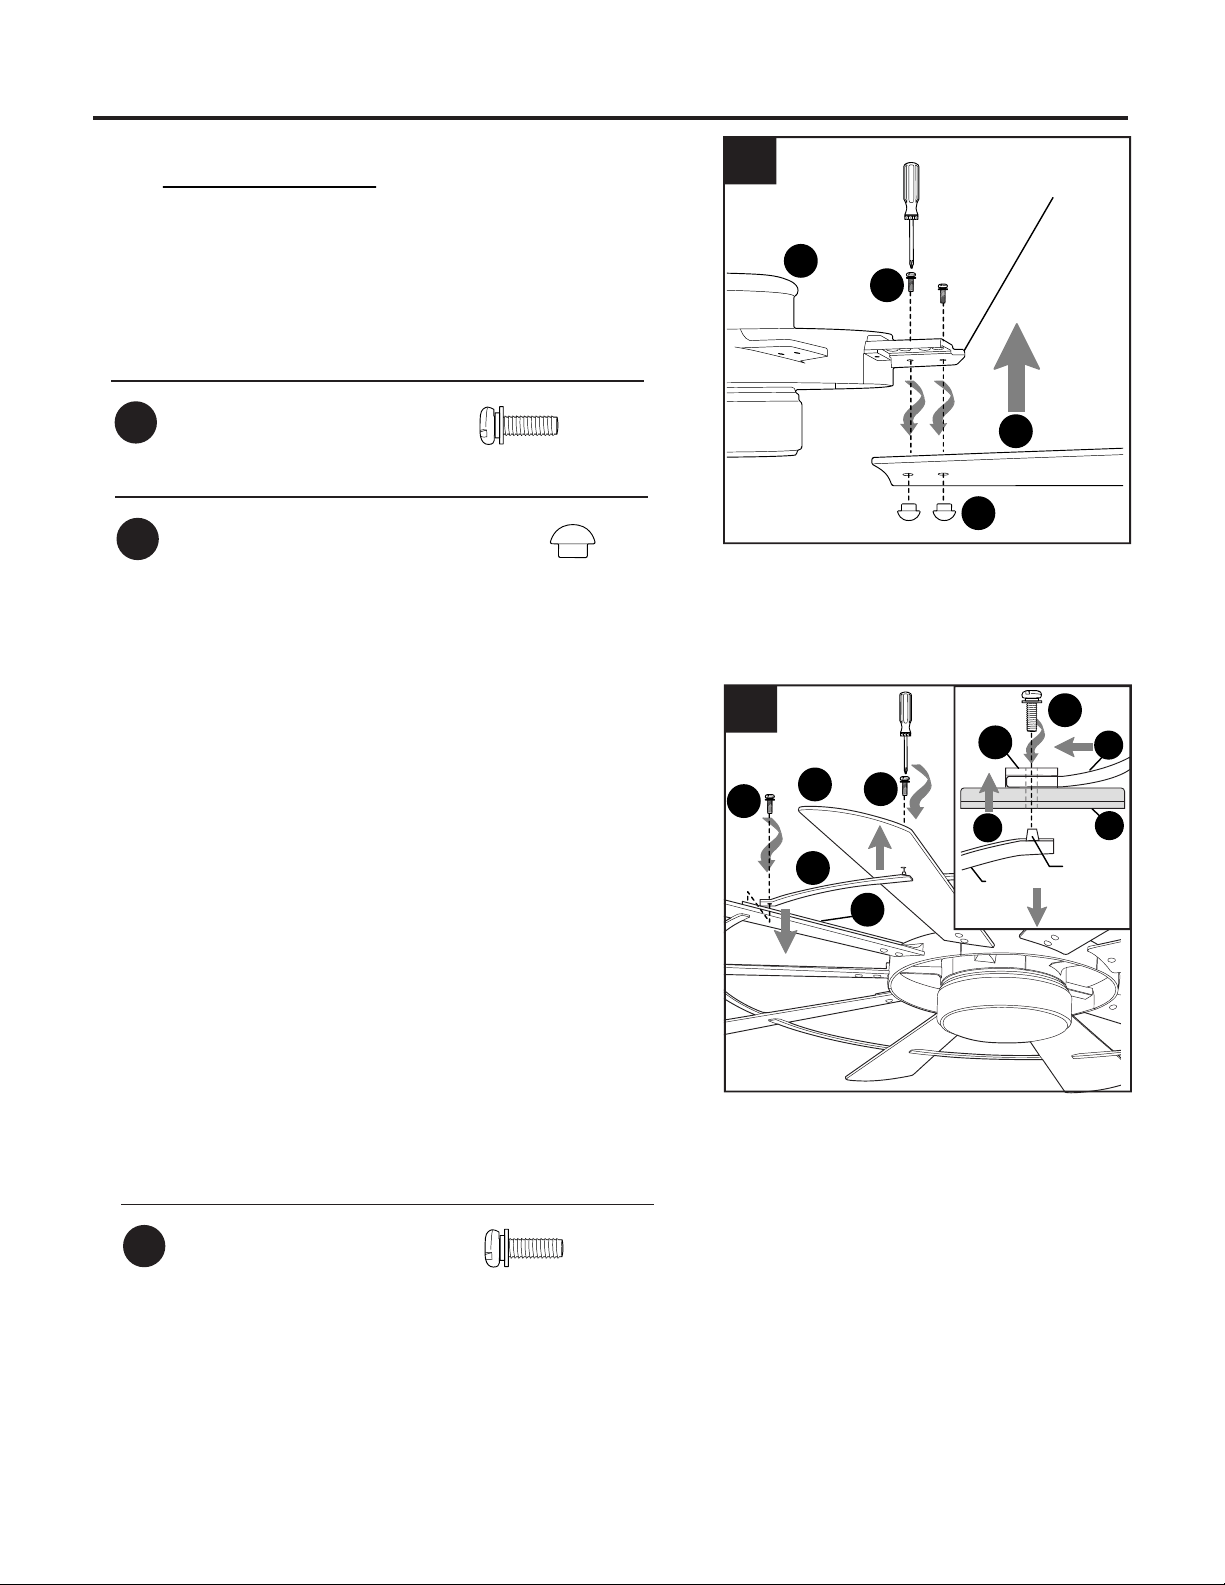
Attach one of the remaining five blades (J) to the
V-shaped blade arms on the motor assembly (I)
using two blade screws/washers (AA) and two
decorative nuts (BB).
Repeat step for the other four remaining blades (J).
Hardware Used
Blade Screw/Washer
x 10
AA
Hardware Used
Decorative Nut
x 10
BB
BB
V-shaped
blade arm
AA
L
J
AA
AA
Connect each blade (J) using the blade bars (L).
On the topside of the blade (J), slide the bent
portion of the blade bar (L) directly under the
opening at the end of the blade bracket (K),
aligning the holes. Then, on the underside of the
blade (J), insert the nodule portion of another blade
bar (L) directly under the same hole. Secure with
one blade screw/washer (AA).
NOTE: Blade bar (L) must be turned with the
smooth side toward the floor.
Repeat step for the remaining blade bars (L) until
the blades (J) are all connected.
CAUTION: Assistance from another person is
recommended for this step.
Hardware Used
Blade Screw/Washer
x 10
AA
1c
L
J
nodule
smooth
side
AA
K
K
L
FINAL INSTALLATION
Loading ...
Loading ...
Loading ...