Loading ...
Loading ...
Loading ...
CAUTION
●
When the battery charger has been continuosly
used, the battery charger will be heated, thus
constituting the cause of the failures. Once the
charging has been completed, give 15 minutes
rest until the next charging.
●
If the battery is charged while it is heated
because it has been left for a long time in a
location subject to direct sunlight or because the
battery has just been used, the pilot lamp of the
charger lights for 1 second, does not light for 0.5
seconds (off for 0.5 seconds).
The battery will not be recharged. In such a case,
let the battery cool before charging.
●
When the pilot lamp fl ickers (at 0.2-second
intervals), check for and take out any foreign
objects in the charger’s battery connector. If
there are no foreign objects, it is probable that
the battery or charger is malfunctioning. Take it
to your authorized Service Center.
PRIOR TO OPERATION
1. Power switch
Ensure that the switch is in the OFF position.
2. Check your work environment
Ensure the following before operation:
○
No fl ammable gas, liquid, or object at worksite.
○
When grinding thin steel sheet it may cause a high
booming noise.
To avoid such noise, place a rubber mat under the
workpiece.
○
Clear the area of children or unauthorized
personnel.
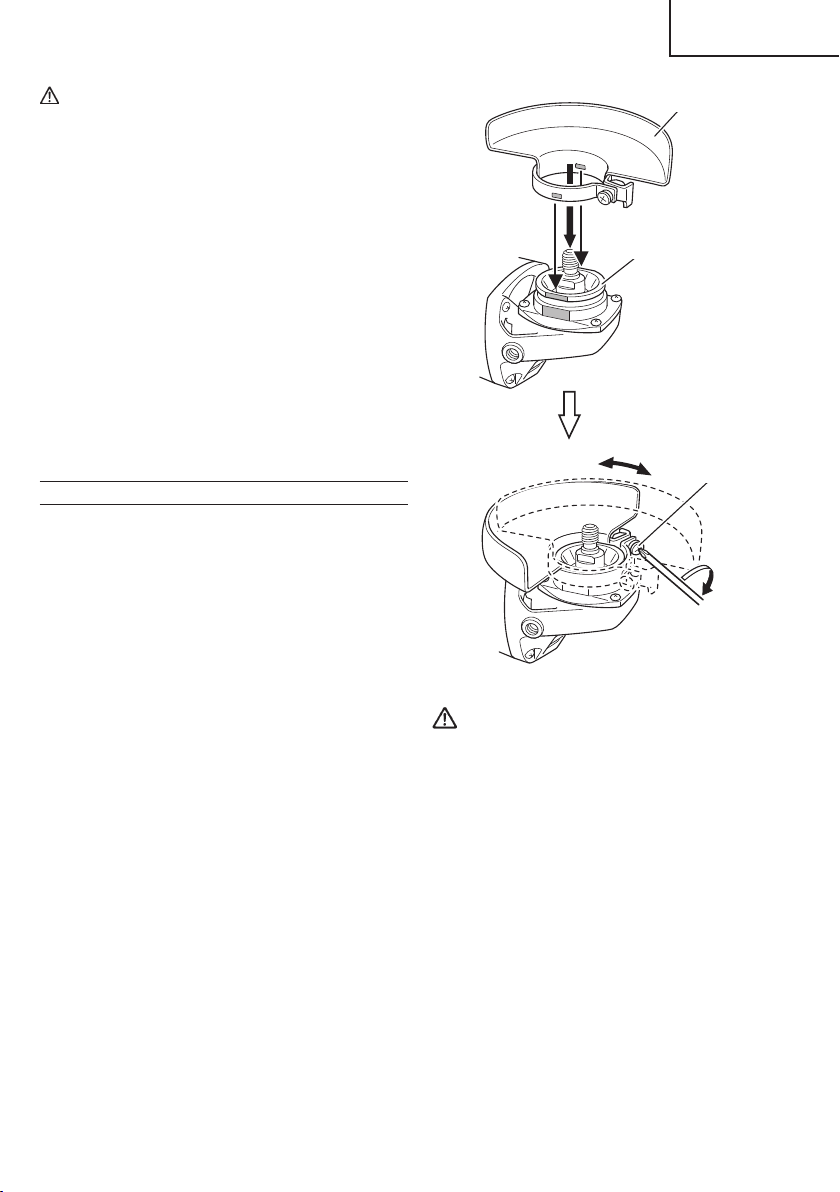
3. Mounting the wheel guard
Be sure to mount the wheel guard at an angle that will
protect the operator’s body from injury by a broken
wheel piece.
[How to attach and adjust the wheel guard] (Fig. 7)
○
Slightly loosen the screw on the wheel guard.
○
Install the wheel guard to the packing gland, turn
it to the angle suitable for operation, and make
adjustment.
○
After the adjustment, ensure that the screw is
securely tightened on the wheel guard in order to
fi x it completely.
Packing gland
Wheel guard
Screw
Fig.7
WARNING
If the wheel guard is not attached properly, a
broken wheel may result in and cause death or
serious injury.
4. Thoroughly check that the depressed center wheel
is free of cracks, splits and other abnomalities before
mounting. Make sure it is fi rmly clamped and has
been properly mounted. Refer to page 17 of this
manual for Depressed Center Wheel Assembly and
Disassembly.
5. Test the grinder before using.
Before actually beginning the grinding work, test the
grinder by fi rst clearing the area of all other personnel.
Make sure the wheel guard is in place and that you
are wearing eye protection. Turn the grinder “on”, and
make sure the grinder runs smoothly and shows no
abnormalities.
Duration of the trial run is as follows:
When depressed center wheel
is replaced .............................. 3 minutes or more
When starting daily work .......... 1 minute or more
15
English
00BookG18DSL2metabo.indb1500BookG18DSL2metabo.indb15 2020/09/1016:34:502020/09/1016:34:50
Loading ...
Loading ...
Loading ...