i mmmJENN-AIR
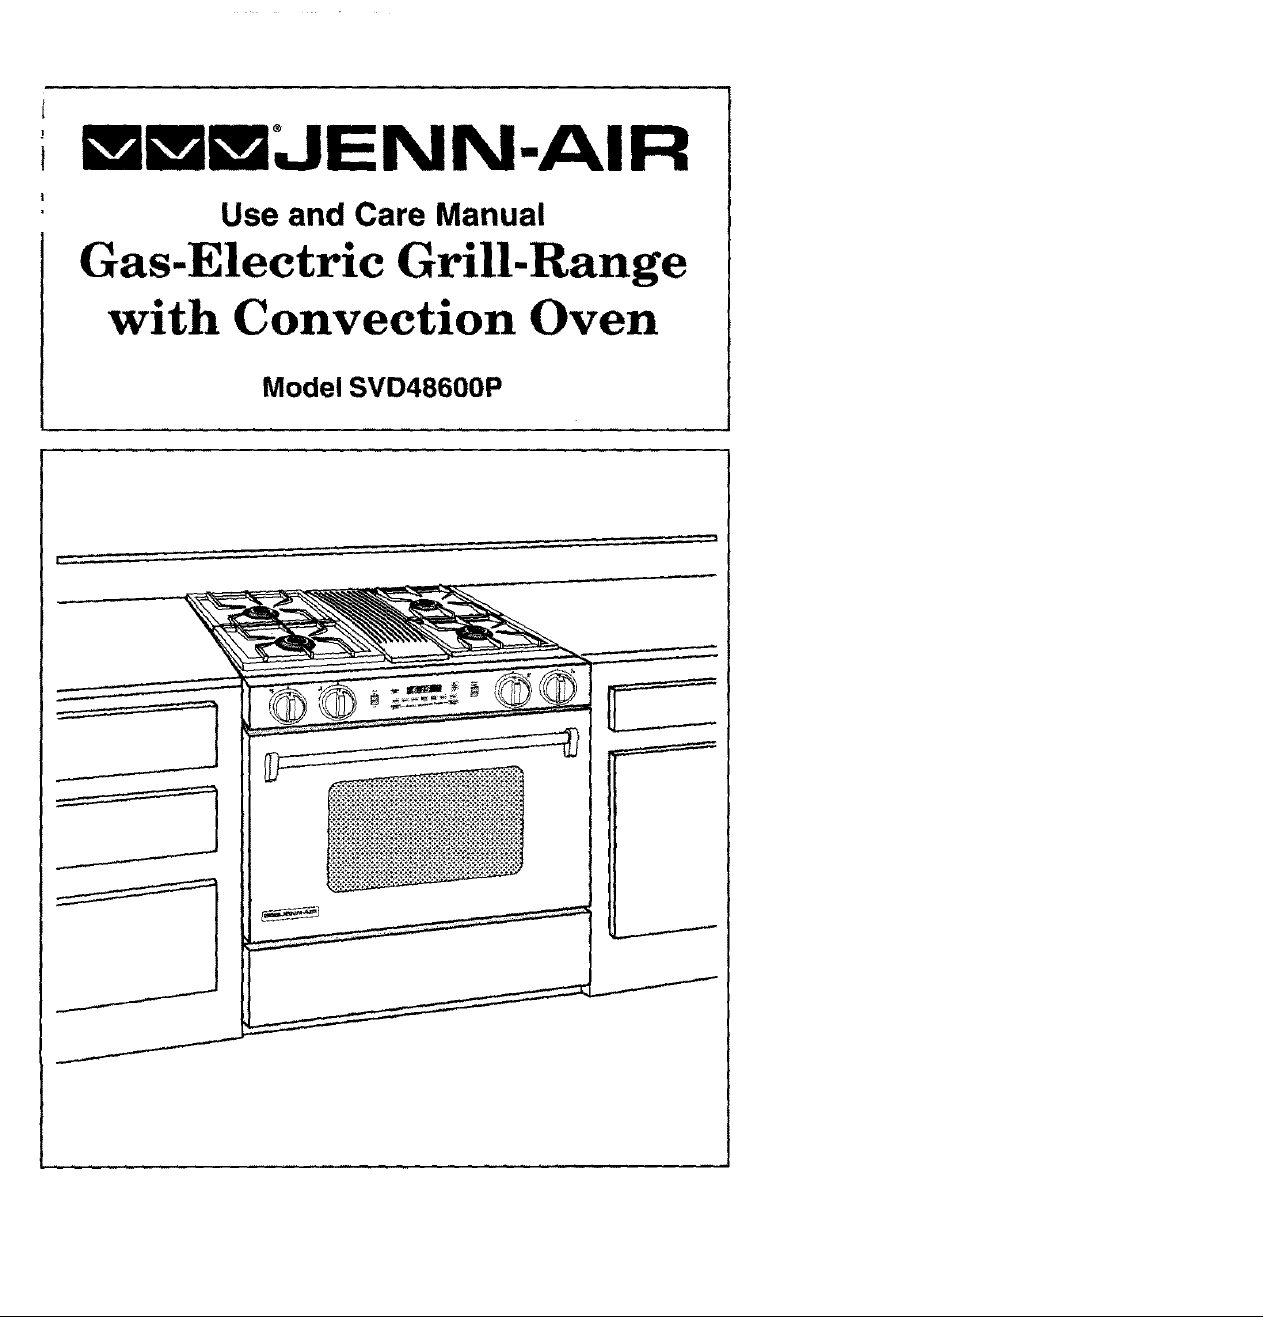
Use and Care Manual
Gas-Electric Grill-Range
with Convection Oven
Model SVD48600P
I
WARNING: If the information in this manual is
not followed exactly, a fire or explosion may
result causing property damage, personal injury
or death.
Do not store or use gasoline or other flam-
mable vapors and liquids in the vicinity of
this or any other appliance.
- WHAT TO DO IF YOU SMELL GAS
• Do not try to light any appliance.
• Do not touch any electrical switch; do not
use any phone in your building.
• Immediately call your gas supplierfrom a
neighbor's phone. Follow the gas
supplier's instructions.
• If you cannot reach yourgas supplier, call
the fire department.
• Extinguish any open flame.
- Installation and service must be performed
by a qualified installer, service agency orthe
gas supplier.
-SAVE THESE INSTRUCTIONS FOR FUTURE REFERENCE-

Congratulations on your choice of a Jenn-Air grill-range. The indoor grilling
of meats, fish or fowl is one of the most attractive and succulent methods
of preparing these foods, .. a unique flexibility made possible by Jenn-Air's
patented integral ventilation system.
Your Jenn-Air self-cleaning oven combinesthe best of four cooking methods,
conventional baking or roasting, convection baking or roasting and broiling.
The Jenn-Air convection oven is actually a conventional oven that circulates
heated air within the oven. As both bake and broil heating elements cycle on
and off with the thermostat, a fan keeps the heated air circulating around the
food. The constantly recirculating heated air in the convection oven strips
away the layer of cooler air that surrounds the food, Consequently, many
foods cook more quickly. Evenly distributed heat makes multiple rack
cooking possible. Convection roasted meats retain their natural flavor and
juiciness with less shrinkage than conventional roasting.
In addition to the many exclusive benefits of convection cooking, your Jenn-
Air oven is also a fine full featured conventional bake and broil oven. You can
cook your "old favorite" recipes as you have in the past. The conventional
bake oven also gives you the flexibility of preparing various foods when
convection cooking may not be as beneficial, as when cooking foods in
covered casseroles or clay pots. The broil element is convenient for top
browning and oven broiling of foods.
Before you begin cooking with your new range, please take a few minutes to
read and become familiar with the instructions in this book. On the following
pages you will find a wealth of information regarding all aspects of using your
new range. By following the instructions carefully, you will be able to fully
enjoy and properly maintain your range and achieve excellent results with the
food you prepare.
Should you have any questions about using your Jenn-Air range, write to us.
Be sure to provide the model number.
Jenn-Air Customer Assistance
c/o Maytag Customer Service
P.O. Box 2370
Cleveland, TN 37320-2370

Appliance Usage
Before You Call For Service ................................................................................................ 50-52
Caring For Your Range
Access Panel .................................................................................................................. 47
Adjust Oven Temperature .................................................................................................. 48
Cleaning Other Parts of Your Range ............................................................................ 45-46
How to Remove the Range ................................................................................................ 48
Oven Light Bulb ................................................................................................................. 47
Range Components ................................................................................................................... 11
Safety Precautions ............................................................................................................... 2, 5-8
Using the Cooktop and Grill
Accessories ............................................................................................................................. 49
Cookware .................................................................................................................................. 14
Ducting Information ...................................................................................................................... 9
Grilling
Cleaning ....................................................................................................................... 20-21
Gdlling Guide ..................................................................................................................... !9
Grilling Tips ....................................................................................................................... 20
Installation ......................................................................................................................... 17
Using the Grill .................................................................................................................... 18
How a Surface Burner Works
Air Shutter Adjustment .................................................................................................. 12-13
How to Operate in the Event of a Power Failu re ................................................................ 12
Low Flame Adjustment ...................................................................................................... 13
Surface Burner Module .............................................................................................................. 16
Surface Controls .................................................................................................................. 15
Ventilation System ..................................................................................................................... 10
Using the Oven
Baking
Baking Charts ................................................................................................................... 31
Causes of Cake Failure ..................................................................................................... 32
Convect Baking ............................................................................................................ 32-33
General Recommendations ............................................................................................... 30
Broiling ................................................................................................................................. 38-39
Clock Controls
Clock Controlled Baking and Roasting ......................................................................... 28-29
Time of Day Clock ............................................................................................................. 26
Timer ................................................................................................................................. 27
Oven Cleaning
Serf-Cleaning Process .................................................................................................. 40-44
Oven Operation
Oven Control Panel ...................................................................................................... 22-23
Rack Positions .................................................................................................................. 25
Setting Controls ................................................................................................................. 24
Roasting
Convection Roasting .......................................................................................................... 36
Frozen Convenience Foods ...............................................................................................37
General Roasting Recommendations ................................................................................. 34
Roasting Chart ................................................................................................................... 35
Read before operating your range
All appliances - regardless of the manufacturer - have the potential
through improper or careless use to create safety problems, Therefore
the following safety precautions should be observed:
1. Be sure your appliance is properly installed and grounded by a
qualified technician.
2. Never use your appliance for warming or heating the room, This
warning is based on safety considerations.
3. Children should not be left alone or unattended in area where
appliance is in use. They should never be allowed to sit or stand
on any part of the appliance.
4. Wear proper apparel. Loose-fitting or hanging garments should
never be worn while using the appliance.
5. Do not repair or replace any part of the appliance unless specifically
recommended in this manual. All other servicing should be
referred to an authorized Jenn-Air Service Contractor,
6. Do not store combustible materials, gasoline or other flammable
vapors and liquid near cooktop. This also applies to aerosol sprays
and aerosol spray cans.
7. Do not use water on grease fires. Smother fire or flame or use dry
chemical or foam-type extinguisher,
8, Use only dry potholders. Moist or damp potholders on hot surfaces
may result in burns from steam. Do not use a towel or other bulky
cloth.
9. Select cookware large enough to properly contain food and avoid
boilovers or spillovers. This will save on cleaning and prevent
hazardous accumulations of food, since heavy splattering or
spillovers left on a cooktop can ignite. Pan size is especially
important in deep fat frying.
10. Never leave rangetop unattended at Hi heat settings. Boilover
causes smoking and greasy spillovers that may ignite.
11. TYPE OF COOKWARE - Avoid pans that are unstable and easily
tipped. _n choosing pans, look for easily-grasped handles that will
stay cool. Pans that are too heavy when filled with food can also
be a hazard. If pan handles twist and cannot be tightened, discard
the pan.

12. HANDLES- Alwaysturn pan handlesto the side or back of the
rangetop - not out into the room where they are easity hit.
COOKWARE HANDLESSHOULDBE TURNEDINWARDAND
NOT EXTEND OVER ADJACENT SURFACE BURNERS to
minimizeburns,ignitionofflammablematerials,andspillagedueto
unintentionalcontact with the cookware.
13. CAUTION - Do not store items of interest to children in cabinets
above range - children climbing on the range to reach items could
be seriously injured.
14, Do nottouch grill and surface burner areas, orperimetertrim around
rangetop or interior surfaces of oven. During and after use, these
areas may be hot enough to cause burns. Avoid contact with these
areas by clothing or other flammable materials until they have had
sufficient time to cool. Other surfaces may become hot enough to
cause burns - among these surfaces are the upper door frame and
door, oven vent opening and surfaces near the opening, and the top
edge of the control panel.
15. Do not heat unopened food containers. Buildup of pressure may
cause container to burst and result in injury.
16. Keep all controls "Off" when unit is not in use.
17. Keep oven vent ducts unobstructed. The oven is vented under the
air grille.
18. GREASE - Grease is flammable and should be handled carefully.
Never leave any cooking operation unattended, Let fat cool before
attempting to handle it. Do not allow grease to collect around the
rangetop or in the vents. Wipe up spillovers immediately.
19, If the range is insta}led near a window, proper precautions should
be taken to prevent curtains from blowing over burners creating a
FIRE HAZARD.
20, Do not use aluminum foil to line aeration tray or burner basin.
Restriction of normal air flow may result in unsafe operation.
21. Do not use cookware on the grill section of this appliance.
22, Before servicing your appliance, disconnect power to the range at
the main fuse or circuit breaker panel and at the electrical receptacle.
23. Always allow hot pans to cool in a safe place out of the reach of small
children.
24. A faint gas odor may indicate a gas leak. If a gas odor is detected,
shut off the gas supply to the range. Call your installer or !ocal gas
company to have the possible leak checked. Never use a match
or other flame to locate a gas leak.
25. Clean only parts listed in this manual and use procedures
recommended.
26. Flame size should be adjusted so it does not extend beyond the
edge of the cookware, this instruction is based on safety
consideration.
27. This appliance has been tested for safe performance using
conventional cookware, go not use any devices or accessories
that are not specifically recommended in this manual. Do not use
eyelid covers for the surface burners, stovetop grills or add-on
convection systems. The use of devices or accessories that are not
expressly recommended in this manual can create serious safety
hazards result in performance problems and reduce the life of the
components of the appliance.
28. Glazed cookware - only certain types of glass, glass-ceramic,
ceramic, earthenware, or other glazed cookpots are suitable for
rangetop surface without breaking due to the sudden change in
temperature. Use only such cookware as you know has been
approved for this purpose.
29. Avoid placing the range in a main "traffic path" or in an isolated
location with no counter space nearby. Visualize the oven in use
before selecting a location. Remember that open oven doors may
block a passageway and create a hazard.
30. Use care when opening oven door. Let hot air or steam escape
before removing or replacing food.
31. Always place oven racks in desired location while oven is cool. If
rack must be moved while oven is hot, do net let potholder contact
hot heating element in oven.
32. Do not clean door gasket. The door gasket is essential for a good
seal. Care should be taken not to rub, damage, or move the gasket.
33. Do not use oven cleaners. No commercial oven cleaner or oven
liner protective coating of any kind should be used in or around any
part of the oven.
34. CAUTION: BEFORE SELF-CLEANING THE OVEN, REMOVE
FOOD, BROILER PAN AND OTHER UTENSILS.
35. Listen for fan. A fan noise should be heard during the broil and
cleaning cycles. If not, call a serviceman before self-cleaning
again.
36. Always remove soiled broiler pan from the broiler compartment
after cooking for grease left in the pan may become hot enough
to ignite.
38.
39.
Do not allow aluminum foil to contact heating element.
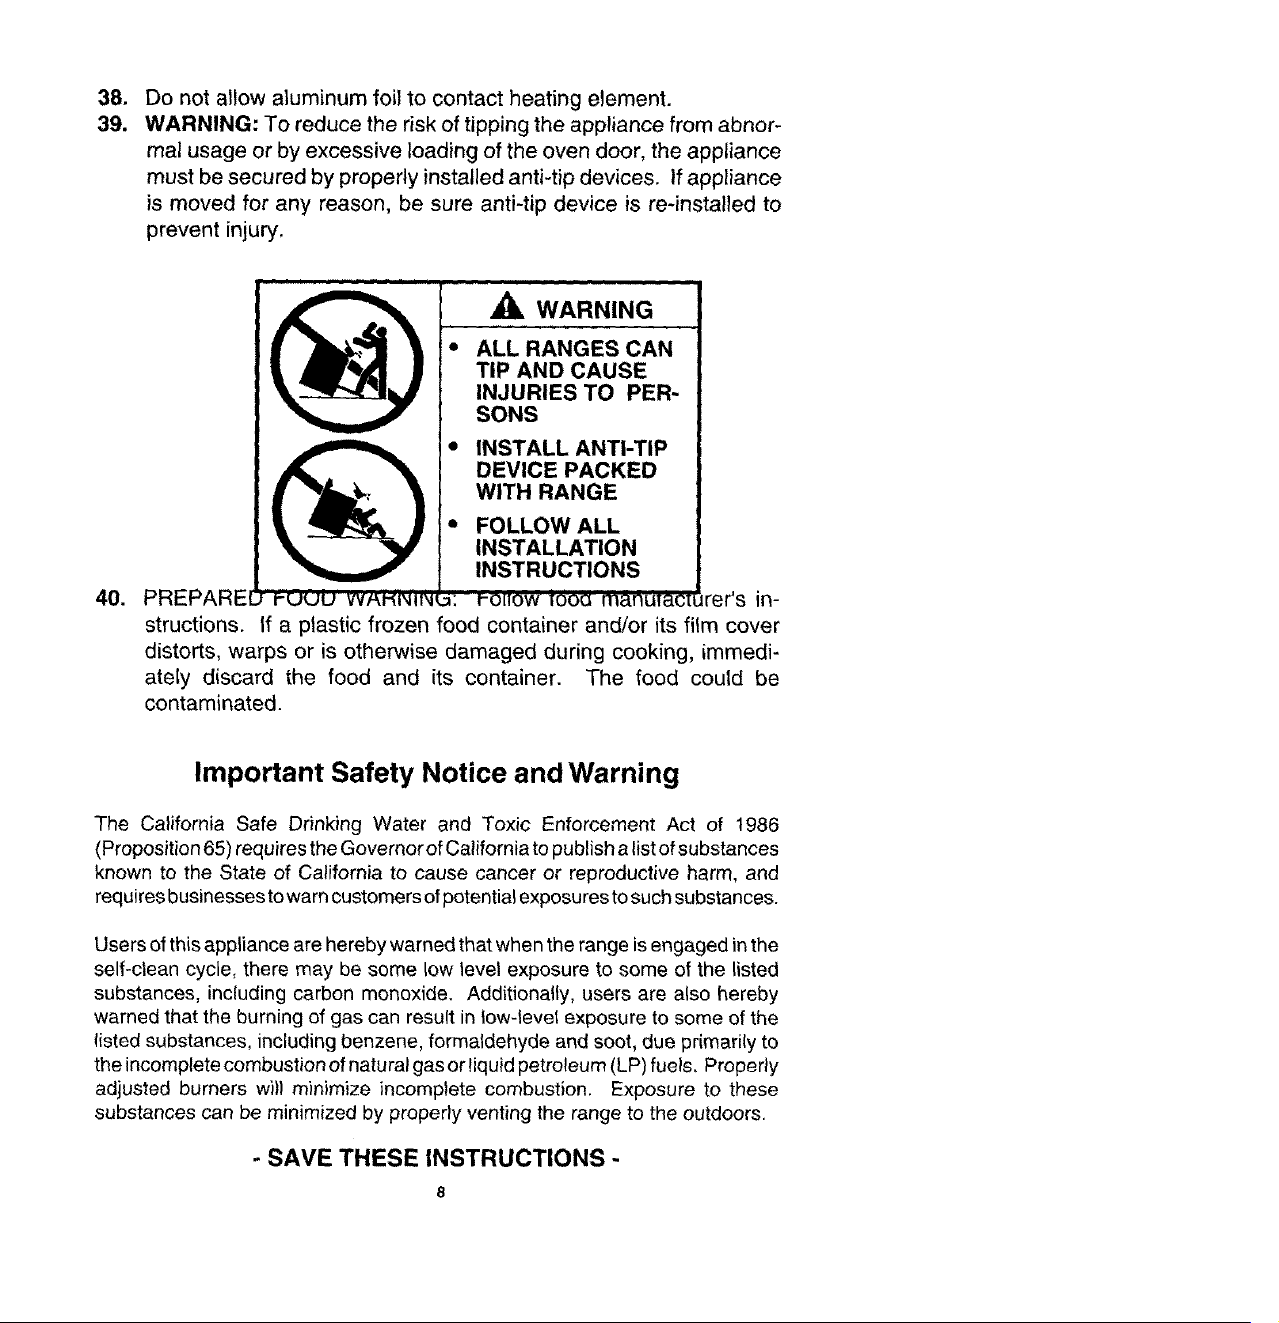
WARNING: To reduce the risk of tipping the appliance from abnor-
mal usage or by excessive loading of the oven door, the appliance
must be secured by properly installed anti-tip devices. If appliance
is moved for any reason, be sure anti-tip device is re-installed to
prevent injury,
40. PREPARE[ t-uuu vvP,'_'N"iNq
A WARNING
* ALL RANGES CAN
TIP AND CAUSE
INJURIES TO PER"
SONS
• INSTALL ANTI-TIP
DEVICE PACKED
WITH RANGE
* FOLLOW ALL
INSTALLATION
INSTRUCTIONS
w: _-oHow t0oo mAnuTact_ rer's in-
structions. If a plastic frozen food container and/or its film cover
distorts, warps or is otherwise damaged during cooking, immedi-
ately discard the food and its container. The food could be
contaminated.
Important Safety Notice and Warning
The California Safe Drinking Water and Toxic Enforcement Act of 1986
(Proposition 65) requires the Governor of California to publish a list of substances
known to the State of California to cause cancer or reproductive harm, and
requires businesses to warn customers of potential exposures to such substances.
Users of this appliance are hereby warned that when the range is engaged in the
self-clean cycle, there may be some low level exposure to some of the listed
substances, including carbon monoxide. Additionally, users are also hereby
warned that the burning of gas can result in tow-level exposure to some of the
listed substances, including benzene, formaldehyde and soot, due primarily to
the incomplete combustion of natural gas or liquid petroleum (LP) fuels, Properly
adjusted burners w))) minimize incomplete combustion. Exposure to these
substances can be minimized by properly venting the range to the outdoors.
- SAVE THESE INSTRUCTIONS -
MODEL NUMBER
SERIAL NUMBER.
(numbers appear on the sedal ptate on the oven front frame)
DATE PURCHASED_
JENN-AtR DEALER FROM WHOM PURCHASED
ADDRESS
CITY
PHONE
AUTHORIZED JENN-AIR SERVICE CONTRACTOR
ADDRESS
CITY
PHONE
Important: Retain proof of purchase documents for warranty service.
Jenn-Air's ventilation system is designed to capture both cooking fumes and smoke
while grilling, ff the system does not, these are some ducting installation situations to
check:
• 6" diameter round or 31/4`'x 10" rectangular ducting should be used for duct lengths
10'-60'. Note: 5" diameter round ducting must be used if the duct length is 10'
or less.
• No more than three 90 ° elbows should be used. Distance between elbows should
be at least 18".
• Recommended Jenn-Air wall cap should be used. Make sure damper moves freely
when ventilation system is operating.
• There should be a minimum clearance of 6" for cooktop installed near a side walt.
If there is not an obvious improper installation, there may be a concealed problem such
as a pinched joint, obstruction in the pipe, etc. _._ta!!atign is the re_on_jbitit_ of the
installer and questions should be addressed first by the installer. The installer should
very carefully check the ducting installation instructions.
9
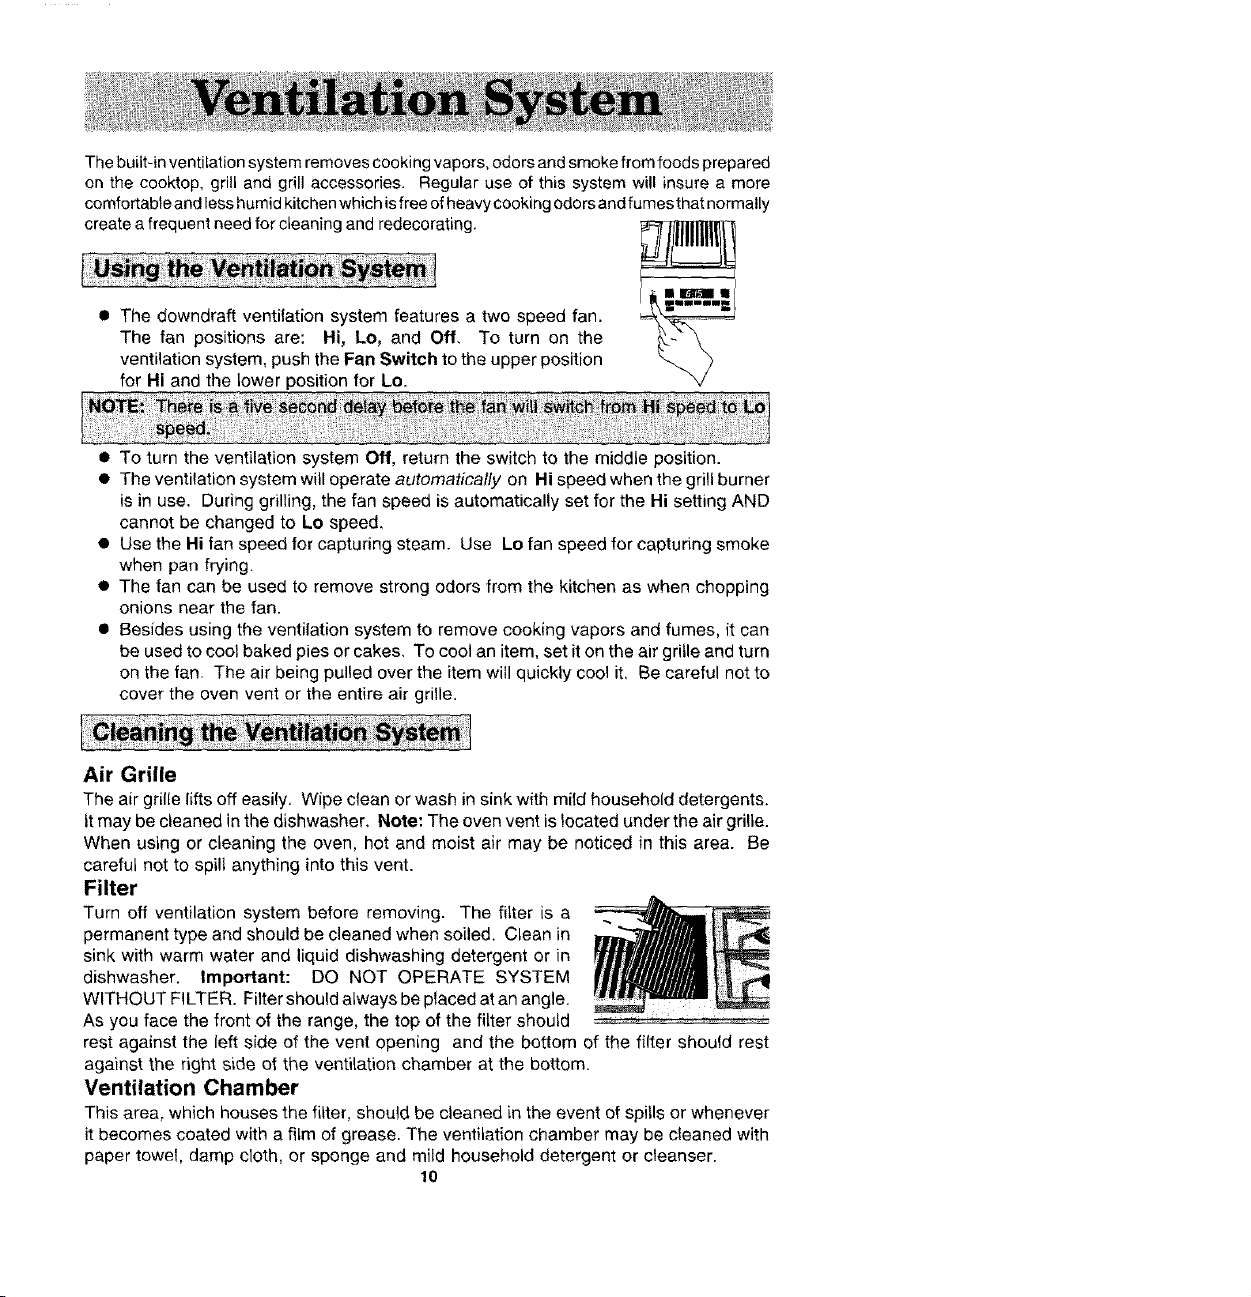
• The downdraft ventilation system features a two speed fan.
The fan positions are: Hi, Lo, and Off. To turn on the
ventilation system, push the Fan Switch to the upper position
for Hi and the lower position for Lo.
The built-in ventilation system removes cooking vapors, odors and smoke from foods prepared
on the cooktop, grill and grill accessories. Regular use of this system will insure a more
comfortable and less humid kitchen which is free of heavy cooking odors and fumes that normally
create a frequent need for cleaning and redecorating. _
-iii ii_Ifi !1
• To turn the ventilation system Off, return the switch to the middle position.
• The ventilation system will operate automatically on Hi speed when the grill burner
is in use. During grilling, the fan speed is automatically set for the Hi setting AND
cannot be changed to Lo speed,
• Use the Hi fan speed for capturing steam. Use Lo fan speed for capturing smoke
when pan frying
• The fan can be used to remove strong odors from the kitchen as when chopping
onions near the fan.
• Besides using the ventilation system to remove cooking vapors and fumes, it can
be used to cool baked pies or cakes. To cool an item, set it on the air gritle and turn
on the fan. The air being pulled over the item will quickly cool it, Be careful not to
cover the oven vent or the entire air grille.
Air Grille
The air grille lifts off easily. Wipe clean or wash in sink with mild household detergents.
it may be cleaned in the dishwasher, Note: The oven vent is _ocated under the air grille.
When using or cleaning the oven, hot and moist air may be noticed in this area. Be
careful not to spill anything into this vent.
Filter
Turn off ventilation system before removing. The filter is a
permanent type and should be cleaned when soiled. Clean in
sink with warm water and liquid dishwashing detergent or in
dishwasher. Important: DO NOT OPERATE SYSTEM
WITHOUT FILTER. Filter should always be placed at an angle.
As you face the front of the range, the top of the fitter should
rest against the left side of the vent opening and the bottom of the filter should rest
against the right side of the ventilation chamber at the bottom.
Ventilation Chamber
This area, which houses the filter, should be cleaned in the event of spills or whenever
it becomes coated with a film of grease. The ventilation chamber may be cleaned with
paper towel, damp cloth, or sponge and mild household detergent or cleanser.
10
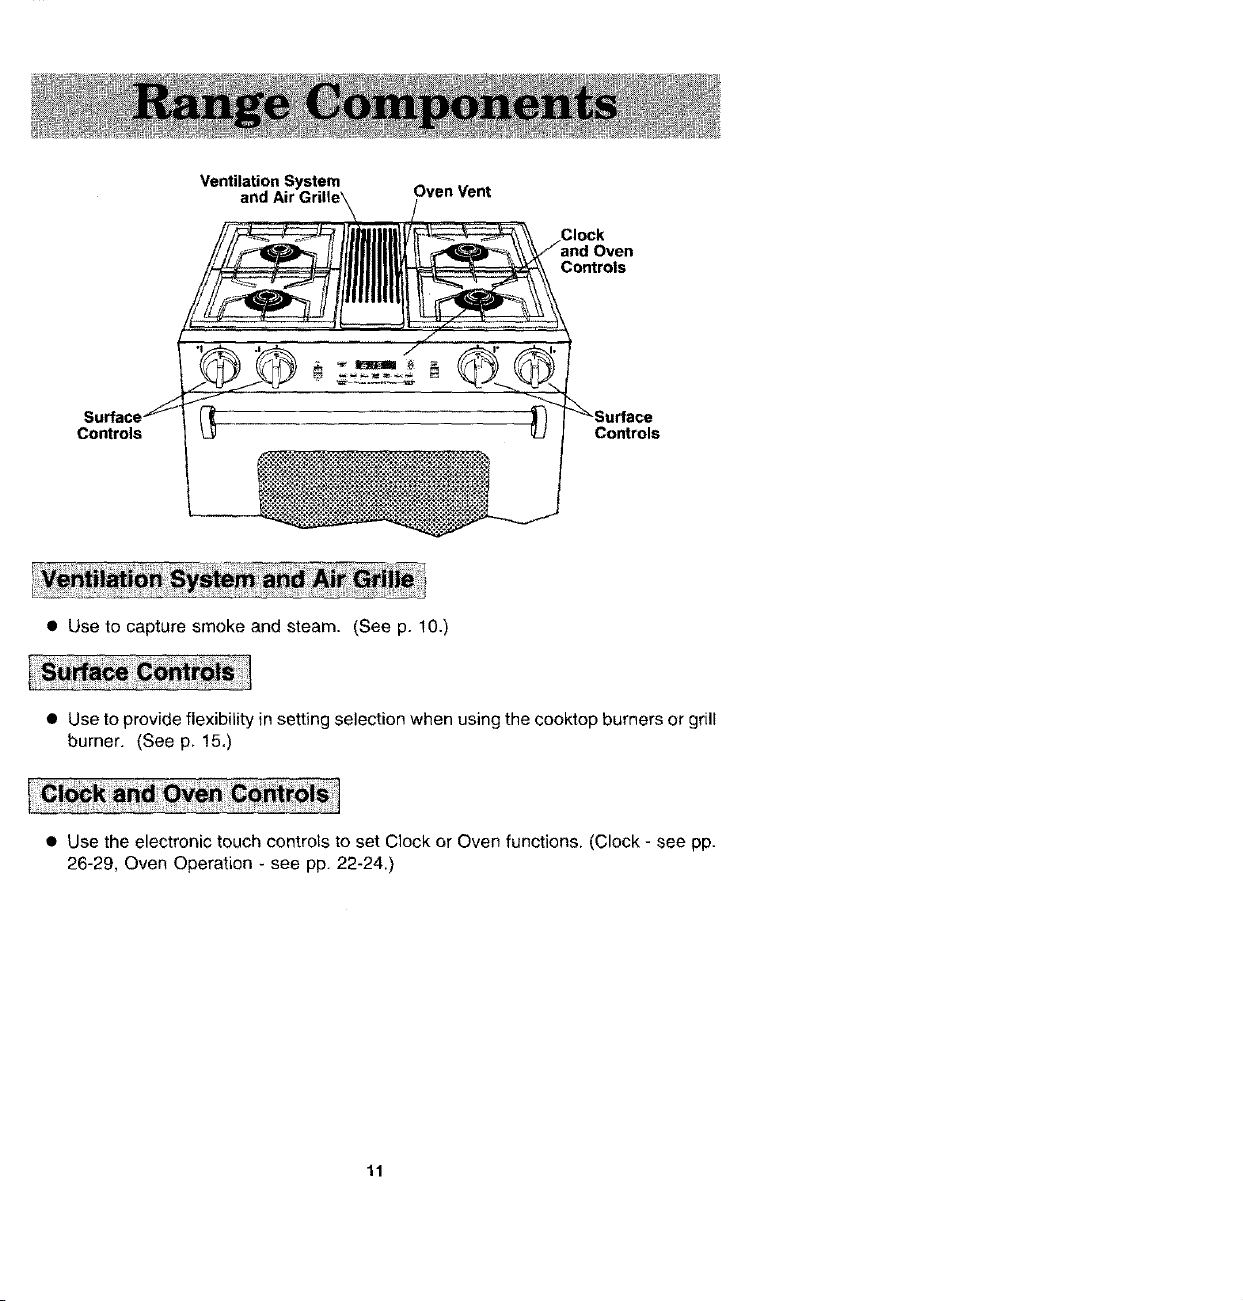
Ventilation System
and Air Oven Vent
Controls
Controls Controls
• Use to capture smoke and steam. (See p. 10.)
• Use to provide flexibility in setting selection when using the cooktop burners or grill
burner, (See p. 15,)
• Use the electronic touch controls to set Clock or Oven functions. (Clock - see pp.
26-29, Oven Operation - see pp. 22-24.)
11
Your new cooktop burners have been preset for an "average" set ofconditions. Regional
variances in gas pressure and atmospheric conditions such as height above sea level
may affect your initial flame performance.
When the control knob is turned on, gas enters the mixer tube and mixes with air. This
air and gas mixture flows to the burner head and is lighted by a spark from the solid state
igniter_
A propedy adjusted burner with clean ports will light within a few seconds, The cone-
shaped flame will be clear blue in color with a clearly defined inner cone. There should
be no trace of yellow in the flame, A yellow flame indicates an improper mixture of air
and gas. tf your flame does not resemble the "correct" flame as described above, follow
the air shutter adjustment instructions below.
The infinite surface controls for the surface burners and grill burner provide flexibility in
setting selection.
Note; The grill can be replaced with an optional surface burner module, Model AG202.
Surface Burners
In case of prolonged power failure, you can manually rightthe surface burner by holding
a lightedmatch nearthe burner ports andslowlytuming thecontrol knob counterclockwise
(after depressing) until the gas ignites, There is no fan so smoke and condensation can
gather,
Grill
IN CASE OF POWER FAILURE DO NOT USE GRILL. VENTILATION SYSTEM WILL
NOT OPERATE.
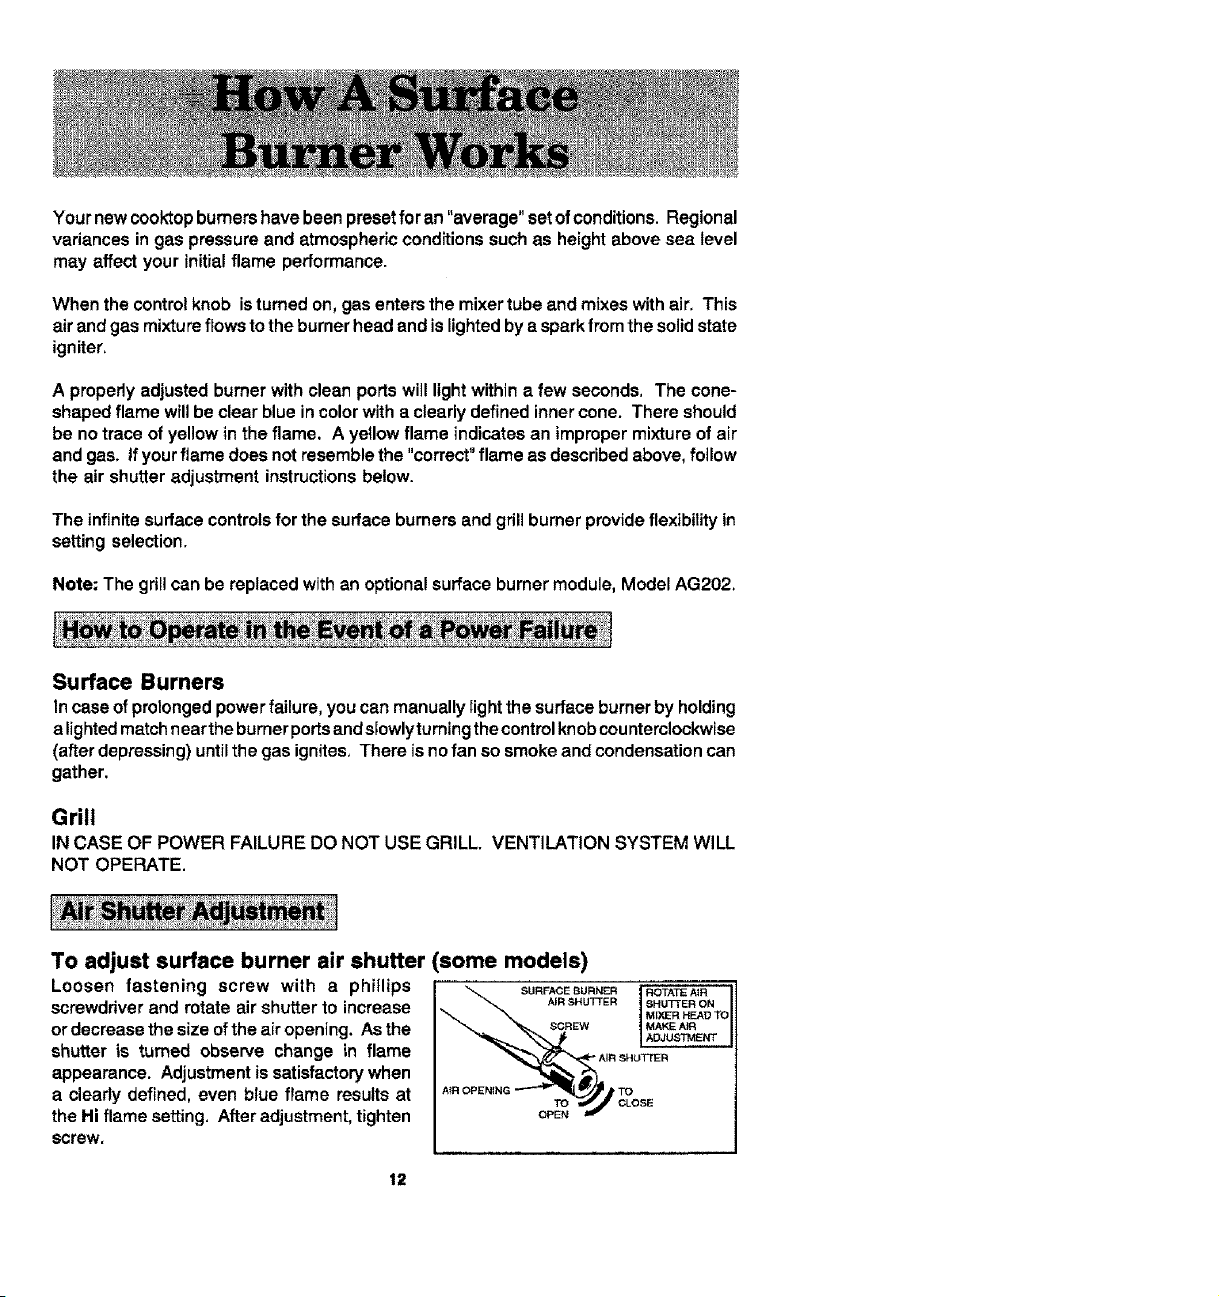
To adjust surface burner air shutter (some models)
Loosen fastening screw with a phirlips
screwdriver and rotate air shutter to increase
or decrease the size of the air opening. As the _CREW
shutter is turned observe change in flame
appearance. Adjustment is satisfactory when
a cleady defined, even blue flame results at
TO
the Hi flame setting. After adjustment, tighten OPEN
screw,
SURFACE BURNER
AIR SHUTTER
ROTATE A_R
SHUTTER ON
MIXER HEAD TO
MAKE AiR
ADJUSTMENT
12
Your new cooktop burners have been preset for an "average" set of conditions. Regional
variances in gas pressure and atmospheric conditions such as height above sea level
may affect your initial flame performance.
When the control knob is turned on, gas enters the mixer tube and mixes with air. This
air and gas mixture flows to the burner head and is lighted by a spark from the solid state
igniter.
A properly adjusted burner with clean ports will light within a few seconds. The cone-
shaped flame will be clear blue in color with a clearly defined inner cone. There should
be no trace of yellow in the flame. A yellow flame indicates an improper mixture of air
and gas. (When using LP gas, some yellow in a flame is acceptable.) If your flame does
not resemble the "correct" flame as described above, follow the air shutter adjustment
instructions below.
The infinite surface controls for the surface burners and grill burner provide flexibility in
setting selection.
Note: The gril! can be replaced with an optional surface burner module, Model AG202.
Surface Burners
In case of prolonged power failure, you can manually light the surface burner by holding
a lighted match near the burner ports and stowly turning the control knob counterclockwise
(after depressing) until the gas ignites. There is no fan so smoke and condensation can
gather.
Grill
IN CASE OF POWER FAILURE DO NOT USE GRILL. VENTILATION SYSTEM WILL
NOT OPERATE.
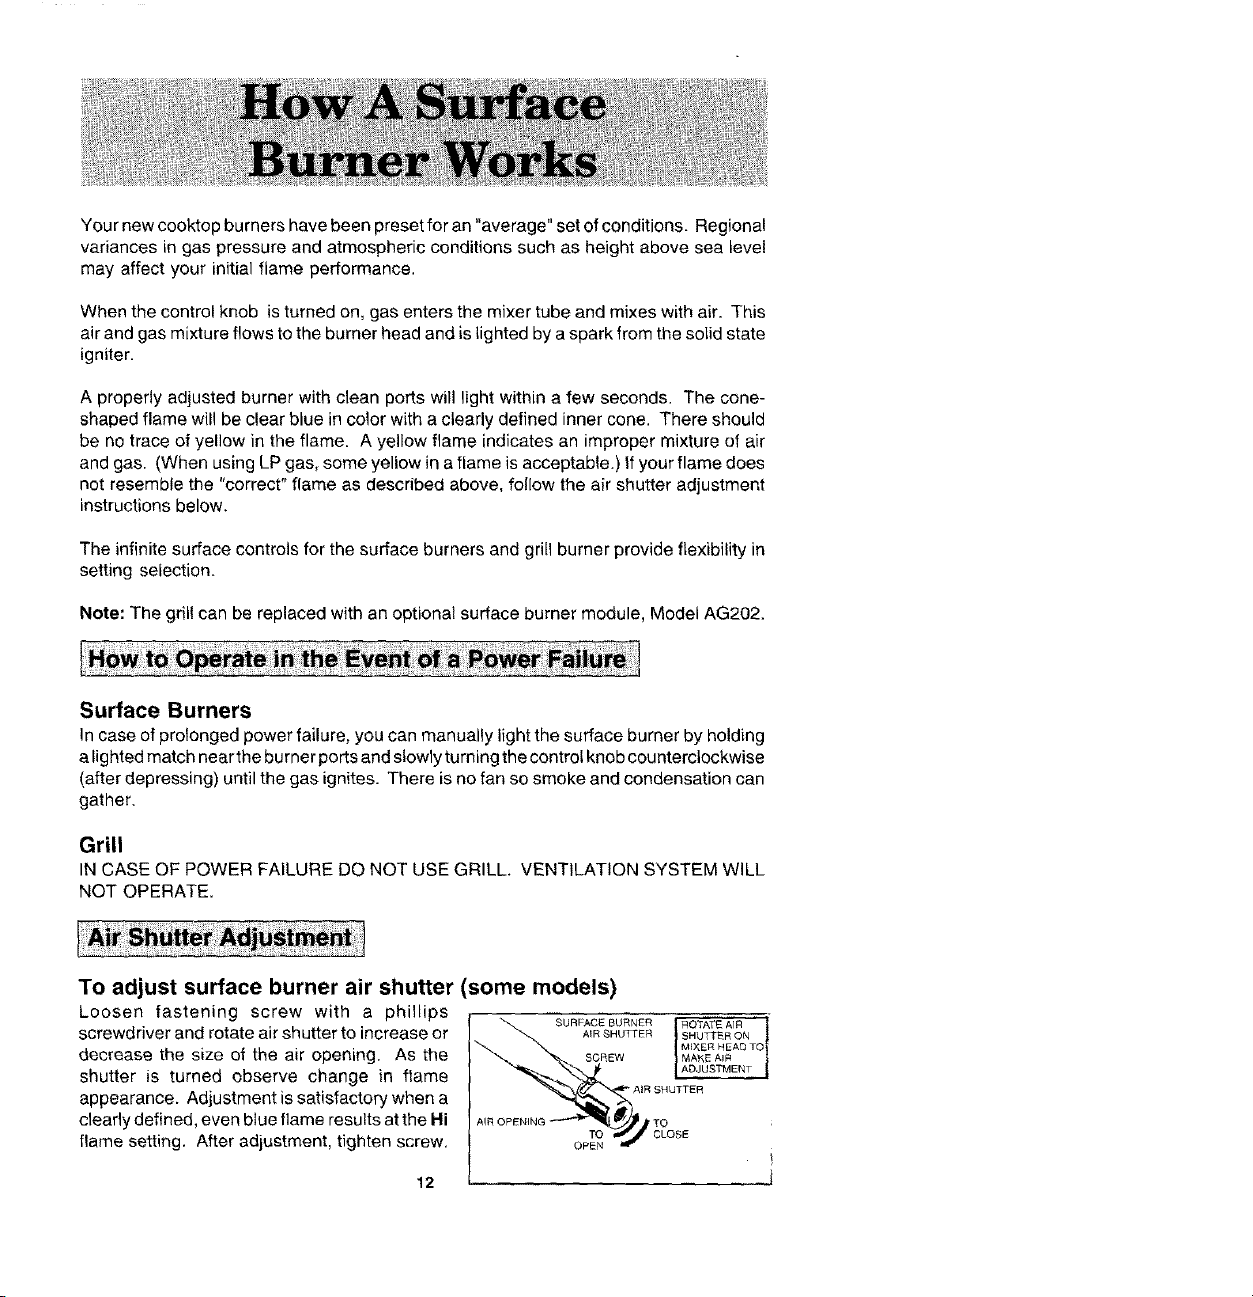
To adjust surface burner air shutter (some models)
Loosen fastening screw with a phillips
screwdriver and rotate air shutter to increase or
decrease the size of the air opening. As the
shutter is turned observe change in flame
appearance. Adjustment is satisfactory when a
deafly defined, even blue flame results atthe Hi
flame setting. After adjustment, tighten screw.
12
TO
OPeN

To adjust grill burner air shutters and surface burner air shutters.
The left hand air shutter controls the rear half of the grill burner or the rear surface burner,
The right hand shutter controls the front half of the grill burner or the front surface burner.
Slide air shutter backward or forward to increase
or decrease the size of the air opening. Air
shutters fit snugly on the burner, so a
screwdriver blade may be required to make
this adjustment. Observe change in flame
appearance as the air shutter is moved,
Adjustment is satisfactory when a clearly
defined, even blue flame results at the Hi
flame setting. The snug fit of the air shutter
assures it will remain positioned correctly.
GRILL BURNER AiR SHUTTER
On any burner, closing the air shutter too far will cause the flame to become soft and
yellow tipped, Opening the air shutter too wide will cause the flame to blow away from
the burner ports. Proper adjustment will produce a sharp, clearly defined even, blue
flame.
This appliance has been shipped from the factory with Lo and Med flame settings
adjusted for use with natural gas and average installations, There is a wide variety of
conditions caused by altitude and gas mixtures controlled by utility companies which will
vary and affect the gas flame and performance. Adjustments should be made at time
of installation. If conditions change, follow the procedures outlined below to adjust the
Lo setting.
To adjust the Lo setting:
1. Light burner and set control knob for low flame.
2. Remove control knob from valve stem.
CAUTION: Never use a metal blade to pry
knob off. If knob cannot be easily removed
tuck the folds of a cloth dishtowel under the
knob skirt and pull the towel forward with
steady, even pressure.
3. Insert a slender, thin-blade screwdriver into
the recess at center of valve stem and engage
blade with slot in adjusting screw.
4. Turn center stem adjusting screw slightly to
set flame size. Note: Turn clockwise to reduce
or counterclockwise to increase flame size.
C[OCKW_S_
TO R_OUCE
FLAME. _IZE
CO_b_TERC'_ OC _,W_S E
TO !NCR_A,gE FLA_E
5. Replace control knob when adjustment is completed.
Proper adjustment will produce a stable, steady blue flame of minimum size, The final
adjustment should be checked by turning knob from Hi to Lo several times without
extinguishing the flame. This adjustment, at the Lo setting, will automatically provide
the proper flame size at Mad setting.
13

Toachieveoptimumcookingperformanceusecookpotswithflatbottomsandtightfitting
covers.Flame size should be adjusted so it does not extend beyond the edge of the
cookware. This instruction is based on safety considerations. Adjusting the size of the
flame to fit the size of the cookware also helps to save fuel.
Important: Leave a minimum of ! ,/2"between side of pan and surrounding surfaces, such
as countertop backsplash or side walls, to allow heat to escape to avoid possible damage
to these areas.
• Aluminum cookware heats evenly and quickly. A slightly larger flame size can be
used. The flame can be adjusted so it comes to the edge of the cookware. However,
the flame should NEVER be adjusted so that it extends beyond the bottom of the
cookware.
• Stainless steel cookware with copper or aluminum cores heat evenly and fairly
quickly. The flame size should be adjusted to extend only halfway between center
and edge of the cookware bottom for best results.
• Cast iron ceokware heats slowly,
• Check manufacturer's recommendations before using porcelain on steel, porcelain
on cast iron, glass, glass-ceramic, earthenware, or other glazed cookpots.
If the cookware is covered, less fue! will be needed. Therefore, a lower flame size can
be used.
Note: Food will not cook any faster when more than the amount of heat needed to
maintain a gentle boil is used.
14

• Since the controls are a push4um type, they must be pushed in before turning. To
set (from the Off position), push in on control knob and immediately turn counterclock-
wise to the Lite position until burner ignites. After ignition, turn knob clockwise to
desired setting.
• Igniter will continue to spark until knob is turned clockwise back to or past Hi position
on knob.
1. Left rear surface burner or grill
2. Left front surface burner or grill
3. Right rear surface burner
4. Right front surface burner
1. 2. 3. 4,
Note: When using an AG202 surface burner
assembly with control locations #1 and #2, the
control knob may be turned to a position lower
than the Lo setting. (The Lo setting is set for the
grill burner.)
The controls offer flexibility in heat setting selection. An infinite number of settings exist
between Hi and Lo. At the Hi setting, a detent may be felt. For all settings other than Hi,
simply adjust your flame for best results.
The size and type of cookware and the amount and type of food being cooked will influence
the setting needed for best results. Suggested settings are provided as guidelines.
Hi: A fast heat to start cooking quickly, to bring liquids to
a boil, to preheat oil for deep fat frying.
(Med, High) For fast frying or browning of foods, to maintain rapid
boil of large amounts of food, to maintain oil
temperature for deep fat frying.
Med, For most frying, saut6ing, and slow boil of large
amounts of food.
(Med. Lo) For simmering, maintaining boil of smalt amounts of
food.
Lo: Maintaining serving temperature of foods, melting
butter or chocolate,
15
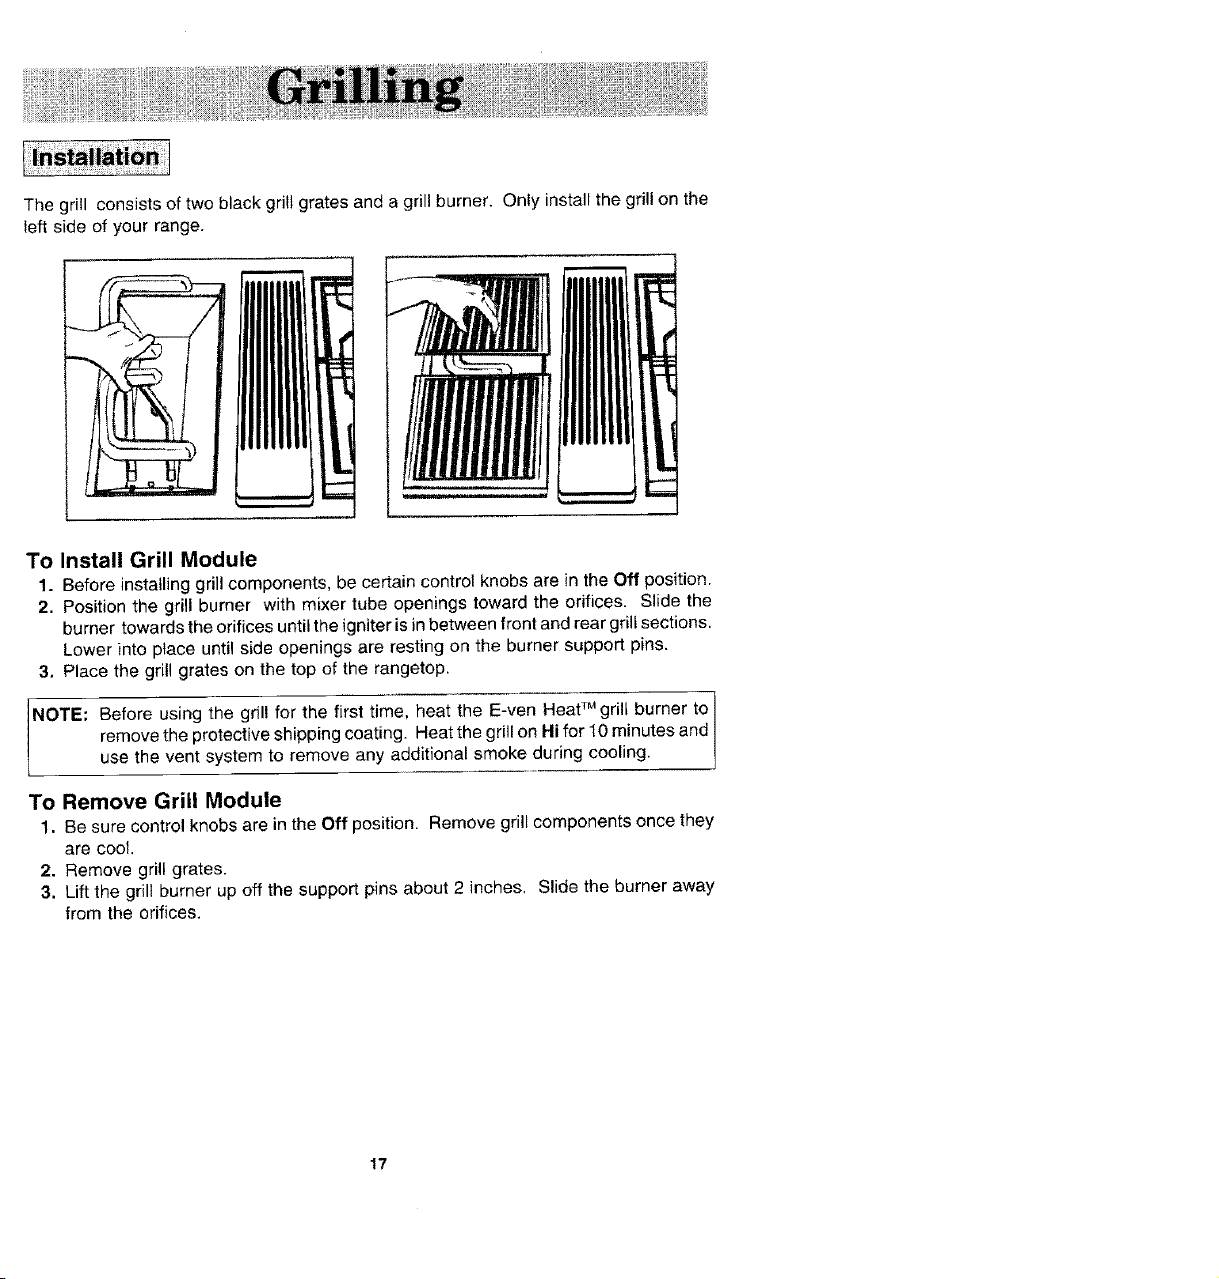
The grill consists of two black grill grates and a grill burner. Only install the grill on the
left side of your range.
L
To Install Grill Module
1. Before installing grill components, be certain control knobs are in the Off position.
2. Position the grill burner with mixer tube openings toward the orifices. Slide the
burner towards the orifices until the igniter is in between front and rear grill sections.
Lower into place until side openings are resting on the burner support pins.
3. Place the grill grates on the top of the rangetop.
NOTE: Before using the grill for the first time, heat the E-yen Heat TM grill burner to
remove the protective shipping coating. Heat the grill on Hi for 10 minutes and
use the vent system to remove any additional smoke during cooling.
To Remove Grill Module
1. Be sure control knobs are in the Off position. Remove grill components once they
are cool.
2. Remove grill grates.
3. Lift the grill burner up off the support pins about 2 inches, Slide the burner away
from the orifices.
17
• Before the first use, wash your new grill grates in hot soapy water, rinse and dry.
Then "season" the surface by wiping on a thin coating of cooking oil. Remove
excess oil by wiping again with another paper towel This procedure should be
repeated when: a) cleaning in the dishwasher since the detergent may remove
seasoning, or b) anytime a sugar-based marinade (for example, barbecue sauce)
is going to be used.
• Use nonmetallic spatulas or utensils to prevent damaging the Excalibur ® nonstick
grill grate finish.
• Preheat the grill on Hi for 5 minutes. Preheating improves the flavor and
appearance of meats and quickly sears the meat to help retain the juices.
• Excessive amounts of fat should be trimmed from meats. Some fat is necessary
to produce the smoke needed for that smoked, "outdoor" flavor. However,
excessive fat can create cleaning and flare-up problems.
• Allowing excessive amounts of grease or drippings to constantly flame voids the
warranty on the grill grates. Excessive flare-ups indicate that either the gdll interior
needs to be cleaned or that excessive amounts of fat are in the meat or the meat
was not properly trimmed.
• Grease drippings will occasionally ignite to produce harmless puffs of flame for a
second or two. This is a normal part of the cooking process.
• NEVER LEAVE GRILL UNATTENDED DURING GRILL OPERATION.
Should excess grease cause sustained flare-up
1. Turn on FAN manually.
2. Immediately turn grill control knobs to Off position.
3. Remove meat from grill.
IMPORTANT
• Do not use aluminum foil inside the grill area.
• Do net use charcoal or wood chips in the grill area.
• Do not allow burner basin to become overloaded with grease. Clean after each
use.
• Do not cover grates completely with meat. Leave air space between each steak,
etc. to a!low proper ventilation as well as prevent flare-ups.
18

Note;Thischartisasuggestedguide,Cookingtimesandcontrolsettingsareapproximatedue
tovariationsinmeatsandgaspressure.
19
WithyourJenn-Airgrillliteraltyanyfoodyou'veconsidered"at its best" when prepared
outdoors can now be prepared indoors with less fuss and great flavor.
The following suggestions are good rules to fotlow and wil! increase your enjoyment of
the equipment.
• Be sure to follow directions on page 18 for using the grill
• Suggested cooking times and control settings are approximate due to variations
in meats. Experience will quickly indicate cooking times as well as which settings
work best.
• For best results, buy top grade meat. Meat that is at least 3/4inch will grill better
than thinner cuts.
• Score fat on edges of steak, but do not cut into meat, to prevent curling while
cooking.
• For the attractive "branded" look on steaks, be sure grill is preheated. Allow one
side of meat to cook to desired doneness, or until juices appear on the top surface,
before turning. Turn steaks and hamburgers just once. Manipulating food
causes loss of juices.
• When basting meats or applying sauces to foods, remember that excessive
amounts wind up inside your grill and do not improve the food flavor. Apply
sauces during the last !5 to 20 minutes of cooking time untess recipe specifies
otherwise. Plus, any time a sugar-based marinade, (for example, barbecue
sauce) is going to be used, the grates should be "seasoned" prior to preheating.
(See p. 18.)
• There are many meat marinades which will help tenderize tess expensive cuts of
meat for cooking on the grill
• Certain foods, such as poultry and non-oily fish, may need some extra fat. Brush
with oil or melted butter occasionally while grilling.
• Use tongs with long handles or spatulas for turning meats. Do not use forks as
these pierce the meat, allowing juices to be lost.
• To help retain meat juices, salt after turning meat or after cooking is completed.
Be sure the grilt is cool and controls are Off.
Grill Grates
These are made from cast a_uminum and are coated with the Exca_ibur_ nonstick finish.
• After the grill grates have cooled, wipe off grates with a paper towel Wash cool
grates (DO NOT IMMERSE HOT GRILL GRATES IN WATER) with soap or
detergent in hot water in the sink or wash them in the dishwasher. Be sure to remove
all food residue before cooking on the grill grates again.
• Remove stubborn spots with a plastic mesh puff or pad. For best results, use only
those cleaning products which state they are recommended for use when cleaning
nonstiek surfaces.
• If grates are washed in the dishwasher, season with oil prior to grilling. (See p. 18.)
• Do not use metal brushes or abrasive scouring pads or other scrubbers intended
to clean outdoor charcoal grills. These will remove the finish as well as scratch the
grates. Do not clean in the self-cleaning oven or use oven cleaners on the grates.
2O
Grill Burner
Follow instructions on page 17 for removing the grill burner. The grill burner should be
cleaned after each use. It can be cleaned with a soapy S.O.S. pad or in the dishwasher.
Rinse and drythoroughly before using again. For heavy soil, bumer should be cleaned
first with a soapy S.O,S. pad, rinsed and dried. Then it can be cleaned in a self-clean
oven for 2 hours.
NOTE: Check to be sure a!l burner ports are open. To open clogged ports, insert a 1
toothpick directly into each port.
Porcelain Burner Basin
This area located under the grill and surface burners. Clean after each use of the grill.
• To remove light soil, clean with soapy water or with cleansers such as Fantastik or 409.
For easier cleanup: a) spray with a household cleanser; b) cover with paper towels;
c) add smatl amount of water to keep the paper towels moist; d) cover and wait 15
minutes; and e) wipe clean.
• To remove moderate soit, scrub with Comet, Bon Ami, a soft scrub cleanser or plastic
scrubber.
• To remove stubborn soil, spray with an oven cleaner, let soak overnight, wipe clean,
rinse and dry.
Note: C(ean the grease drain after each use. To clean: Pour about V3 cup of very hot tap
water mixed with 1 teaspoon dish detergent down the drain. (n the event the drain is clogged,
due to large food particles being trapped, use the nylon string that was packaged with your
range. To use the nylon string, simply insert one end into the drain opening in the basin pan,
Feed the nylon string down until it is visible under the range. Now pult up on the end extending
out from the top while holding a paper towel around the string, to clean the string as it is being
pulled. This should free any trapped particles of food. Pour another _/3cup of very hot water
mixed with dish detergent to assure the drain is opened and clear.
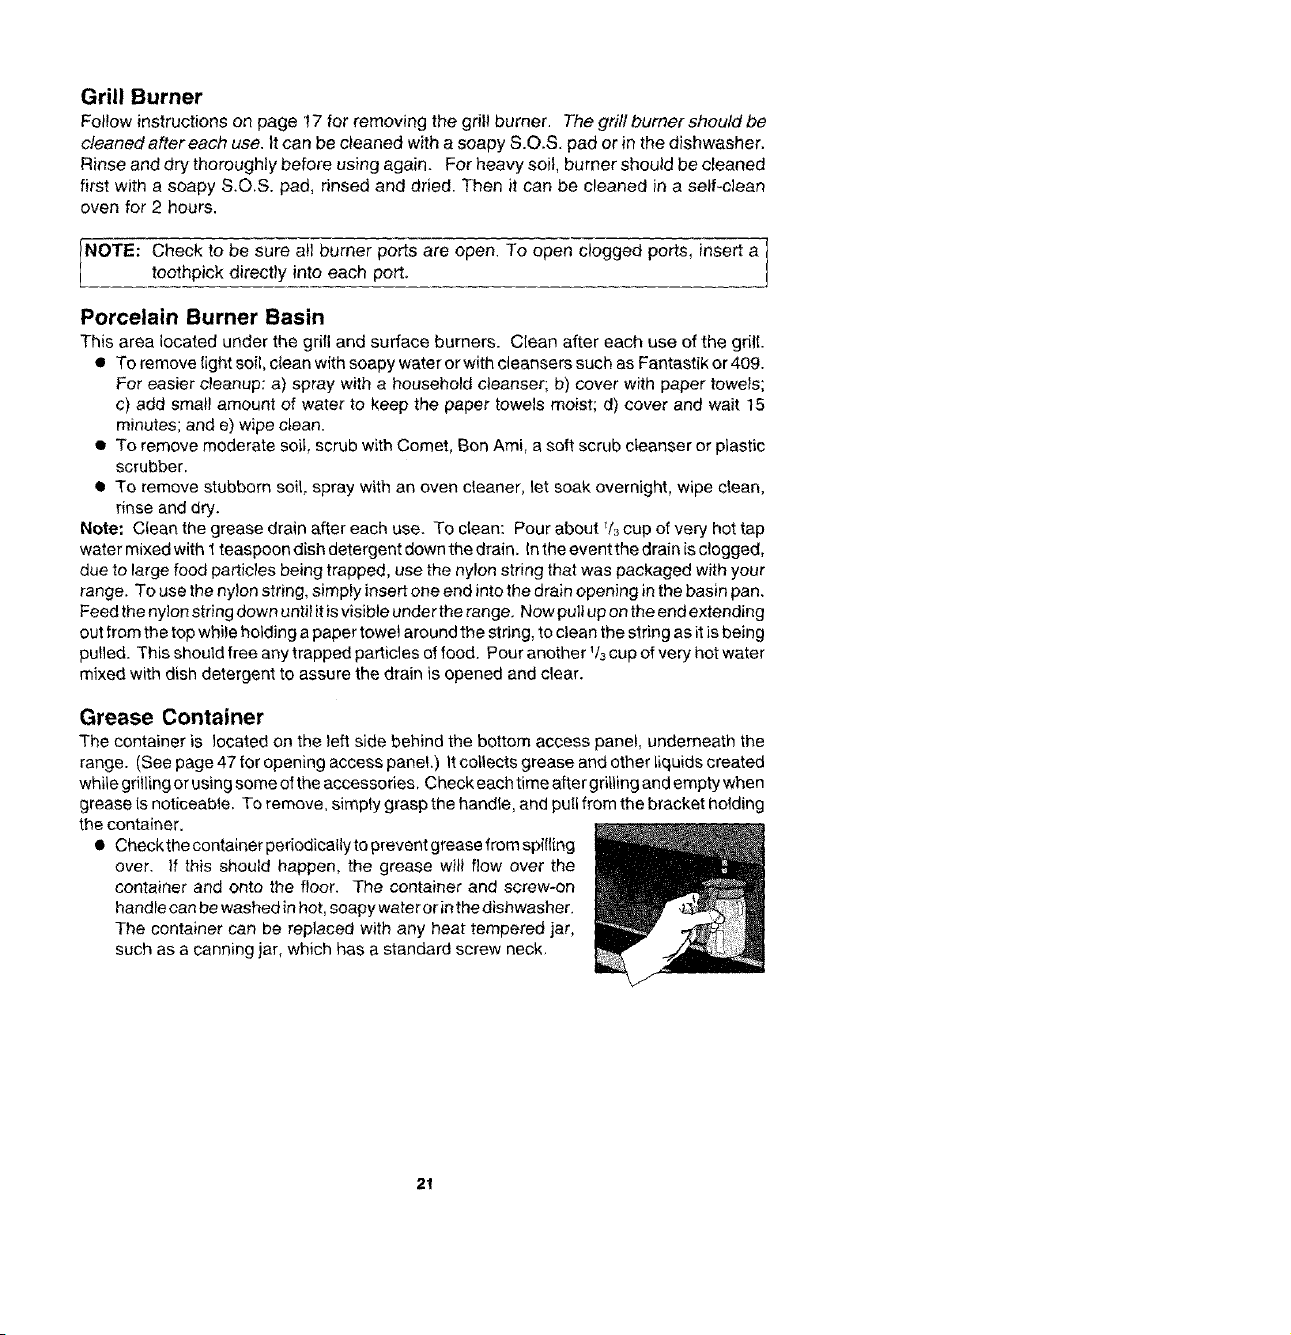
Grease Container
The container is located on the left side behind the bottom access panel, underneath the
range. (See page 47 for opening access panel.) It collects grease and other liquids created
while grilling or using some o_ the accessories_ Check each time after gfitling and empty when
grease ts noticeable. To remove, simply grasp the handle, and pull from the bracket holding
the container.
• Checkthe container periodically to prevent grease from spilling
over. If this should happen, the grease wi}i flow over the
container and onto the floor. The container and screw-on
handle can be washed in hot, soapy wateror in the dishwasher.
The container can be replaced with any heat tempered jar,
such as a canning jar, which has a standard screw neck.
21

The control panel is designed for ease in programming. The Display Window features
Indicator Words which will flash to prompt you for the next step.
To program
1. Touch the function pad to give command desired.
2. Touch the Up or Down Arrow Pad(s) to enter time or temperature.
Note: Four seconds after selecting a time or temperature, the time or temperature
will automatically be entered. If more than fifteen seconds elapse between touching
a pad and touching the Up or Down Arrow Pad(s), the control is not set and Display
will return to previous Display,
Oven
FBn
., o°.,
N .............N
Lo
Function Pads
Use forconventional baking or roasting.
Use for top browning or oven broiling.
Use to set self-cleaning process.
Use for clock controlled cooking,
Usefor clock controlled cooking and cleaning when a delayed start is desired.
Use to set time of day,
Use to signal expiration of a time period up to 11 hours and 55 minutes.
Use for convect baking.
Use for convect roasting,
Cancels all programming except Timer.
Use to enter times or temperatures.
22
Oven Light Switch (Control Panel)
The oven light automatically comes on whenever the oven door is opened. When the
door is closed, push the Oven Light Switch to turn oven light on or off.
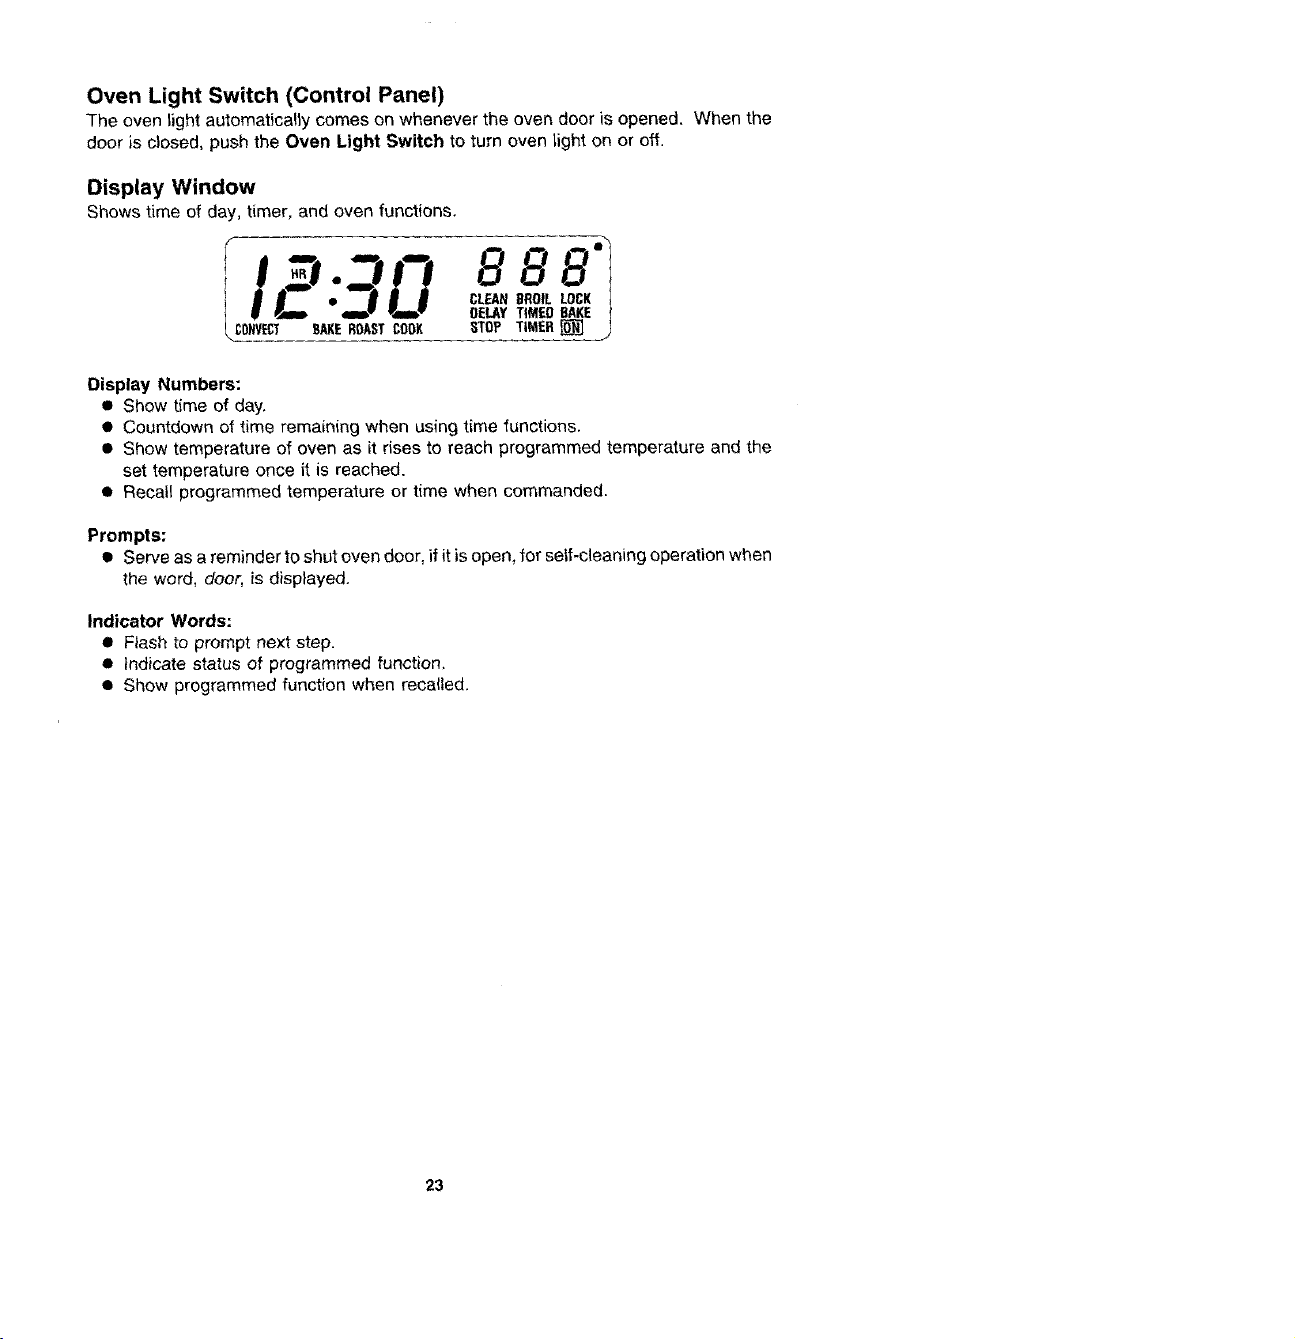
Display Window
Shows time of day, timer, and oven functions.
88B'I
OELAY TIMED BAKE 1
CONVECT SAKE BOAST COOK STOP TIMER _j
Display Numbers:
• Show time of day.
• Countdown of time remaining when using time functions.
• Show temperature of oven as it rises to reach programmed temperature and the
set temperature once it is reached.
•Recatl programmed temperature or time when commanded.
Prompts:
• Serve as a reminder to shut oven door, if it is open, for self-cleaning operation when
the word, door, is displayed.
Indicator Words:
• Flash to prompt next step.
• Indicate status of programmed function,
• Show programmed function when recalled.
23
To set oven on bake or convection bake or convection roast
1. Place oven racks on proper rack positions. (See p. 25.)
2. Touch Bake Pad or Cenvect Bake Pad or Convect Roast Pad.
indicator Words BAKE or CONVECT BAKE or CONVECT ROAST will flash and
three dashes will be shown in the Display.
Note: If more than fifteen seconds elapse between touching a pad and touching an
Arrow Pad, the Display will return to previous Display.
3. Touch the Up or Down Arrow Pad(s) for desired oven temperature.
(Allowable range is 100° to 550°.) Note: When baking, first tap of an Arrow Pad
will give you 350 °, When convect baking or convect roasting, first tap of an Arrow
Pad will give you 325 °.
After four seconds, the oven will begin to preheat. The Indicator Words ON, and
either BAKE or CONVECT BAKE or CONVECT ROAST will appear in the Display.
The temperature shown will be 100 ° or the oven temperature whichever is higher.
Example: If at 10 o'clock you set the oven for 350 ° for convection baking, after four
seconds the Display will show:
;o..oo'
_O_E_T BAK_
During the preheat, the Display wil! show a rise in 5° increments until programmed
temperature is reached. When the oven is preheated, the oven will beep once, the
QN Indicator Word wit1 go off and the CONVECT BAKE Indicator Words and
programmed oven temperature will remain in the Display.
Note: Oven will preheat for approximately 7 to 11 minutes.
Important: Whenever ON appears in the Display, the oven is heating.
To recall temperature set during preheat: Touch the appropriate Bake Pad or
Convect Bake Pad or Convect Roast Pad. Temperature will be briefly displayed, then
will automatically return to on-going program.
To change temperature set: Touch appropriate Bake Pad or Convect Bake Pad or
Convect Roast Pad and the Up or Down Arrow Pad(s) for the new desired
temperature. Note: If you are lowering the temperature below the current oven
temperature, the Indicator Word ON will appear briefly in the Display and the preheat
beep will sound. Then, the Display wilt show programmed temperature and Indicator
Word BAKE or CONVECT BAKE or CONVECT ROAST only.
4. Touch Cancel Off Pad to turn oven off at end of baking.
24
The rack positions noted are generally recommended for the best browning results and
most efficient cooking times. For many food items, excellent results can be achieved
when using one of several different rack positions. Refer to baking and roasting sections
for recommendations for specific foods.
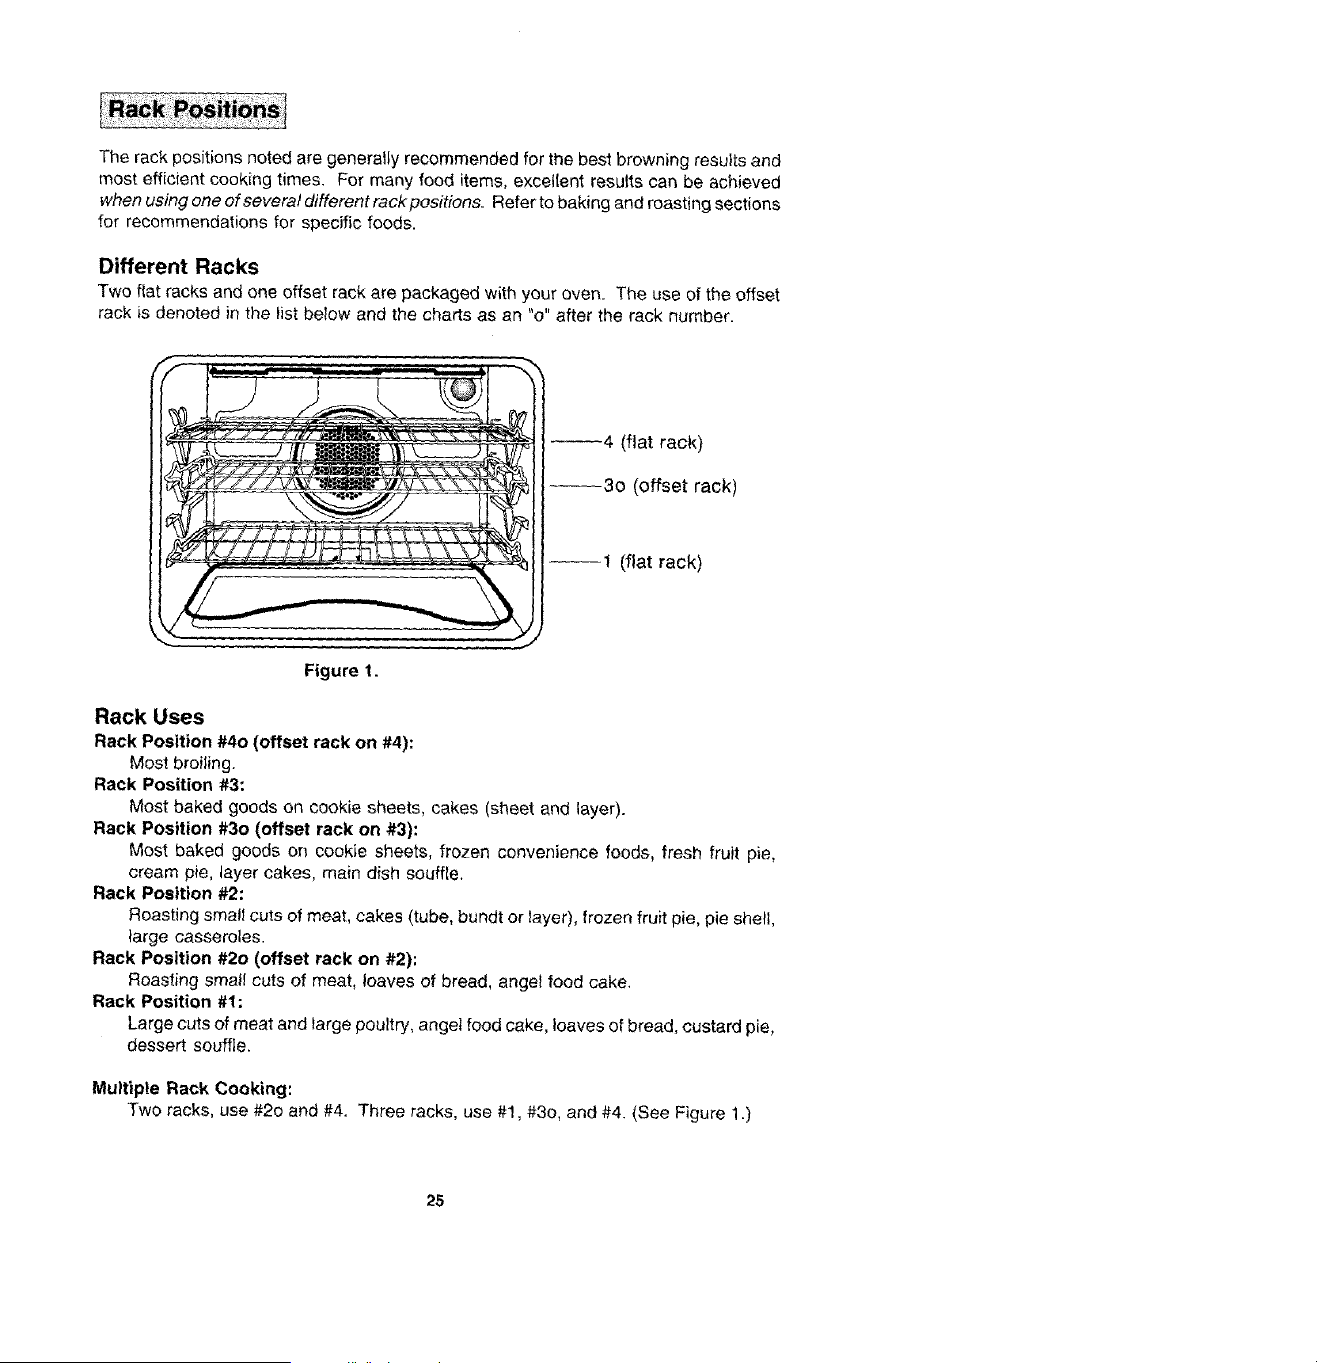
Different Racks
Two flat racks and one offset rack are packaged with your oven. The use of the offset
rack is denoted in the list below and the charts as an "o" after the rack number.
_4 (flat rack)
--30 (offset rack)
--1 (flat rack)
Figure t.
Rack Uses
Rack Position #40 (offset rack on #4):
Most broiling.
Rack Position #3:
Most baked goods on cookie sheets, cakes (sheet and layer).
Rack Position #30 (offset rack on #3):
Most baked goods on cookie sheets, frozen convenience foods, fresh fruit pie,
cream pie, layer cakes, main dish souffle.
Rack Position #2:
Roasting small cuts of meat, cakes (tube, bundt or layer), frozen fruit pie, pie shell,
large casseroles.
Rack Position #20 (offset rack on #2):
Roasting smatl cuts of meat, loaves of bread, angel food cake.
Rack Position #1:
Large cuts of meat and large poultry, angel food cake, loaves of bread, custard pie,
dessert souffle,
Multiple Rack Cooking:
Two racks, use #20 and #4. Three racks, use #1, #30, and #4. (See Figure 1.)
25
Whene_ectricalpoweris suppliedor afterpowerinterruption,the tastclocktime
displayedbeforepowerwasinterruptedwit1flash.Timewiltadvanceandcontinueto
flashunti!clockisreset,
To set time of day
1. Touch Clock Pad.
indicator Word TIME witl flash and time digits wilt remain in the Display. (If more
than fifteen seconds elapse between touching Clock Pad and touching an Arrow
Pad, Clock Pad must be touched again in order to set clock.)
2. Touch the Up or Down Arrow Pad(s) until correct time of day appears in the
Display.
Note: Four seconds later, the time of day will _utoj_atic_ be entered.
IMPORTANT
• To recall time of day when another time function is showing: Touch Clock
Pad.
€ To change time of day set on the clock: Repeat Steps 1 and 2 above.
• Clock time cannot be changed when oven has been programmed for Timed Bake,
Timed Convect Bake, Timed Convect Roast or Seff-ctean. Cancel program before
reprogramming clock.
2.6
important: This interval Timer can be used to remind you when a period, up to 11 hours
and 55 minutes, expires. It can be used independently of any other oven activity and
can be set while another oven function is operating. The Timer does not control the oven.
To set Timer
1. Touch a Timer Pad.
The Indicator Word TIMER and either 1 or 2 flashes and "0Hr:00" appears in the
Disptay.
2. Touch the appropriate number pads until the desired number of minutes or hours
and minutes appear in the Display+
Note: If more than five seconds elapse between touching a Timer Pad and a
number pad, the Timer Pad must be touched again.
Example: To set Timer One for 5 minutes, touch the Timer One Pad and the
number pad "5". After five seconds, the Display will show:
:05
Example: To set Timer Two for 1 hour and 30 minutes, touch the Timer Two Pad
and the number pads "1, 3, 0". After five seconds, the Display will show:
I+90
Countdown will start after five seconds. Countdown will have display precedence
over other time functions. If both timers are set, the timer with the least amount of
time remaining will have display precedence.
At the end of time set, the Timer will chime four times and "End" will appear in the
Display. If the Timer is not cancelled (see below), "End" will remain in the Display
and there wilt be two chimes every thirty seconds for five minutes.
To cancel Timer
1. Touch and hold the Timer Pad for four seconds.
OR
2. A. Touch the Timer Pad.
B. Touch "0" number pad. Five seconds later the Timer will be cancelled.
NOTE: Touching Cancel Off Pad to cancel chimes will cancel ALL selected oven 1
programming.
!
27
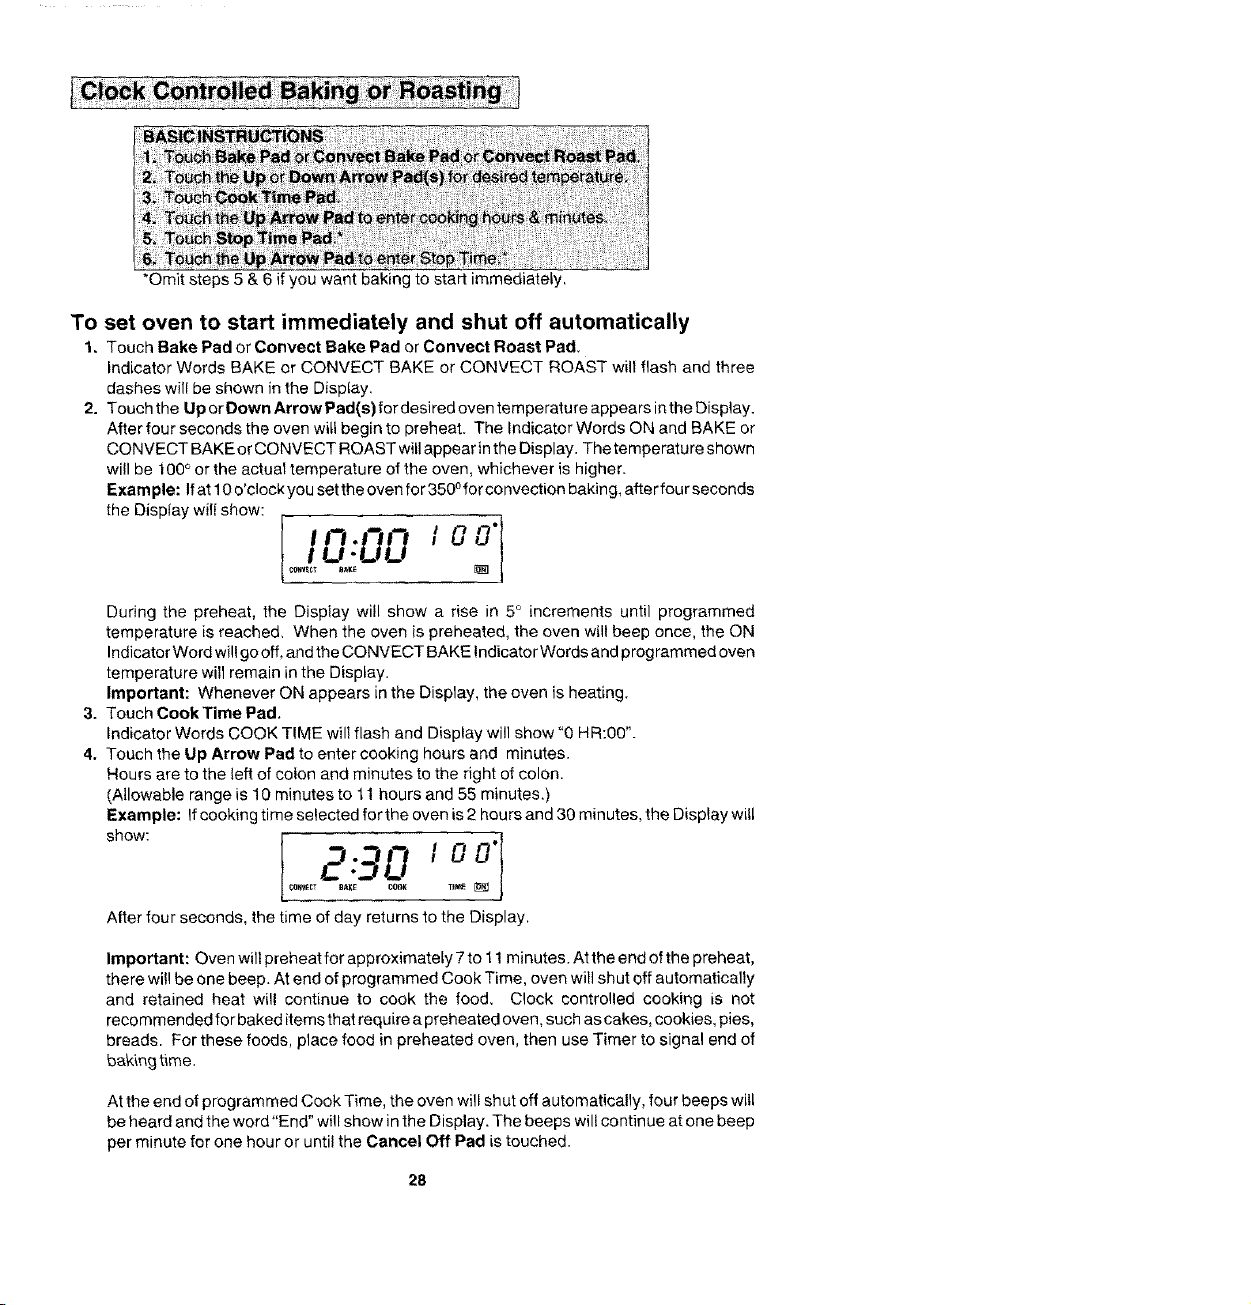
*Omit steps 5 & 6 if you want baking to start immediately.
To set oven to start immediately and shut off automatically
1, Touch Bake Pad or Convect Bake Pad or Convect Roast Pad.
Indicator Words BAKE or CONVECT BAKE or CONVECT ROAST will flash and three
dashes will be shown in the Disptay
2. Touchthe UporDownArrowPad(s)fordesiredoventemperatureappearsintheOisplay.
After four seconds the oven will begin to preheat. The Indicator Words ON and BAKE or
CONVECT BAKE or CONVECT ROAST will appear in the Display. The temperatu re shown
will be 100 ° or the actual temperature of the oven, whichever is higher.
Example: If at 10 o'clock you set the oven for 350 ofor convection baking, after four seconds
the Display will show:
During the preheat, the Display will show a rise in 5 ° increments until programmed
temperature is reached. When the oven is preheated, the oven will beep once, the ON
Indicator Word will go off, and the CONVECT BAKE Indicator Words and prog rammed oven
temperature will remain in the Display.
Important: Whenever ON appears in the Display, the oven is heating.
3. Touch CookTime Pad.
Indicator Words COOK TIME will flash and Display will show "0 HR:00".
4. Touch the Up Arrow Pad to enter cooking hours and minutes.
Hours are to the left of colon and minutes to the right of colon.
(Allowable range is 10 minutes to 11 hours and 55 minutes.)
Example: If cooking time selected for the oven is 2 hours and 30 minutes, the Display witl
After four seconds, the time of day returns to the Display.
Important: Oven will preheat for approximately 7 to 11 minutes. At the end of the preheat,
there will be one beep. At end of programmed Cook Time, oven will shut off automatically
and retained heat will continue to cook the food, Clock controlled cooking is not
recommended for baked items that require a preheated oven, such as cakes, cookies, pies,
breads. For these foods, place food in preheated oven, then use Timer to signal end of
baking time.
At the end of programmed Cook Time, the oven will shut off automatically, four beeps will
be heard and the word"End" will show in the Display. The beeps will continue at one beep
per minute for one hour or until the Cancel Off Pad is touched.
28
To set oven to start at future time and shut off automatically
1-4. Follow preceding steps 1-4 on pages 28.
5. Touch Stop Time Pad.
indicator Words STOP TIME will flash. Display will show the calculated stop time
based on current time of day and cook time.
6. Touch the Up Arrow Pad to enter desired stop time.
A stop time can only be accepted for later in the day.
Note: Since food continues to cook if left in the oven, it is suggested that the clock
controls be used primarily to start the oven when no one is in the kitchen. Provisions
should be made to have the food removed as soon as the cook time is completed.
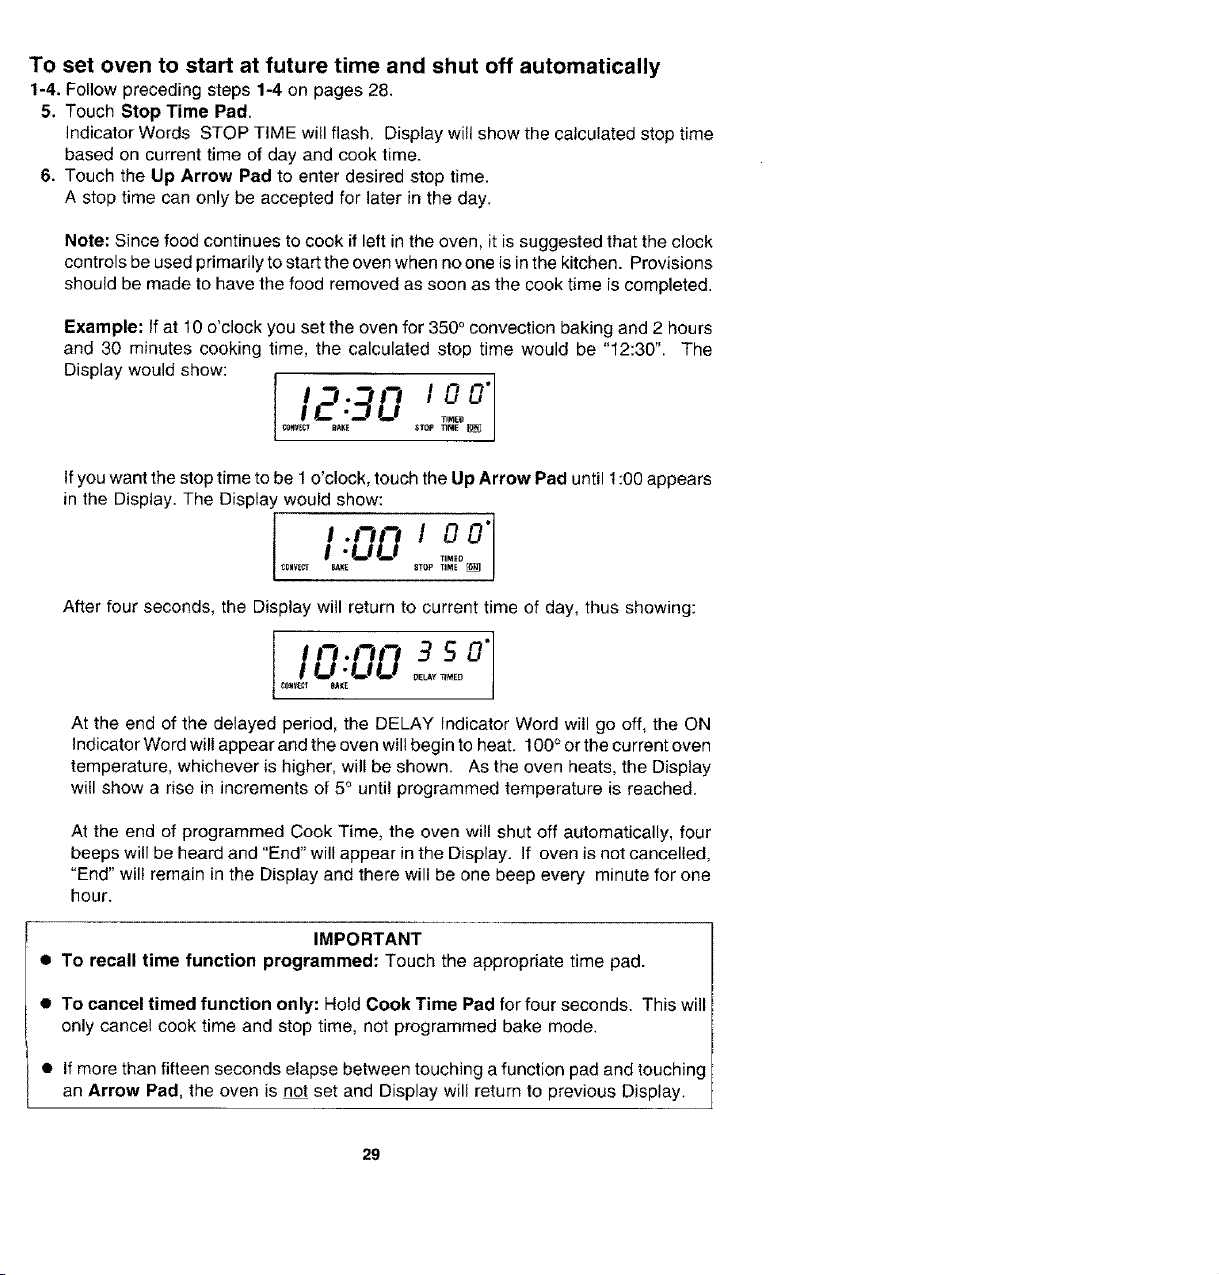
Example: if at 10 o'clock you set the oven for 3500 convection baking and 2 hours
and 30 minutes cooking time, the calculated stop time would be "12:30". The
Display would show:
1o0"
If you want the stop time to be I o'clock, touch the Up Arrow Pad until t :00 appears
in the Display. The Display would show:
'-00
_r_Nl_'_ _BAKE S 0
After four seconds, the Display will return to current time of day, thus showing:
I0".00
_V_CT BAK[
At the end of the delayed period, the DELAY Indicator Word will go off, the ON
Indicator Word will appear and the oven will begin to heat. 100 ° or the current oven
temperature, whichever is higher, will be shown. As the oven heats, the Display
witl show a rise in increments of 5 o until programmed temperature is reached.
At the end of programmed Cook Time, the oven will shut off automatically, four
beeps will be heard and "End" will appear in the Display. If oven is not cancelled,
"End" will remain in the Display and there will be one beep every minute for one
hour.
IMPORTANT
• To recall time function programmed: Touch the appropriate time pad.
• To cancel timed function only: Hold Cook Time Pad for four seconds. This will
only cancel cook time and stop time, not programmed bake mode.
• If more than fifteen seconds elapse between touching a function pad and touching
an Arrow Pad, the oven is not set and Display will return to previous Display.
29
• When cooking foods for the first time in your new oven, use recipe cooking times
and temperatures as a guide.
• Use tested recipes from reliable sources.
• Preheat the oven only when necessary. For baked foods that rise and for richer
browning, a preheated oven is better. Casseroles can be started in a cold oven.
Preheating takes from 7 to 11 minutes; place food in oven after preheat beep.
• Arrange oven racks before turning on oven. Follow suggested rack positions on
pages 25 and 31.
• Allow about 1 to 11/2inches of space between the oven side walls and pans to allow
proper air circulation.
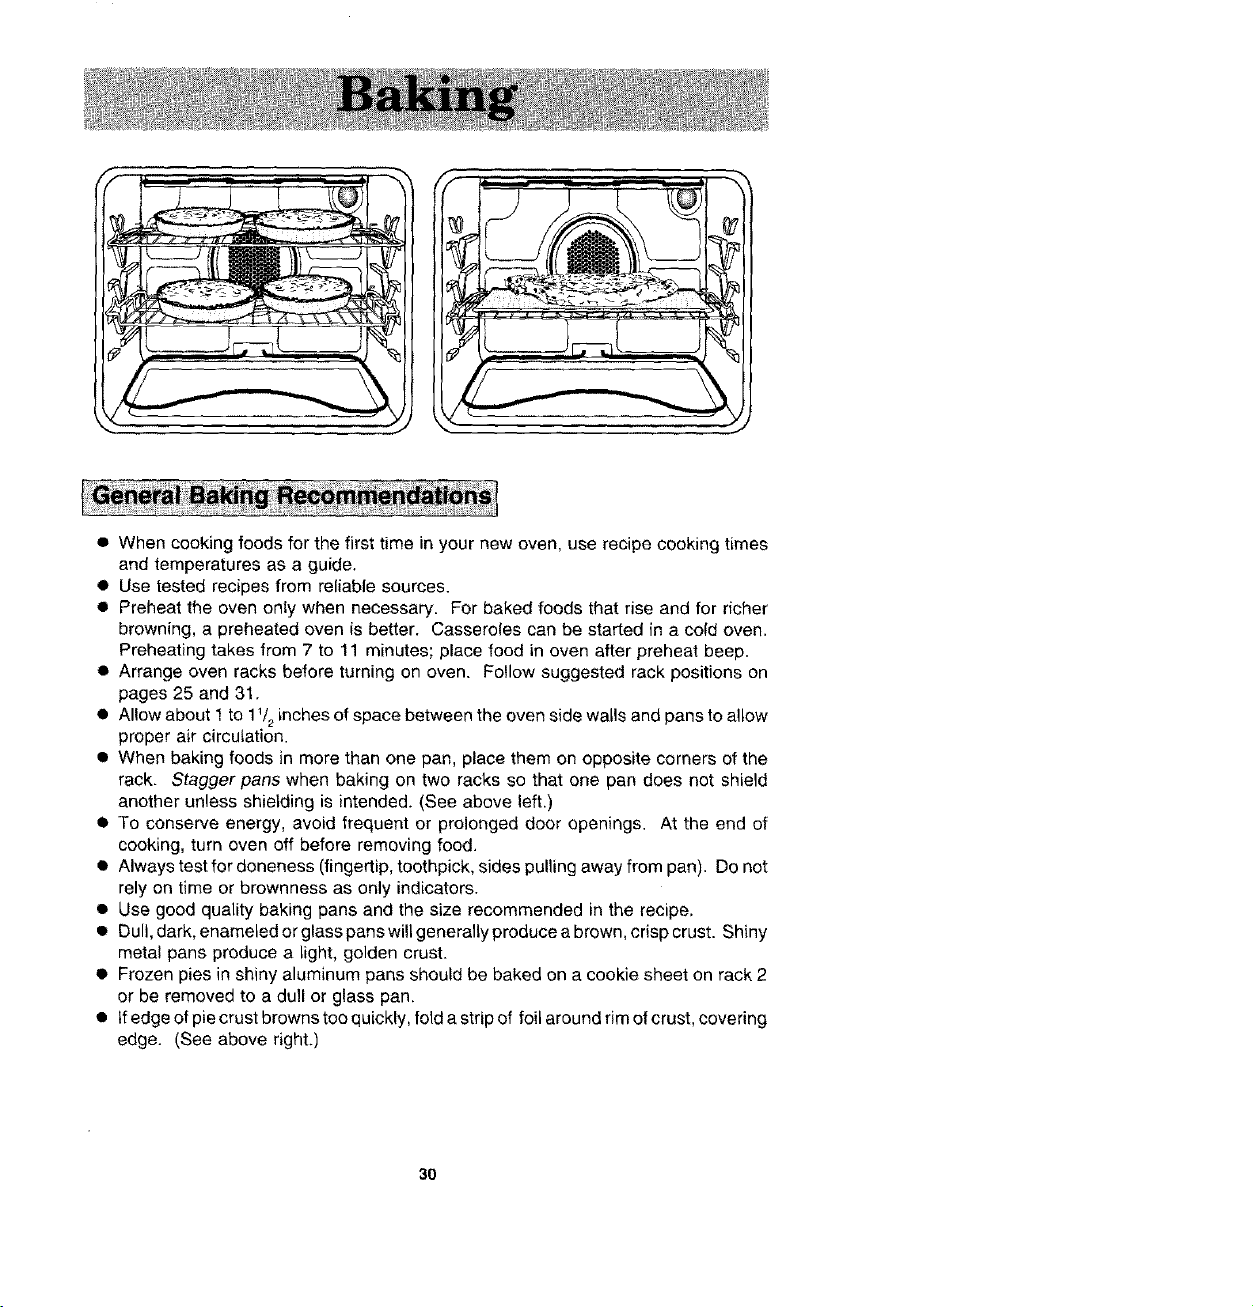
• When baking foods in more than one pan, place them on opposite corners of the
rack. Stagger pans when baking on two racks so that one pan does not shield
another unless shielding is intended. (See above left.)
• To conserve energy, avoid frequent or prolonged door openings. At the end of
cooking, turn oven off before removing food.
• Always test for doneness (fingertip, toothpick, sides pulling away from pan). Do not
rely on time or brownness as only indicators.
• Use good quality baking pans and the size recommended in the recipe,
• Dull, dark, enameled or glass pans will generally produce a brown, crisp crust. Shiny
metal pans produce a light, golden crust.
• Frozen pies in shiny aluminum pans should be baked on a cookie sheet on rack 2
or be removed to a dull or glass pan.
• tfedgeofpiecrustbrownstooquickly, fold a strip of foil around rim of crust, covering
edge. (See above right.)
3O
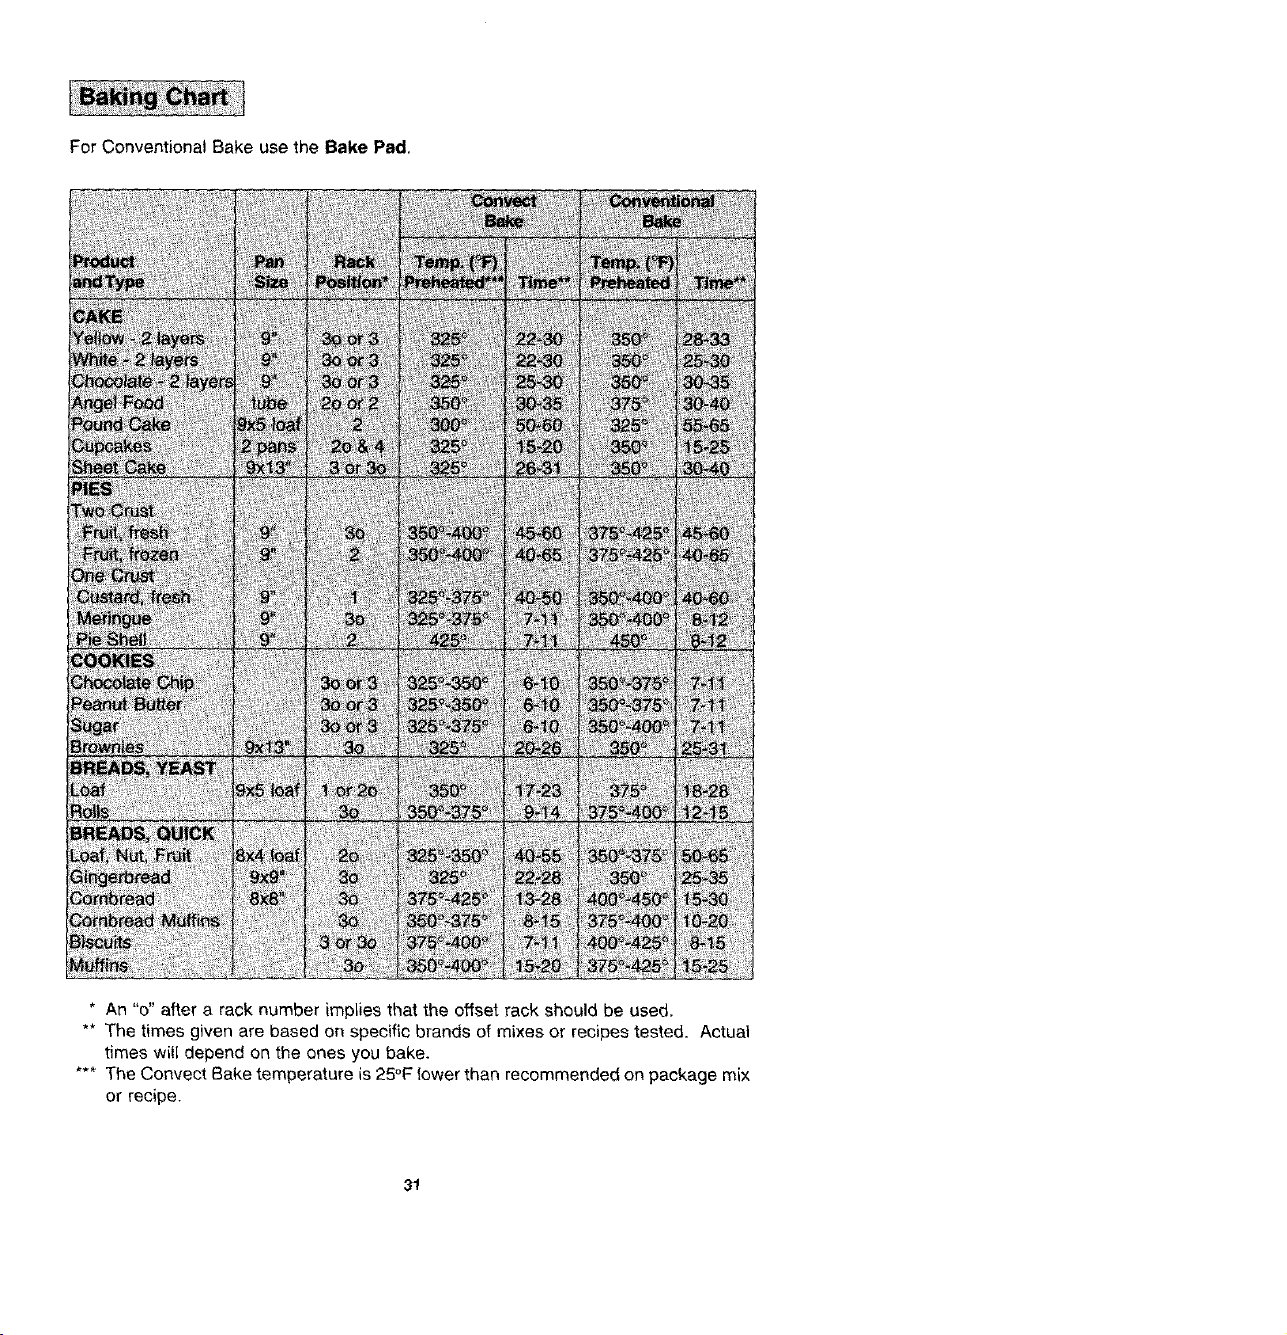
For Conventional Bake use the Bake Pad,
8X4k_ii _]
* An "o" after a rack number implies that the offset rack should be used.
** The times given are based on specific brands of mixes or recipes tested. Actual
times witl depend on the ones you bake.
*** The Convect Bake temperature is 25°F lower than recommended on package mix
or recipe.
31
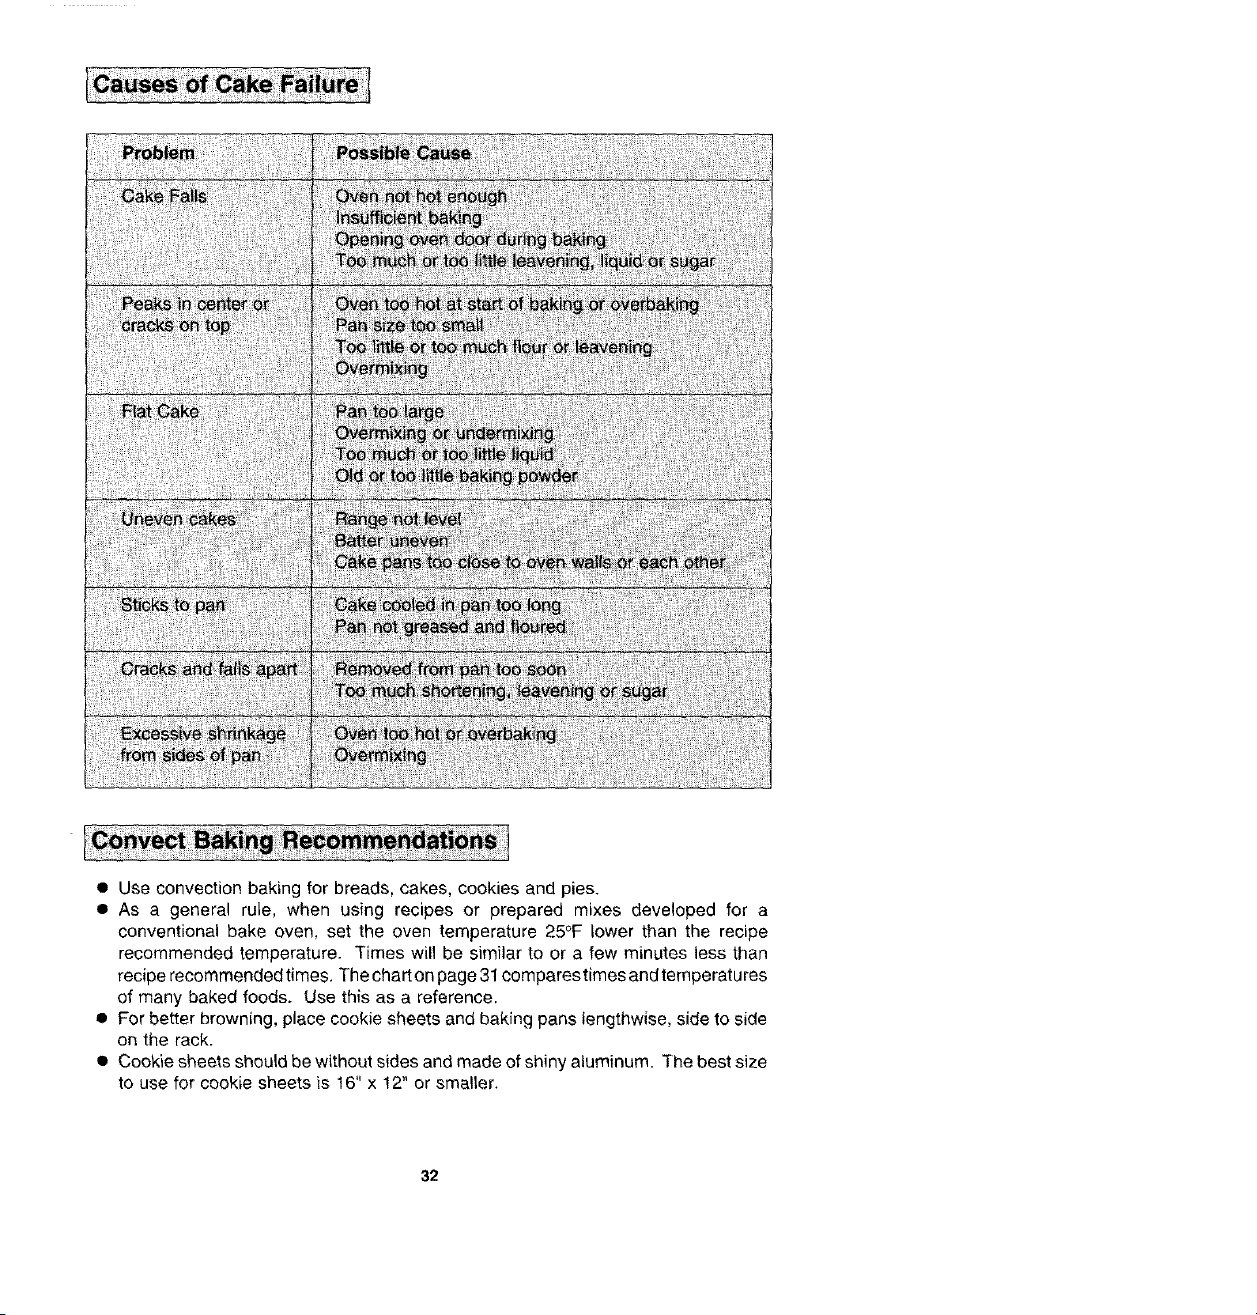
• Use convection baking for breads, cakes, cookies and pies.
• As a general rule, when using recipes or prepared mixes developed for a
conventional bake even, set the oven temperature 25°F lower than the recipe
recommended temperature. Times will be similar to or a few minutes less than
recipe recommended times. The chart on page 31 comparestimes and temperatures
of many baked foods. Use this as a reference.
• For better browning, place cookie sheets and baking pans lengthwise, side to side
on the rack.
• Cookie sheets should be without sides and made of shiny aluminum. The best size
to use for cookie sheets is 16" x 12" or smaller.
32
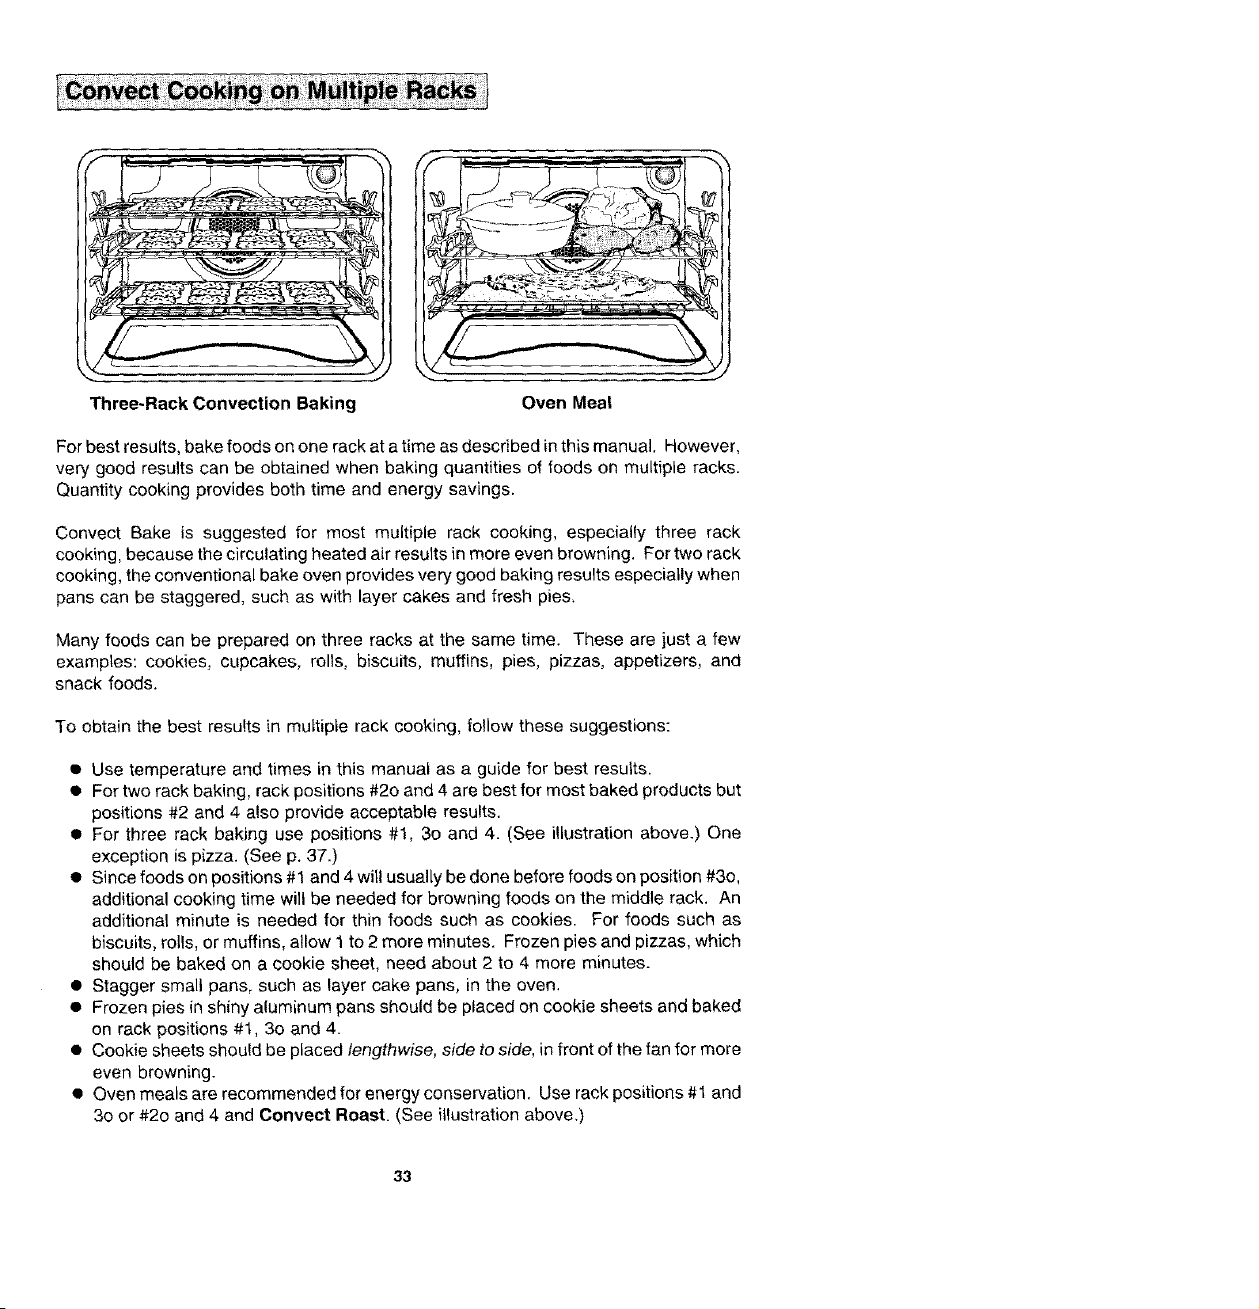
Three-Rack Convection Baking
Oven Mea!
For best results, bake foods on one rack at a time as described in this manual. However,
very good results can be obtained when baking quantities of foods on multiple racks.
Quantity cooking provides both time and energy savings.
Convect Bake is suggested for most multiple rack cooking, especially three rack
cooking, because the circulating heated air results in more even browning. For two rack
cooking, the conventional bake oven provides very good baking results especially when
pans can be staggered, such as with layer cakes and fresh pie&
Many foods can be prepared on three racks at the same time. These are just a few
examples: cookies, cupcakes, rolls, biscuits, muffins, pies, pizzas, appetizers, and
snack foods.
To obtain the best results in multiple rack cooking, follow these suggestions:
• Use temperature and times in this manual as a guide for best results.
• For two rack baking, rack positions #20 and 4 are best for most baked products but
positions #2 and 4 also provide acceptable results.
• For three rack baking use positions #1, 3o and 4. (See illustration above.) One
exception is pizza. (See p. 37.)
• Since foods on positions #1 and 4 will usually be done before foods on position #3o,
additional cooking time will be needed for browning foods on the middle rack. An
additional minute is needed for thin foods such as cookies. For foods such as
biscuits, rolls, or muffins, allow 1 to 2 more minutes. Frozen pies and pizzas, which
should be baked on a cookie sheet, need about 2 to 4 more minutes.
• Stagger small pans, such as layer cake pans, in the oven.
• Frozen pies in shiny aluminum pans should be placed on cookie sheets and baked
on rack positions #1, 30 and 4.
• Cookie sheets should be placed lengthwise, side to side, in front of the fan for more
even browning.
• Oven meals are recommended for energy conservation. Use rack positions #1 and
30 or #2o and 4 and Convect Roast. (See illustration above,)
33
• Preheating is not necessary.
• For open pan roasting, place meat or poultry on the slotted portion of the two-piece
pan included with the oven, Do net add water to the pan. Use open pan roasting
for tender cuts of meat. Less tender cuts of meat need to be cooked by moist heat
in a covered pan.
• For best results, a meat thermometer is the most accurate guide to degree of
doneness. The tip of the thermometer should be located in the thickest part of a
roast, not touching fat, bone, or gristle. For turkeys and large poultry products,
insert the tip of the thermometer into the thickest part of the inner thigh.
• Place roast fat side up to allow self basting of meat during roasting.
• Since meats continue to cook after being removed from the oven, remove roast
from oven when it reaches an internal temperature about 5 degrees below the
temperature desired.
• For less loss of juices and easier carving, allow about 15 mLnutes "standing time"
after removing meat from oven.
• For best results in roasting poultry, thaw completely. Due to the structure of poultry,
partially thawed poultry will cook unevenly.
• If preferred, tender cuts of meat can be roasted in the conventional bake oven by
following the general recommendations given above. However, meats will roast
more quickly in the convect oven using Oonvect Roast.
• Conventional bake is best for less tender cuts of meat that require a longer, moist
heat method of cooking. Follow your recipe for times and temperatures for covered
meats.
• Meats cooked in oven cooking bags, dutch ovens, or covered roasting pans are best
cooked in the conventional bake oven using the Bake Pad,
• Use meat roasting charts in standard cookbooks for recommended times and
temperatures for roasting in a conventional bake oven.
34
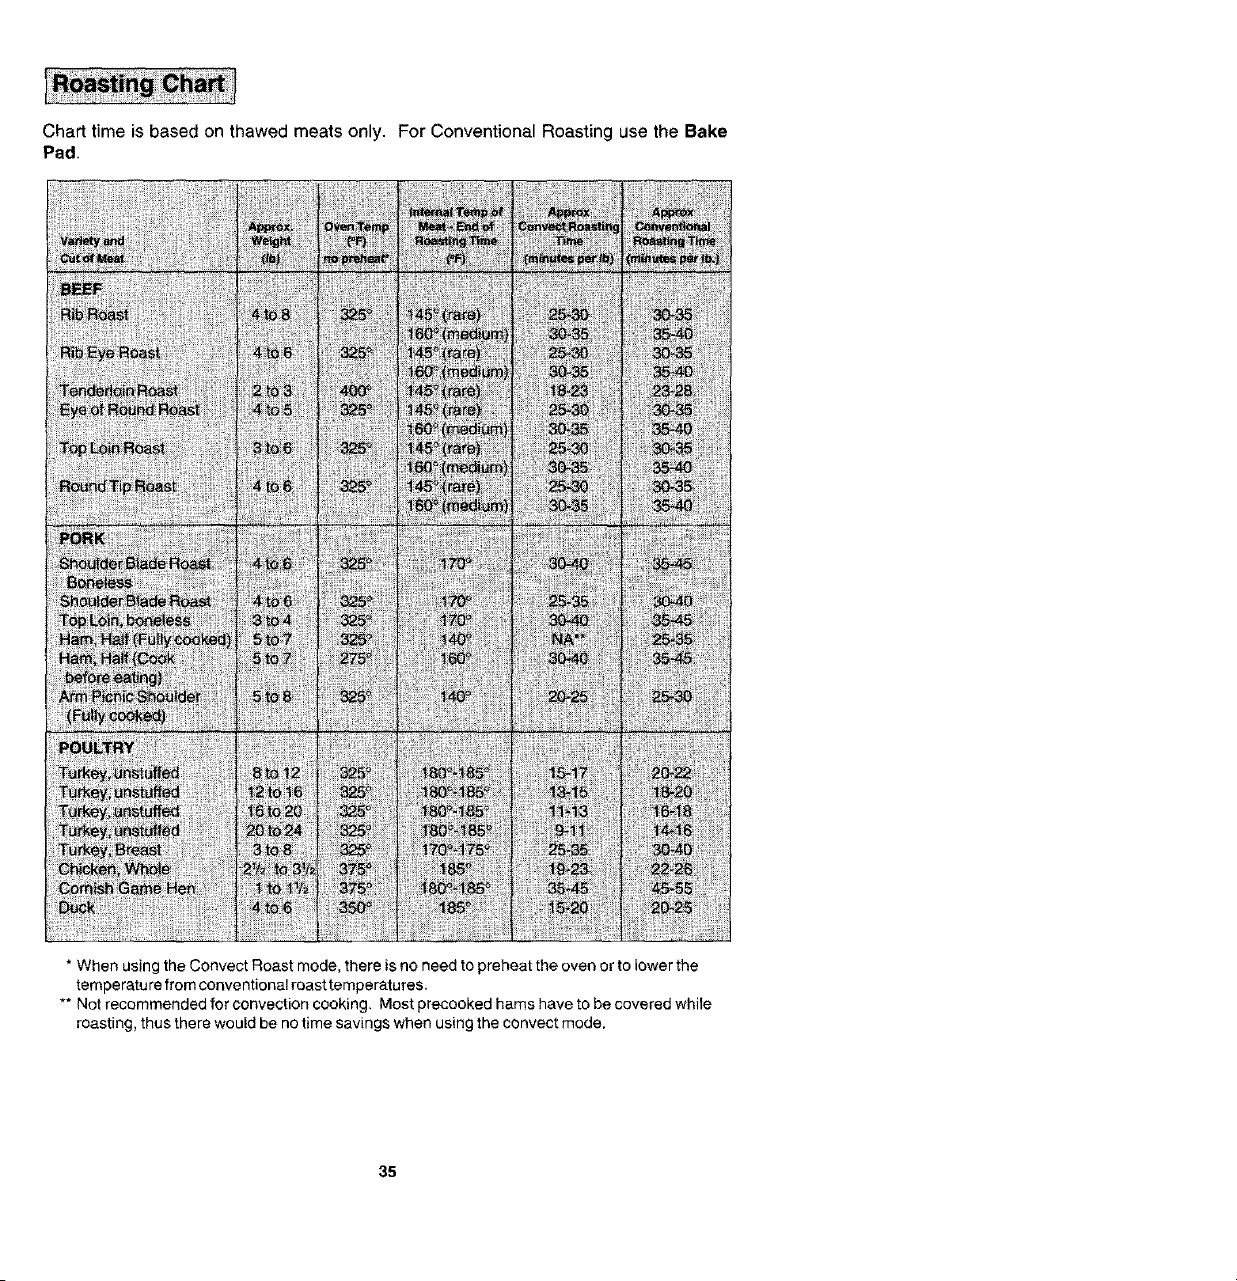
Chart time is based on thawed meats only. For Conventional Roasting use the Bake
Pad.
* When using the Convect Roast mode, there is no need to preheat the oven or to lower the
temperature from conventional roast temperatures.
** Not recommended for convection cooking. Most precooked hams have to be covered while
roasting, thus there would be no time savings when using the convect mode,
35
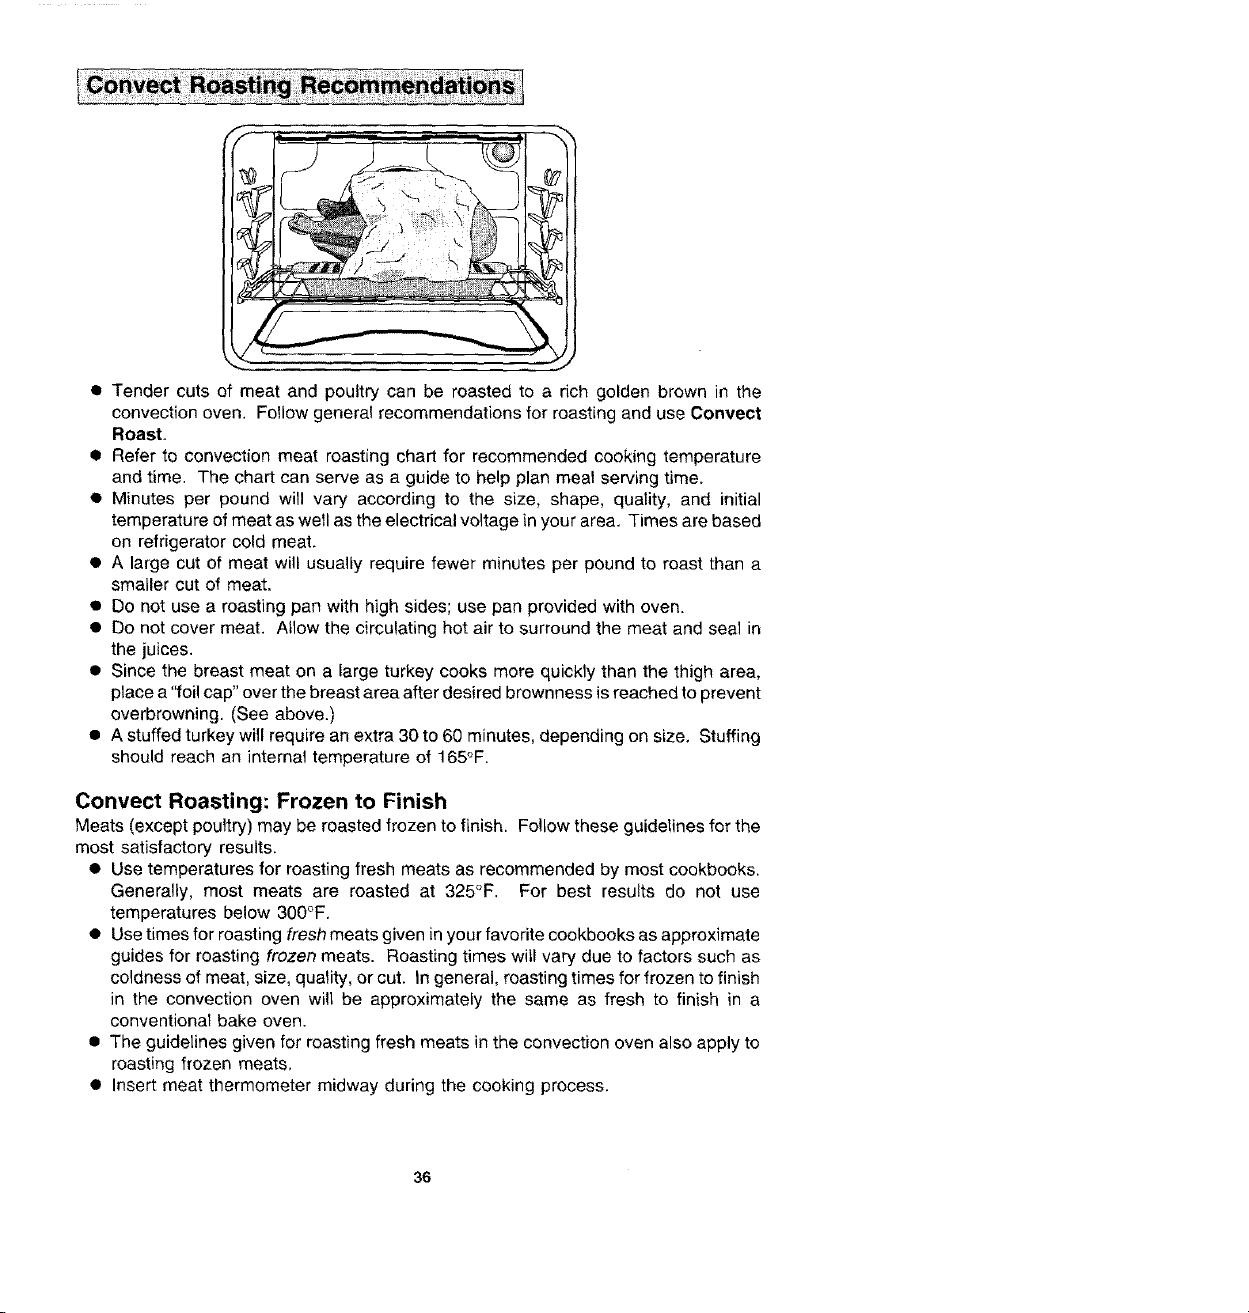
• Tender cuts of meat and poultry can be roasted to a rich golden brown in the
convection oven. Follow general recommendations for roasting and use Conveet
Roast.
• Refer to convection meat roasting chart for recommended cooking temperature
and time. The chart can serve as a guide to help plan meal serving time.
• Minutes per pound will vary according to the size, shape, quality, and initial
temperature of meat as well as the electrical voltage in your area. Times are based
on refrigerator cold meat.
• A large cut of meat will usually require fewer minutes per pound to roast than a
smaller cut of meat,
• Do not use a roasting pan with high sides; use pan provided with oven.
• Do not cover meat. Atlow the circulating hot air to surround the meat and seal in
the juices.
• Since the breast meat on a large turkey cooks more quickly than the thigh area,
place a "foil cap" over the breast area after desired brownness is reached to prevent
overbrowning. (See above.)
• A stuffed turkey will require an extra 30 to 60 minutes, depending on size, Stuffing
should reach an internal temperature of 165°F.
Convect Roasting: Frozen to Finish
Meats (except poultry) may be roasted frozen to finish. Follow these guidelines for the
most satisfactory results.
• Use temperatures for roasting fresh meats as recommended by most cookbooks.
Generally, most meats are roasted at 325°F. For best results do not use
temperatures below 300°F.
• Use times for roasting fresh meats given in your favorite cookbooks as approximate
guides for roasting frozen meats. Roasting times witl vary due to factors such as
coldness of meat, size, quality, or cut. In general, roasting times for frozen to finish
in the convection oven will be approximately the same as fresh to finish in a
conventional bake oven.
• The guidelines given for roasting fresh meats in the convection oven also apply to
roasting frozen meats,
• Insert meat thermometer midway during the cooking process.
36
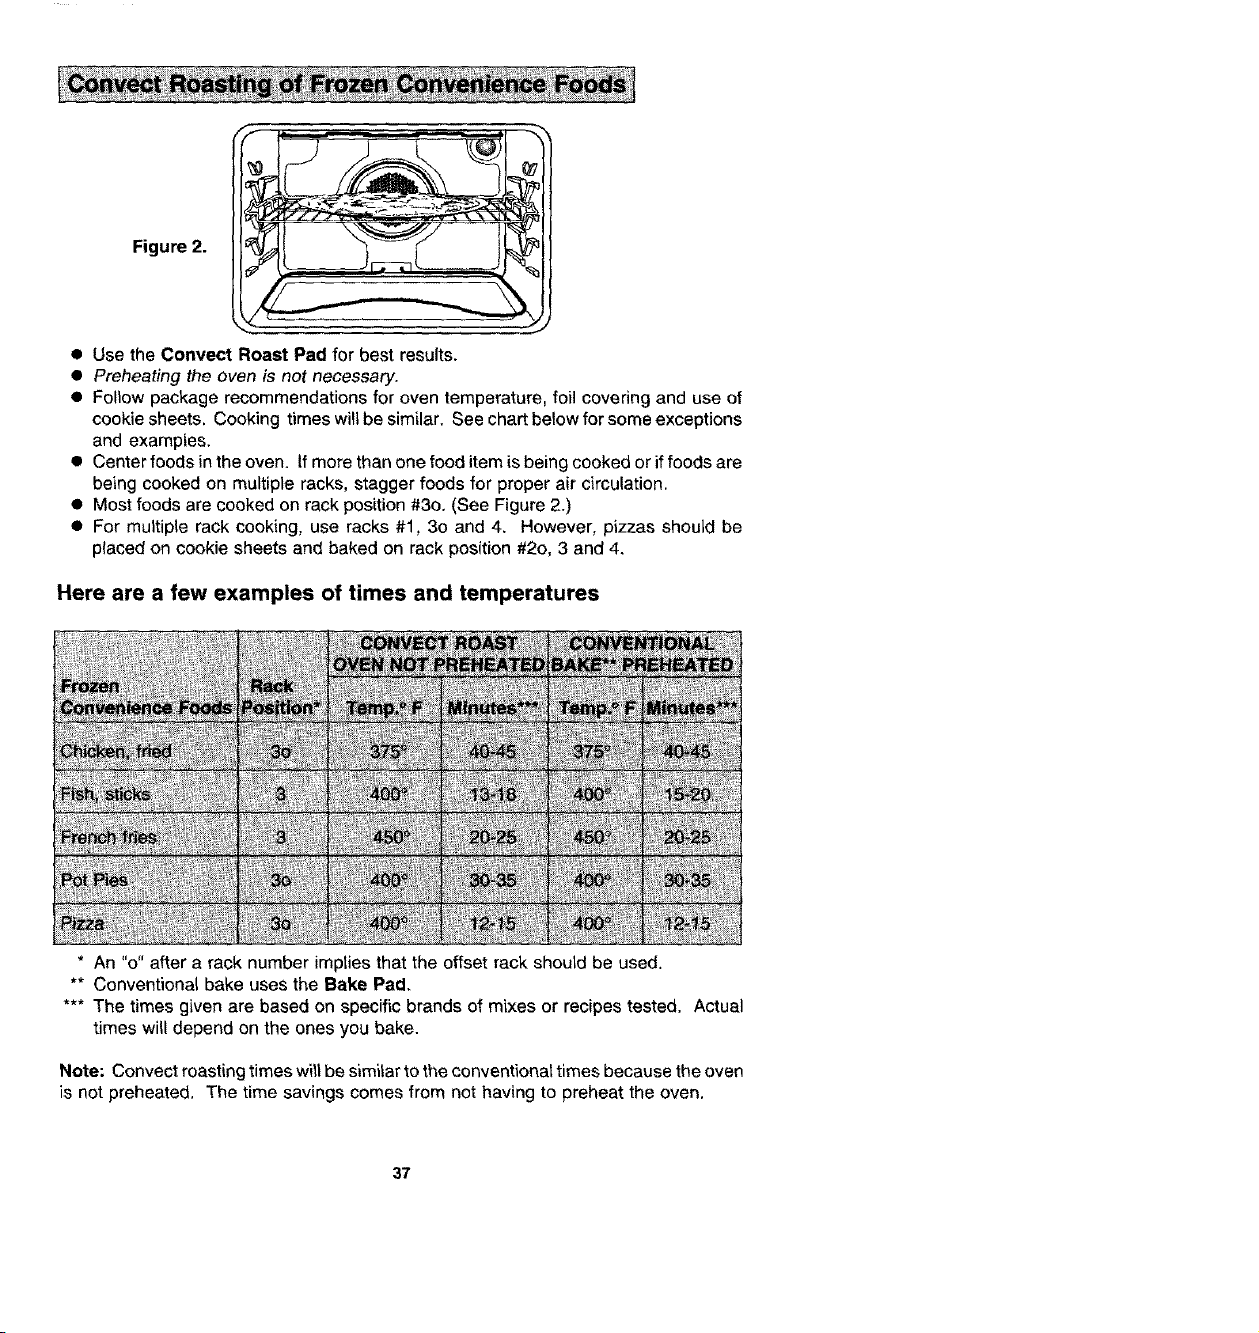
Figure 2.
• Use the Conveet Roast Pad for best results.
• Preheating the oven is not necessary.
• Follow package recommendations for oven temperature, foil covering and use of
cookie sheets. Cooking times will be similar. See chart below for some exceptions
and examples.
• Center foods in the oven. If more than one food item is being cooked or if foods are
being cooked on multiple racks, stagger foods for proper air circulation.
• Most foods are cooked on rack position #3o. (See Figure 2.)
• For multiple rack cooking, use racks #1, 30 and 4. However, pizzas should be
placed on cookie sheets and baked on rack position #2o, 3 and 4.
Here are a few examples of times and temperatures
* An "o" after a rack number implies that the offset rack should be used.
** Conventional bake uses the Bake Pad.
*** The times given are based on specific brands of mixes or recipes tested. Actual
times will depend on the ones you bake.
Note: Convect roasting times will be similar to the conventional times because the oven
is not preheated. The time savings comes from not having to preheat the oven.
37

1. Place oven rack on the rack position suggested in the charL (See p. 39.)
Distance from broiling element depends on foods being prepared. Rack position
4o (offset rack in position #4) is usually recommended unless otherwise stated.
2. Touch Broil Pad.
Indicator Word BROIL will flash and Display will show three dashes.
Note: If more than fifteen seconds elapses between touching Broil Pad and
touching Up or Down Arrow Pad(s), the oven is _notset and Display wil! return to
previous Display.
3,
Touch Up or Down Arrow Pad(s).
The first touch of an Arrow Pad will enter "HI" in the Display. The oven has a
variable broil feature which means that a lower temperature can be selected. Touch
Down Arrow Pad if a lower temperature is desired. Use "HI" broil for most broil
operations. Use vadable broil for delicate and long-term items.
Four seconds after entering "HI" or entering a temperature, the broil element will
come on and the Indicator Words BROIL and ON will remain in the Display along
with the selected Broil temperature. If the variabte broil feature was selected, the
Indicator Word ON will cycle with the element.
Example: If at 10 o'clock you set the oven for broi! ("HI"), the Display will show:
I0:00 .I ]
8ROLL
4. Place food on broiler pan. Broil element will preheat in 5 minutes. After broil element
is red, place food in oven. Oven door MU__b_e_Jeft open at broil stop position.
5. Touch Cancel Off Pad to turn off oven when food is cooked.
NOTE: A fan comes on during the BROIL cycle. If it does not, the oven broil element
will cycle on and off. ff the fan does not operate, contact your authorized Jenn-
Air Service Contractor for repair.
38
• Tender cuts of meat or marinated meats are best for broiling. This includes rib and
loin cuts of steak, ground beef, ham steaks, poultry pieces or fish. For best results,
steaks should be at least 1" thick. Thinner steaks should be pan-broiled.
• Do not cover broiler grid with foil since this prevents fat drippings from draining into
the bottom of the pan.
• Before broiling, remove excess fat from meat and score edges of fat (do not cut into
meat) to prevent meat from cuding. Salt after cooking.
• To prevent dry surface on fish or Lean meats, brush melted butter on top.
• Foods that require turning should be turned only once during broiling. Turn meat
with tongs to avoid piercing and loss of juices.
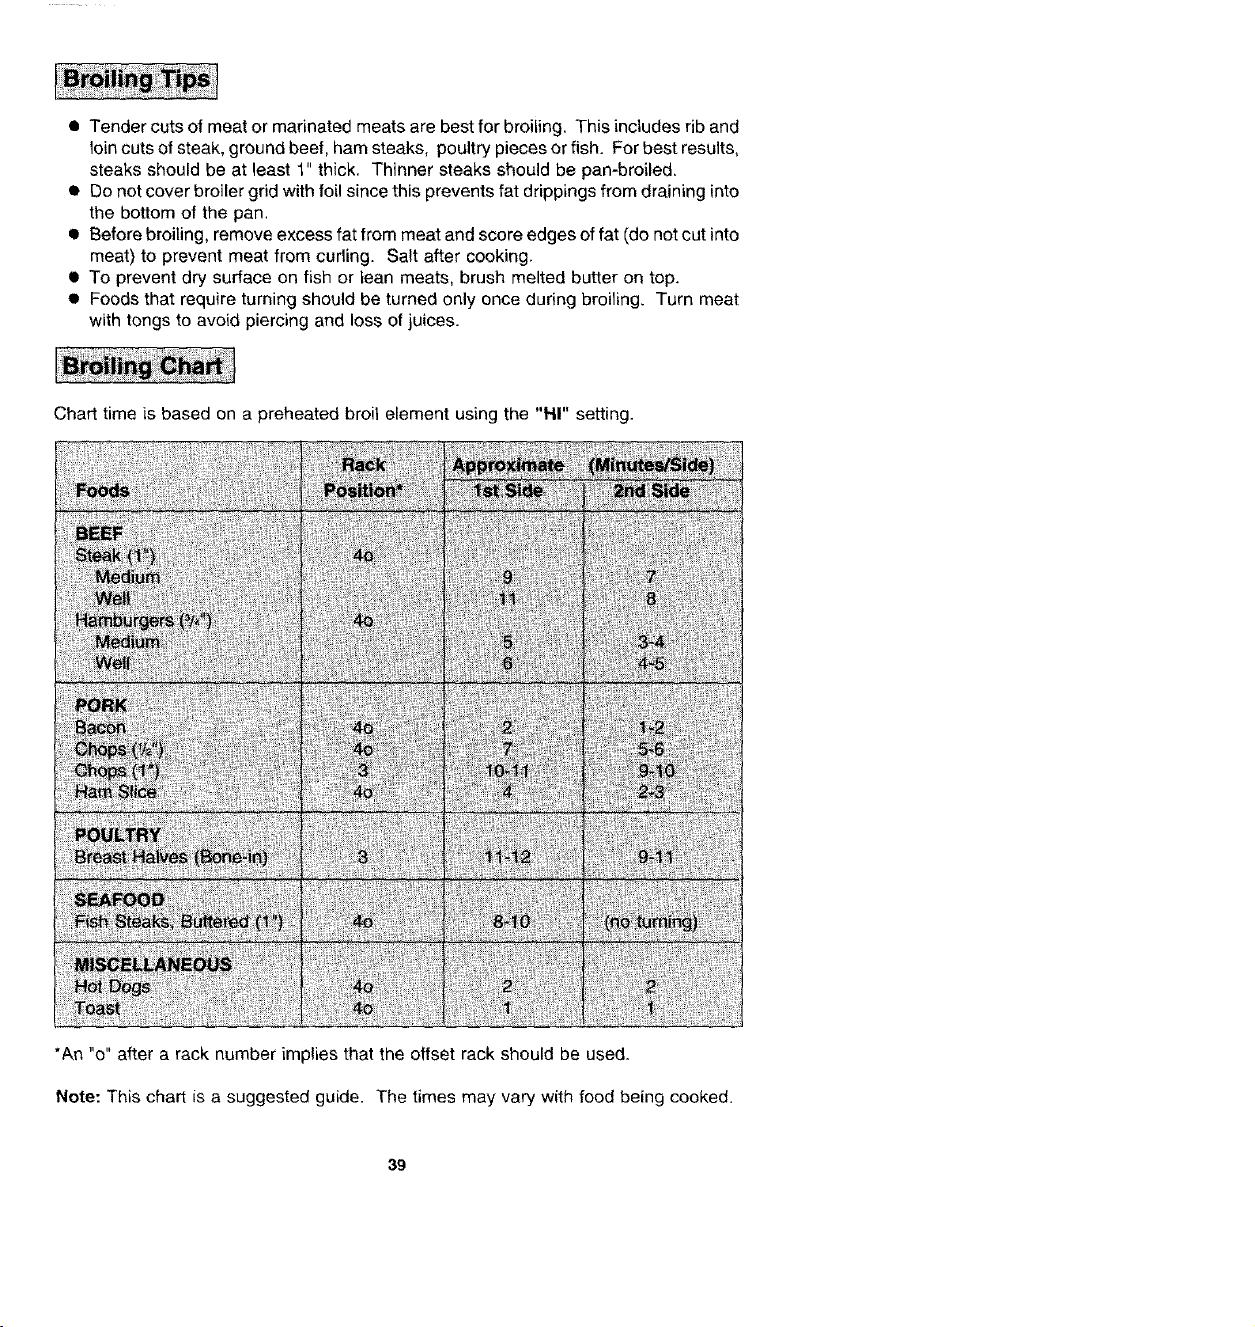
Chart time is based on a preheated broil element using the "FII" setting.
*An "o" after a rack number implies that the offset rack should be used.
Note: This chart is a suggested guide. The times may vary with food being cooked.
39
When the oven controls are set to CLEAN, the oven heats to temperatures that are
higher than those used for cooking. The high temperatures cause food soil to burn off
and substantially disappear. While this occurs, a device in the oven vent helps to
consume normal amounts of smoke. The oven is vented through an opening under the
air grille.
• Remove the broiler pan and any other utensils from the oven. These utensils cannot
withstand the high temperatures of the cleaning process.
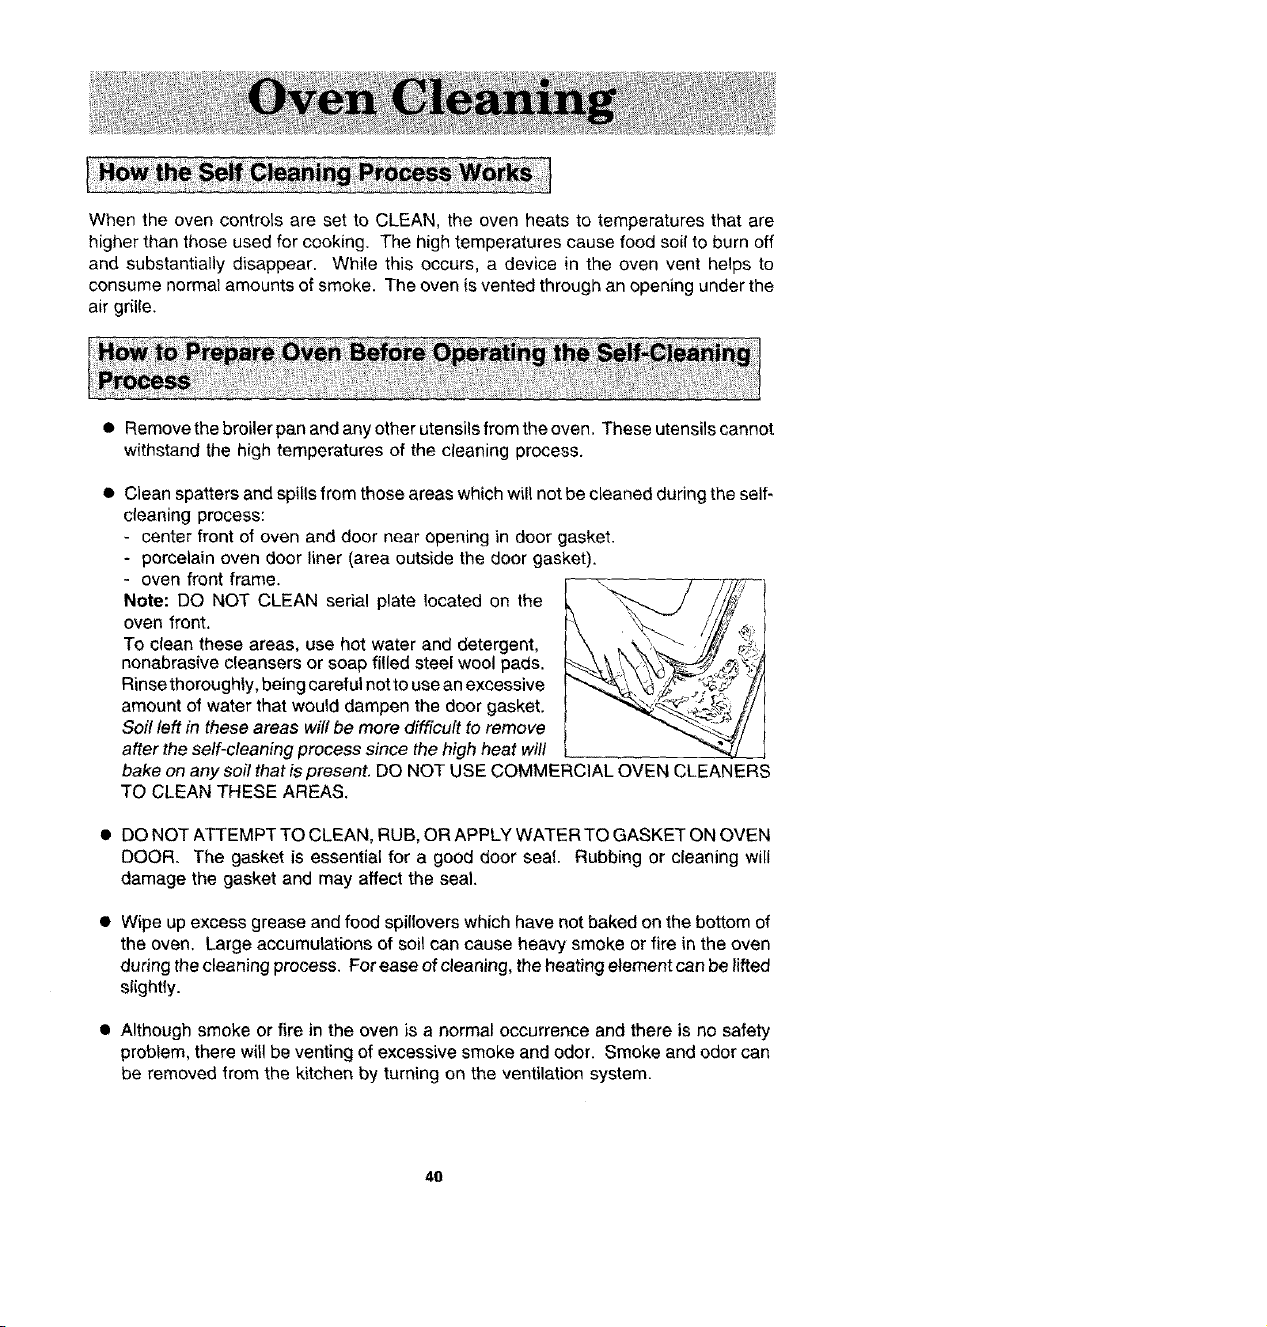
• Clean spatters and spills from those areas which will not be cleaned during the self-
cleaning process:
- center front of oven and door near opening in door gasket.
- porcelain oven door liner (area outside the door gasket).
- oven front frame.
Note: DO NOT CLEAN serial plate located on the
oven front.
To clean these areas, use hot water and detergent,
nonabrasive cleansers or soap filled steel wool pads.
Rinse thoroughly, being careful not to use an excessive
amount of water that would dampen the door gasket.
Soil left in these areas will be more difficult to remove
t
after the self-cleaning process since the high heat will I
bake on any soil that is present. DO NOT USE COMMERCIAL OVEN CLEANERS
TO CLEAN THESE AREAS.
• DO NOT ATTEMPT TO CLEAN, RUB, OR APPLY WATER TO GASKET ON OVEN
DOOR. The gasket is essential for a good door seal. Rubbing or cleaning will
damage the gasket and may affect the seal.
• Wipe up excess grease and food spillovers which have not baked on the bottom of
the oven. Large accumulations of soil can cause heavy smoke or fire in the oven
during the cleaning process. For ease of cleaning, the heating element can be lifted
slightly.
• Although smoke or fire in the oven is a normal occurrence and there is no safety
problem, there will be venting of excessive smoke and odor. Smoke and odor can
be removed from the kitchen by turning on the ventilation system.
4O
• The oven racks can be cleaned in the oven. However, the oven racks wil_ discolor,
lose shininess, and become difficult to slide in and out if left in the oven during the
ctean[ng process. REMOVE RACKS FROM OVEN IF THIS OISCOLORATiON
WILL BE OBJECT}ONABLE. As a suggestion, do not leave the racks in the oven
during each self-cleaning process if they do not need to be cleaned since they will
discolor to a duff silver after the first cleaning. Moderately soiled racks can be
cleaned with a soapy S.O.S. pad or Scotch-Brite scour pad. Stubborn stains need
to be removed in the serf-cleaning process. Be sure to read special tips on page
44 if oven racks are cleaned during the serf-cleaning process,
*Omit steps 4 & 5 if you wish clean1 ng to begin immediately.
To set oven to start cleaning immediately
1. Ctose the oven door.
2. Touch Clean Pad,
Indicator Words CLEAN TIME will flash and Display will show" HR : _ _".
3. Touch Up or Down Arrow Pad(s) to select cteaning time.
The first touch of an Arrow Pad will give you 3 hours of eteaning time, The cleaning
time can be varied depending on the amount of soil, Set "2:00" for light soil or "4:00"
for heavy soil.
Note: If more than fifteen seconds elapse between touching Clean Pad and
touching an Arrow Pad, the oven is DOtset and time of day will automatically return
to the Display.
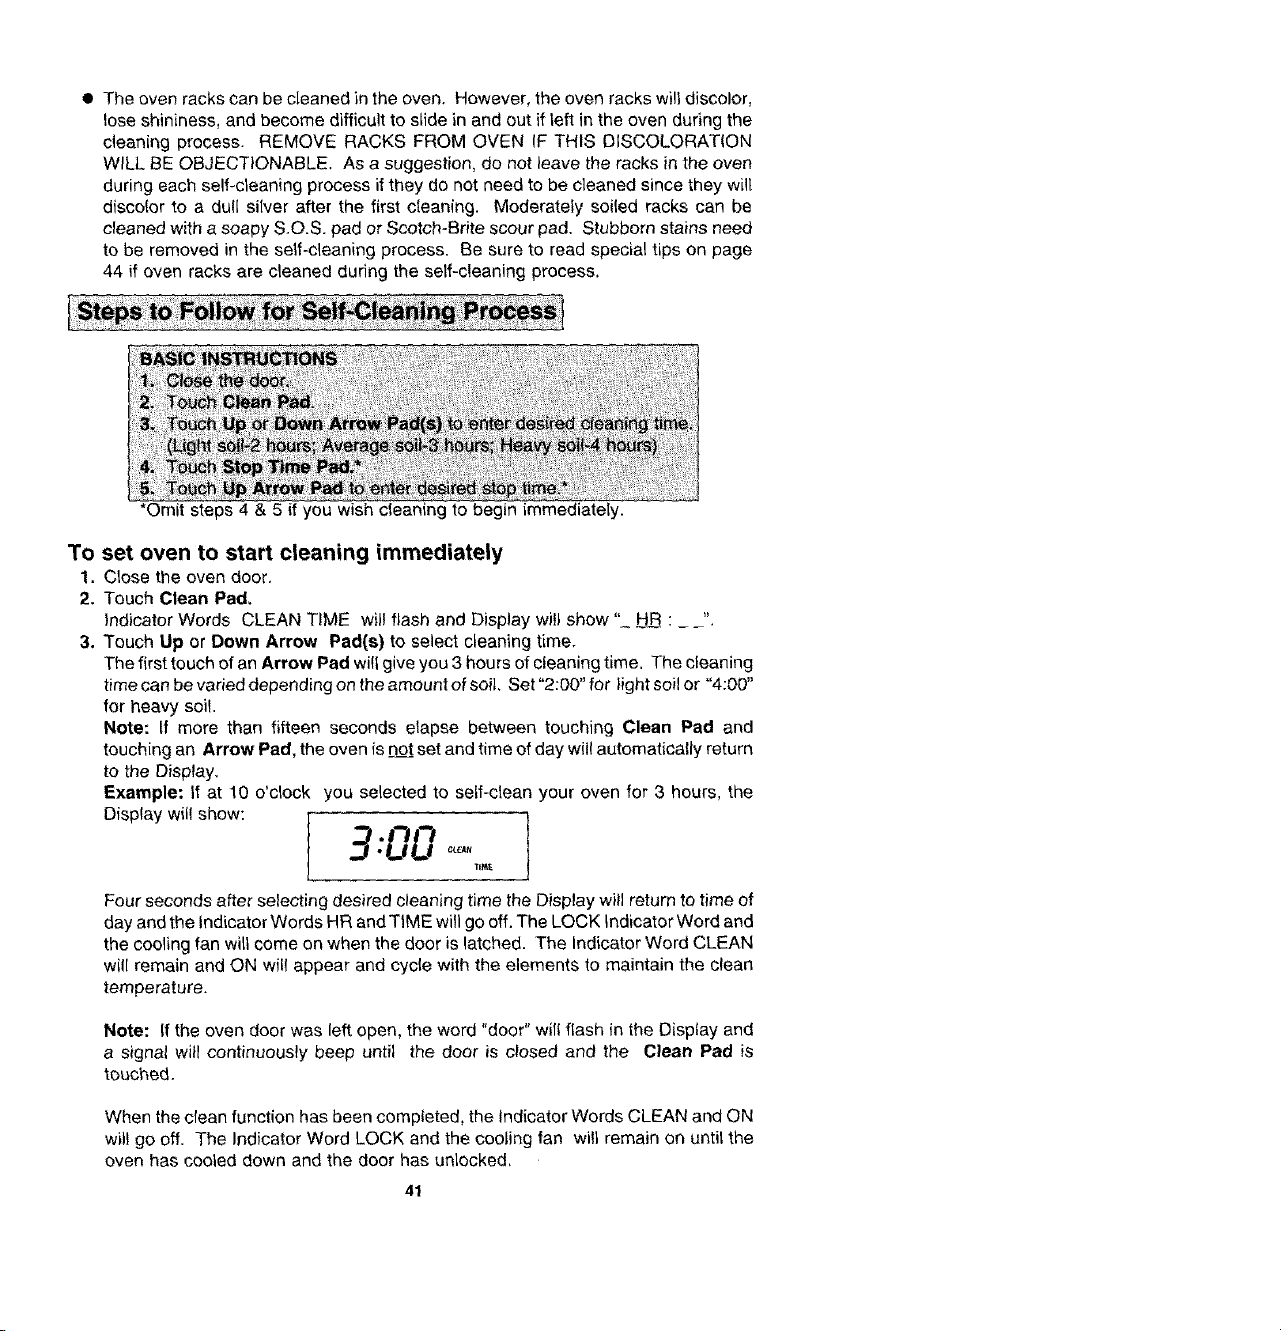
Example: If at 10 o'clock you selected to self-clean your oven for 3 hours, the
[ 900
TIM_
Four seconds after selecting desired cleaning time the Display will return to time of
day and the indicator Words HR and TIME will go off. The LOCK Indicator Word and
the cooling fan will come on when the door is latched. The Indicator Word CLEAN
wi!l remain and ON will appear and cycle with the elements to maintain the clean
temperature.
Note: If the oven door was left open, the word "door" will flash in the Disptay and
a signal will continuously beep until the door is closed and the Clean Pad is
touched.
When the clean function has been completed, the Indicator Words CLEAN and ON
will go off, The Indicator Word LOCK and the cooling fan will remain on until the
oven has cooled down and the door has unlocked,
41
To set oven to start cleaning at a later time
1-3. Follow steps 1-3 in previous section on page 41.
4. Touch Stop Time Pad.
Indicator Words STOP TIME will flash in the Display. The Indicator Word CLEAN
and the calculated stop time will also appear in Display.
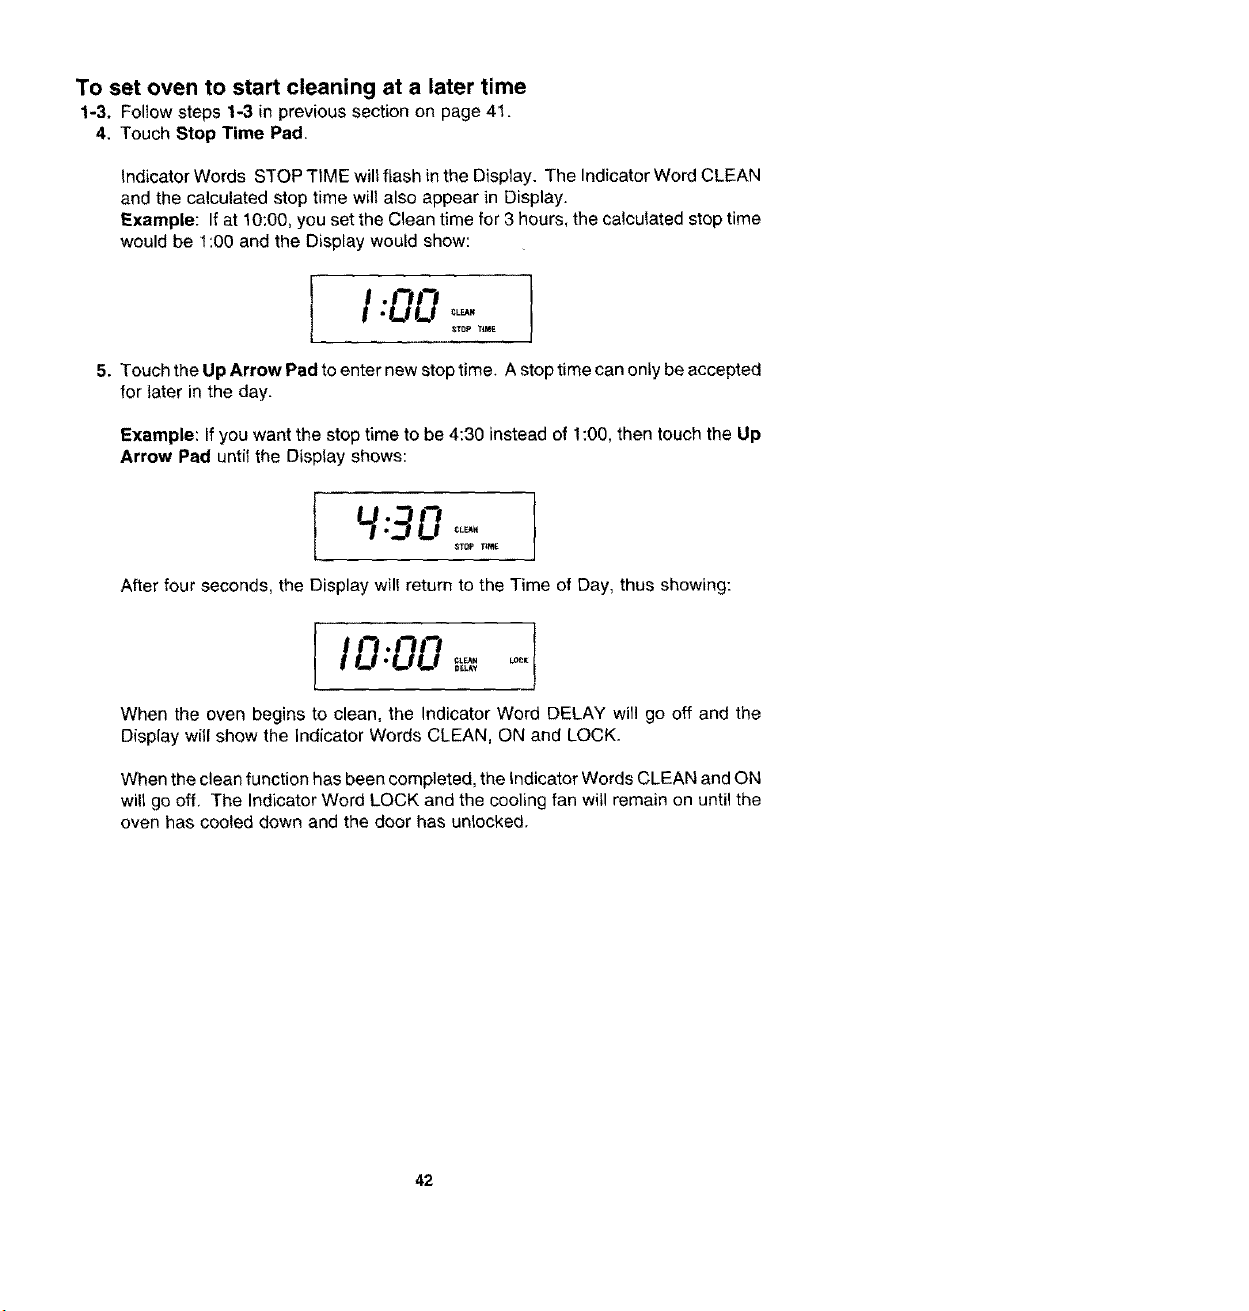
Example: If at 10:00, you set the Clean time for 3 hours, the calculated stop time
would be 1:00 and the DispLay would show:
5. Touch the Up Arrow Pad to enter new stop time. A stop time can only be accepted
for tater in the day.
Example: If you want the stop time to be 4:30 instead of 1:00, then touch the Up
Arrow Pad until the Display shows:
After four seconds, the Display wil! return to the Time of Day, thus showing:
I000 °°'!
When the oven begins to clean, the Indicator Word DELAY will go off and the
Display will show the indicator Words CLEAN, ON and LOCK.
When the clean function has been completed, the Indicator Words CLEAN and ON
will go off. The Indicator Word LOCK and the cooling fan will remain on until the
oven has cooled down and the door has unlocked.
42

To cancel self-clean
• Touch Cancel Off Pad.
• The oven door will be _ocked while the LOCK Indicator Word remains in the Display.
Depend{ng on the length of time the oven had been self-cleaning, it may take up to
45 minutes for the oven to coot down, the door to unlock and c0oting fan to turn off.
IMPORTANT
• To recall cleaning time or stop time: Touch the appropriate pad (Clean Pad or
Stop Time Pad).
• To change cleaning time or stop time before cleaning begins: Repeat the
preceding steps,
I When the Clean Pad is touched, a fan comes on. If this fan is not operating, the
oven wilt go through the cleaning process at a reduced oven temperature and the;
oven will not clean effectively. If the fan does not operate, contact your authorized
Jenn-Air Service Contractor for service.
43

• A slight odor may be detected, and if an oven is heavily soiled, some smoke may
be visible, Some smoke and odor during the cleaning process is a normal
occurrence. Since the oven vent is located under the air grille, vapors, moisture,
etc. may be seen coming from this area. 14the odor is strong or objectionable, turn
on the ventilation system to exhaust odors to the outdoors. (See p. 10,)
• During the cleaning process, do not be alarmed ff an occasional flame is visible
through the oven window. This is caused by excessive food soil that was not
removed before the oven was set to clean.
• SINCE THE DOOR AND WINDOW OF THE OVEN WILL GET WARM DURING
THE SELF-CLEANING PROCESS, AVOID CONTACT.
• Some types of soit may disintegrate but leave a light film or heavier deposit of ash.
The amount of ash depends on the amount of soil which was in the oven. After oven
has cooled, this ash may be removed with a damp sponge, If other dark deposits
remain after wiping with a sponge, the time set for the length of cleaning was not
enough. Increase the cleaning time for future cteanings or clean more frequently.
The normal cleaning time is 3 hours. A maximum of 4 hours may be selected if
necessary,
• If racks have been left in oven during the cleaning process, they should be treated
as follows. After the cleaning process is completed and the oven has cooled, buff
the underside of rack edges with Scotch-Brite scour pad or rub lightlyfhe underside
of rack edges with a coating of vegetable oil. Use a light application of oi! so it does
not soil the oven. This will make the cleaned racks slide more easily.
• To remove occasional spitlovers between cleanings, use a soap-filled scouring pad
or mild cleanser; rinse well.
• It is better to clean the over) regularly rather than wait until there is a heavy buildup
of soil in the oven.
• During the cleaning process, the kitchen should be well ventilated to help eliminate
normal odors associated with cleaning,
• DO NOT USE COMMERCIAL OVEN CLEANERS.
• DO NOT USE ALUMINUM FOIL OR OTHER LINERS IN THE OVEN.
44
Stainless Steel
• DO NOT USE ANY CLEANING PRODUCT CONTAINING CHLORINE BLEACH.
• ALWAYS WIPE WITH THE GRAIN WHEN CLEANIIVG.
• Daily Cleaning/Light Soil - wipe with one of the following - soapy water, white
vinegar/water solution, Formula 409 Glass and Surface Cleaner or a similar multi-
surface cleaner - using a sponge or soft cloth. Rinse and dry. To polish and help
prevent fingerprints, follow with Stainless Steel Magic Spray (Jenn-Air Model A912,
Part No_ 20000008).
• Moderate/Heavy Soil - wipe with one of the following - Ben Ami, Smart Cleanser
or Soft Scrub - using a damp sponge or soft cloth. Rinse and dry. Stubborn soils may
be removed with a damp Scotch-Brite pad; rub evenly with the grain. Rinse and
dry. To restore luster and remove streaks, follow with Stainless Steel Magic Spray
(Jenn-Air Model A9t2, Part No. 20000008).
• Discoloration-usingadampspongeorsoftcloth, wipewithCameoStainlessSteel
Cleaner. Rinse immediately and dry. To remove streaks and restore luster, follow
with Stainless Steel Magic Spray (Jenn-Air Mode_ A912, Part No. 20000008).
• Stubborn food stains - may be removed by spraying with an oven cleaner, Allow
to set overnight, then rinse wel( and dry. Follow with a multi-surface cleaner. To
polish, use Stainless Steel Magic Spray (Jenn-Air Model A912, Part No. 20000008).
45
Control Knobs
The knobs on the control panel can be removed with the controls in the Off position. Pull
each knob straight from the shaft. Wash knobs in warm soapy water or dishwasher; do
not use abrasive cleansers or materials. To replace each knob, match flat part of knob
opening with the fiat of the shaft, returning in Off position. Important: Never use a metal
blade to pry knob off.
Control Panel Area and Clock Display Window
Wipe with paper towels dampened with soapy water or glass cleaner. Do not spray any
cleaning solutions directly onto the Display window or use large amounts of soap and
water. Do not scrub with S.O.S pads or abrasive cleansers,
Glass Window
Use any suitable glass cleaner or soapy water. Do not use excessive amounts of
water which may seep behind the glass, Do not use abrasive cleaning agents.
Igniters
• It is important to keep igniter port openings on burners clear and free of obstructions
to avoid ignition failure and possible gas buildup. If the port openings are blocked,
use a toothpick to remove food particles.
• The igniter cap and stem can be cleaned with warm soapy water and a plastic
scrubber. The wire electrode inside the cap can be cleaned with a small brush.
Rinse and dry.
Surface Burner Assembly
The surface burner assembly can be cleaned with mild detergents and a ptastic
scrubber, or washed in the dishwasher. To prevent scratching the burner heads, do not
use abrasive cleansers or scrubbing pads. Do NOTclean in a self-clean oven.
Note: Check to be sure all ports are open. To open clogged ports, insert a toothpick
directly into each port.
Although the burner grate is durable, it will gradually lose its shine and/or discolor,
regardless of the care you take of it. This is due to its exposure to the high temperature
of the gas flames.
To preserve the porcelain enamet finish as long as possible, have a pan on the grate
before you turn on the burner, and lower the flame when food reaches the desired
cooking temperature.
46
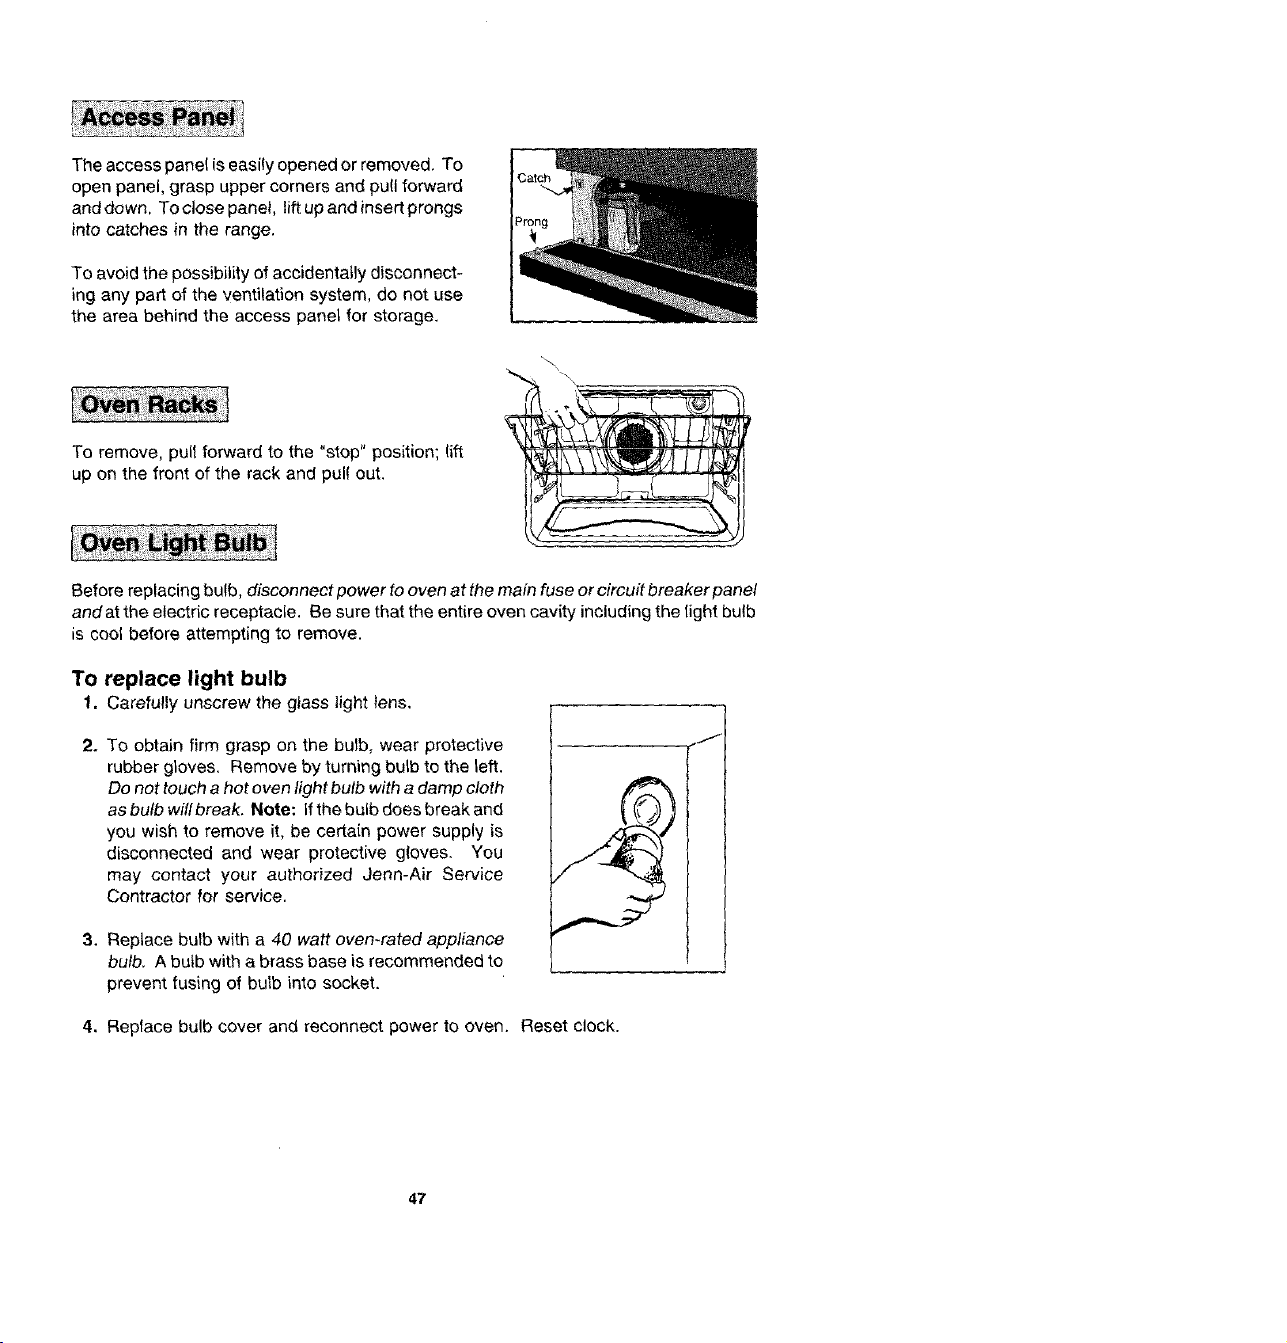
The access panel is easiiy opened or removed. To
open panel, grasp upper corners and pull forward
and down, To ctose panel lift up and insert prongs
into catches in the range.
To avoid the possibility of accidentally disconnect-
ing any part of the ventilation system, do not use
the area behind the access panel for storage.
To remove, pull forward to the "stop" position; lift
up on the front of the rack and pul! out.
Before replacing bulb, disconnect power to oven at the main fuse or circuit breaker panel
andat the electric receptacle. Be sure that the entire oven cavity including the light bulb
is cool before attempting to remove.
To replace light bulb
1. Carefully unscrew the glass light _ens,
2. To obtain firm grasp on the bulb, wear protective
rubber gloves. Remove by turning bulb to the left.
Do not touch a hot oven light bulb with a damp cloth
as bufb wllfbreak. Note: If the bulb does break and
you wish to remove it, be certain power supply is
disconnected and wear protective gloves. You
may contact your authorized Jenn-Air Service
Contractor for service.
3. Replace bulb with a 40 watt oven-rated appliance
bulb. A butb with a brass base is recommended to
prevent fusing of bulb into socket.
4. Replace bulb cover and reconnect power to oven. Reset clock.
47
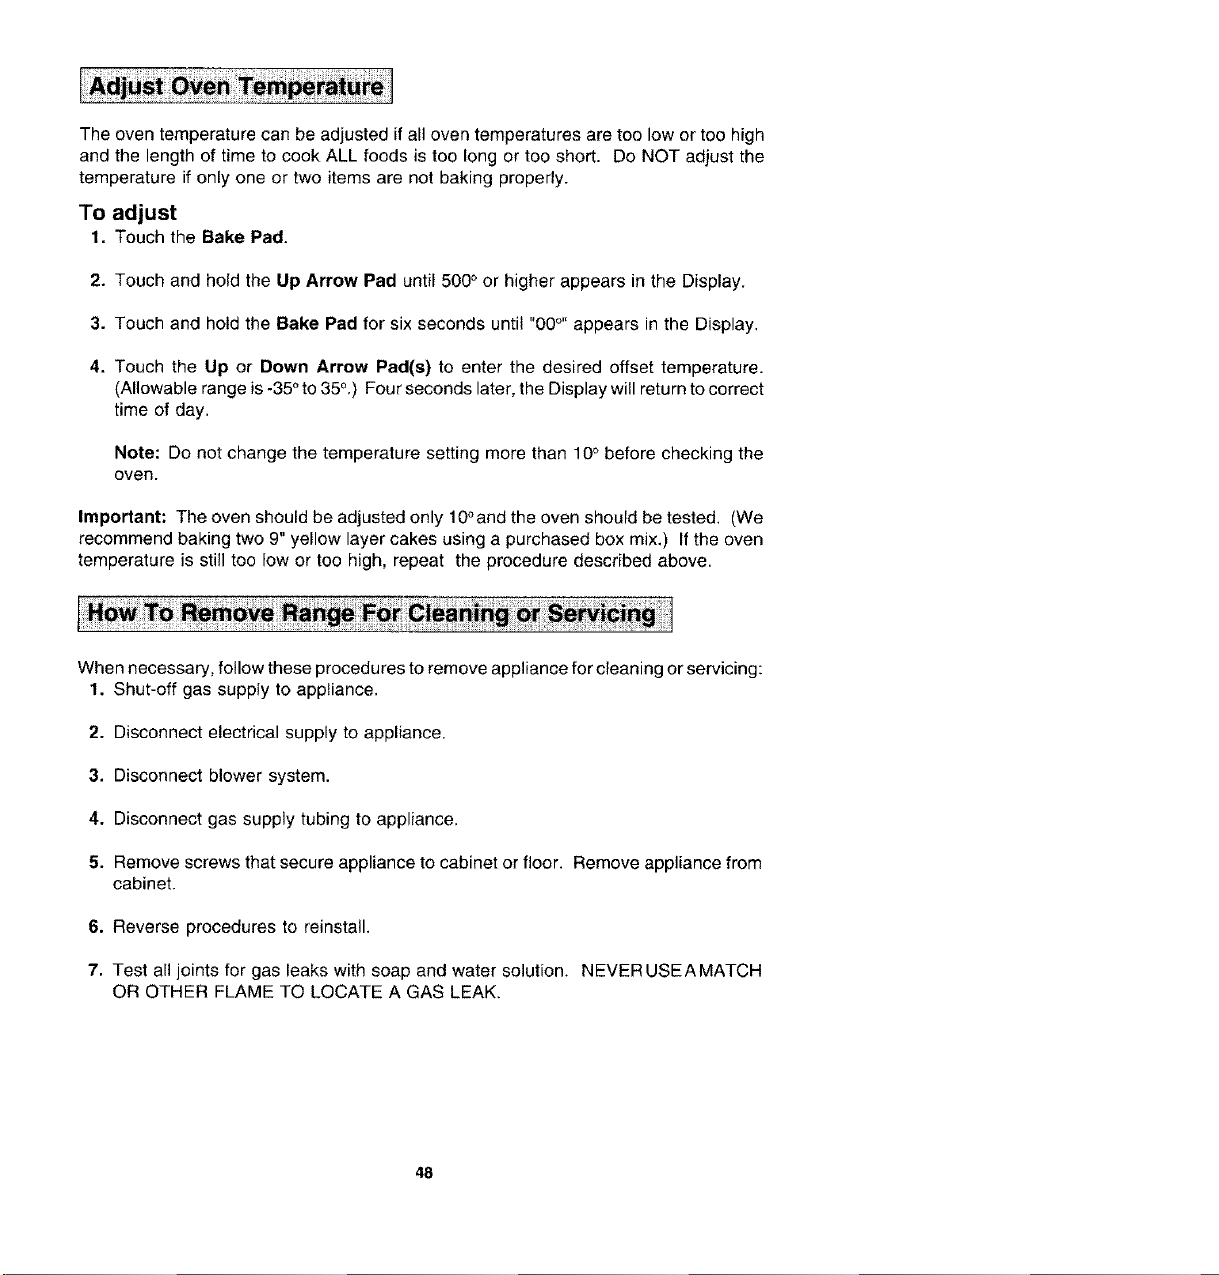
The oven temperature can be adjusted if all oven temperatures are too low or too high
and the length of time to cook ALL foods is too long or too short. Do NOT adjust the
temperature if only one or two items are not baking properly.
To adjust
1. Touch the Bake Pad.
2. Touch and hold the Up Arrow Pad until 500 ° or higher appears in the Display.
3. Touch and hold the Bake Pad for six seconds until "00 °" appears in the Display,
4. Touch the Up or Down Arrow Pad(s) to enter the desired offset temperature.
(Allowable range is -35 ° to 35°.) Four seconds later, the Display will return to correct
time of day,
Note: Do not change the temperature setting more than 10° before checking the
oven.
Important: The oven should be adjusted only 10°and the oven should be tested, (We
recommend baking two 9" yellow layer cakes using a purchased box mix.) If the oven
temperature is still too low or too high, repeat the procedure described above.
When necessary, follow these procedures to remove appliance for cleaning or servicing:
1. Shut-off gas supply to appliance.
2. Disconnect electrical supply to appliance.
3. Disconnect blower system.
4. Disconnect gas supply tubing to appliance,
5. Remove screws that secure appliance to cabinet or floor. Remove appliance from
cabinet.
6. Reverse procedures to reinstall.
7. Test all joints for gas leaks with soap and water solution. NEVER USEAMATCH
OR OTHER FLAME TO LOCATE A GAS LEAK.
48

Griddle - Model AG302
Self-draining griddle makes many favorite foods
easier to fix. Family-sized surface lets you
cook several pancakes, hamburgers, or gri!led
sandwiches at the same time.
Wok - Model AO142
Idea! for stir-frying, steaming, braising, and
stewing. Wok has nonstick finish, wood
hat, dies, cover, steaming rack, rice paddies
and cooking tips.
Surface Burner Module - Model AG202
Includes surface burner assembly, aeration
tray, and two surface burner grates.
Grill Cover - Model AG341
Attractive grill cover protects grill when not in
use. Textured steel with molded handles.
I NOTE: Only these accessories are approved for use with your gas grill-range. DO|
NOT USE Jenn-Air electric grill-range accessories on your gas grill-range, j
49
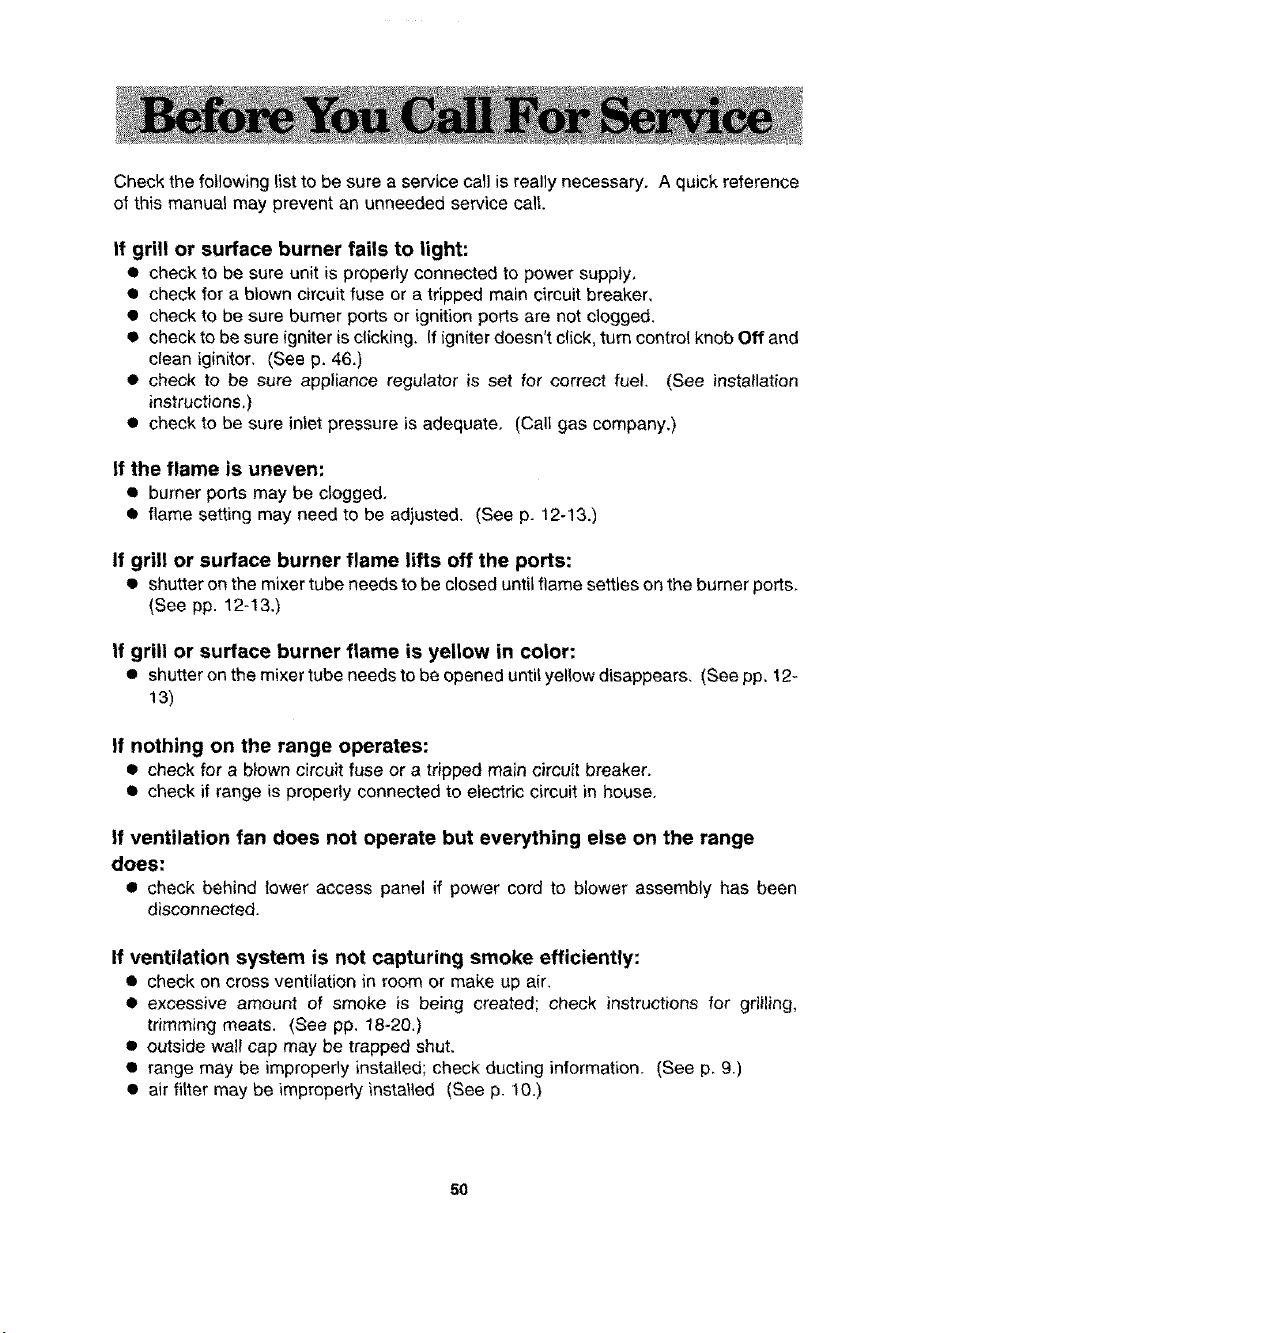
Check the following list to be sure a service call is really necessary, A quick reference
of this manua_ may prevent an unneeded service caE
If grill or surface burner fails to light:
• check to be sure unit is properly connected to power supply,
• check for a btown circuit fuse or a tripped main circuit breaker,
• check to be sure burner ports or ignition ports are not clogged.
• check to be sure igniter is clicking. If igniter doesn't click, turn control knob Off and
clean iginitor. (See p. 46,)
• check to be sure appliance regulator is set for correct fuel. (See installation
instructions.)
• check to be sure inlet pressure is adequate, (Ca!L gas company.)
If the flame is uneven:
• burner ports may be clogged,
• flame setting may need to be adjusted. (See p. 12-13.)
If grill or surface burner flame lifts off the ports:
• shutter on the mixer tube needs to be closed until flame settles on the burner ports.
(See pp. 12-13.)
If grill or surface burner flame is yellow in color:
• shutter on the mixer tube needs to be opened until yellow disappears, (See pp. 12-
13)
If nothing on the range operates:
• check for a blown circuit fuse or a tripped main circuit breaker.
• check if range is properly connected to electric circuit in house,
If ventilation fan does not operate but everything else on the range
does:
• check behind lower access panel if power cord to blower assembly has been
disconnected.
If ventilation system is not capturing smoke efficiently:
• check on cross ventilation in room or make up air.
• excessive amount of smoke is being created; check instructions for grilling,
tdmming meats. (See pp. 18-20.)
• outside wa2! cap may be trapped shut,
• range may be improperly installed; check ducting information. (See p, 9.)
• air fitter may be improperly insta_ed (See p. 10.)
50
f oven does not heat:
• the oven controls may be set incorrectly.
• clock controls may be set for delayed start of oven.
If the oven light does not work:
• the light bulb is toose or defective.
• oven light does not work during self-cleaning process,
If oven will not go through self-cleaning process:
• controls may be improperly set.
• check the clock controlled settings and the current time of day on the clock,
If oven did not clean properly:
• oven may need longer cleaning time.
• excessive spills were not removed prior to sell-cleaning process.
If oven door will not unlock:
• oven may not have cooled to safe temperature after self-cleaning process.
• electric current coming into the oven may be off,
If foods do not broil properly:
• the oven controls may not be set properly.
• check rack position.
• voltage into house may be low.
If baked food is burned or too brown on top:
• food may be positioned incorrectly in oven.
• oven not preheated properly.
If foods bake unevenly:
• the range may be installed improperly.
• check the oven rack with a level.
• stagger pans, do not allow pans to touch each other or oven wall,
• check instructions for suggested placement of pans on oven rack,
If oven baking results are less than expected:
• the pans being used may not be of the size or material recommended for best
results.
• there may not be sufficient room around sides of the pans for proper air circulation
in the oven,
• check instructions for preheating, rack position and oven temperature.
• oven vent may have been blocked or covered.
51
If baking results differ from previous oven:
• oven thermostat calibration may differ between old and new ovens. Foltow recipe
and use and care directions before calling for service since the calibration on the
previous oven may have drifted to a too high or too tow setting. (See p. 48 - Adjusting
Oven Temperature.)
If F plus a number appears in the Display:
• a fault code is being shown. When a fault code appears and a continuous beep
sounds, touch the Cancel Off Pad. If the fault code reappears, disconnect power
to the range and call an authorized Jean-Air Service Contractor.
m ImJENN-AIR
403 WEST _:OURTPI STREET NQR'_H • NB.WTON, ]A 50208
Printed in U,S,A Cat. No. RA46600PUB
@1997 Jenn-Air Part No. 8111P240_60 2/97