Loading ...
Loading ...
Loading ...

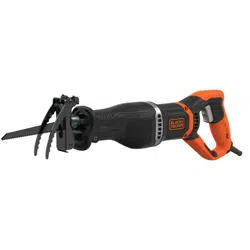
ENGLISH
6
Cutting Branches (Fig. D)
Branches up to 1" (25 mm) in diameter can be cut with
thistool.
WARNING! Do not use the tool while in a tree, on a
ladder or on any other unstable surface. Be aware of
where the branch willfall.
• Cut downward and away from yourbody.
• Make the cut close to the main branch or treebody.
• To use the removable branch holder
7
, hook the branch
holder arm over the branch and make sure the branch is
positioned between the arm and theshoe
.
Pocket Cutting - Wood Only (Fig. A, I)
Measure the surface area to be cut and mark clearly with a
pencil, chalk orscriber.
1. Insert blade
4
into the blade clamp collar
3
and
tighten blade clampcollarsecurely.
2. Tip the saw backward until the back edge of the pivoting
shoe is firmly on the worksurface.
3. Switch motor on, permitting blade to attain
maximumspeed.
4. Grip handle steadily and begin a slow, deliberate upward
swing with the handle of thesaw.
5. The blade will begin to feed into material. Always be sure
blade is completely through material before continuing
with pocketcut.
NOTE: In areas where blade visibility is limited, use the edge
of the pivoting shoe as aguide.
Metal Cutting (Fig. H)
1. Use a finer blade for ferrous metals and a coarse blade for
non-ferrousmaterials.
2. In thin gauge sheet metals it is best to clamp wood to
the underside of the sheet. This will ensure a clean cut
without excess vibration or tearing ofmetal.
3. Avoid forcing cutting blade as this reduces blade life and
causes costly bladebreakage.
NOTE: You should spread a thin film of oil or other coolant
along the line ahead of the saw cut for easier operation and
longer blade life. For cutting aluminum, kerosene ispreferred.
Flush Cutting (Fig. A, G)
The compact design of the recipro cating saw motor housing
and pivoting shoe permit close cutting to floors, corners and
other difficultareas.
1. To maximize flush cutting capabilities, insert the
blade
4
into the blade clamp collar
3
with the teeth of
the blade facingup.
2. Turn the saw upside down so you are as close to the work
surface aspossible.
3. Switch on saw motor before starting thecut.
4. Always hold saw firmly with both hands while cutting.
Whenever possible, the adjustable shoe must be held
firmly against the material being cut. This will prevent
the saw from jumping or vibrating and minimize
bladebreakage.
Wood Cutting (Fig. A, F)
1. Before cutting any type of wood, be sure the workpiece is
firmly anchored or clamped to preventslipping.
2. Place adjustable shoe
2
firmly against work tobecut.
Place blade
4
lightly on work to be cut.
Trigger On/Off Switch (Fig. A)
The tool is turned on and off by pulling and releasing the
variable speed trigger
1
. The farther the trigger is depressed,
the higher the speed of the tool.
Proper Hand Position (Fig.E)
WARNING: To reduce the risk of serious personal injury,
ALWAYS use proper hand position asshown.
WARNING: To reduce the risk of serious personal
injury, ALWAYS hold securely in anticipation of a
suddenreaction.
Proper hand position requires one hand on the hand grip
6
,
with the other hand on the main handle
5
.
OPERATION
WARNING: To reduce the risk of serious personal
injury, turn unit off and disconnect it from
power source before making any adjustments or
removing/installing attachments or accessories.
An accidental start‑up can causeinjury.
Removable Branch Holder (Fig. D)
Your tool is provided with a removable branch holder
7
to
assist in cuttingbranches.
1. Remove theblade.
2. Push the shoe release lever
8
downwards and slide the
removable branch holder
7
into the desiredsetting.
3. Push the shoe release lever
8
upwards to tighten the
removable branchholder.
4. To remove the removable branch holder, push the shoe
release lever
8
downwards and slide out the removable
branchholder.
Adjustable Shoe (Fig. A)
1. The adjustable shoe
2
will adjust to limit the depth
ofcut.
2. Hold the saw with the underside facingup. Push the
shoe release lever
8
downwards and slide the shoe
2
out to the desired setting and push the shoe release lever
back intoposition.
Assemble Shoe (Fig. C)
1. Remove theblade.
2. Push the shoe release lever
8
downwards and slide the
adjustable shoe
2
into the desiredsetting.
3. Push the shoe release lever
8
upwards to tighten
theshoe.
4. To remove the shoe, push the shoe release lever
8
downwards and slide out theshoe.
1. Rotate open blade clamp collar
3
to its full
openposition.
2. Removeblade.
Loading ...
Loading ...
Loading ...