Please Read These Instructions Carefully Before Use!
84-GALLON POND KIT
KSPK-84
Installation Manual
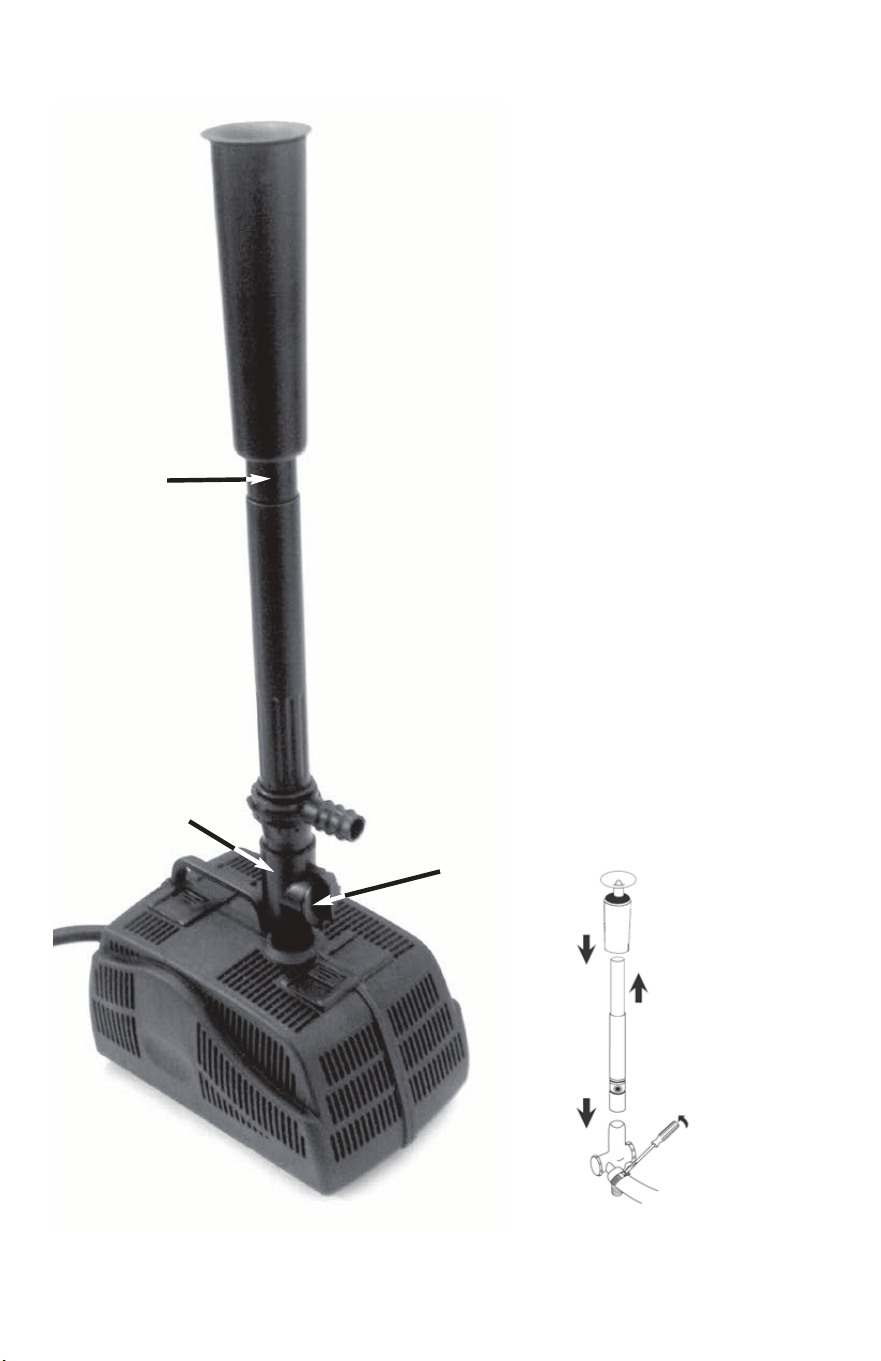
ASSEMBLING YOUR PUMP
1
2
4
7
5
6
3
Place desired fountain head (1) on riser (2)
pushing down until snug.
Adjust the size of the waterbell by turning
the round piece (3) on top.
Put riser (2) into diverter (4), pushing down
until the hole is no longer visible.
Some light force may be required.
Adjust the flow of water to your fountain
head by turning the diverter knob (5).
Attach all to the pump (6) by pushing
down the diverter into the hole located on
top of the pump (6).
FOR A HIGHER FOUNTAIN HEAD
• Extend the tube extention (7) found
inside the riser (2).
FOR A WATERFALL
• Place clamp over tubing.
• Fit tubing over diverter.
• Tighten clamp over tubing with a flat
head screwdriver.
NOTE
Do NOT plug in your pump until it is fully immersed in water. Never run your pump dry!
WARRANTY
This KOOLATRON product is warranted to the retail consumer for 90 days from
date of retail purchase, against defects in material and workmanship.
WHAT IS COVERED
- Replacement parts and labor.
- Transportation charges to customer for the repaired product.
WHAT IS NOT COVERED
- Commercial or industrial use of this product.
- Damage caused by abuse, accident, misuse, or neglect.
- Transportation of the unit or component from the customer to Koolatron.
IMPLIED WARRANTIES
Any implied warranties, including the implied warranty of merchantability are also
limited to duration of 90 days from the date of retail purchase.
WARRANTY AND SERVICE PROCEDURE
Keep the original, dated, sales receipt with this manual. If you have a problem with
your unit, or you require replacement parts, please telephone the following number
for assistance:
1-800-265-8456
A Koolatron Master Service Centre must perform all warranty work. Service after warranty
may be obtained at a Master Service Centre or at an authorized service dealer.
Purchase Receipt is required to establish warranty eligibility.
Koolatron has Master Service Centres at these locations:
U.S.A. - 4330 Commerce Dr., Batavia, NY 14020-4102
Canada - 139 Copernicus Blvd., Brantford, ON N3P 1N4
www.koolatron.com
©2020 Koolatron, Inc. All rights reserved.
All specification are subject to change without notice.
Made in China
5/2020-v4H1S087
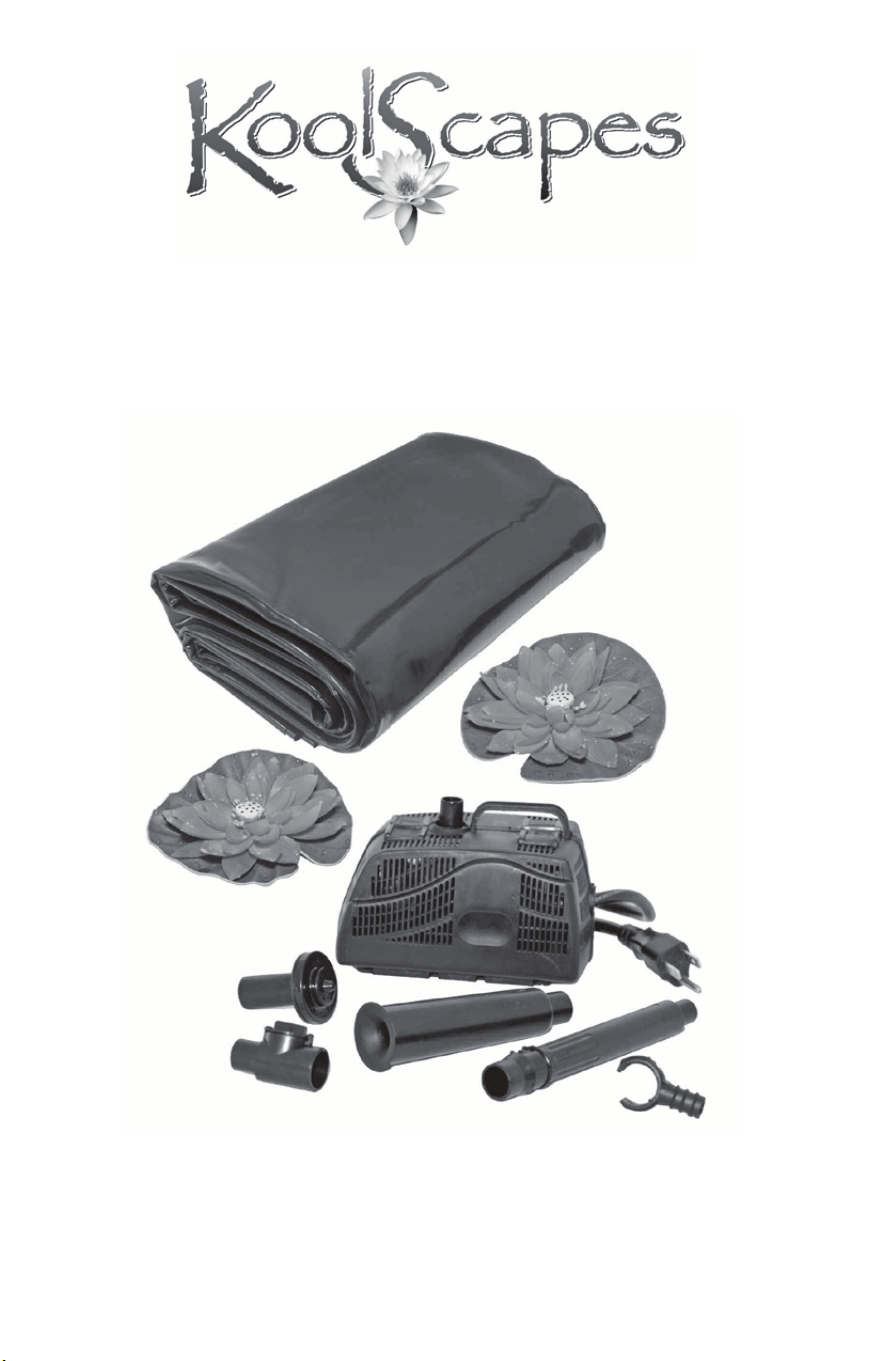
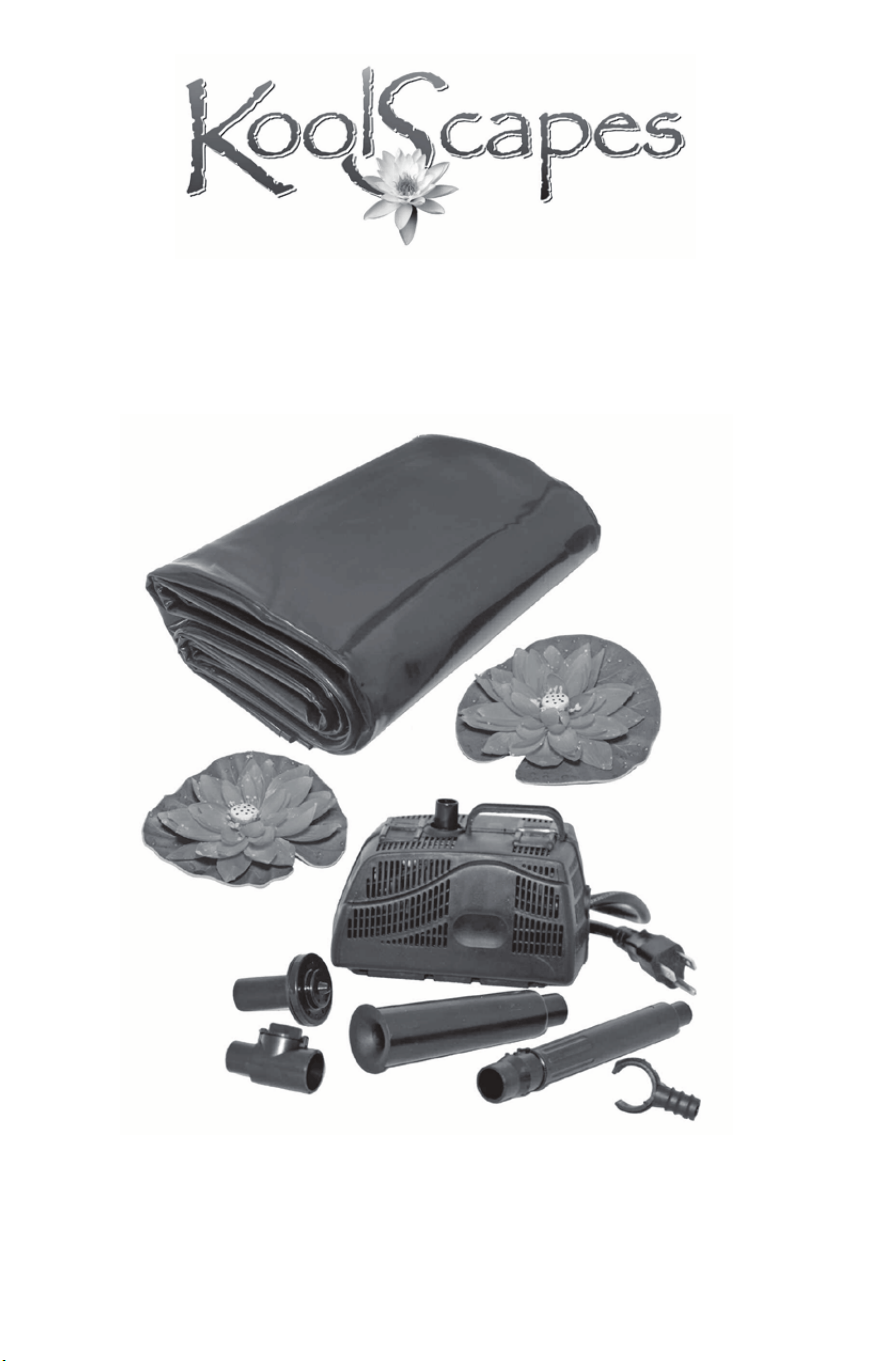
FEATURES
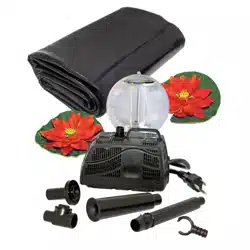
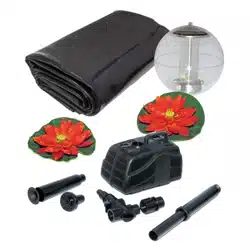
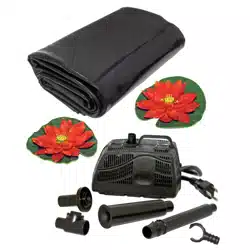
The popularity of backyard ponds continues to grow at a vigorous pace. This kit includes
everything you need to construct a beautiful, low maintenance water garden.
- 8ft x 10ft non-toxic Pond Liner
- 200gph Filter Free Pump
with protective shell
- Water-bell Fountain Head
- 3-tier Fountain Head
- Telescopic Riser
- Diverter with flow control
- 2 silk Water Lilies
- 1 Solar Glo - floating pond light
- Installation Manual
ELECTRICAL
- Pump Voltage: 110V
- Pump Capacity: 200 gallons/hour
- Pump Power Consumption: 12W
- Pump cULus: E 204083
INSTALLATION
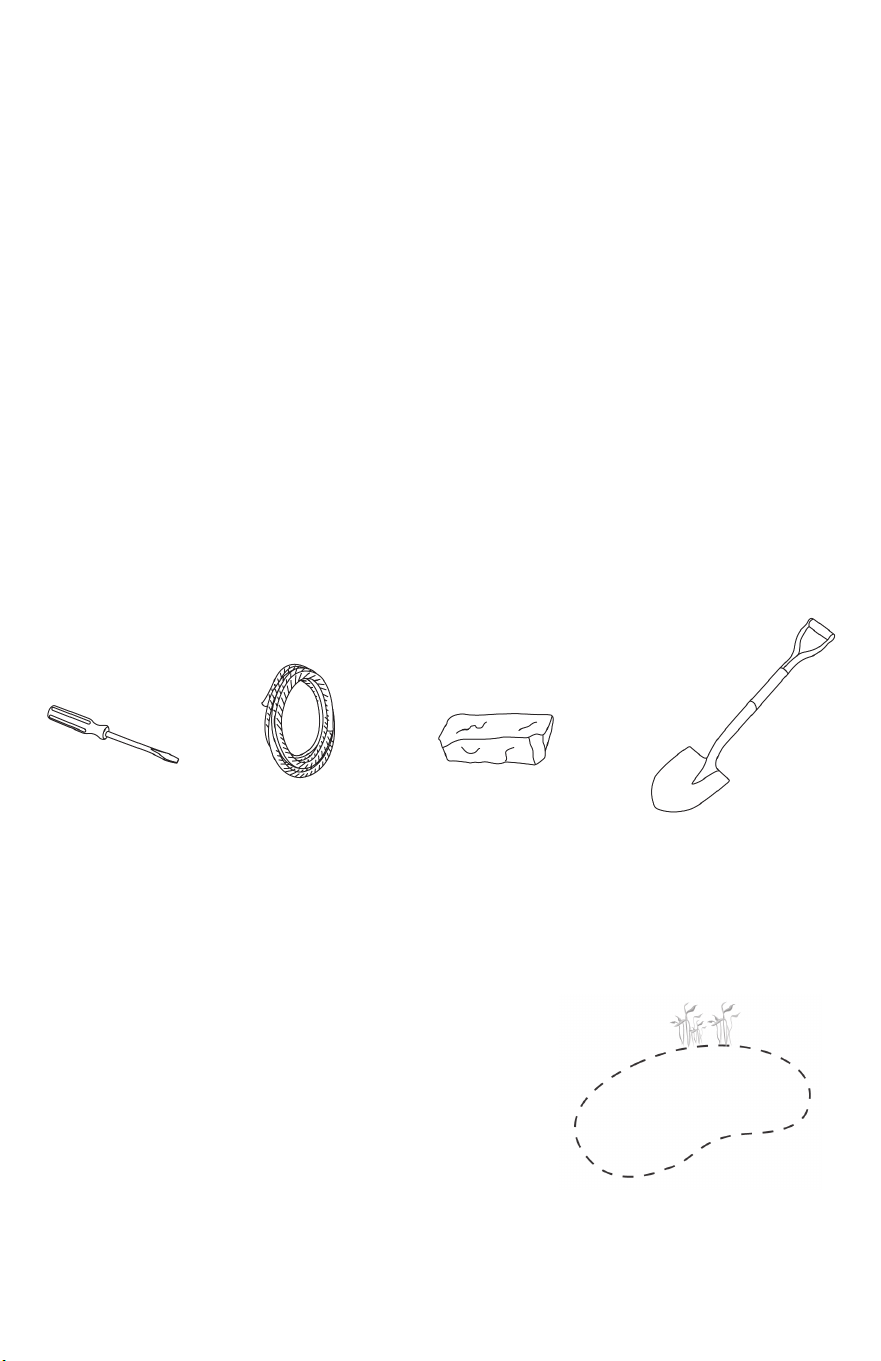
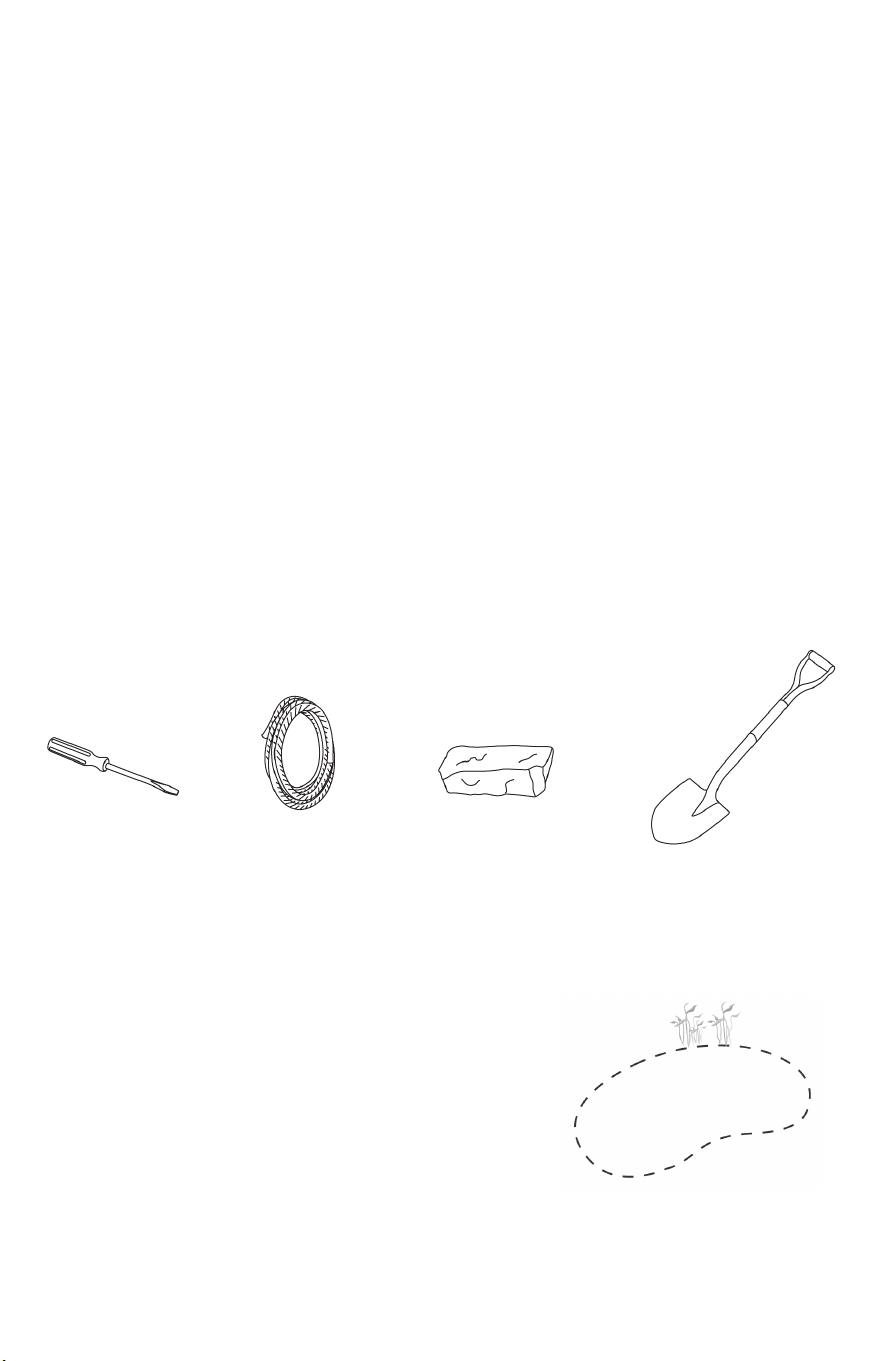
YOU WILL NEED
flat head
screwdriver
rope edging material
(i.e.rock)
garden shovel
TO START
Once you gathered everything you need, it is time
tostart. It is important to take the time to design your
pond before beginning. Keep in mind the depth and
width of your pond compared to the size of liner you
have to work with. Once you have a style and size
inmind mark the shape using heavy rope. Be mindful
ofburied wires and pipes. Ensure electric cable will
reach pump.
INSTALLATION (cont.) INSTALLATION (cont.)
ADDING WATER
Your pond is now ready to fill with water. As the pond
is filling you may want to smooth major wrinkles in
the liner by pulling and shifting the liner. Once the
pond is about half full remove some of the anchor
stones to allow the liner to sink to the bottom of the
hole.
CARE AND MAINTENANCE
With the proper care and maintenance this pond will last a very long time and look more
beautiful with each year. Simple steps can be taken to ensure a long life from your pond.
Clean your pump regularly to prevent build up. If your pump stops working, unplug it and
take it out of the pond. Follow the care instructions given in your pump kit box. If there is
a lot of calcium build up on your pump it may stop working. To clean, simply place the
pump motor (remove attachments) in vinegar water then plug it in. Let the pump run for
about 30 seconds. Once cleaned rinse your pump with water and place back in pond.
WINTER CARE
Getting ready for winter may seem like an arduous task, but if the right steps are taken it
can be very beneficial to your pond and any life within it. During the fall months the pond
should be kept free from fallen leaves and other debris that may rot and cause harmful
toxins in your pond. Once the temperature reaches 43°F (6°C) outside, it is time to winterize
your pond. The first step is to remove any submersible pumps and clean them for winter
storage. If you have fish the next step is to add a Pond Breather or Floating Pond Heater
to circulate oxygen and release toxic gases. After the pond has been winterized and the
ice has formed, there isn’t much work to be done during the winter months. The fish will
naturally go to deeper depths of the pond where the water is warmer and require no
feeding during these cold months. Never allow water to freeze in the pump.
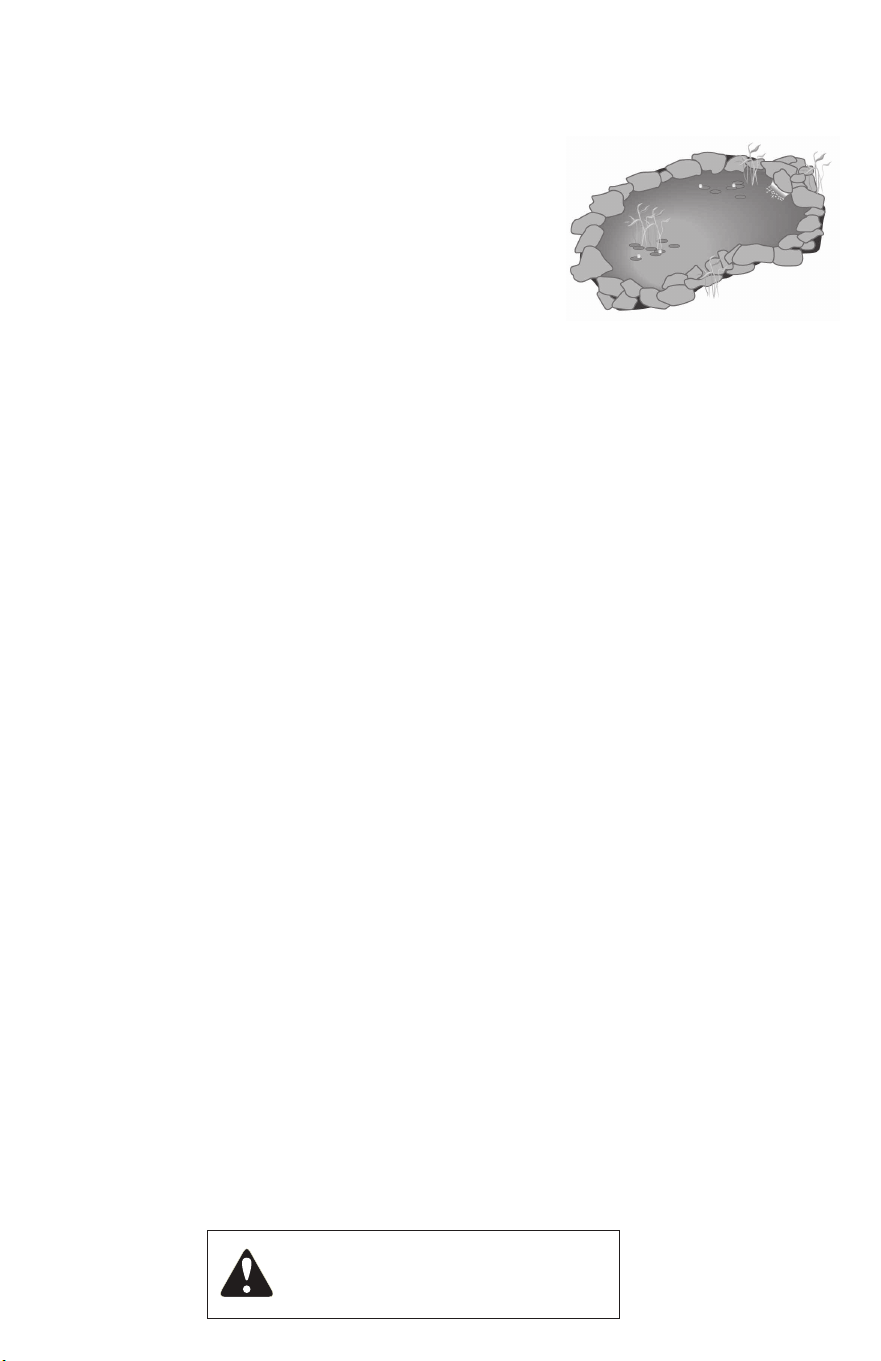
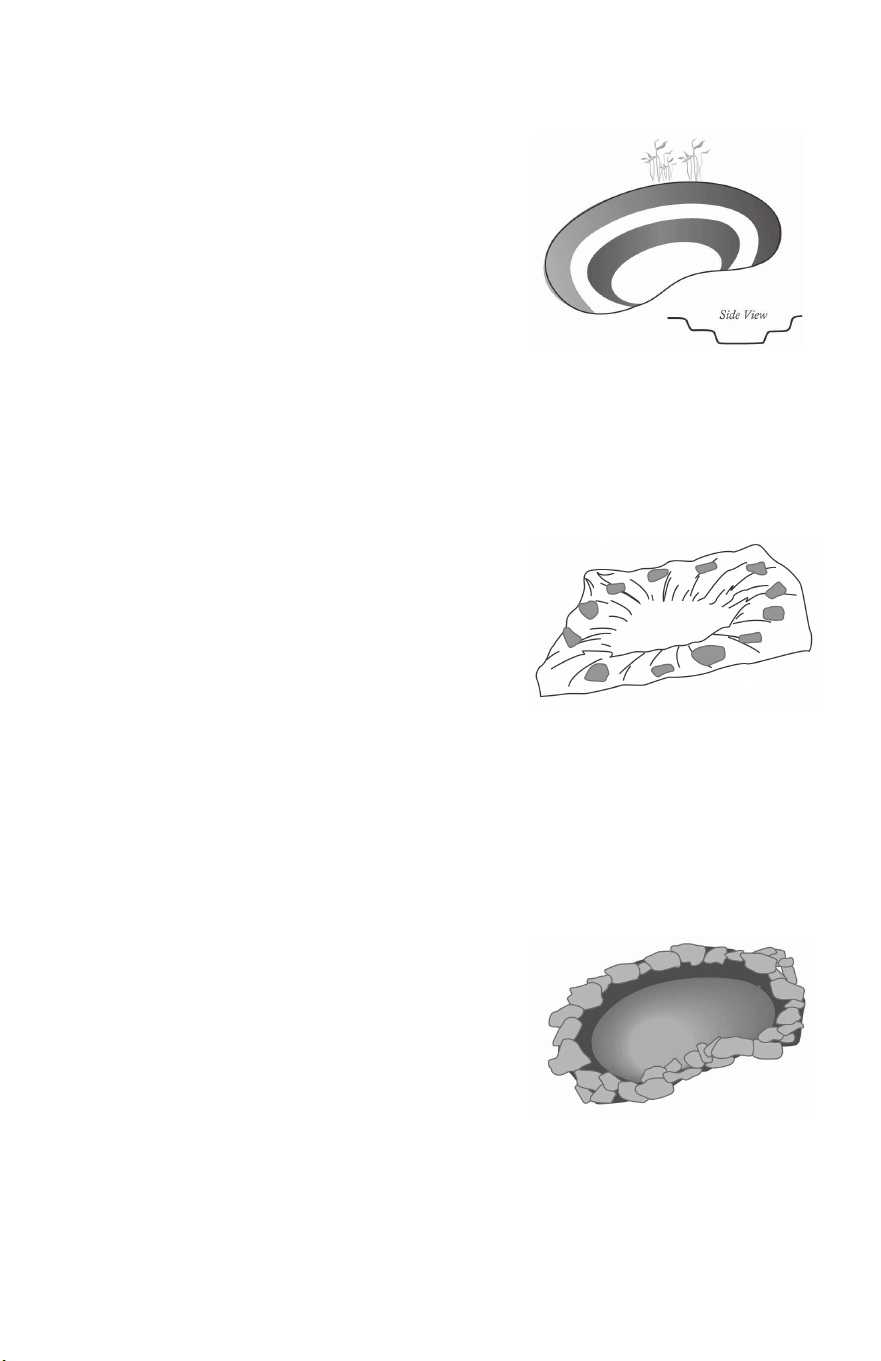
FINISHING
Once your pond is full you should use some long
nails to secure the liner in place. Cut off any excess
liner. Using decorative rocks around the edge will
help hold the liner in place and give your pond a
more natural look. Place the pump in your pond,
then plug it in. If adding plants to your pond you
should wait 48 hours after completion, and if adding
fish you should wait 72 hours after completion.
DECORATE AND ENJOY!
DIGGING
Start by removing the sod in the area you have
marked with the rope. It is best to start digging from
the middle out. This will allow you to easily remove
dirt with a wheelbarrow. When digging, keep in mind
that most ponds have plant shelves. These shelves
are traditionally 6" below water level and should be
at a 20° angle for support.
PREPARATION
To prepare the hole for the liner you must remove
anysharp stones or roots. Sharp objects could
puncture\or ruin your liner. You may put 5-8cm (2-3in)
of sandat the bottom of the pond, but it is not necessary.
Once the area is clear, place the provided liner inside
the hole, friends or family may be required for help.
Hold the liner in place using some of the rocks for
theedging.
WARNING! This product contains chemicals known to
the State of California to cause cancer, and birth defects
or other reproductive harm. www.P65Warnings.ca.gov

FEATURES
The popularity of backyard ponds continues to grow at a vigorous pace. This kit includes
everything you need to construct a beautiful, low maintenance water garden.
- 8ft x 10ft non-toxic Pond Liner
- 200gph Filter Free Pump
with protective shell
- Water-bell Fountain Head
- 3-tier Fountain Head
- Telescopic Riser
- Diverter with flow control
- 2 silk Water Lilies
- 1 Solar Glo - floating pond light
- Installation Manual
ELECTRICAL
- Pump Voltage: 110V
- Pump Capacity: 200 gallons/hour
- Pump Power Consumption: 12W
- Pump cULus: E 204083
INSTALLATION
YOU WILL NEED
flat head
screwdriver
rope edging material
(i.e.rock)
garden shovel
TO START
Once you gathered everything you need, it is time
tostart. It is important to take the time to design your
pond before beginning. Keep in mind the depth and
width of your pond compared to the size of liner you
have to work with. Once you have a style and size
inmind mark the shape using heavy rope. Be mindful
ofburied wires and pipes. Ensure electric cable will
reach pump.
INSTALLATION (cont.) INSTALLATION (cont.)
ADDING WATER
Your pond is now ready to fill with water. As the pond
is filling you may want to smooth major wrinkles in
the liner by pulling and shifting the liner. Once the
pond is about half full remove some of the anchor
stones to allow the liner to sink to the bottom of the
hole.
CARE AND MAINTENANCE
With the proper care and maintenance this pond will last a very long time and look more
beautiful with each year. Simple steps can be taken to ensure a long life from your pond.
Clean your pump regularly to prevent build up. If your pump stops working, unplug it and
take it out of the pond. Follow the care instructions given in your pump kit box. If there is
a lot of calcium build up on your pump it may stop working. To clean, simply place the
pump motor (remove attachments) in vinegar water then plug it in. Let the pump run for
about 30 seconds. Once cleaned rinse your pump with water and place back in pond.
WINTER CARE
Getting ready for winter may seem like an arduous task, but if the right steps are taken it
can be very beneficial to your pond and any life within it. During the fall months the pond
should be kept free from fallen leaves and other debris that may rot and cause harmful
toxins in your pond. Once the temperature reaches 43°F (6°C) outside, it is time to winterize
your pond. The first step is to remove any submersible pumps and clean them for winter
storage. If you have fish the next step is to add a Pond Breather or Floating Pond Heater
to circulate oxygen and release toxic gases. After the pond has been winterized and the
ice has formed, there isn’t much work to be done during the winter months. The fish will
naturally go to deeper depths of the pond where the water is warmer and require no
feeding during these cold months. Never allow water to freeze in the pump.
FINISHING
Once your pond is full you should use some long
nails to secure the liner in place. Cut off any excess
liner. Using decorative rocks around the edge will
help hold the liner in place and give your pond a
more natural look. Place the pump in your pond,
then plug it in. If adding plants to your pond you
should wait 48 hours after completion, and if adding
fish you should wait 72 hours after completion.
DECORATE AND ENJOY!
DIGGING
Start by removing the sod in the area you have
marked with the rope. It is best to start digging from
the middle out. This will allow you to easily remove
dirt with a wheelbarrow. When digging, keep in mind
that most ponds have plant shelves. These shelves
are traditionally 6" below water level and should be
at a 20° angle for support.
PREPARATION
To prepare the hole for the liner you must remove
anysharp stones or roots. Sharp objects could
puncture\or ruin your liner. You may put 5-8cm (2-3in)
of sandat the bottom of the pond, but it is not necessary.
Once the area is clear, place the provided liner inside
the hole, friends or family may be required for help.
Hold the liner in place using some of the rocks for
theedging.
WARNING! This product contains chemicals known to
the State of California to cause cancer, and birth defects
or other reproductive harm. www.P65Warnings.ca.gov
Please Read These Instructions Carefully Before Use!
84-GALLON POND KIT
KSPK-84
Installation Manual
ASSEMBLING YOUR PUMP
1
2
4
7
5
6
3
Place desired fountain head (1) on riser (2)
pushing down until snug.
Adjust the size of the waterbell by turning
the round piece (3) on top.
Put riser (2) into diverter (4), pushing down
until the hole is no longer visible.
Some light force may be required.
Adjust the flow of water to your fountain
head by turning the diverter knob (5).
Attach all to the pump (6) by pushing
down the diverter into the hole located on
top of the pump (6).
FOR A HIGHER FOUNTAIN HEAD
• Extend the tube extention (7) found
inside the riser (2).
FOR A WATERFALL
• Place clamp over tubing.
• Fit tubing over diverter.
• Tighten clamp over tubing with a flat
head screwdriver.
NOTE
Do NOT plug in your pump until it is fully immersed in water. Never run your pump dry!
WARRANTY
This KOOLATRON product is warranted to the retail consumer for 90 days from
date of retail purchase, against defects in material and workmanship.
WHAT IS COVERED
- Replacement parts and labor.
- Transportation charges to customer for the repaired product.
WHAT IS NOT COVERED
- Commercial or industrial use of this product.
- Damage caused by abuse, accident, misuse, or neglect.
- Transportation of the unit or component from the customer to Koolatron.
IMPLIED WARRANTIES
Any implied warranties, including the implied warranty of merchantability are also
limited to duration of 90 days from the date of retail purchase.
WARRANTY AND SERVICE PROCEDURE
Keep the original, dated, sales receipt with this manual. If you have a problem with
your unit, or you require replacement parts, please telephone the following number
for assistance:
1-800-265-8456
A Koolatron Master Service Centre must perform all warranty work. Service after warranty
may be obtained at a Master Service Centre or at an authorized service dealer.
Purchase Receipt is required to establish warranty eligibility.
Koolatron has Master Service Centres at these locations:
U.S.A. - 4330 Commerce Dr., Batavia, NY 14020-4102
Canada - 139 Copernicus Blvd., Brantford, ON N3P 1N4
www.koolatron.com
©2020 Koolatron, Inc. All rights reserved.
All specification are subject to change without notice.
Made in China
5/2020-v4H1S087
S.V.P., lire attentivement les instructions avant l’utilisation !
TROUSSE D’ÉTANG DE JARDIN
84 GALLONS
KSPK-84
Guide d’utilisation
ASSEMBLAGE DE LA POMPE
1
2
4
7
5
6
3
Placez la tête de fontaine de votre préférence (1) sur la
colonne montante coulissante (2) en appuyant jusqu’à
ce qu’elle tienne bien en place.
Ajustez la grandeur de la fontaine champignon en
tournant la pièce ronde (3) au-dessus.
Placez la colonne coulissante (2) dans le partiteur (4)
en appuyant jusqu’à ce qu’il n’y ait plus de visibilité du
trou. Une petite force peut être requise pour accomplir
cette tâche.
Ajustez l’écoulement de l’eau de votre fontaine en
tournant le bouton du partiteur (5).
Assemblez tout à la pompe (6) en appuyant le partiteur
vers le bas au trou situé au-dessus de la pompe (6).
AJUSTEMENT DE LA HAUTEUR
DE LA FONTAINE
• Étendrez le tube d’extension (7) qui
se trouve dans la colonne coulissante (2).
AJUSTEMENT POUR UNE CHUTE D’EAU
• Placez un serre-joint sur le tube.
• Assemblez le tube sur le partiteur.
• Serrez le serre-joint sur le tube avec
un tournevis à tête plate.
REMARQUE
Ne branchez pas votre pompe à moins qu’elle soit submergée dans l’eau. Ne fonctionner
jamais votre pompe au sec.
GARANTIE
Cet appareil KOOLATRON est garanti à l'acheteur au détail pendant 90 jours à
compter de sa date d'achat contre tous défauts de pièces et de fabrication.
CE QUE COUVRE LA GARANTIE
• Pièces de rechange et main d'oeuvre.
• Frais d'expédition du produit réparé de Koolatron à l'adresse du client.
CE QUE LA GARANTIE NE COUVRE PAS
• Tous dégâts causés par un abus, un accident, une mauvaise utilisation ou
une négligence.
• Frais d'expédition de l'appareil ou de la pièce du client à Koolatron.
GARANTIES IMPLICITES
Toutes garanties implicites, y compris celle de qualité marchande, se limitent
également à 90 jours à compter de la date d'achat.
GARANTIE ET PROCÉDURES DE RÉPARATION
Conservez le reçu de caisse daté d'origine avec ce manuel. Si vous avez un problème
avec votre unité ou si vous avez besoin de pièces de rechange, veuillez téléphoner
au numéro suivant pour assistance :
Amérique du Nord 1-800-265-8456
Les centres spécialisés de dépannage Koolatron doivent effectuer tous les travaux
relatifs aux garanties. Les services après garantie peuvent s’obtenir dans l’un
des centres spécialisés de dépannage ou chez un concessionnaire agréé.
Reçu d’achat exigé afin de définir si la garantie est applicable ou non.
Koolatron dispose de centres principaux de réparations à ces adresses :
U.S.A. - 4330 Commerce Dr., Batavia, NY 14020-4102
Canada - 139 Copernicus Blvd., Brantford, ON N3P 1N4
www.koolatron.com
©2020 Koolatron, Inc. Tous droits réservés.
Toutes spécifications sont sujettes à changement sans préavis.
Fabriqué en Chine
5/2020-v4H1S087
CARACTÉRISTIQUE
La popularité des étangs de jardin continue d’accroître à un rythme vigoureux.
Cette trousse inclut tout ce dont vous avez besoin pour construire un beau jardin d’eau
sans entretien.
- 1 membrane d’étang 6pi X 6pi
- 1 pompe emboîtée sans entretien
d’un débit de 200 gal/h
- 1 tête de fontaine à 3 hauteurs
d’arches de niveau d’eau
- 1 tête de fontaine d’un jet d’eau
en forme d’un champignon
- colonne montante coulissante
- partiteur avec régulateur de débit d’eau
- 2 lis en soie
- 1 lueur solaire - lumière flottante d’étang
- guide d’utilisation
CARACTÉRISTIQUE ÉLECTRIQUES
- Voltage de la pompe : 110V
- Capacité de la pompe : 200 gal/heure
- Consommation de puissance de la
pompe : 12W
- Pompe cULus : E 204083
INSTALLATION
VOUS AVEZ BESOIN
tournevis à
tête plate
corde matériaux pour border
(c.ò.d. pierre)
pelle de jardin
POUR COMMENCER
Lorsque vous avez tout ce dont vous avez besoin, il est
temps de commencer. C’est très important de planifier le
style du pond que vous désirez avant d’entreprendre ce
projet. Prenez compte de la profondeur et de la grandeur
du pond comparativement à la grandeur de la membrane
que vous avez. Lorsque vous avez choisi un style et une
grandeur, marquez la forme en utilisant la corde. Soyez
attentif aux câbles électriques et tuyaux qui peuvent être
enterrés. Assurez-vous que le câble d’alimentation de la
trousse peut joindre la pompe.
INSTALLATION (cont.) INSTALLATION (cont.)
ADDITION DE L’EAU
Votre étang de jardin est maintenant près à recevoir
de l’eau. Lors du remplissage de l’étang, vous devez
défroisser les plis de la membrane en tirant et en
déplacent un peu la membrane. Lorsque l’étang est
à peu près moitié rempli, enlevez quelques pierres
d’ancrage pour permettre la membrane d’enfoncer
au bas du trou.
ENTRETIEN ET SOINS
Avec entretien et soins, votre étang de jardin durera pour longtemps et embellira chaque
année. Quelques étapes devront être pris pour assurer que votre étang dure longtemps.
Nettoyez votre pompe régulièrement afin de prévenir l’accumulation de la saleté. Si votre
pompe arrête de fonctionner, débranchez et sortez-la de l’étang. Suivez les directives
dans le guide d’instructions fourni avec la trousse de pompe. S’il y a beaucoup
d’accumulation de calcium sur votre pompe, votre pompe pourrait arrêter de fonctionner.
Pour nettoyer, placez la pompe (enlevez tous accessoires) dans de l’eau avec vinaigre,
puis branchez-la. Laissez la pompe fonctionner pour à peu près 30 secondes. Une fois
nettoyée, rincez la pompe avec de l’eau et replacez-la dans l’étang.
SOINS D’HIVER
La préparation pour l’hiver est un travail laborieux, mais bénéficiaire pour votre étang et
la vie qu’elle soutienne si de bonnes étapes sont entreprises. Pendant les mois d’automne,
l’étang devrait être dégagé de toutes feuilles d’automne et autres débris qui peuvent pourrir
et causer des toxines néfastes à votre étang. La première étape est d’enlever toutes
pompes submergées et de les nettoyer pour l’entreposage d’hiver. Si vous avez
des poissons, la prochaine étape est d’ajouter un oxydateur ou un appareil de chauffage
flottant pour circuler l’oxygène et pour relâcher des gaz toxiques. Après la couverture
d’hiver et qu’il y a une couche de glace, il n’y a pas beaucoup d’entretien à faire pendant
les mois d’hiver. Les poissons iront naturellement au fond de l’étang où l’eau est plus
chaude. Les poissons ne nécessitent pas de nourriture pendant ces mois froids. Ne laissez
amais l’eau froidir dans la pompe.
FINITIONS
Lorsque votre étang est rempli, vous devez utiliser
des clous longs pour fixer la membrane en place.
Coupez la membrane d’excès. En utilisant des pierres
décoratives autour du bord, votre membrane tiendra
bien en place et donnera à votre étang une apparence
naturelle. Placez la pompe dans l’étang, puis branchez-la.
Si vous voulez ajouter des plantes à votre étang, vous devez
attendre au moins 48heures après achèvement et 72 heures
aprèsachèvement si vous voulez ajouter des poissons.
DÉCOREZ ET RÉJOUISSEZ-VOUS !
CREUSEMENT
Commencez par enlever la terre de la section que
vous avez marquée avec la corde. Il est préférable
de commencer à creuser du centre vers l’extérieur.
Ceci vous permettra d’enlever la terre avec l’aide
d’une brouette. Lors du creusement, prenez compte
que la plupart des étangs de jardin ont des étages
de plantes. Ces étagères sont habituellement 6”
sous l’eau et devront être à 20° d’angle pour support.
PRÉPARATION
Pour préparer le trou pour la membrane, vous devez
enlever toutes pierres aiguës et racines. Les objets
aigus peuvent ponctuer ou endommager votre
membrane. Vous pouvez ajouter 5-8cm (2-3po)
de sable au fond de l’étang, mais ce n’est pas
nécessaire.
Une fois que la section de l’étang est dégagée,
placez la membrane fournie dans le trou de par l’aide
des amis ou de la famille. Tenez la membrane en
place en utilisant quelques pierres.
AVERTISSEMENT! Ce produit contient des produits
chimiques qui, de l’avis de l’État de Californie, causent
des cancers ou des anomalies congénitales ou d’autres
problèmes de reproduction. www.P65Warnings.ca.gov

S.V.P., lire attentivement les instructions avant l’utilisation !
TROUSSE D’ÉTANG DE JARDIN
84 GALLONS
KSPK-84
Guide d’utilisation
ASSEMBLAGE DE LA POMPE
1
2
4
7
5
6
3
Placez la tête de fontaine de votre préférence (1) sur la
colonne montante coulissante (2) en appuyant jusqu’à
ce qu’elle tienne bien en place.
Ajustez la grandeur de la fontaine champignon en
tournant la pièce ronde (3) au-dessus.
Placez la colonne coulissante (2) dans le partiteur (4)
en appuyant jusqu’à ce qu’il n’y ait plus de visibilité du
trou. Une petite force peut être requise pour accomplir
cette tâche.
Ajustez l’écoulement de l’eau de votre fontaine en
tournant le bouton du partiteur (5).
Assemblez tout à la pompe (6) en appuyant le partiteur
vers le bas au trou situé au-dessus de la pompe (6).
AJUSTEMENT DE LA HAUTEUR
DE LA FONTAINE
• Étendrez le tube d’extension (7) qui
se trouve dans la colonne coulissante (2).
AJUSTEMENT POUR UNE CHUTE D’EAU
• Placez un serre-joint sur le tube.
• Assemblez le tube sur le partiteur.
• Serrez le serre-joint sur le tube avec
un tournevis à tête plate.
REMARQUE
Ne branchez pas votre pompe à moins qu’elle soit submergée dans l’eau. Ne fonctionner
jamais votre pompe au sec.
GARANTIE
Cet appareil KOOLATRON est garanti à l'acheteur au détail pendant 90 jours à
compter de sa date d'achat contre tous défauts de pièces et de fabrication.
CE QUE COUVRE LA GARANTIE
• Pièces de rechange et main d'oeuvre.
• Frais d'expédition du produit réparé de Koolatron à l'adresse du client.
CE QUE LA GARANTIE NE COUVRE PAS
• Tous dégâts causés par un abus, un accident, une mauvaise utilisation ou
une négligence.
• Frais d'expédition de l'appareil ou de la pièce du client à Koolatron.
GARANTIES IMPLICITES
Toutes garanties implicites, y compris celle de qualité marchande, se limitent
également à 90 jours à compter de la date d'achat.
GARANTIE ET PROCÉDURES DE RÉPARATION
Conservez le reçu de caisse daté d'origine avec ce manuel. Si vous avez un problème
avec votre unité ou si vous avez besoin de pièces de rechange, veuillez téléphoner
au numéro suivant pour assistance :
Amérique du Nord 1-800-265-8456
Les centres spécialisés de dépannage Koolatron doivent effectuer tous les travaux
relatifs aux garanties. Les services après garantie peuvent s’obtenir dans l’un
des centres spécialisés de dépannage ou chez un concessionnaire agréé.
Reçu d’achat exigé afin de définir si la garantie est applicable ou non.
Koolatron dispose de centres principaux de réparations à ces adresses :
U.S.A. - 4330 Commerce Dr., Batavia, NY 14020-4102
Canada - 139 Copernicus Blvd., Brantford, ON N3P 1N4
www.koolatron.com
©2020 Koolatron, Inc. Tous droits réservés.
Toutes spécifications sont sujettes à changement sans préavis.
Fabriqué en Chine
5/2020-v4H1S087